

St. Patrick’s Day is just around the corner, and what better way to celebrate than by crafting a festive card? Today, I am excited to showcase one of Pajama Crafter Stamps’ latest releases, “Chuggin’ on Stamps!” Click here to see all PCS has to offer–>https://shareasale.com/r.cfm?b=1737668&u=1886305&m=108254&urllink=&afftrack=

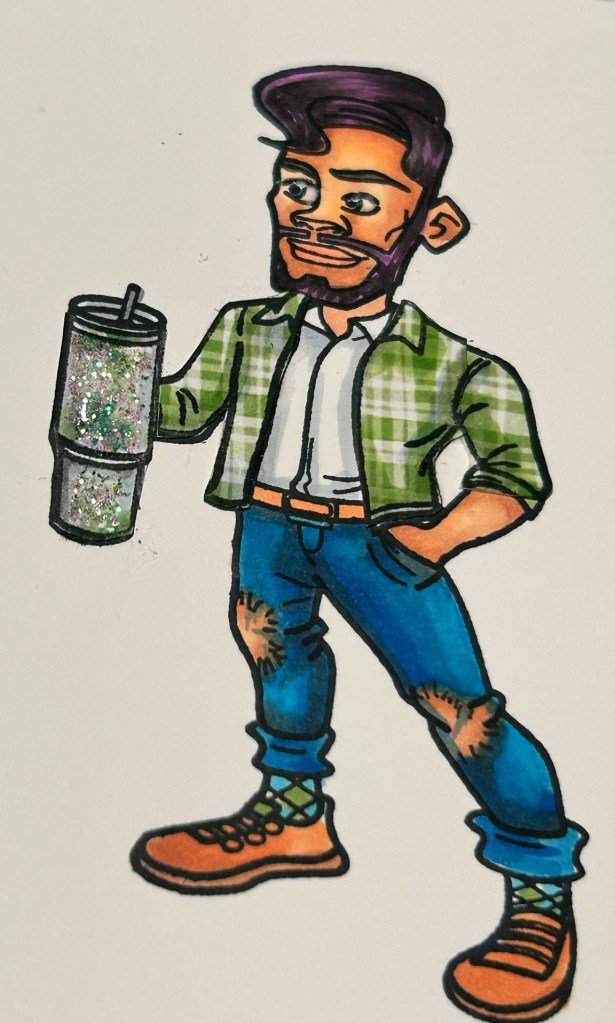
This adorable collection has these really fun Stanley-style cups you can customize for any occasion. It’s a fun and versatile set and will certainly make your card truly stand out. Let’s jump into the instructions on how to create your own St. Patrick’s Day card!
What You’ll Need:
- Pajama Crafter Stamps: Chuggin’ on Stamps set
- Emerald Isle Patterned Paper Pack 6×6
- Cardstock (card mat and coordinating colored paper for mats–I used glitter cardstock for festive glitz)
- Alcohol markers
- Skin – E04, E11, E21, E00, E000, R20
- Man Hair – BV02, T7, T9
- Gal Hair – Y21, YR21, YR24
- Jeans – B41, B45, B37
- White Shirt & Shoes – C1
- Brown Shoes – E13, E17
- Ink pad (black Memento ink for alcohol markers)
- Distress Ink for background in greens
- Adhesive (glue)
- Scissors
- Decorative elements (I used Stickles)
- Stencil with shamrocks for background
Here is a close up showing how I stamped on my patterned paper to create a fun pattern for his shirt.
Step-by-Step Instructions:
Prepare Your Card Base:
- Start with a piece of cardstock measuring 5.5” x 8.5”. Fold it in half to create a standard A2-sized card (4.25” x 5.5”).
Stamp Your Images:
- Using your ink pad, stamp the Chuggin’ on Stamps images onto a separate piece of cardstock. Feel free to use multiple cups and orientation for a delightful and playful look!
Coloring:
- Once the images are stamped, it’s time to add some color! Use alcohol markers or colored pencils to bring your cups to life. Think bright green for St. Patrick’s Day, along with other fun colors to make your card pop.
Cut Out the Images:
- After coloring, carefully cut out each image using scissors.
Create the Background:
- Prepare a background for your card. You can keep it simple with a solid color or get creative! Consider using a pattern that includes shamrocks or rainbows to enhance the festive feel of your card. I used a clover stencil and Distress Ink to create my background.
Assemble Your Card:
- Start arranging your stamped images on the card base. Play around with the layout until you find a design you love. Once you’re happy, adhere the images in place using glue or double-sided tape.
Add your Sentiment:
- If you’d like, add a fun St. Patrick’s Day sentiment. You can either stamp directly onto the card or create a small banner using a separate piece of cardstock. The set is not intended to be a St. Patrick’s Day themed set, it’s all about color scheme and sentiment! It’s super versatile!
Finishing Touches:
- Customize and enhance your card by adding decorative elements like sequins, washi tape, or even shamrock stickers. These little details will give your card a festive flair. I used the St. Patty’s Day sentiment and clover from the set, You’re My Pot of Gold.
Sign and Share:
- Don’t forget to sign your card inside! Share it with friends, family, or anyone who could use a little extra cheer this St. Patrick’s Day.
Happy Crafting!
Be sure to grab your Chuggin’ on Stamps set from Pajama Crafter Stamps and let your creativity flow.
Happy Crafting, everyone! 🍀💚

