Memorial Day Card Inspiration

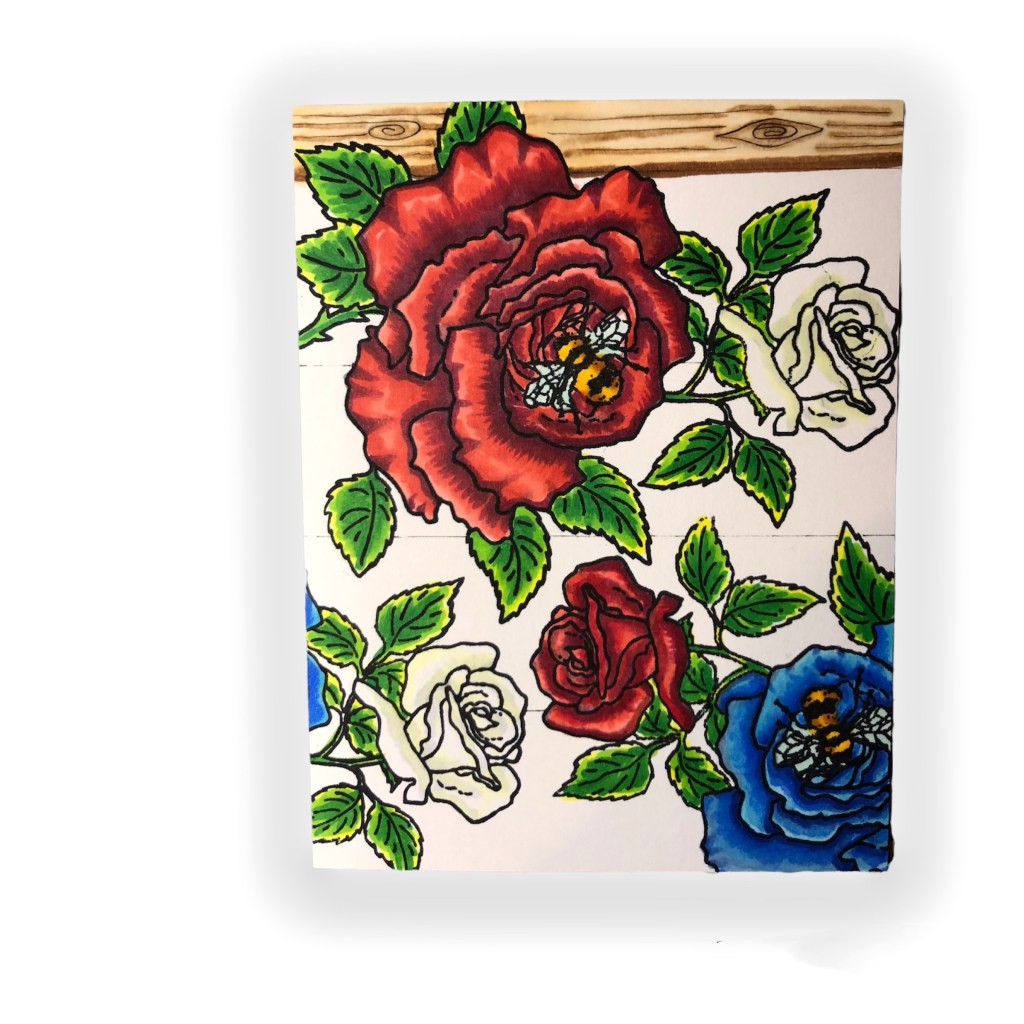
Thank you to the brave men and women who have made the ultimate sacrifice. This card’s color pallet was inspired by the colors in our American 🇺🇸Flag.

A2 Size Card featuring Annie’s Garden Stamp Set: Bumblebee and Roses

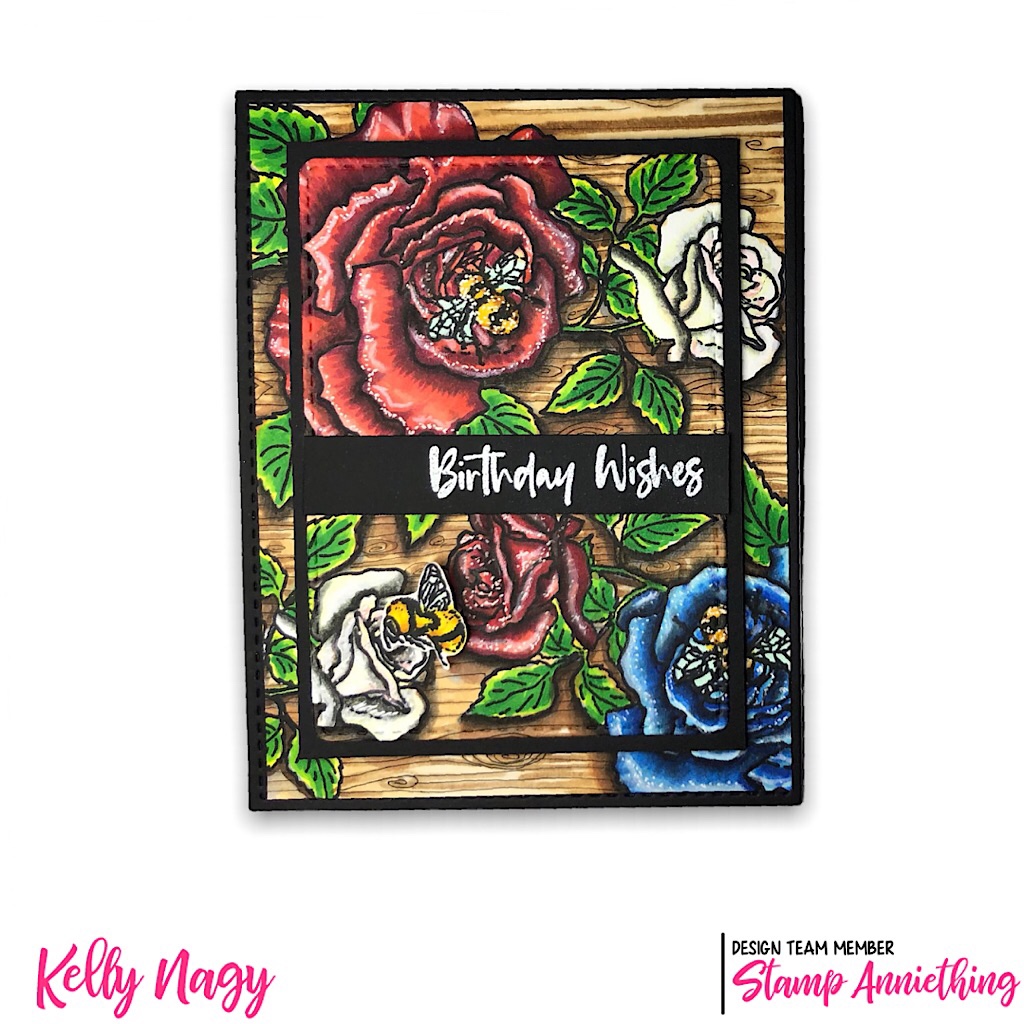
I created this card using images from the Bumblebee and Roses set from Annie’s Garden.

I stamped the flowers onto a A2 size card panel using Memento Black Ink on card stock that is alcohol ink friendly. I used 110 lb Hammermill paper.

Stamp your image in different angles on card panel to cover.

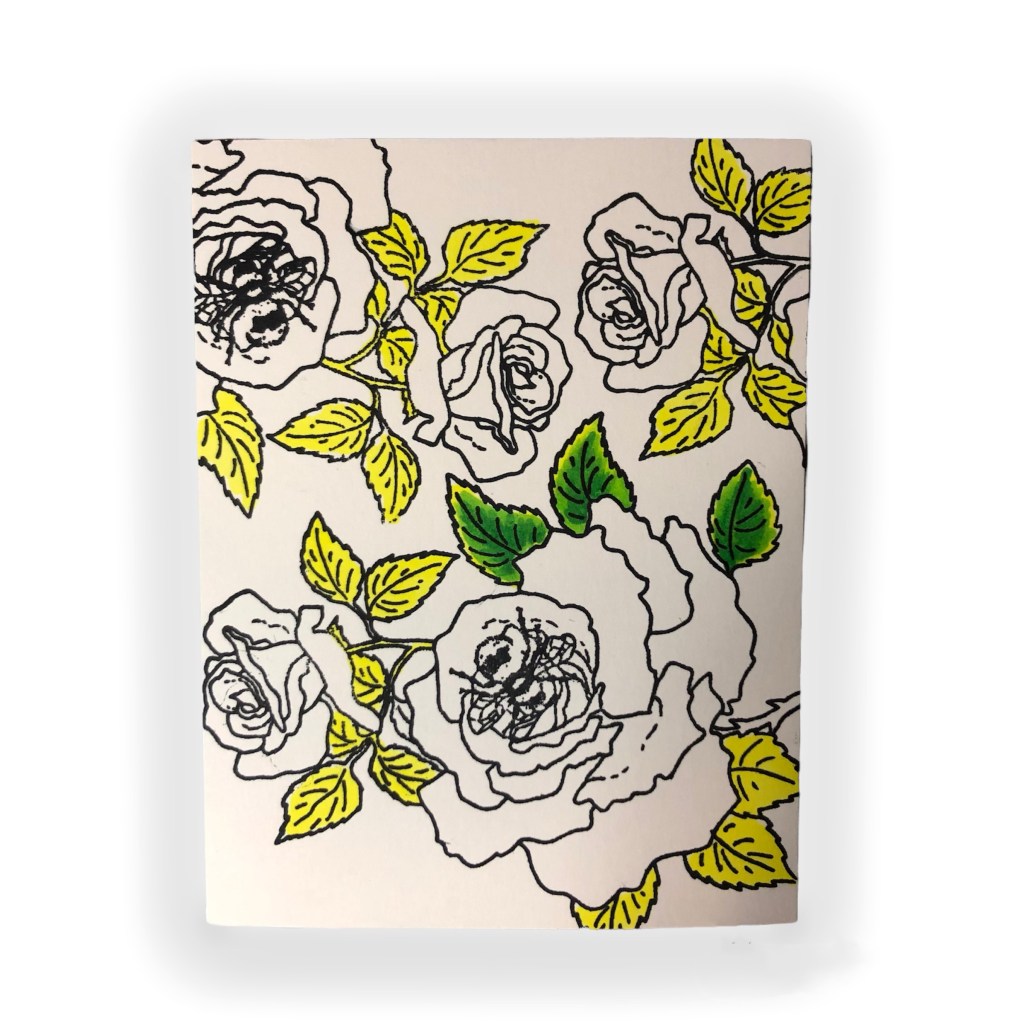
I started coloring the leaves using my COPIC markers. Y04, YG07 and G09 were used to color the leaves.

Sometimes if you are coloring something quickly, I do assembly line coloring, to speed like colored objects.

I don’t always go ahead, as I like the ink to be wet when coloring so that the colors blend automatically, the work is done for you when you apply the ink layers while the ink underneath is still wet, or at least damp.

To color the RED roses, I used the following blend: BV23 (shadow/under paint), R22, R24, R29, and R39.


Add shadows down first with BV23
After coloring all the flowers, I decided I wanted to create a wooden background. I divided the panel using a ruler and doodled with a Micron permanent black ink and filled in with Copic markers to complete the background.
Continue down the panel until wood pattern is complete

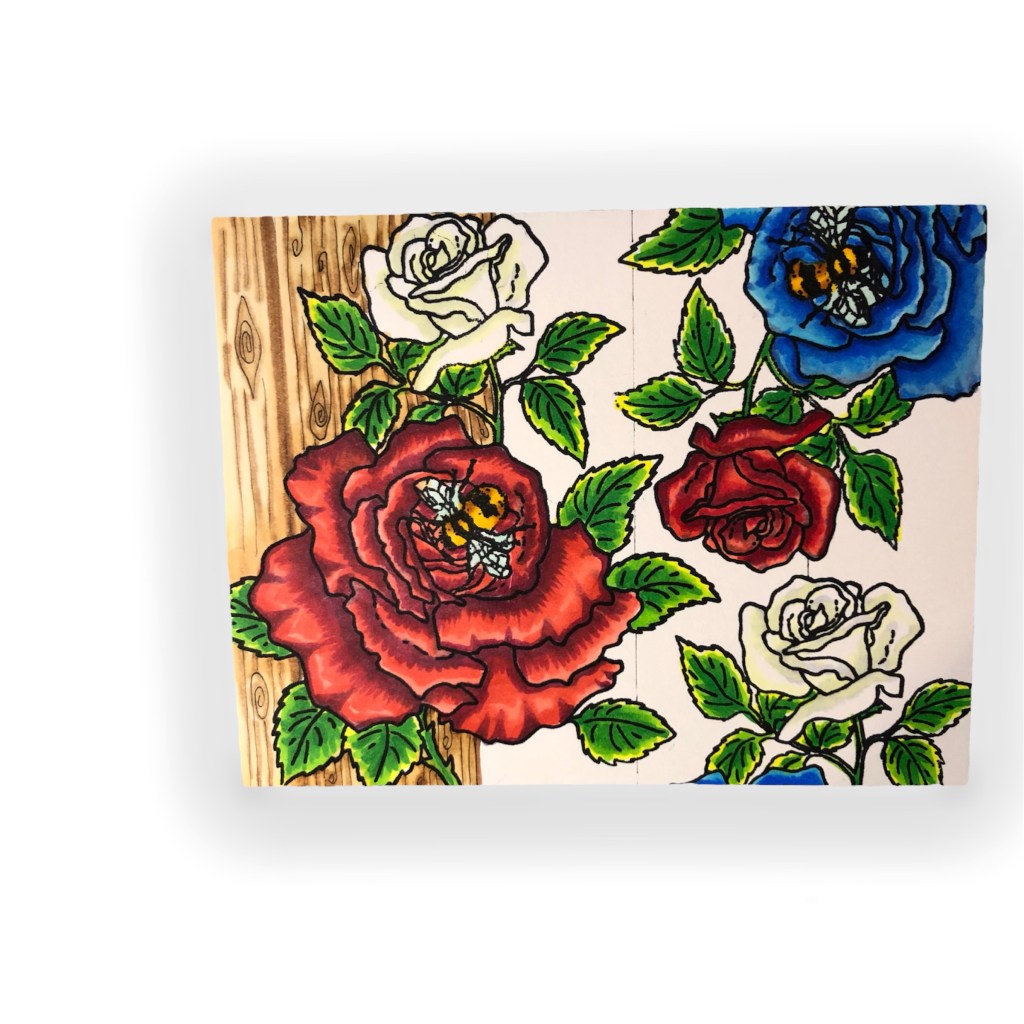
COPIC Blends are as follows:

  • Blue Roses – B01, FBG2, FB2, B12 and B18
  • White Roses – C1, Y000 and RV000
  • Bumblebee – Y000, YR23, YR27, FY1 and BG11
  • Wood – E57, E53, E51, E50 (shadow BV31 & E13)

Once the Copic coloring was complete, I used Prismacolor pencils and Gamsol to add extra depth to the shadows. Thank you for your support. Please like and follow! Happy Crafting!❤️

FRIENDS – Square Card

Featuring May 2022 Release: Hello Everyone

The main front panel started with a 6×6 piece of paper from the coordinating paper pack from this release. I then cut a piece of 12×12 paper in white in half and scored at 6 inches to form the card base. The panel was glued on top of the card base.

I stamped 3 images from the stamp set and pulled out my color wheel and decided on 3 colors to form my pallet: yellow, pink and blue. This forms a triangle on the wheel. It is called a triadic color scheme.

Hello Everyone Stamp Set

I chose the images with the bird, kitty and frog hoodies. The color blends used are:

  • Light Skintone – E04, E11, E21, E00, E000 and R20 cheeks
  • Dark Skintone – E59, E57, E15, E33, E31 and R22 cheeks
  • Bird Hoodie – T9, T7, T4; Beak – Y23 and Y19 and T0 – white sections
  • Brunette Hair -E59, E34 and E57
  • Kitty Hoodie -BG0000 (white parts used to lay down shadow
  • Blonde Hair -E25, Y26, Y21 and YR24
  • Pink Bow & Shirt/Socks – FRV1 and RV00 – (Silver Spica pen dotted for glitz)
  • Overall Shorts – FBG2 and BG000 (white gel pen for polka dots)
  • Frog Hoodie & socks – FYG2, YG01, Y00
  • Black Hair – BG02, C3, C5, 100
  • Striped Dress – R20, R24, R39 and R39

I used a geometric basic stencil and the coordinating stencil from this release on top of one another to create an inked panel to show off my colored images. I matted the square in coordinating colors and cut strips of other patterned paper for added interest. The images were adhered to card with dimensional foam tape.

My Blood Type is –COFFEE–

Are you someone who can’t do anything BEFORE coffee? If so, this set is for you! Have you seen Scrappy Boy’s newest line called Cute Girls? They are really just that!! CUTE! Each month, Sean plans to release a new theme of CUTE GIRLS. You’ll want them all!!!❤️

I created this A2 size card by cutting a piece of white card stock and stamping the coffee girl with IV pole in the center. I then created the hospital room scene using COPIC markers.

  • Fair Skin – E04, E11, E21, E00 and E000, Cheeks R20; Eyelids- B01
  • Reddish-Brown Hair – E49, E13, E19 and E39
  • Red Shirt – R20, R24, R29, R39
  • Jeans – B34 & B37
  • Coffee Cup – FVG2 and Y00
  • Coffee IV bag – B66, E79, E77, E74, E71

Sentiment is heat embossed in WHITE on black card stock. A white gel pen was used to draw stitch lines on edge of card.

You Sure Are Spiffy

Featuring Images and Stair Builder Die from
June 2022 Stamp Release

A2 Card Base cut 4 1/4 x 11, scored at 5 1/2

Copic Blends:

  • Skin – E04, E11, E21, E00, E000 and R20 for cheeks
  • Lady’s Attire – Y28, Y23, YR24, Y21
  • Men’s Attire – T9, T7, T4 and 0
  • Stairs – suspended moon rock ink refill or comparable gray color and black (sparingly) by dropping about 3-5 drops and tgen using a skewer to swirl the ink to create a marbled look to ink. i took the stair die cut and dipped into the shaving cream, which picked up the pigment and transferred to paper. i wiped off the shaving cream and let pieve dry.
  • Blonde Hair – E44, E39, Y21 and E59
  • Brunette Hair – E89, E59, E34 and E57
  • Prismacolor pencils used to create deeper shadows, as well as white gelpen highlights.

I embossed the sentiment with white embossing powder and popped up with foam tape.

Chocolate Makes Everything Better

I started the card using a 110 lb cardstock and used the U Bridge Card Die Set from Stamp Anniething. It allows you to create this fun fold card simply and a photo of the dies are below.

U Bridge Card Die

This die cuts several pieces and score lines you will need to use by your bone folder down the scored edges to smooth and crisp folds.

I used the 6×6 coordinating paper pack and selected the coordinating paper to create the scene using the die and then gluing the patterned papers onto the base card previously cut out of the white cardstock with liquid glue.

Overhead view to show dimension
Closer view to show miniature candy after hitting the shrink plastic. You can use the builder stencil, instead. See site for coordinating products.

COPIC Combos Used:

  • Uniforms Light Pink – RV32, RV10 and RV00
  • Uniform Maroon – R37, R39 and RV99
  • Red Hair – YR23, YR12, YR14, YR18, E97 and E07
  • Blonde Hair – E71, E70, N4 and E000
  • Skin Tones for both – E04, E11, E21, E00 & E000 with R20 for cheeks and R39 for lips
  • Chocolates – B66, E49, E27 and E77
  • Tablecloth – BG000, BG72, BG75 and BG70
  • Sign – RV34, RV32, RV10 and RV00
  • Use white gel pen for accents on chocolate and wherever you would like.
  • Black colored pencils used for extra shadow emphasis

Please reach out if you have questions. Please support small business and shop http://www.scrappyboy.com, as well as http://www.StampAnniething.com for the U-Bridge Die.

Ever Since We Said I Do……

Scrappy Boy Design Team Project – May 2, 2022

I had so much fun making this card with my husband, Louie. We grew up watching the show that inspired this month’s release and we enjoyed reminiscing as I colored up the images with my Copic markers.

I tried to keep this card’s color palette simple… combining a soft pink with grayscale tones. The Copic Markers used on this project are photographed below. For her lips, I used R81.

This release is so much fun. There are two 6×8 stamp sets and coordinating outline dies, coordinating stencils and the cutest coordinating paper packs in both 6×6 and slimline. See http://www.scrappyboy.com to check out all Sean has to offer.

I used Scrappy Boy’s A2 Stitched Scalloped Edge Dies. They cut like butter and are powder-coated in Scrappy Boy Blue, which helps me tell my dies apart from others.

The inside of the card, with a special red heart in the corner to finish off this card