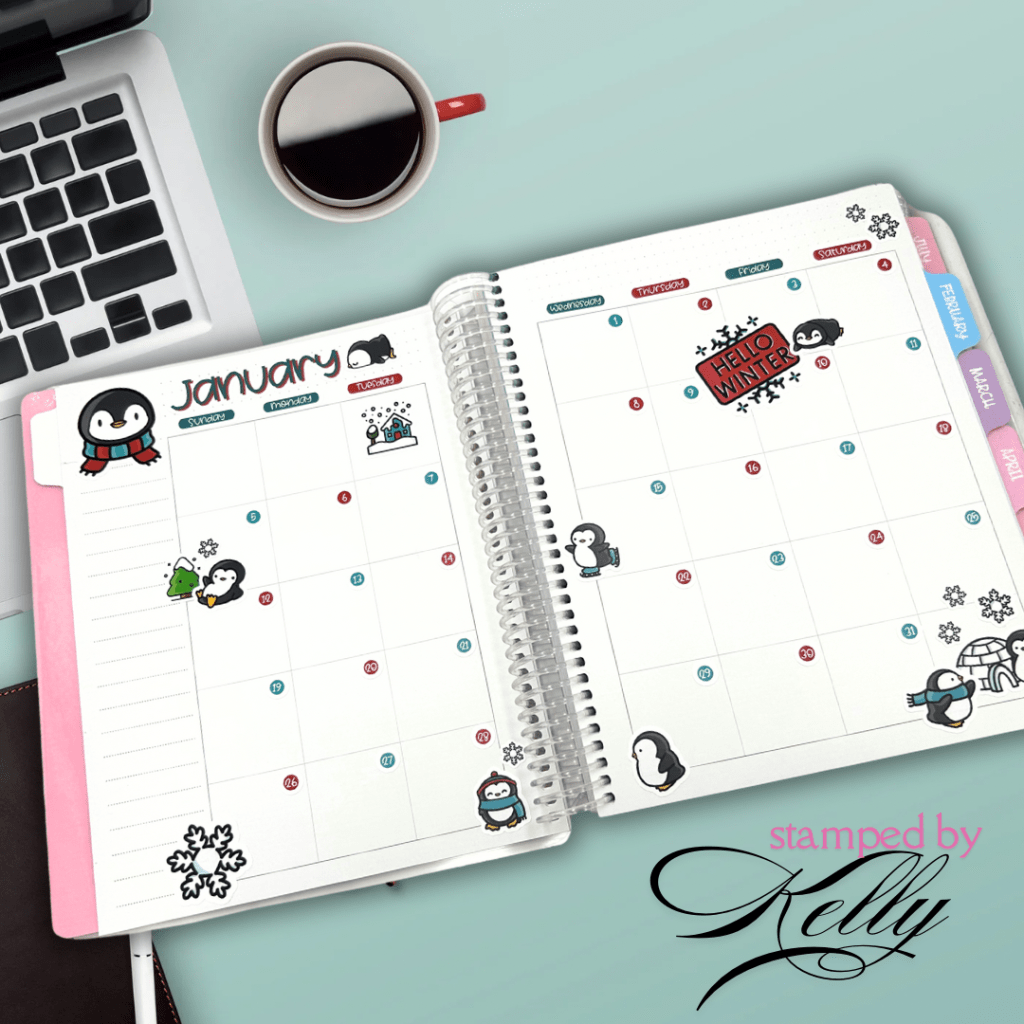
I just created a fun planner layout using my favorite planner from Sassy Club Stamps, specially designed for those who love using alcohol-based markers and other mediums! 🎨🖌️ If you’re looking for the best planners for decorating, the Sassy Club has a fantastic selection that I highly recommend. They have different styles, but this one is my favorite, it lays flat and the alcohol ink does not bleed through other side of paper.
Spiral Comes in Pink or Blue Laminated Covers
It’s been such a joy to color, ink blend, and experiment, but sometimes I crave a quick and easy layout that still looks like it took hours to create.
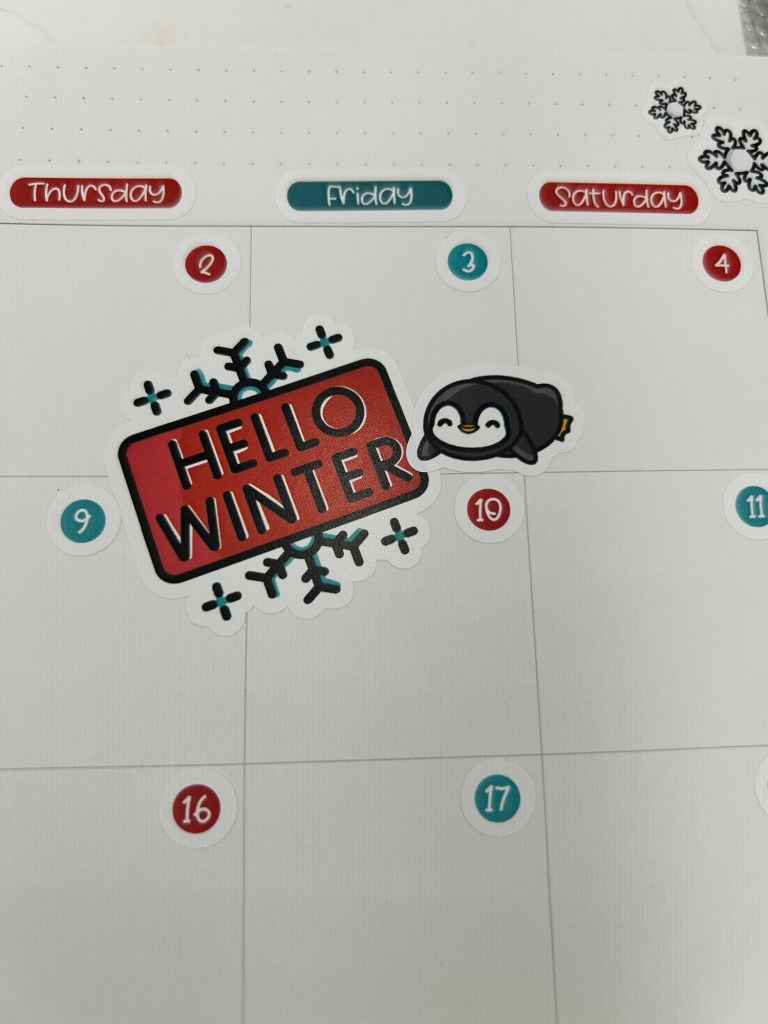
Cute Winter Penguin Theme from Stamp Anniething
Thanks to the new stickers from Stamp Anything, I achieved just that! 🐧💖 I noticed there are only four sets left, so if you love what you see, don’t miss out—check it out here: Winter Penguins January Sticker Set. http://www.stampanniething.com
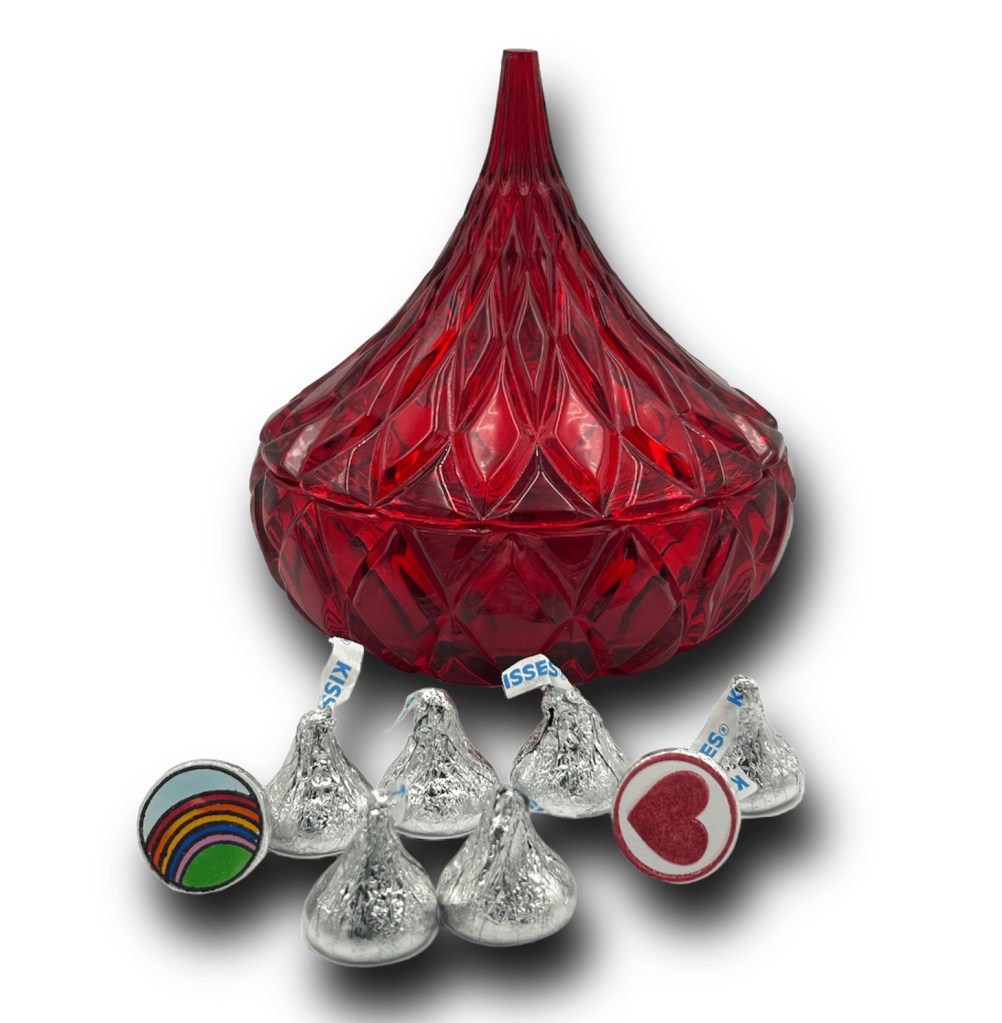
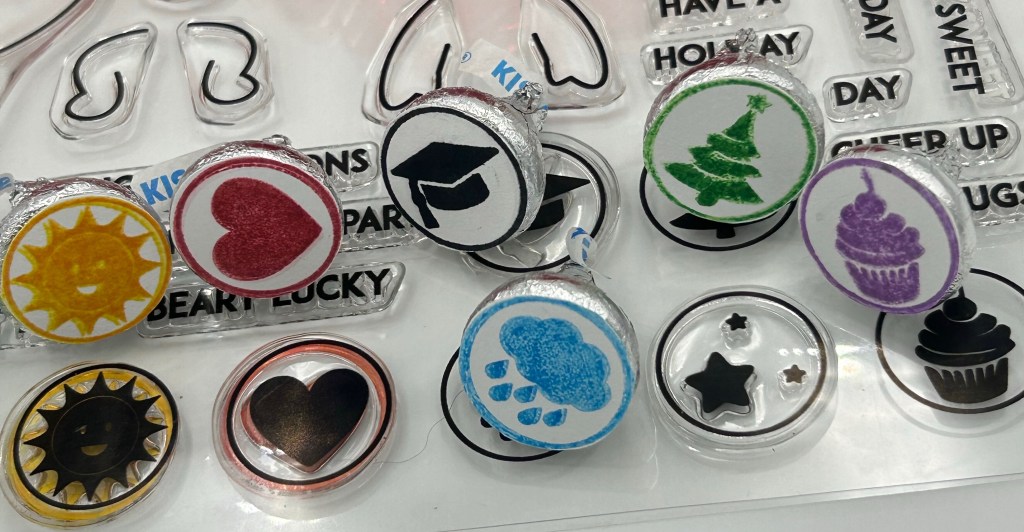
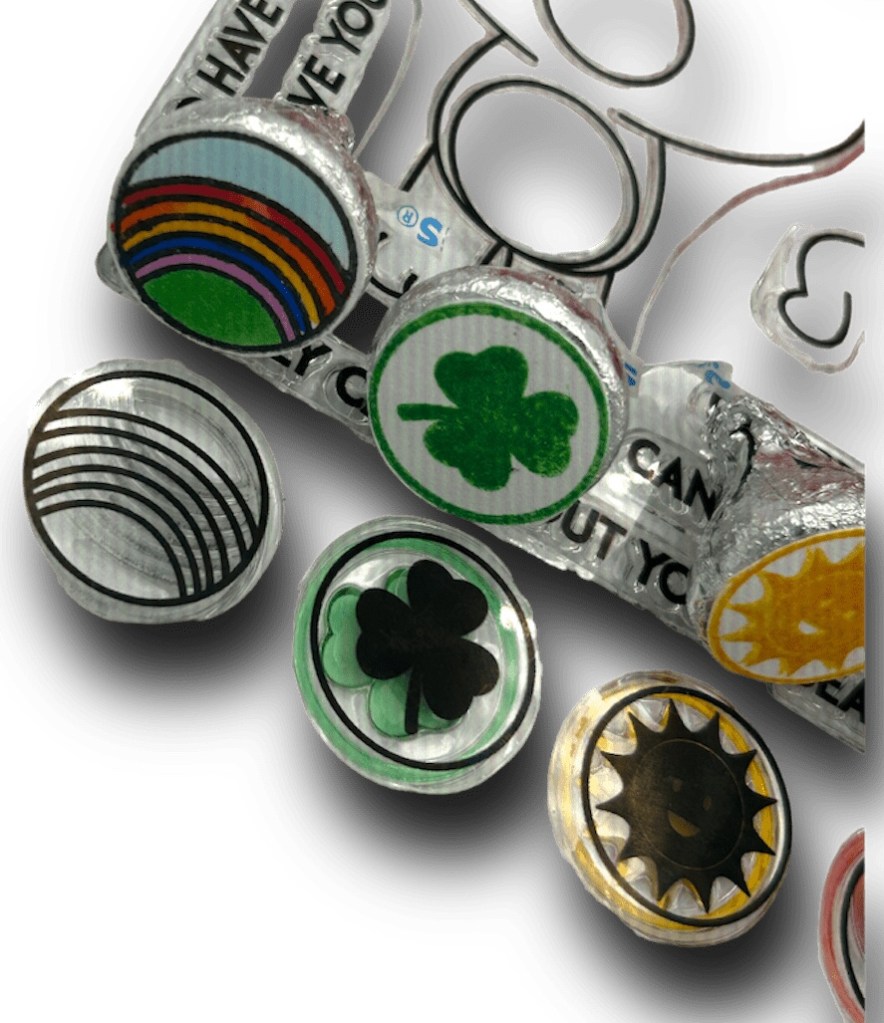
Belly Badges from set fit perfectly to bottom of all standard size Hershey’s Kisses.
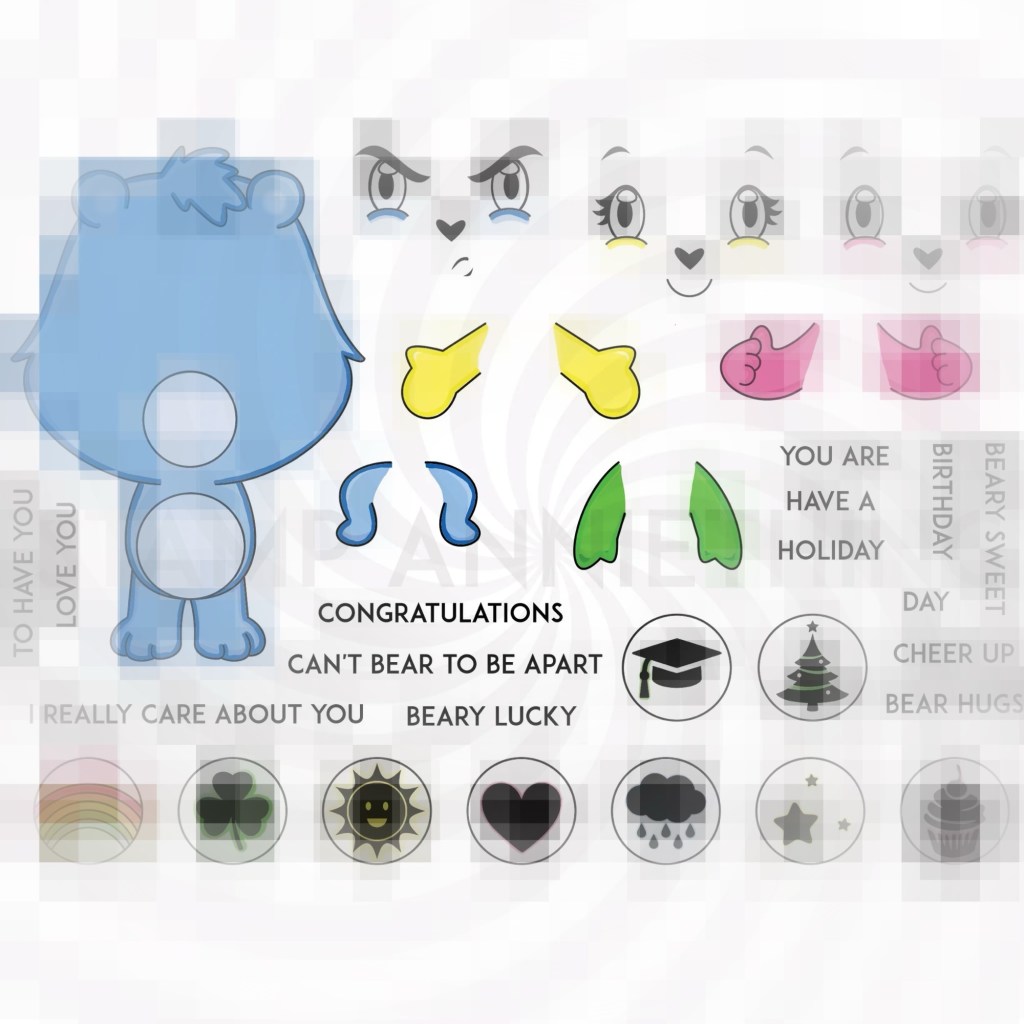
The Build a Caring Bear set will certainly be a great addition to any paper crafter’s stash. This is a versatile set that is great for cards, planners, scrapbook pages and even party decor and favors!!!
The belly badge goes in the middle of the bear’s tummy, but these badges are also the perfect size to adorn the bottom of a Hershey’s Kiss!
If you’re looking for a fun and unique way to personalize your treats inside your treat bags, look no further than the soon to be restocked BUILD A CARING BEAR set from Stamp Anniething. These fun images can be stamped in all black, stamped with your favorite color and are the perfect size to decorate the bottom of a Hershey’s Kiss, and with a wide variety of themed emblems in the set, you can customize each treat to fit your holiday, event or celebration.
Circle size stamps can be easily fussy cut out or use a small circle die or punch
Build a Caring Bear belly badge stamps have a variety of different emblems to match the themes of your party or event. Here are just a few ideas:
Sunshine – Get Well, Be Happy, Don’t worry
Heart – Love, wedding (emboss in gold or silver), Anniversary, Valentines
Once you’ve chosen your badges, it’s as simple as attaching them to the bottom of each Hershey’s Kiss using a dab of frosting or melted chocolate. You can also adhere using double-sided tear/paper tape. Not only do these badges add a colorful and fun touch to your treat bags, but they also make each treat feel more personalized and thoughtful.
So the next time you’re planning a party or event, consider adding Build a Caring Bear belly badges to your list of decorations. With their colorful designs and customizable options, they’re sure to be a hit with guests of all ages! Happy Crafting!
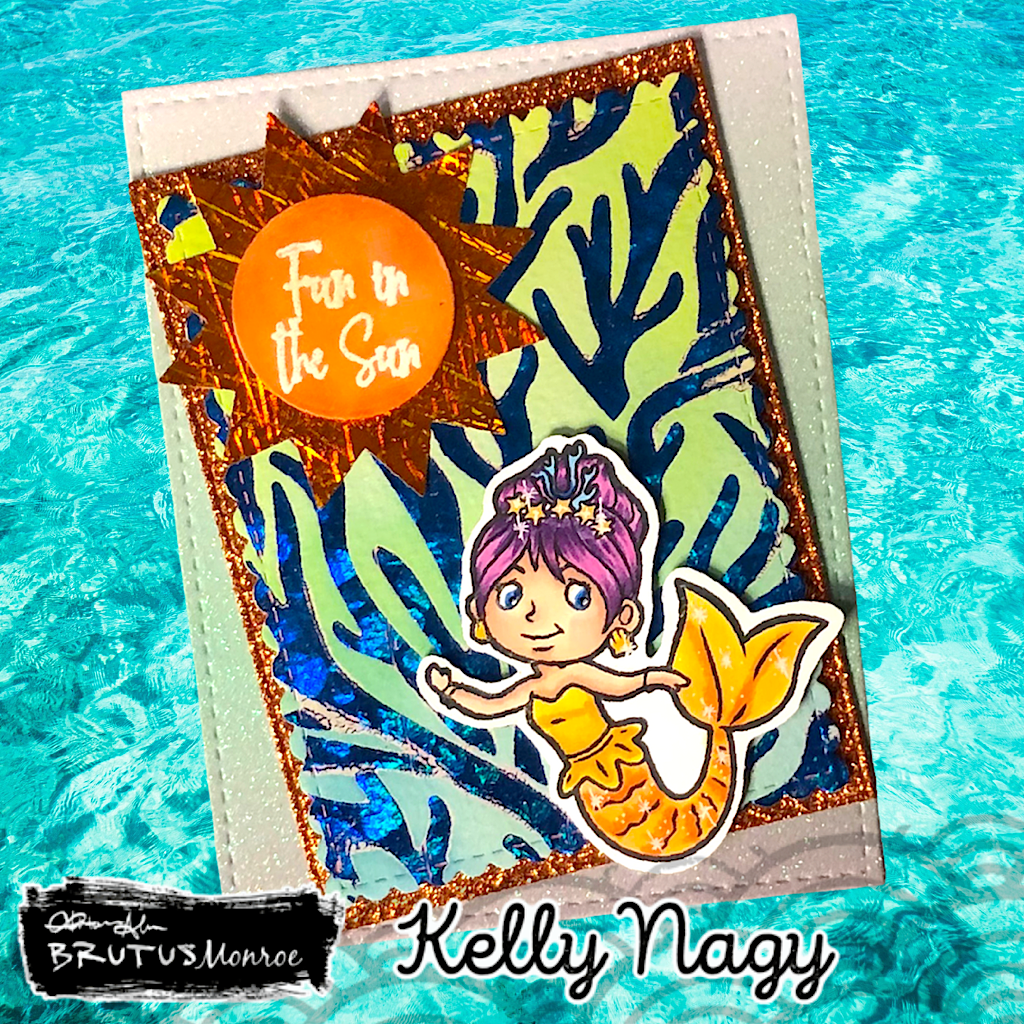
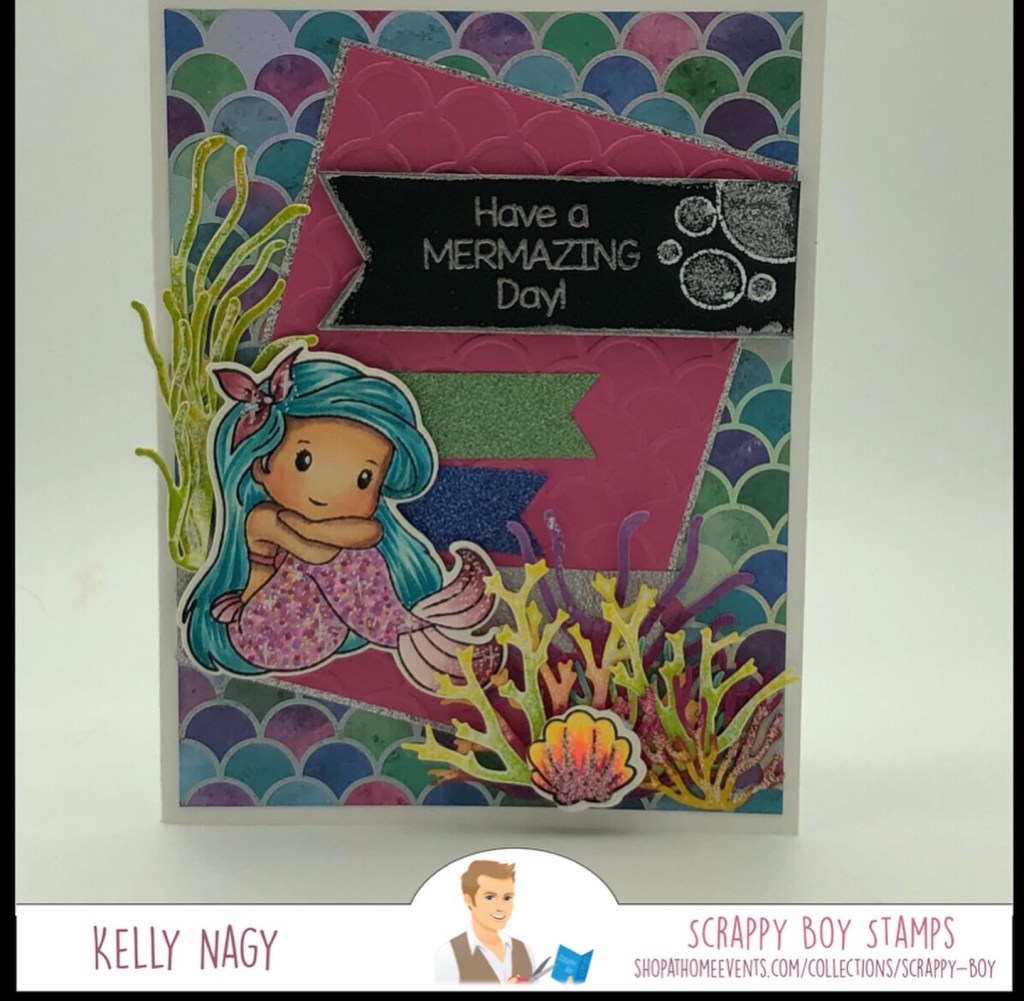
Today is National Mermaid Day and it’s the perfect excuse to break out your crafting stash and get creative. Whether you’re a seasoned crafter or a beginner, there are plenty of ways to celebrate this mystical day with some mermaid-themed cards.
Box card featuring Stamp Anniething
There are so many fun and creative ways to celebrate National Mermaid Day with your crafting stash. Whether you choose to create something practical like one of the cards I have posted, a mermaid tail blanket or something decorative like wall art, the possibilities are endless. So grab your crafting supplies, set your imagination free, and celebrate one of the most enchanted and captivating creatures of the sea!
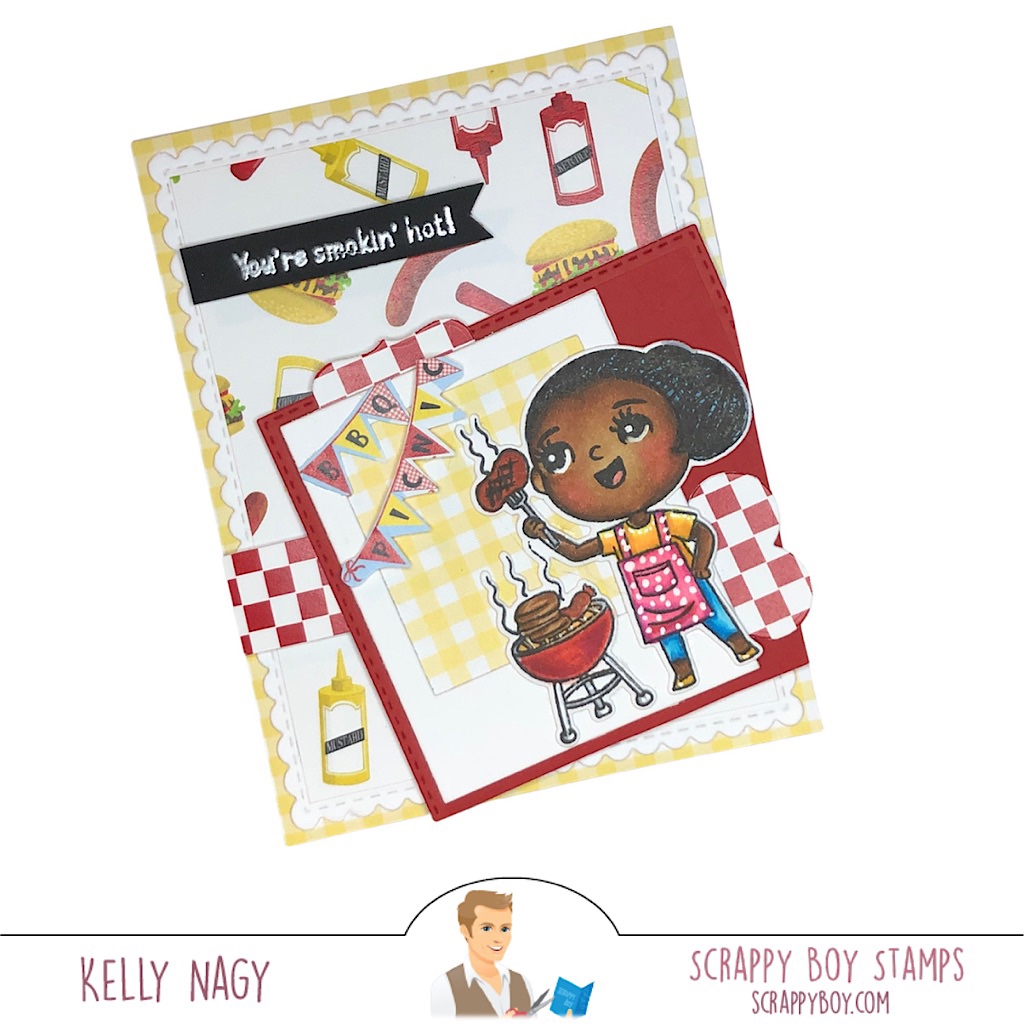
Check your stamps for grilling meat on a stick!!!! Celebrate EVERYTHING!!!!
Observed each year on March 28th, National Something on a Stick Day is a food holiday that lets you use your creative talents. Once you get started, the possibilities are endless. Foods that come on a stick are fun and easy to eat.
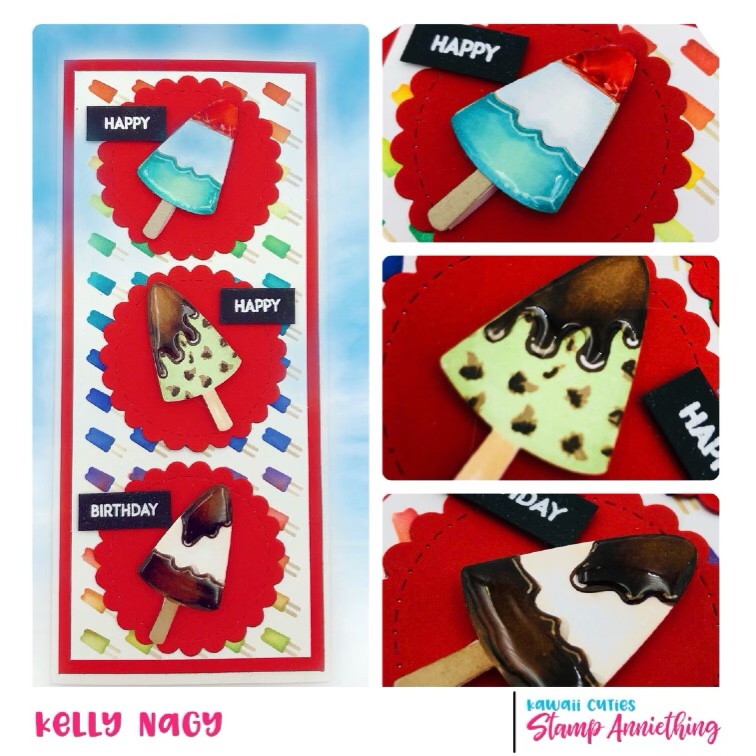
Check your stash for lollipops – Yum! Yay for food on a stick!
From cool summer treats like the Popsicle to frozen food staples like the corn dog, food on a stick is one of the world’s great inventions. Fresh fruit kabobs and skewers of grilled veggies and meat are both summer favorites.
Street fairs and food trucks have created a variety of recipes made to go on a stick that takes us from breakfast to after-party hunger with flavor combinations that sometimes make us wonder why we haven’t tried that before! Whether it is fresh and healthy or breaded and deep-fried, menu choices are broad and plentiful for National Something on a Stick Day.
Pull out your food stamps and celebrate National Food-On-A-Stick Day doing something creative.
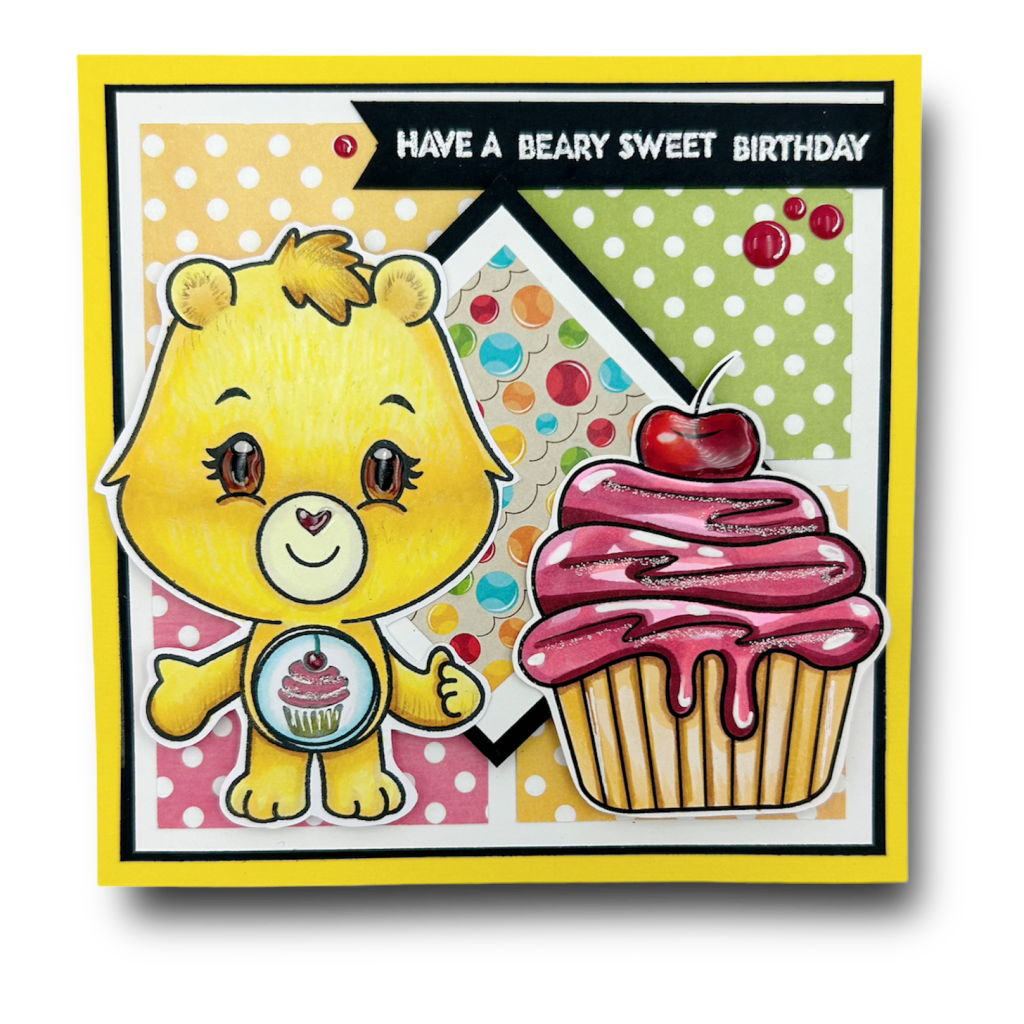
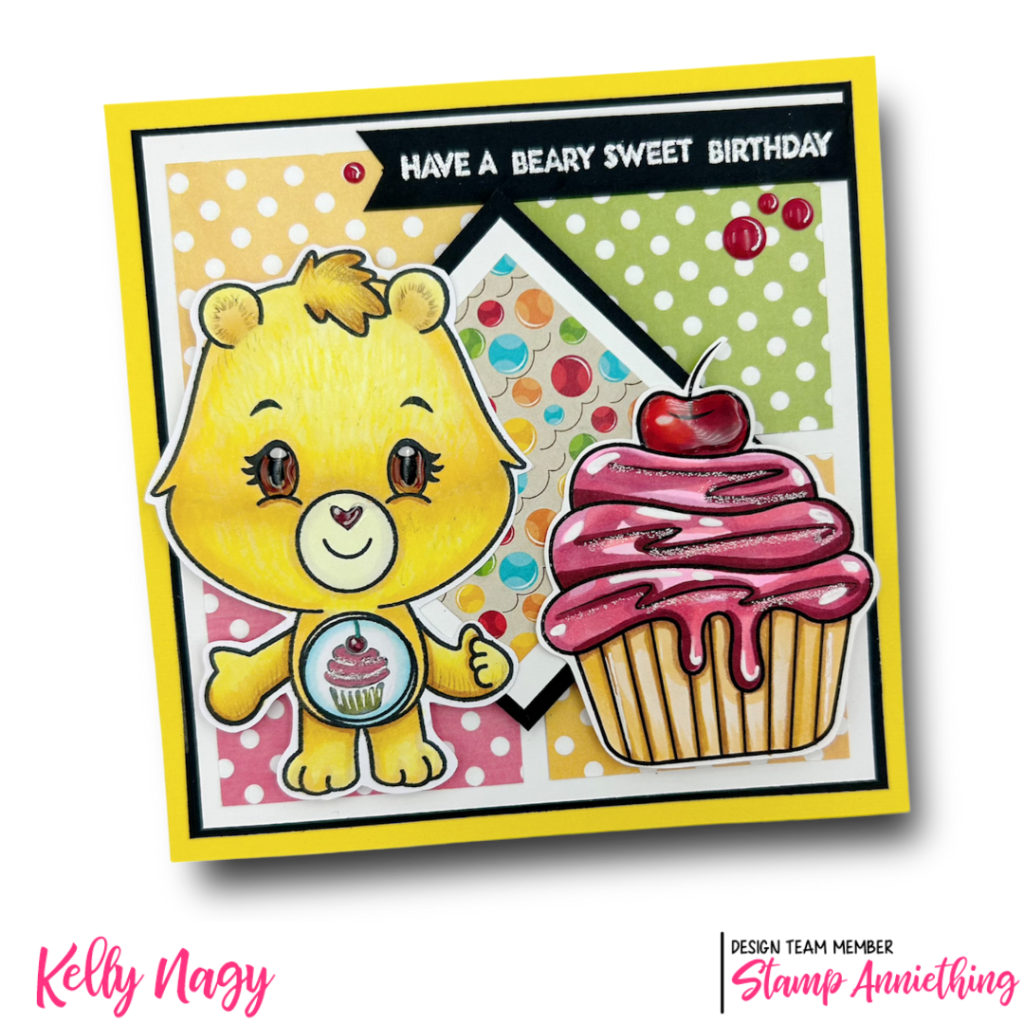
Card features Build A Caring Bear Limited Edition Set by Stamp Anniething
The art of gift-giving isn’t just about what’s inside the box. Adding a personal touch to your greeting card can make all the difference, especially when it’s for someone very special. That’s why I’m excited to share with you this really cute new set from Stamp Anniething that can be customized for any occasion and recipient.
Image is DISTORTED on purpose to prevent theft
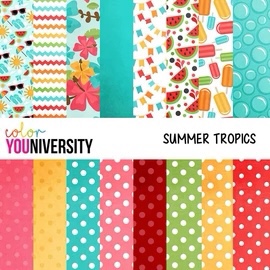
I created a birthday card using the Build A Caring Bear set, as well as patterned paper from the SUMMER TROPICS pack as a background. So, let’s dive in and see how to make this versatile square card.
The first thing you’ll need is a 5 1/4 in square card base. This size will provide enough space to showcase your creativity while still being efficient enough to mail. Next, you’re going to create your characters using the Build A Caring Bear set. The great thing about this set is that you can mix and match the different elements like faces, arms and belly tag to create your unique bear. I decided to go with a Happy Cupcake Bear because I wanted to create a festive and colorful birthday card.
Once I BUILT my bear, I started creating a fun birthday scene. To do this, I downloaded a free digital image that coordinated with the image on my bear’s belly. It’s easy to do and it provides a great way to add a personal touch to your card. I went with a cupcake!
I wanted to create texture on the card, so I used patterned paper from the SUMMER TROPICS pack to make the background. The bright colors and versatile patterns are perfect for a celebration and it compliments the bear image well. I cut a total of four (4) two-and-a-quarter inch squares and a 2 1/2 inch square in white and a 2 3/4 inch square in black to frame and then place in center on the diagonal using double-sided foam tape. I had a small square scrap I added from the Pets Grab & Go Box (no longer available), that I added to the center of the square.
6×6 paper pack – 24 pages
Finally, I added a sentiment to the top right of the card, wishing the recipient a BEARY sweet birthday. It’s simple, but heartfelt, and it ties everything together nicely. Added some Enamel Dots from Stamp Anniething to repeat the pops of color in a triangular pattern, to draw your rye from the sentiment to the cherry on the cupcake and back to the sentiment again.
Build A Caring Bear Birthday Card
In conclusion, with little effort, anyone can make a sweet, personalized birthday card using the Build A Caring Bear set and Summer Tropics patterned paper. You can change the occasion, color scheme or even switch out the face, belly badge and arm positions to create a unique design tailored to whomever you’re giving it to. It’s a thoughtful gesture that shows you care, and the recipient will surely appreciate the time and effort put into it. Happy creating!
I am following up after my LIVE held on Tuesday, 3/14, International Pi Day, where I started to share how to get creative and make something fun and unique to honor the day! And what better and CALORIE FREE way to celebrate Pi Day, than by creating a pie shaker element using the Circle Shaker Basics 1 set from Stamp Anniething?
A pre-recorded video will be shared on the Stamp Anniething Stampers Facebook page shortly which will provide additional details and elaborate more on how to create this shaker element and two 5.5 inch square cards. My initial LIVE was cut short due to a family emergency and appreciate everyone’s concern. We are all good now!
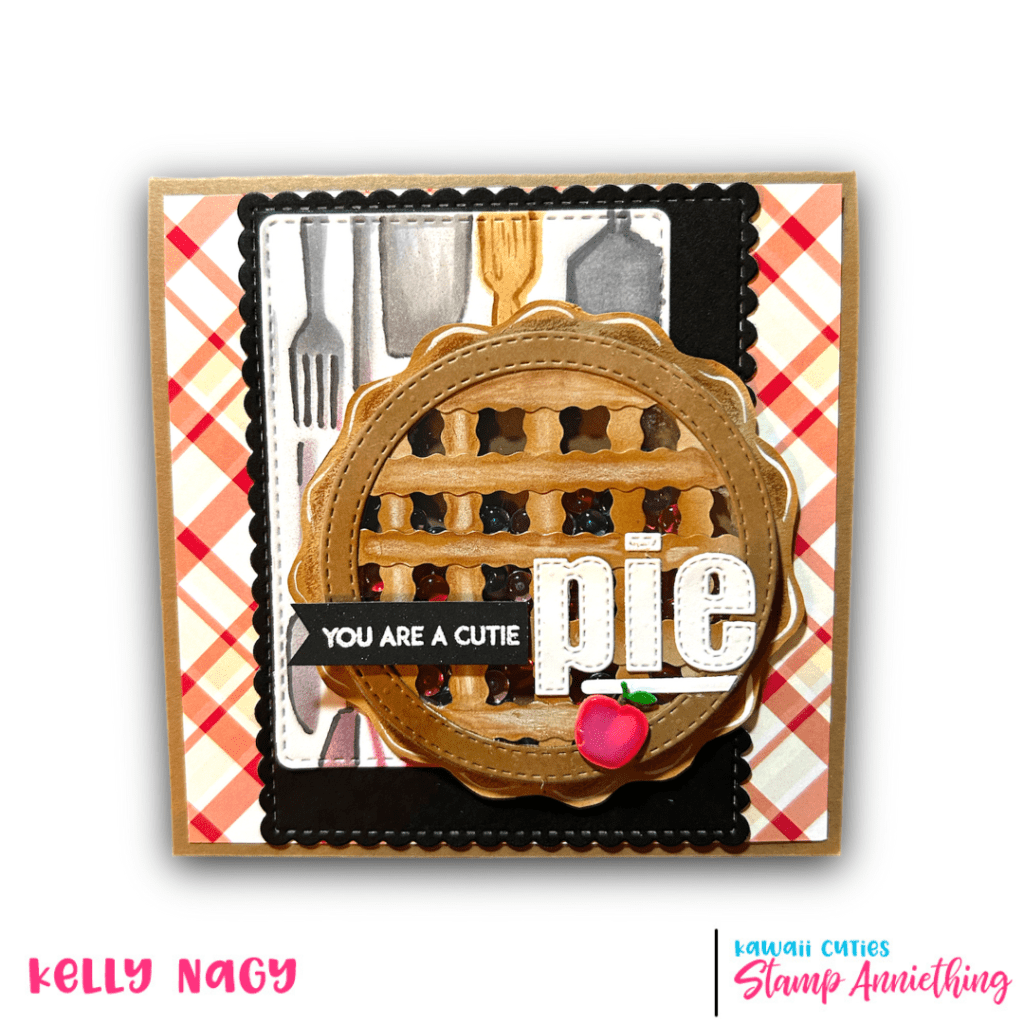
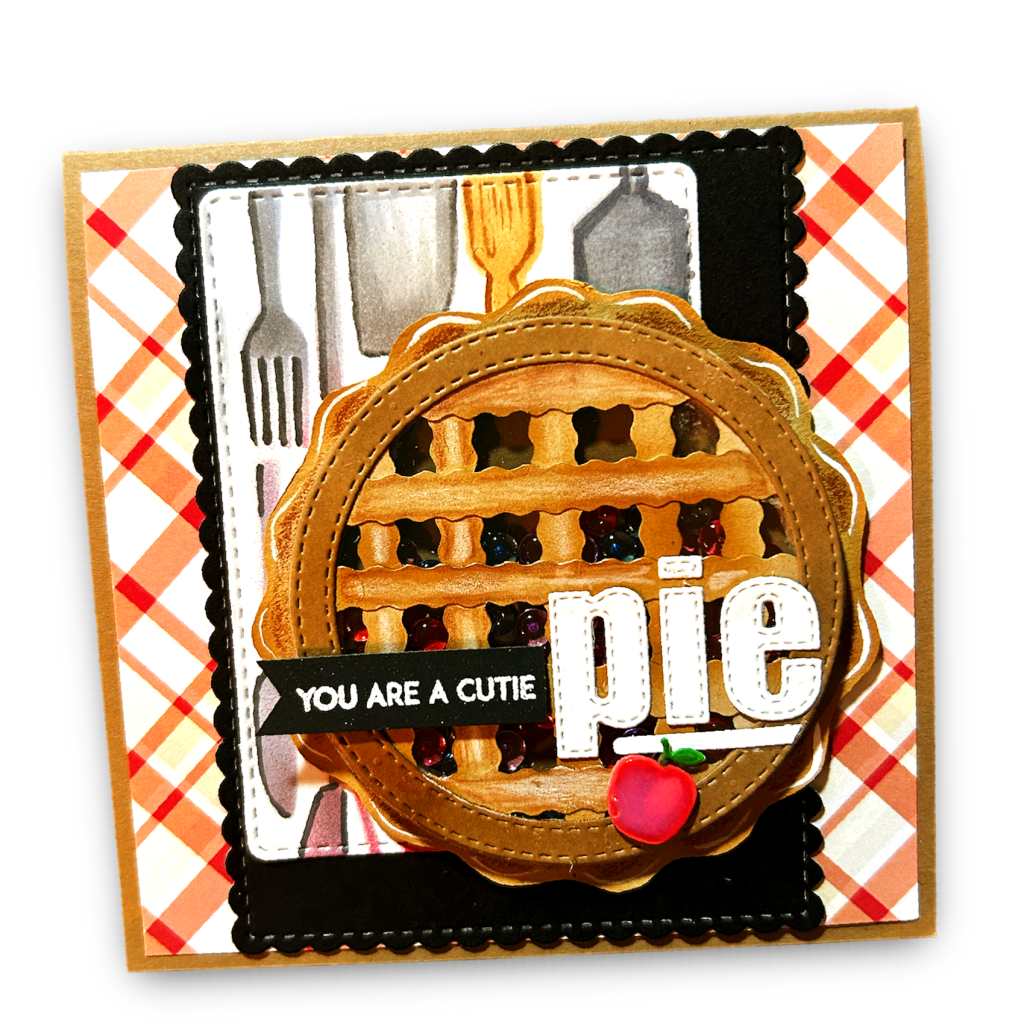
Card using Pie Shaker Element
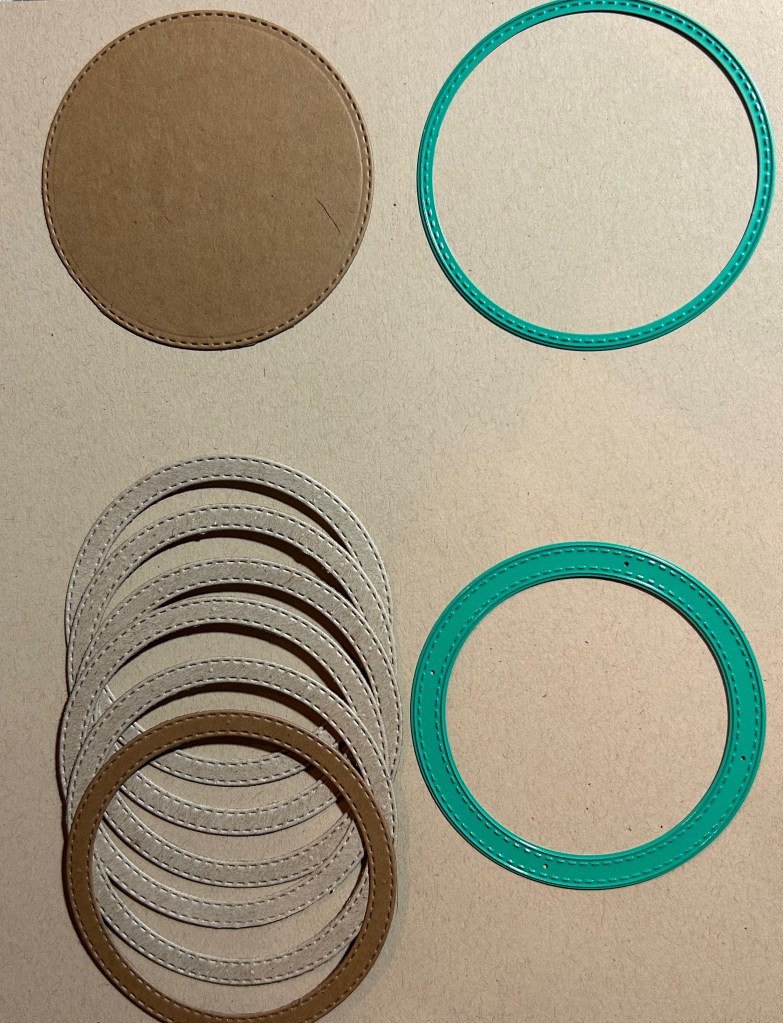
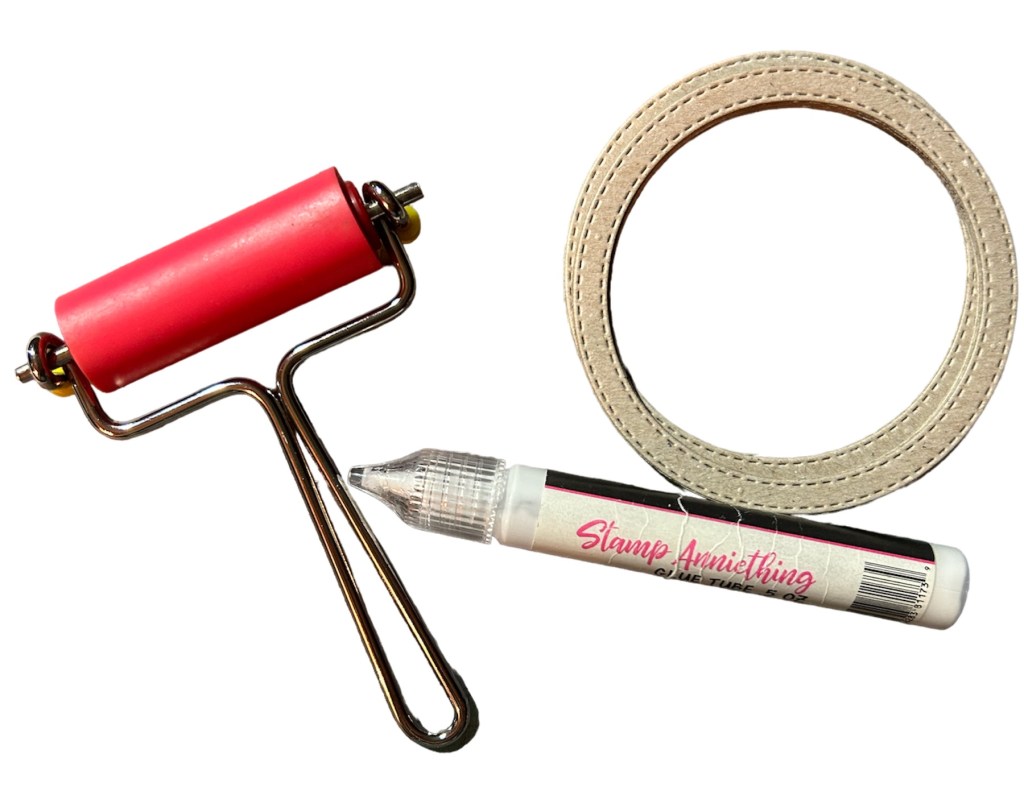
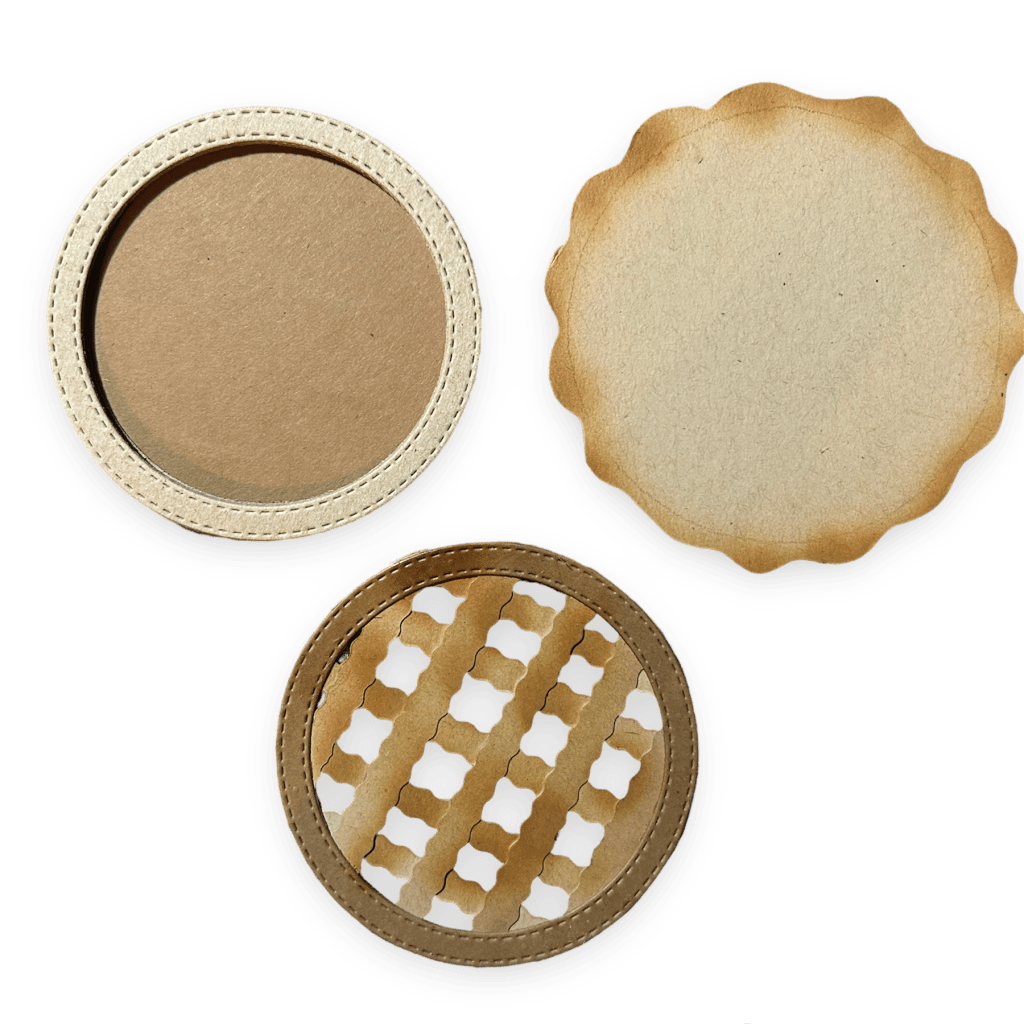
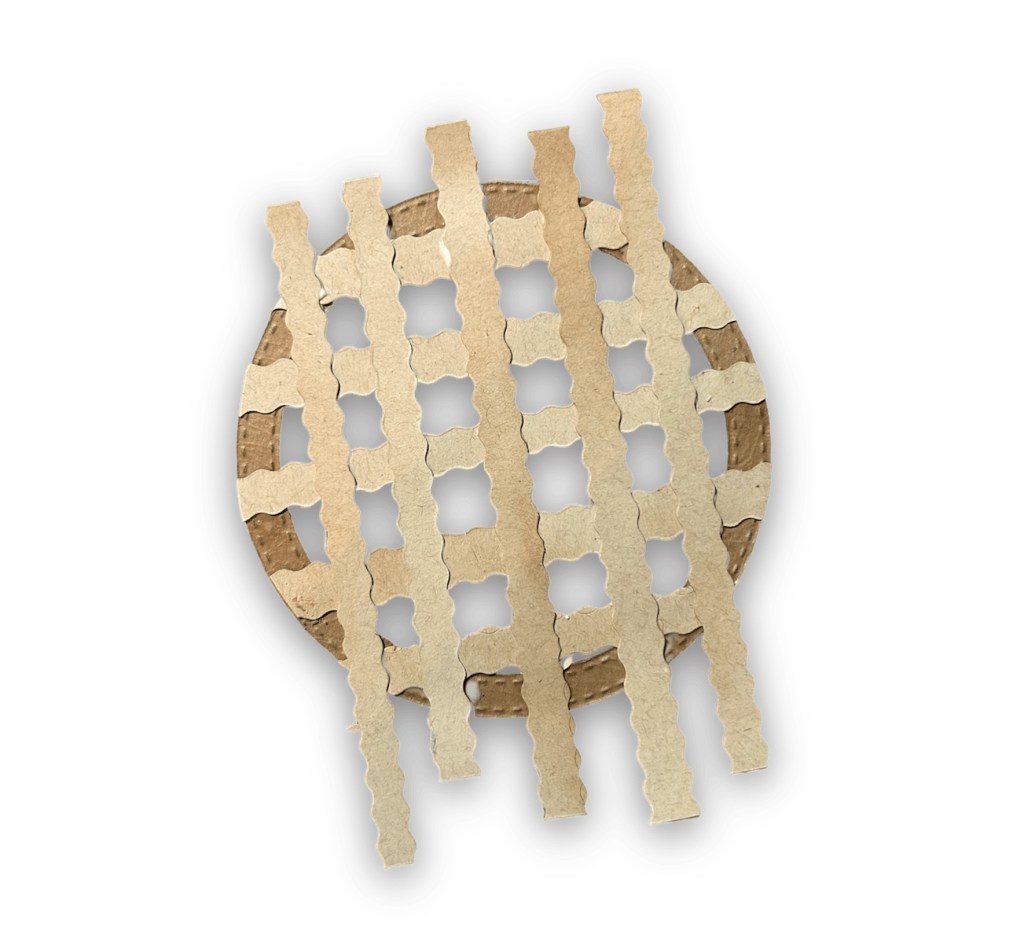
To get started, you’ll need the Circle Shaker Basics 1 set, some cardstock in your desired color, chipboard, acetate sheet, shaker bits and liquid adhesive. Begin by die-cutting 5 circles using the circle “frame” die from the set – one from cardstock and the others from chipboard. Make sure when gluing together, they match up in size.
Shaker Basics 1 from Stamp Anniething 5 chipboard & 1 card-stock – image shows which dies to use to cut. Keep negative pieces for a future project. Cut acetate sheet with the single die at the top. Later, we will use this to seal your pie and create barrier to hold shaker bits in.
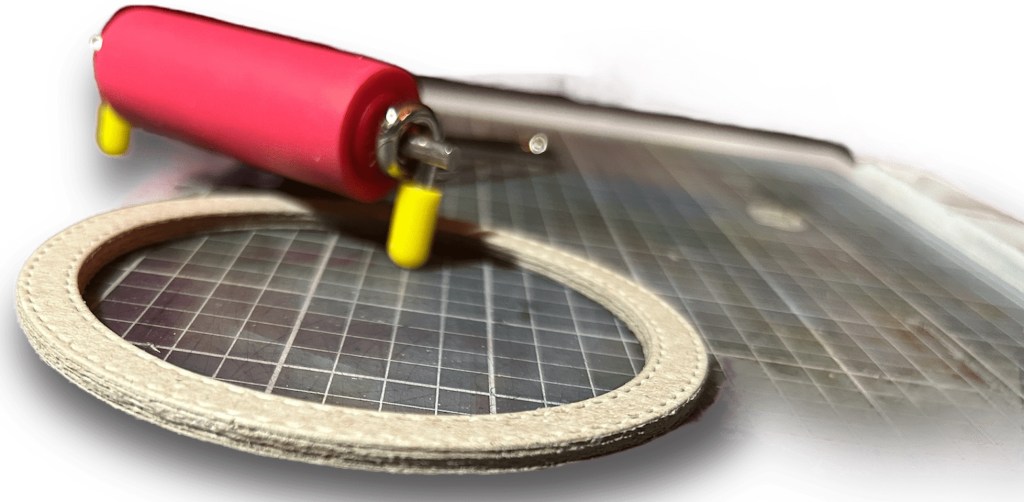
Next, layer of each die-cut with the liquid adhesive and use brayer or your fingers to make sure the layers are stacked evenly and ensure there is no air or separation between layers to prevent your shaker bits from escaping.
Running brayer over each layer helps create a strong seal, keeping shaker fill where it belongs.
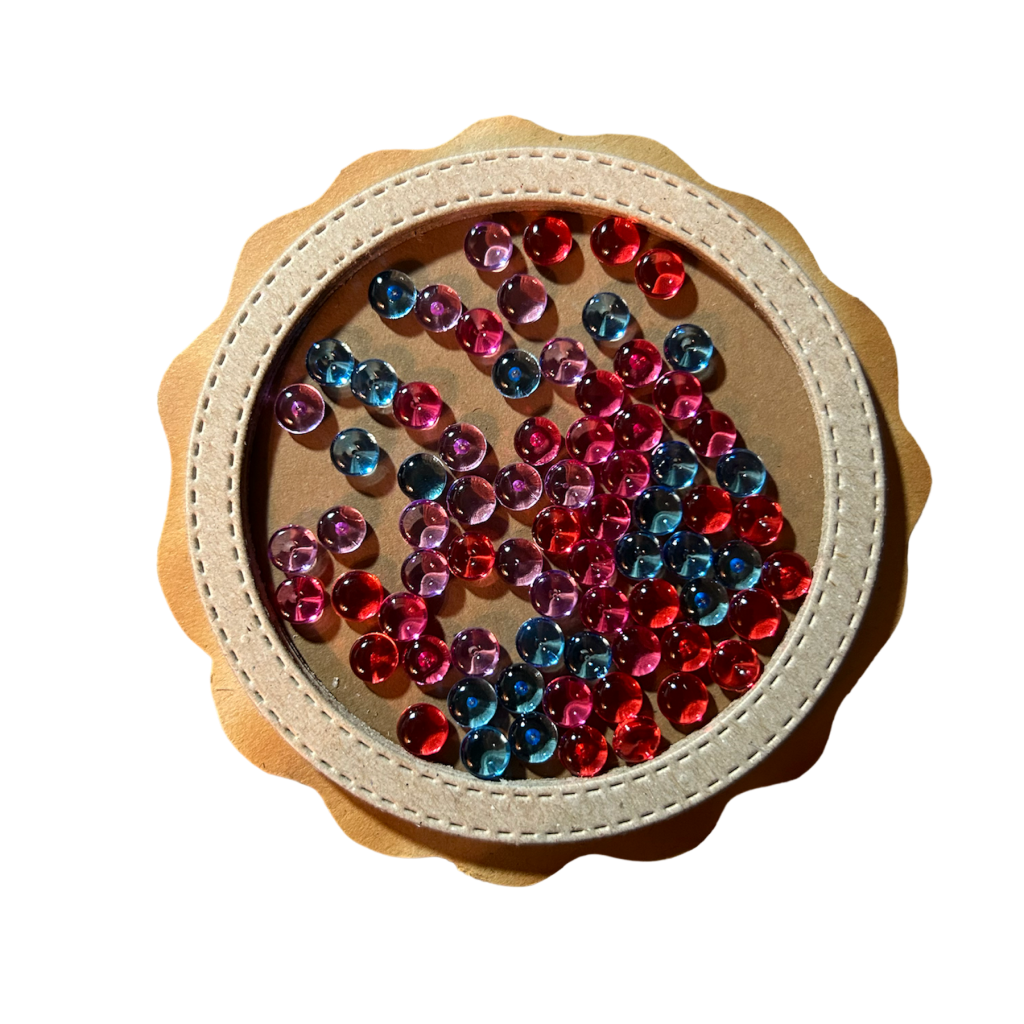
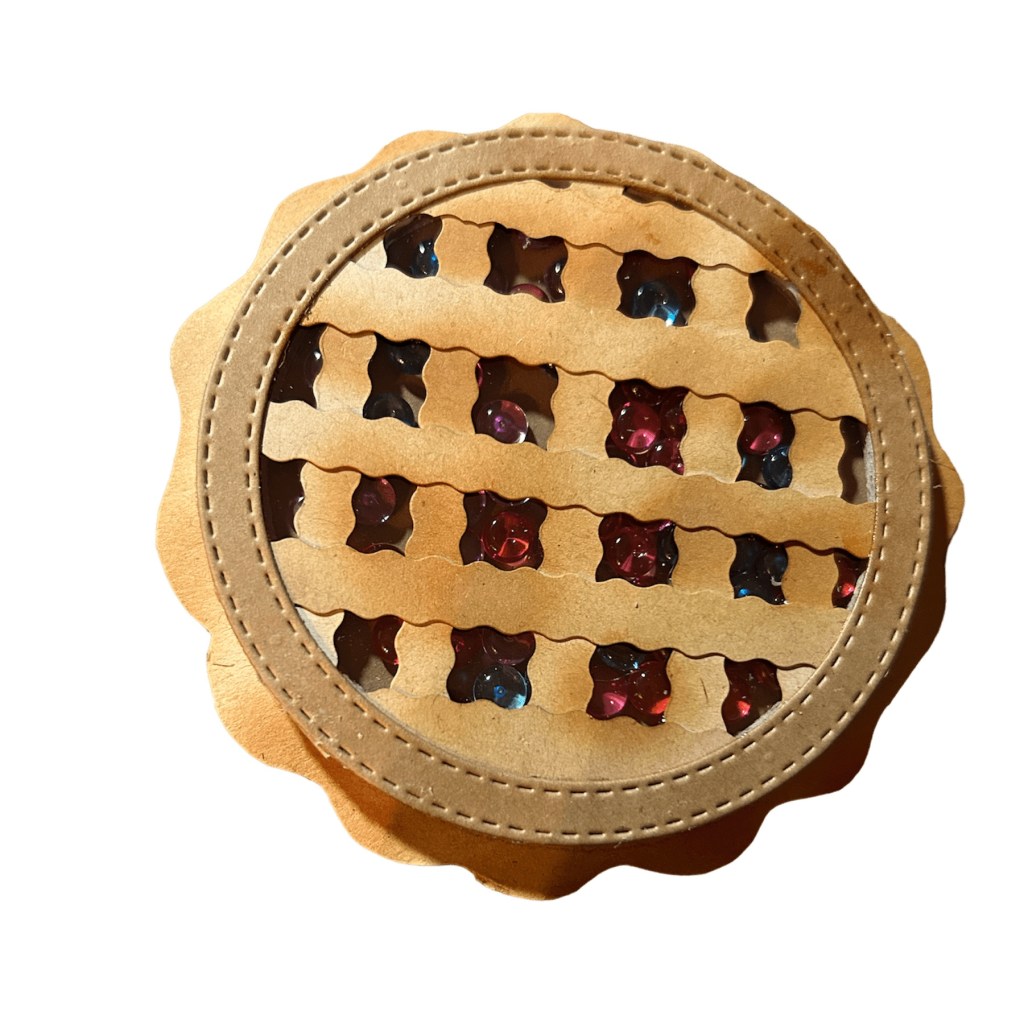
Now, add the shaker bits-on top of the cardstock circle in the well you created, as desired – you can add whatever you want to create interest (sequins, clay shaker bits, etc). I used jelly dots. You can use one color or simply mix a variety of colors for a more random look, as I have done here. Once you’re happy with how the shaker filling are arranged, carefully glue the cardstock circle onto the top on the acetate circle to seal.
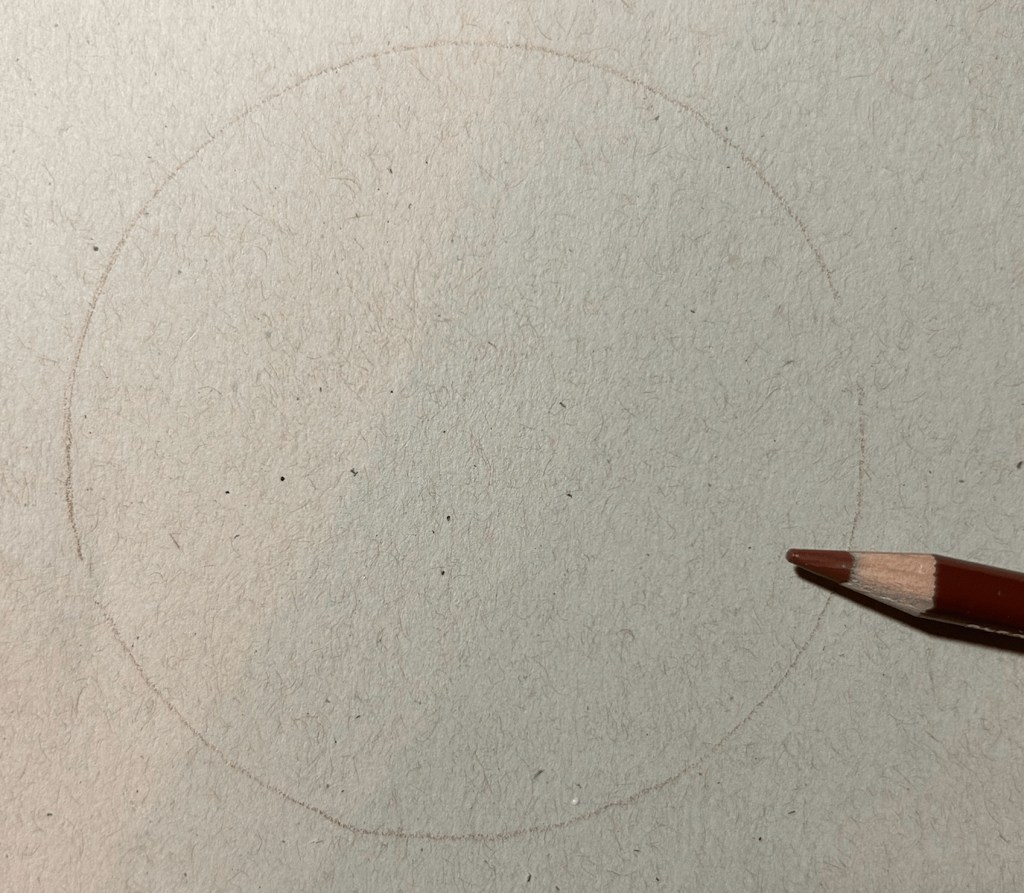
See the depth created by layering chipboard versus using foam tape.To create wavy pie crust edge, trace circle onto coordinating card stock. Then cut with scissors a curvy edge about 1/2 inch wider than the initial line drawn. Ink blend edges to look like it browned in oven and finish with white gel pen for added interest.This photo shows the different pieces that will be glued together to create pieFill well with shaker bits after gluing down to free-handed circle you traced and fussy cut to create the wavy outside of the pie crust edge. This seals one side of your pie element. Place something heavy to ensure good adhesion.
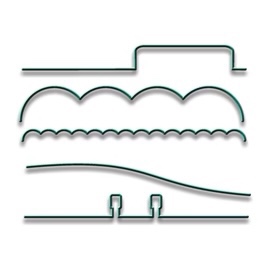
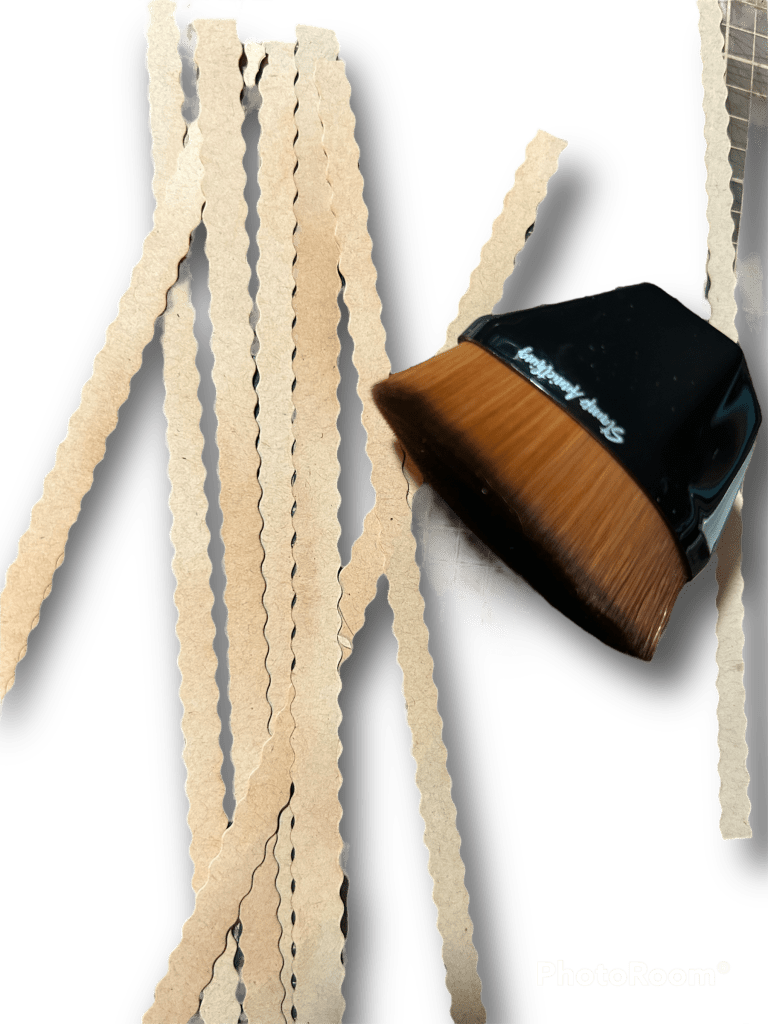
Finally, you can add some touches to make it look like a pie – for example, you can cut small strips of card stock in 1/4 in strips either with decorative scissors or your paper trimmer. Consider ink blending the edges to create a visual effect of being browned in the oven. Other options for a decorative edge could be to use the edger dies from Stamp Anniething to make it look more like rippled pastry to form the lattice crust.
Edger dies/see smaller scalloped aboveInk blend your strips and glue down in s lattice design snd then cut off any edges that hang over.Layer strips and glue down to single frame to create pie top.
And voila – you now have a pie shaker element that you can use to decorate cards, scrapbook pages, or even as a fun little trinket to give away as a gift, attached to a tag, memordex card or mini recipe album! The possibilities are endless, and the best part is that you can customize it to fit your personal style and preference.
Finished pie element
So why not get your creative juices flowing and make your own pie shaker element to not just celebrate International Pi Day, but stretch your current die stash and use your supplies in a new, unique and fun ways!?!
Example of 5.5 inch square card paired up with a chibi
Happy crafting!
Final Card Project using pie element without chibi
If you haven’t heard it yet today, YOU ARE INCREDIBLE and you matter! Happy Crafting! Please follow, like, subscribe and share
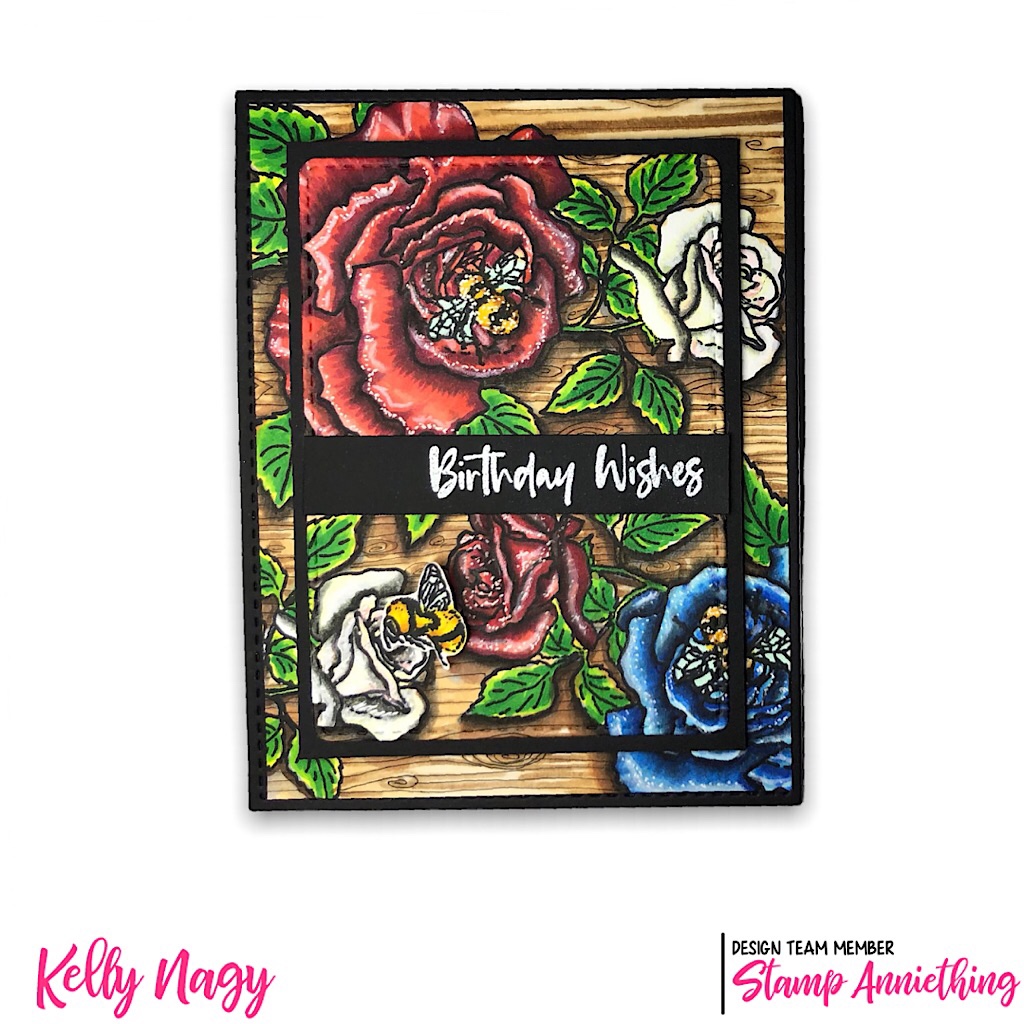
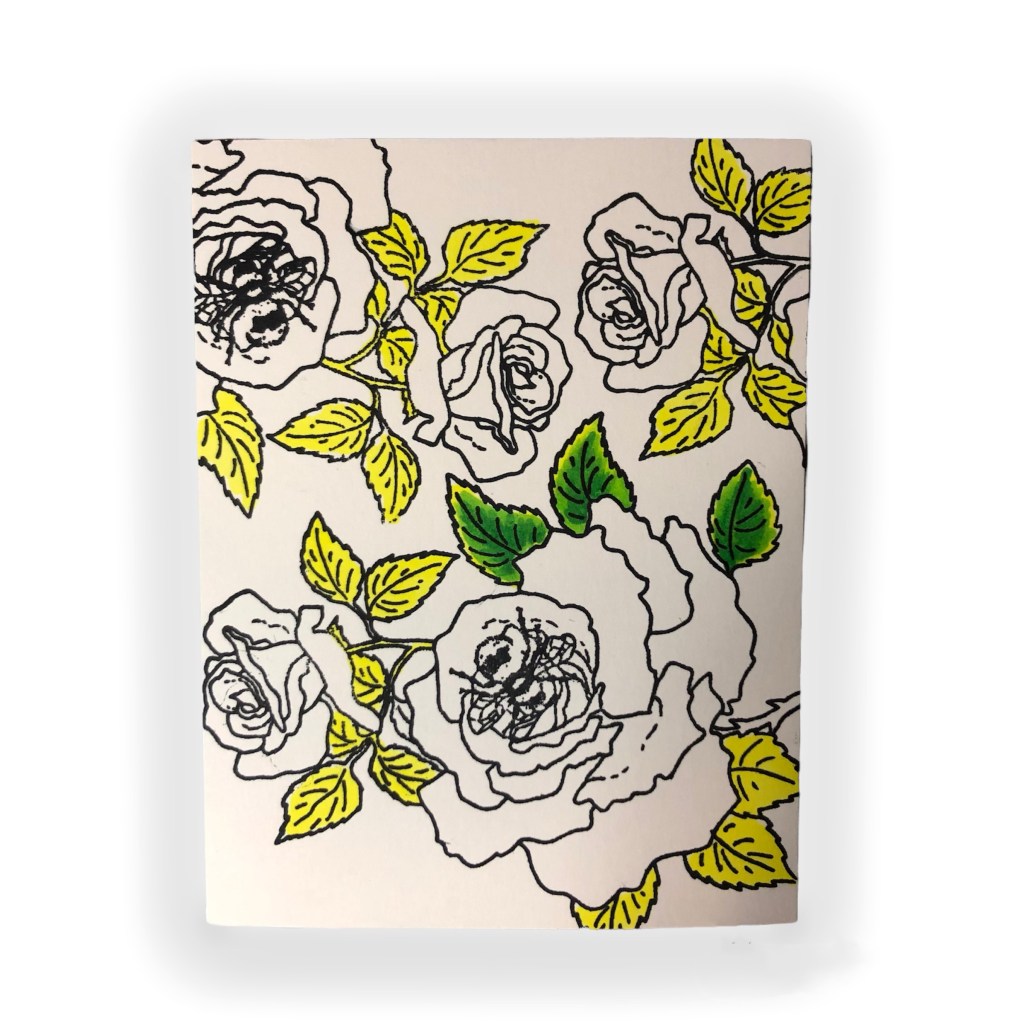
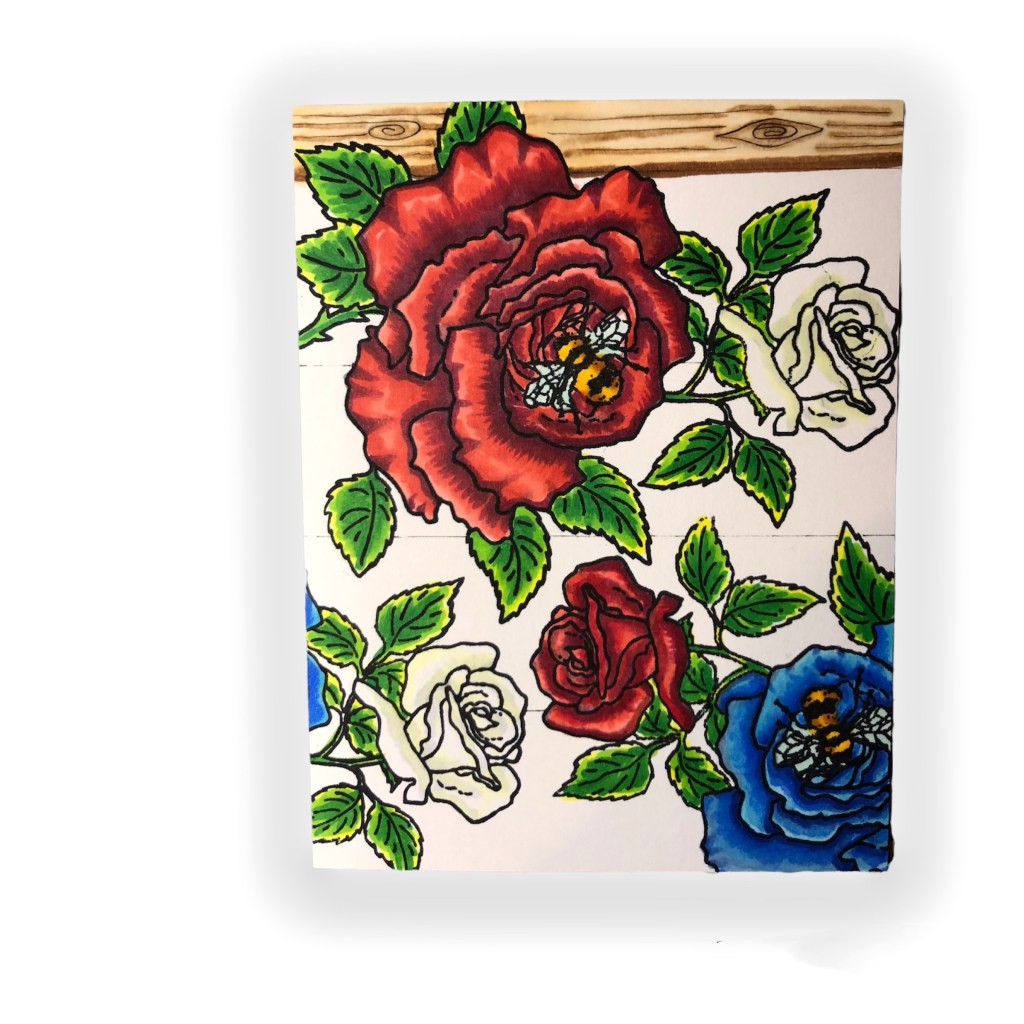
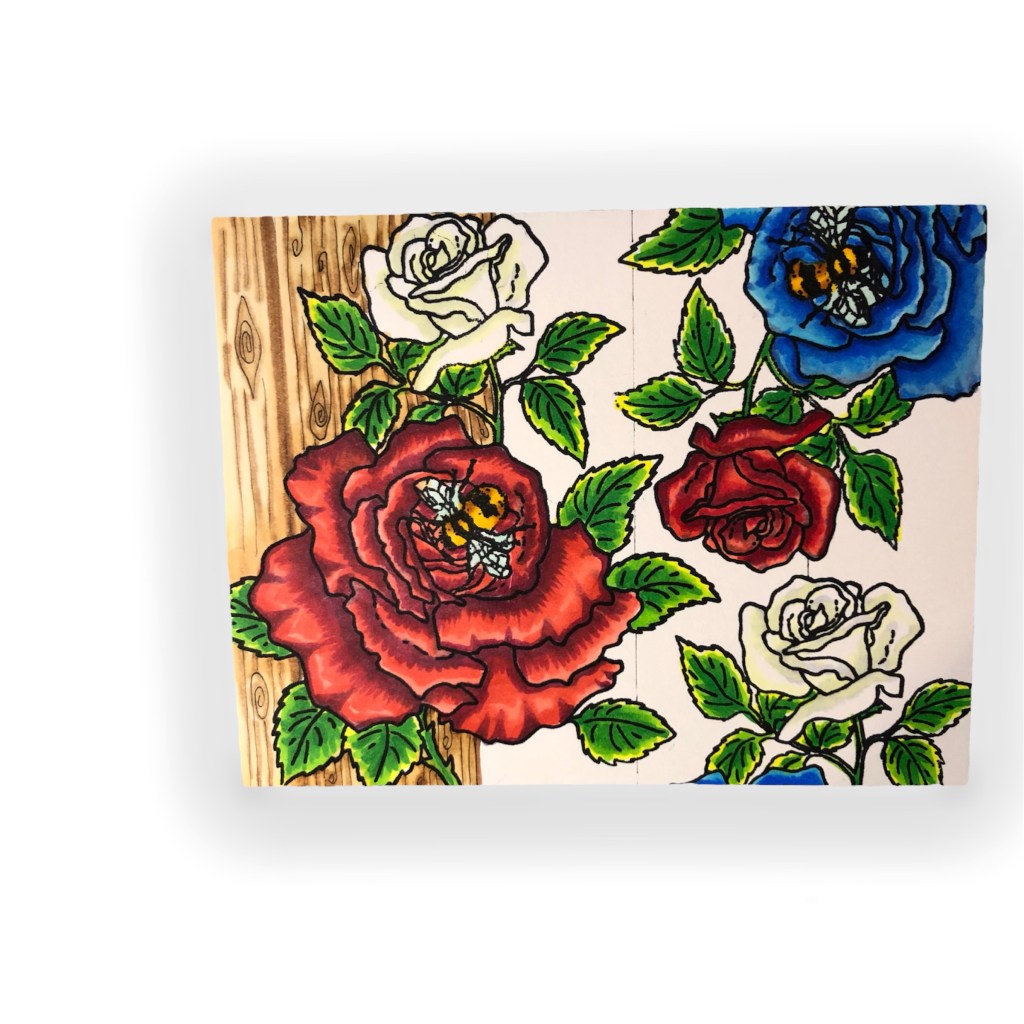
I created this card using images from the Bumblebee and Roses set from Annie’s Garden.
I stamped the flowers onto a A2 size card panel using Memento Black Ink on card stock that is alcohol ink friendly. I used 110 lb Hammermill paper.
Stamp your image in different angles on card panel to cover.
I started coloring the leaves using my COPIC markers. Y04, YG07 and G09 were used to color the leaves.
Sometimes if you are coloring something quickly, I do assembly line coloring, to speed like colored objects.
I don’t always go ahead, as I like the ink to be wet when coloring so that the colors blend automatically, the work is done for you when you apply the ink layers while the ink underneath is still wet, or at least damp.
To color the RED roses, I used the following blend: BV23 (shadow/under paint), R22, R24, R29, and R39.
Add shadows down first with BV23After coloring all the flowers, I decided I wanted to create a wooden background. I divided the panel using a ruler and doodled with a Micron permanent black ink and filled in with Copic markers to complete the background.Continue down the panel until wood pattern is complete
COPIC Blends are as follows:
Blue Roses – B01, FBG2, FB2, B12 and B18
White Roses – C1, Y000 and RV000
Bumblebee – Y000, YR23, YR27, FY1 and BG11
Wood – E57, E53, E51, E50 (shadow BV31 & E13)
Once the Copic coloring was complete, I used Prismacolor pencils and Gamsol to add extra depth to the shadows. Thank you for your support. Please like and follow! Happy Crafting!❤️
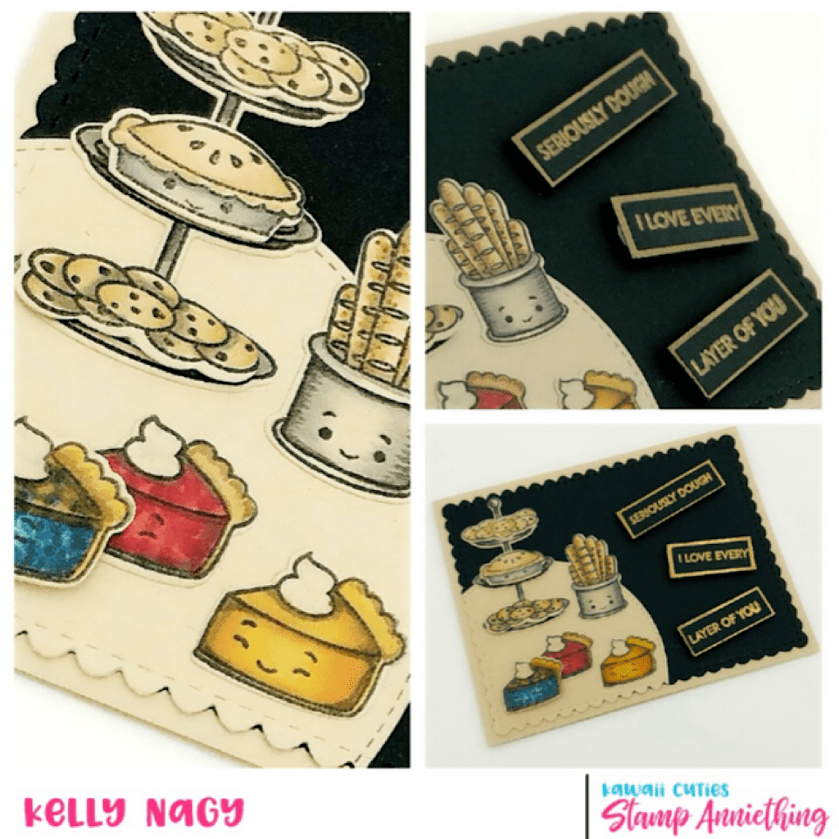
Today I am sharing an elegant card using a neutral color pallet, with pops of gold metallic mats behind the embossed sentiment, “Seriously Dough, I Love Every Layer of You.” This card could be used as Valentine Card, Galentine Card, Pick Me Up, Thinking of You, Birthday, Miss You….literally for any person on your list! It’s a great set and can’t wait to see what everyone else makes. If you post a creation using SA products, make sure you tag them using #STAMPANNIETHING in your social media for a chance to win some great prizes.
This set, like I have already said, is extremely versatile and features many yummy gourmet pastry images, a cute little girl and one of those popular layered display trays. To make my card, I used the following Stamp Anniething supplies and have inclulded links for your convenience below.
Images above do not include calories, but can add a whole punch of color to any card project.
Copic markers were used to color up the images and blends are as follows:
Yellow/Orange – Pumpkin Pie
YR00, YR12, YR16, YR18
Blue – Pie Filling
B000, B21, B23, B26
Red – Pie Filling
R20, R24, R29, R39
Crusts
Y23, E31
Miscellaneous Shading & Containers
BV31, C1, C3, C5
Use whatever your favorite coloring medium is. You don’t have to have the exact colors I used, try different combinations and make YOUR own favorite pies.


