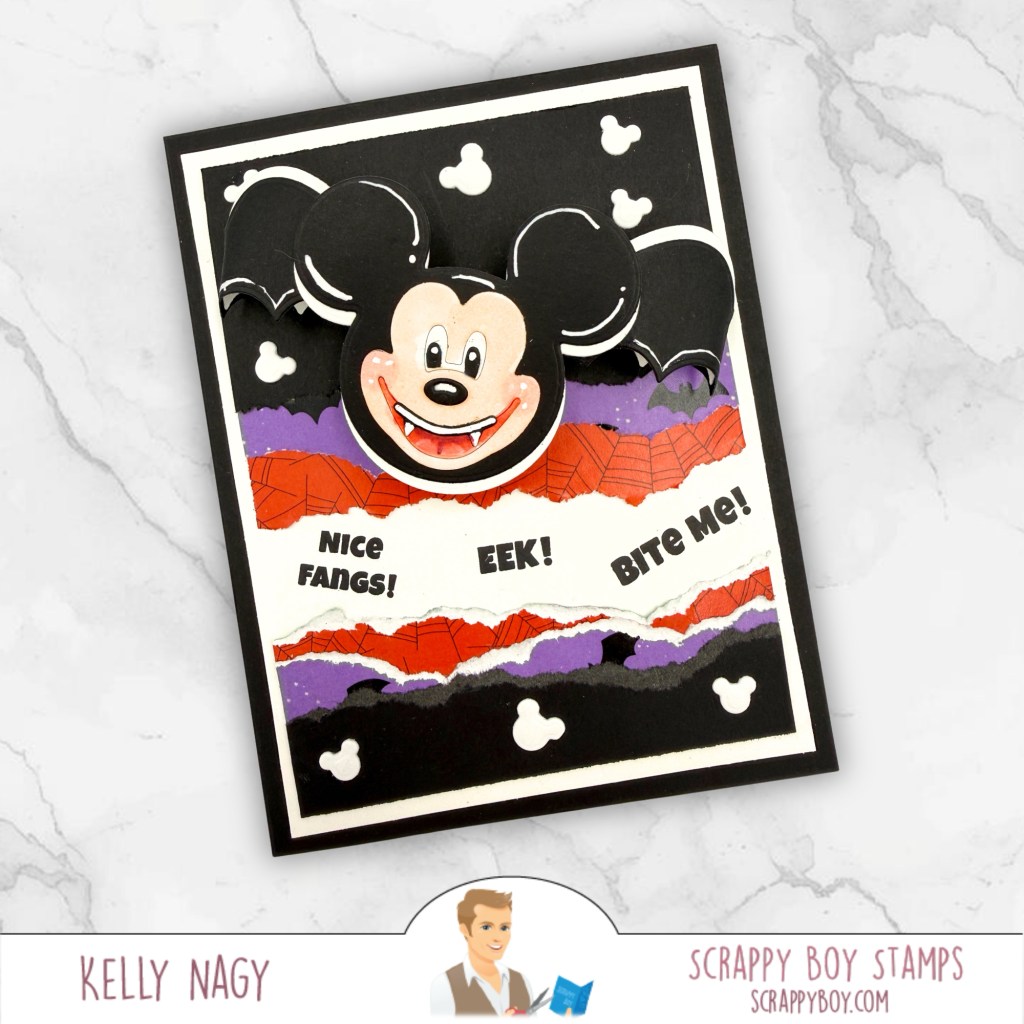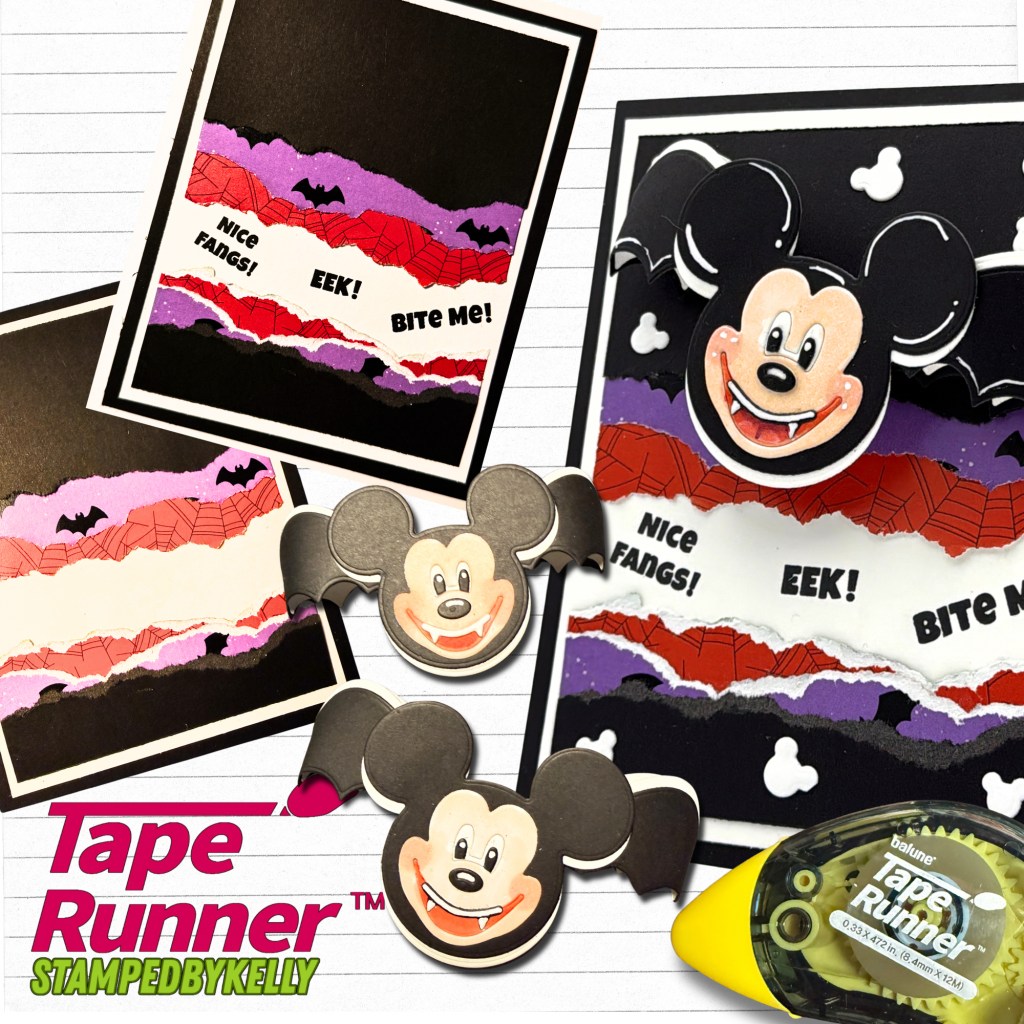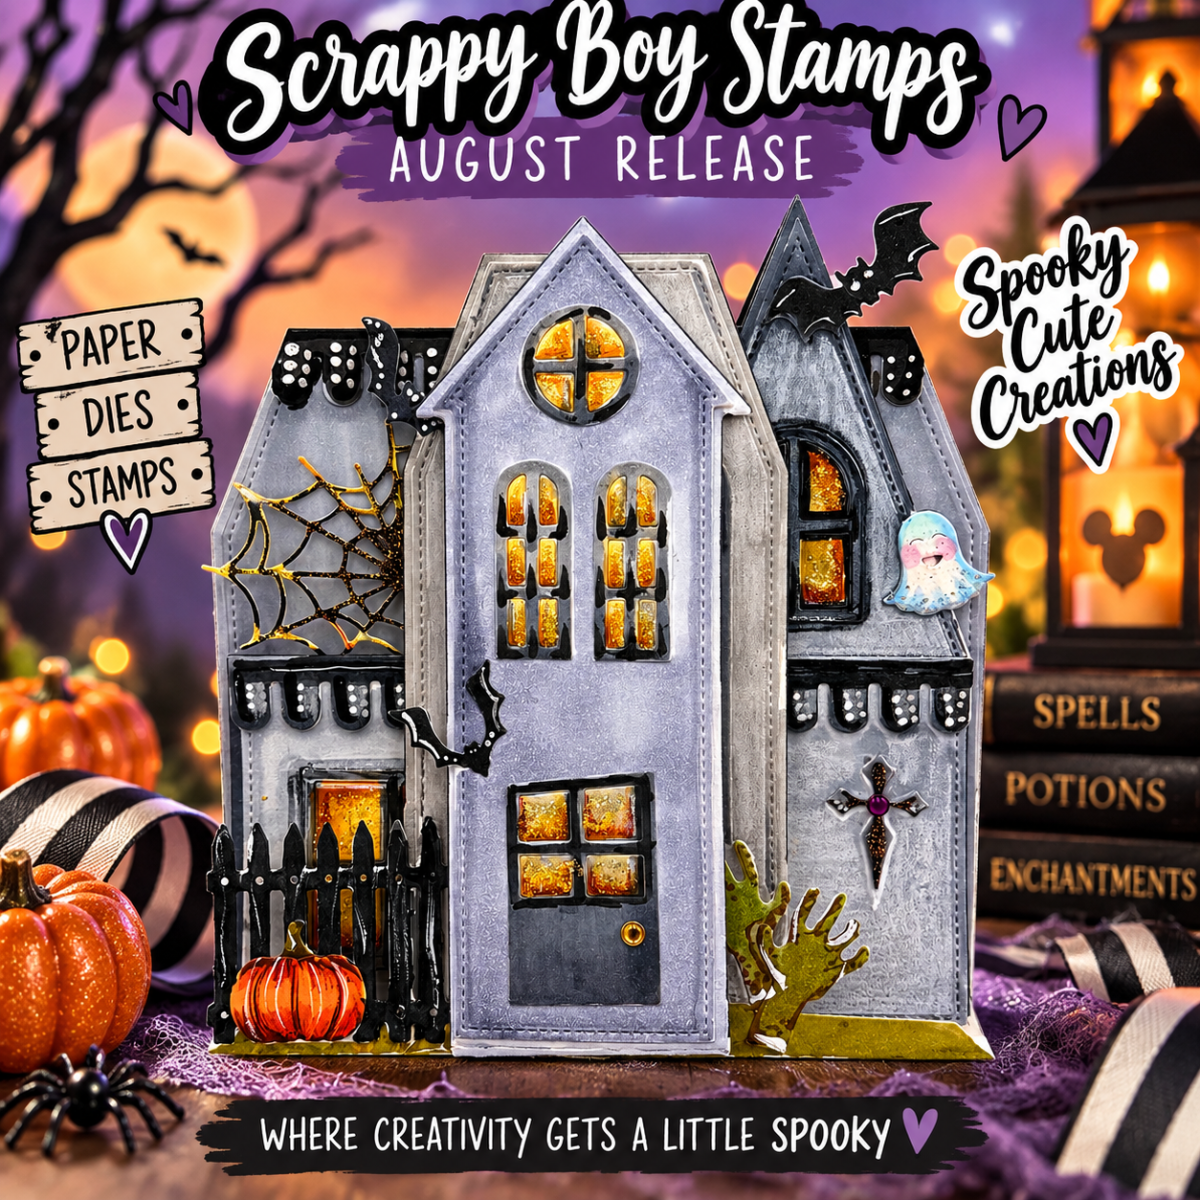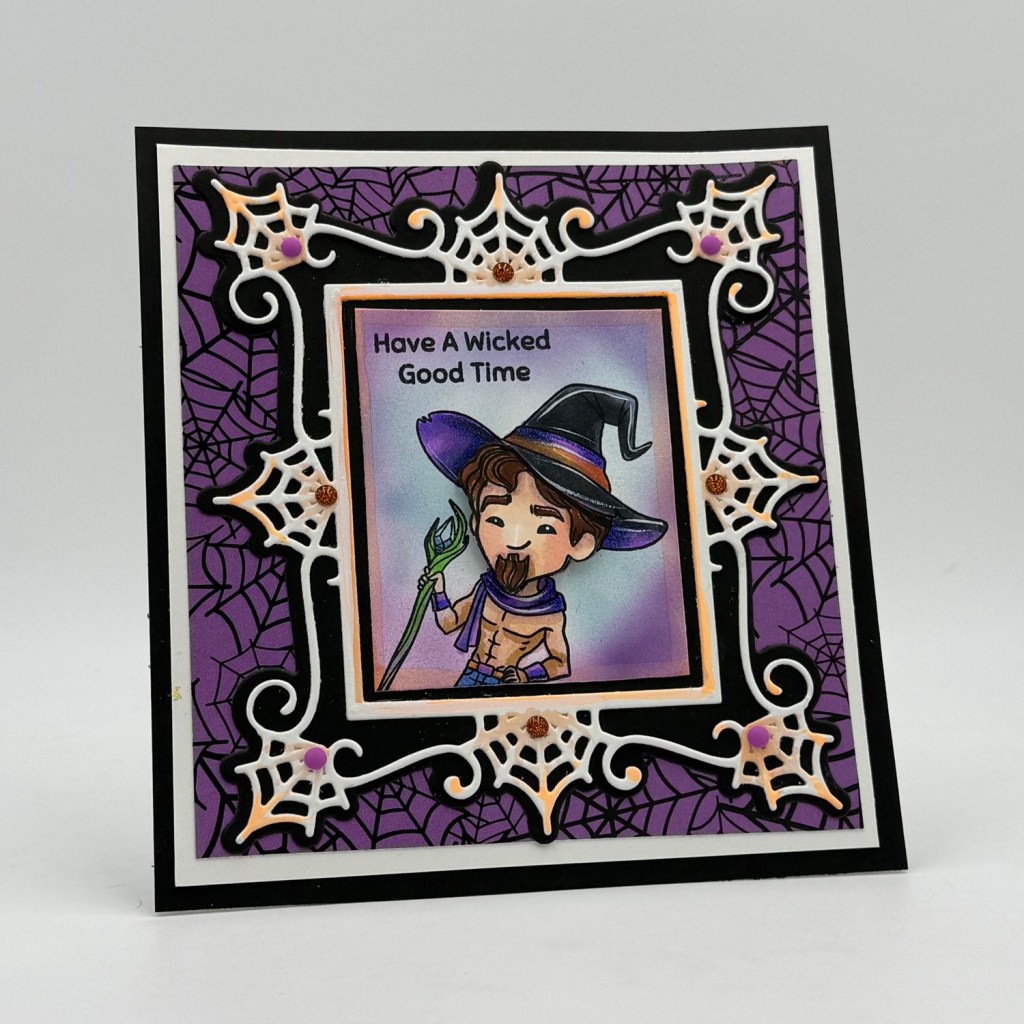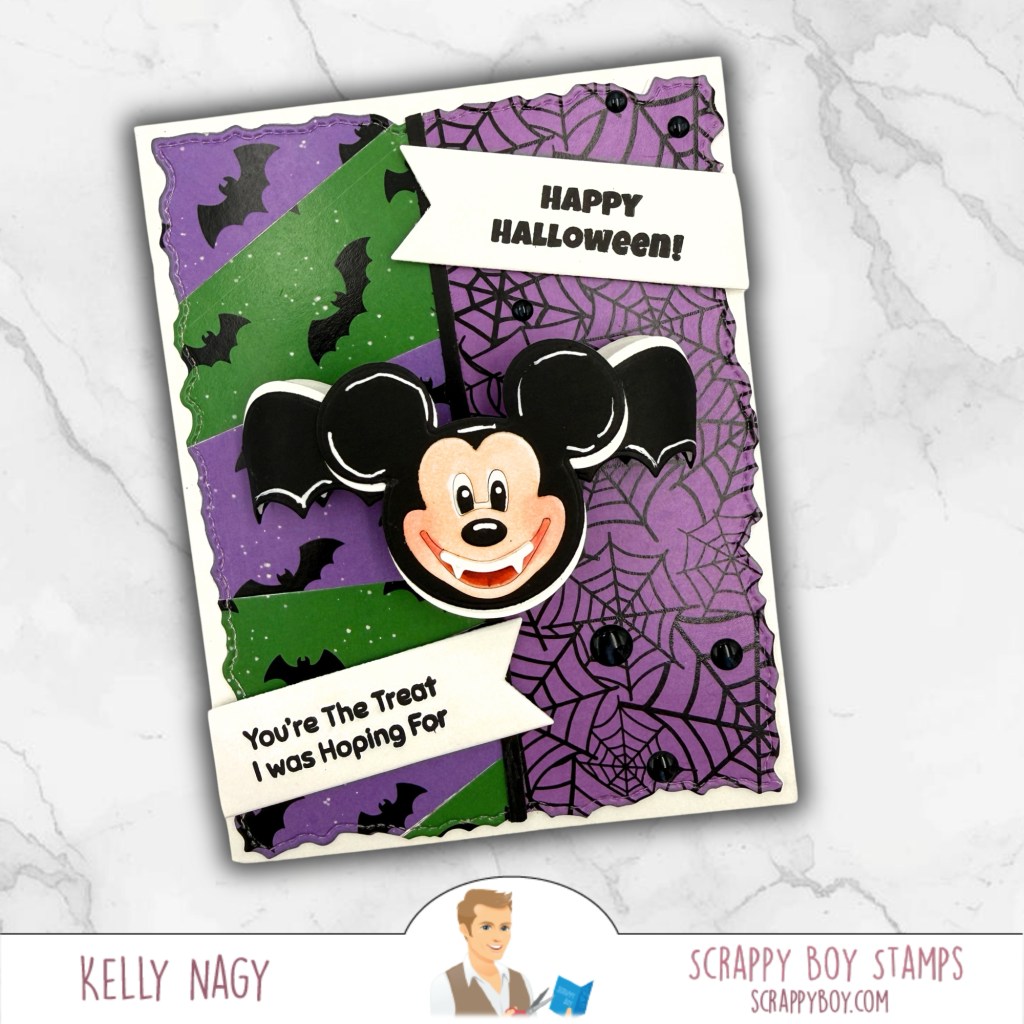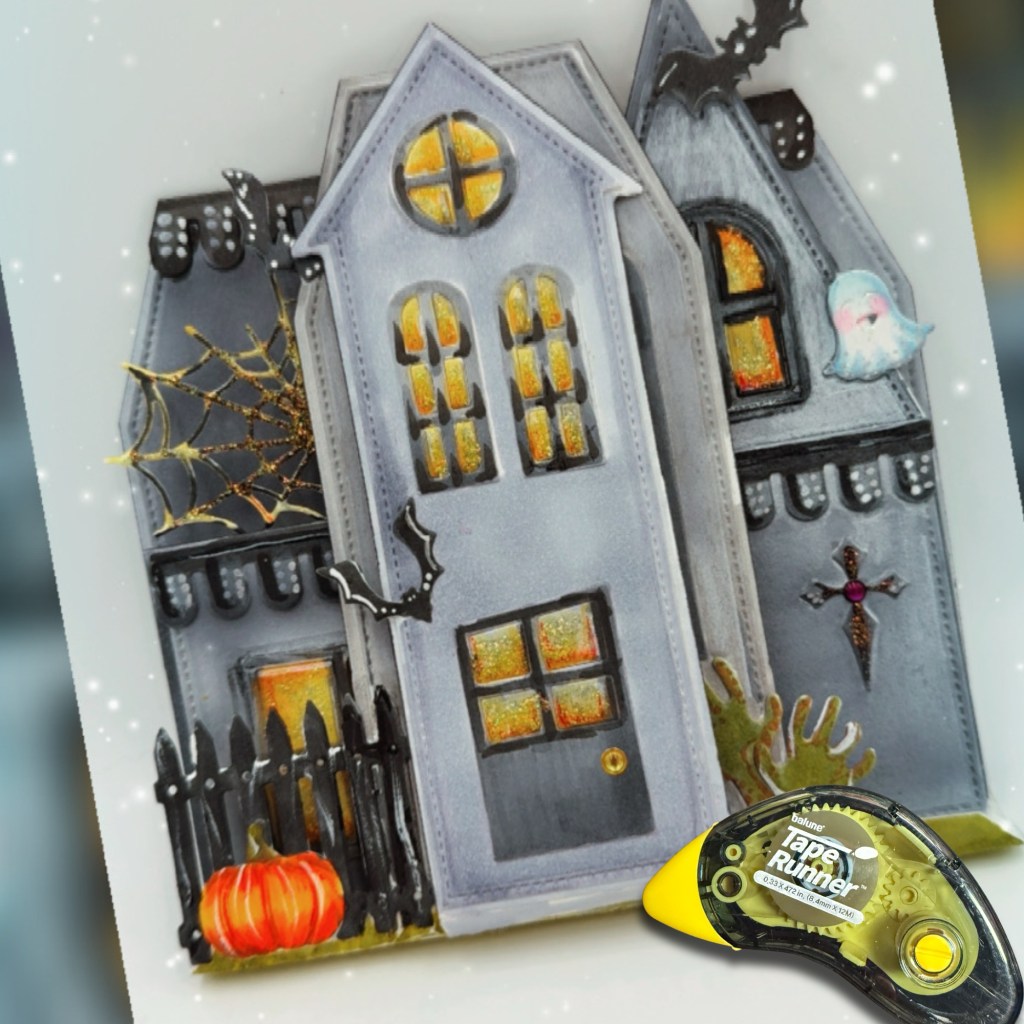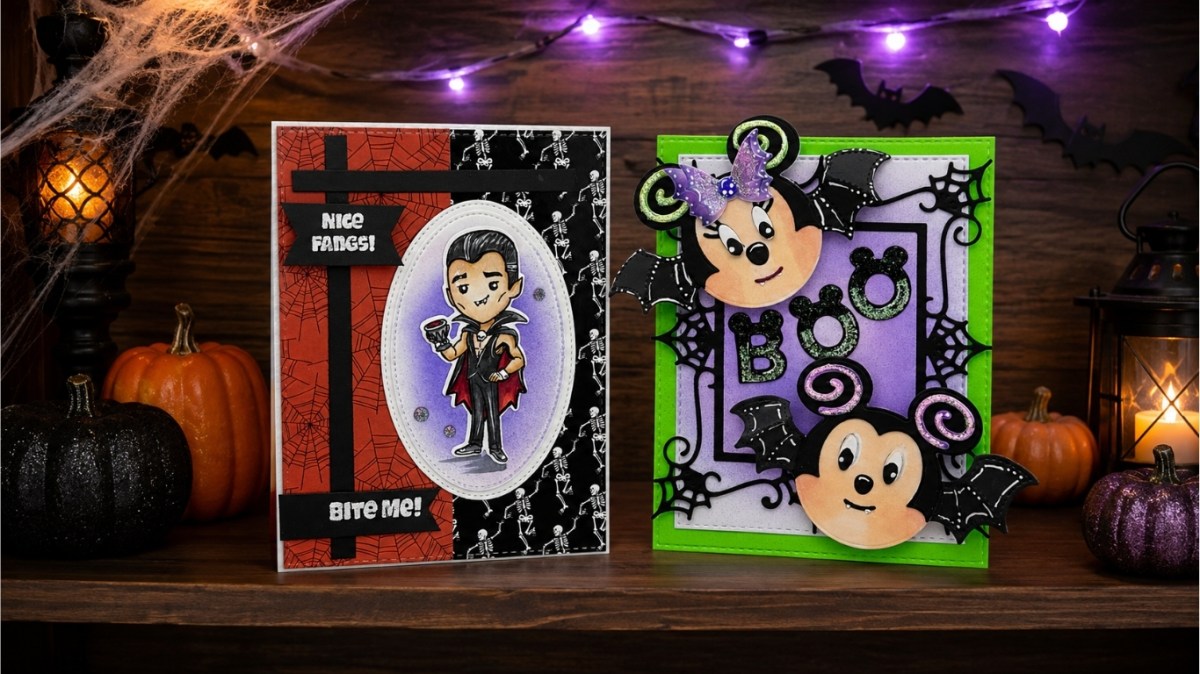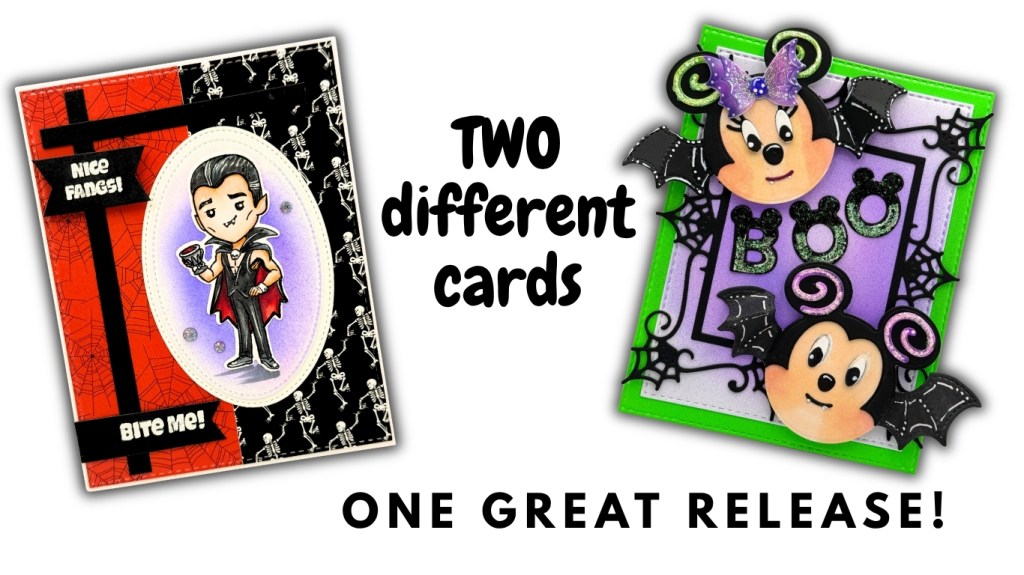
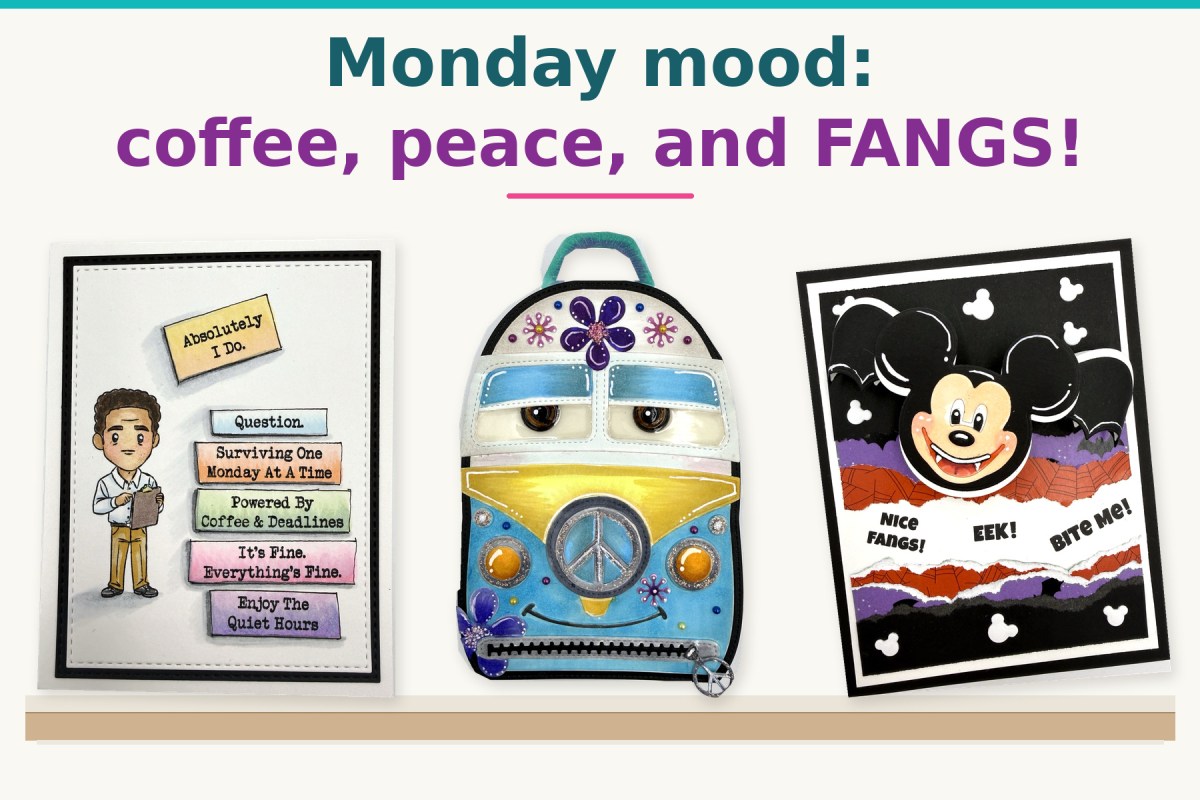
Create two colorful Halloween cards featuring the newest Scrappy Boy Stamps release—the Hex Appeal I Want It All Bundle, Spooky Bat Mouse Embellishment Die, Mouse Ears Alphabet & Numbers Dies and Gothic Picture Frame.
Halloween crafting is in full swing, and today I’m sharing two frightfully fun projects featuring the newest release from Scrappy Boy Stamps! From a charming vampire to the cutest little bat mice, these cards are filled with bright colors, playful details, and just the right amount of spooky sparkle.
Two Halloween cards featuring the newest release from Scrappy Boy Stamps
Hex Appeal August Sketch Challenge Card
My first project is squeaking in just in time for the final day of the Scrappy Boy Stamps August Sketch Challenge!
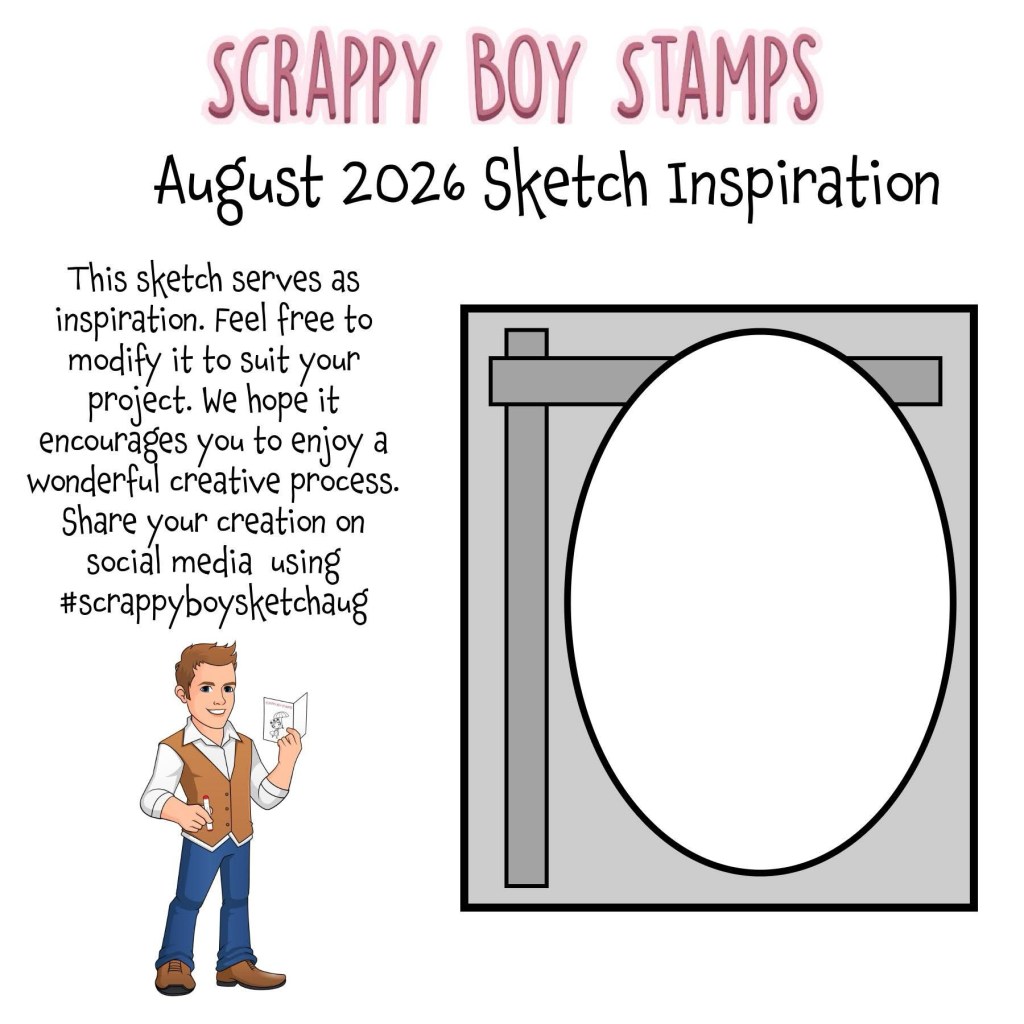
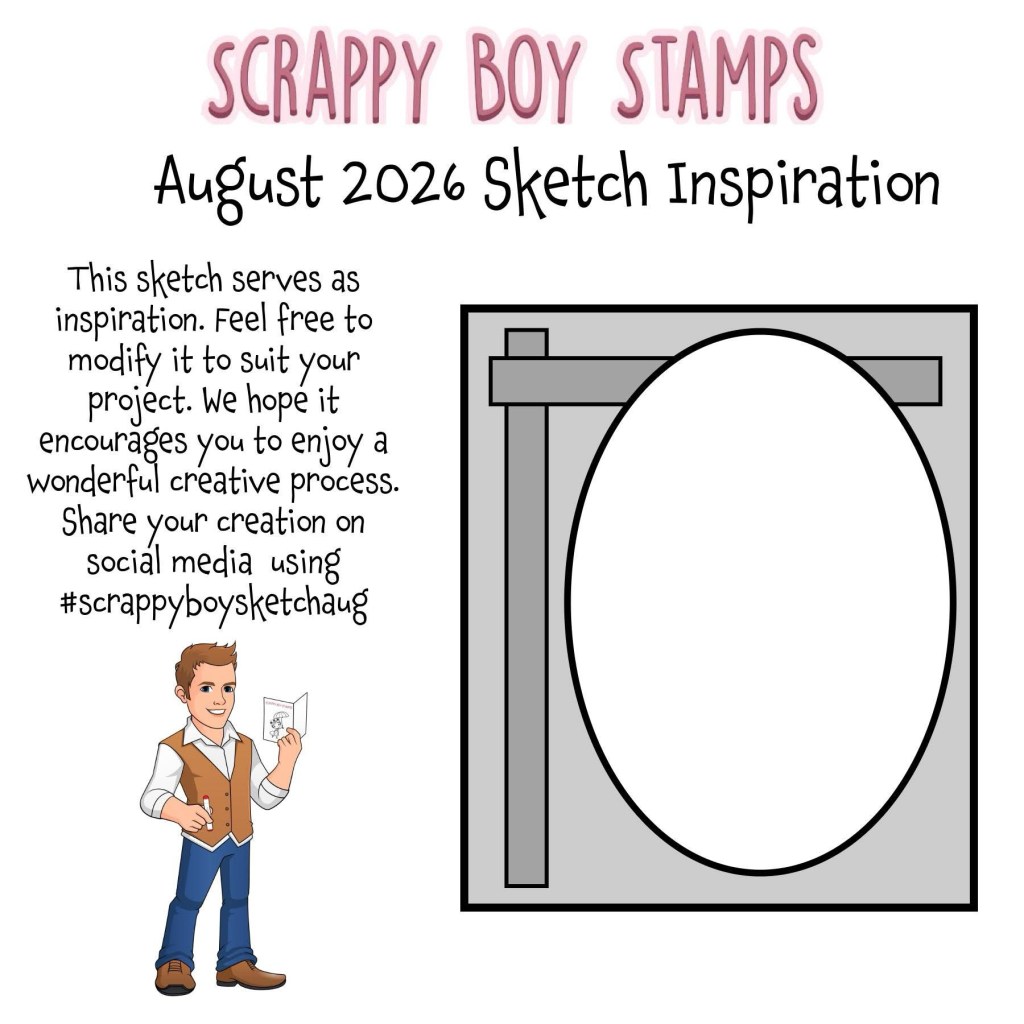
Scrappy Boy Stamps August 2026 Sketch Inspiration.
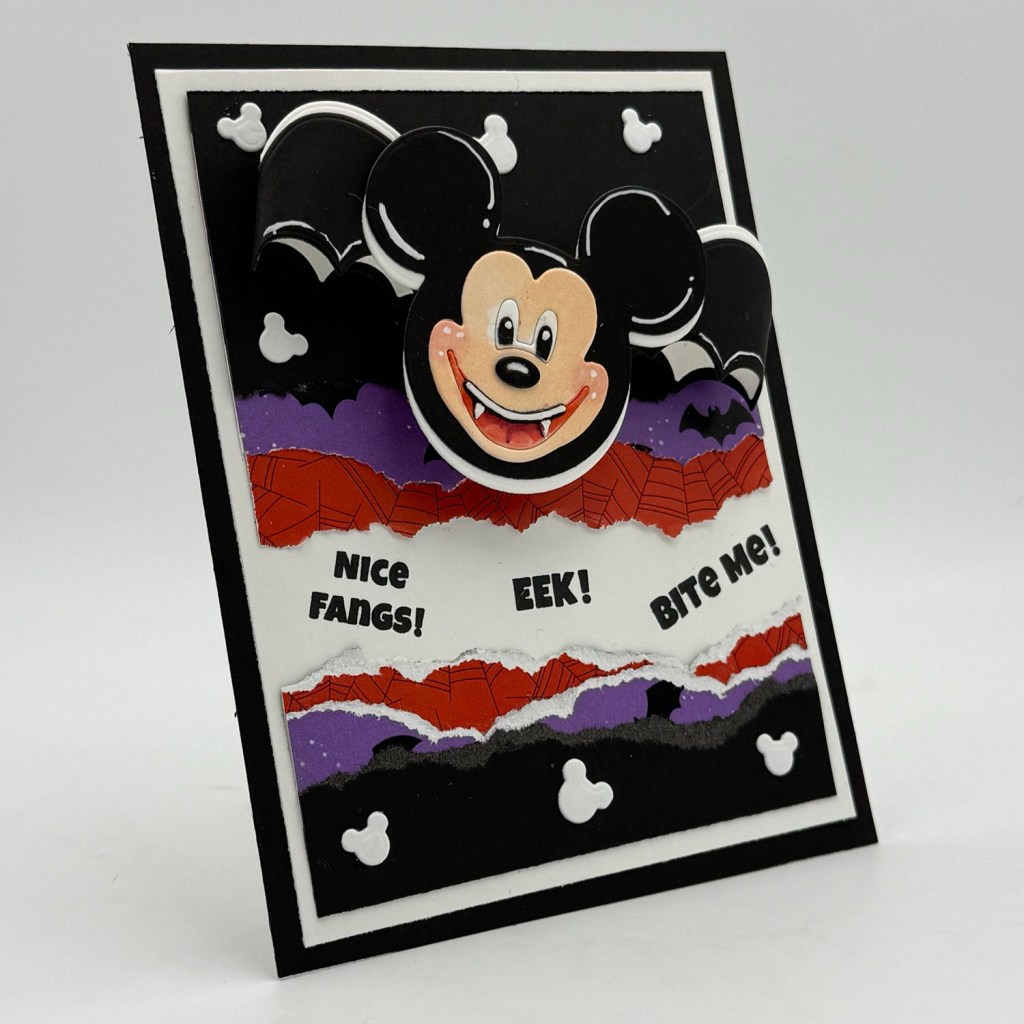
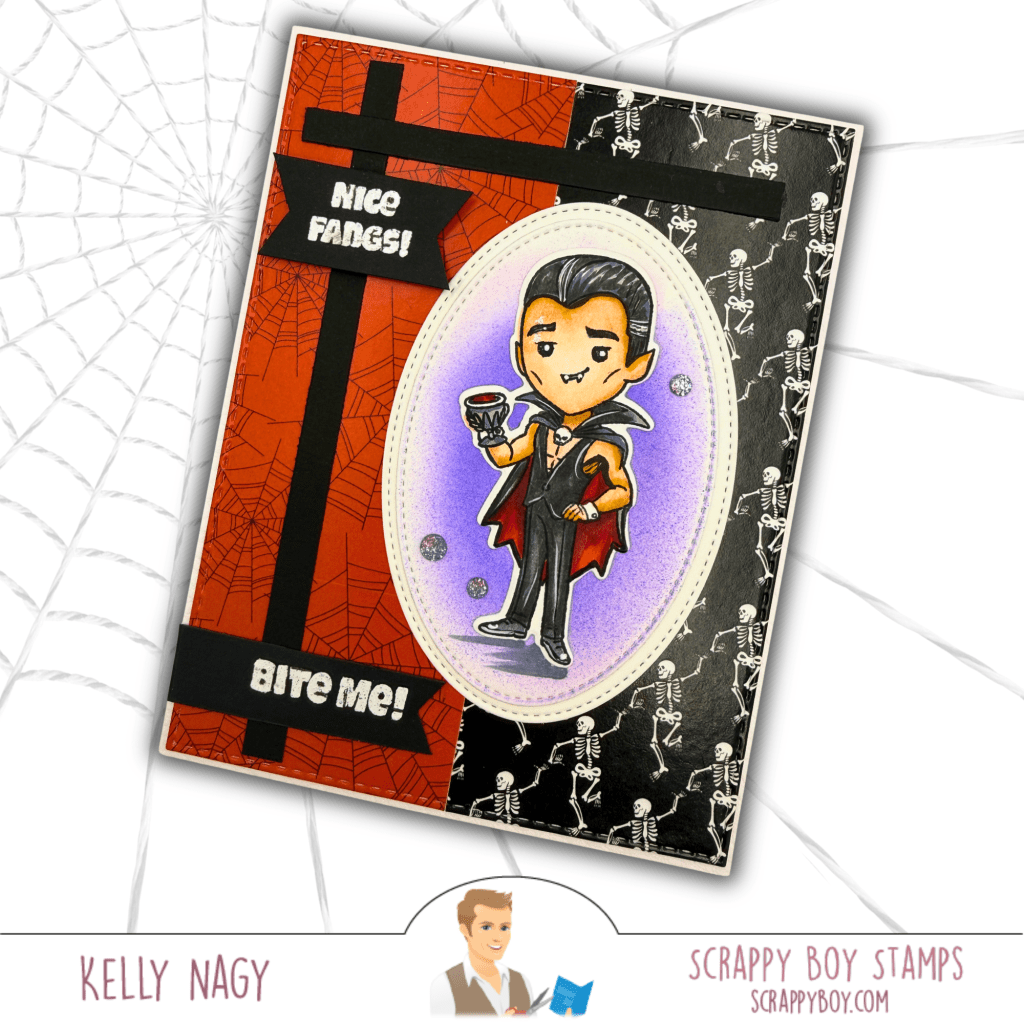
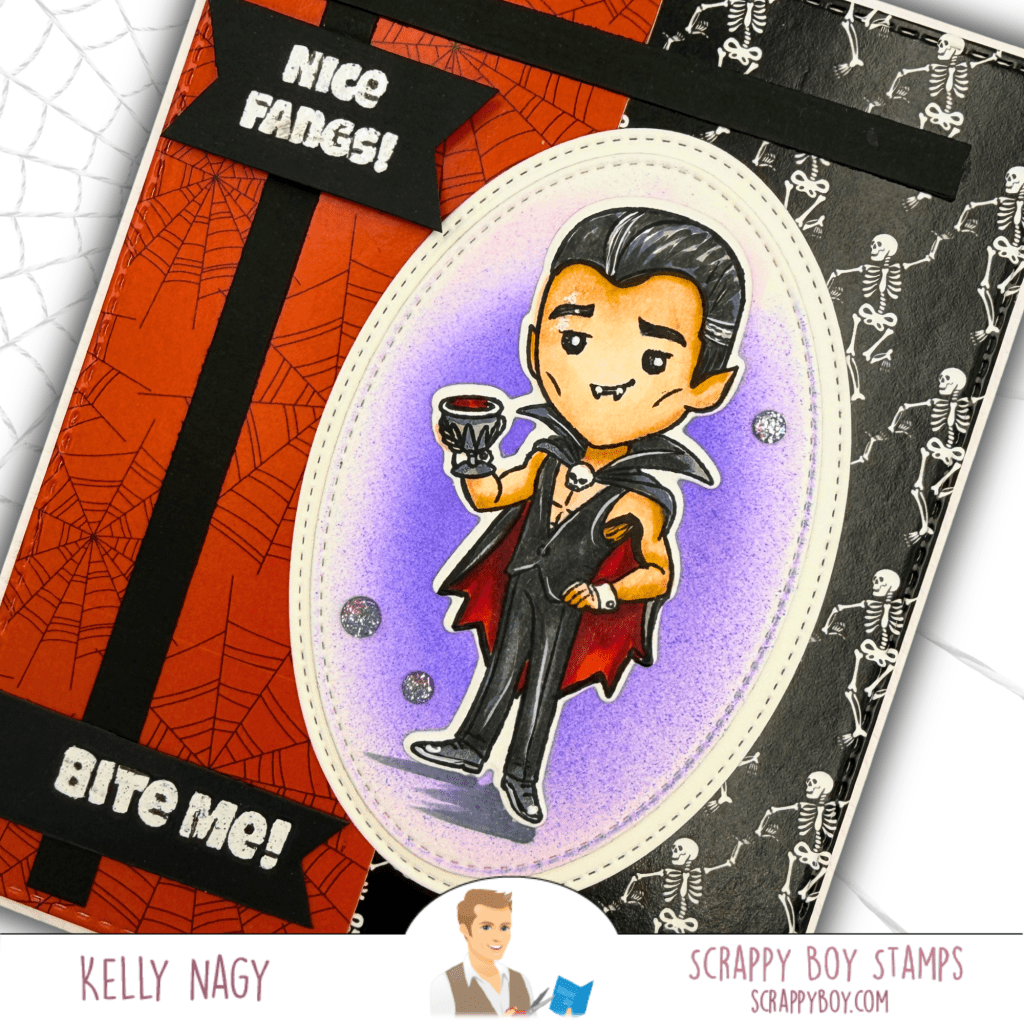
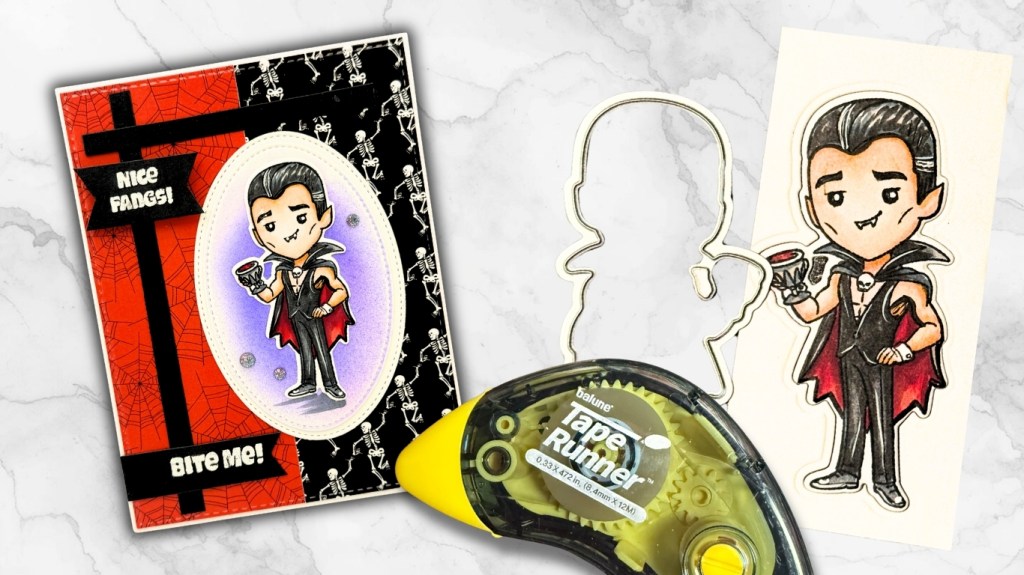
I used the Hex Appeal I Want It All Bundle to create this handsome little vampire card. The August sketch inspired the bold layout, including the vertical and horizontal cardstock strips and the large oval focal point.
The orange spiderweb paper and black skeleton pattern create a classic Halloween color combination, while the softly colored purple background helps the vampire stand out. The heat-embossed “Nice Fangs!” and “Bite Me!” sentiments add a playful finishing touch.
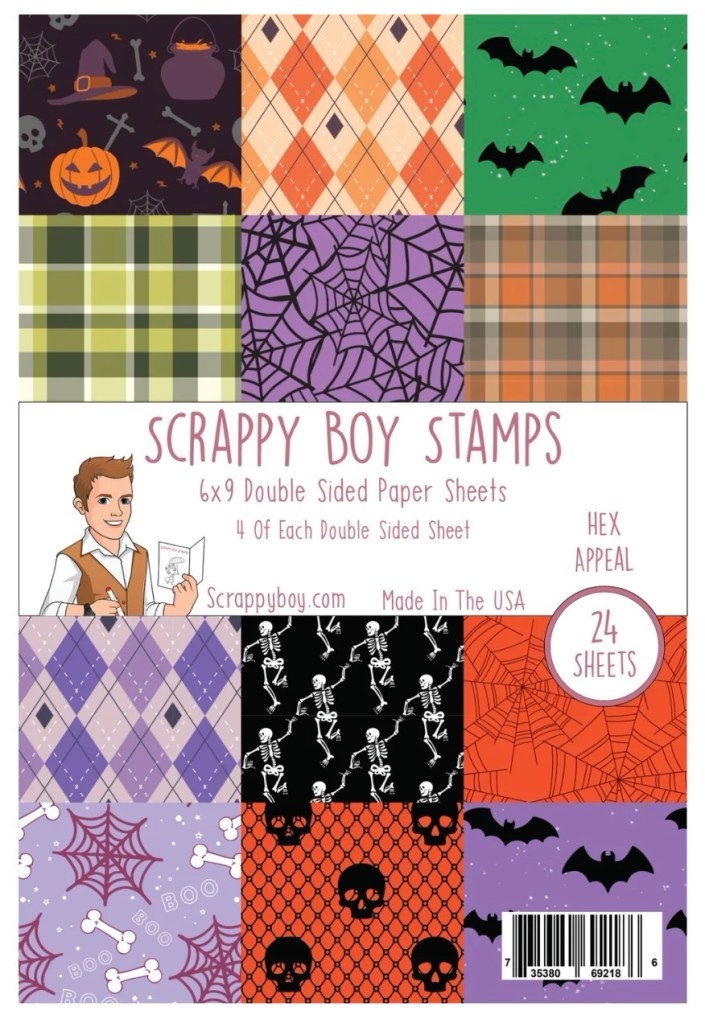
Hex Appeal Coordinating Paper Pack
A few sparkly embellishments, dimensional layers, and stitched details complete this fang-tastic design!
Close Up to show layers. Stitched Oval Nesting Dies from Scrappy Boy Stamps
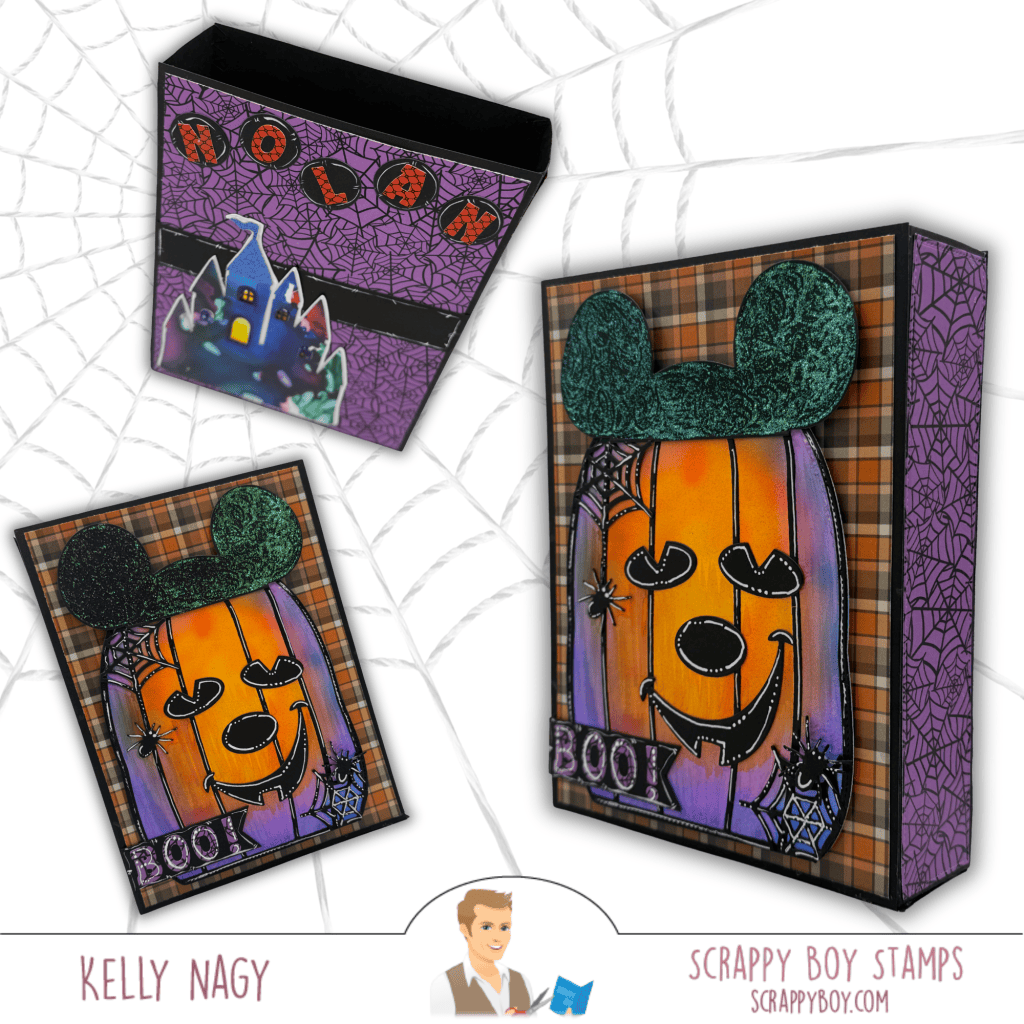
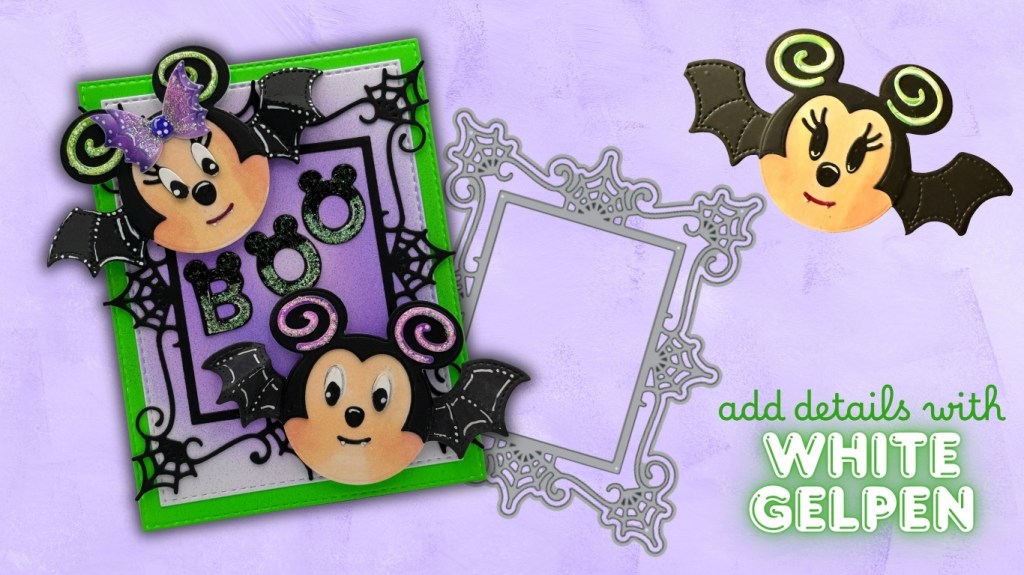
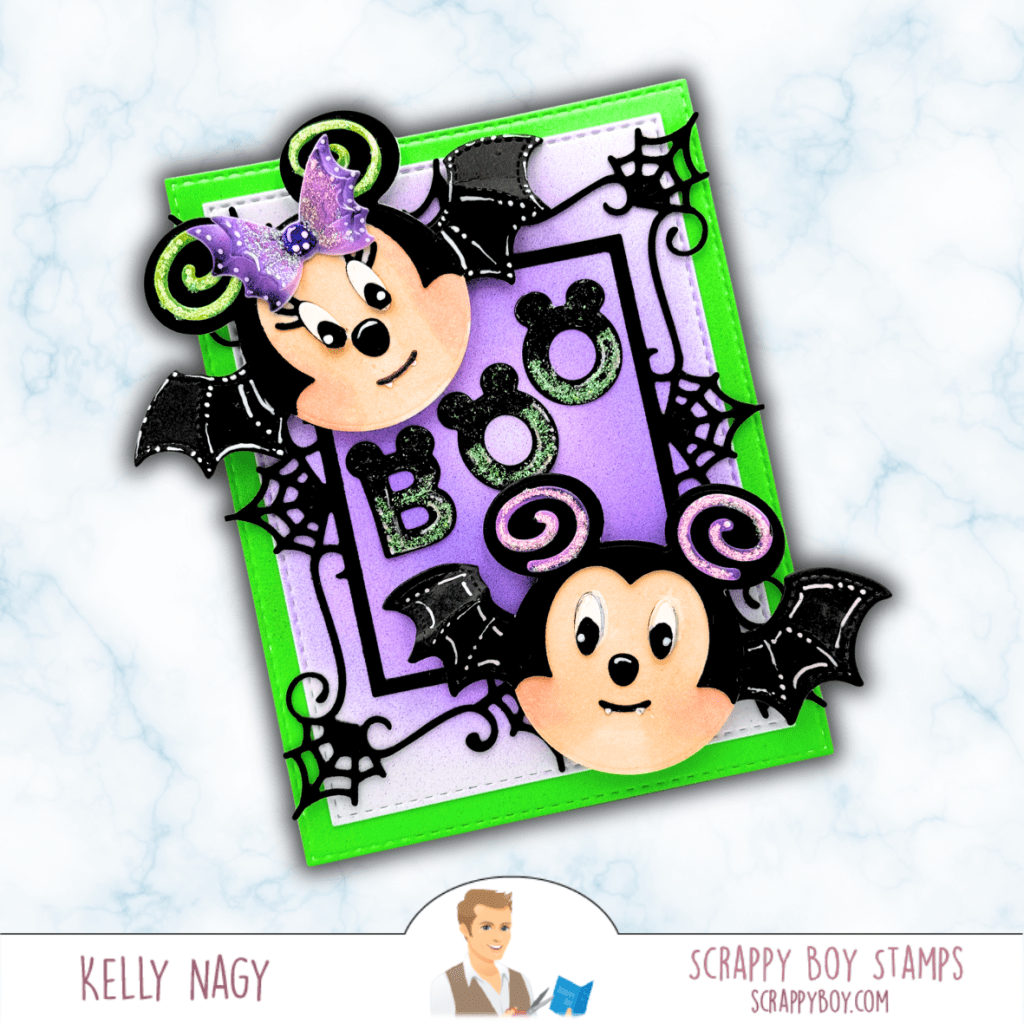
Spooky Bat Mouse Embellishment Dies paired with the Gothic Picture Frame
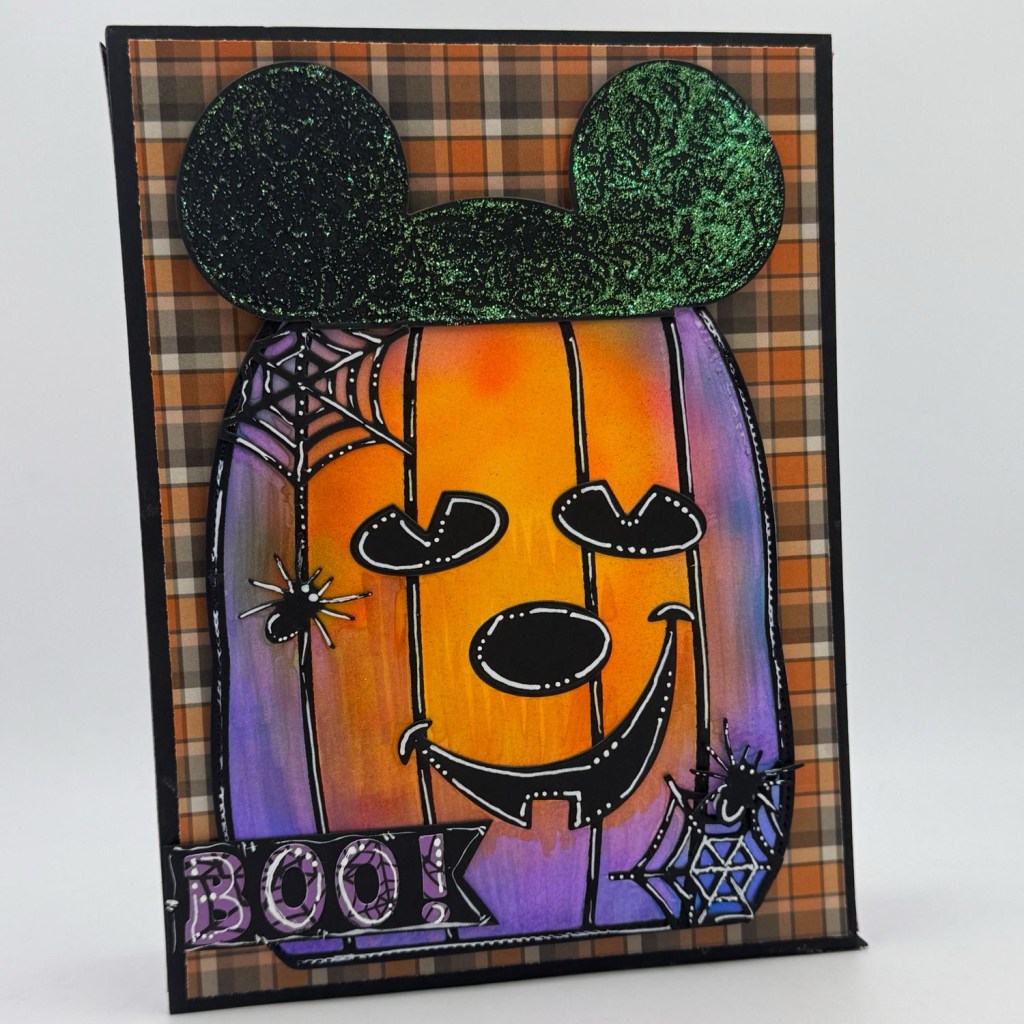
These little bat mice are almost too cute to spook! I used bright green, purple, and black for a playful Halloween color palette and added white highlights to bring out the details in their wings and faces.
The Gothic Picture Frame creates the perfect backdrop, while the spiderweb accents, sparkly swirls, and bold BOO sentiment add extra texture and personality. The Mouse Ears alphabet dies are a cute addition and nod to the mouse! I love how the bright green border makes the entire card pop!
Glitter, white highlights, and whimsical die-cut details make these bat mice ready for Halloween.
Both projects show how easily the newest Scrappy Boy Stamps products can be mixed and matched to create Halloween cards ranging from delightfully spooky to cute and whimsical.
Suggested Copic combinations: Skin: E000, E00, E11, E13; hair and clothing: C3, C5, C7, C9; cape and wine: R29, R39, R59; and purple airbrushed background: V04, V06, V09. I used the Copic Airbrush System to create the soft purple glow behind the vampire.
I used my favorite dry adhesive from TapeRunner.com to assemble all the layers of this card. Shop their selection of crafty adhesives and use promo code KELLY10 to save 10% on your entire cart! This costs you nothing extra and helps support my creative journey.
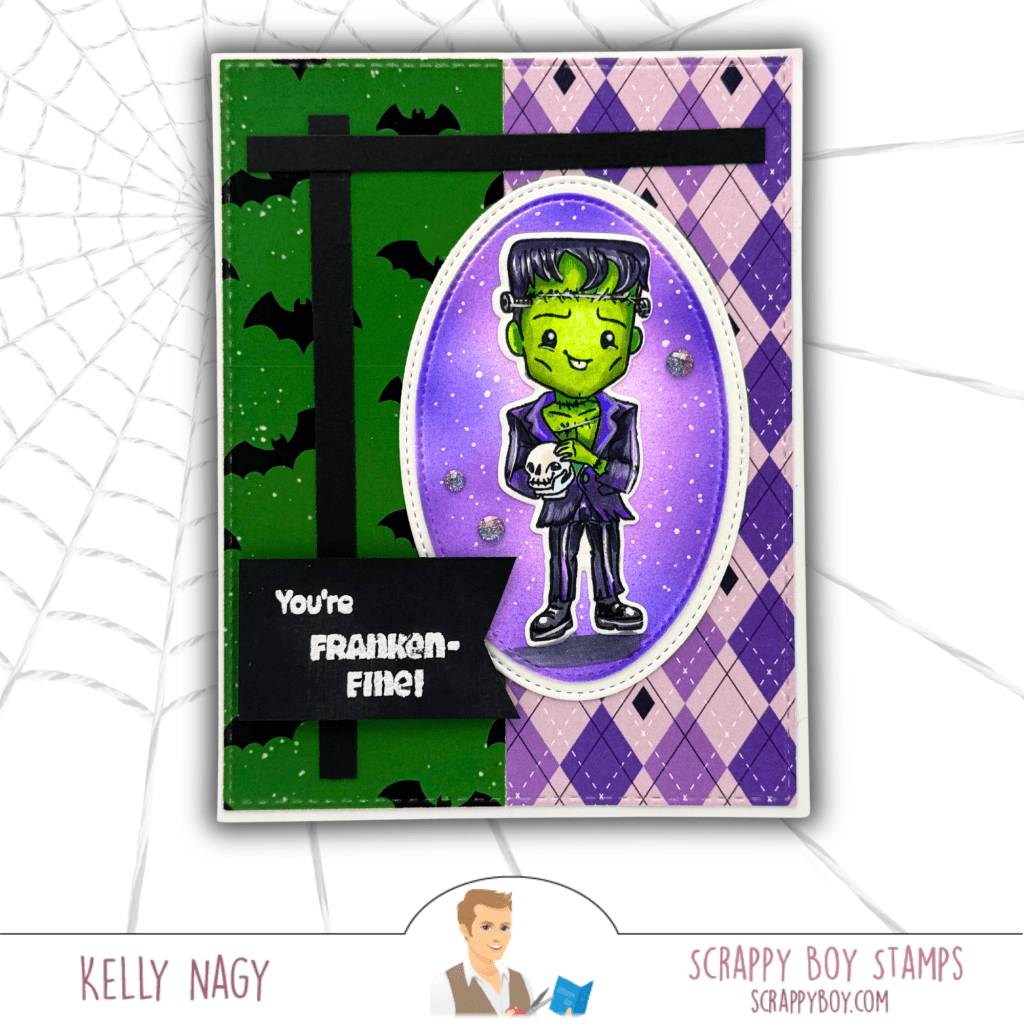
Get spooky-cute with the NEWEST Hex Appeal release from Scrappy Boy Stamps! See how I used the August Card Sketch Inspiration to create this Franken-Fine Halloween card, complete with patterned papers, stitched dies, heat embossing, and my Copic color combinations. 💚💜🎃
I’m popping in with a little spooky-cute inspiration featuring the NEWEST release from Scrappy Boy Stamps — HEX APPEAL! 🎃💜💚
Featuring Hex Appeal & Coordinating Products
For this card, I also took inspiration from the Scrappy Boy Stamps August Card Sketch. There’s still a little time to play along, so grab your favorite Scrappy Boy goodies and put your own spin on the sketch!
One of my favorite things about sketches is that they take away that “where do I start?” moment. You already have the bones of the design—you just get to make it yours!
My Take on the Sketch
I stayed fairly close to the original layout, using two contrasting patterned papers for the background and bold black cardstock to recreate the strong horizontal and vertical elements.
Of course, the star had to be this adorable little Frankenstein! 💚
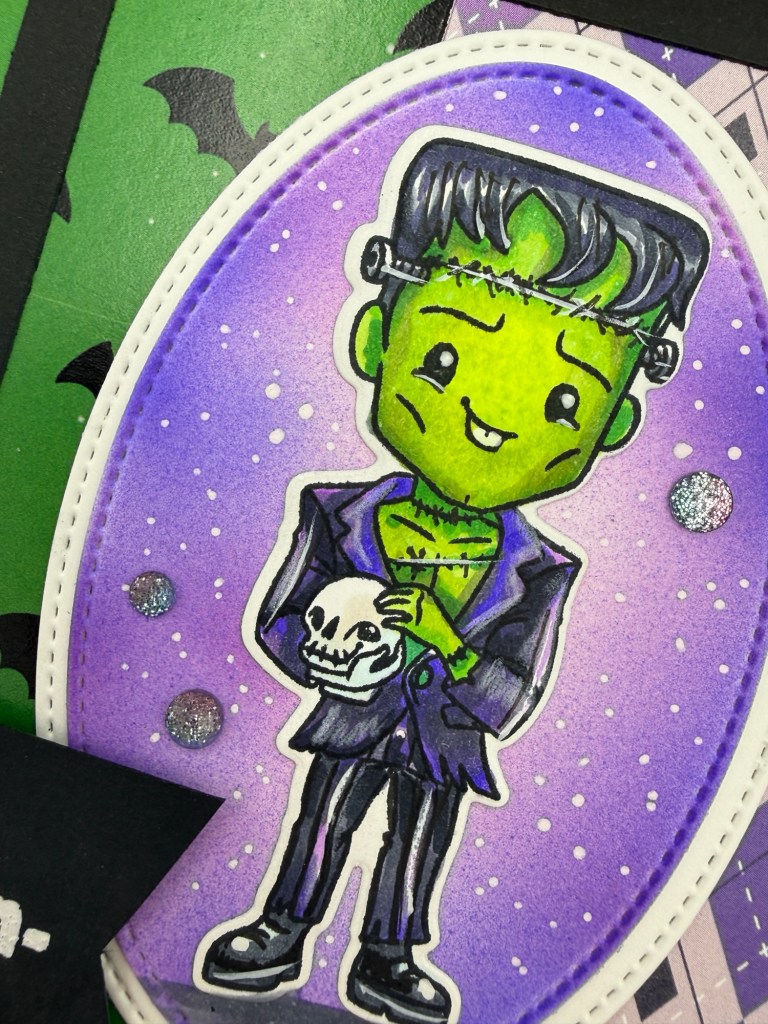
I placed him inside an Oval Stitched Nesting Die and gave the background a soft purple blend using my airbrush attachment from Copic to help him pop without competing with the image. A few white splatters and sparkly accents finished off the background.
And how could I resist…
“You’re Franken-Fine!” 😂
Close up to see white gel pen accents
Copic Coloring
I colored my little guy with Copic markers, using bright yellow-greens for that classic Frankenstein look and deep violets and cool grays to coordinate with the Hex Appeal patterned paper.
The Hex Appeal 6×9 Paper Pack made this sketch especially fun. Mixing the green bats with the purple argyle gave me plenty of pattern and color while still allowing my stamped image to remain the focal point.
For the sentiment, I heat embossed “You’re Franken-Fine!” in white on black cardstock. The crisp white embossing against the bold black gives the sentiment plenty of contrast and ties in perfectly with the black elements from the sketch. 🖤
My Go-To Dry Adhesive ✂️
With all these fun layers, I reach for my TapeRunner dry adhesive! It makes lining up and layering cardstock quick and easy, while helping keep my panels smooth and warp-free—especially when working with multiple layers.
Want to give it a try? Use promo code KELLY10 for 10% OFF your TapeRunner purchase! 💕
Come Play Along!
Remember, a card sketch is meant to inspire you—not limit you. Change the shapes, flip the design, rotate it, add another layer or simplify it. There’s no wrong way to interpret it!
You still have a little time to join the Scrappy Boy Stamps August Sketch Inspiration, so get those stamps, dies and papers out and PLAY!
When you share your creation on social media, be sure to use:
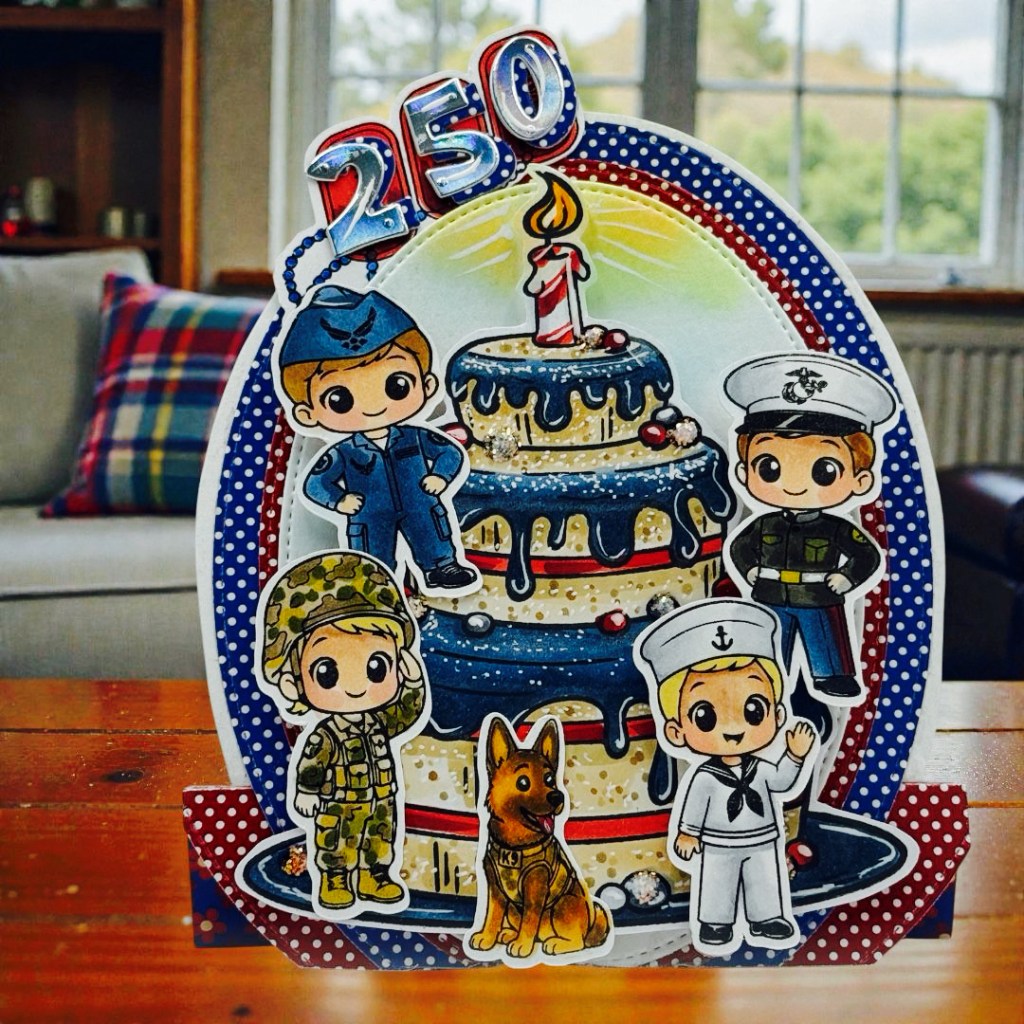
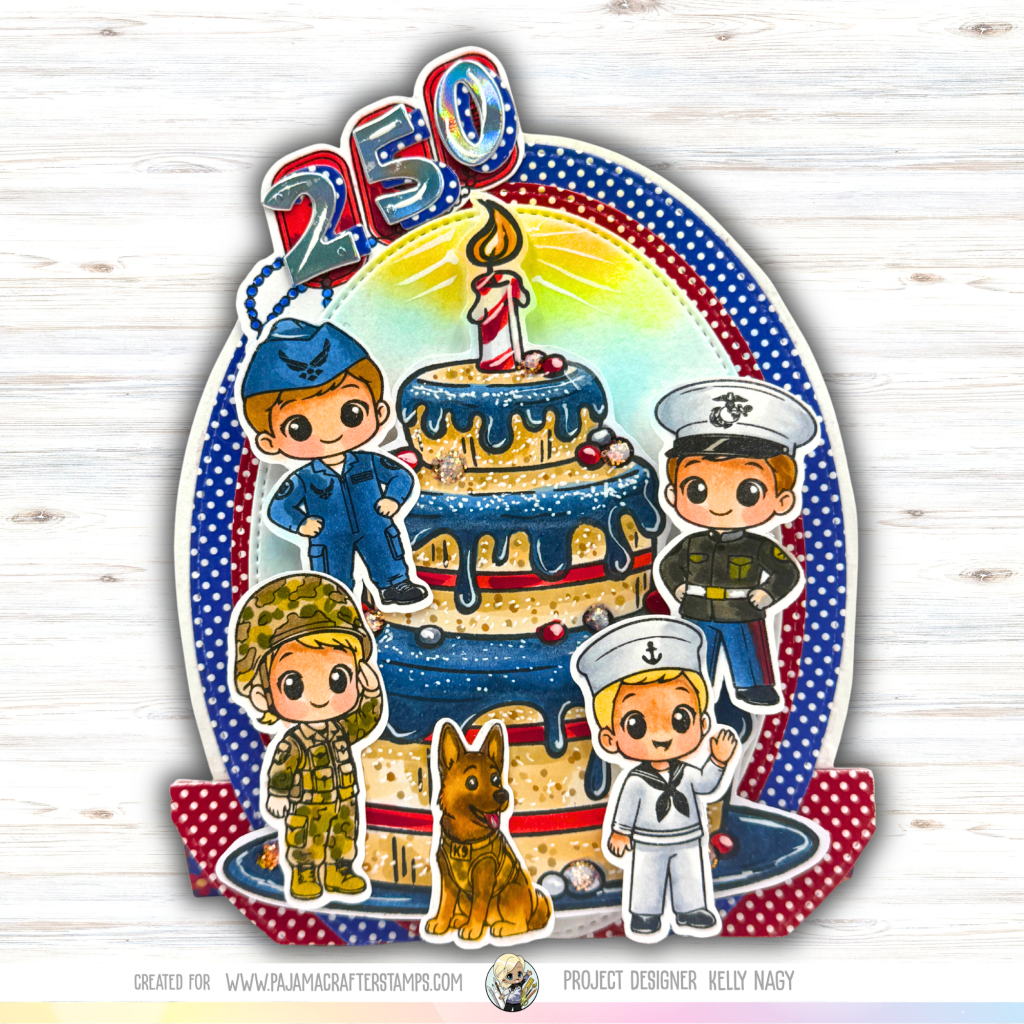
Celebrate freedom with a fun patriotic easel card featuring the NEW Freedom Isn’t Free stamp set paired with the versatile Forever 29 Cake stamp set and Vintage Americana 6×6 patterned papers from Pajama Crafter Stamps. See how these products come together to create a festive display card perfect for honoring those who serve. TapeRunner.com use promo code KELLY10 for discount.
Welcome friends! Today I’m excited to share my latest project for the Pajama Crafter Stamps Adventure Awaits Inspiration Hop! This special hop is filled with creative projects inspired by courage, patriotism, service, and unforgettable journeys.
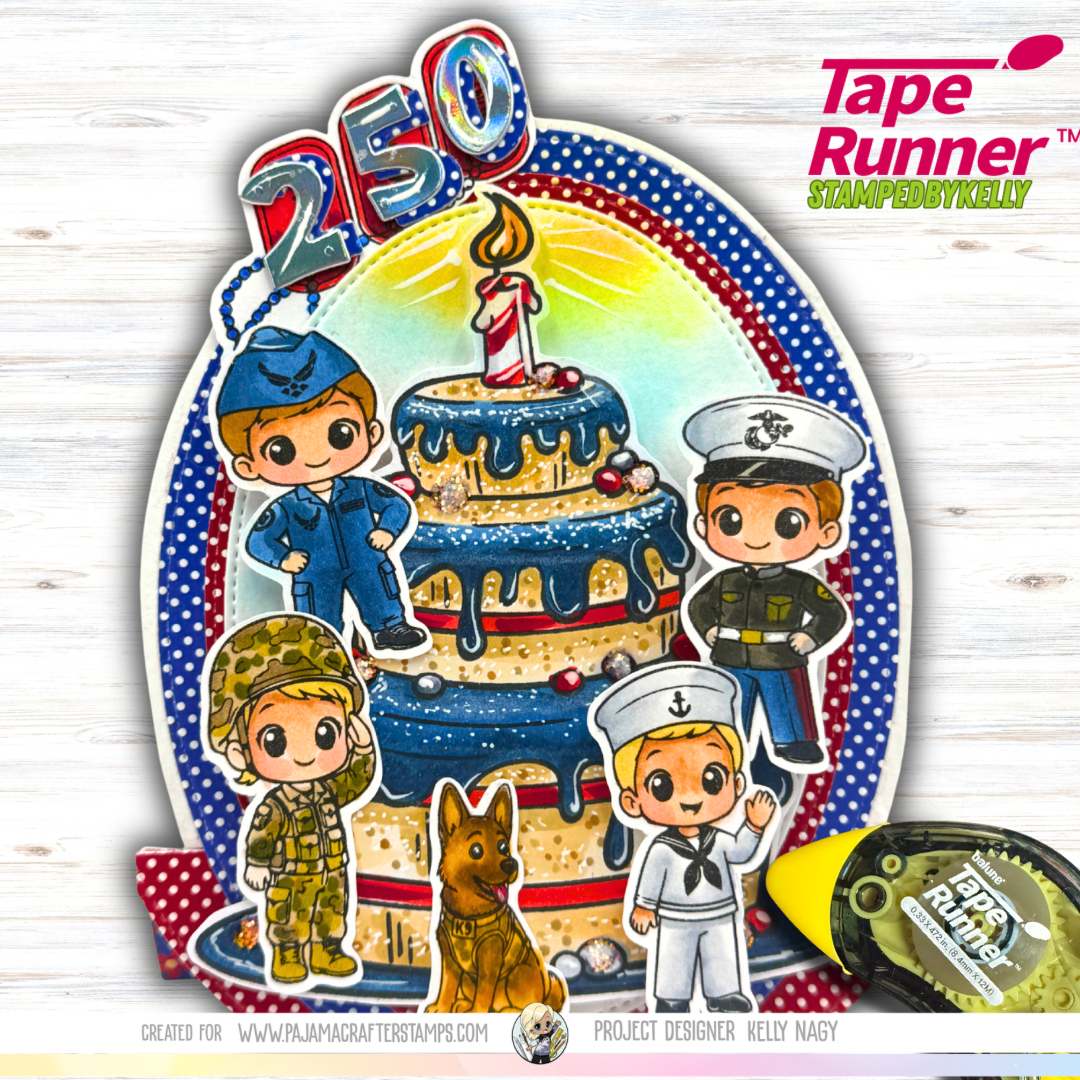
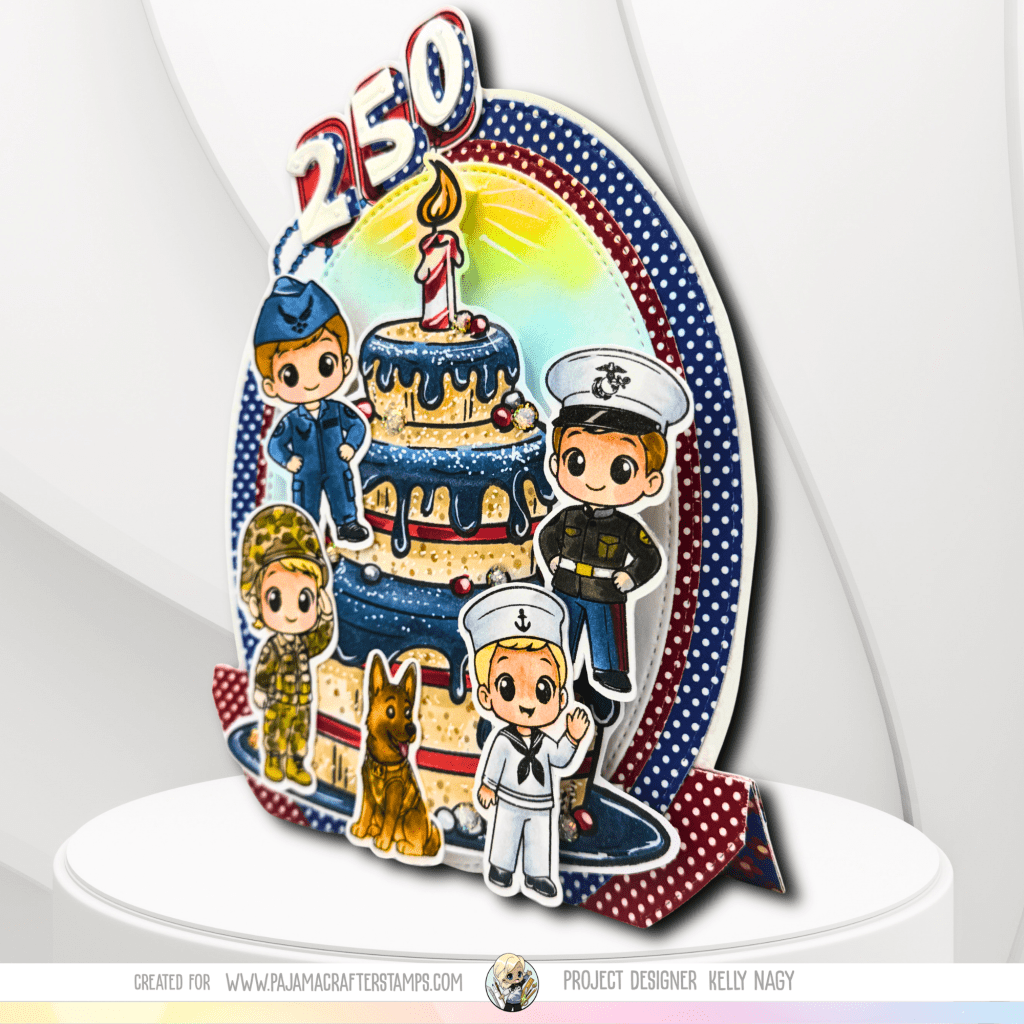
For my project, I wanted to celebrate a very special milestone—America’s 250th Birthday in 2026! I created a dimensional easel card featuring a festive red, white, and blue birthday cake surrounded by adorable service members representing the various branches of the military. A loyal K9 companion adds the perfect finishing touch to this tribute to those who serve.
Featuring Pajama Crafter Stamps June 2026 Release
🇺🇸 Join the Instagram Hop!
The Adventure Awaits Inspiration Hop is officially underway over on Instagram! Be sure to hop along with the Pajama Crafter Stamps Design Team for inspiration featuring themes of:
Adventure
Military and patriotic projects
Heroic journeys
Nautical fun
Courage and strength
Legendary tales and imaginative scenes
There are so many incredible projects to discover, and you won’t want to miss all the creativity!
This easel card was designed to honor both our nation’s 250th anniversary and the men and women who serve. I combined bright patriotic colors, playful characters, and lots of sparkle to create a keepsake card that can be displayed and enjoyed long after the celebration.
The layered design creates wonderful dimension while the large “250” topper makes the occasion the star of the show.
❤️ Products Used
🇺🇸 New Release Product
❤️ Freedom Isn’t Free Stamp Set
🤍 Coordinating Products
🤍 Forever 29 Cake Stamp Set
💙 Vintage Americana 6×6 Patterned Paper Pack
❤️ Holographic Specialty Cardstock
🤍 Die-cutting machine
💙 Copic markers
❤️ White gel pen accents
🤍 Glitter embellishments and gems
🎨 Copic Marker Colors
Skin
E000
E00
E11
R20
Hair
Y21
Y26
E35
Navy Blue
B24
B26
B29
Red
R24
R27
R59
Gold
Y21
Y26
Y28
Gray/White Accents
C1
C3
C5
🇺🇸 A Card with Meaning
As we look ahead to celebrating America’s 250th birthday, I wanted this card to reflect gratitude and appreciation for the brave men and women who protect our freedoms. The combination of the NEW Freedom Isn’t Free Stamp Set with the versatile Forever 29 Cake Stamp Set made it easy to create a festive patriotic celebration with a meaningful message.
Thank you so much for stopping by! I hope this project inspires you to create something meaningful and to join us for the Pajama Crafter Stamps Adventure Awaits Inspiration Hop.
Happy crafting!
💕 Kelly
Shop the Products
If you’d like to recreate this project, you can find these products and so much more using my affiliate link:
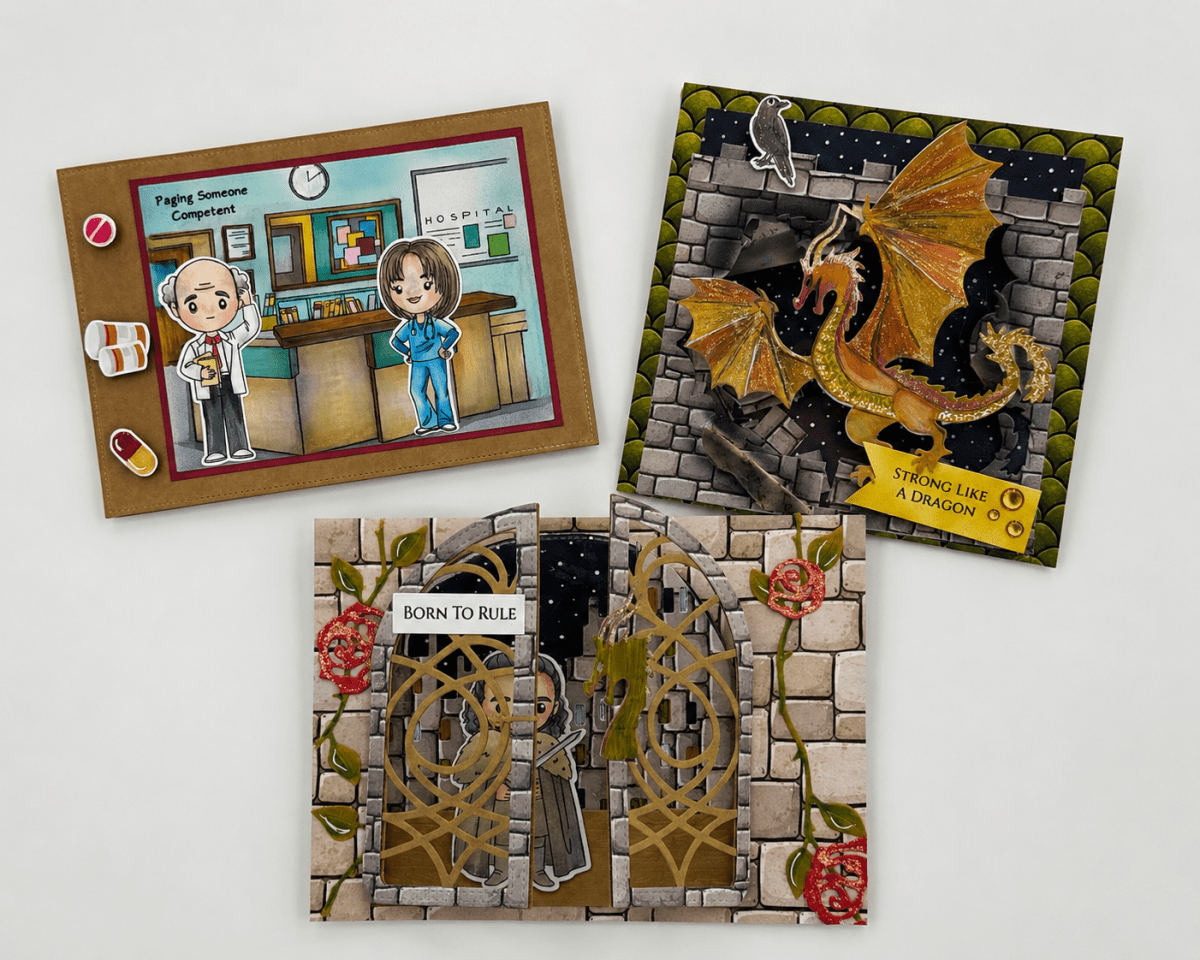
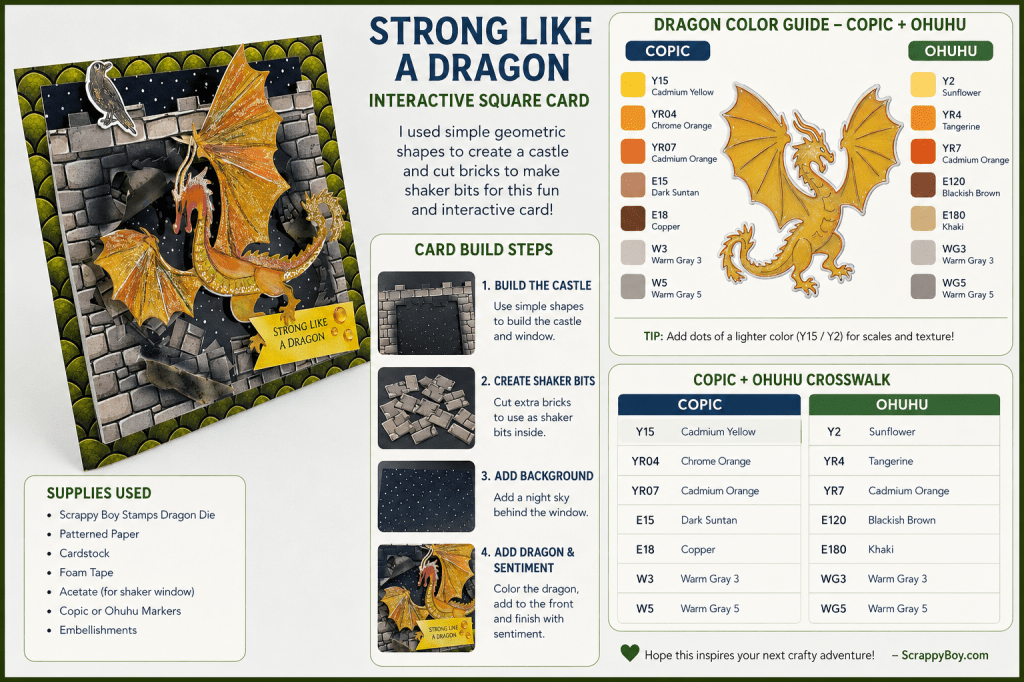
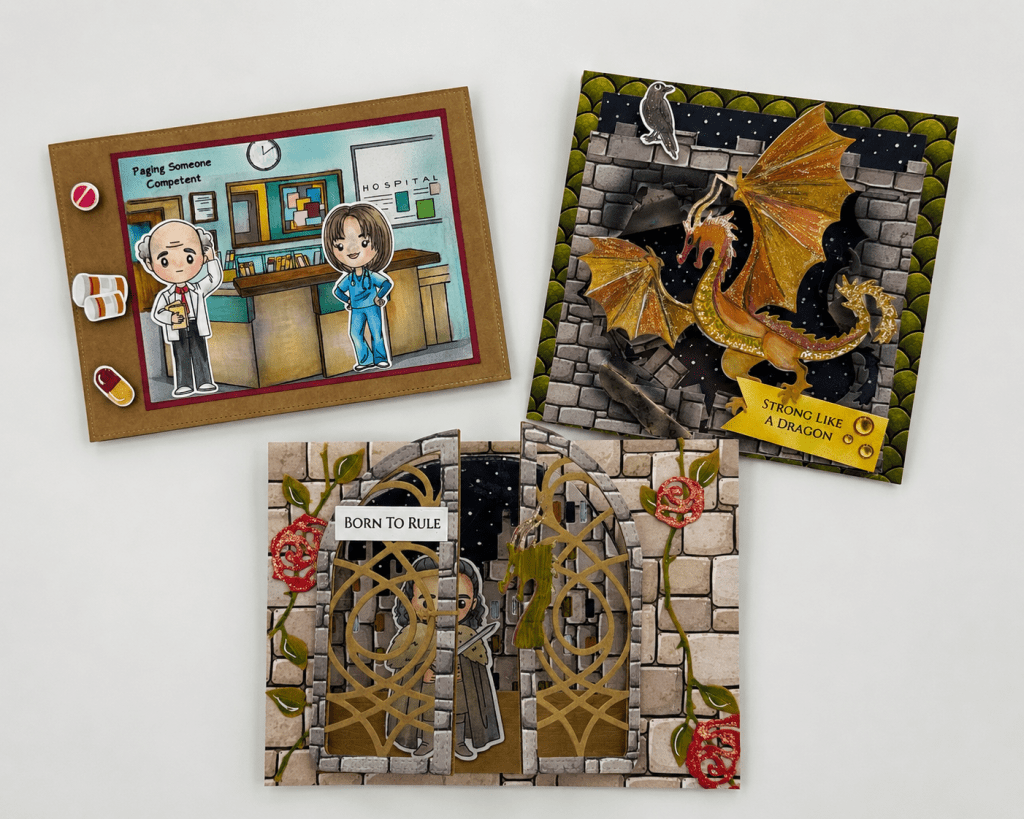
Looking for creative interactive card ideas featuring the newest stamp and die releases? In today’s project roundup, I’m sharing three handmade interactive cards packed with fun techniques, dimensional elements, and unique paper crafting inspiration. From shaker card designs to clever moving features and detailed die-cut scenes, these projects showcase how versatile stamps, dies, patterned paper, and coloring techniques can be combined to create memorable handmade greeting cards. Whether you enjoy card making, scrapbooking, paper crafting, or mixed media projects, these interactive designs offer plenty of inspiration for birthdays, celebrations, and special occasions. Scroll through to see each project up close, discover creative ways to use your supplies, and find ideas you can incorporate into your own card making adventures
Today I’m sharing a fun roundup of three cards I created using products from the newest Scrappy Boy Stamps release. Each project features a different interactive element and plenty of detail, making them perfect for anyone who loves adding a little extra magic to their handmade cards.
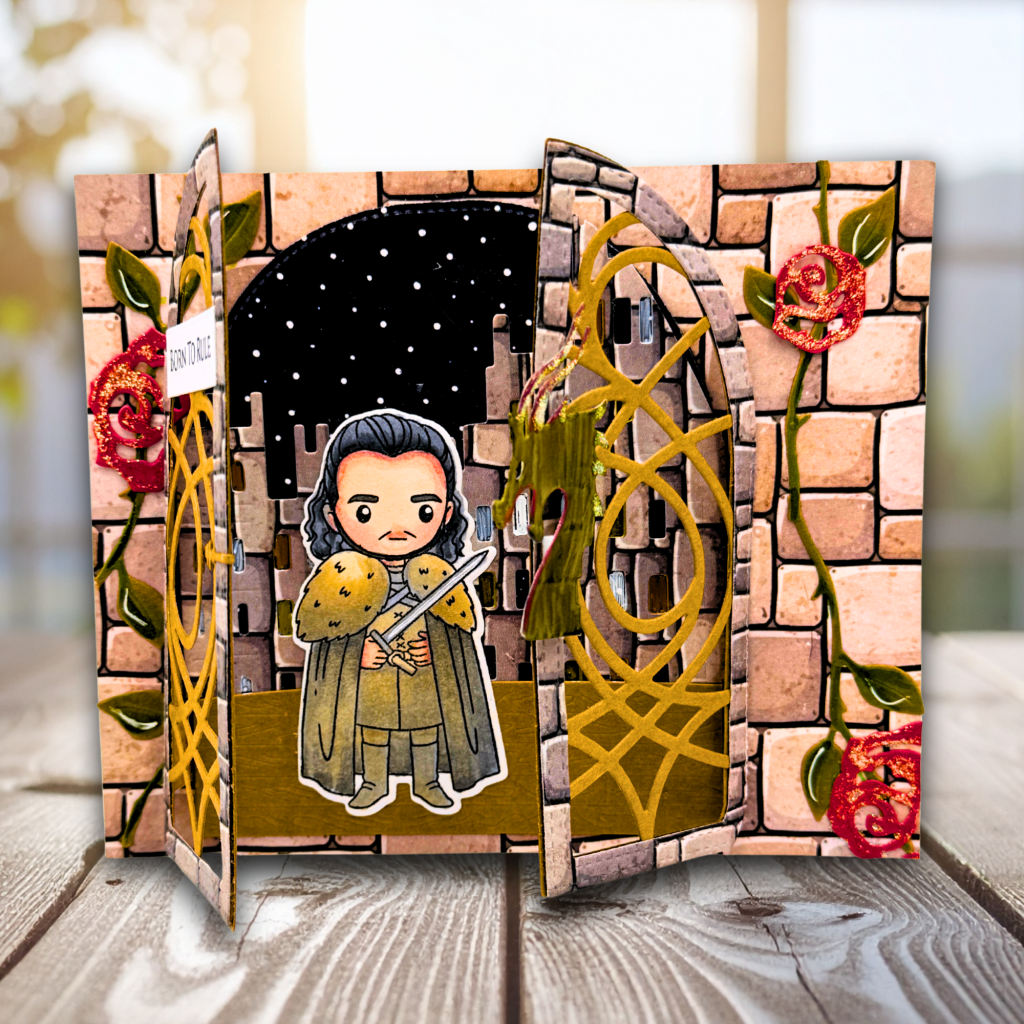
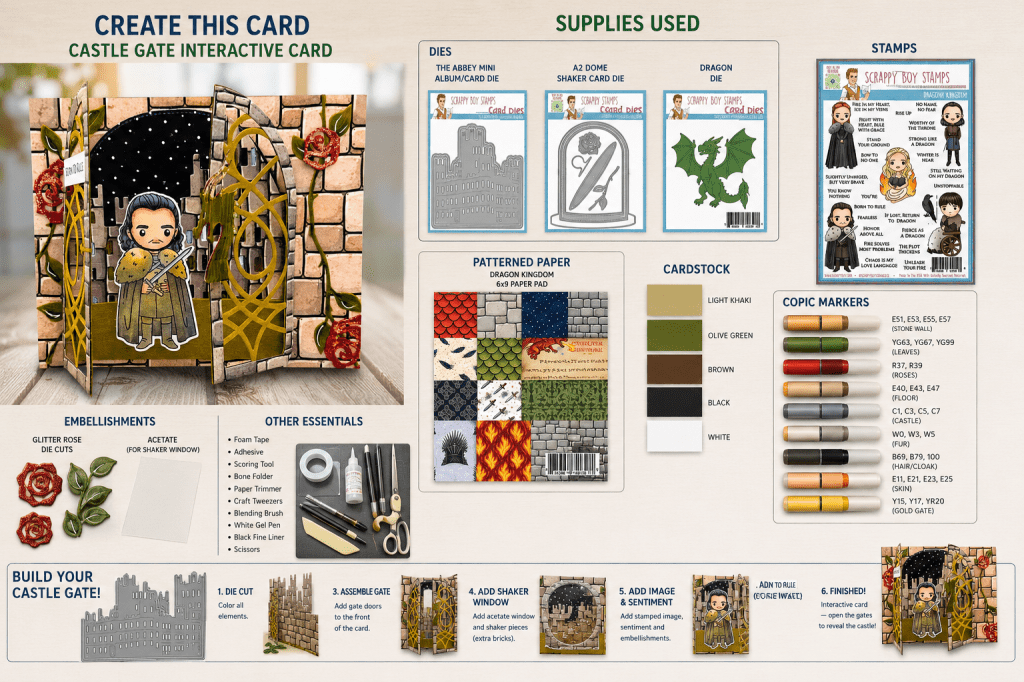
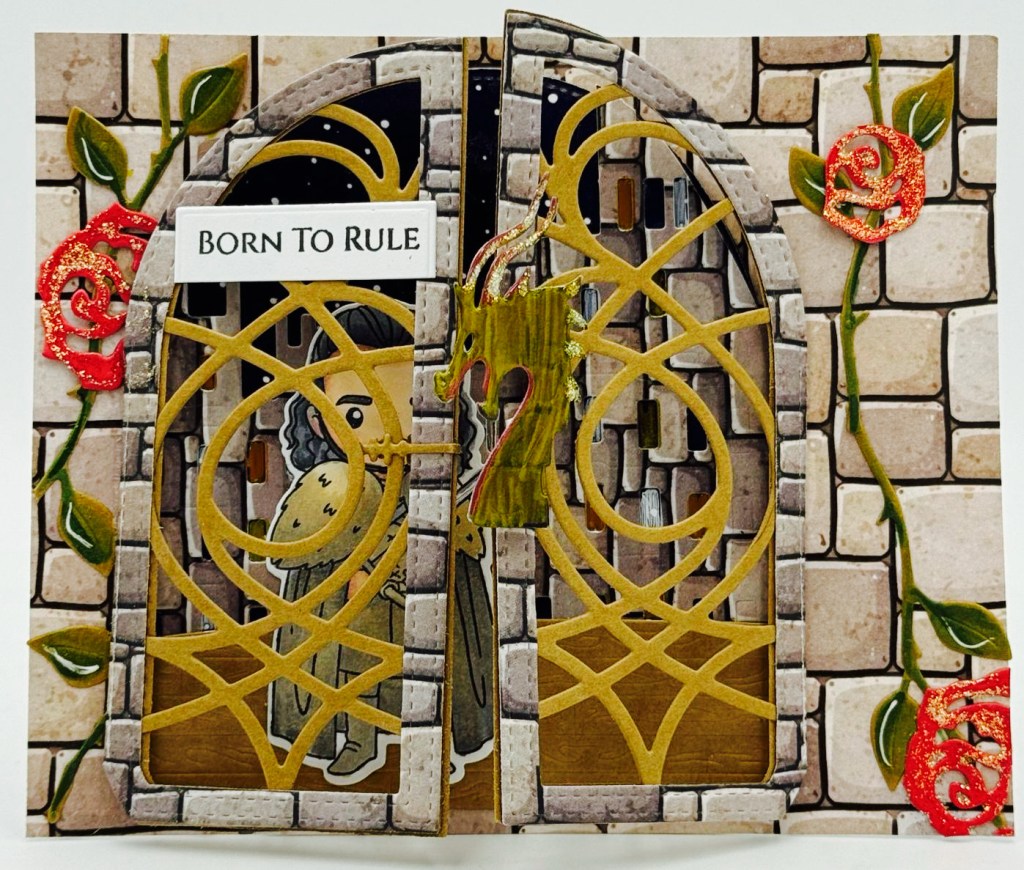
🏰 Castle Gate Card
For this card, I created a magical castle scene featuring interactive opening gates that reveal the story inside. The layered details, rich colors, and dimensional elements make this design feel like stepping into a fairy tale.
not photographed: Gates to Emerald City
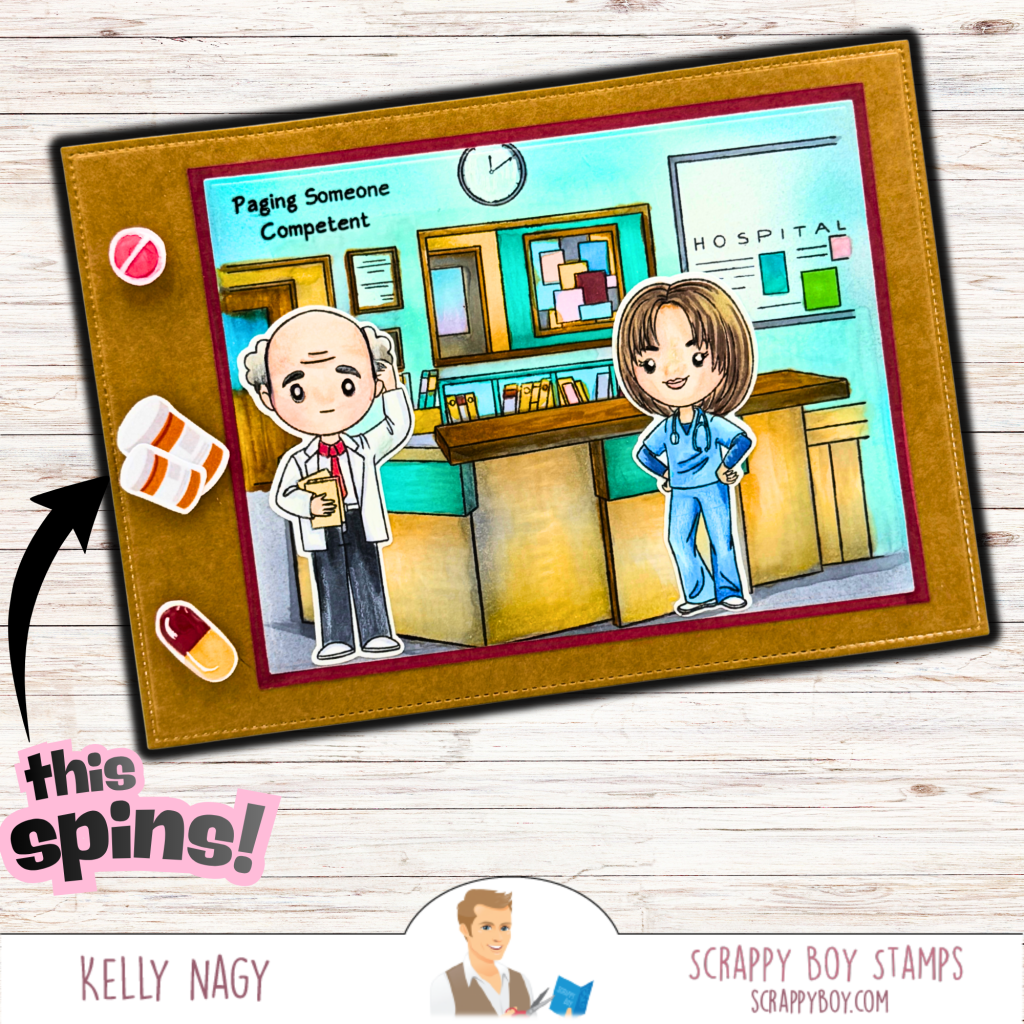
💊 Interactive Spinner Card
This playful spinner card adds movement and surprise with a fun interactive mechanism. Watching the focal image spin brings the design to life and makes it a great card for birthdays, celebrations, or just because.
I used a spinner mechanism that easily glues one side to image and one to card. The SPINCYCLE MICRO ROTATORS that create the movement can be found here on Grab your 10 pk SpinCycle Micro Rotators
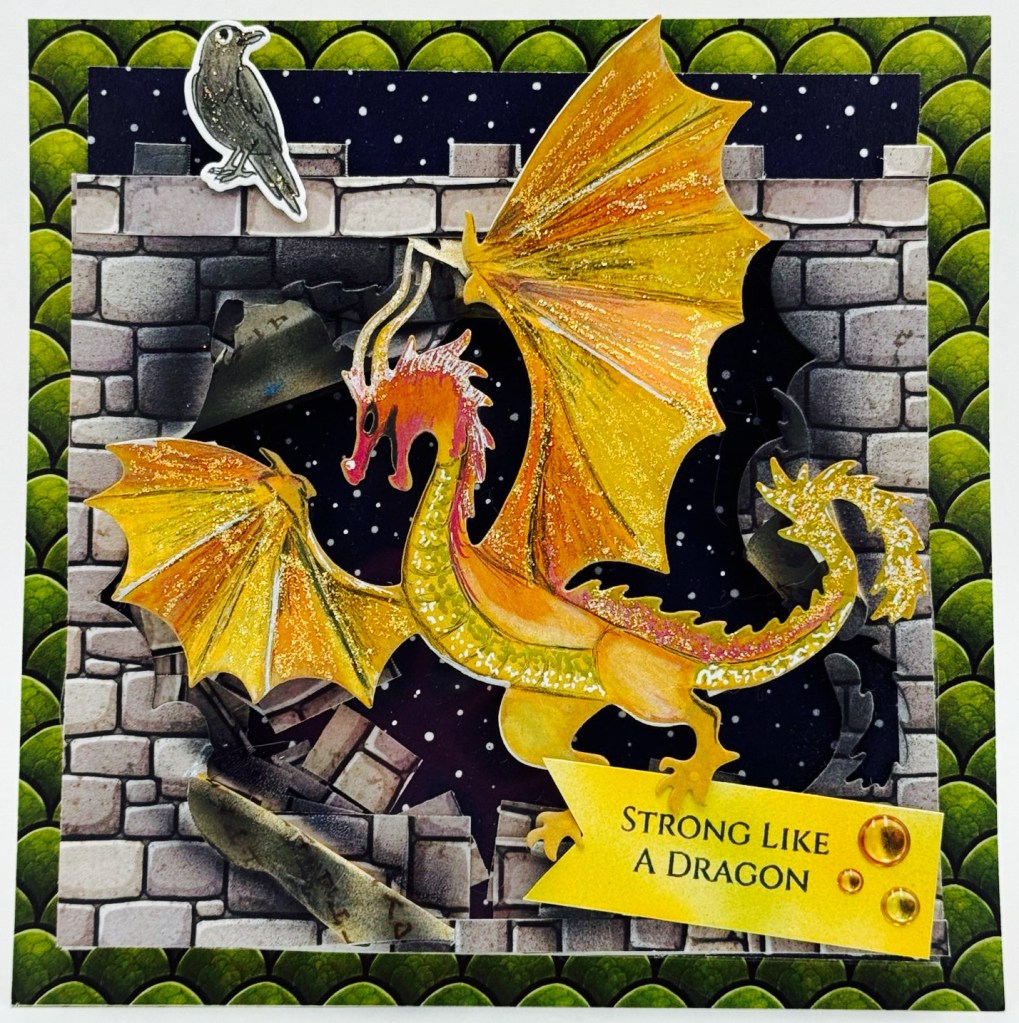
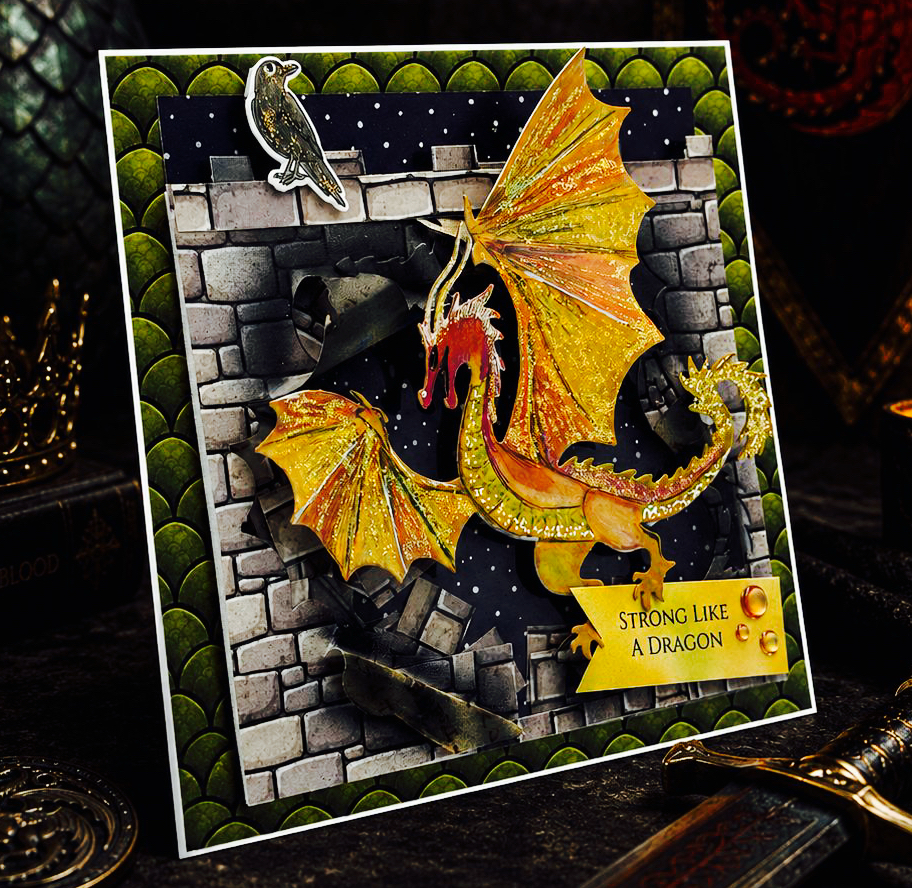
🐉 Dragon Shaker Card
My dragon shaker card combines sparkle, texture, and movement with a shaker element full of colorful sequins. The adorable dragon and fantasy-themed details make this one especially fun for dragon lovers and fantasy fans.
I had so much fun bringing these scenes to life with movement, dimension, and a little bit of magic! Each card showcases a different way to create interactive designs while highlighting the versatility of this fantastic new release. The square shaker uses the Dragon Die Set paired with the raven and sentiment from Dragon Kingdom. Fabulous patterned paper is so easy to put together a scene to make your supplies shine!!
Which one is your favorite?
❤️ Castle 💙 Spinner 💚 Dragon
Shop the new release at ScrappyBoy.com and visit StampedByKelly.com for more photos, details, supply lists, and Copic color combinations!
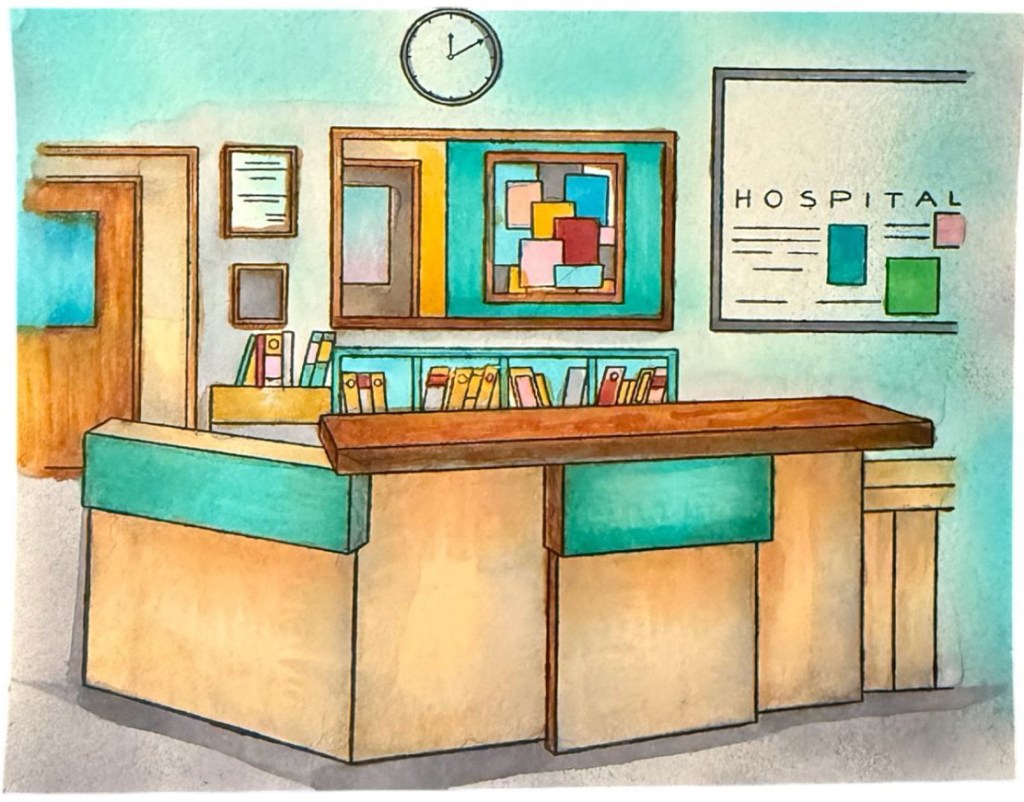
Some images in this post were created with AI assistance for visual reference purposes. If you spot an error, please let me know so I can update it. Thank you for your help and understanding
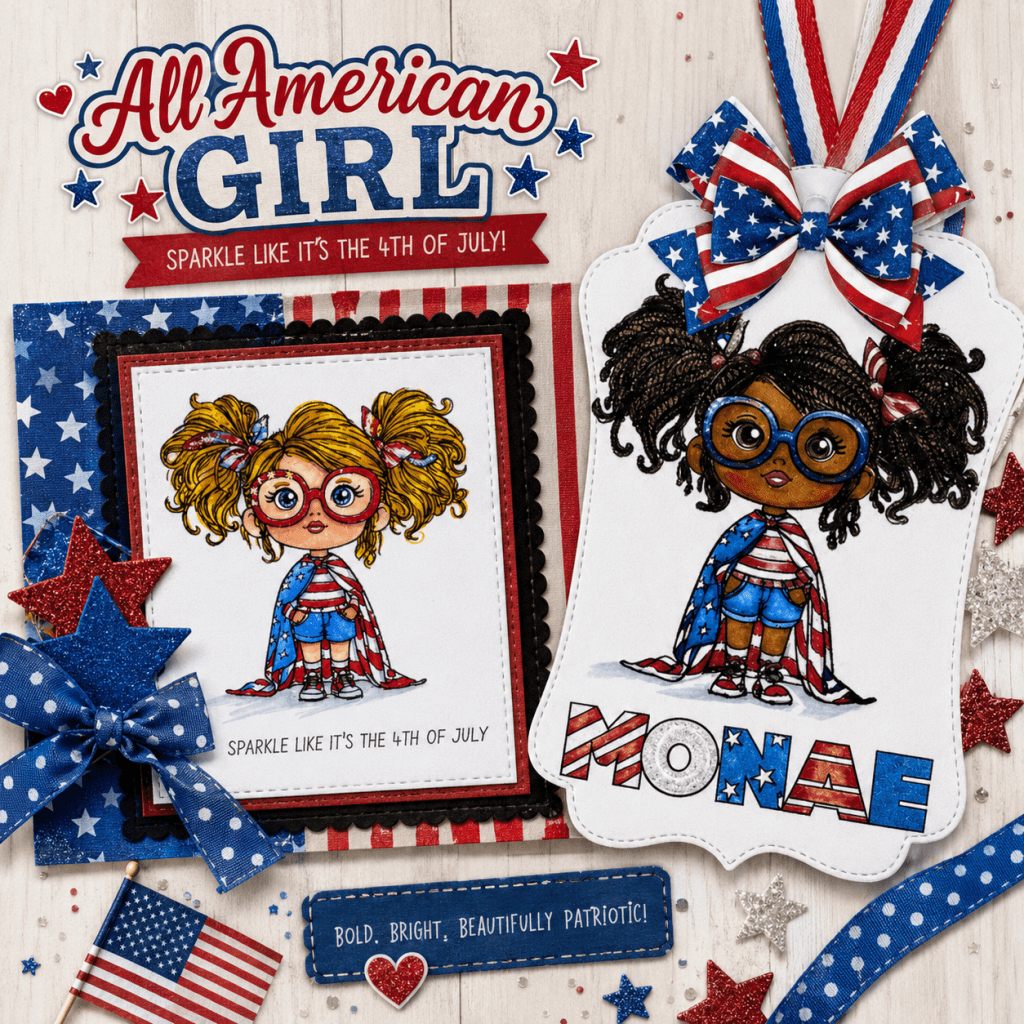
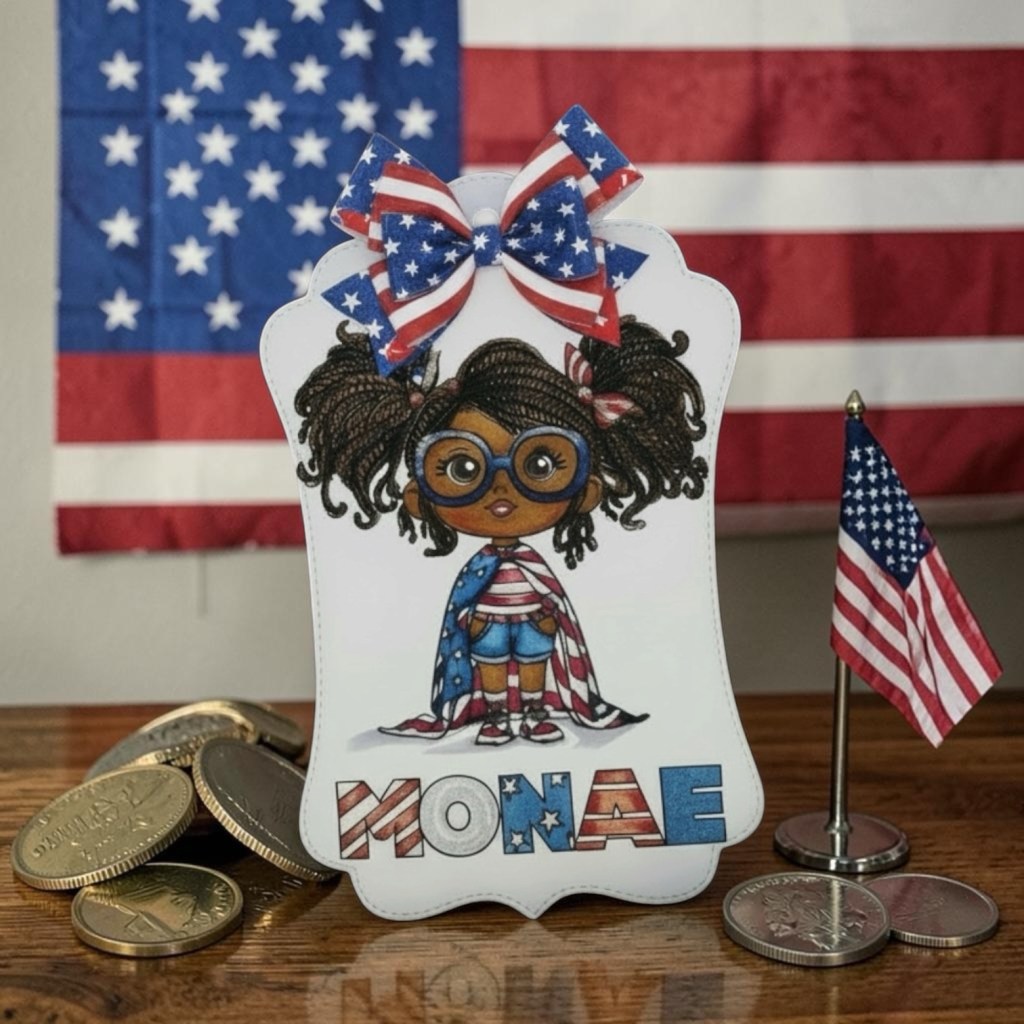
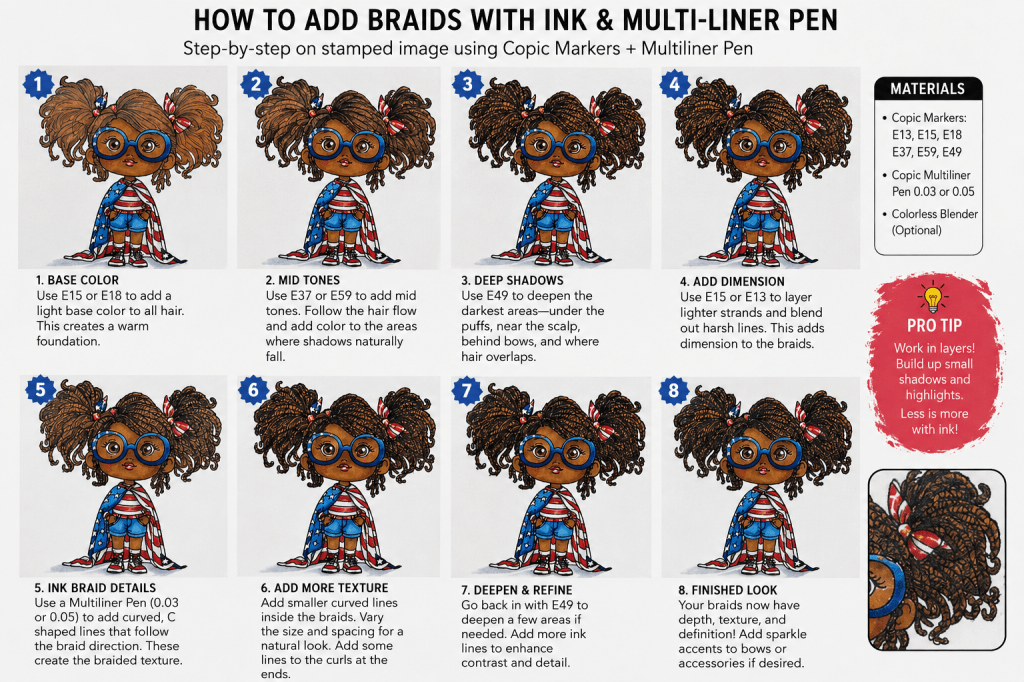
Discover how creative color placement, textured marker strokes, and multiliner pen details can completely transform stamped images into beautifully personalized works of art. In this post, I’m sharing how I created braided and textured hairstyles on my patriotic “Monae” project using Copic Markers, along with thoughts on artistic customization, representation in crafting, and how Angel Policies typically support creative interpretation through coloring and hand-detailed enhancements.
Image: Pajama Crafter Stamps ALL AMERICAN GIRL
Celebrating Diversity Through Coloring, Texture & Artistic Expression
One of my favorite things about cardmaking and stamped images is how a single character can become completely unique through creative coloring choices. By changing hair texture, color placement, shading, and added pen details, you can personalize stamped images to better reflect different cultures, styles, personalities, and artistic visions.
Before I get started, if you LOVE this image and want to grab one for yourself, my affiliate link To Pajama Crafter Stamps is here. Appreciate your support!!
Recently, I shared this patriotic project featuring “Monae” with textured braids created using a combination of Copic Markers and a multiliner pen. That project sparked a wonderful question regarding customization and Angel Policies — specifically whether artists are allowed to alter stamped images through coloring techniques, added details, or texture enhancements.
The short answer? In most cases: Absolutely yes.
Stamps Are Meant to Inspire Creativity
When you purchase a stamp, you are purchasing a tool for artistic expression. Coloring, shading, customizing hairstyles, changing textures, adding freckles, altering eye color, deepening skin tones, creating curls, adding braids, or modifying color placement are all forms of artistic interpretation.
This is no different than:
Choosing seasonal color palettes
Paper piecing clothing
Adding glitter or embossing
Extending backgrounds
Creating scene cards
Altering hair color or eye color
Adding accessories or texture
As stampers and colorists, we bring these characters to life through our own creativity.
Using Color Placement to Create Hair Texture
Hair texture can dramatically change the personality and cultural representation of a stamped image. Small changes in marker strokes and pen detailing can create:
Soft waves
Loose curls
Tight coils
Natural texture
Braids
Twists
Locs
Straight styles
Puff ponytails
Protective styles
The stamped outline simply becomes the foundation.
Techniques for Creating Braids & Natural Texture
For my patriotic “Monae” project, I used layered Copic coloring and fine multiliner detailing to create the appearance of textured braids and coiled hair.
The Process Included:
1. Base Coloring
I started with warm brown Copic tones to establish the hair foundation.
2. Directional Coloring
Instead of coloring with smooth flat strokes, I followed the natural movement of the stamped hair using curved flicking motions.
3. Layering Shadows
Darker shades were concentrated:
Near the scalp
Under overlapping curls
Behind accessories
In deeper sections of the ponytails
4. Multiliner Pen Detailing
This is where the transformation really happens.
Using a very fine multiliner pen (0.03 or 0.05), I added:
Small curved “C” strokes
Looping braid shapes
Tiny directional texture lines
Additional strand definition
These details create the illusion of:
Braided sections
Coily texture
Dimensional curls
Natural hair movement
Creative Representation Matters
One of the beautiful things about stamping is the ability to create artwork that reflects a wide variety of people, cultures, and identities.
Coloring techniques allow artists to:
Increase representation
Create inclusive projects
Personalize characters
Reflect family and friends
Explore different artistic styles
A single stamped image can become countless unique interpretations simply through:
Skin tone combinations
Hair color
Texture techniques
Fashion color placement
Accessories
Cultural styling inspiration
That creative flexibility is part of what makes paper crafting so meaningful.
Understanding Angel Policies
Angel Policies are designed to protect the intellectual property of the original artwork while still allowing crafters to enjoy creating with their stamps.
While every company has its own policy, most Angel Policies generally allow:
Personal crafting
Handmade card sales in limited quantities
Coloring and customization
Artistic interpretation
Different color palettes
Added shading and details
What is typically not allowed is:
Digitally reproducing the original line art
Scanning and redistributing images
Mass production without permission
Creating counterfeit copies
Adding creative coloring, texture, braids, curls, or stylistic details through hand-coloring does not usually violate an Angel Policy because you are enhancing the artwork — not reproducing or replacing the original illustration.
That said, always review the individual company’s Angel Policy if you plan to:
Teach classes
Sell products
Create digital downloads
Manufacture items
Reproduce imagery commercially
Art Is Personal
One of the most rewarding parts of coloring stamped images is making them your own. Whether you prefer:
Soft vintage palettes
Bold rainbow colors
Fantasy hair
Realistic skin tones
Cultural hairstyles
Glitter and sparkle
Graphic comic-inspired shading
…your creativity is what transforms a stamped image into art.
And honestly? The crafting world becomes more beautiful when more people can see themselves reflected in the art we create.
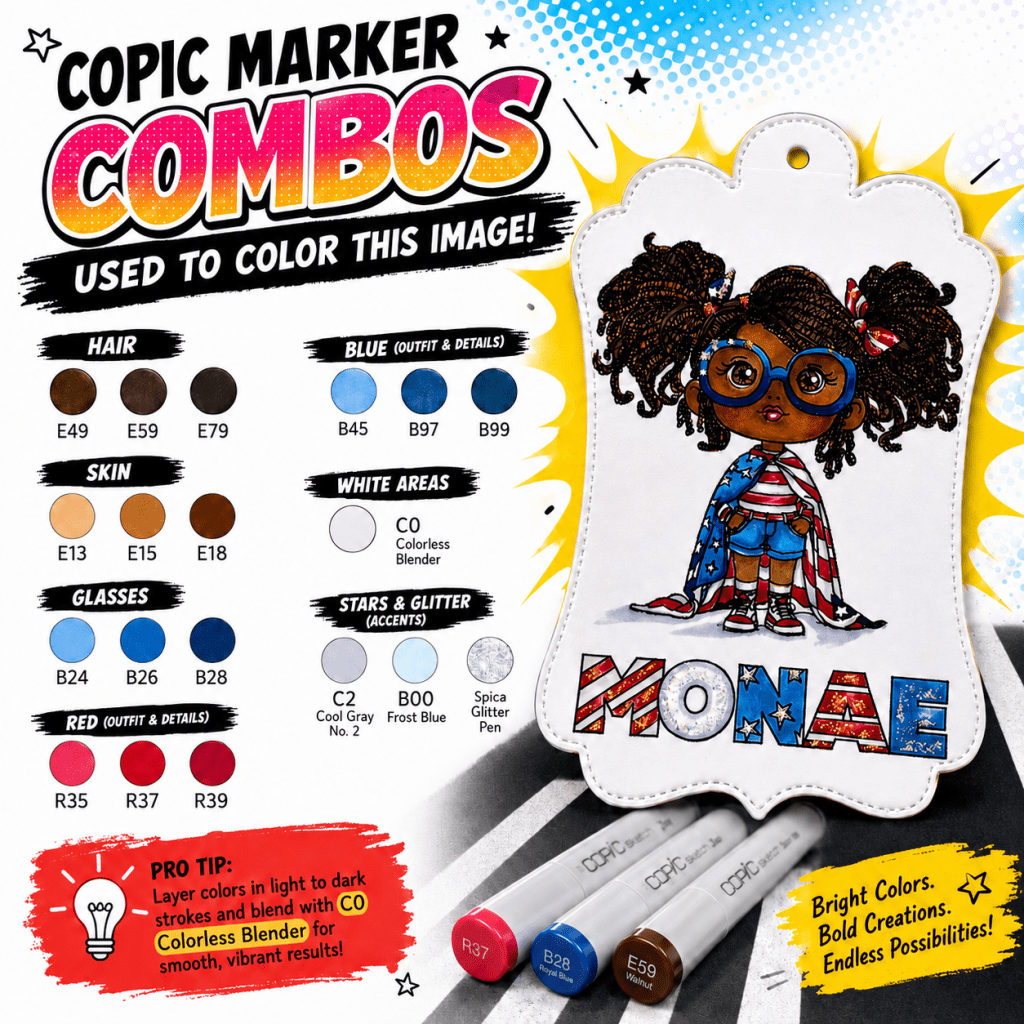
Featured Techniques Used on “Monae”
Hair
E49
E59
E79
Multiliner 0.03
Skin
E13
E15
E18
Texture Technique
Layered curved flick strokes
Tiny looping pen details
Deep shadow placement
Highlight preservation
Final Thoughts
Never be afraid to experiment with color placement and texture techniques. Sometimes the smallest artistic choices — a deeper shadow, a braided line, a curl detail, or a different marker stroke — can completely transform a stamped image into something powerful, personal, and unique.
Creativity is the heart of stamping. And every artist brings something different to the table.
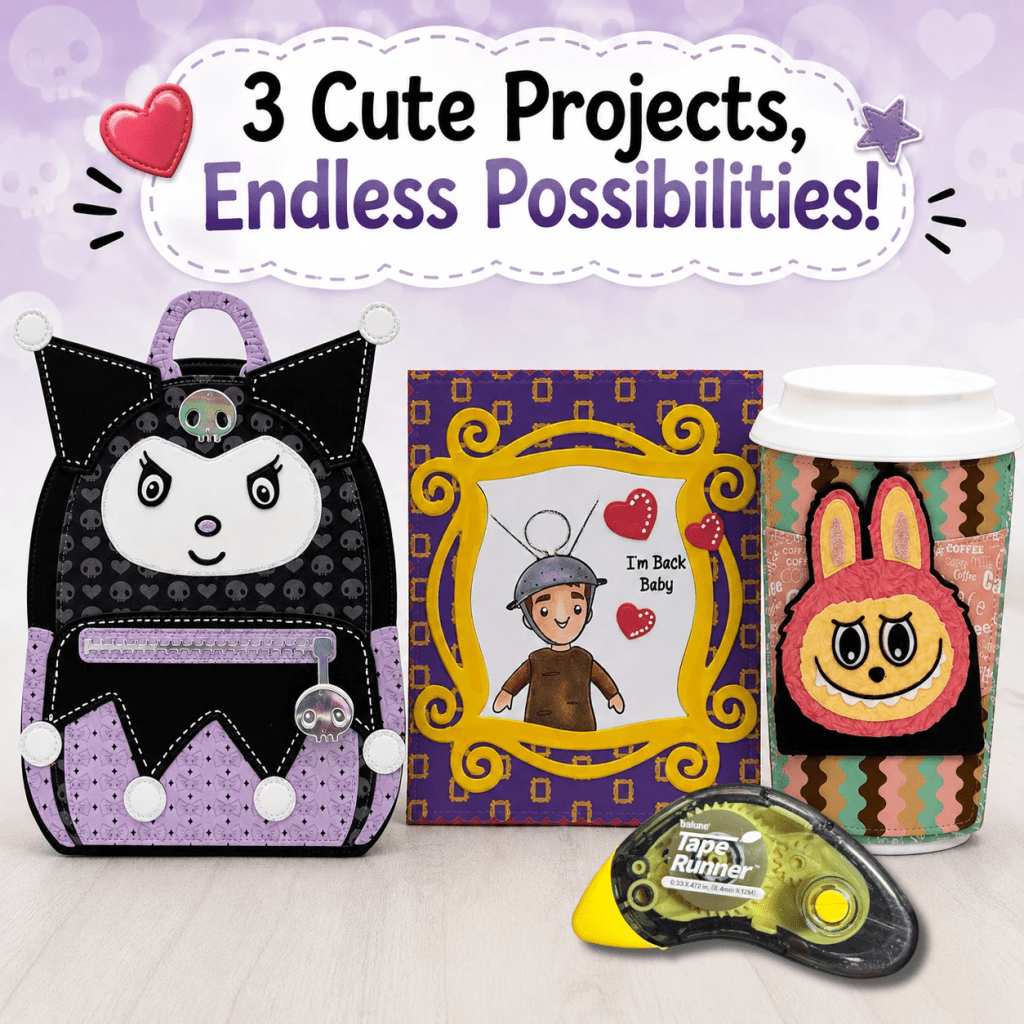
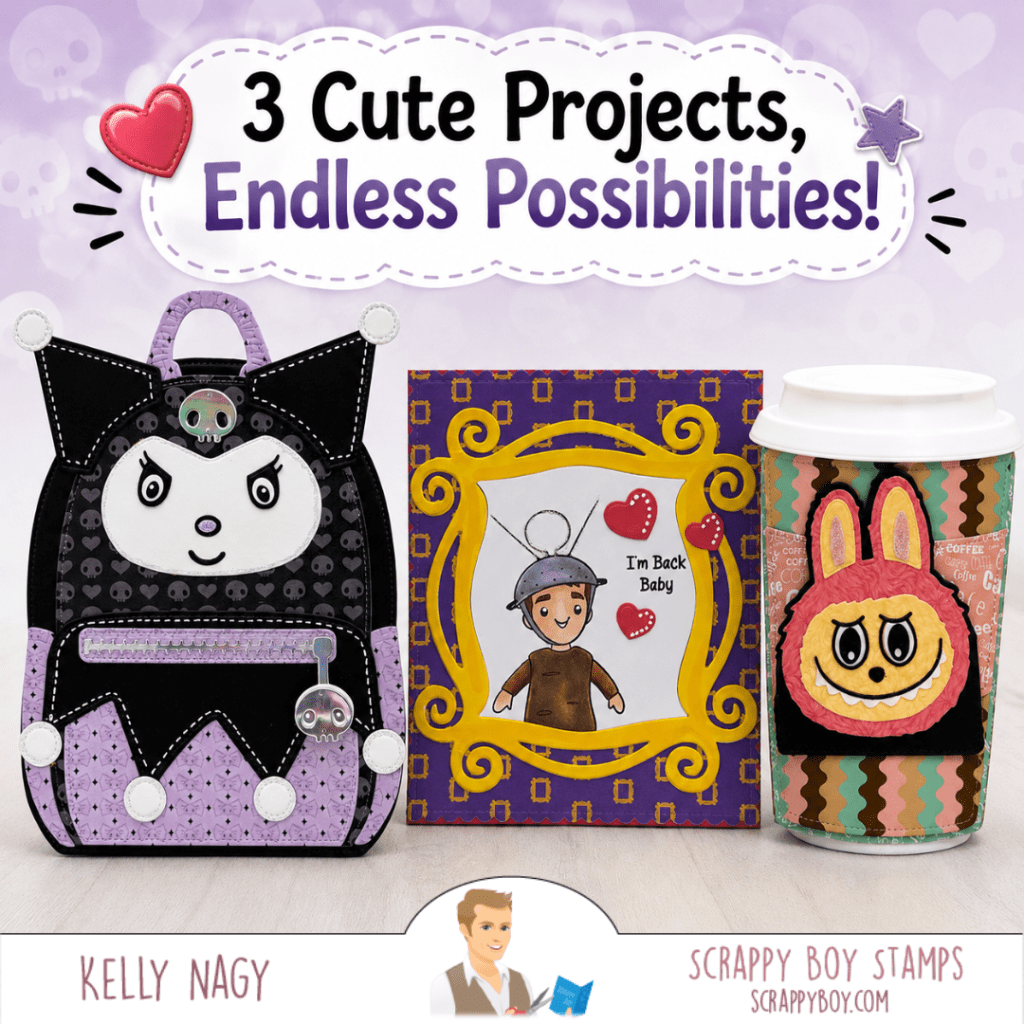
Create adorable handmade projects with Scrappy Boy Stamps including a spooky-cute Evil Bunny Backpack gift holder, Friends Forever handmade card, and coffee cup gift card holder die set. Get paper crafting inspiration, layering ideas, and interactive project inspiration using dies, stamps, and patterned paper.
Today I’m sharing three fun handmade projects featuring products from Scrappy Boy Stamps! These projects are full of personality and include interactive elements, layered die cuts, and playful details that make paper crafting so much fun. putting them together’s really easy and clean when using the tape runner, my favorite dried adhesive. I also use a combination of wet glue and foam tape to create dimension. If you would like a coupon code for taperunner.com, use KELLY10 for 10% off your cart.
From a spooky-cute backpack gift holder to a friendship-themed card and an adorable coffee cup gift card holder, each project has its own unique style while still coordinating beautifully together.
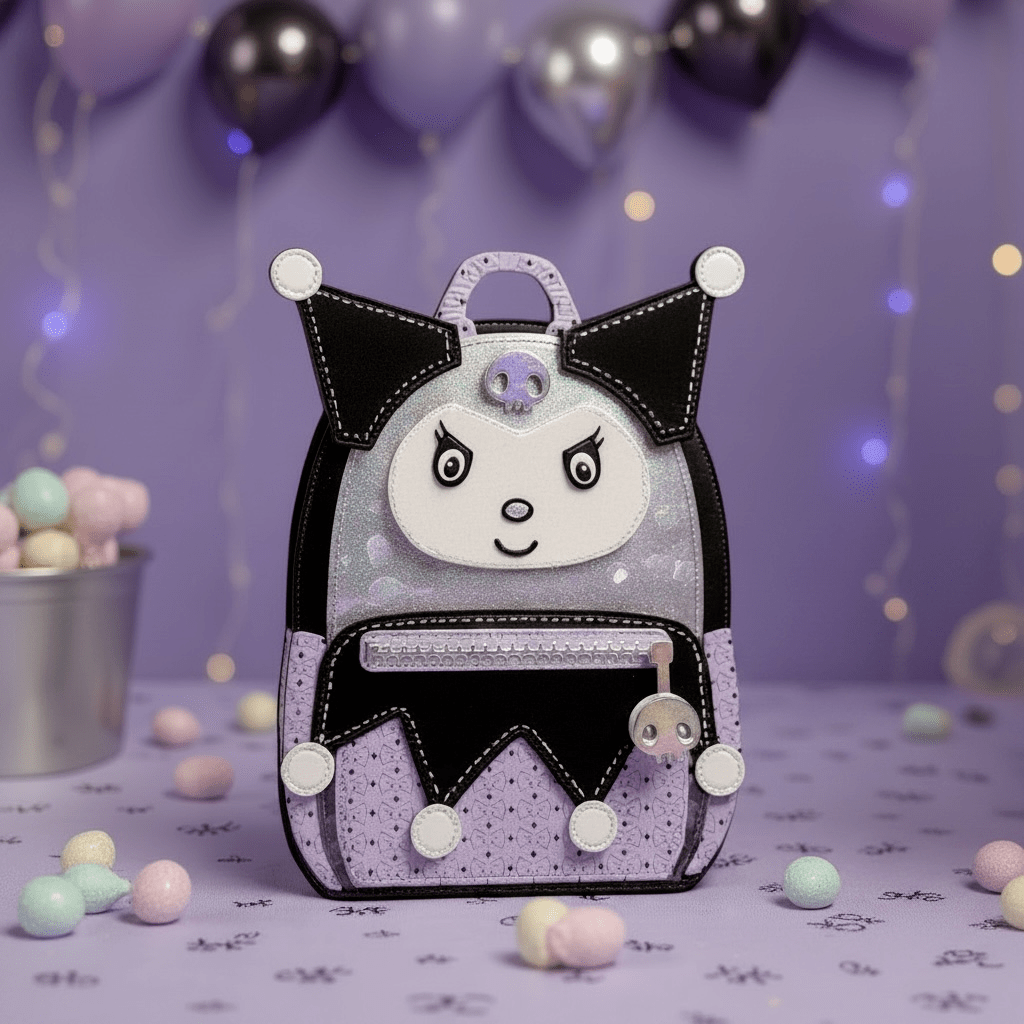
Evil Bunny Backpack Gift Holder 🖤💜
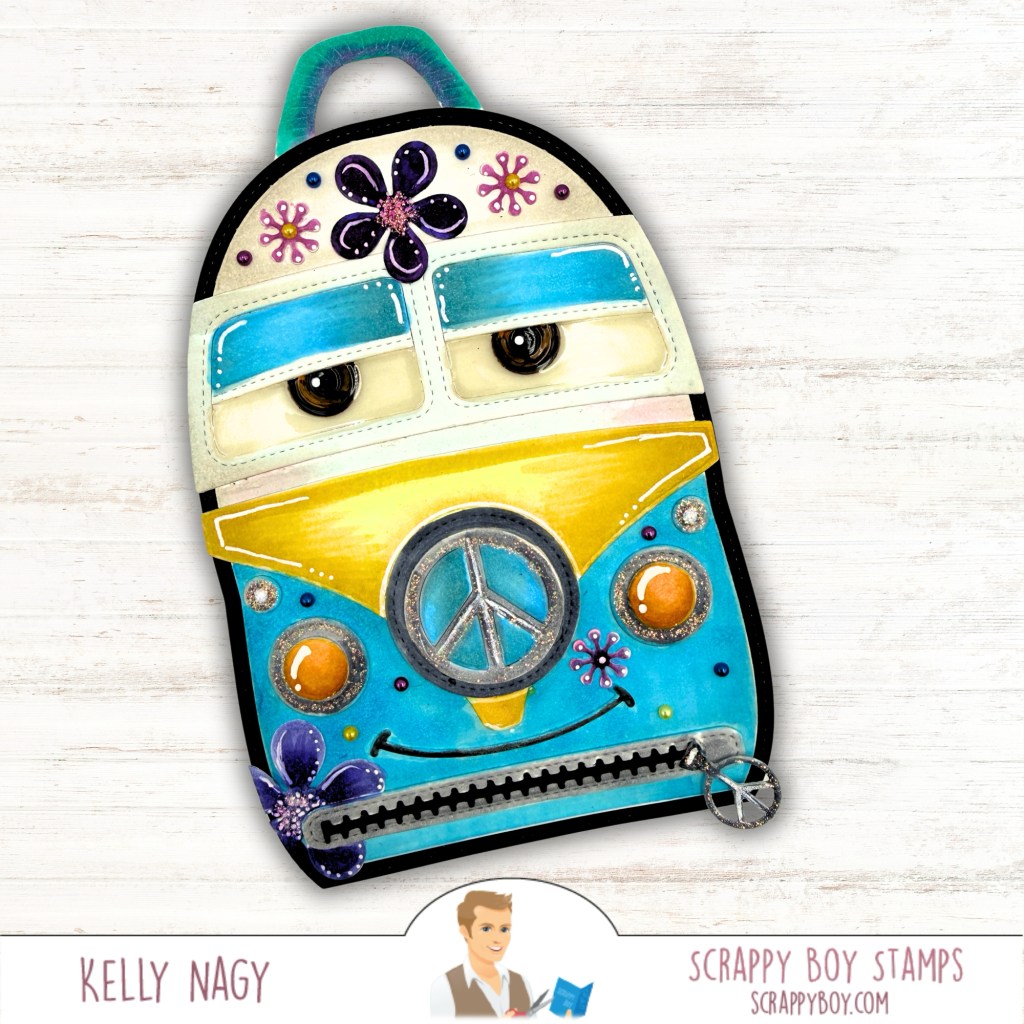
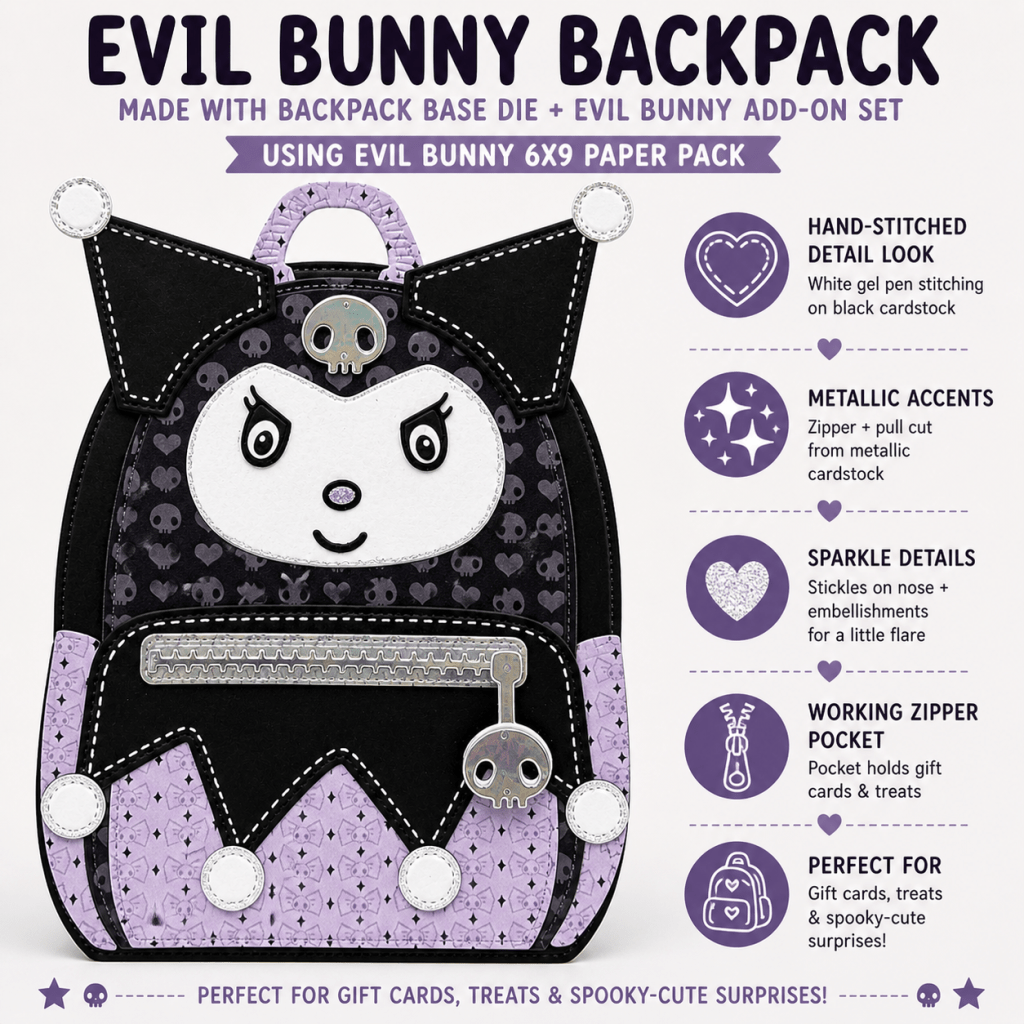
This backpack project was created using the Backpack Base Die paired with the Evil Bunny Backpack Add-On Set and coordinating patterned papers.
What I love most about this project:
Faux stitched details using a white gel pen
Metallic zipper accents
Interactive zipper pocket
Dimensional layered elements
Perfect size for treats or gift cards
The black and lavender color palette gives this project the perfect spooky-cute vibe while still keeping it playful and fun.
Supplies Used:
Backpack Base Die
Evil Bunny Backpack Add-On
Evil Bunny 6×9 Paper Pack
White gel pen
Metallic cardstock
Foam adhesive
Friends Forever Card 💛💜
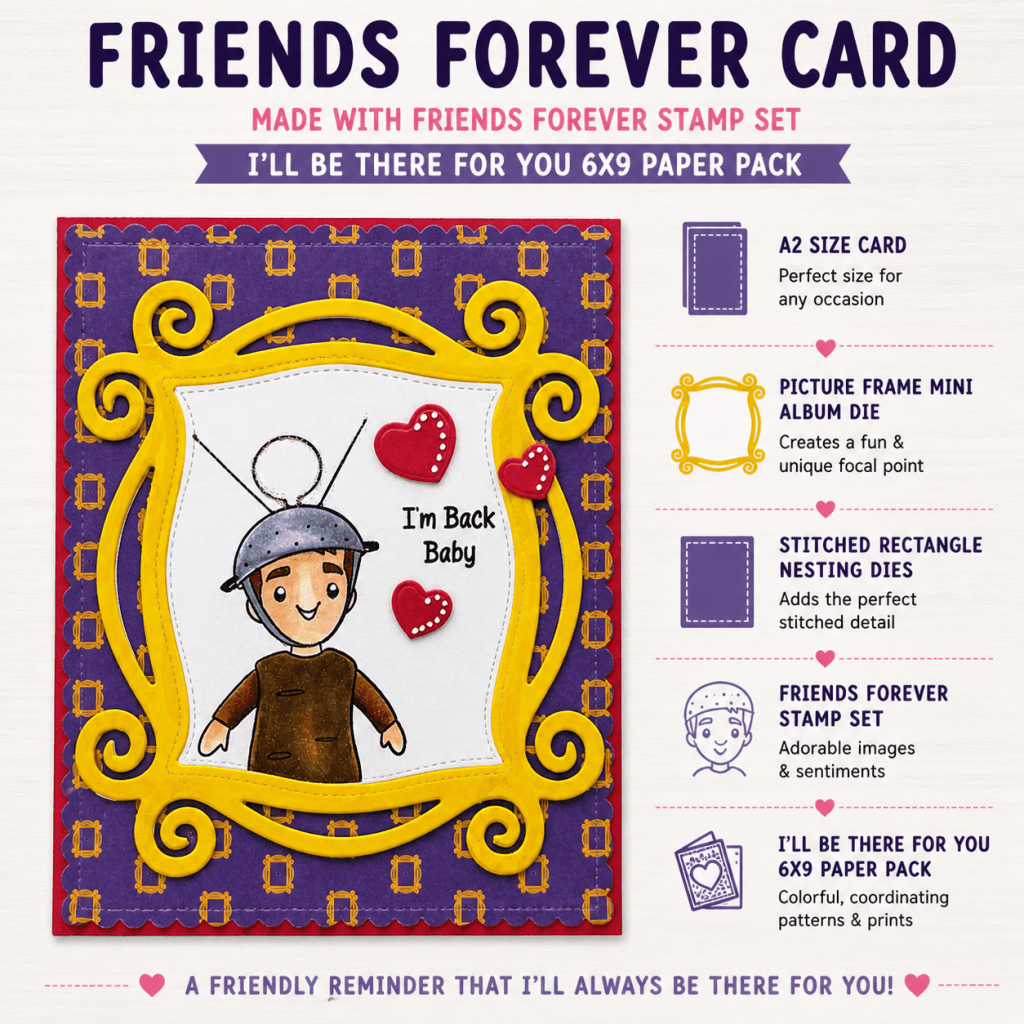
Next is this bright and cheerful friendship-themed card featuring the Friends Forever Stamp Set and the Picture Frame Mini Album Die.
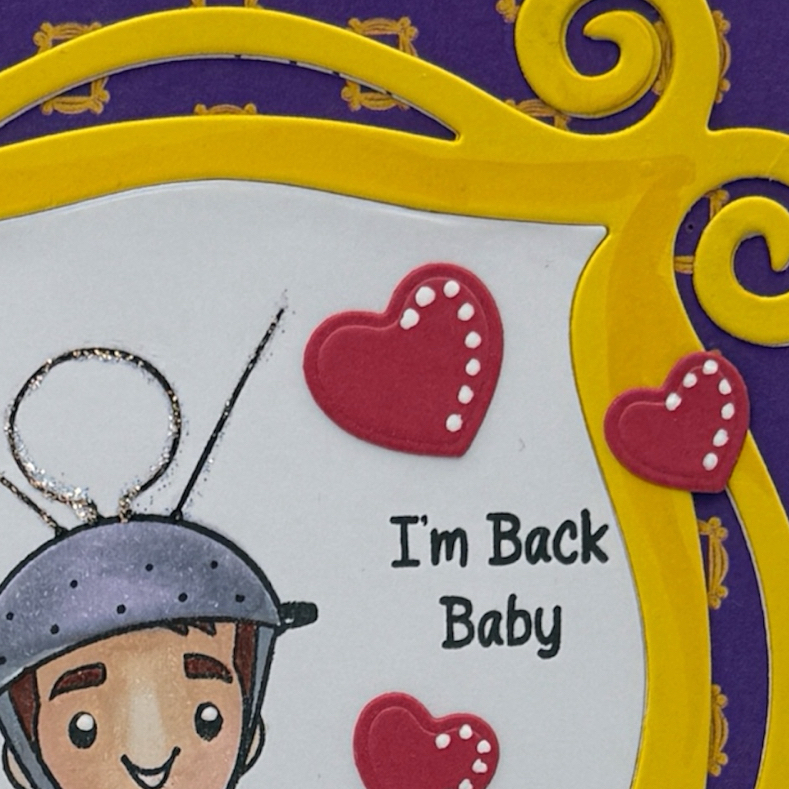
I love how the bold yellow frame pops against the purple patterned paper background. The layered hearts and sweet sentiment make this such a fun card for a friend or just-because greeting.
Details:
A2 sized card
Layered die cut frame focal point
Stitched rectangle details
Hand-colored stamped image
Coordinating patterned papers
This design would work for birthdays, encouragement cards, or simply sending happy mail to a friend.
Stickles & white gel pen accents add interest – hearts from SHAKER PLATES
Coffee Cup Gift Card Holder ☕💗
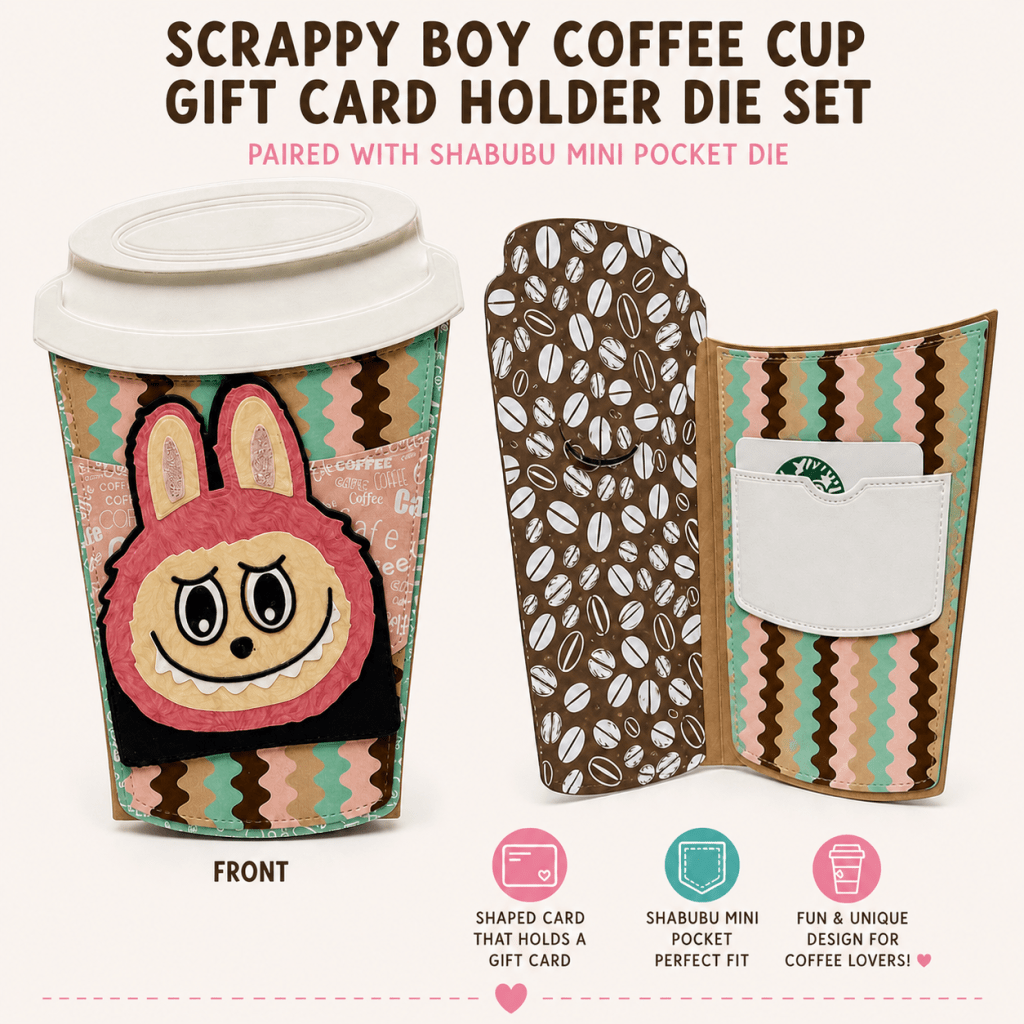
This coffee-themed project might be my favorite because it combines a shaped card with a hidden gift card pocket!
Created using the Coffee Cup Gift Card Holder Die Set and paired with the Shabubu Mini Pocket Die, this project is both cute and functional.
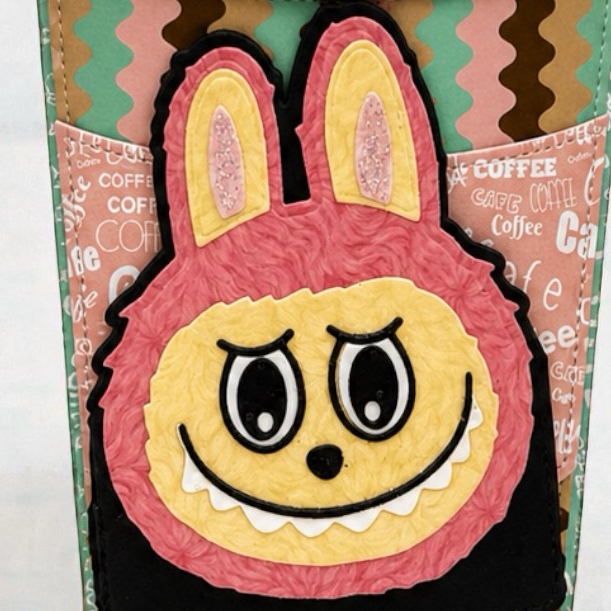
The fun patterned papers and dimensional bunny embellishment make this such a unique gift idea for coffee lovers.
Perfect For:
Gift cards
Teacher gifts
Coffee shop surprises
Birthday treats
Thank-you gifts
Shabubu Mini Pocket Die
Why I Love These Projects Together
Even though these projects each have a completely different theme, they all showcase what I love about crafting with Scrappy Boy Stamps:
Interactive designs
Fun layered dies
Coordinating products
Creative gift ideas
Endless customization options
Mixing stamps, dies, papers, and embellishments together helps create projects that feel cohesive while still allowing each design to stand on its own.
Final Thoughts
I had so much fun creating these projects and experimenting with different styles and themes. Whether you love spooky-cute designs, friendship cards, or gift card holders, there are so many ways to customize these products and make them your own.
Be sure to check out more inspiration and project details over on my blog:
🐾 Featuring the adorable Furever Loved set from Pajama Crafter Stamps, I’m sharing two completely different card designs using the same stencil—plus a fun no-waste technique you have to try!
💥 This weekend only (through April 12):
Use code KELLY10 for 10% OFF your cart!
Don’t miss it—these prices are already amazing!
We have been celebrating PET WEEK all week, with cards featuring stamped images of our furry, feathered and scaled friends.
I’m so excited to share today’s project featuring an absolutely adorable new set from Pajama Crafter Stamps — Furever Loved from the March 2026 release!
This set is truly a must-have for your craft stash… because honestly, who can resist a cute dog?! 🐶 Whether you’re creating for a friend, a fellow dog lover, or even a heartfelt “just because” card, this set has so much versatility built right in.
💖 Pairing Products for a Versatile Look
For this project, I paired the stamp set with the In My Heart of Hearts Stencil, also from Pajama Crafter Stamps. This stencil is perfect for creating customized, romantic and fun backgrounds—ideal for everything from friendship cards to more elegant, celebratory designs.
And today, I’m sharing two looks using this stencil… one traditional and one with a fun twist!
🎨 Technique Spotlight: Get More From Your Stencil (No Waste!)
If you’ve ever finished stenciling and noticed all that leftover ink sitting on your stencil… don’t clean it just yet! 👀
Instead, try this:
👉 Lightly mist your stencil (depending on your ink type)
👉 Flip it over onto a clean piece of cardstock
👉 Press to transfer the remaining ink
This creates a completely different “negative” impression background—and it’s such a fun way to stretch your supplies!
I used a cardstock that could handle a slightly wetter medium to avoid warping, and the result was a beautifully soft, organic background that looked totally different from the original design.
🐶 Bringing It All Together
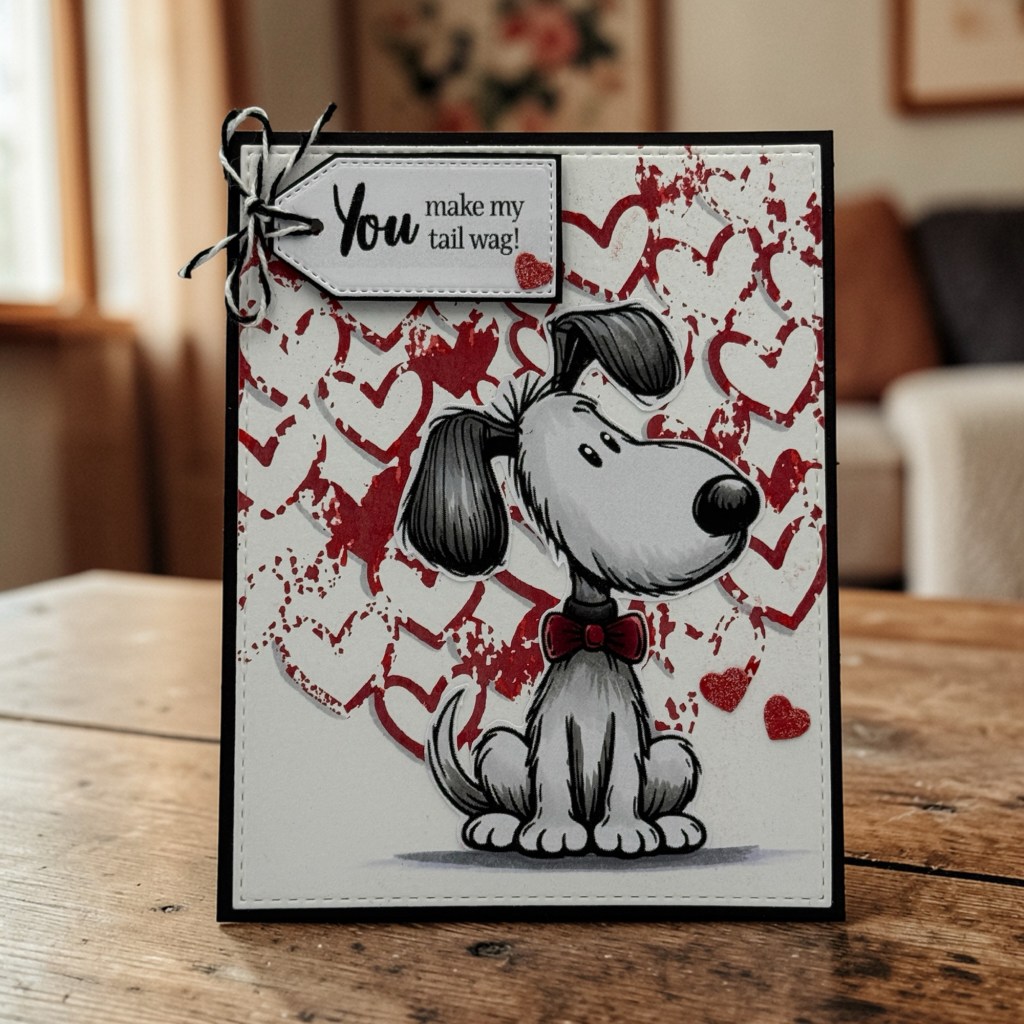
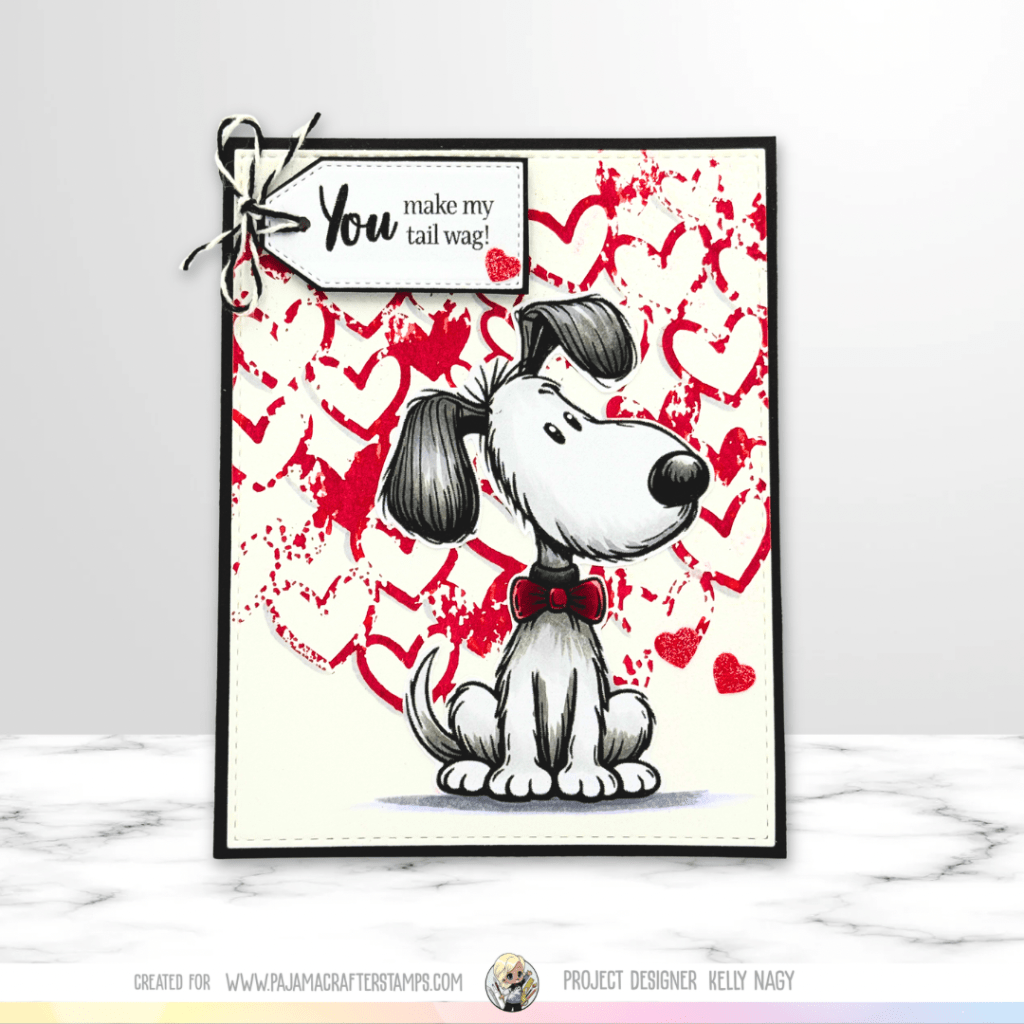
For my second card, I paired that transferred background with the black-and-white dog image from Furever Loved, adding just a pop of color to the bow to match the inked background.
The result? A playful, coordinated design that feels cohesive without being overly busy.
💍 The Original Design
I’m also sharing my original card, where I used the stencil as intended. This created a more polished, elegant background—perfect for a wedding or formal celebration card.
Same stencil… two completely different looks!
💬 Which One Is Your Favorite?
Do you love the soft, elegant original or the playful, no-waste background version? I’d love to hear which one you’d choose!
🛍️ Special Feature + Weekend Savings!
I’m so honored to be featured at Pajama Crafter Stamps right now, and to celebrate, there’s a special deal just for you:
💥 This weekend ONLY (through Sunday, April 12, 2026 at midnight):
Use code KELLY10 for 10% OFF your entire cart!
Their prices are already amazing… so this is just the icing on the cake! 🎂
🏃♀️ Run, don’t walk—this deal won’t last long!
✨ Final Thoughts
This project is such a great reminder that sometimes the “extra” ink we overlook can turn into something beautiful. I love finding ways to get more from my supplies while creating unique, one-of-a-kind designs.
Happy crafting this weekend! 💛
And as always, don’t hesitate to reach out if you have any questions—I’m always happy to help!
Get Crafty This Easter with the “Hog Your Shine” Stamp Set!
This Easter, I’m all about spreading joy and smiles with my Hog Your Shine stamp set from Pajama Crafter Stamps! I crafted an A2 sized card that’s not only “ham”-dazzling but also serves as a heartfelt reminder to embrace our inner shine. This card is perfect for sharing encouragement and positivity. Join me in celebrating Easter by creating and sharing your own ham-made cards! Let’s make this season full of warmth and crafty joy! 🐷✨🌷
Happy Easter, everyone! 🐣✨ I whipped up an A2 sized card that’s sure to “ham” it up with joy! Using the delightful Hog Your Shine stamp set from Pajama Crafter Stamps, I created a card that encourages everyone to bring out their inner sparkle!
🖌️ Let’s not forget, it’s time to “be a ‘ham’ and shine” this Easter! HAM-Made cards are perfect for spreading hugs and sunshine to friends and family.
To grab a HOG YOUR SHINE set or treat yourself to some supplies without breaking the bank, check out:
🌈💕 Plus, let’s support small businesses that make our crafting adventures much more fun! Check out @PajamaCrafterStamps for the cutest stamps that are “meat” for your creative spirit!
You can also find great dry adhesive at TapeRunner.com and get 10% OFF your cart using PROMO CODE: KELLY10
Show me your crafty creations and let’s celebrate this sunny season of renewal together! 🐰💌#HogYourShine #PajamaCrafterStamps #CraftyCommunity #StampedbyKelly
Dino, Gator, or Dragon? Join the Pop of Color Instagram Hop as I reimagine Pajama Crafter Stamps’ new Closer to Extinction and pair it with the fresh Hog Your Shine release. Is that stamped creature a dinosaur, an alligator, a dragon—or something entirely new? I masked and mashed up images for a playful, unexpected twist. Hop over to Instagram to see the full card, my WIP shots, and the design team’s colorful projects — plus giveaway!
Today I’m thrilled to share Pajama Crafter Stamps’ newest release: Hog Your Shine! I paired this new set with two favorites — Stadium Food and Date Night — to make a fun, snack-loving card with the giggle-worthy sentiment, “I’m just here for the snacks!” Food (and friends) really are the best part of any get-together, and these stamps capture that playful vibe perfectly.
Marshmallow Cardstock — my go-to for alcohol-marker coloring; crisp, bright, smooth finish
Pig Press — used on top of my stamp positioner for a solid impressions every time
Barely Arts glue — available as Starter Kit (with detailed tip) and Refill — my adhesive for layering when a wet glue is desired
Color and technique I colored on Pajama Crafter Stamps’ Marshmallow Cardstock with alcohol markers for bold, smooth blends and bright, crisp results. The Hog Your Shine images are perfect for layered color and playful shading, and Stadium Food adds that snack-time charm. I used the Pig Press with my stamp positioner to get clean, even impressions every time.
Join the POP of Color Instagram Hop We’re hopping over on Instagram for the Pajama Crafter Stamps March 2026 Inspiration Hop: POP of Color. Our design team is sharing colorful new projects, tips for using color and contrast, and loads of crafty inspiration. Hop with us on Instagram at @PajamaCrafterStamps and @stampedbykelly — there’s also a chance to win a certificate toward purchases on the Pajama Crafter Stamps site!
Shop and support Fill your cart at PajamaCrafterStamps.com — I’ve included product links above for easy shopping.
See you on Instagram — hop, enjoy the projects, and don’t forget the snacks!
Here is a perk at my HOP CARD, which I used the NEW RELEASE, Closer to Extinction, but with creative color placement, made him a FLORIDA GATOR!! To put my simple layers together, my GO TO dry adhesive is from Tape Runner and you can use promo code KELLY10 for 10% off your cart.
Unlocking Creativity with Die Cuts in Card Making! ✂️✨
Welcome back, crafty friends! Today, I’m excited to share how die cuts can transform your card making and elevate your projects to new heights. From festive designs like the Shabubu Head Die Set for St. Patrick’s Day to cozy creations with the Hoodie Shaped Card, the possibilities are endless!
Get inspired by the fun Mouse Pizza Builder Die Set and the creative Blind Box with Rip Strip for unique gift card presentations. With die cuts, you can add dimension and personality to your cards, making them truly special. Ready to unleash your creativity? Let’s dive into these amazing projects together! 💖🎉
Hey there, crafty friends! Are you ready to take your card making and paper crafting to the next level? Let’s dive into four fabulous projects that showcase how die cuts can truly transform your creations!
1️⃣ Shabubu Head Die Set: Just in time for St. Patrick’s Day, this die set lets you customize adorable characters in vibrant green! With die cuts, you can add dimension and personality to your cards, making them extra special. 🎉💚
2️⃣ Hoodie Shaped Card & Add-On Die Set: Say goodbye to basic cards! This hoodie die set allows you to create cozy, themed cards that can be zip-up or feature front pockets. Customization is key, and with just a few die cuts, you can create a professional-looking design that’s full of warmth and fun. 👕✨
3️⃣ Mouse Pizza Builder Die Set: This set proves that die cuts can do much more than just cut flat shapes! Use them creatively, like I did when I transformed a piece from the Magic Mirror Mini Die Set into a pizza board. Experiment with cutting your dies in plain white cardstock and let your imagination run wild with colors and arrangements! 🍕🐭
4️⃣ Blind Box with Rip Strip: This project combines playful design with functionality! Using patterned paper and an image from The Other Side Stamp Set, I created a gift box that’s perfect for presenting a gift card. The rip strip adds an exciting reveal, making gift-giving even more delightful! 🎁✨
With die cuts, the sky’s the limit! You can add dimension by layering your cuts, and even more depth by adding shadows and colors using your favorite mediums or simple ink blending on the edges.
So, are you ready to unleash your creativity? Dive into these projects and see how die cuts can elevate your crafting game! Share your favorites in the comments below, and let’s inspire each other to create something amazing!
I use dry adhesive and liquid adhesive for my projects. There are specific times when one works better than the other. Follow me for more tips on that and if you wish to visit taperunner.com you can use code Kelly10 for 10% off your cart.