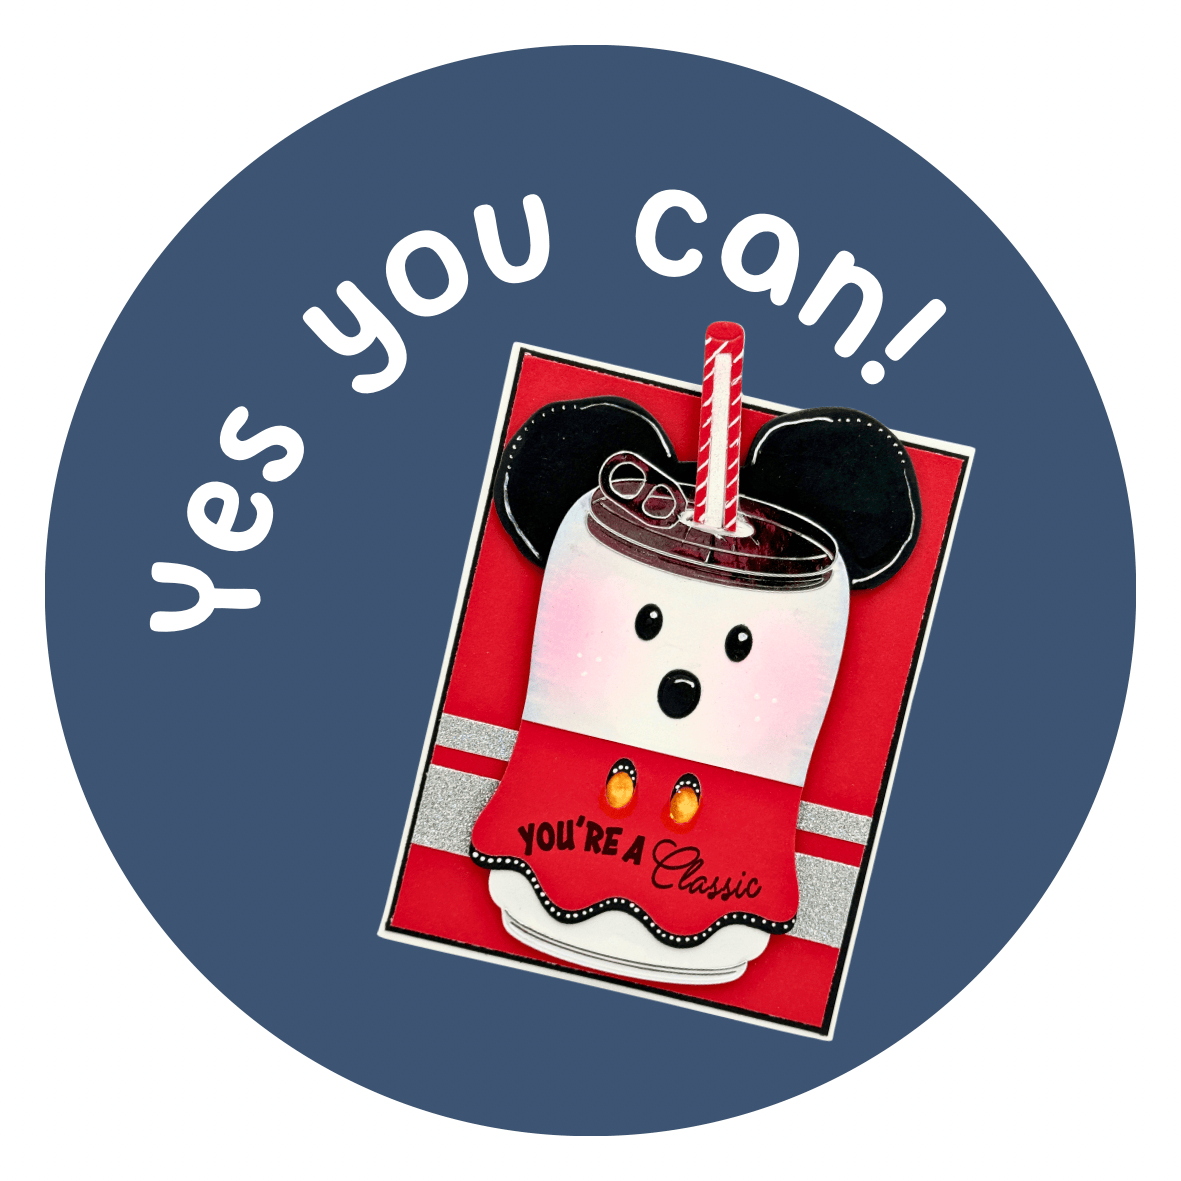
You’re a Classic! 🐭❤️ | My 118th Craft Roulette Submission

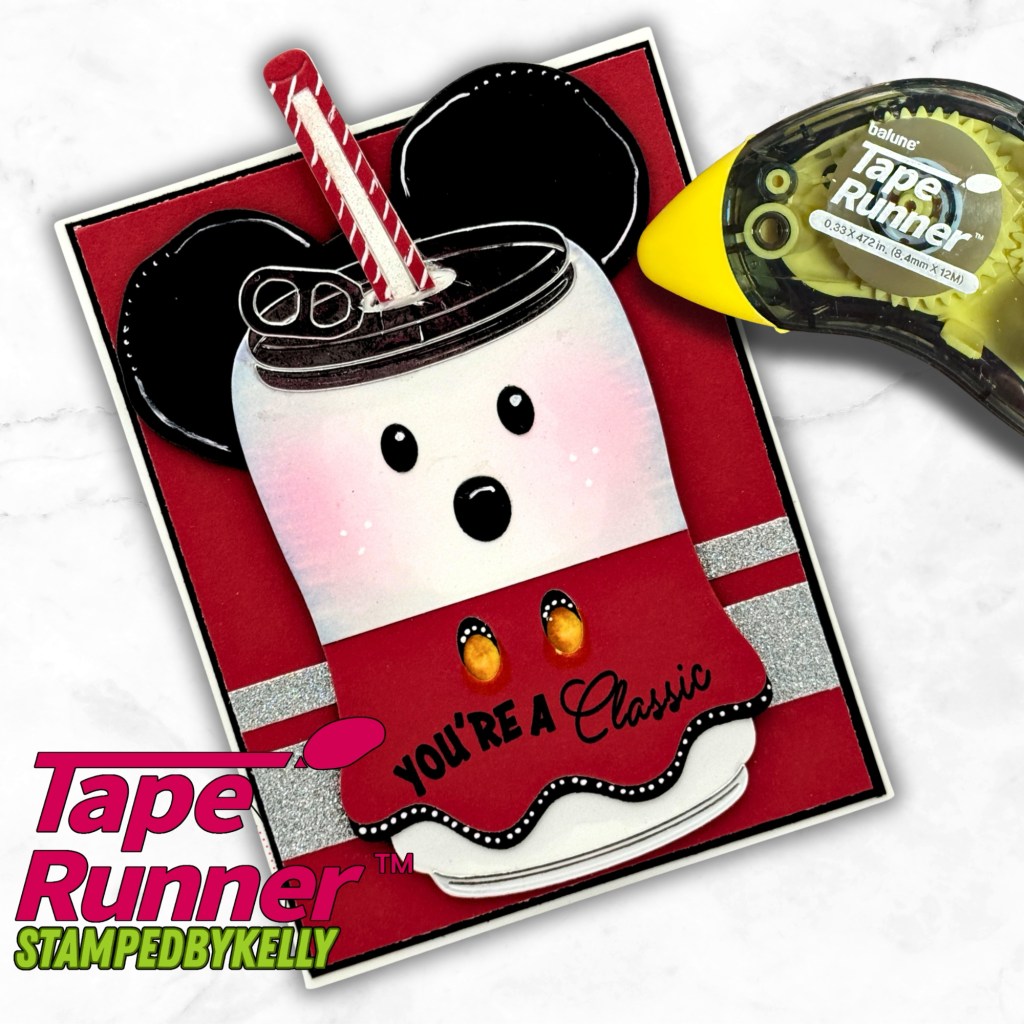
Celebrating my 118th Craft Roulette submission with a classic mouse-inspired soda can card using The Sassy Club Stamps Cola Pop Stamp Set and Soda Can Die! Discover how I interpreted planetary colors, created wonky mouse ears, and incorporated two folds — including a clever scored flap that lifts to reveal a hidden handwritten message!

A Little Wonky, A Little Disney Magic, and a Whole Lot of Crafty Fun!

Hello, crafty friends! 💕

I’m back with another creative adventure, and this week I’m celebrating my 118th submission to Craft Roulette! Can you believe it?

One of my favorite things about Craft Roulette is how four completely random parameters can take you in a direction you might never have considered. This week was no exception!
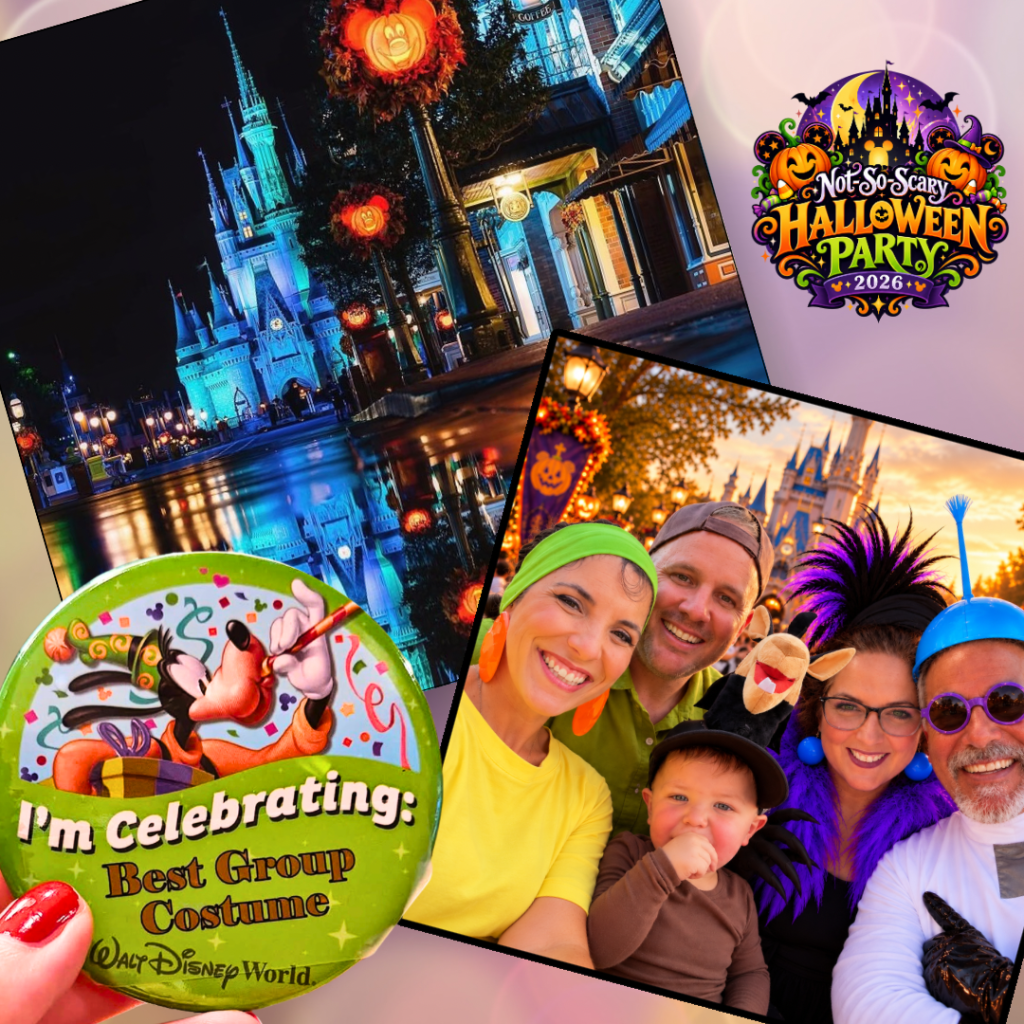
My family as The Emperor’s New Groove this year!

I reached for The Sassy Club Stamps Cola Pop Stamp Set and the Sassy Club Stamps Soda Can Die, then after a visit to Mickey’s Not So Scary Halloween Party, was inspired to create this fun modification that combines a classic color palette, a little wonky personality, and a secret place to write a special message.

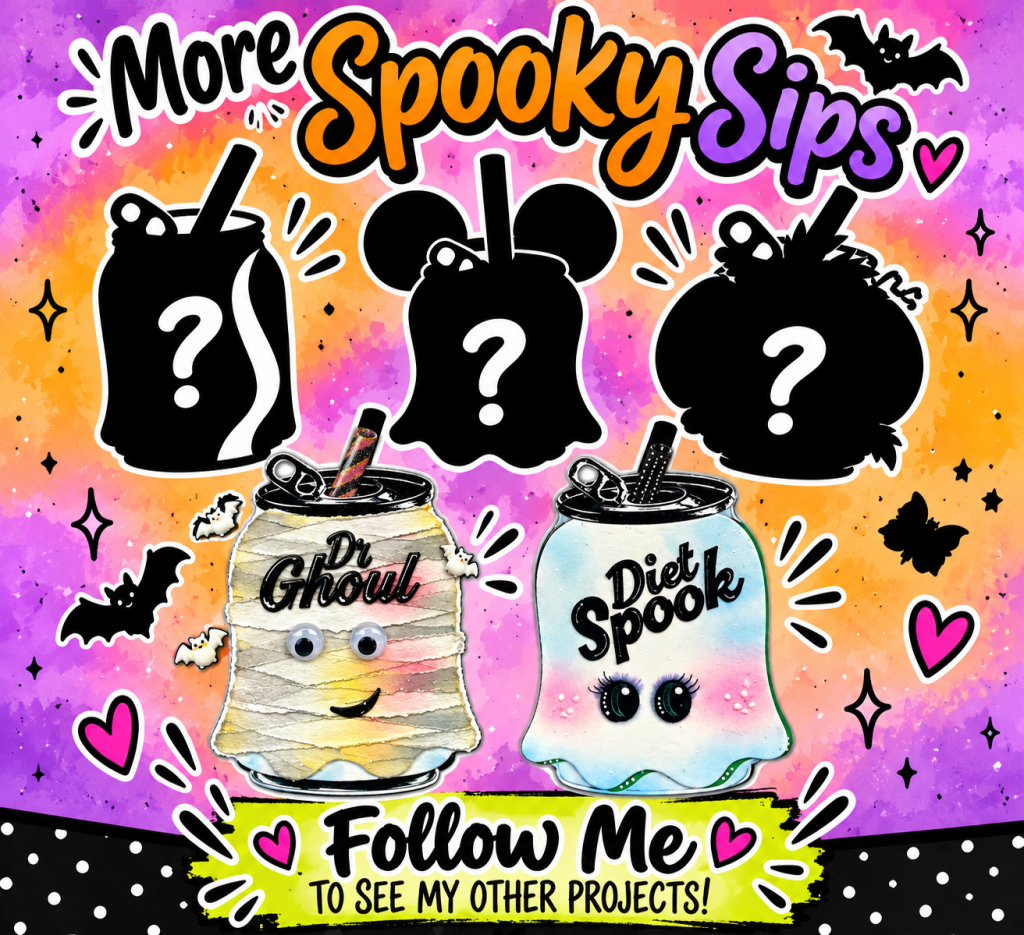
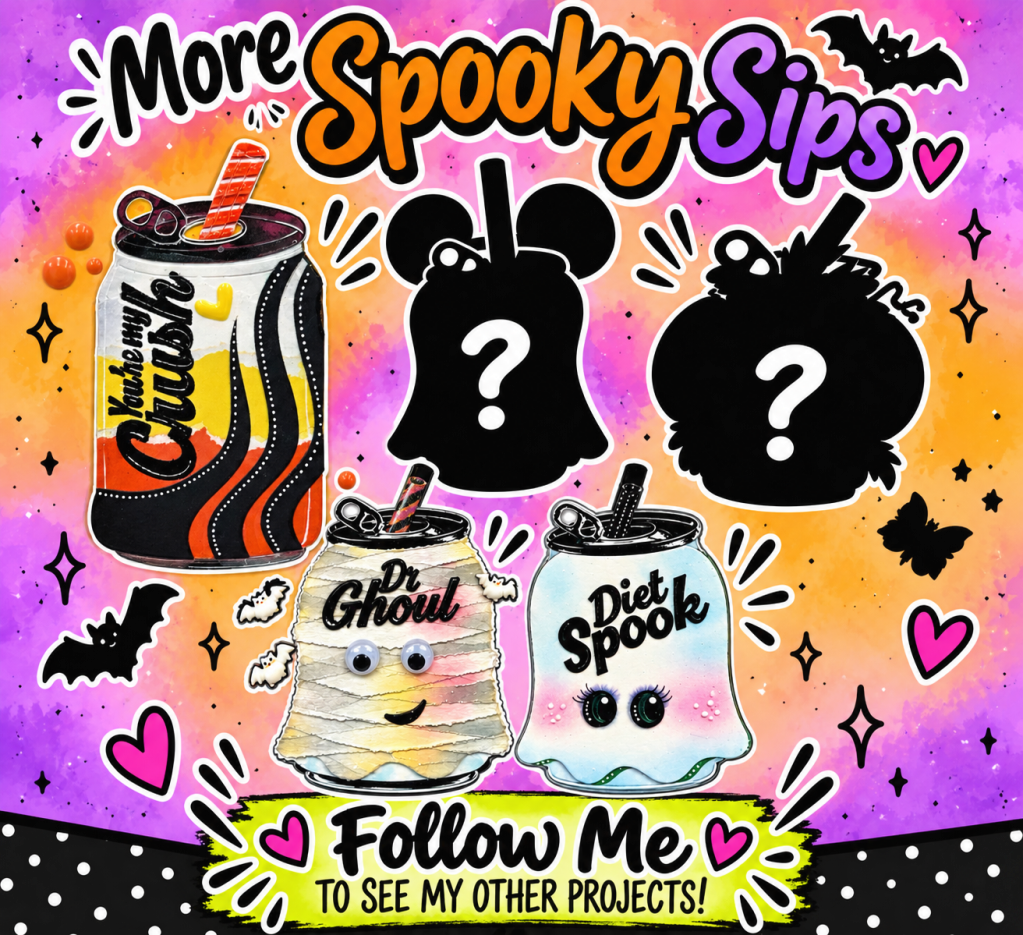
And yes, this little cutie is another addition to my More Spooky Sips collection! Follow me on Facebook at Stampedbykelly.
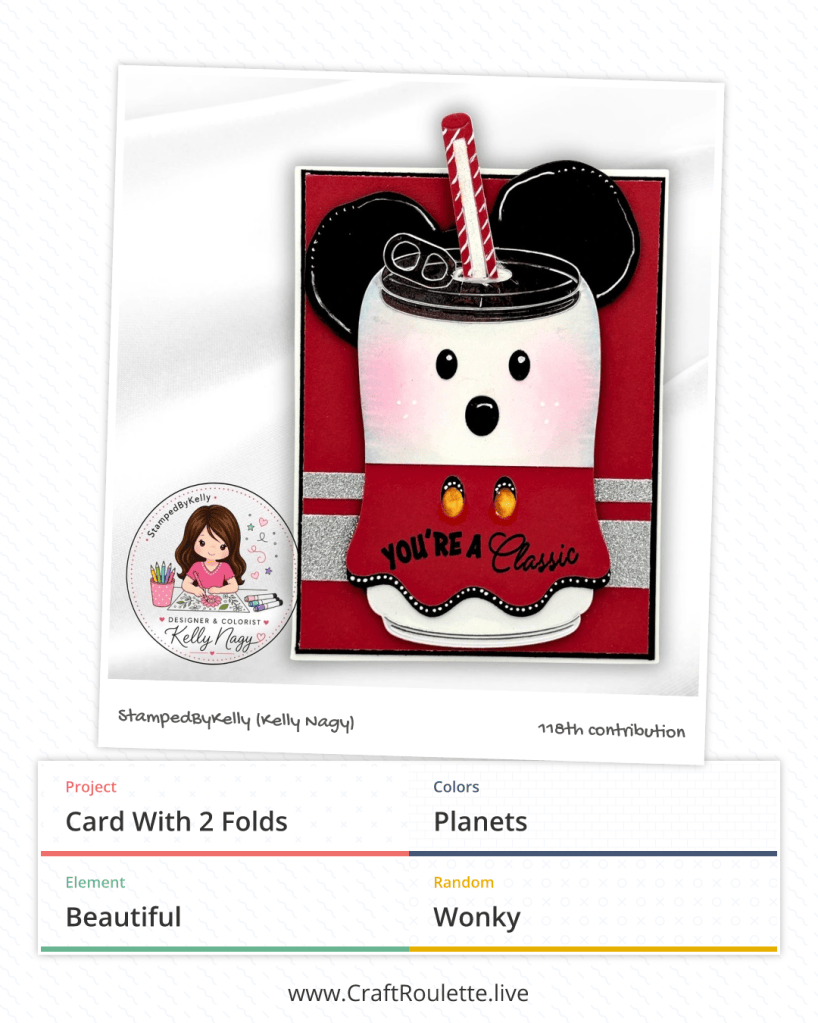
🎰 This Week’s Craft Roulette Parameters

  • Project: Card with 2 Folds
  • Colors: Planets
  • Element: Beautiful
  • Random: Wonky

Let’s see how I brought all four parameters together!
🪐 Planetary Colors — A Little Creative Interpretation!

When the wheel landed on Planets, I immediately started thinking about the beautiful colors found throughout our solar system.

Rather than trying to represent every planet, I focused on a few planetary color inspirations that would complement my mouse-inspired design.

My deep red cardstock reminds me of Mars, the Red Planet, while the soft pink and creamy white blending on my soda can brings to mind the beautiful cloud colors associated with Venus. I incorporated black accents for the darkness of space and sparkling silver elements inspired by the metallic and icy appearances we often associate with celestial landscapes.

Of course, I couldn’t resist adding those cheerful yellow buttons for a little extra sunshine!

I love how a color parameter can be interpreted creatively while still maintaining the overall personality of a project.

🐭 You’re a Classic!

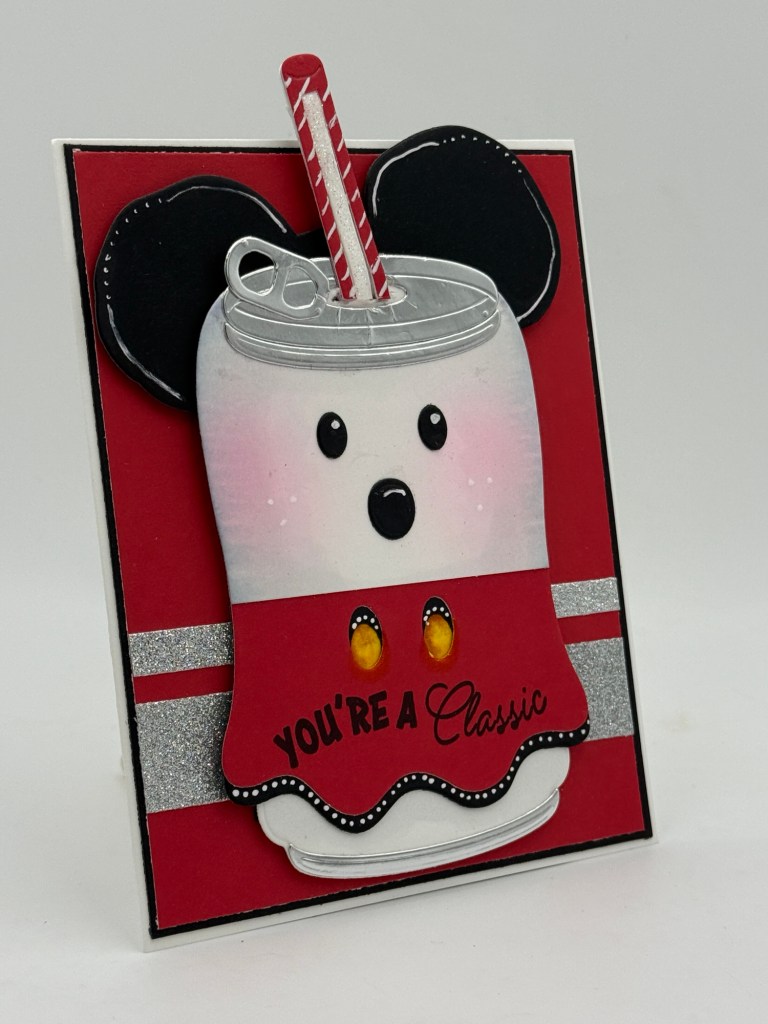
For my main focal point, I used The Sassy Club Stamps Cola Pop Stamp Set along with the Sassy Club Stamps Soda Can Die to create this adorable classic mouse-inspired character.

The black mouse ears, rosy cheeks, striped straw, and bright yellow buttons immediately give this little can its personality!

The sentiment “YOU’RE A Classic” seemed especially fitting. After all, some things just never go out of style!

I also added a shiny metallic can lid and pull tab, along with little white gel pen highlights and dotted details.

Behind my character, I layered red cardstock over a thin black mat and added horizontal strips of silver glitter cardstock for just the right amount of sparkle.
✂️ Two Folds — With a Little Creative Paper Engineering!

Now, this is where I had some fun interpreting the Card with 2 Folds parameter!

My first fold is the traditional fold used to create my A2-size card base. This gives me the familiar greeting card format that opens to reveal the inside.

My decorated card front sits on top of that folded A2 card base.

But I wasn’t finished there! This is a photo dramatization of my “second” fold.
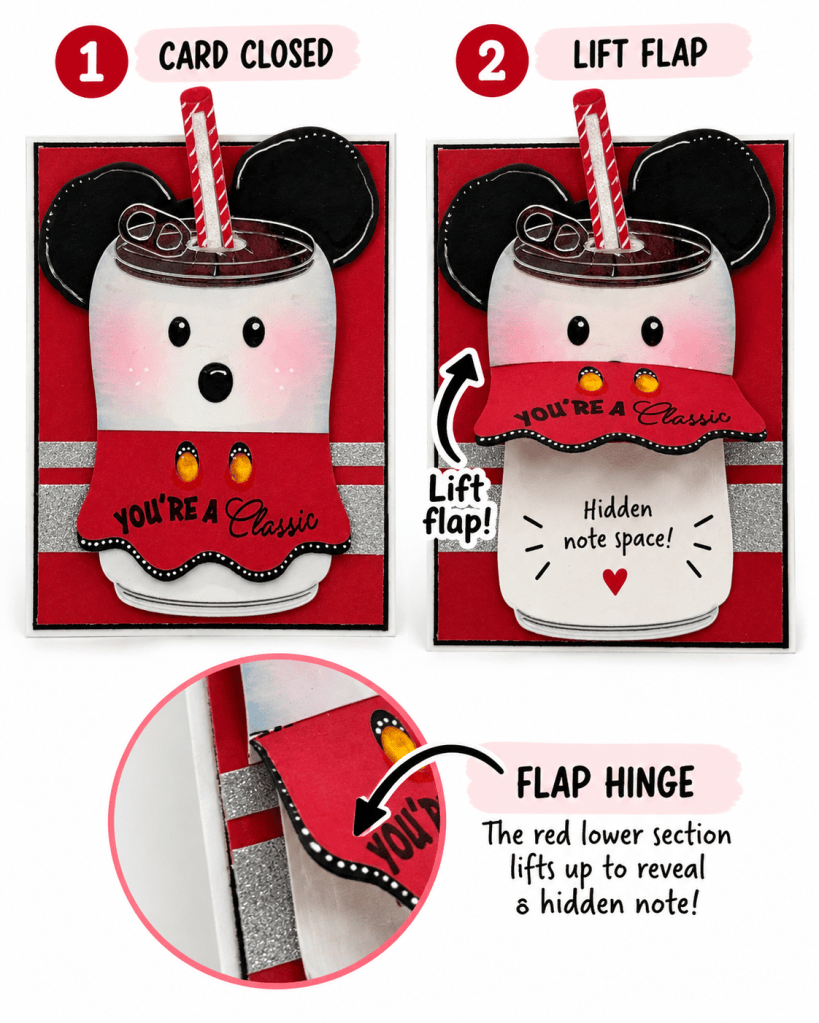
For my second fold, I created a scored hinge on the red lower portion of my soda can character.

That scored line allows the red section to fold upward like a little flap, revealing a hidden space underneath where a personal message can be written!

So technically, my second fold isn’t another fold in the actual card base. Instead, it’s a functional scored fold incorporated into the decorative element attached to the card front.

And I’m counting it! 😄

I love how it adds a fun interactive surprise without changing the overall appearance of the card.
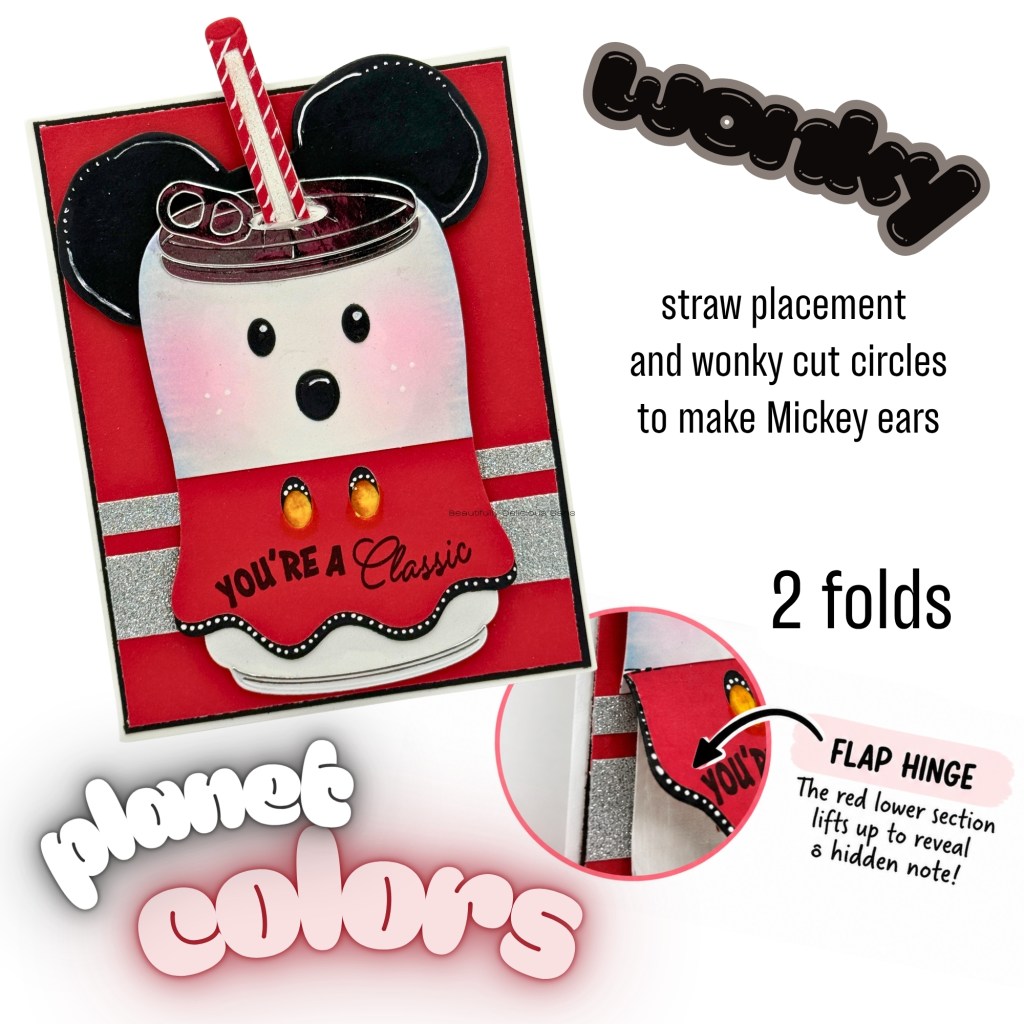
A little note tucked behind that adorable character makes the card even more personal. After all, part of the joy of handmade cards is giving someone a reason to smile!

🤪 Wonky Is Wonderful!

The Wonky parameter was another opportunity to have some fun!

Instead of using perfectly symmetrical die-cut circles, I cut my black mouse ears by hand, allowing them to have slightly uneven, wonky shapes.

I also placed the striped straw at an angle rather than straight up and down.

These little imperfections give the character personality and remind me that handmade doesn’t have to mean perfectly measured or perfectly symmetrical.

Sometimes wonky is exactly what makes something wonderful!

✨ The Beautiful Little Details

For the Beautiful parameter, I focused on all those little finishing touches that make a handmade card feel special.

From the softly blended rosy cheeks and the silver metallic lid to the glittery horizontal accents and tiny white gel pen dots, each detail adds a little charm.

I especially love the contrast between the bold red cardstock and the shimmer of the silver accents.

It’s amazing how a few small details can bring an entire character to life!
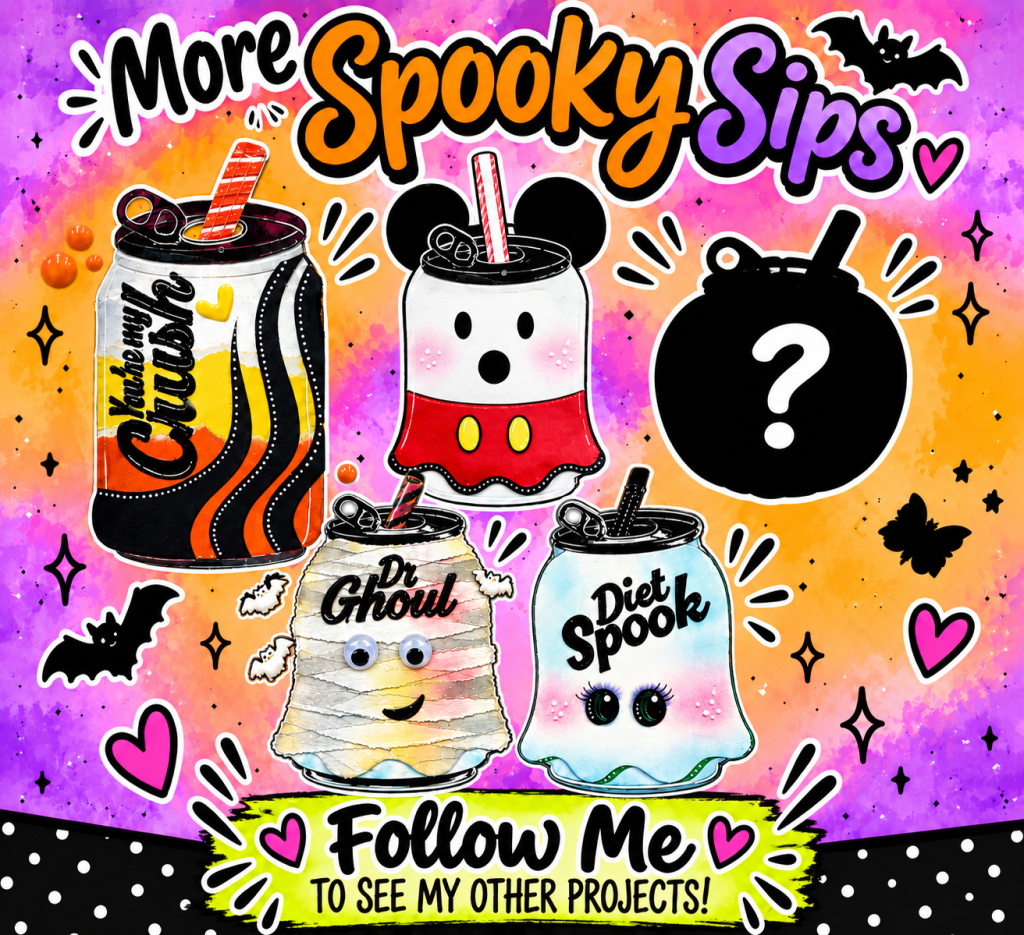
🥤 More Spooky Sips with The Sassy Club!

This little mouse-inspired soda can is another addition to my More Spooky Sips series featuring The Sassy Club Stamps Cola Pop Stamp Set and the Sassy Club Stamps Soda Can Die.

I’ve been having so much fun transforming the same basic soda can shape into different personalities!

Each new creation reminds me how versatile our crafting supplies can be when we start looking beyond their original purpose.

And there’s still another spooky sip waiting to be revealed!

💕 118 Submissions and Still Having Fun!

After 118 Craft Roulette submissions, I still get excited to see what those spinning wheels will challenge us to create next!

Some weeks the parameters come together easily. Other weeks they require a little imagination, a little experimenting, and maybe even a few creative interpretations.

But that’s the fun of it!

Whether you’re an experienced cardmaker or someone who has never picked up a stamp or die-cutting machine, I hope my projects encourage you to give something creative a try.

You don’t need to be an artist to enjoy creating. Sometimes all you need is paper, a few favorite supplies, and a crafty friend to inspire you along the way.

Thank you for stopping by and sharing a little craft therapy with paper with me today!

Until next time, keep crafting, keep smiling, and never be afraid to get a little wonky!

Happy crafting! 💗

Kelly
StampedbyKelly


🛍️ Supplies Used

Use Code: KELLY10 at TapeRunner.com for 10% OFF

🌸 Follow Along for More Crafty Inspiration!

Blog: http://www.stampedbykelly.blog
Instagram: @stampedbykelly
YouTube: @stamped_by_kellyb
Craft Roulette: http://www.CraftRoulette.live
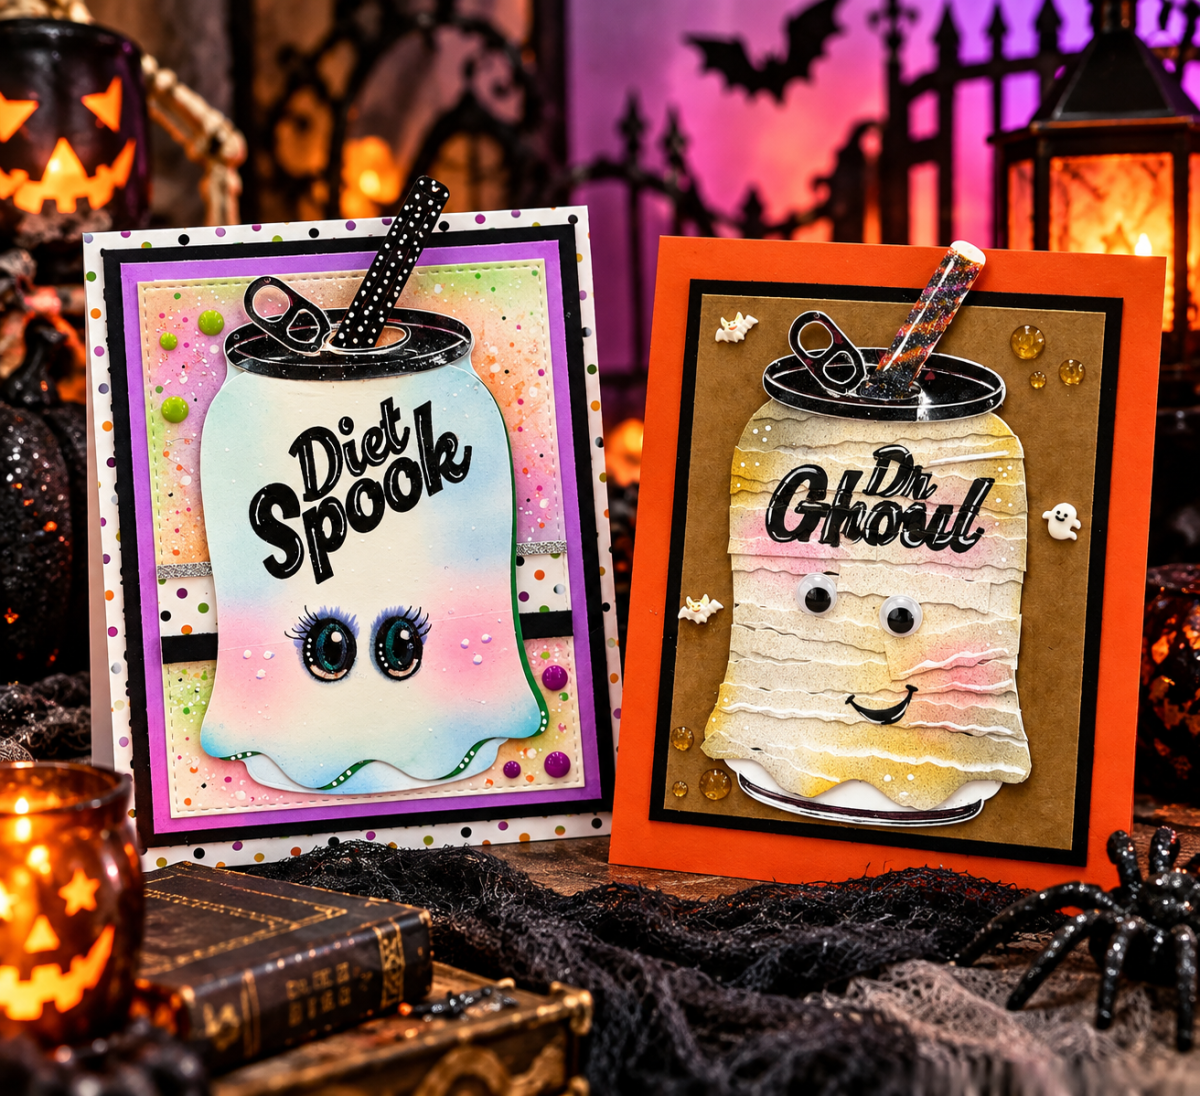
Meet Dr. Ghoul! 👻 A Spooky Soda Can Makeover

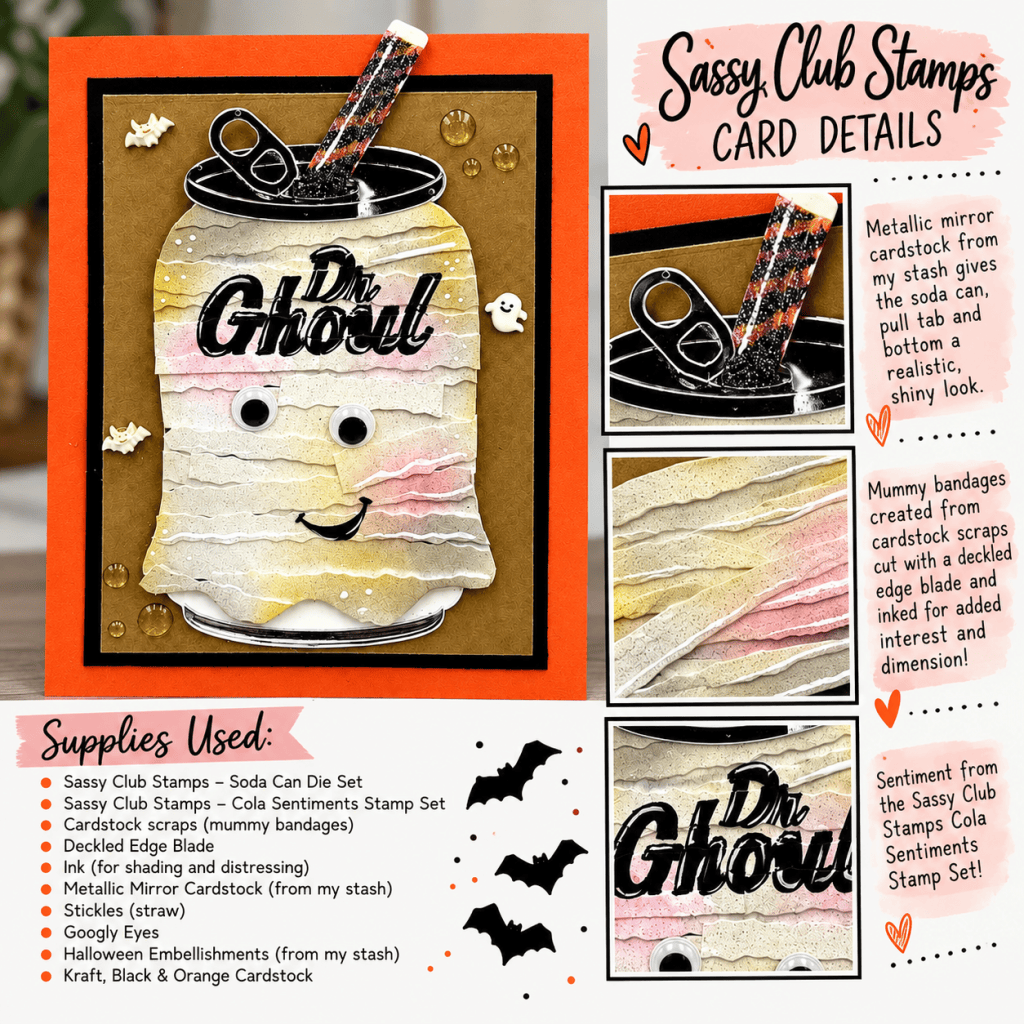
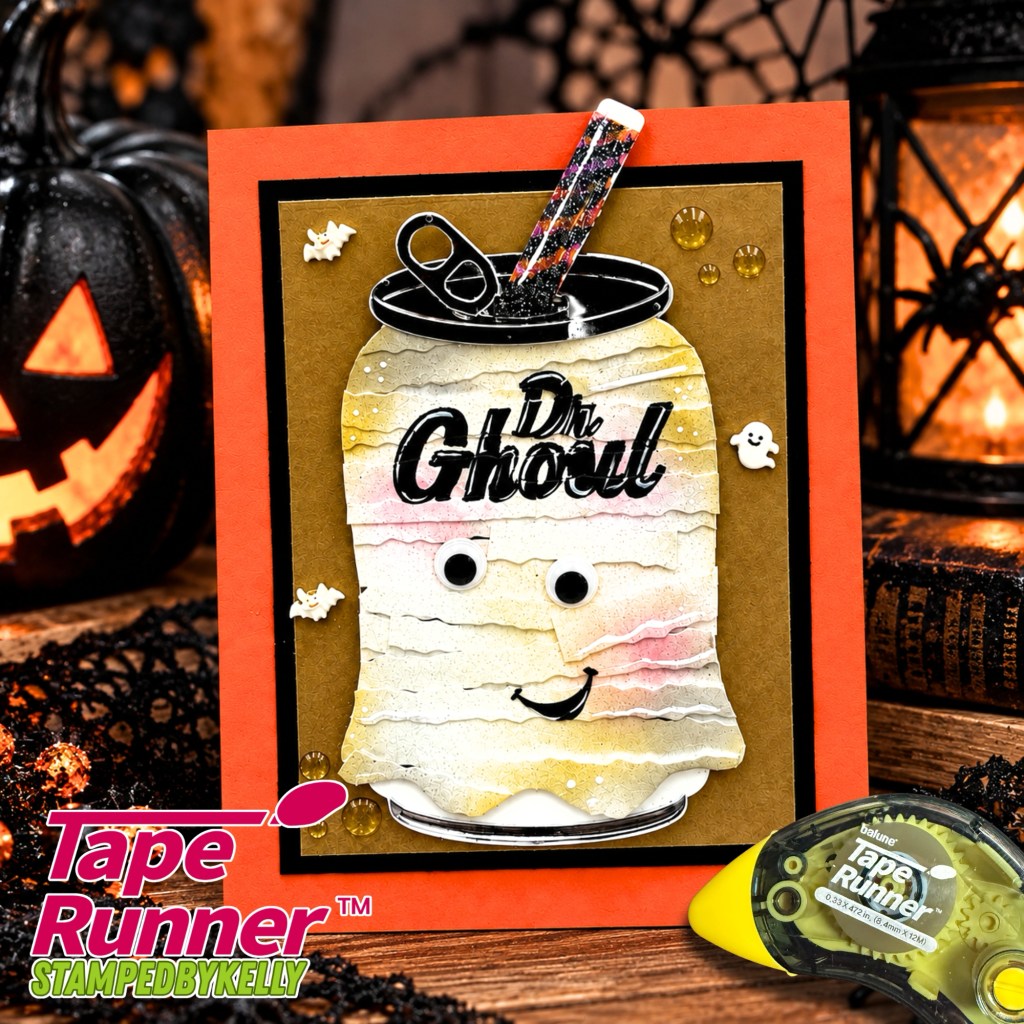
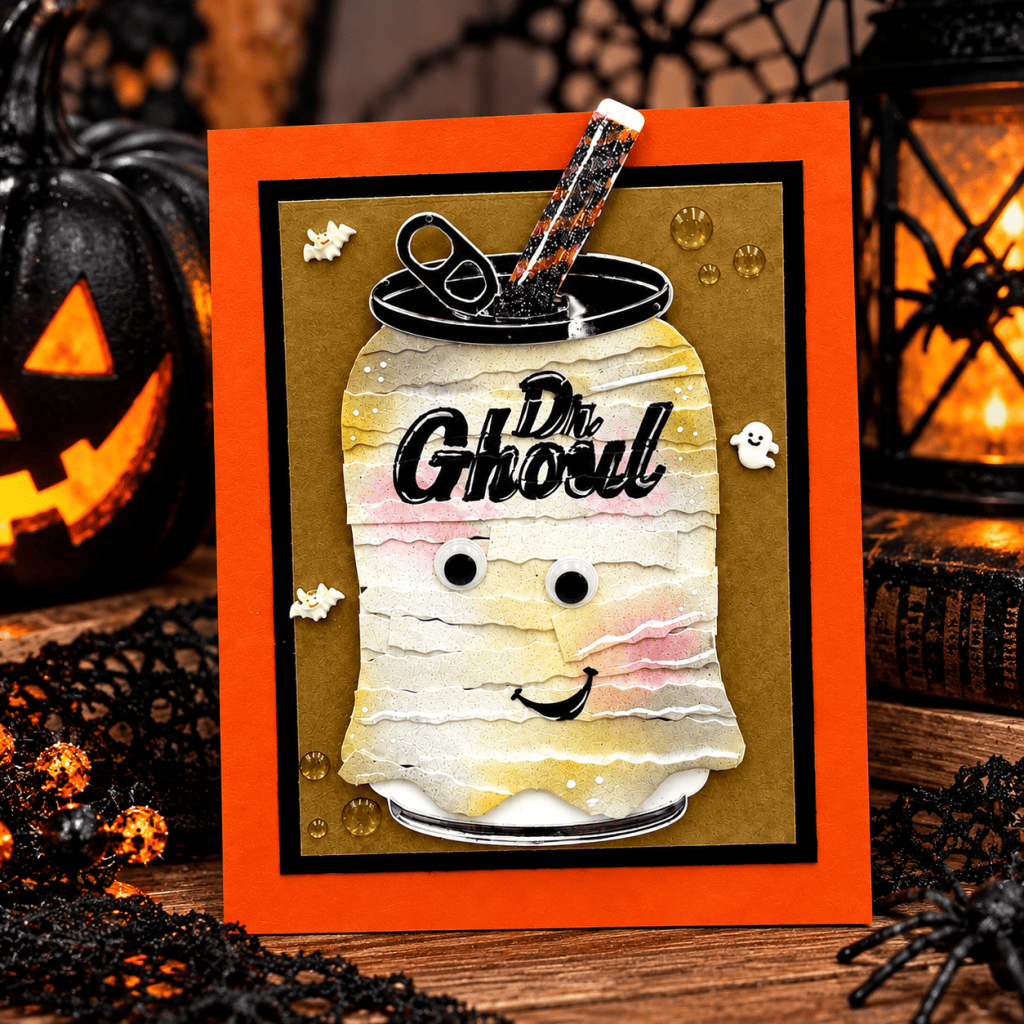
👻 Meet Dr. Ghoul, project #2 of my five spooky soda can makeovers! Inspired by crafty friend Sandi Powers, this adorable mummy features deckled-edge cardstock scraps, metallic details, and a glittery straw. See how I’m stretching my Sassy Club Stamps stash, and follow along for three more reveals! 🧡
Project #2 of 5 | Sassy Club Stamps | Stamped by Kelly

Who knew a soda can could be so SPOOK-tacular? 👻🥤

I’m back with my second Halloween creation featuring the Sassy Club Stamps Soda Can Die Set! Meet Dr. Ghoul, an adorable mummy made with cardstock scraps, a little ink, and plenty of crafty imagination!

If you’ve followed me for a while, you know my rule: Before purchasing a crafty product, I try to think of at least three different ways to use it. Well, this die set has inspired FIVE projects!
A Little Inspiration from a Crafty Friend 💕

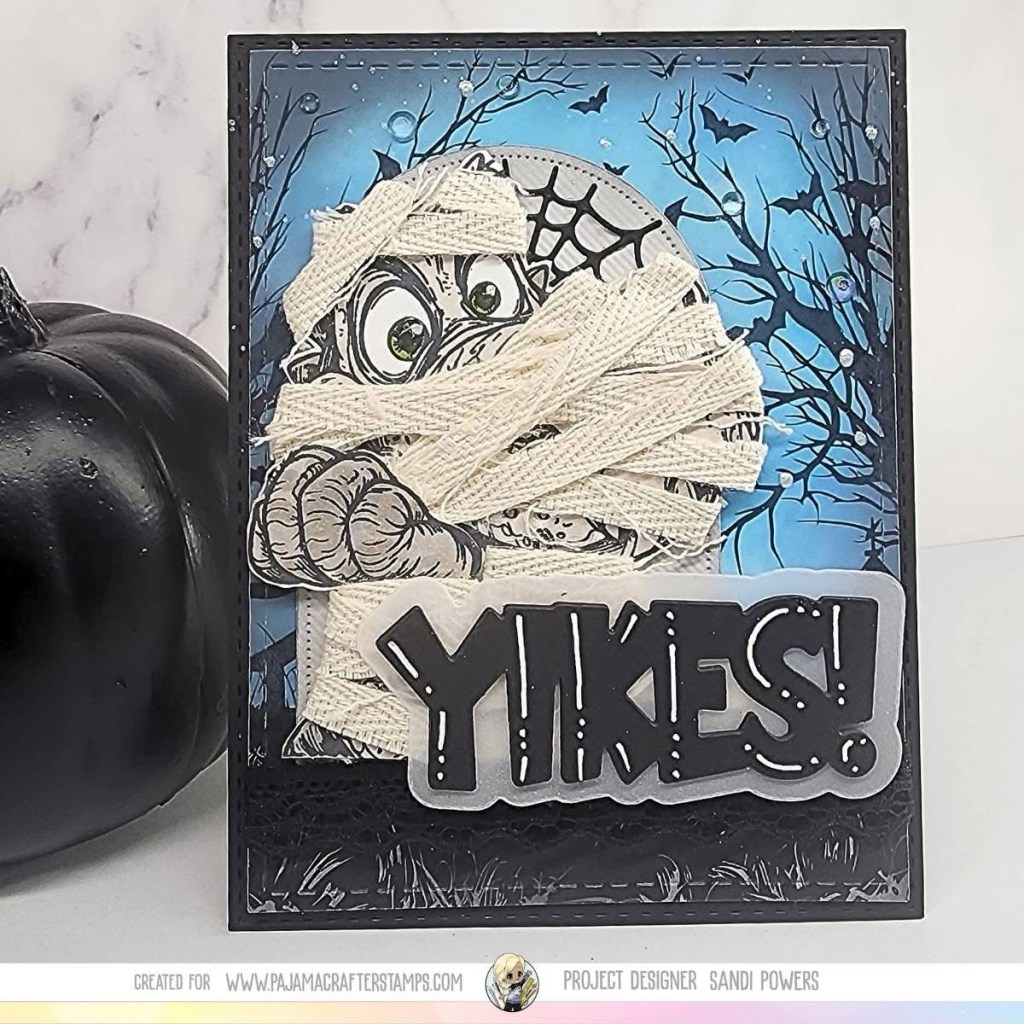
Several weeks ago, my talented friend Sandi Powers shared an adorable project where she transformed a dinosaur image from Pajama Crafter Stamps into a mummy!

Her creativity inspired me to look at my own supplies differently. Why not give my soda can a mummy makeover, too?

Photo and project credit: Sandi Powers.

Be sure to check out Sandi’s beautiful work! You can also explore Pajama Crafter Stamps through my affiliate link.

Affiliate disclosure: I may earn a small commission from qualifying purchases made through my affiliate link, at no additional cost to you.

Let’s Get Wrapped Up! 🧻

My favorite part of Dr. Ghoul is those mummy bandages, made entirely from cardstock scraps!

  • Mummy bandages: Cut scraps into strips with my deckled-edge blade, inked the edges, and layered them for dimension.
  • Metallic details: Mirror cardstock gives the soda can rim, pull tab, and bottom a realistic shine.
  • Halloween sparkle: Stickles on the straw add a little holiday glitz!
  • Card layers: Kraft, black, and orange cardstock.
  • Finishing touches: Googly eyes, white gel pen details, glossy dots, and Halloween embellishments from my stash.

Supplies Used 🛍️

Sassy Club Stamps

From My Stash

  • Cardstock scraps and deckled-edge blade
  • Ink for distressing
  • Metallic mirror cardstock
  • Stickles glitter glue
  • Kraft, black, and orange cardstock
  • Googly eyes, white gel pen, and Halloween embellishments

A Little Adhesive Love

Of course, a project with this many layers calls for dependable adhesive! I love using my TapeRunner to assemble my cards.

You can shop at TapeRunner.com and use code KELLY10.

More Spooky Sips Are Coming! 👀

Dr. Ghoul is project #2 of 5, and I’m revealing the remaining soda can creations over the next few days!

I hope these projects encourage you to look at your dies differently and stretch those crafty dollars a little further!

💕 Please LIKE and FOLLOW @StampedByKelly on Facebook and social media! Your likes, comments, and follows truly mean so much to me. They let me know you’re enjoying my projects and inspire me to keep sharing!

Now tell me — which is your favorite so far, Diet Spook or Dr. Ghoul? 👻🥤

Thanks for stopping by!

Stay crafty and keep stretching that stash!

Kelly 💕
Stamped by Kelly

#StampedByKelly #SassyClubStamps #DrGhoul #HalloweenCardmaking #StretchYourStash #HandmadeCards

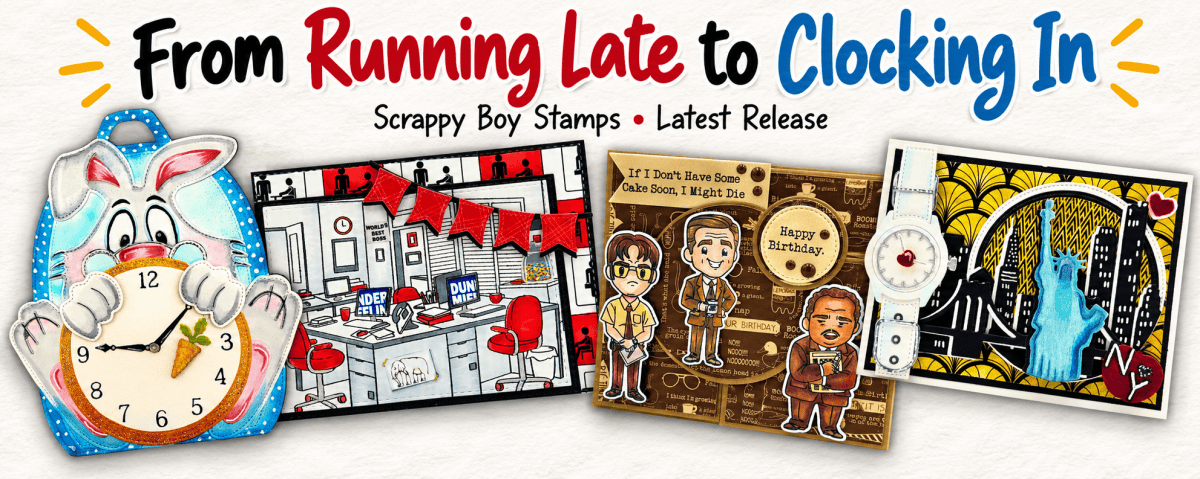
From Running Late to Clocking In: Four Projects from Scrappy Boy’s Latest Release

From running late to clocking in, these four Scrappy Boy projects are ready for a little adventure! I’m sharing the details, products used, and Copic color combos behind each one.

A rabbit with a clock, a watch in New York, and a few unforgettable coworkers—Scrappy Boy’s latest release gave me so many stories to tell! I made four separate projects, each with its own personality. I hope they inspire you to mix new products with the Scrappy Boy favorites already in your craft room.

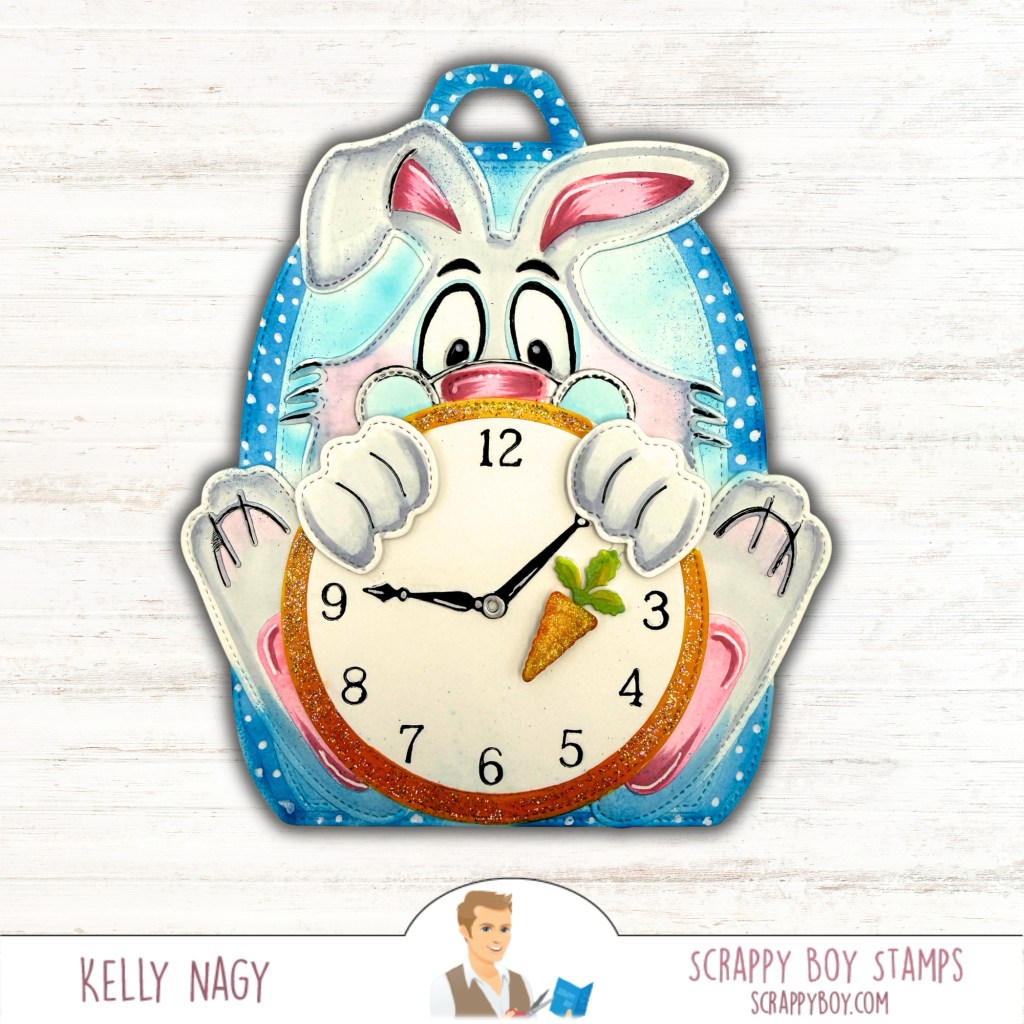
A Little Late? 🐰

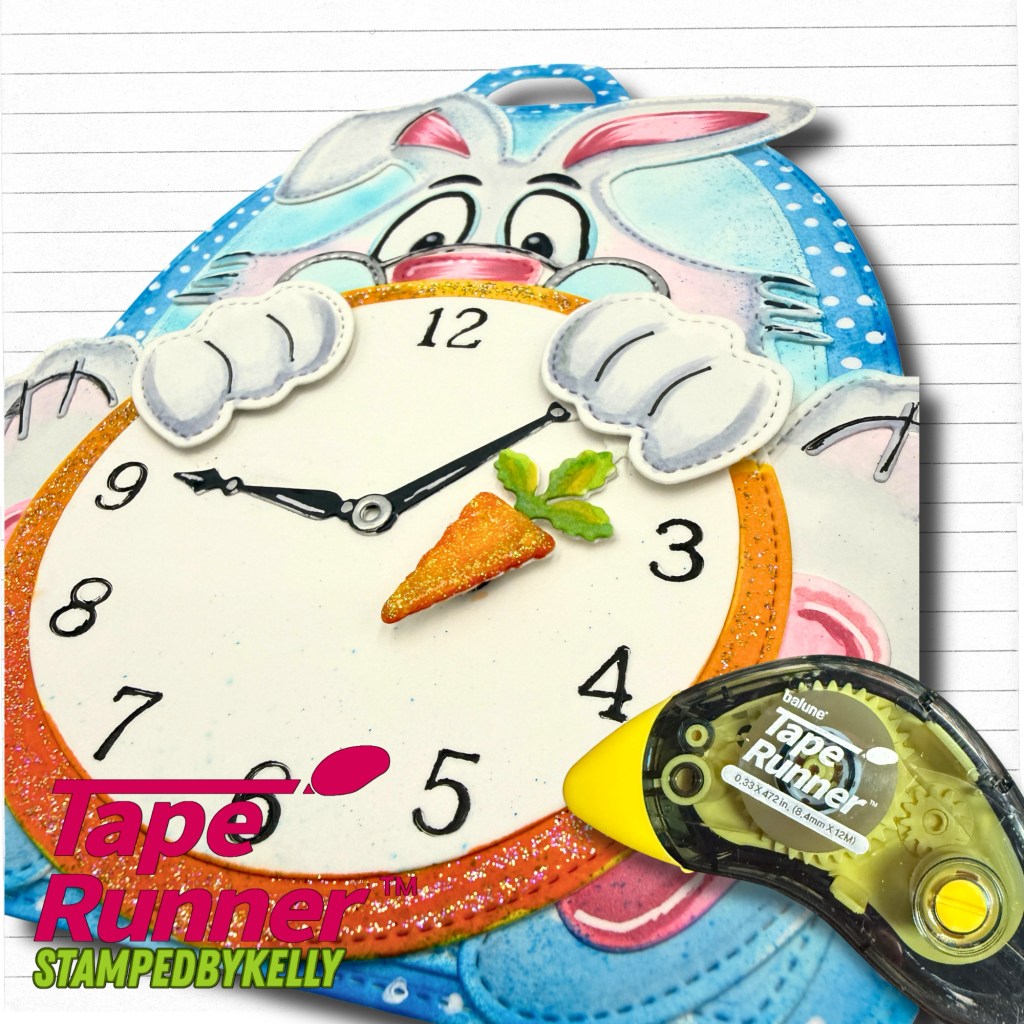
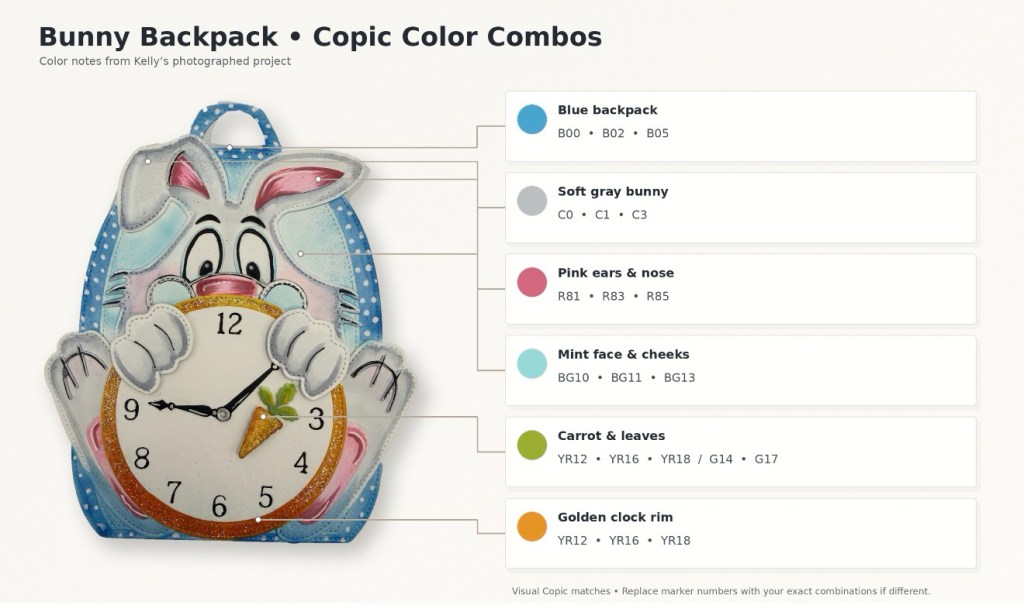
That built-in clock makes this bunny backpack feel ready for an adventure down the rabbit hole! I had fun coloring the bunny and adding little white accents to the blue backpack. I love putting together the different elements, like a puzzle, with my handy-dandy dry adhesive tape runner from Tape Runner. Use code KELLY10 only at Tape Runner for 10% OFF your cart.

I added Stickles to a variety of elements for added interest and sparkle.

Scrappy Boy Stamps’ Products used:

Copic color combinations:

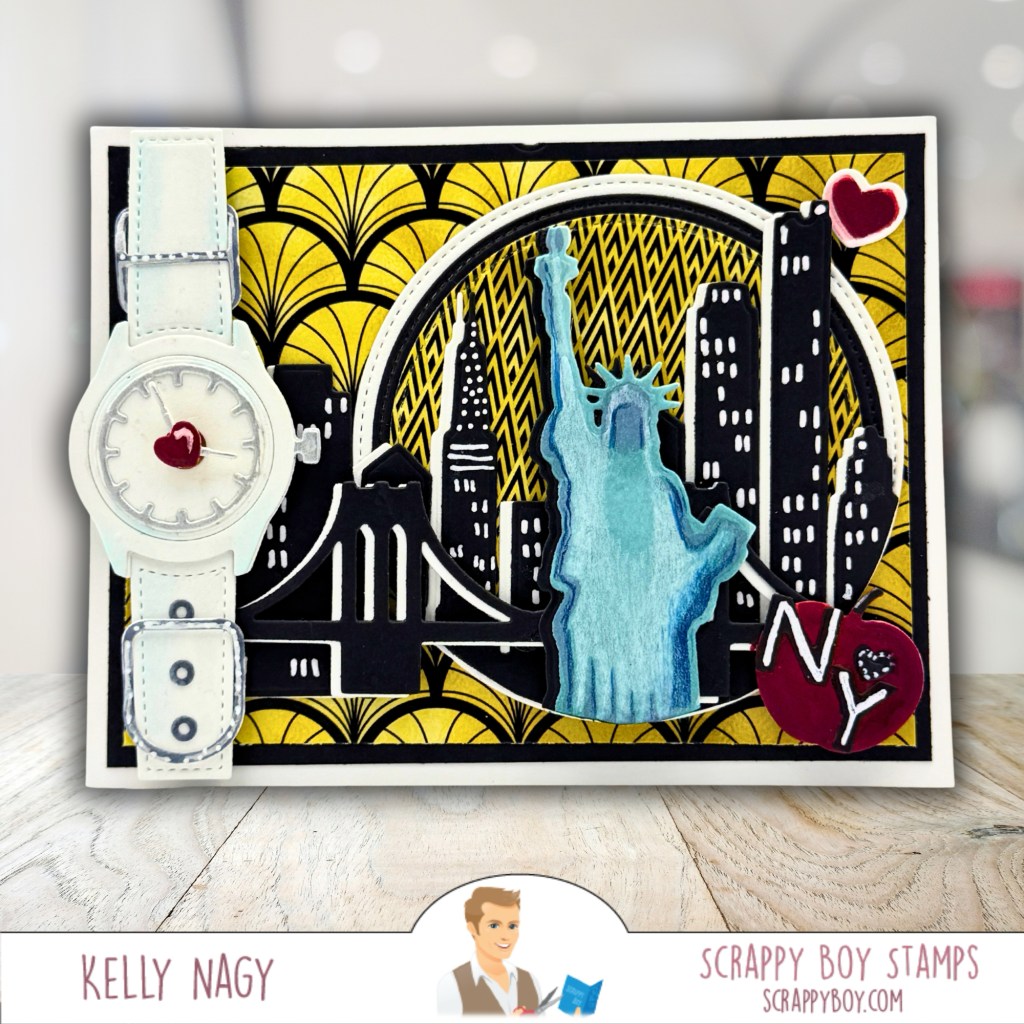
New York Minute ⌚🏙️

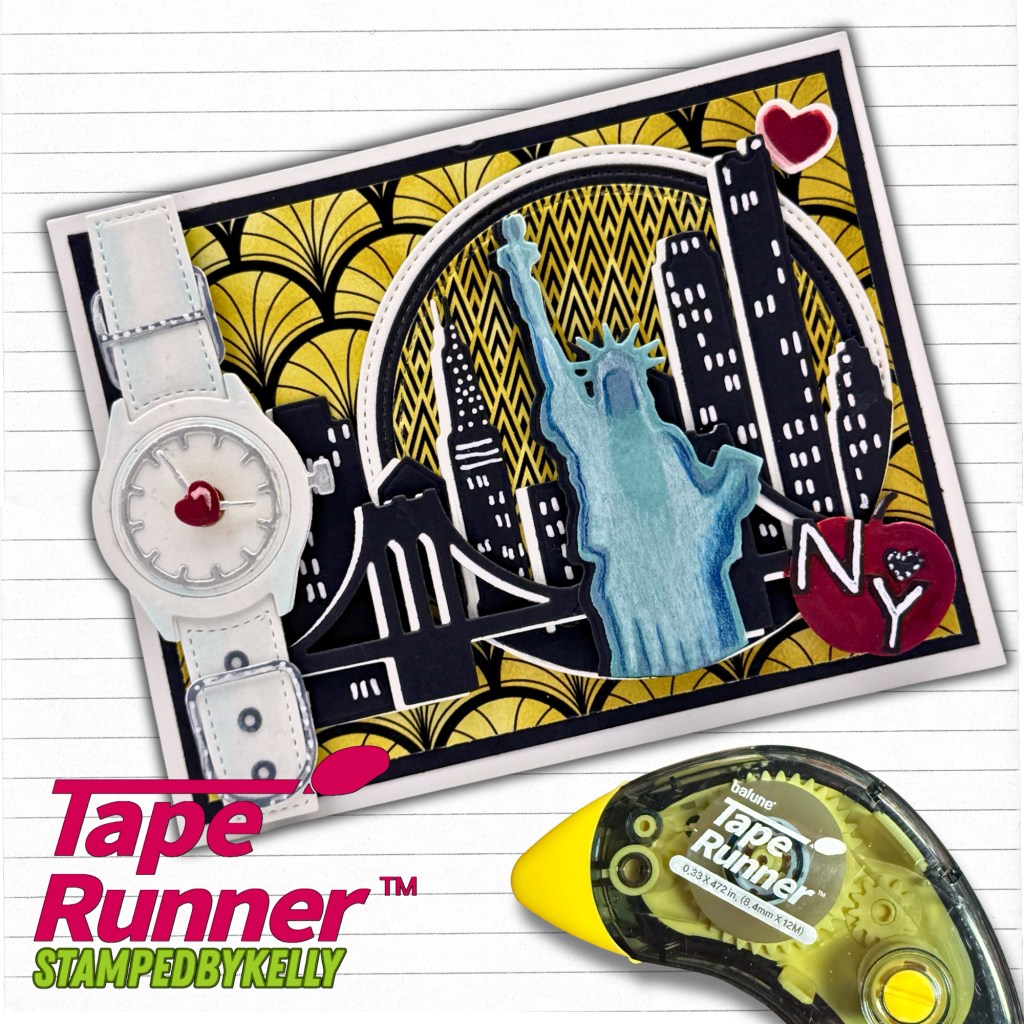
The new watch shaker die was a natural companion to Scrappy Boy’s NY Skyline Die Set, as we recognize the 25th Anniversary of 9/11 this year.

For this card, I paired Scrappy Boy’s new Shaker Watch Die with the New York skyline, their 1920’s Elegance bold patterned paper, stitched nested circle dies and a few bright accents.

I used a Spinner from my stash to make the arms on the watch-face rotate.

Products used:

Clocking In 🖥️

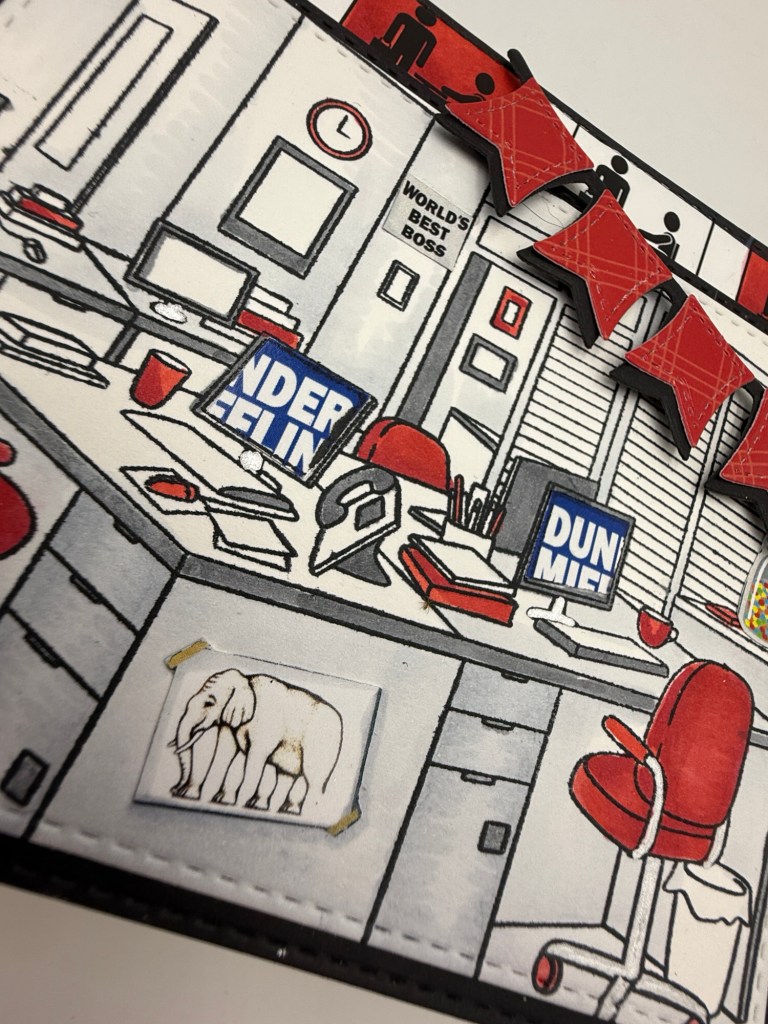
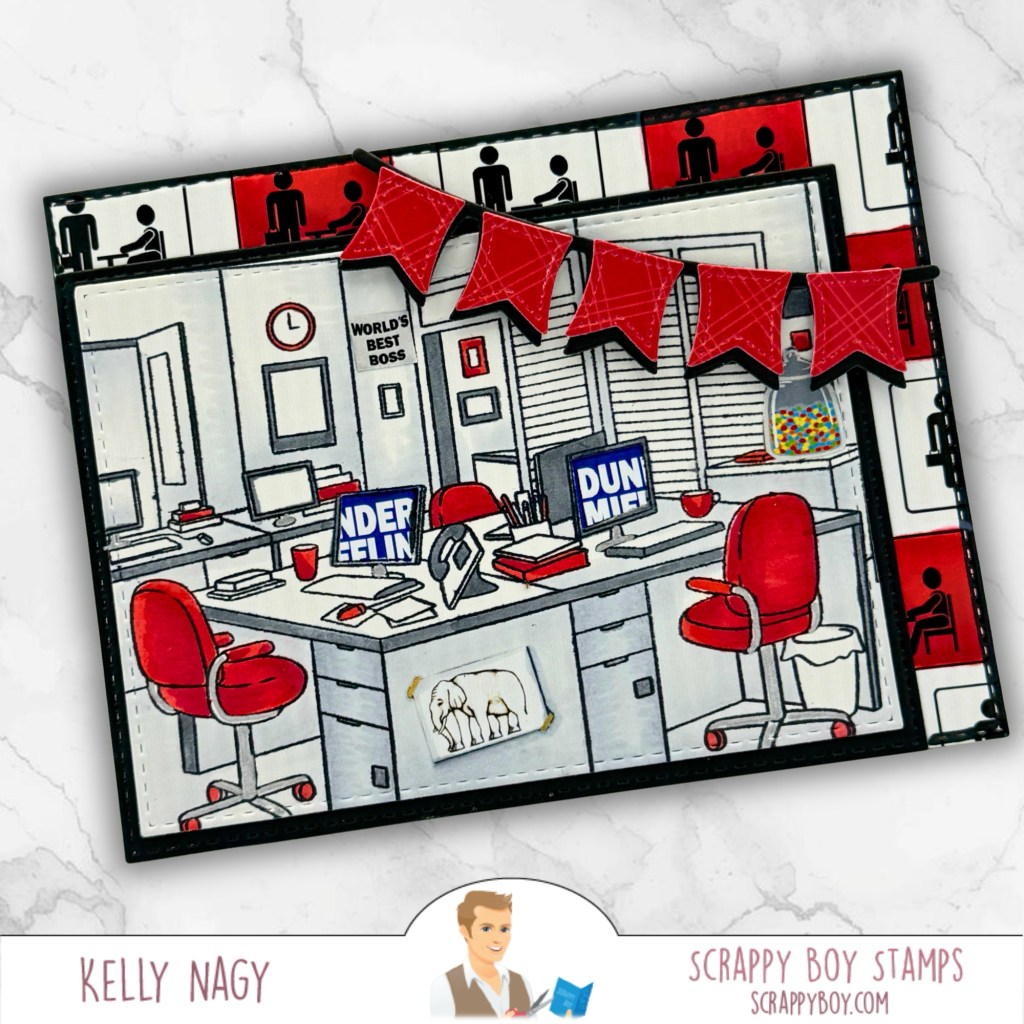
The workplace background stamp sets the scene for an office full of familiar little details. I kept the red, black, and white palette running through the whole card, from the chairs to the banner. I used elements from the coordinating paper pack to add visual interest and tie the stamp-set together.

Products used:

Copic color combinations:

  • Chairs and red details: R35, R37, R39
  • Desks and office details: BV20, BV23, N0, N2, N5
  • Stamp and Cut from Professionally Unhinged Patterned Paper

Coworkers Galore 🎂

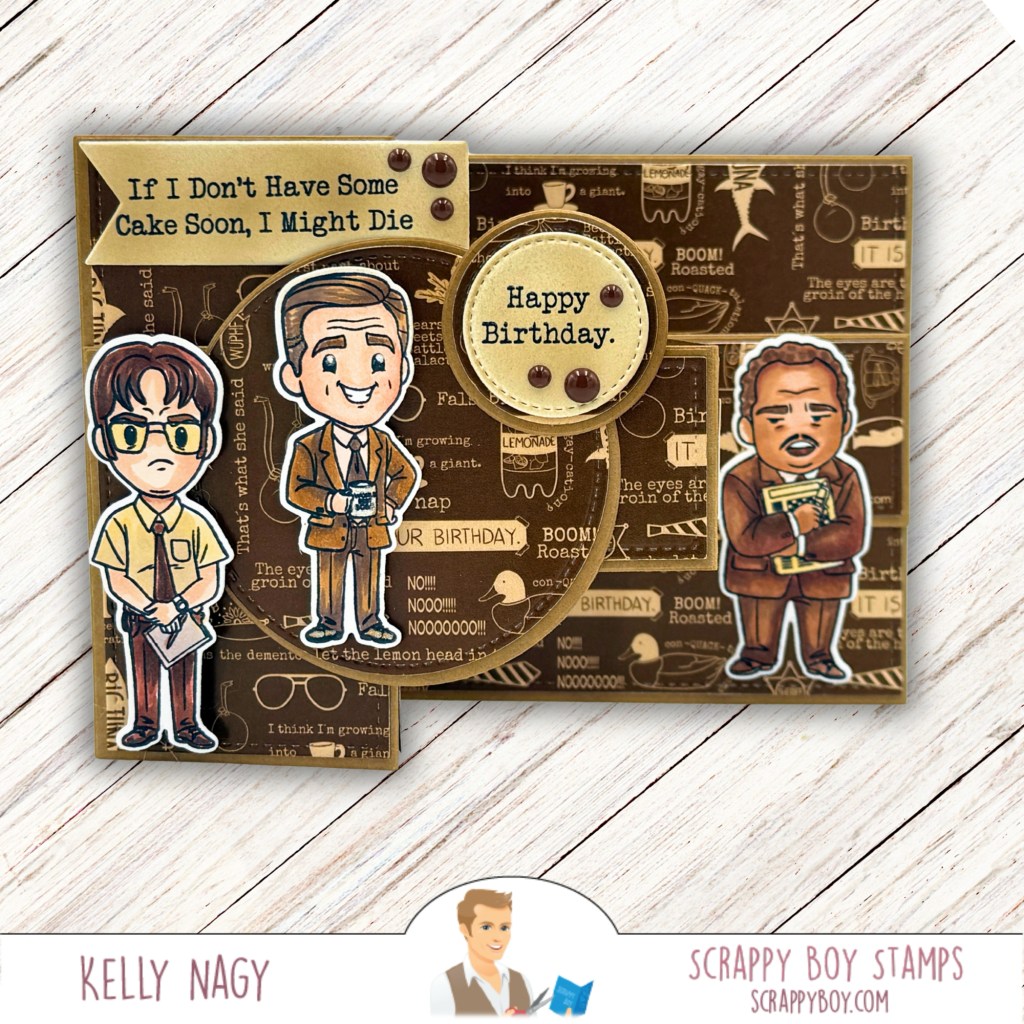
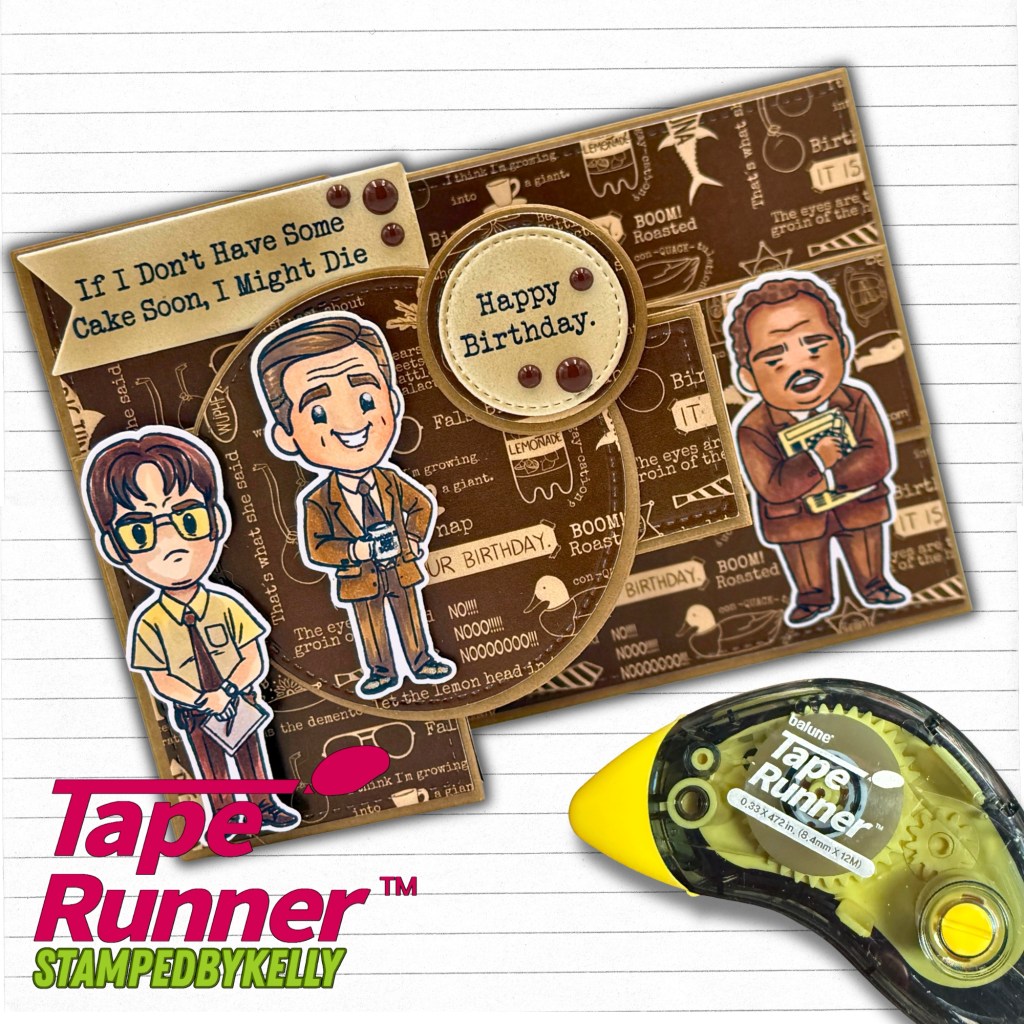
And what would an office release be without the coworkers? I brought a few of them together for a birthday card with plenty of personality—and a very relatable request for cake!

Products used:

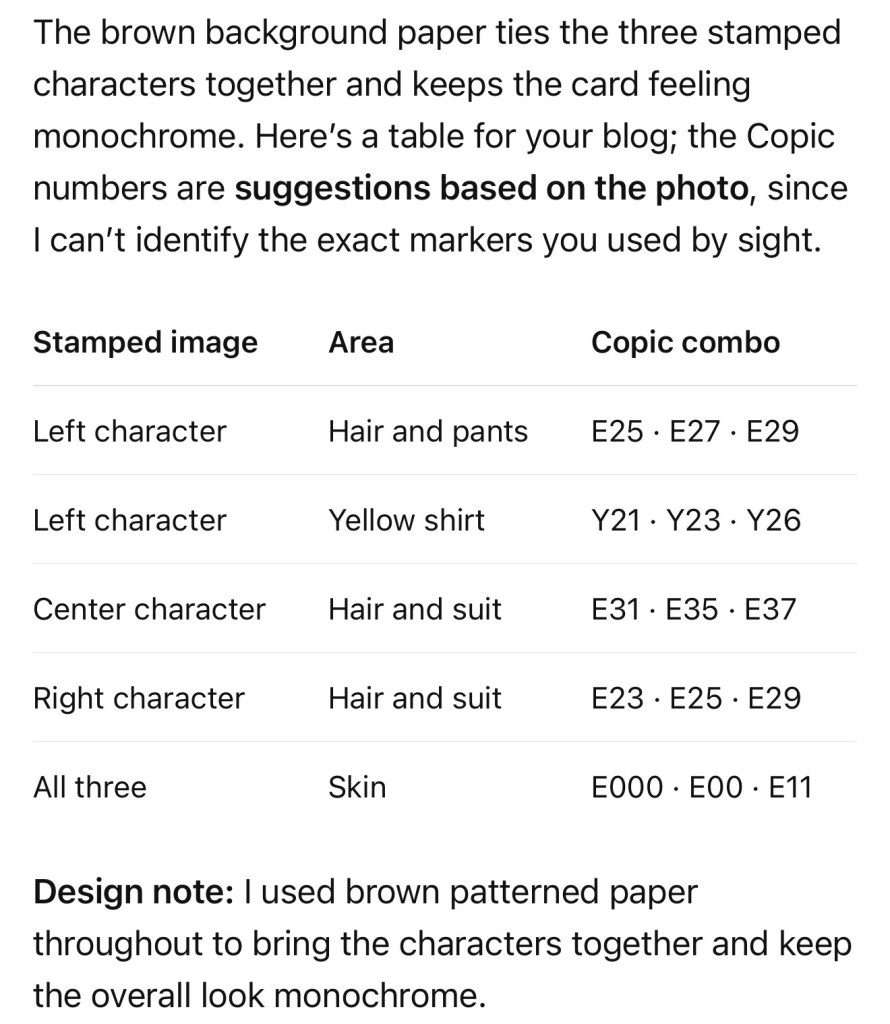
Copic color combinations:

That’s what I love about a Scrappy Boy release: one product can spark an idea for another. The bunny’s clock led me to the watch, and the workplace scene led me straight to the coworkers. Which of these four projects is your favorite?

You can find the new release at ScrappyBoy.com.

Find great dry adhesive options in a variety of colors, sizes and shapes at TapeRunner.com. Use PROMO CODE KELLY10 for 10% OFF at TapeRunner.com

Happy crafting!
Kelly

Spooky Cute with the Scrappy Boy Stamps August Release! 🦇🎃

Get spooky cute with the Scrappy Boy Stamps August Release! I’m mixing stamps, dies, paper and a little unexpected inspiration to create Halloween projects filled with dimension, personality and fun—including a special treat box made for my grandson and one of our favorite Halloween traditions. 🎃🦇✨

If you know me, you know I LOVE finding unexpected ways to use my crafty supplies! Sometimes a stamp or die may have been designed with one idea in mind, but I immediately start thinking, “What else can I turn this into?” And living in Central Florida, it probably comes as no surprise that a little theme park inspiration frequently sneaks into my craft room!

For these projects, I pulled out some of the spooky-cute goodies from the Scrappy Boy Stamps August Release and gave them my own magical Halloween twist.

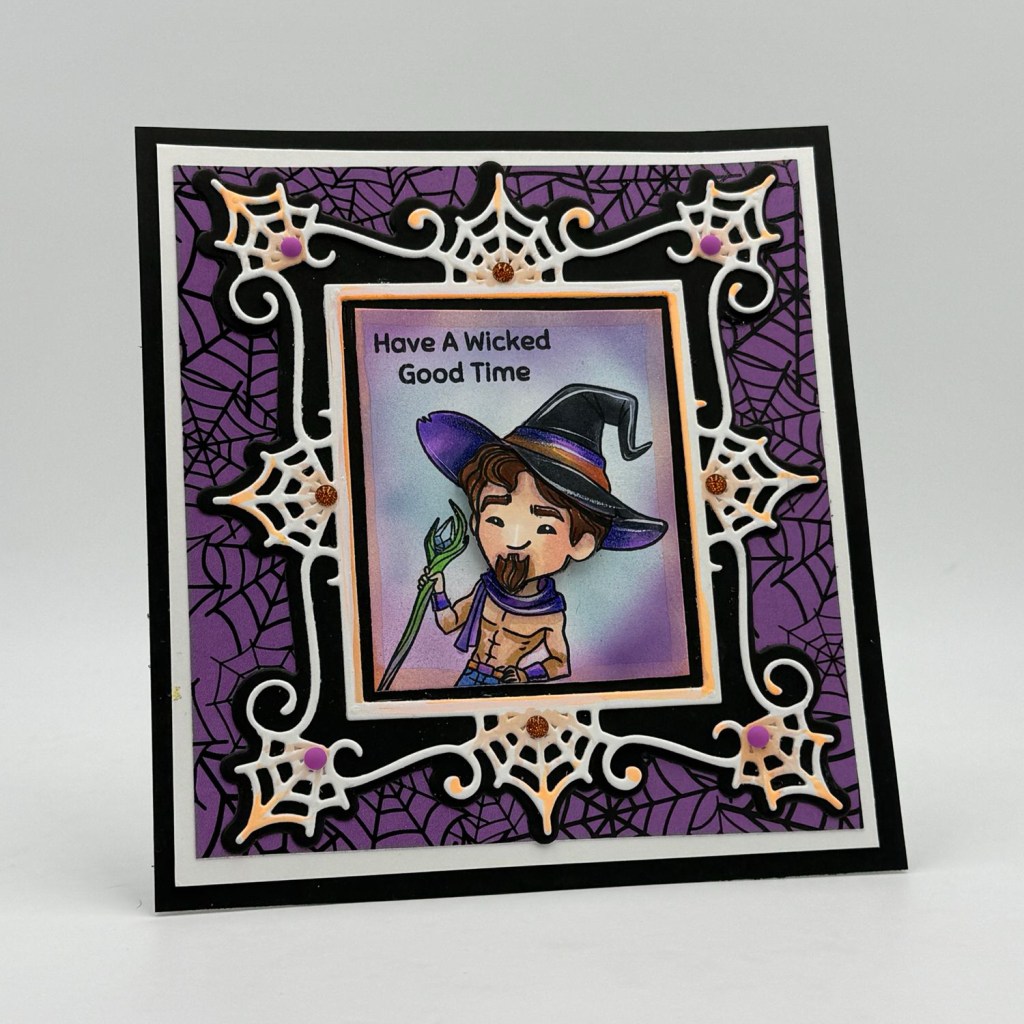
“Have a Wicked Good Time” Gothic Picture Frame card

The Gothic Picture Frame Die was perfect for framing one of the adorable images from Hex Appeal. I kept the traditional Halloween palette of purple, black, orange and white, adding little pops of sparkle to the spiderweb details. I love how the oversized frame makes the stamped image feel like a spooky portrait hanging inside a haunted mansion.

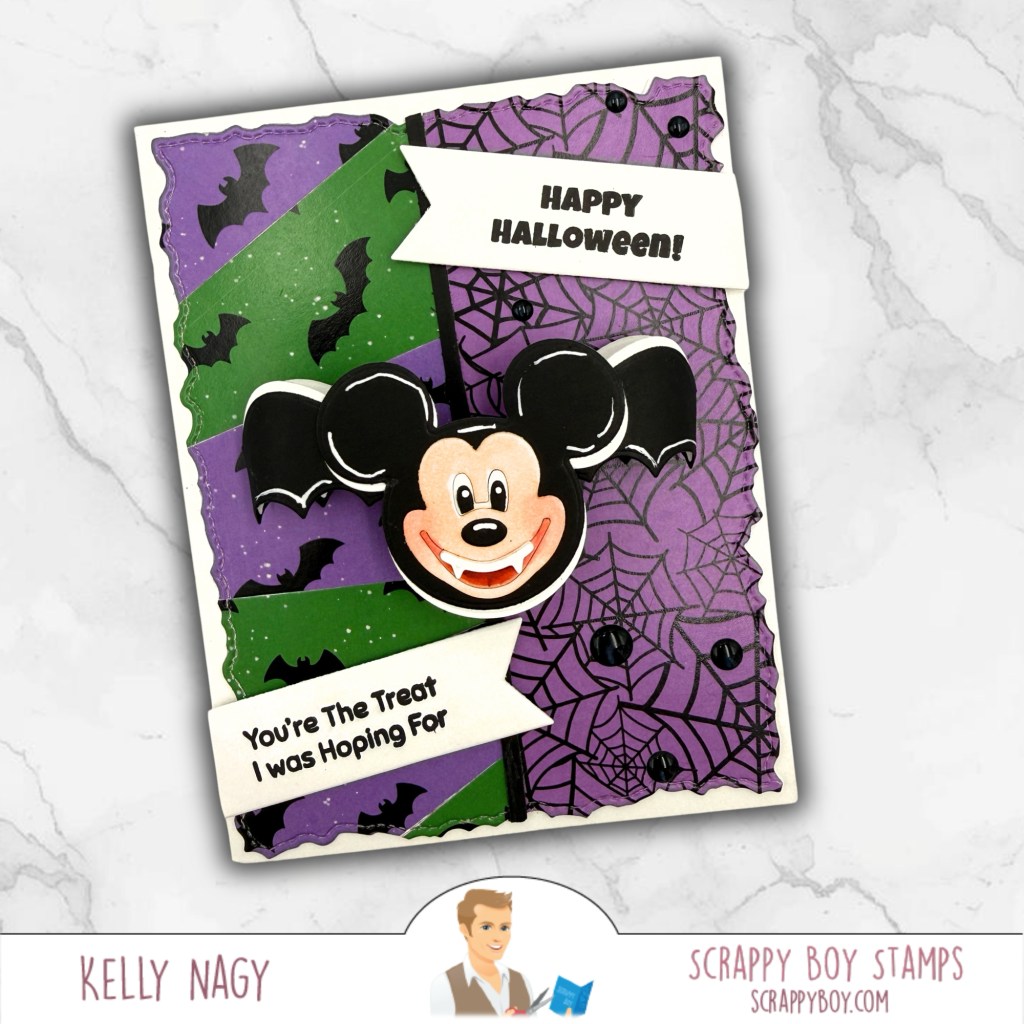
Mouse Bat card — “You’re the Treat I Was Hoping For

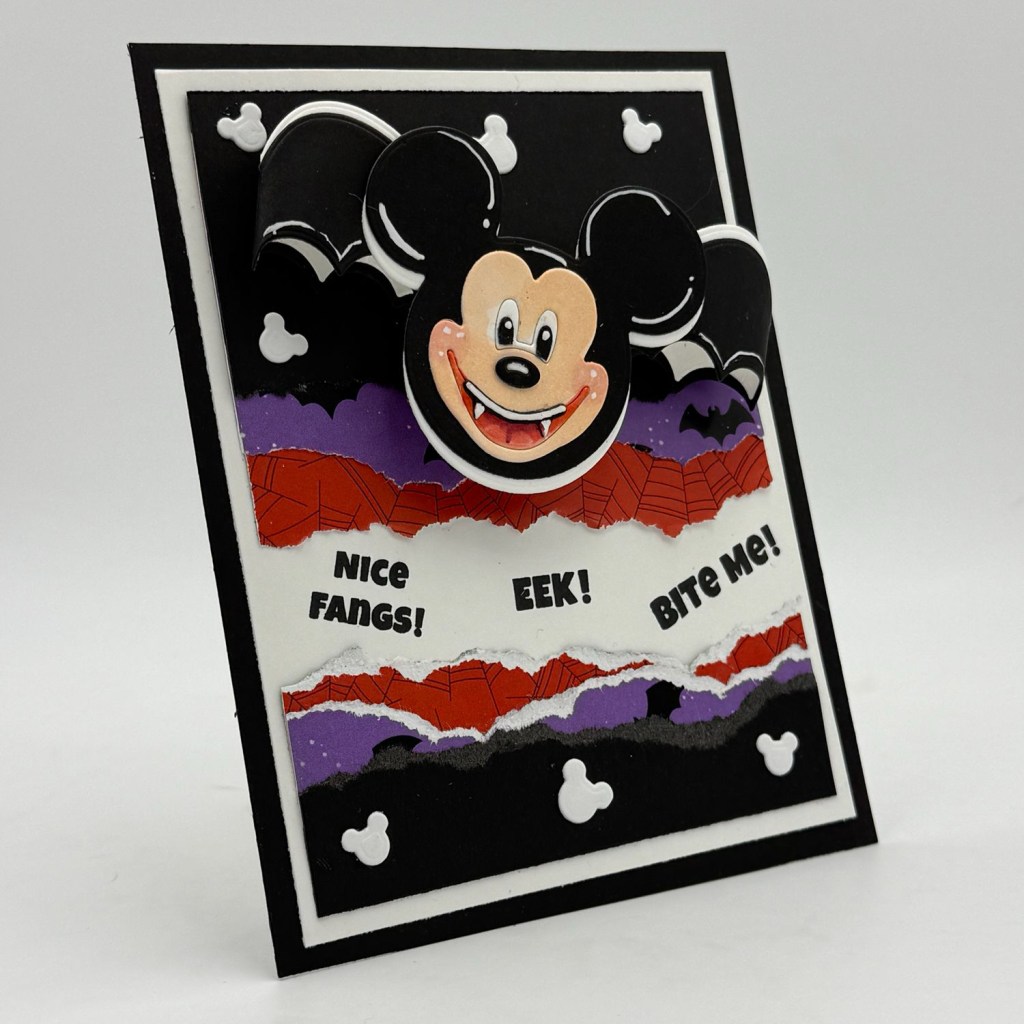
Then came those Mouse Bat Embellishment Dies! These were just begging for some theme park-inspired fun. I played with layers, patterned papers, torn edges and white gel-pen accents to create two completely different Halloween cards.

Mouse Bat card — “Nice Fangs! Eek! Bite Me!”

The dimensional bat ears make such a fun focal point, especially when paired with those classic Halloween colors. I especially love how differently the same basic die can look simply by changing the background, composition and embellishments.

And I couldn’t stop there!

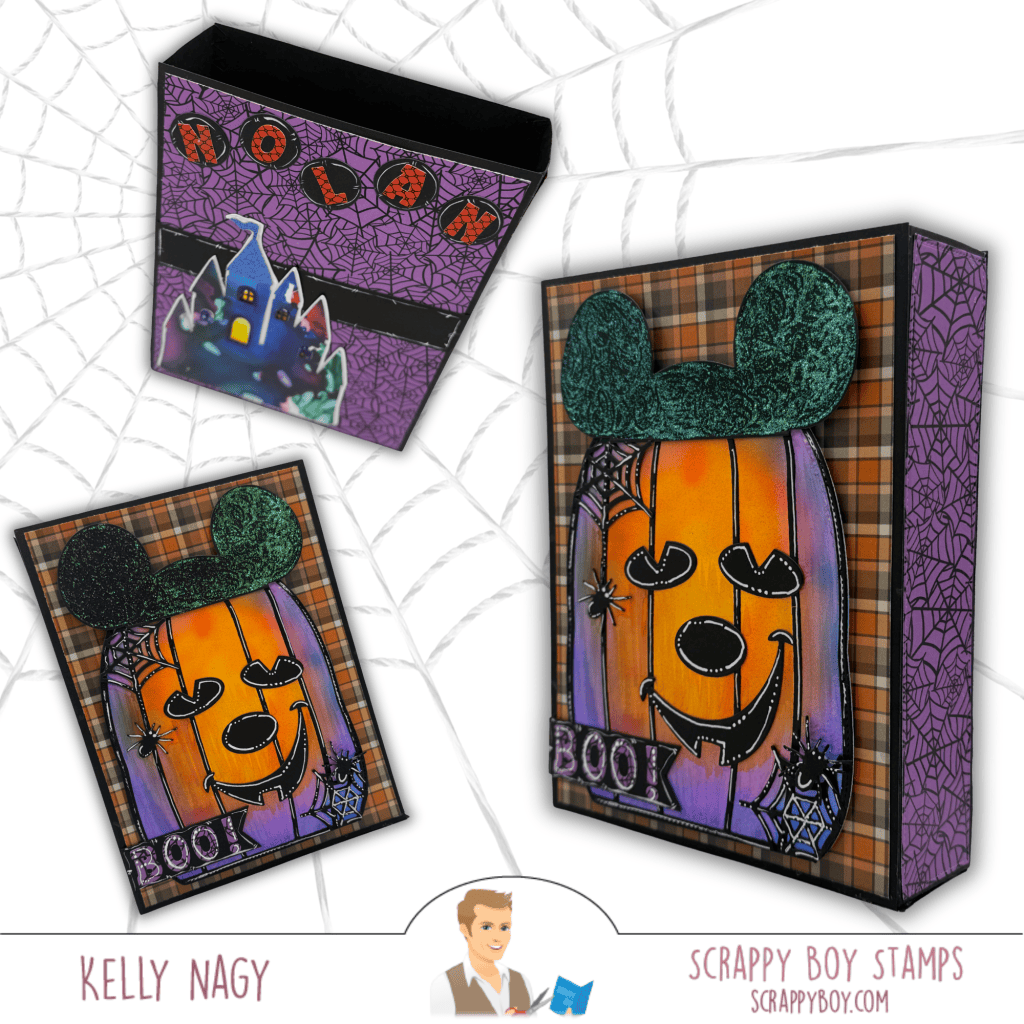
Full Pumpkin Mouse project showing both the card and dimensional folio/box

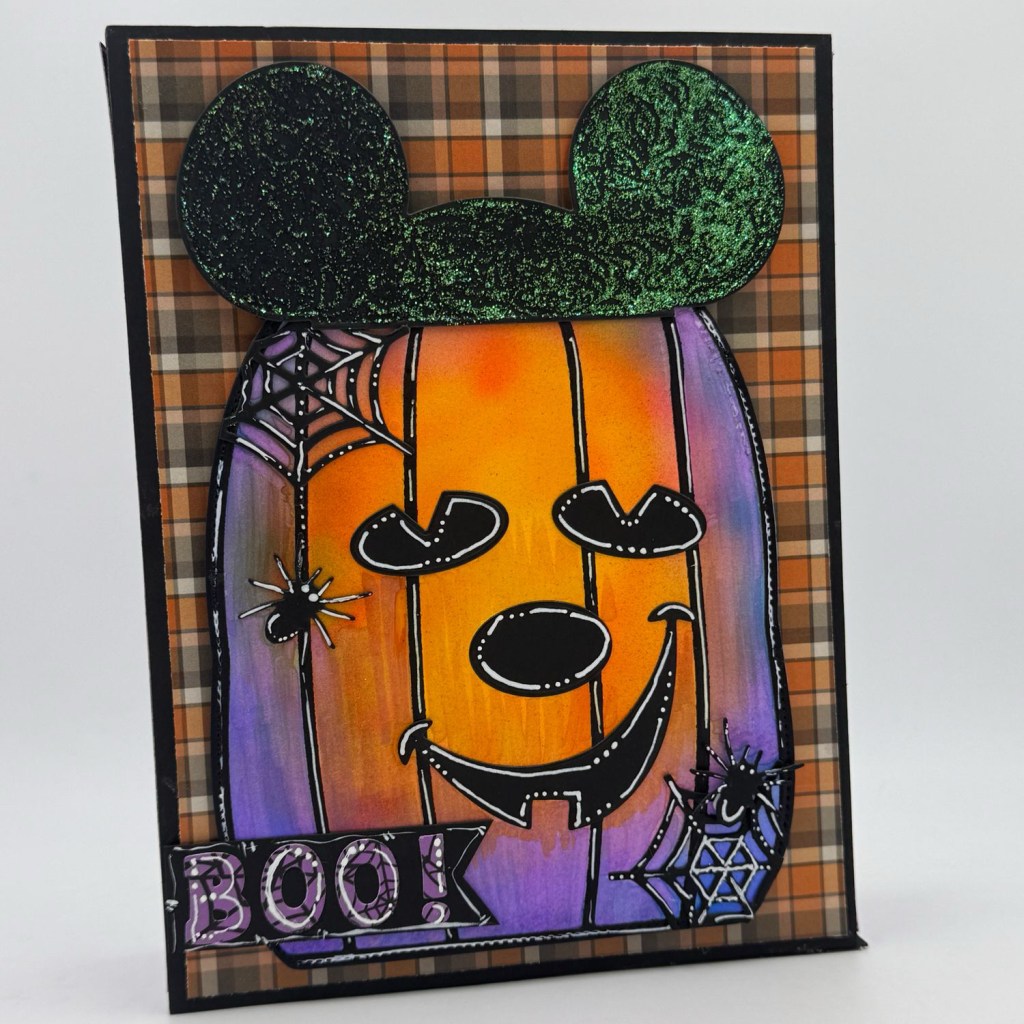
The Pumpkin Mouse Backpack Add-On became the star of one of my favorite projects. Instead of treating it simply as a backpack element, I transformed that big pumpkin into a dimensional Halloween centerpiece and paired it with plaid and spiderweb papers. A little tissue paper and some fun halloween treats and gift cards and you have a decorative, heartfelt gift and memory holder once emptied.

Close-up of Pumpkim

Lots of ink blending, deep shadows, white gel-pen highlights, lovingly put together with my hand-held adhesive from Tape Runner and a little shimmer helped bring all of those layers to life. The close-up really shows how much dimension and texture can be added to simple paper die cuts.

This treat box is especially close to my heart because I created it for our grandson, Nolan, as we prepare for our second annual visit to the Mouse’s Not-So-Scary Halloween Party at the theme park, a tradition that combines celebrating his birthday with officially kicking off the Halloween season here in Central Florida!

I personalized the back with his name and even pulled in the castle die from a previous Scrappy Boy Stamps release, which was the perfect way to add another little touch of magic. I love mixing pieces from different releases and finding completely new ways to use them, but even more, I love knowing that this project will become part of another special memory with our grandson. 🎃🏰🧡

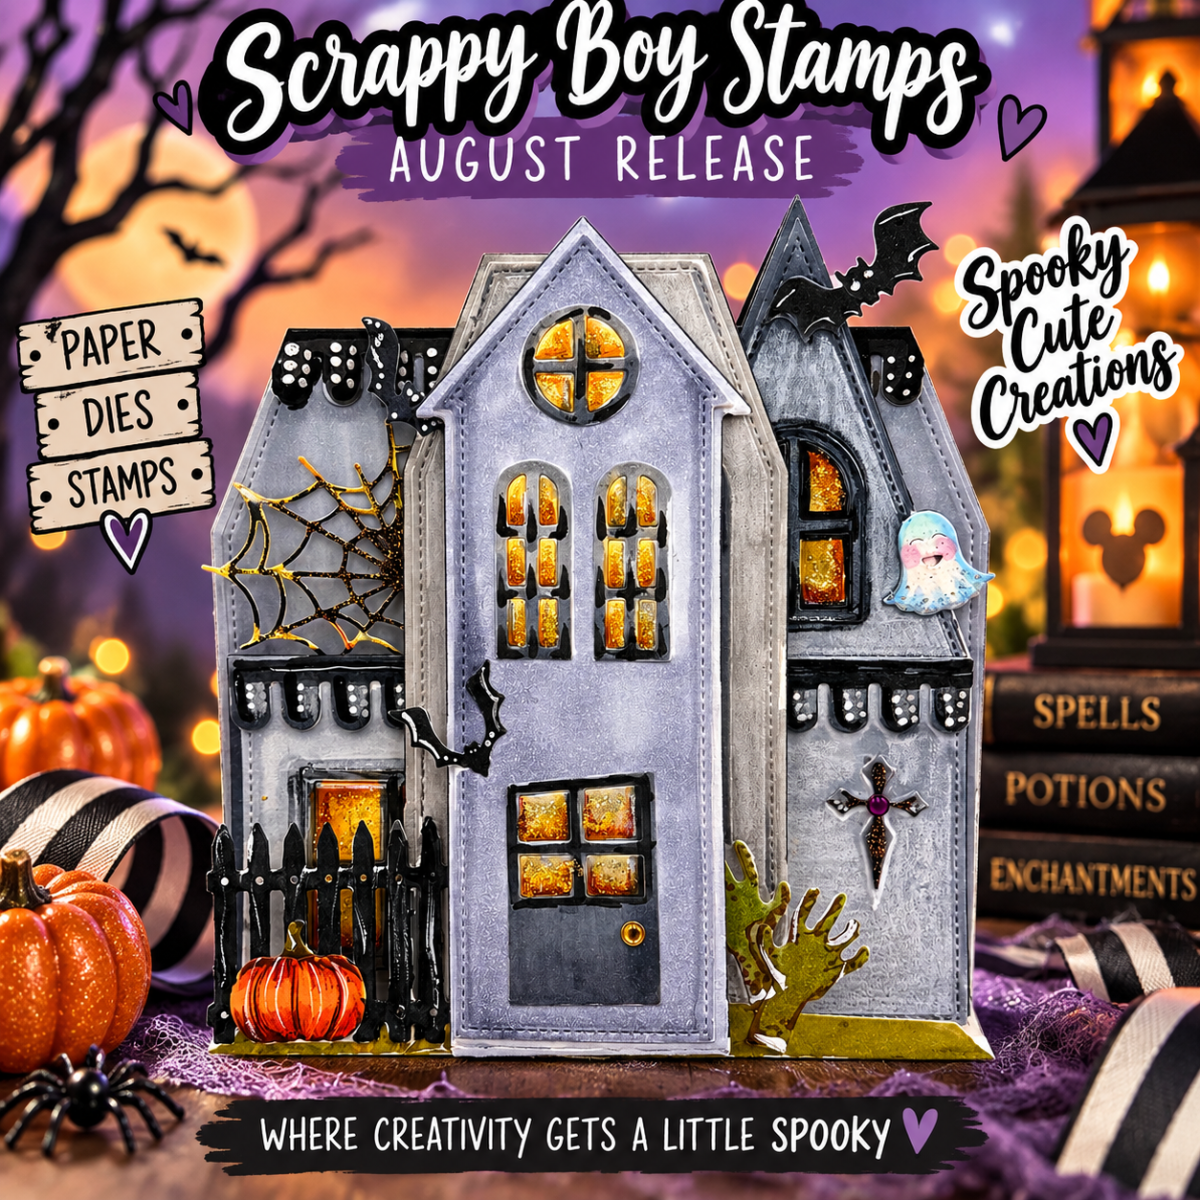
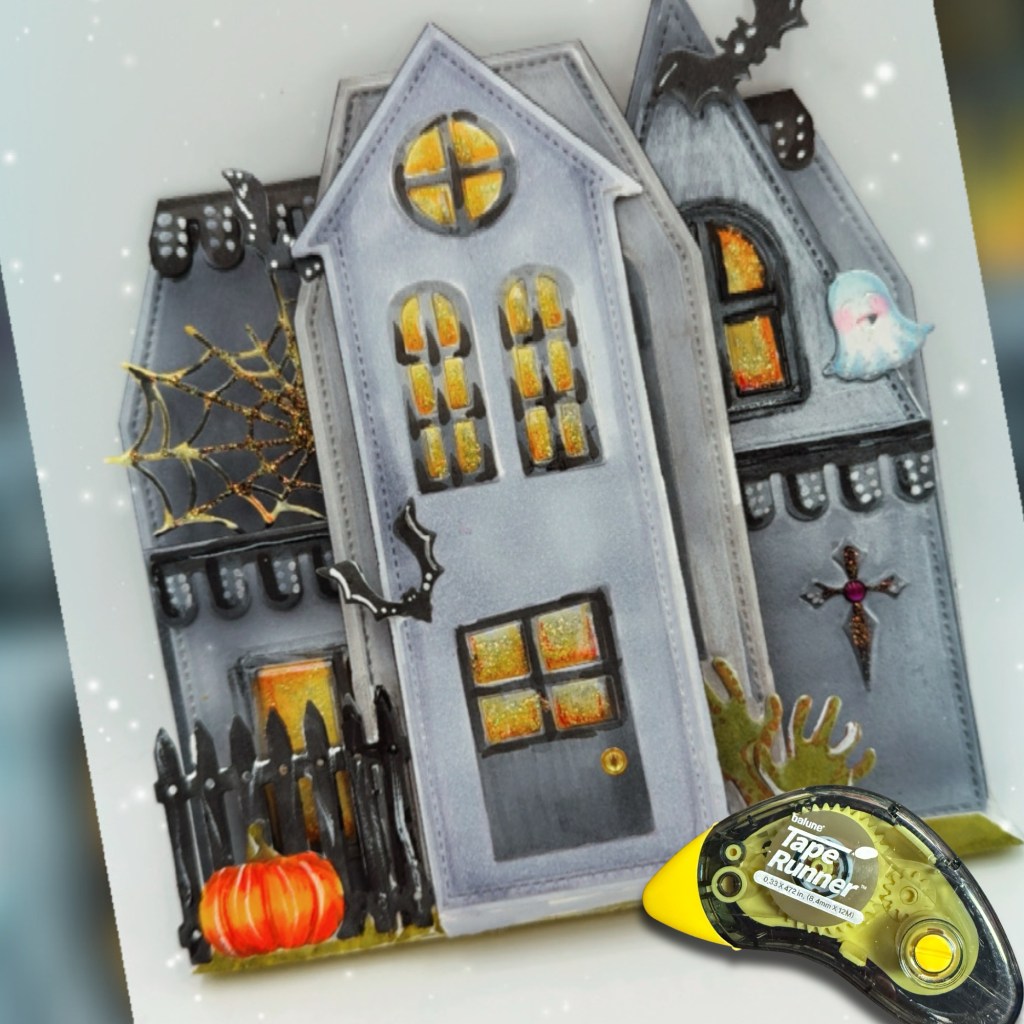
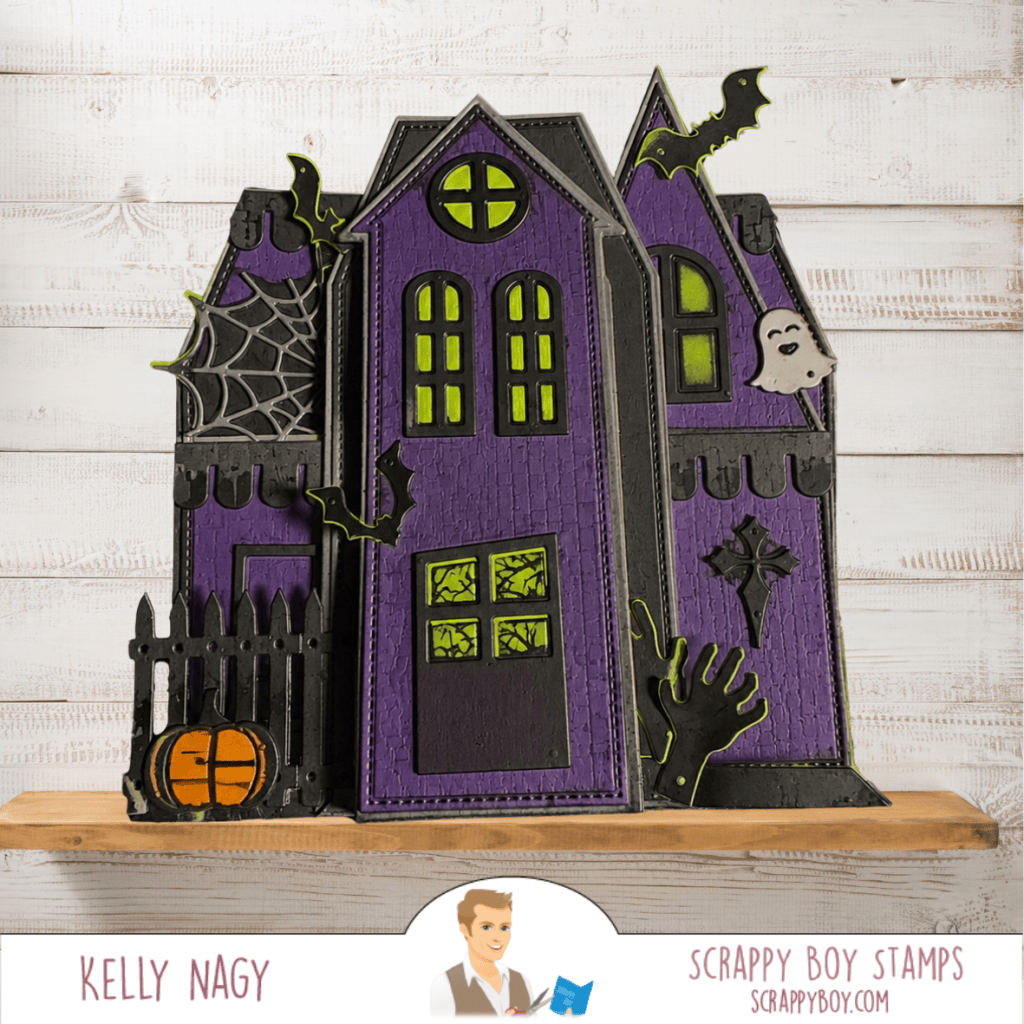
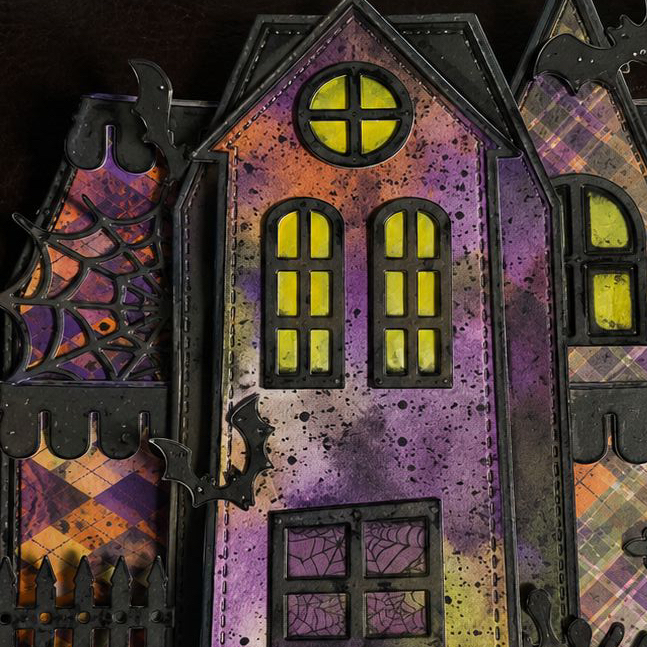
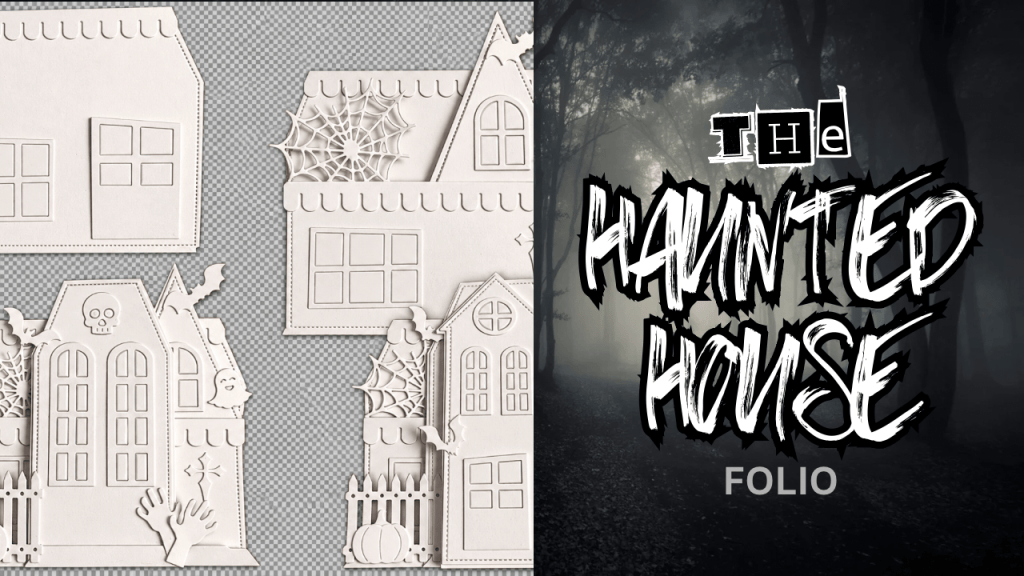
Finally, I had to play with the Haunted House Folio. I went for an eerie-but-cute abandoned mansion look with weathered grays, soft lavender, glowing golden windows, bats, spiderwebs, a pumpkin and even a creepy little hand reaching up from below. It was easy to position and adhere the smaller pieces with my hand-held Tape Runner. This project has so many tiny details to discover!

That’s probably my favorite part about crafting: the dies give you the pieces, but your imagination gets to decide what they become.

I hope these projects inspire you to pull out your supplies and look at them a little differently. Mix collections. Change the intended theme. Add unexpected colors. Turn an embellishment into the focal point. Most importantly, have fun creating something that’s completely you.

Happy crafting — and stay spooky! 🦇🎃✨

👻 Haunted House Folio Die | Scrappy Boy Stamps

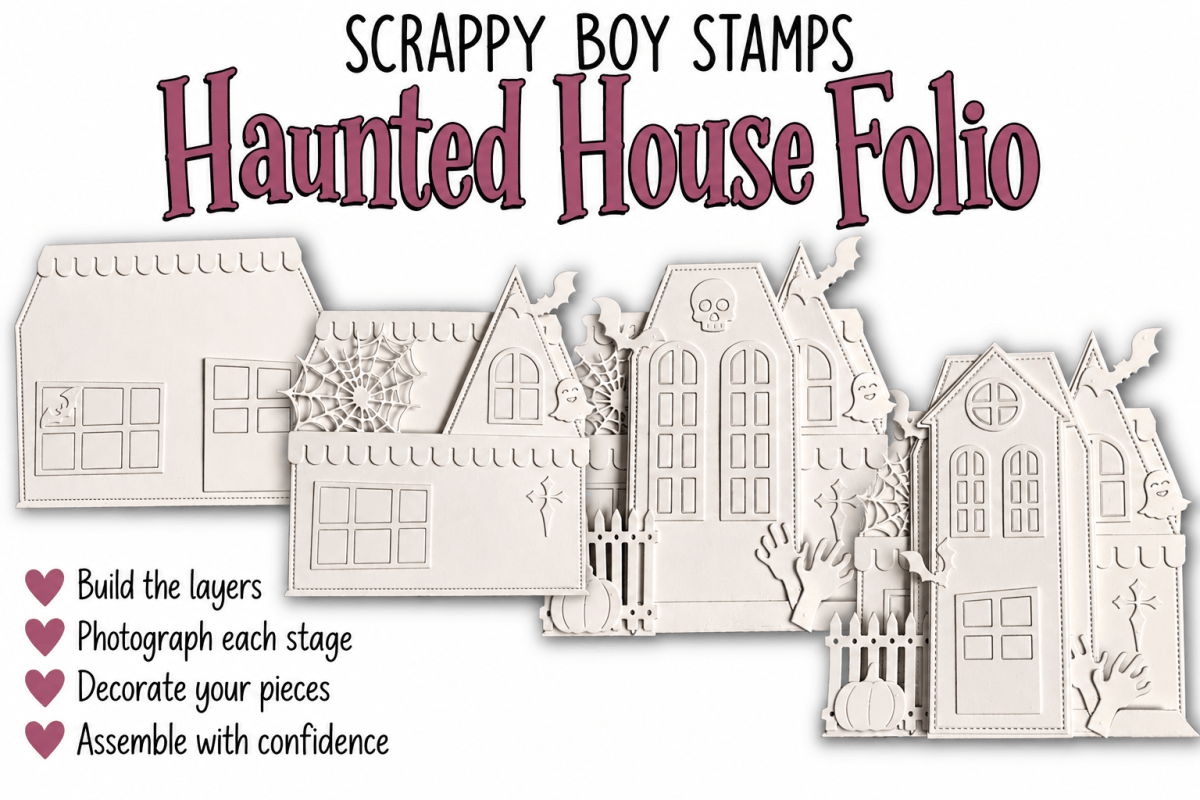
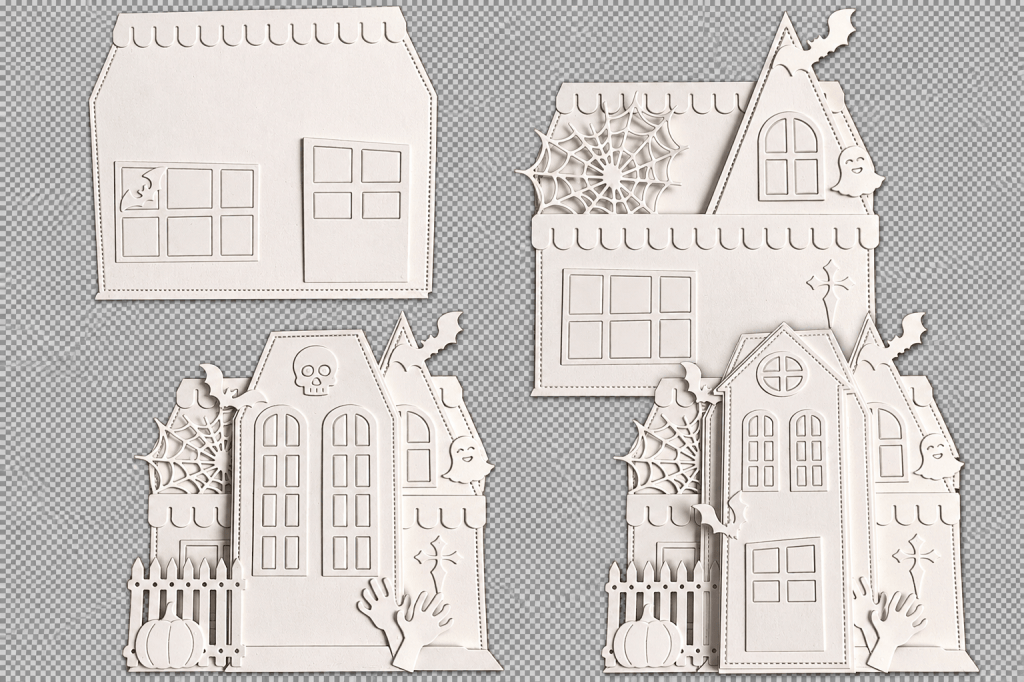
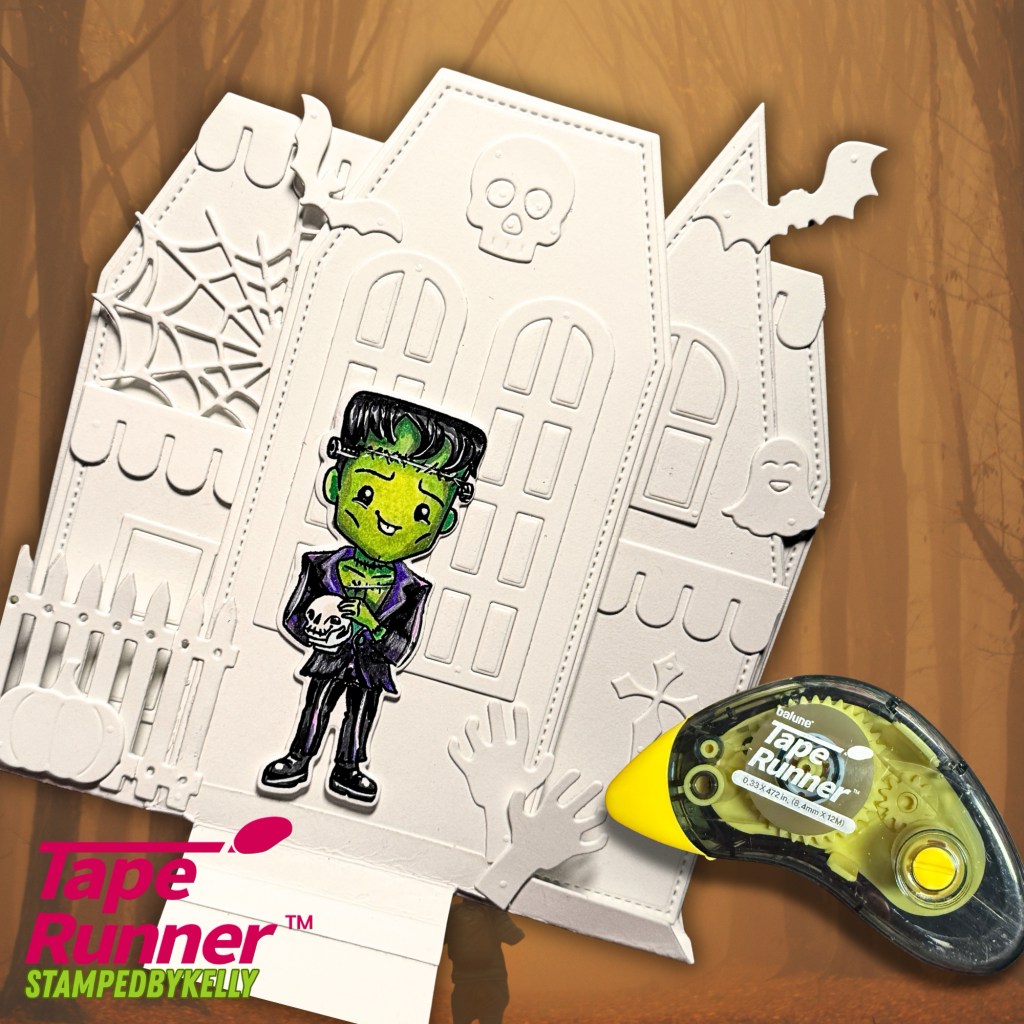
See how the Scrappy Boy Stamps Haunted House Folio Die comes together layer by layer! I first build the entire haunted house in white cardstock and photograph each stage as a reference. Then I can take it apart, add all the spooky color and details, and assemble everything using my favorite TapeRunner.com handheld adhesive tape runners. Use code KELLY10 to save 10%.

There’s something spooky happening at Stamped by Kelly! 🦇🏚️

Today I’m featuring the Haunted House Folio Die from the August Release from Scrappy Boy Stamps, and this one was SO much fun to create!

I love a die set that gives you plenty of room to make it your own, and this haunted house definitely delivers. I created two completely different looks to show just how versatile it can be.

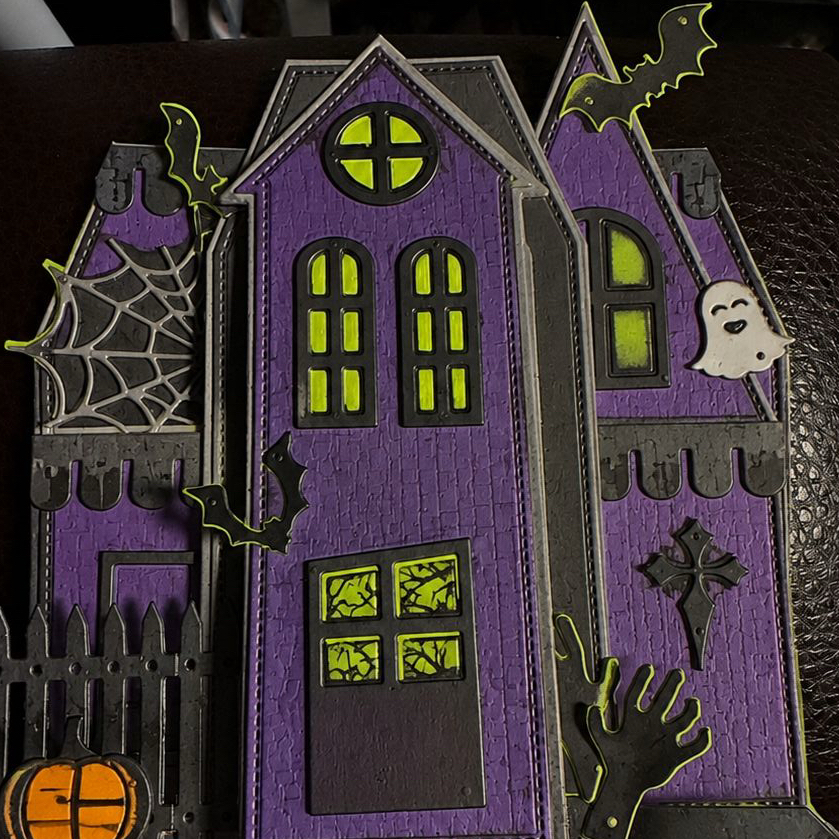
For my first version, I went with a classic Halloween palette of deep purple, black, gray and bright spooky green. I added texture to the house panels and layered all of those fabulous little details—the bats, spiderweb, ghost, creepy hand, fence, pumpkin and more. The bright green windows give it that perfect eerie glow!

For my second version, I decided to get a little messier! I used a combination of inks, splatters and coordinating patterned papers from the Hex Appeal bundle to create a distressed, grungy haunted-house feel. I love how the oranges, purples and blacks work together while the bright yellow-green windows really pop against the darker colors.

One die set—two totally different haunted houses! That is exactly what I love about dies like this. You can keep it clean and coordinated or pull out the inks, patterned papers and splatters and make it wonderfully creepy.

The Haunted House Folio Die is part of Scrappy Boy Stamps’ August release and is packed with details that make it perfect for Halloween cards, folios, albums, home décor and more.

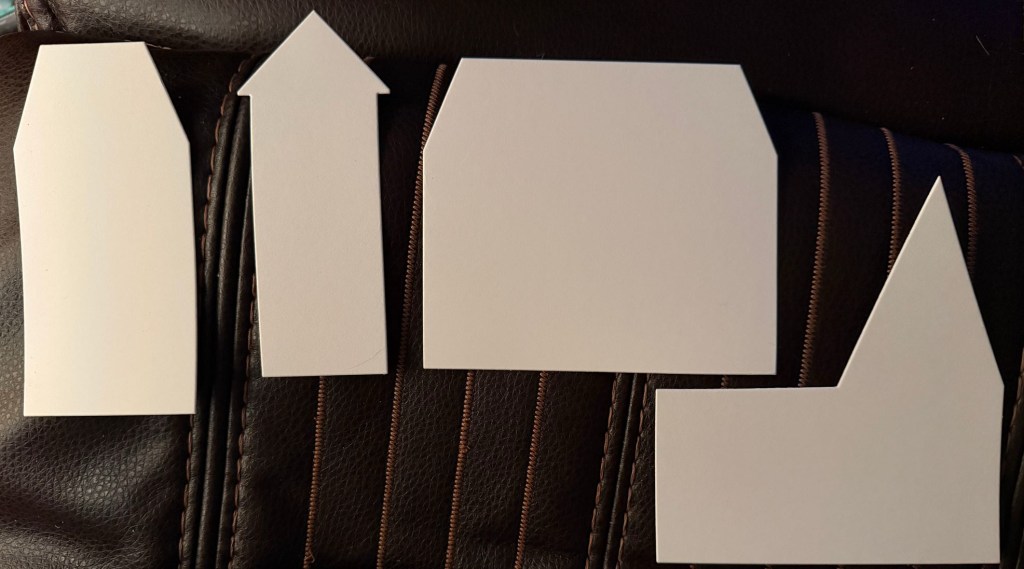
Started with 4 main layers.

Building the Haunted House Folio — Layer by Layer

Each layer builds upon the next to create this fun Haunted House Flipbook/Folio. Before adding color or patterned paper, I like to:

  • 🤍 Die-cut and assemble each layer in white cardstock to create a visual reference.
  • 📸 Photograph each stage so I can easily remember how all those little pieces fit together.
  • 🎨 Take everything back apart and decorate each panel individually with coloring, patterned papers, and embellishments.
  • 🏠 Reassemble and permanently adhere each layer using my favorite handheld adhesive tape runners from TapeRunner.com.

This little extra planning step makes decorating a detailed project so much easier—and I have my photos to reference when it’s time to put the whole haunted house back together!

SAVE 10%: Use promo code KELLY10 when shopping at TapeRunner.com.

Available at http://www.scrappyboy.com

You can find the new release and the Haunted House Folio Die at Scrappy Boy Stamps⁠.

Thanks so much for stopping by!

Happy Crafting!
Kelly
StampedbyKelly 🖤👻🦇

Going Batty with the New Scrappy Boy Stamps Halloween Release!

Create two colorful Halloween cards featuring the newest Scrappy Boy Stamps release—the Hex Appeal I Want It All Bundle, Spooky Bat Mouse Embellishment Die, Mouse Ears Alphabet & Numbers Dies and Gothic Picture Frame.

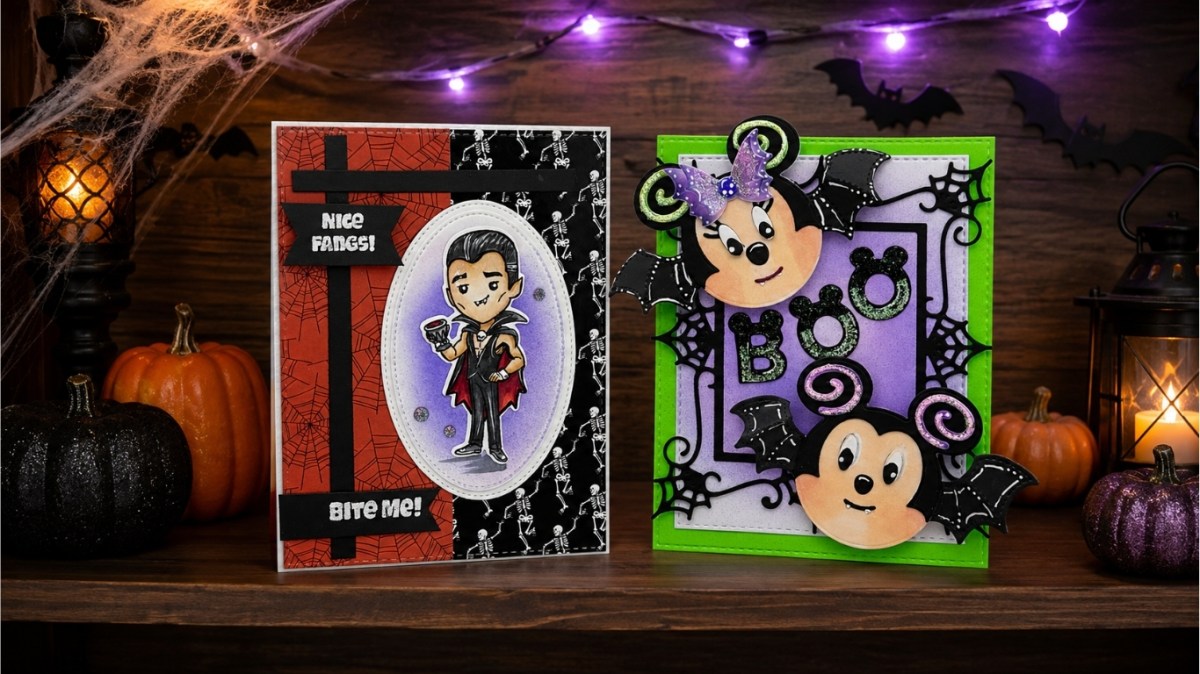
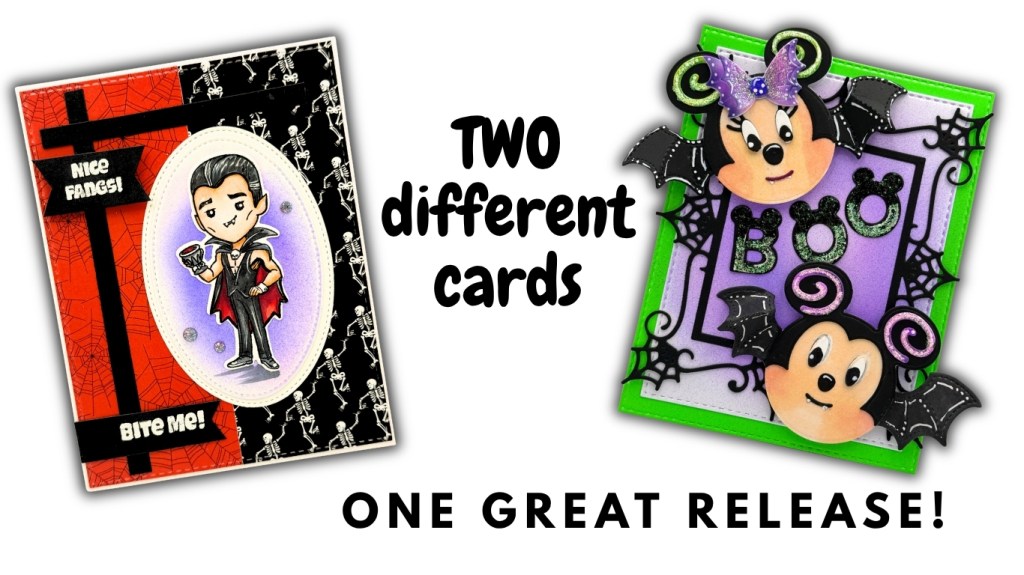
Halloween crafting is in full swing, and today I’m sharing two frightfully fun projects featuring the newest release from Scrappy Boy Stamps! From a charming vampire to the cutest little bat mice, these cards are filled with bright colors, playful details, and just the right amount of spooky sparkle.

Two Halloween cards featuring the newest release from Scrappy Boy Stamps

Hex Appeal August Sketch Challenge Card

My first project is squeaking in just in time for the final day of the Scrappy Boy Stamps August Sketch Challenge!

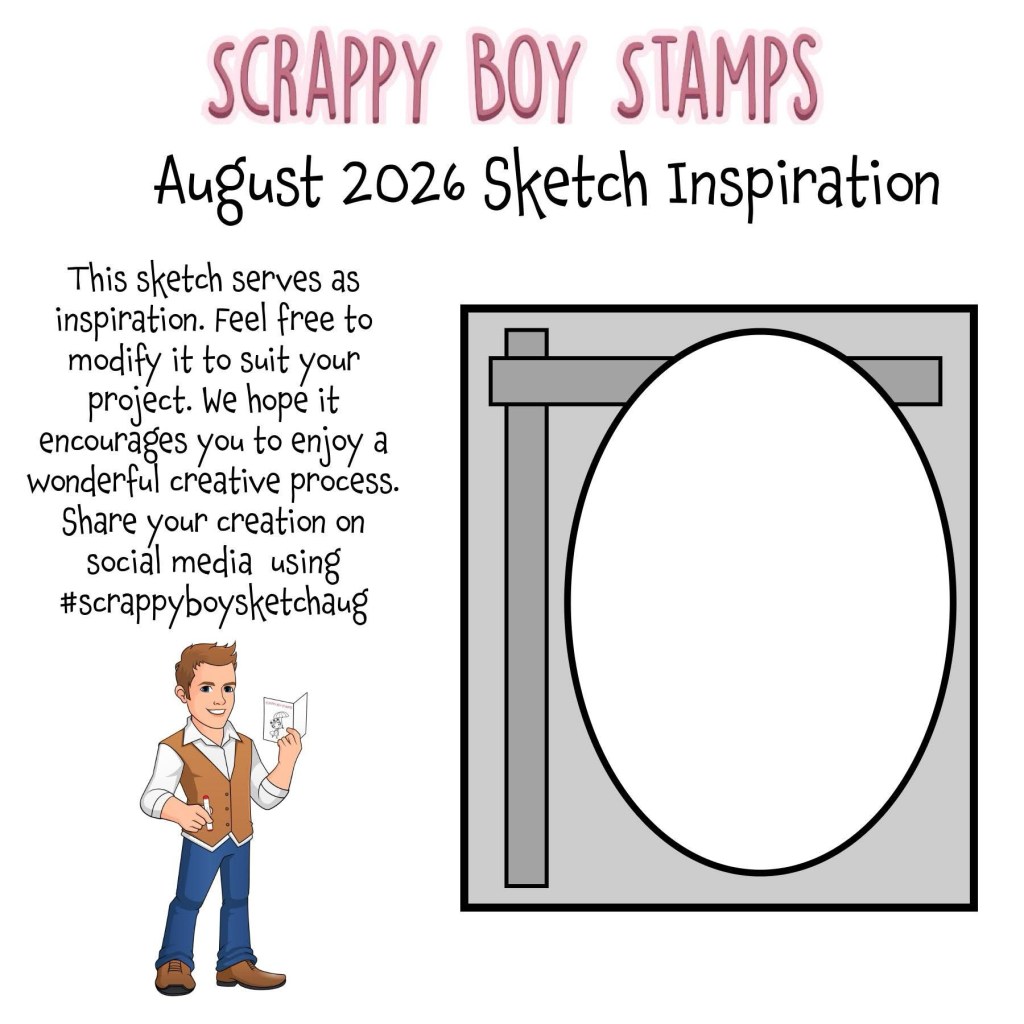
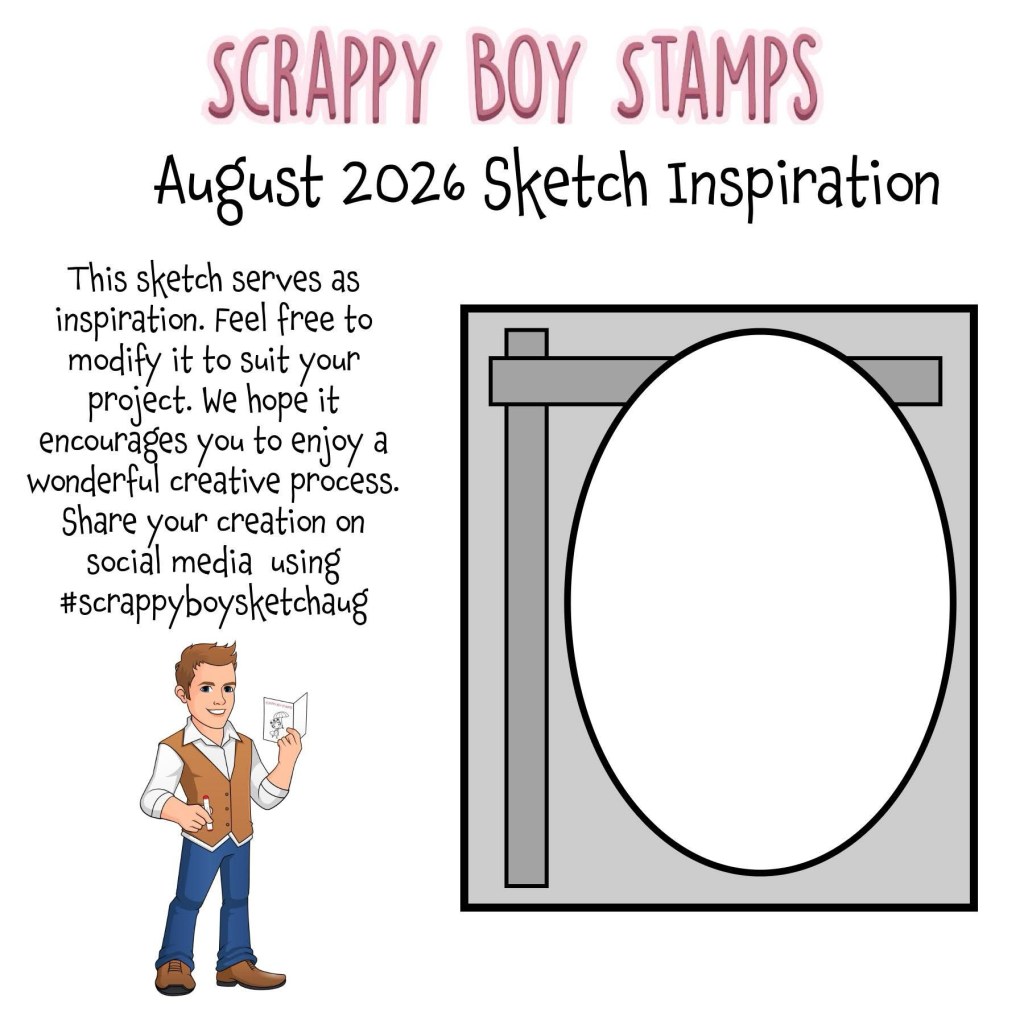
Scrappy Boy Stamps August 2026 Sketch Inspiration.

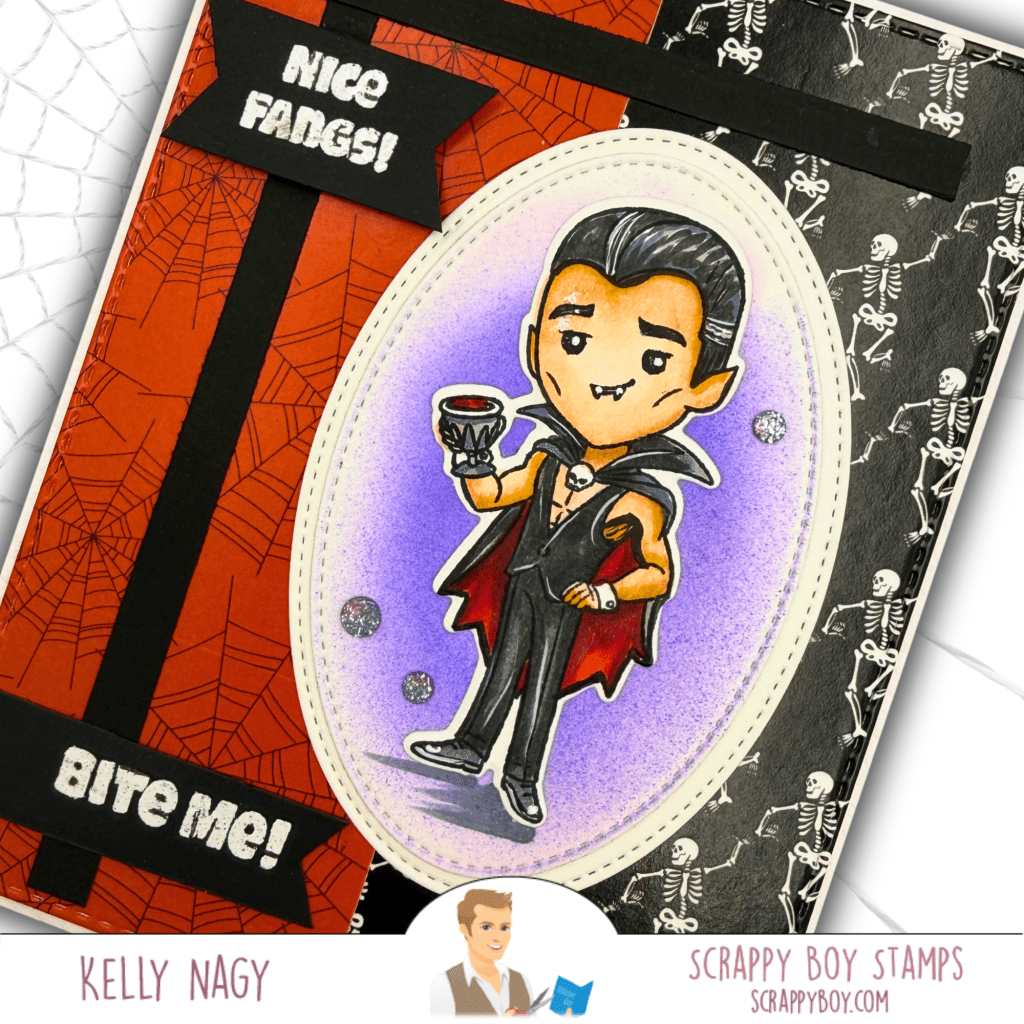
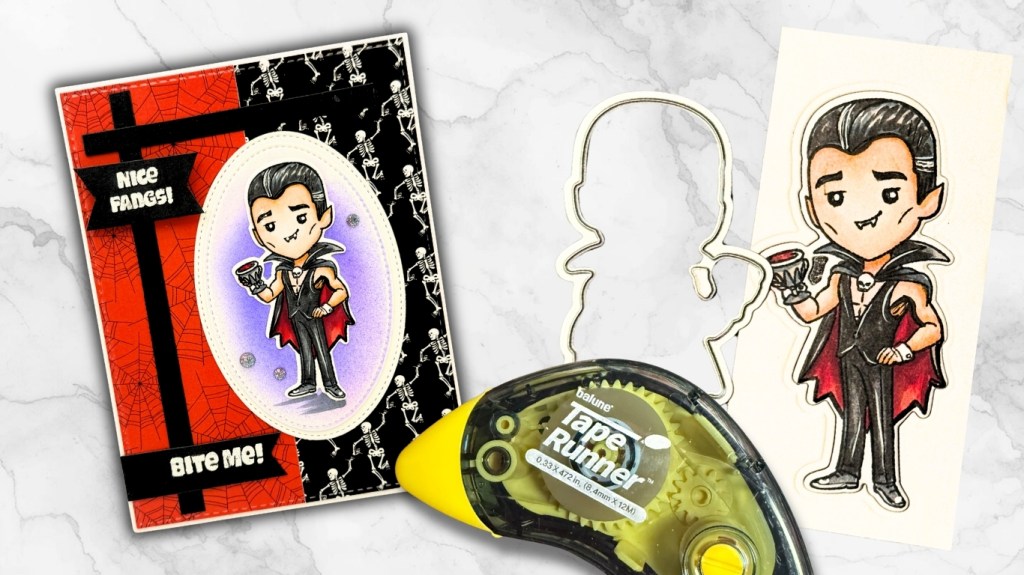
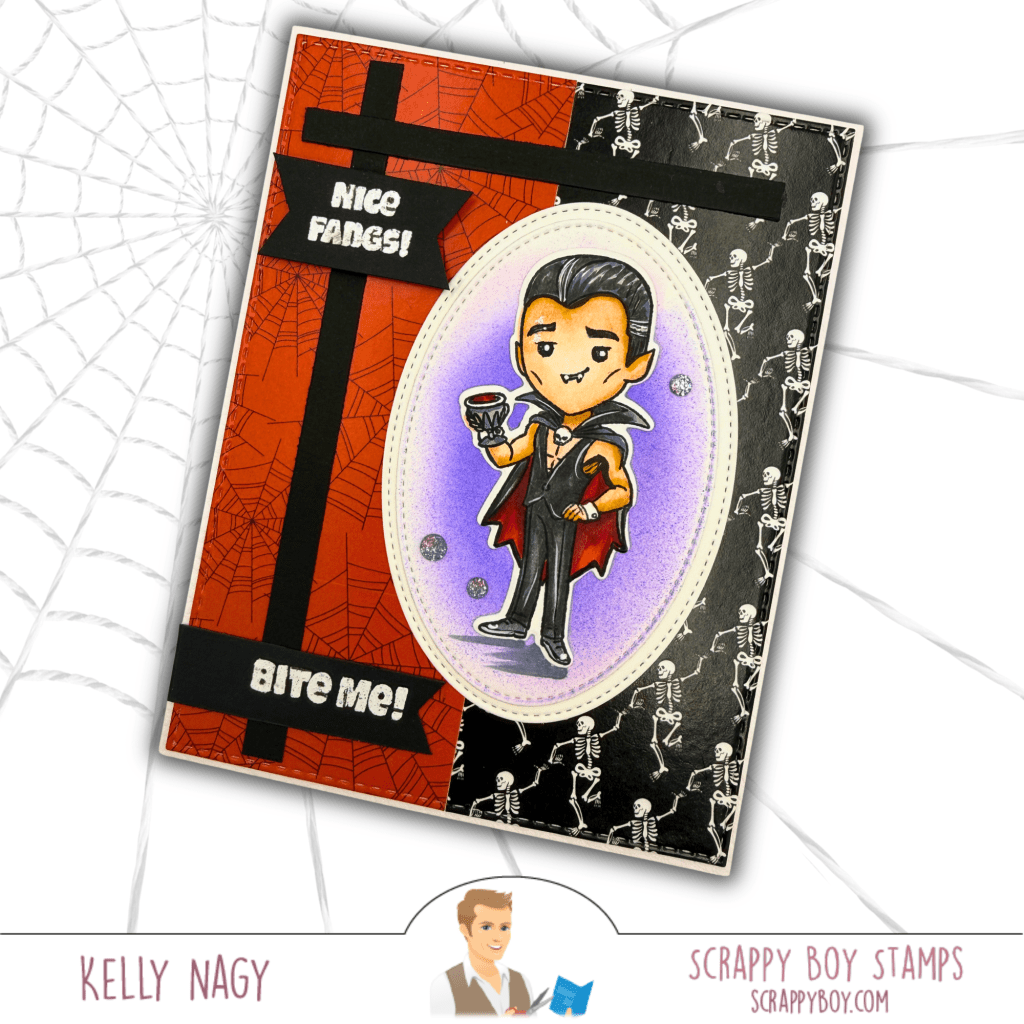
I used the Hex Appeal I Want It All Bundle to create this handsome little vampire card. The August sketch inspired the bold layout, including the vertical and horizontal cardstock strips and the large oval focal point.

The orange spiderweb paper and black skeleton pattern create a classic Halloween color combination, while the softly colored purple background helps the vampire stand out. The heat-embossed “Nice Fangs!” and “Bite Me!” sentiments add a playful finishing touch.

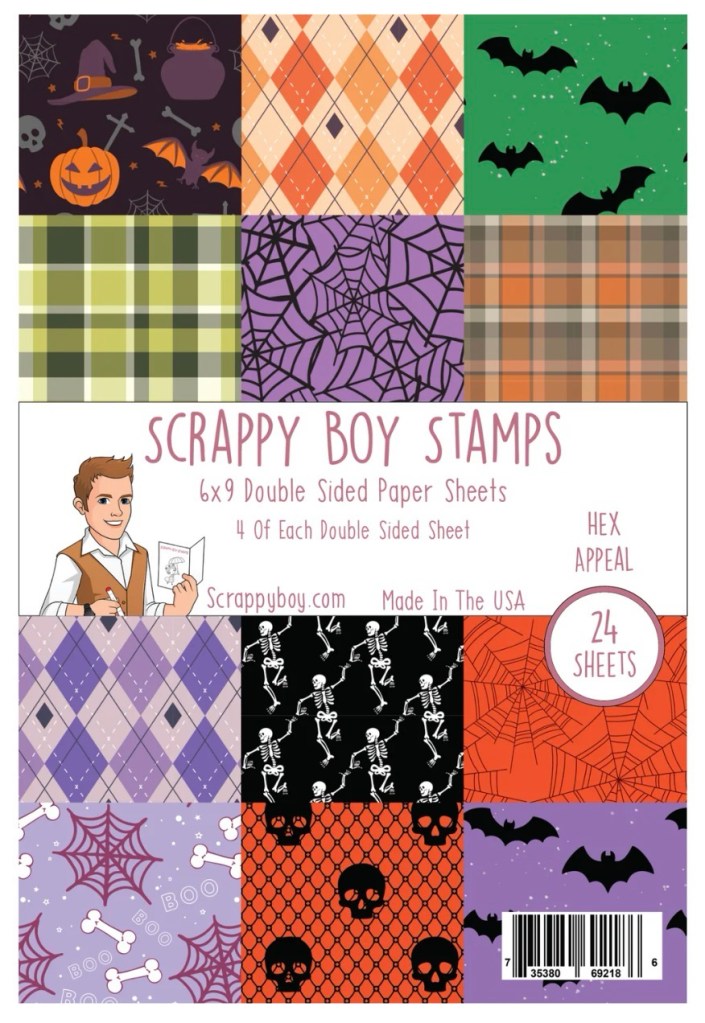
Hex Appeal Coordinating Paper Pack

A few sparkly embellishments, dimensional layers, and stitched details complete this fang-tastic design!

Close Up to show layers. Stitched Oval Nesting Dies from Scrappy Boy Stamps

Spooky Bat Mouse Halloween Card

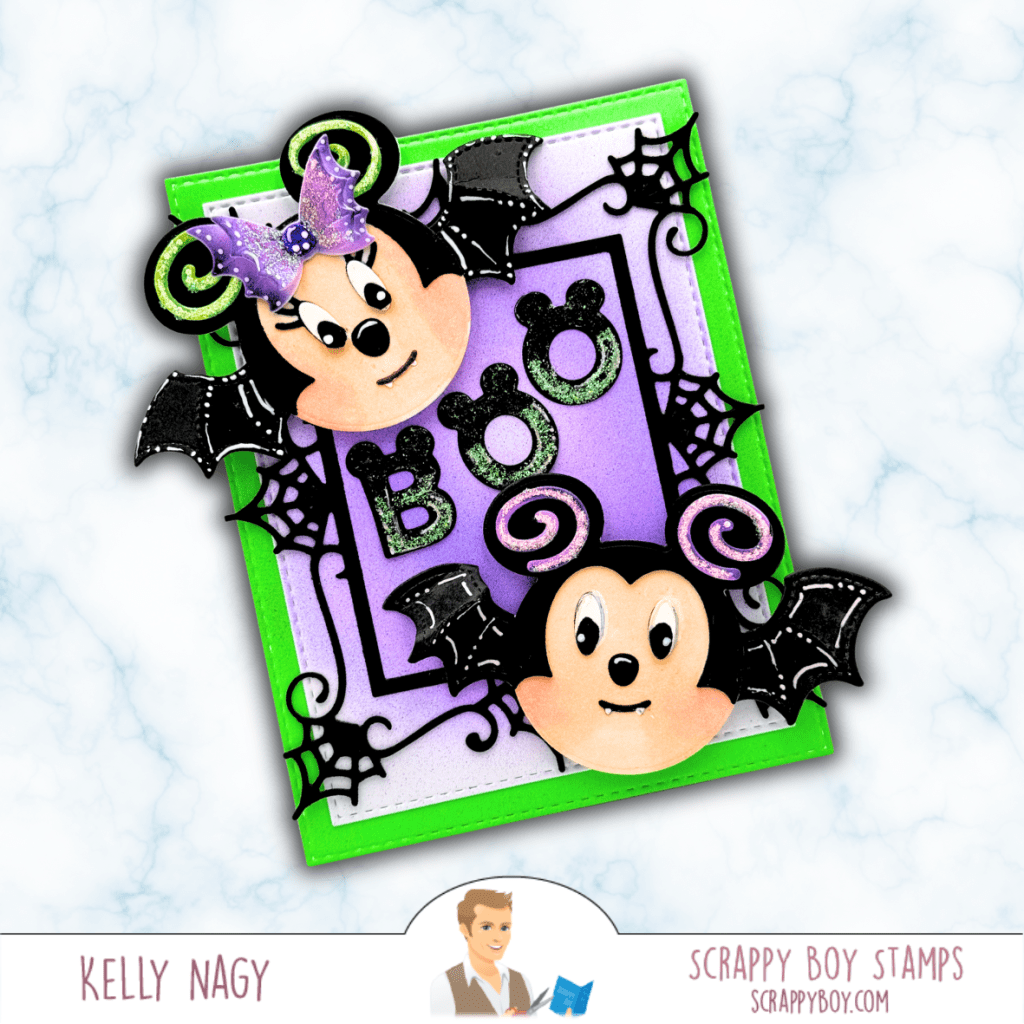
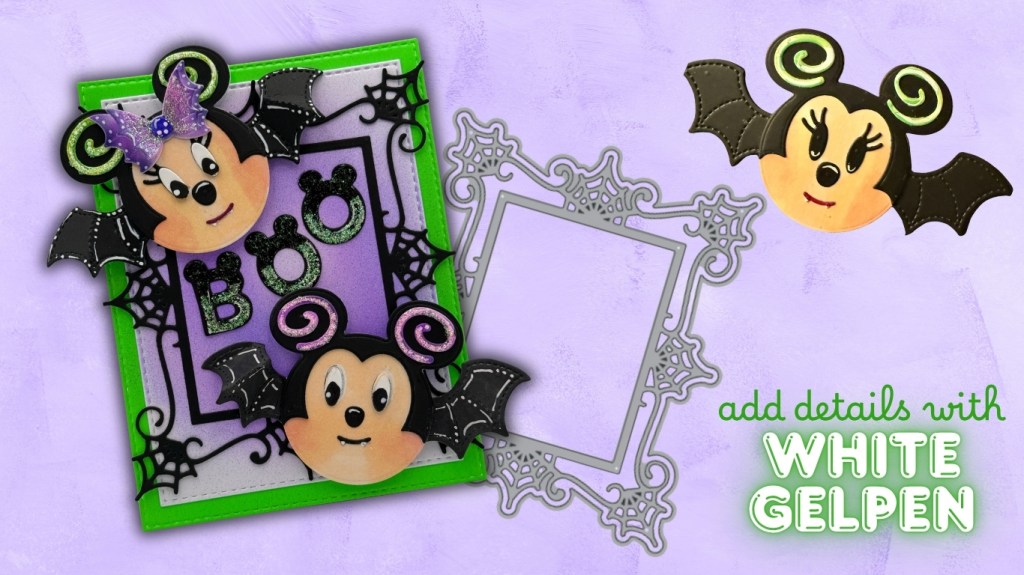
For my second project, I paired the adorable Spooky Bat Mouse Embellishment Die with the dramatic Gothic Picture Frame.

Spooky Bat Mouse Embellishment Dies paired with the Gothic Picture Frame

These little bat mice are almost too cute to spook! I used bright green, purple, and black for a playful Halloween color palette and added white highlights to bring out the details in their wings and faces.

The Gothic Picture Frame creates the perfect backdrop, while the spiderweb accents, sparkly swirls, and bold BOO sentiment add extra texture and personality. The Mouse Ears alphabet dies are a cute addition and nod to the mouse! I love how the bright green border makes the entire card pop!

Glitter, white highlights, and whimsical die-cut details make these bat mice ready for Halloween.

Both projects show how easily the newest Scrappy Boy Stamps products can be mixed and matched to create Halloween cards ranging from delightfully spooky to cute and whimsical.

Suggested Copic combinations: Skin: E000, E00, E11, E13; hair and clothing: C3, C5, C7, C9; cape and wine: R29, R39, R59; and purple airbrushed background: V04, V06, V09. I used the Copic Airbrush System to create the soft purple glow behind the vampire.

I used my favorite dry adhesive from TapeRunner.com⁠ to assemble all the layers of this card. Shop their selection of crafty adhesives and use promo code KELLY10 to save 10% on your entire cart! This costs you nothing extra and helps support my creative journey.

Ready to create your own Halloween projects? Purchase the Hex Appeal I Want It All Bundle, Spooky Bat Mouse Embellishment Die, Gothic Picture Frame, and more at ScrappyBoy.com. Scrappy Boy links are NOT affiliate links, just added for convenience. If you do happen to make a purchase, please let them know in the comments that I inspired you in some way.

Happy crafting!
Kelly
Stamped by Kelly

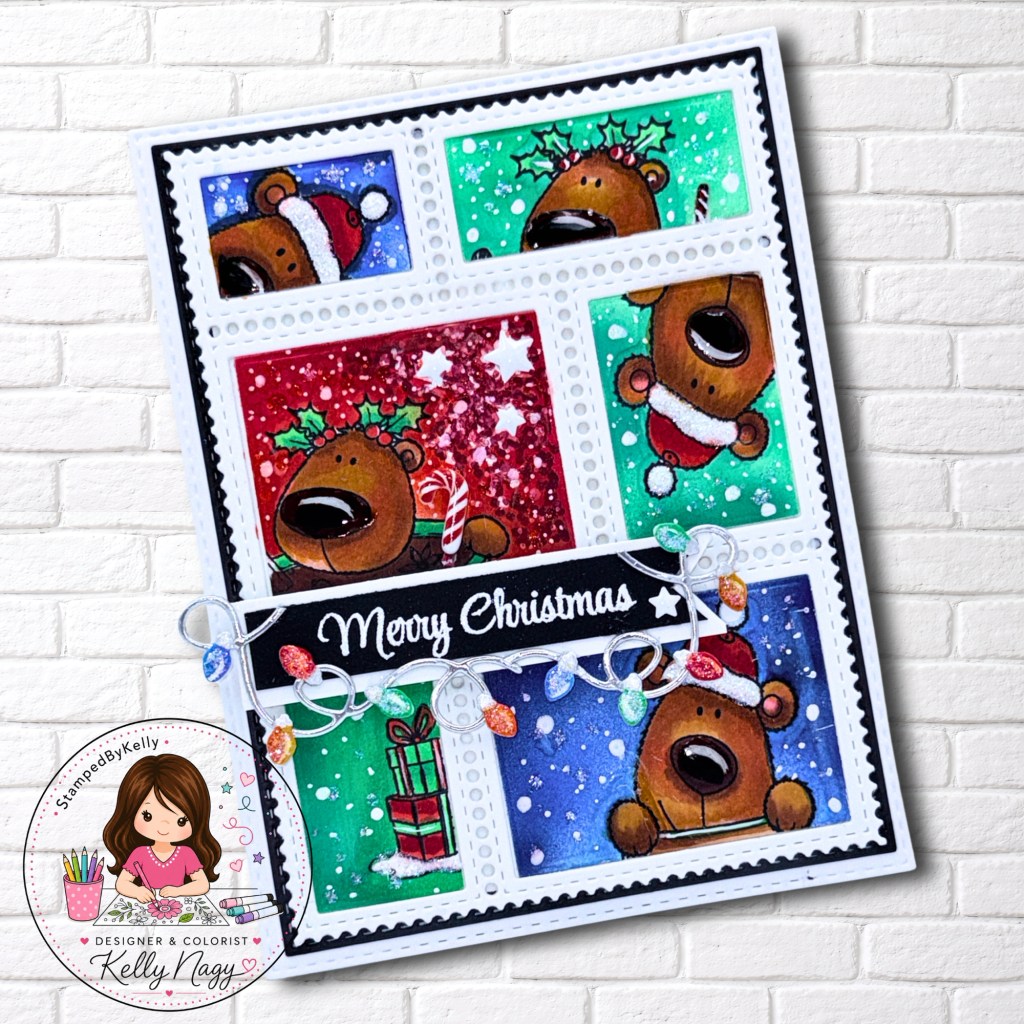
Cheers to Christmas: A Whimsical Postage Stamp Card 🎄🐻

Create a whimsical A2 Christmas card with the Cheers to the Season stamp set, simple masking, Copic airbrushing, and bold red, green, and blue backgrounds. Learn how to make playful postage-stamp scenes, color coordinating bear images, and add festive sparkle to your handmade holiday cards.

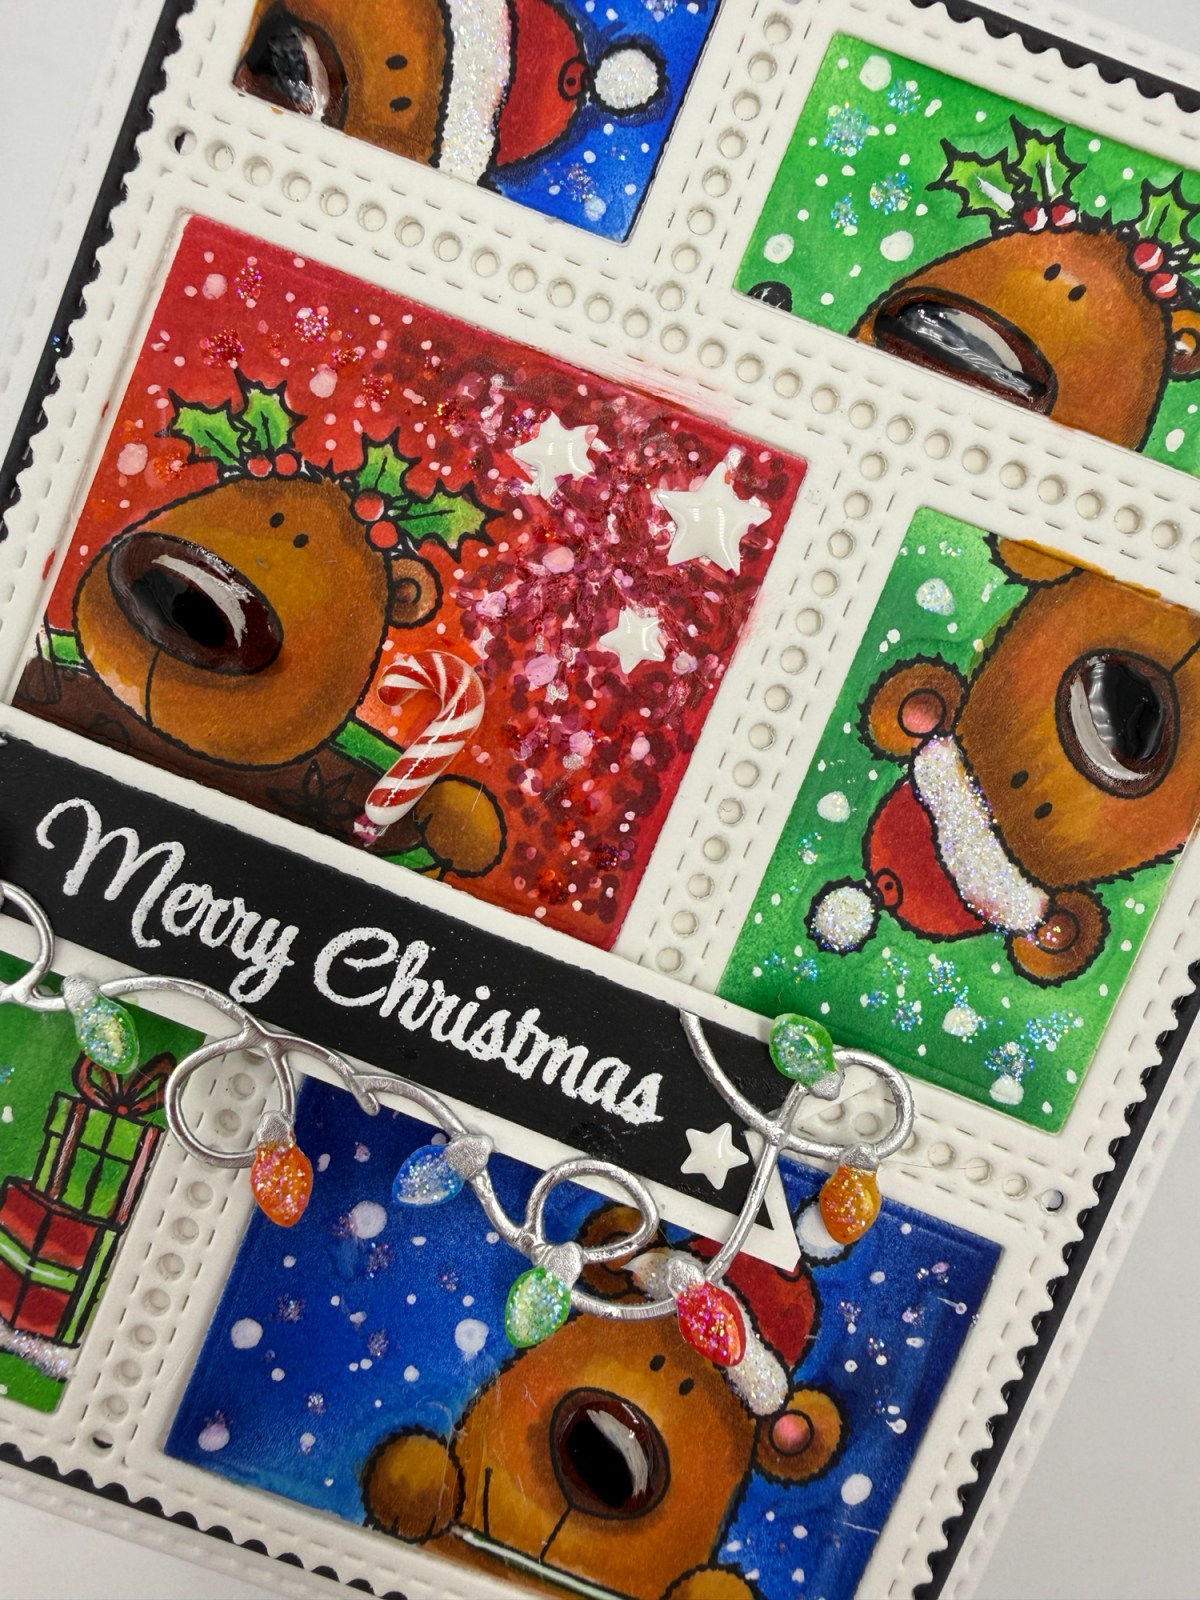
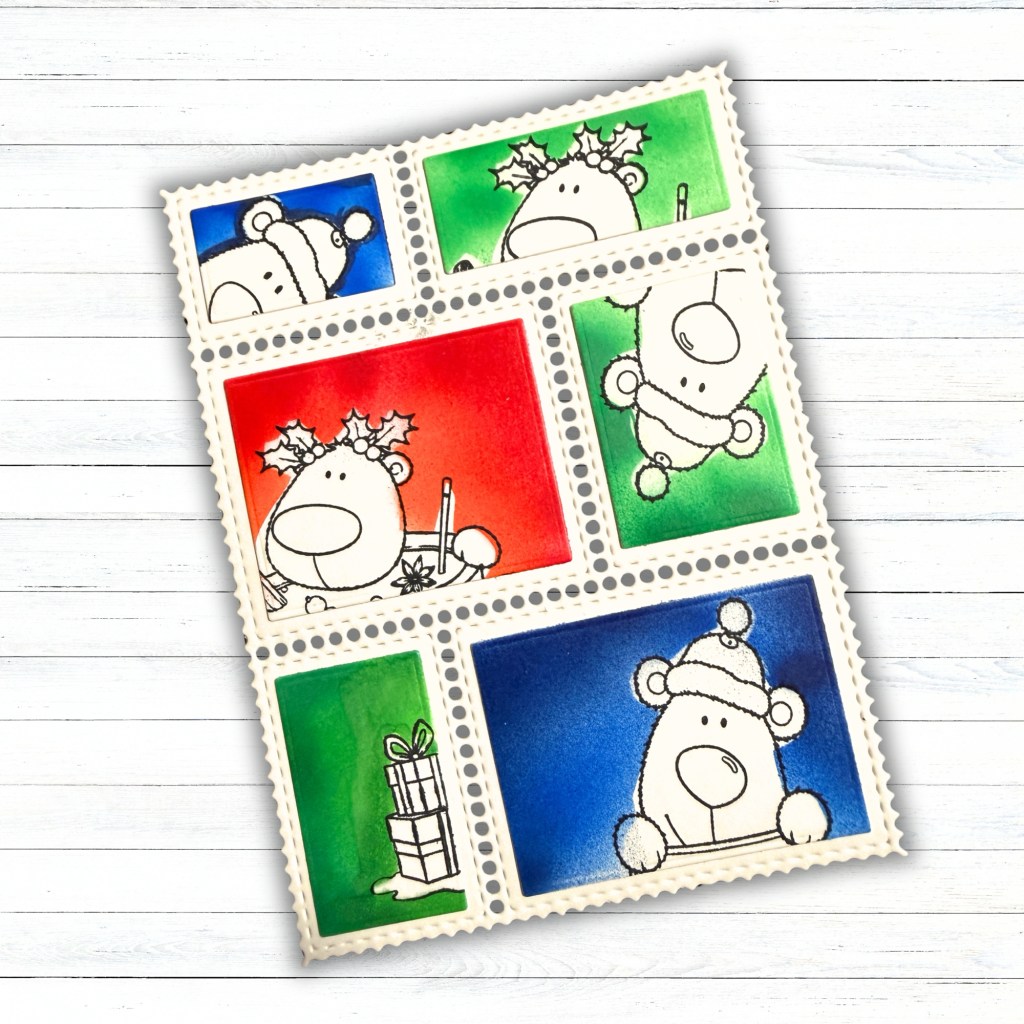
Sometimes the most fun cards begin with looking at your stamps in a new way! For this A2 Christmas card, I created a whimsical postage-stamp design with Waffle Flower’s Postage Die paired with the adorable Cheers to the Season stamp set, simple masking, and my Copic Airbrush System.

The Cheers to the Season stamp set is available from Pajama Crafter Stamps. Although I am no longer on their design team, they are a favored small business that offers whimsical stamps and coordinating products, including fun tools that can double as decor in your craft room. Be sure to check them out, and tell them Kelly sent you!

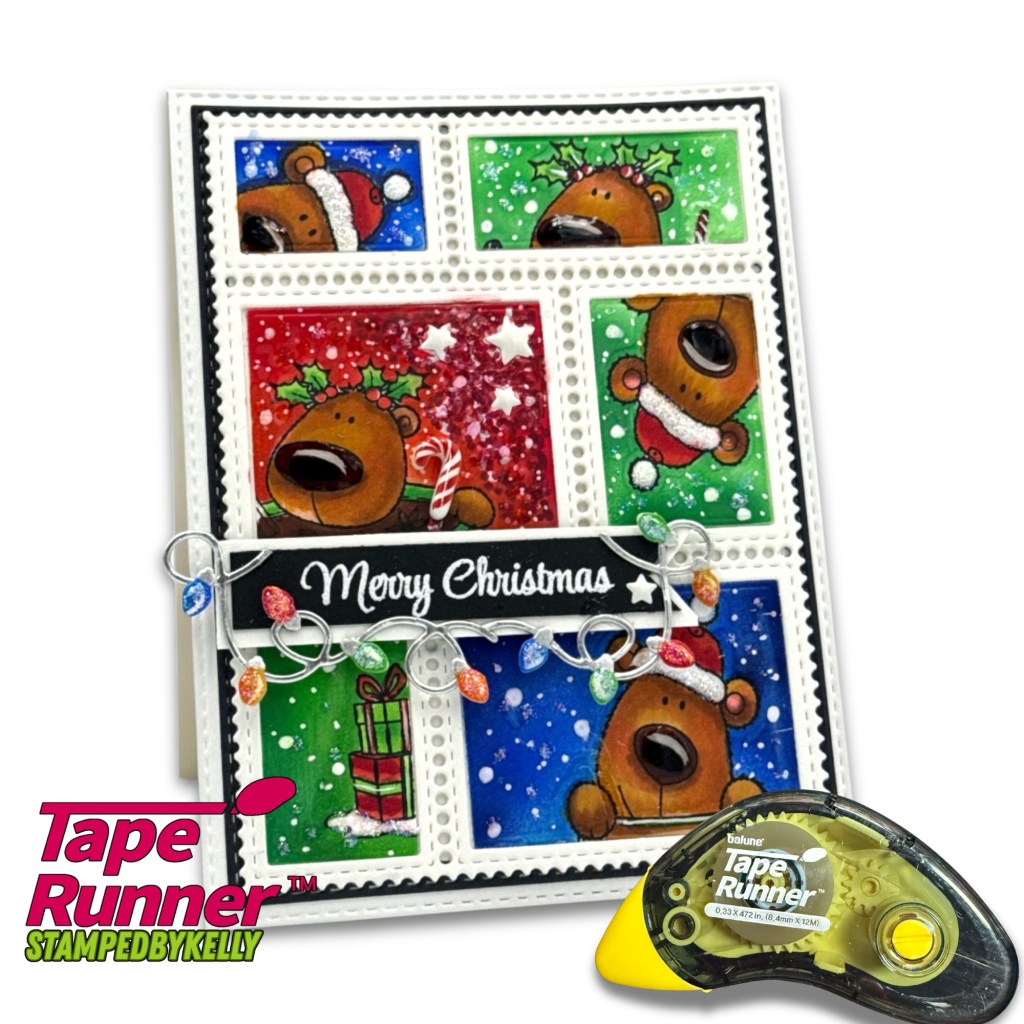
Finished Card Front

Creating the Postage Collage

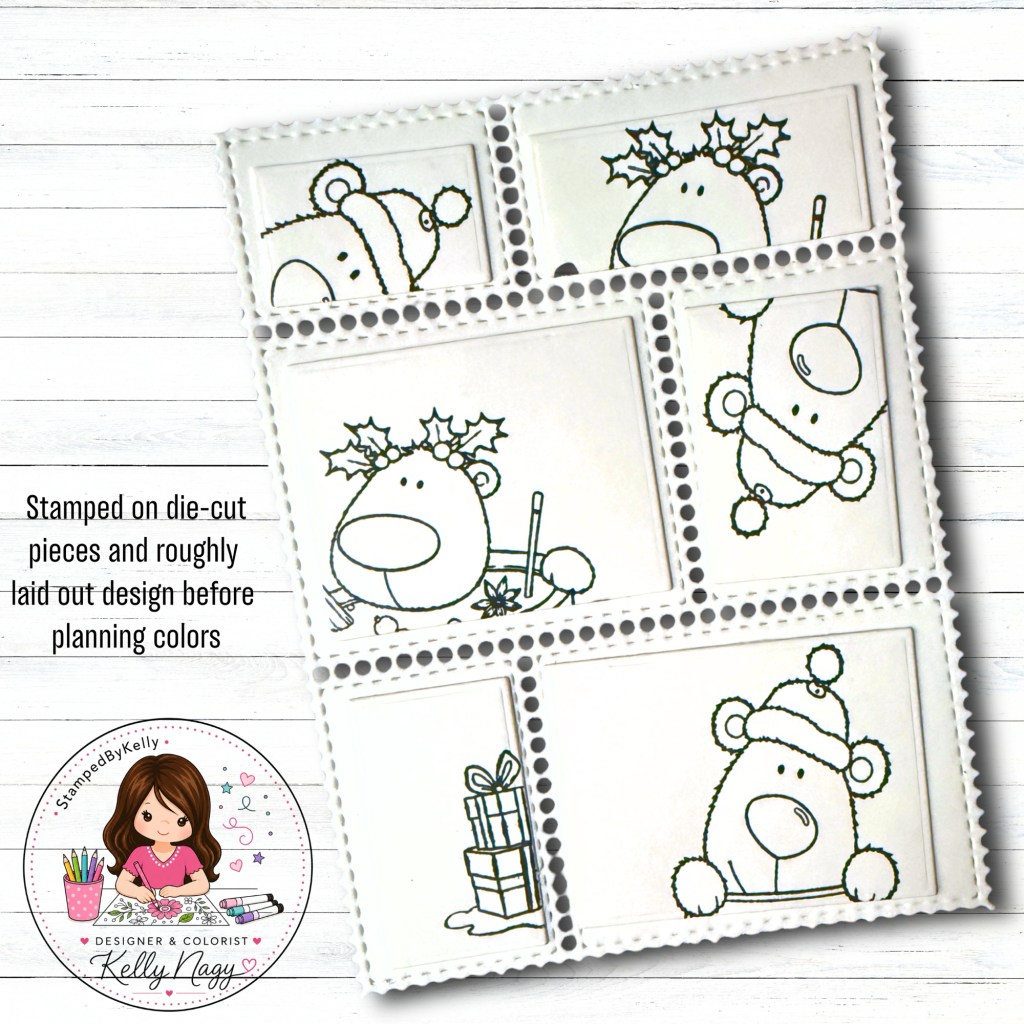
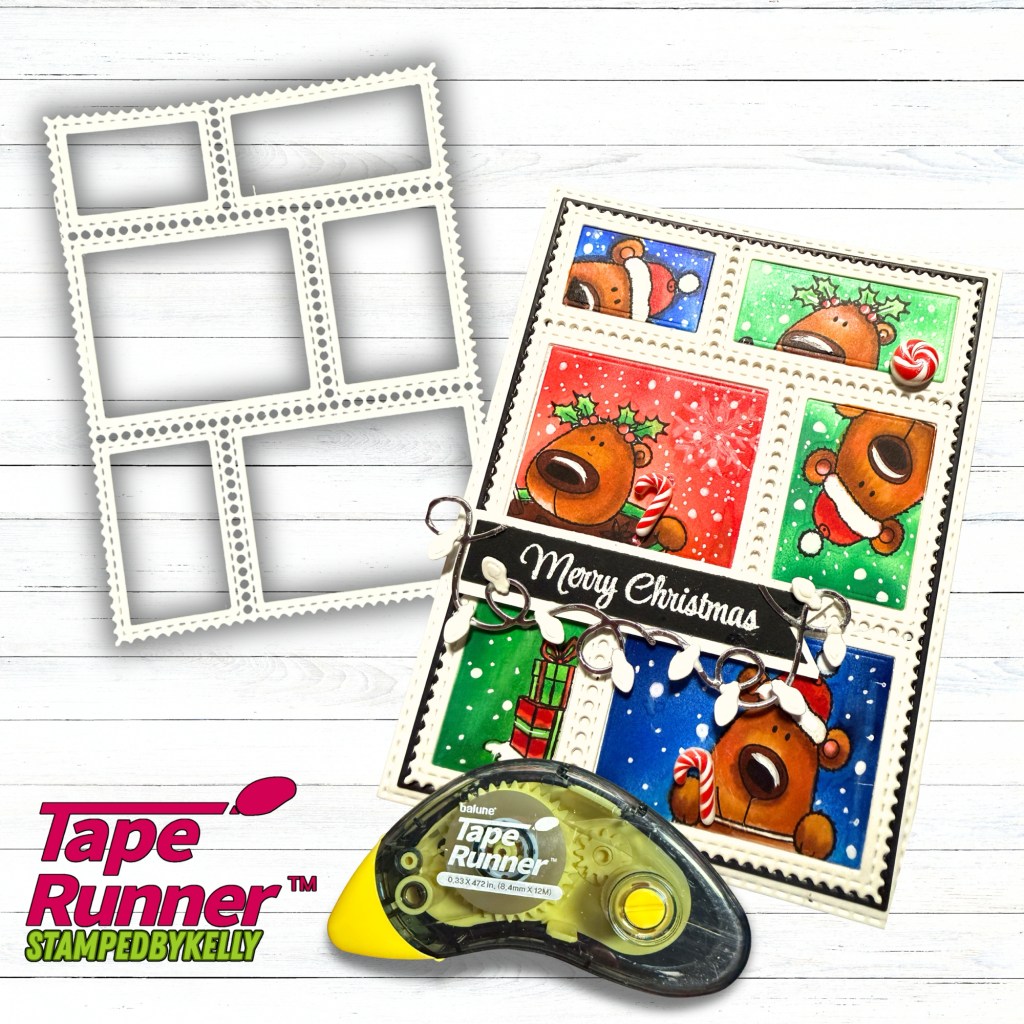
The fun postage-style layout for this A2 card was created using the Waffle Flower Postage Collage Die. I love how the six connected postage areas create little spaces for each stamped scene while still coming together as one cohesive design. The die is currently listed as pre-order/backordered on Waffle Flower’s website. I am not an affiliate—I’m simply sharing the link for your convenience in case you’d like to check it out for yourself. (waffleflower.com)

Shop the Postage Collage Die:
Waffle Flower Postage Collage Die

Creating the Postage Scenes

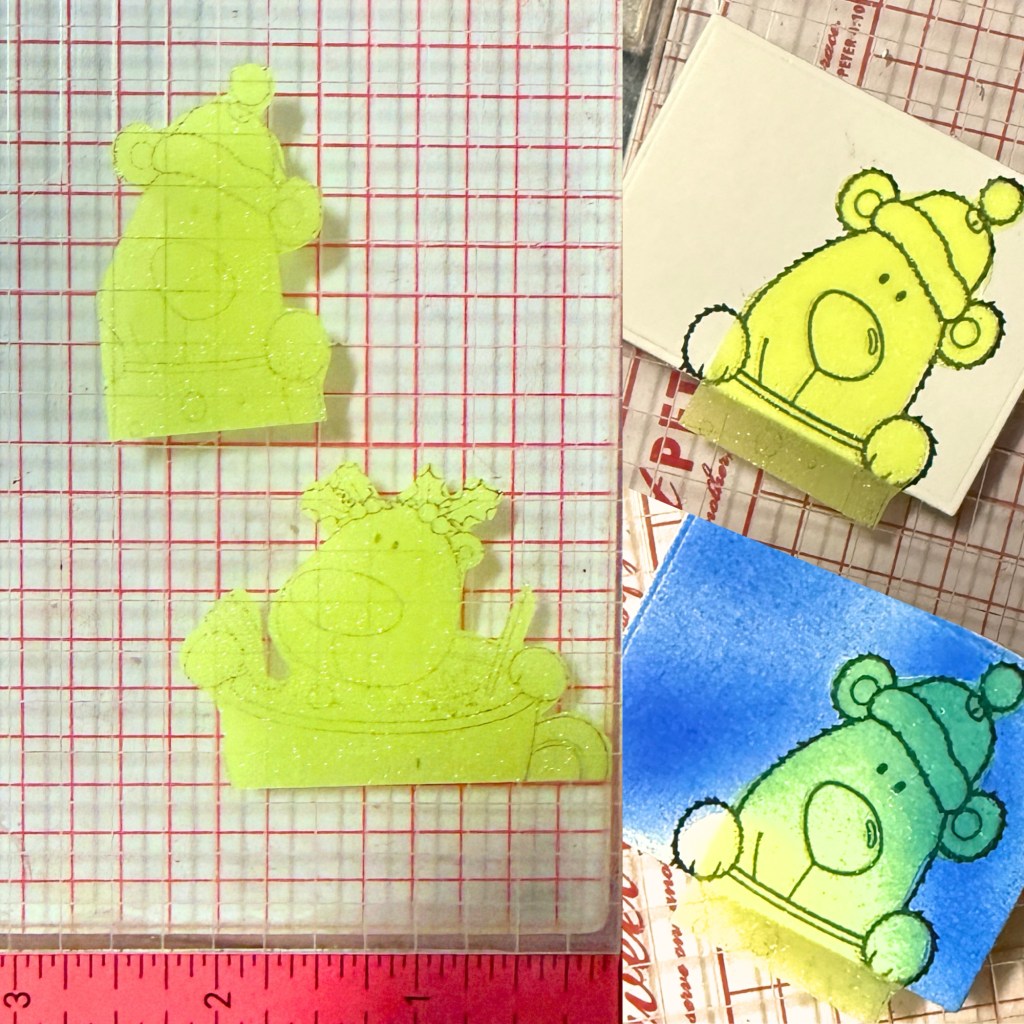
I stamped the bears throughout the postage openings without worrying about perfect placement. Some peek in from the sides, turn sideways, or extend beyond the edges, giving each little scene its own personality.

Using the same stamp set in several different ways keeps the card playful and cohesive.

Masking and Airbrushing

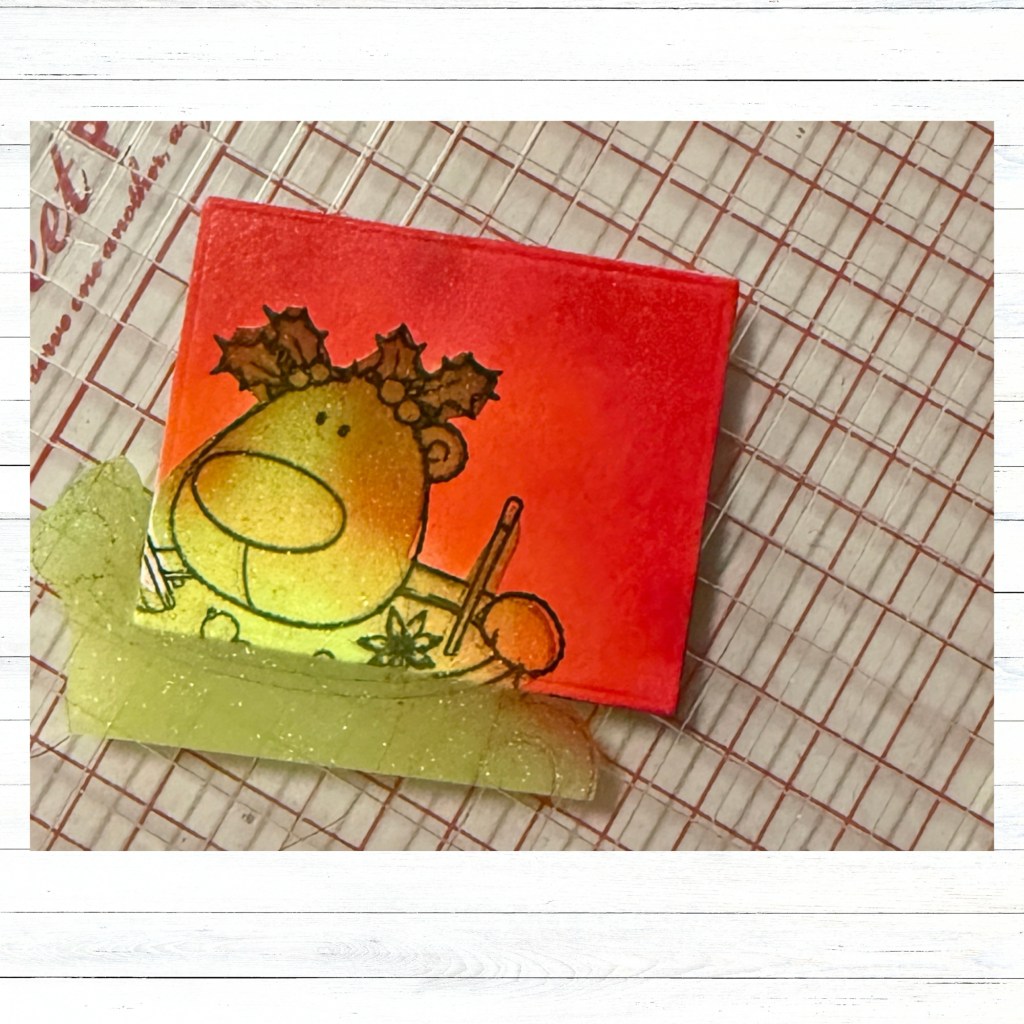
To protect the stamped bears, I created simple masks with Post-it notes. Then I used my Copic Airbrush System to fill the openings with a bold Christmas palette of vibrant red, green, and blue.

The airbrush made it easy to build saturated backgrounds while keeping the images clean.

Mask your stamped images with Post-it Notes

Copic Airbrush Color Combinations

For the bold backgrounds, I used my Copic Airbrush System and layered a combination of colors rather than relying on a single marker. For the red backgrounds, I used R08, R27 and R46; for the green backgrounds, I used G03, G05 and YG09; and for the blue backgrounds, I combined B02 with fluorescent FB and FBG. Layering two or more colors within each color family gave the backgrounds more depth and variation while still keeping that bright, whimsical Christmas feel. I love how the airbrush allows the colors to blend softly without competing with the stamped images!

Post it note blocks ink overspray & allows for crisp white paper to finalize your coloring of images

❤️ Vibrant Red
💚 Bright Green
💙 Bold Blue

Keeping the Bears Simple

Because the backgrounds are so colorful, I kept all of the bears in the same warm brown color palette. This creates continuity and keeps their coloring from competing with the bold airbrushed backgrounds.

Copic Colors for the Images

To keep the colorful backgrounds as the star of the show, I kept my stamped images fairly simple and consistent. For the bears, I used E31, E33, E35, E37 and E29, creating warm brown tones with deeper shades for contrast and dimension. I also went ahead and took my YR23 marker over the browns on my bears to add some warmth and blend out the layers. For the festive details, I pulled from R27 and R29 for the reds, YG03, YG17, G05 and G07 for the greens, and E49 and 100 for the deepest shadows and details. Keeping the bears within the same color family helped unify all of the little postage-stamp scenes without competing with those vibrant airbrushed backgrounds.

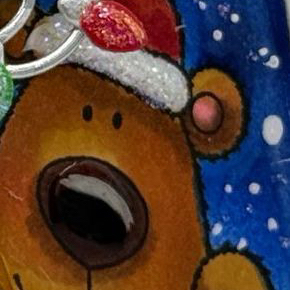
I finished the bears’ noses with 3D GALAXY GLASS for a little extra dimension and shine. I also pulled out my WHITE GEL PEN and added dots for snow on the background. I adds texture, interest and a festive, snowy feel!

Assembling the Card

Once everything was colored, I assembled the layers with my TapeRunner Dry Adhesive. If you wish to purchase from there and receive 10% off everything in your cart, you can use promo code KELLY10 at check out.

Living in Florida means HUMIDITY! ☀️🌴 Whenever possible, I avoid adding extra moisture to my cardstock. A tape runner adhesive provides a clean, strong bond without the wet adhesive that can contribute to warping—especially on cardstock that has already been colored and airbrushed.

Finishing Touches ✨

I added the bold black “Merry Christmas” sentiment across the center, then finished the card with colorful Christmas lights, snowy splatters, sparkle, and shine. I colored the bulbs in coordinating colors and added some Stickles Glitter Glaze for some festive glitz!

Love the lights? They are from my Scrappy Boy Stamps‘ stash and I’m not sure if they’re available on their website any longer. There are plenty of other options to add bling or a festive element. All you have to do is think outside of the box and use what you have already.

I love how the finished design feels like a collection of tiny Christmas snapshots!

Remember, you don’t have to use a stamp exactly as you see it. Turn it sideways. Let it peek into a window. Mask it. Crop it. Airbrush around it. Finding new ways to use the stamps you already have is part of the fun!

I hope this inspires you to grab some Post-it notes, your favorite stamps, and your Copic markers to create something uniquely yours.

I can’t wait to see what you make! ❤️💚💙

Happy crafting!
Kelly | Stamped by Kelly

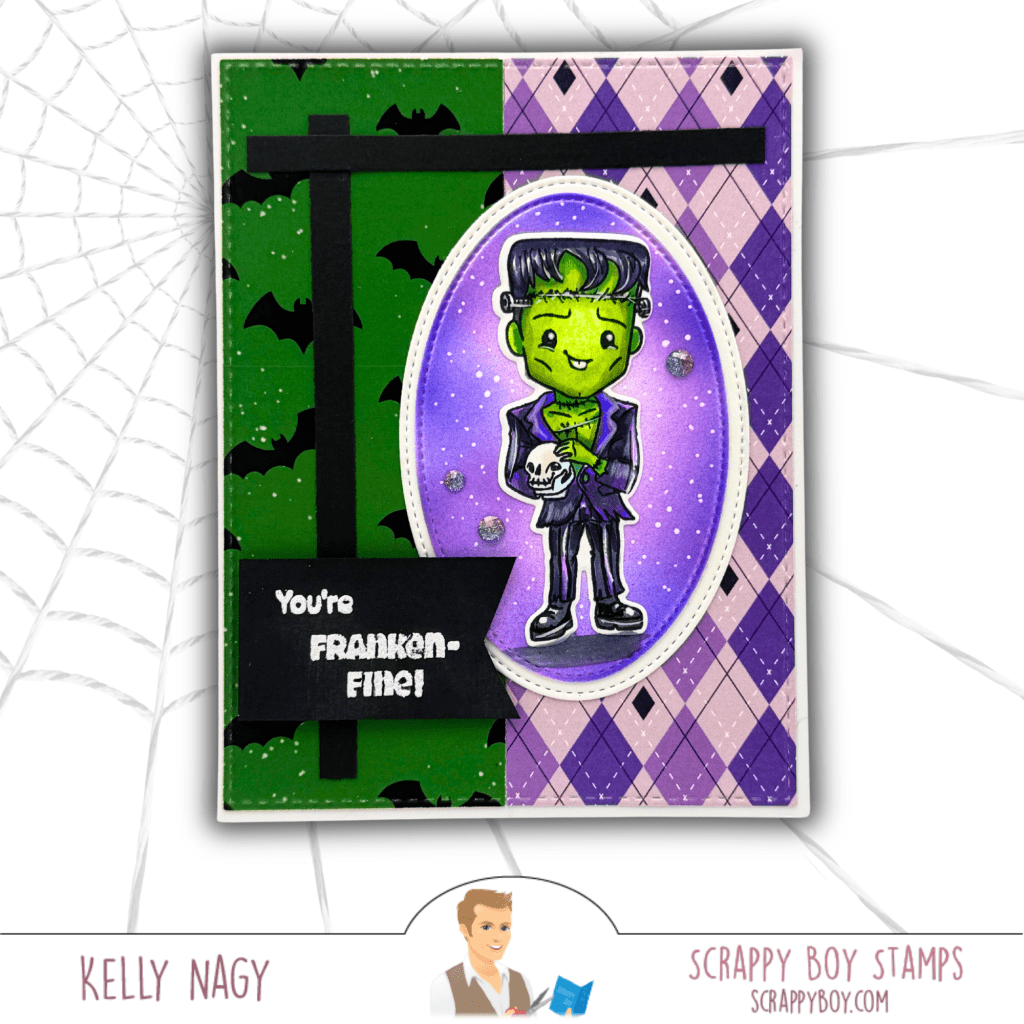
A Little Hex Appeal + A Whole Lot of Franken-Fine!

Get spooky-cute with the NEWEST Hex Appeal release from Scrappy Boy Stamps! See how I used the August Card Sketch Inspiration to create this Franken-Fine Halloween card, complete with patterned papers, stitched dies, heat embossing, and my Copic color combinations. 💚💜🎃

I’m popping in with a little spooky-cute inspiration featuring the NEWEST release from Scrappy Boy Stamps — HEX APPEAL! 🎃💜💚

Featuring Hex Appeal & Coordinating Products

For this card, I also took inspiration from the Scrappy Boy Stamps August Card Sketch. There’s still a little time to play along, so grab your favorite Scrappy Boy goodies and put your own spin on the sketch!

One of my favorite things about sketches is that they take away that “where do I start?” moment. You already have the bones of the design—you just get to make it yours!

My Take on the Sketch

I stayed fairly close to the original layout, using two contrasting patterned papers for the background and bold black cardstock to recreate the strong horizontal and vertical elements.

Of course, the star had to be this adorable little Frankenstein! 💚

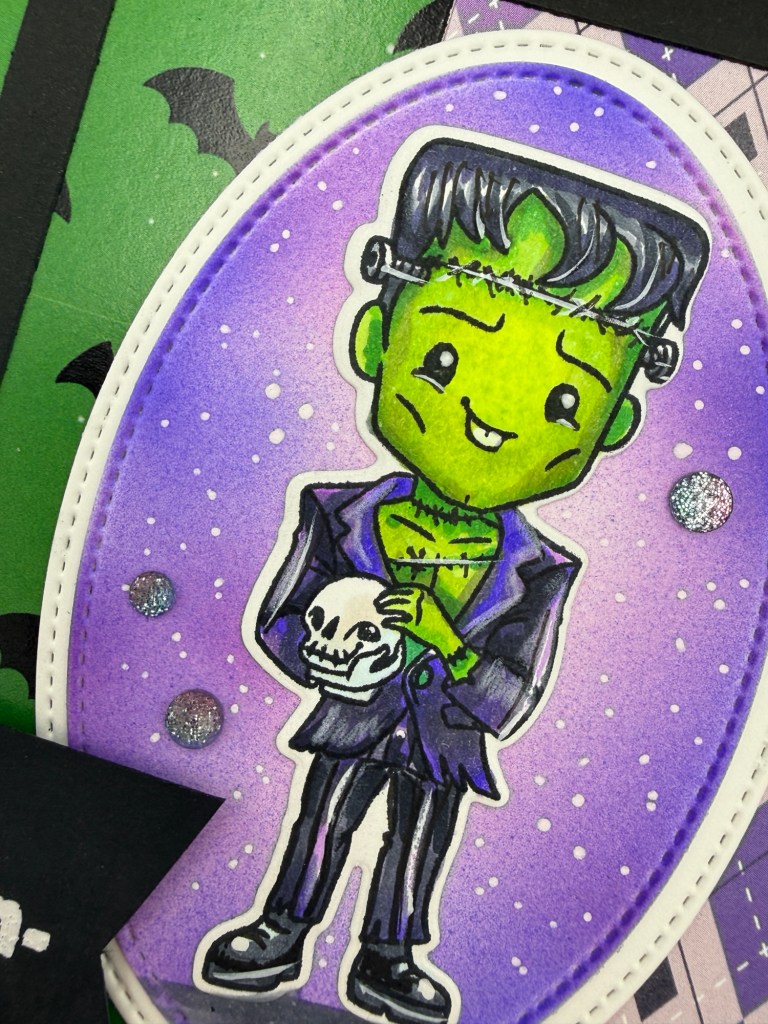
I placed him inside an Oval Stitched Nesting Die and gave the background a soft purple blend using my airbrush attachment from Copic to help him pop without competing with the image. A few white splatters and sparkly accents finished off the background.

And how could I resist…

“You’re Franken-Fine!” 😂

Close up to see white gel pen accents

Copic Coloring

I colored my little guy with Copic markers, using bright yellow-greens for that classic Frankenstein look and deep violets and cool grays to coordinate with the Hex Appeal patterned paper.

Copic Color Combinations:

💚 Skin: YG01 • YG03 • YG05 • YG07
💜 Purple: V12 • V15 • V17
🖤 Black/Gray: C3 • C5 • C7 • C9
🤍 Skull: C0 • C1 • C3

Feel free to substitute your favorite combinations—the fun is making these characters completely your own!

Scrappy Boy Supplies

🎃 HEX APPEAL STAMPS & OUTLINE DIES
👻 HEX APPEAL 6×9 PAPER PACK
✂️ OVAL STITCHED NESTING DIES
✂️ RECTANGLE STITCHED NESTING DIES

The Hex Appeal 6×9 Paper Pack made this sketch especially fun. Mixing the green bats with the purple argyle gave me plenty of pattern and color while still allowing my stamped image to remain the focal point.

For the sentiment, I heat embossed “You’re Franken-Fine!” in white on black cardstock. The crisp white embossing against the bold black gives the sentiment plenty of contrast and ties in perfectly with the black elements from the sketch. 🖤

My Go-To Dry Adhesive ✂️

With all these fun layers, I reach for my TapeRunner dry adhesive! It makes lining up and layering cardstock quick and easy, while helping keep my panels smooth and warp-free—especially when working with multiple layers.

Want to give it a try? Use promo code KELLY10 for 10% OFF your TapeRunner purchase! 💕

Come Play Along!

Remember, a card sketch is meant to inspire you—not limit you. Change the shapes, flip the design, rotate it, add another layer or simplify it. There’s no wrong way to interpret it!

You still have a little time to join the Scrappy Boy Stamps August Sketch Inspiration, so get those stamps, dies and papers out and PLAY!

When you share your creation on social media, be sure to use:

#scrappyboysketchaug

I can’t wait to see what you create!

Happy Crafting!
Kelly
Stamped By Kelly

Beyond Christmas: Copic Airbrushing + One Stamp, So Many Celebrations!

Stretch your Christmas stamps beyond the holidays! See how simple color changes turn one festive stamp set into handmade cards for any celebration.

I have a new technique obsession to share today!

Example of what I used to create airbrushed backgrounds

I’ve been experimenting with my Copic markers and an air compressor attachment, and I LOVE the soft, blended backgrounds I can create. Even better? This technique is easy to customize simply by changing your colors.

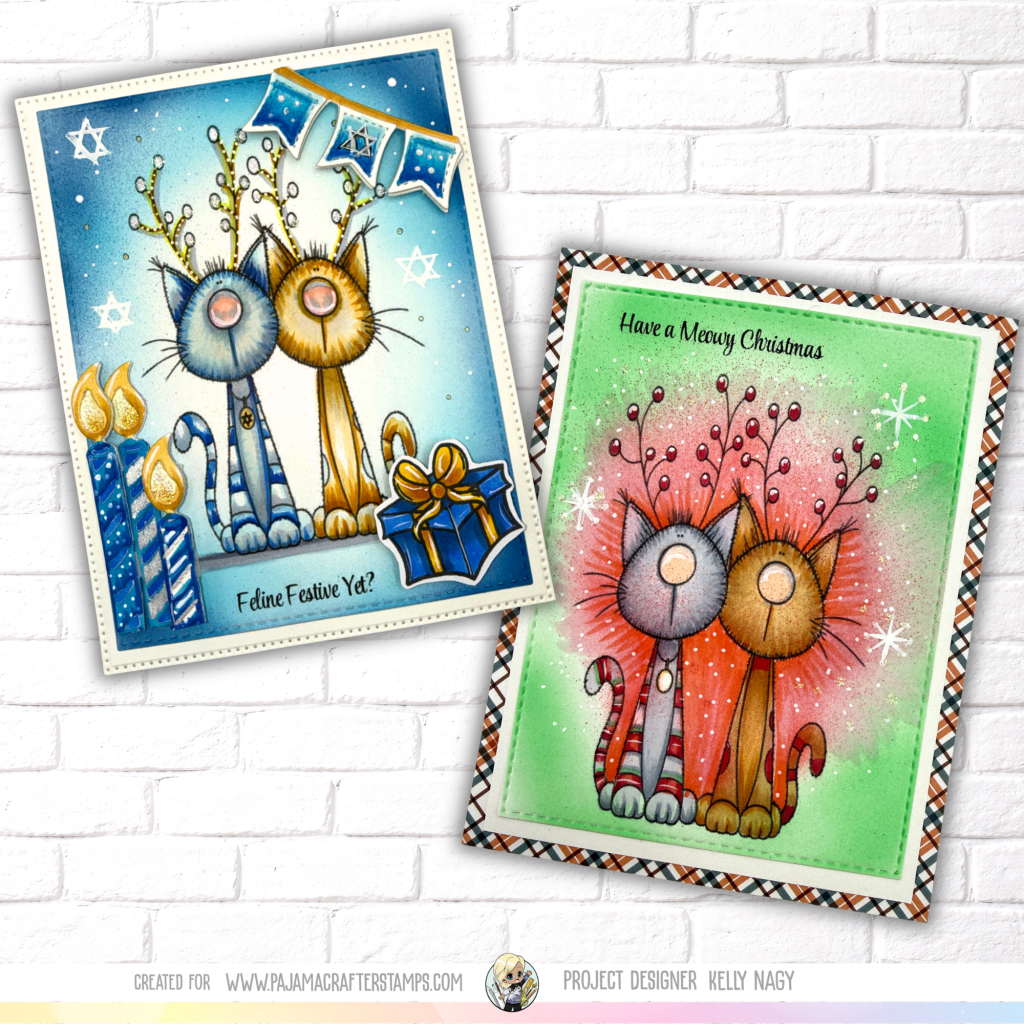
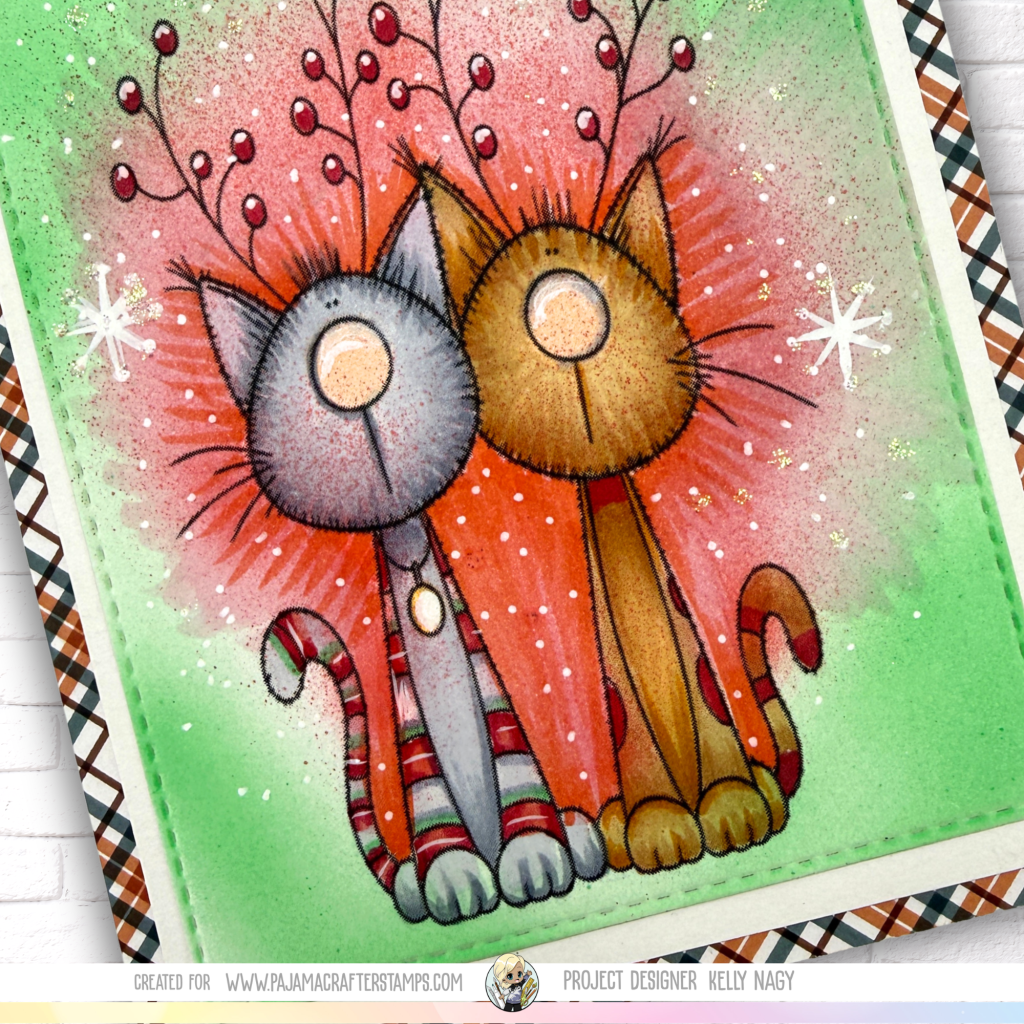
That got me thinking about the adorable new MERRY MEOWMAS stamp set from the Pajama Crafter Stamps August Release.

Yes, it’s designed for Christmas—but who says it has to stay there?

🐱 Same Stamp. Different Celebration.

For one card, I embraced Christmas with festive reds and greens.

❤️ 💚 🤍 CHRISTMAS

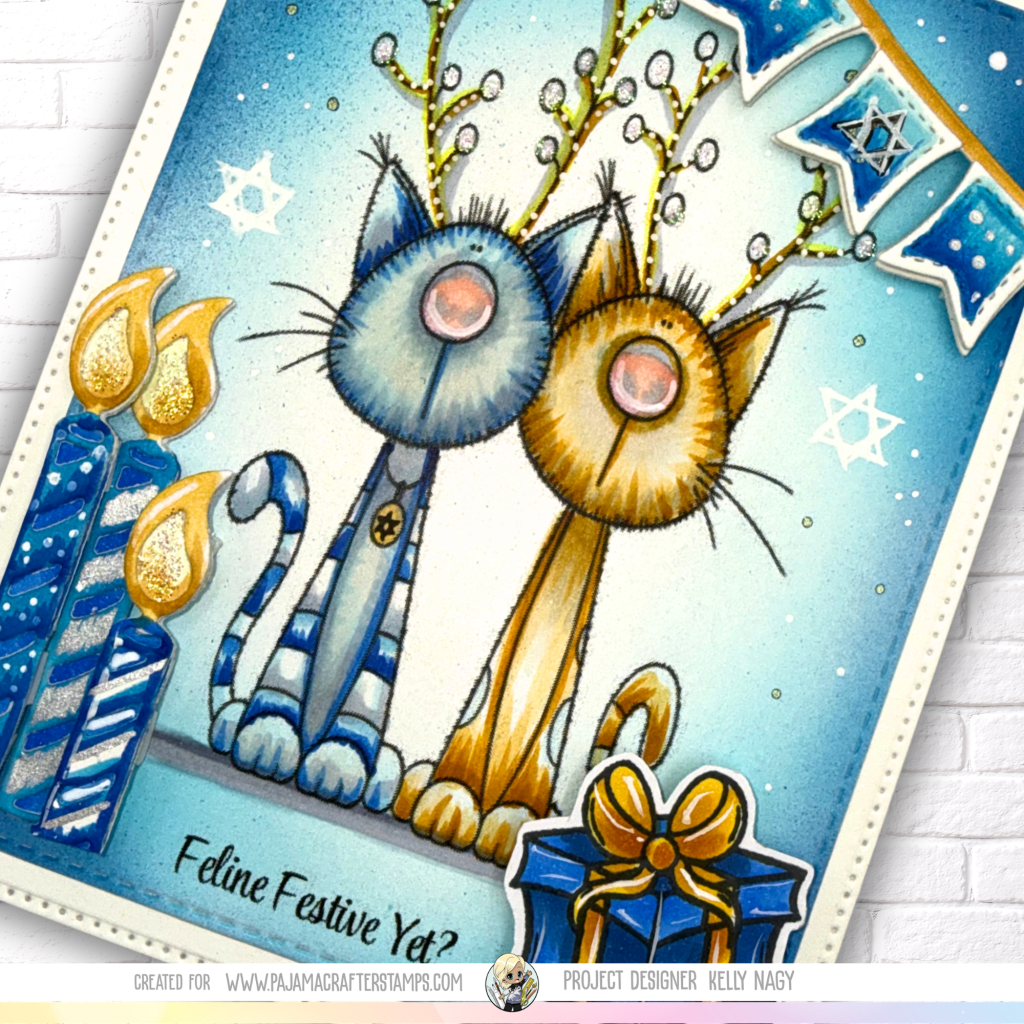
Then I took the same MERRY MEOWMAS image, changed my Copic colors and added a few elements from my stash to create a Hanukkah-inspired card.

💙 🤍 💛 HANUKKAH

The air compressor attachment made it easy to coordinate each background with my Copic coloring. I simply sprayed light layers of color and gradually built the intensity until I was happy with the result.

No complicated blending—just spray, layer and have fun!

💙 Why This Project Is Personal

We are a blended family. My husband’s children from his first marriage were raised Jewish by their mom while also celebrating Christmas with us. Today, they have families of their own who continue to recognize both traditions.

That makes creating for different celebrations especially meaningful to me.

It also reminds me that our stamps don’t have to be limited by the holiday printed on the package!

❤️ 🖤 💚 KWANZAA

❤️ 🩷 🤍 VALENTINE’S DAY

🧡 🤎 💛 THANKSGIVING

🖤 🤍 💛 NEW YEAR’S

❤️ 🧡 💛 💚 💙 💜 BIRTHDAYS

Change the colors. Add something from your stash. Change the sentiment.

Make it YOUR celebration!

🎨 Try It Yourself!

Grab a stamp that was designed for one specific holiday and ask yourself:

“What ELSE could this become?”

For me, MERRY MEOWMAS went from Christmas kitties to a completely different celebration with little more than Copic color choices, some airbrushing and a few creative additions.

That’s exactly the kind of crafting I love—using what we have in unexpected ways!

Use KELLY10 for 10% Off your cart at TapeRunner.com

🛍️ Supplies

🐱 MERRY MEOWMAS – Pajama Crafter Stamps

🎨 Copic Markers + Air Compressor Attachment
(not an affiliate link- Blick Website)

✨Tape Runner Adhesive – PROMO CODE: KELLY10

✨ Additional Supplies

You can also see more inspiration from the newest Pajama Crafter Stamps August Release here:

👉 PAJAMA CRAFTER STAMPS

One stamp. New colors. A little airbrush magic. So many reasons to celebrate! 🐱🎨💨

Happy crafting!

Kelly | Stamped by Kelly

Check out Instagram Hop
My featured HOP card! The cookies SPIN!!!

From Shells to Flowers

Who says seashells have to stay at the beach? In today’s card, I’m transforming shell images into beautiful flowers with a fun, unexpected twist using the SHARK-UTERIE stamp set from Pajama Crafter Stamps! Stop by for step-by-step details, close-up photos, and a creative technique that will have you looking at your stamps in a whole new way.

Sometimes the smallest stamp in a set becomes the biggest surprise!

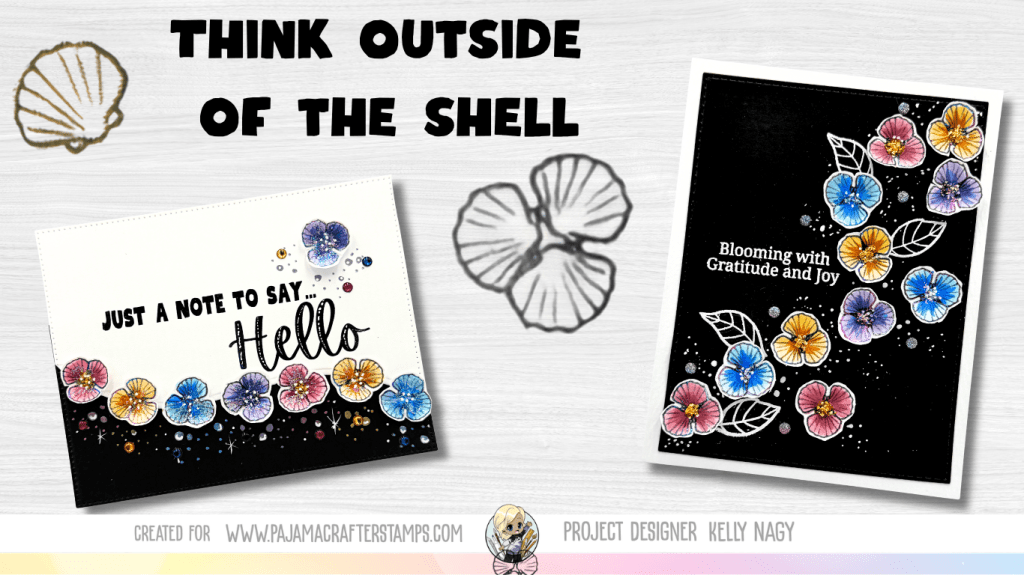
When I was first designing this SHARKuterie Board stamp set from the July Pajama Crafter Stamps’ Release, I added this cute little shell, which is perfect for beach scenes. But after playing around with it, I discovered that stamping three shells together created the sweetest little flowers!

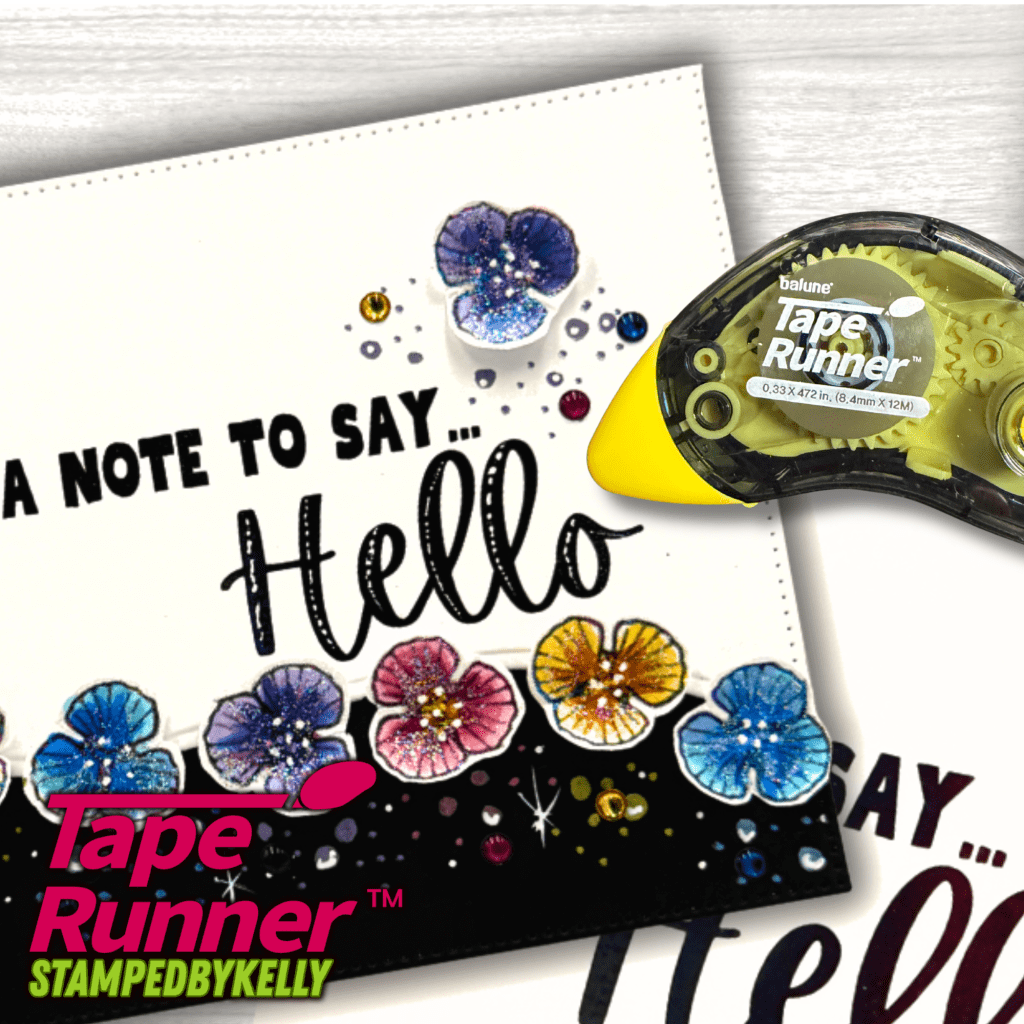
I loved this concept so much that I designed two completely different cards using the same shell flowers—proving that a single stamp can inspire so many creative possibilities.

USE PROMO CODE: KELLY10 for
10% OFF on TapeRunner.com

Rather than sharing all the details here, I invite you to visit the Pajama Crafter Stamps Blog, where I post all the fun details! You’ll find:

If you’re looking for inspiration to stretch your stamps and think outside the box, I hope you’ll stop by and check it out!

👉 Read my August 1 featured post on the Pajama Crafter Stamps’ Blog here: https://pjcrafterstamps.com/

Thanks so much for visiting, and as always…

Happy Crafting! 💜

Kelly

💜 Affiliate Link: If you shop using my link below, I may earn a small commission at no additional cost to you. Thank you for supporting my crafting journey!

#StampedByKelly #PajamaCrafterStamps #SharkuterieBoard #SharkWeek #CreativeInspiration