From Coffee Breaks to Happy Hour: Creativity Around the Clock!

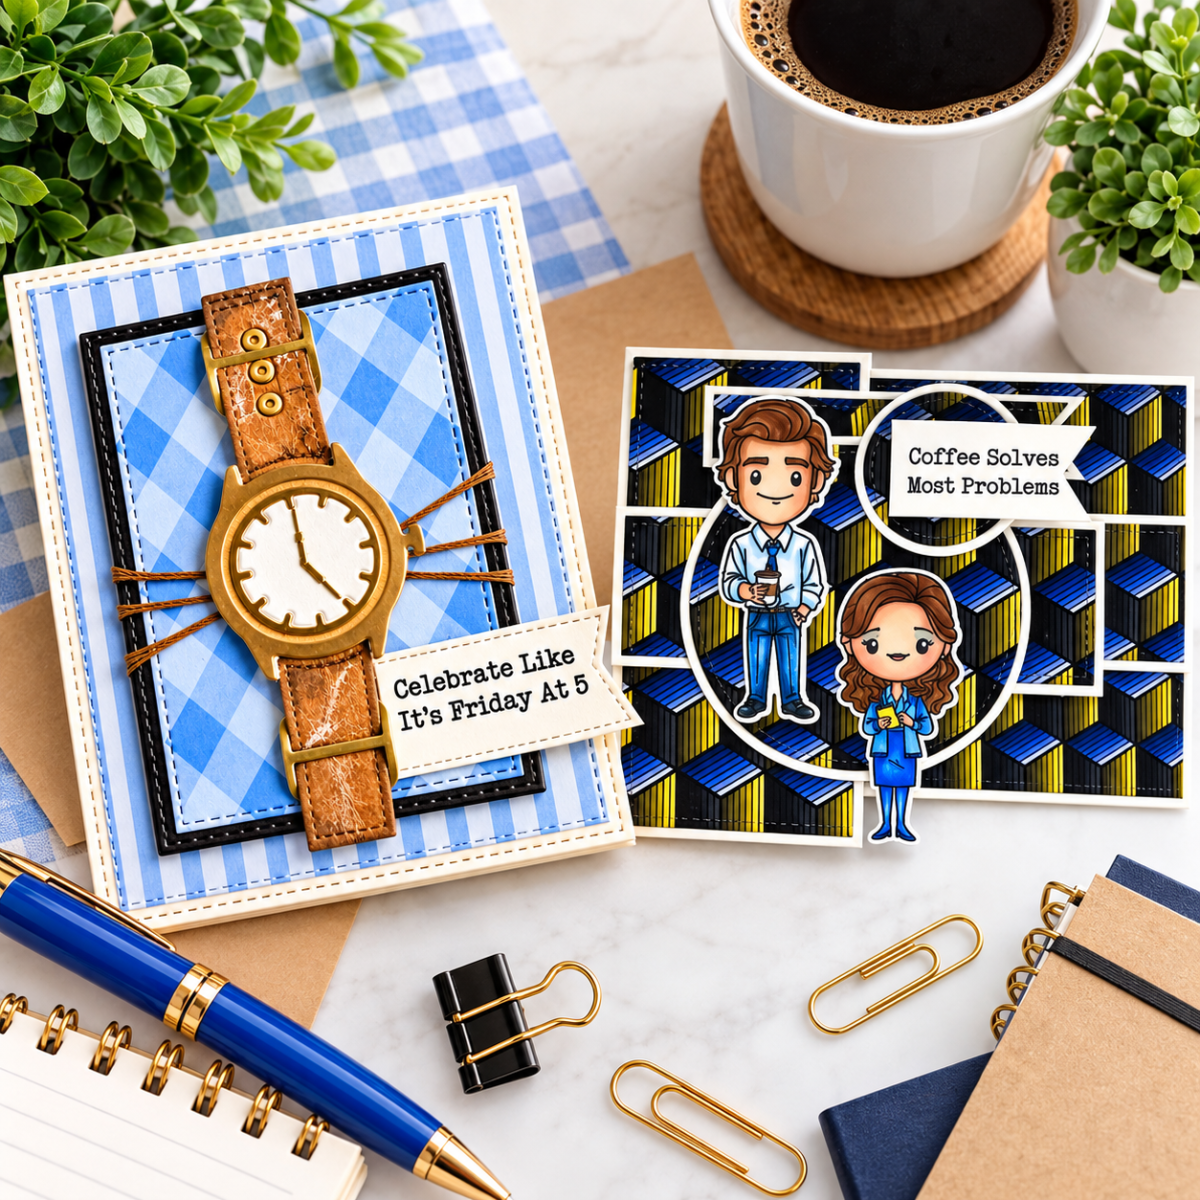
From coffee breaks to Friday at five! ☕⌚ I’m sharing two fun cards featuring the September Scrappy Boy Stamps release, including a realistic faux-leather watchband made entirely from cardstock and an office-inspired design full of personality. Discover creative techniques, playful sentiments, and inspiration for stretching your crafty stash!

Scrappy Boy Stamps | September 2026 Release

Hello, crafty friends!

Who says work and play can’t go hand in hand? Today I’m sharing my last two Design Team projects featuring products from the September 2026 Scrappy Boy Stamps release, since the October 2026 release is just around the corner! One celebrates the magic of Friday at five, while the other reminds us that a little coffee can solve just about anything! Sentiments on both cards and the images of the a couple on the one card all from the Professionally Unhinged stamp set.

What I love most about this release is how versatile the products are. Whether you’re creating for a coworker, celebrating a birthday, or just making someone smile, there are so many possibilities.

It’s Friday at Five Somewhere!
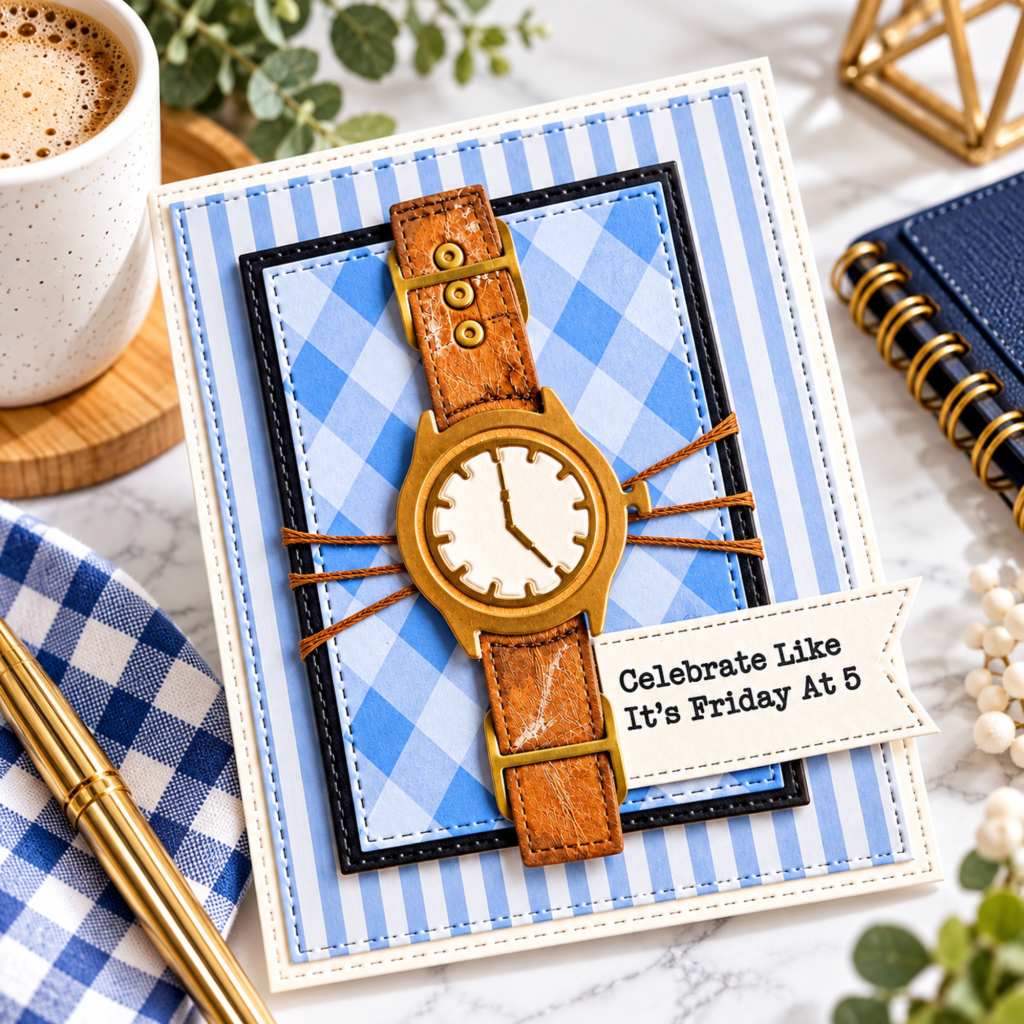
First up is my watch-inspired card featuring the fabulous Watch Shaker Die Set.

I created a layered design using Scrappy Boy’s Little Dog 6×9 blue patterned papers, stitched rectangular panels, and a classic brown-and-gold watch combination. The warm metallic finish and distressed-looking watchband add a little sophistication, while the sentiment brings all the fun! I cut the metal pieces out of a frosted gold card stock versus a glitter or shiny metallic. It’s all personal preference.

From Cardstock to Leather — A Little Paper Magic! ⌚

  • Choose cardstock: Use kraft-colored, medium- to heavyweight cardstock.
  • Dampen: Lightly mist with water—do not soak.
  • Crumple: Form a tight ball, unfold, and repeat several times.
  • Dry: Let the wrinkled cardstock dry completely.
  • Ink: Apply Distress Ink over the surface to highlight the creases. The darker brown distress ink that gets into the wrinkles, and the stitched cuts from the die, actually look like fabric stitches once dry. I actually took E13 and E25 of my Copic markers to accentuate some areas for added interest.
  • Distress: Add white gel-pen streaks and gently smudge them. I love how the white ink bleeds into the small wrinkles that you created when crumbling the paper. Make sure that you smear that ink when it is wet because the more messy, the more natural it looks versus planned markings.
  • Die-cut: Cut the watchband shape from the Watch Shaker Die Set with a die-cutting machine.
  • Finish: Smooth the edges and add holes, fasteners, or other details.

Result: A weathered, leather-like watchband made from cardstock. ❤️

“Celebrate Like It’s Friday At 5”
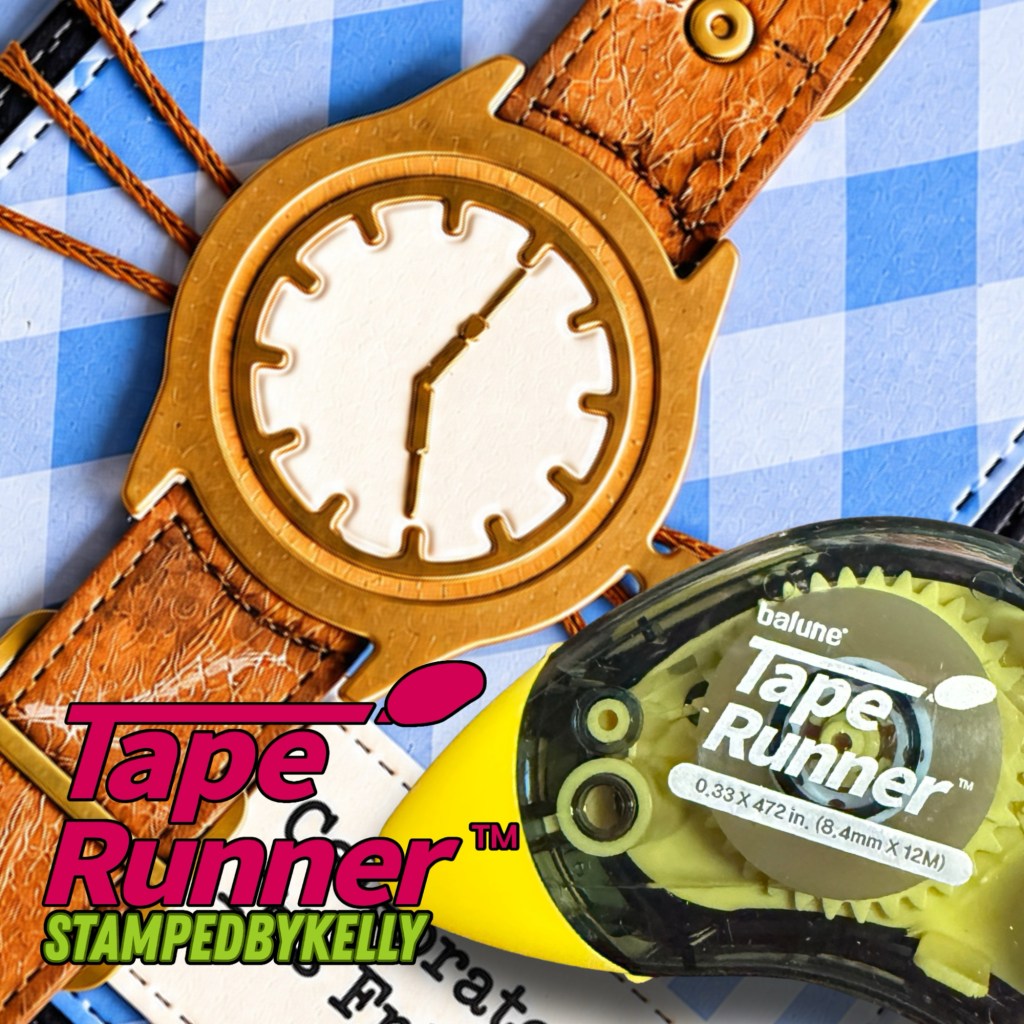
I especially love how the watch becomes the focal point of the entire card. And here’s a little crafty reminder: just because a die is designed as a shaker doesn’t mean you have to use it that way! Sometimes a beautiful dimensional embellishment is all you need.
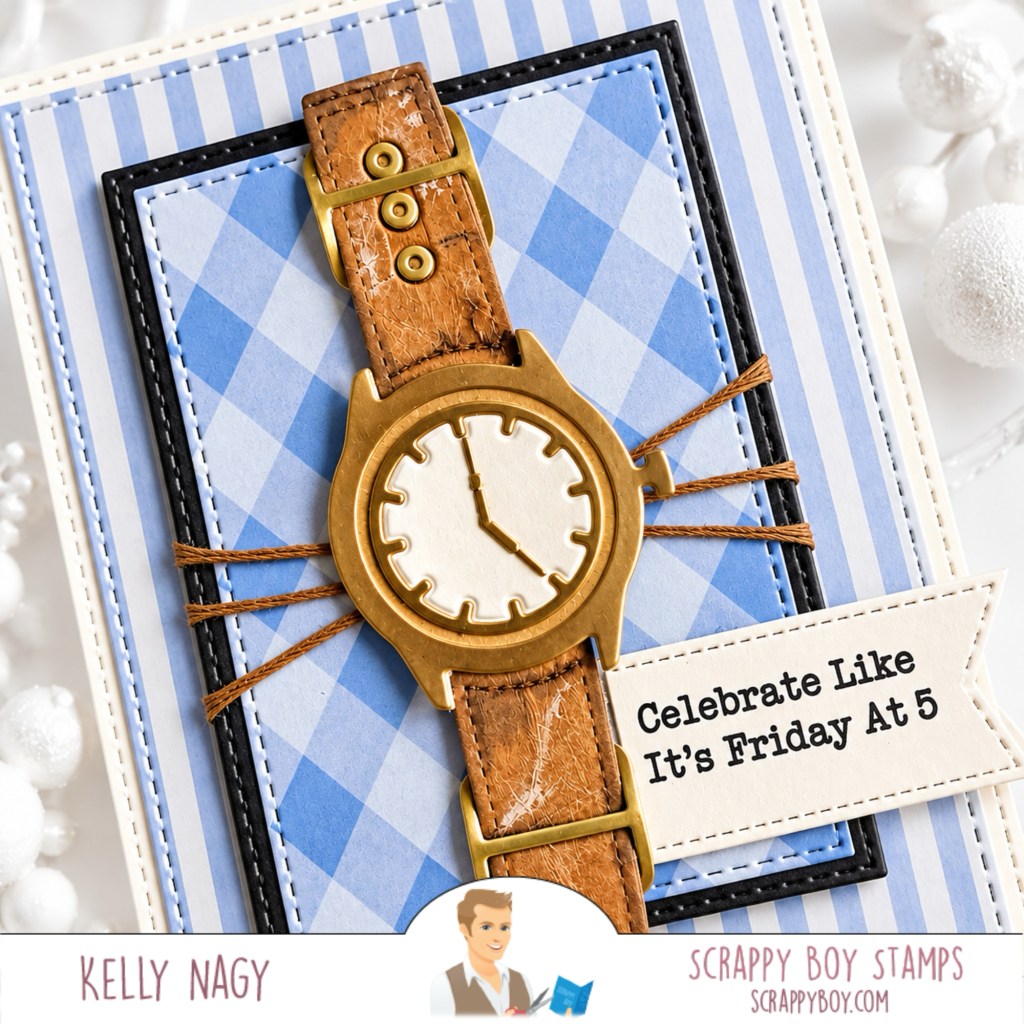
Featuring Scrappy Boy Dies & Patterned Papers

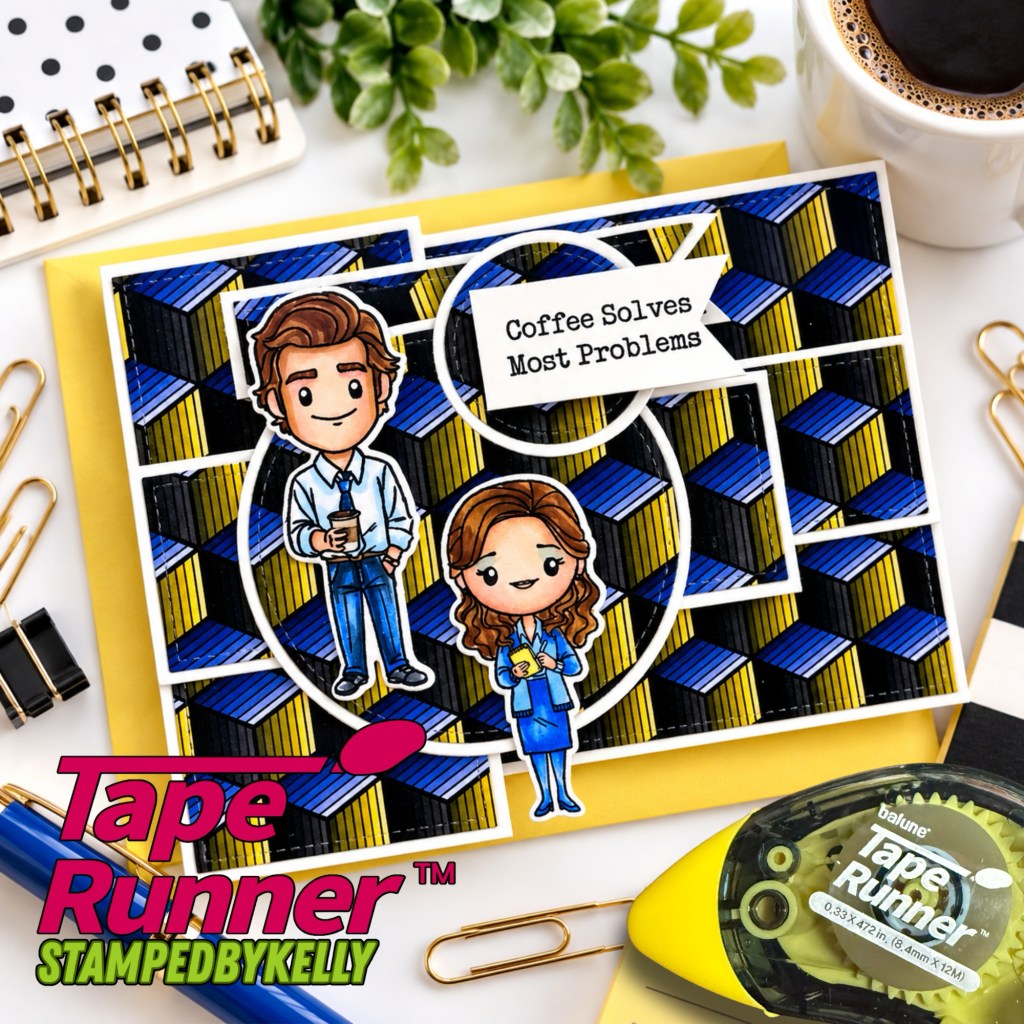
Coffee Solves Most Problems!

Next up is a little workplace humor featuring the Professionally Unhinged and Working Hard-ish collection.

I combined two adorable characters inspired by a couple we grew to love, with a bold geometric patterned background and layered geometric die-cut frames.

Copic Coloring Combinations

I had so much fun coloring these two adorable characters! There’s just something about a cute stamped image and a little coffee inspiration that makes me smile. I stamped both characters using Memento Tuxedo Black Ink and reached for my Copic Sketch Markers to bring them to life. I wanted to keep their coloring soft and cheerful, with warm peachy skin tones, rich brown hair, and beautiful shades of blue for their outfits. I especially love how the little details, from his coffee cup to her tiny notepad, give each character so much personality!
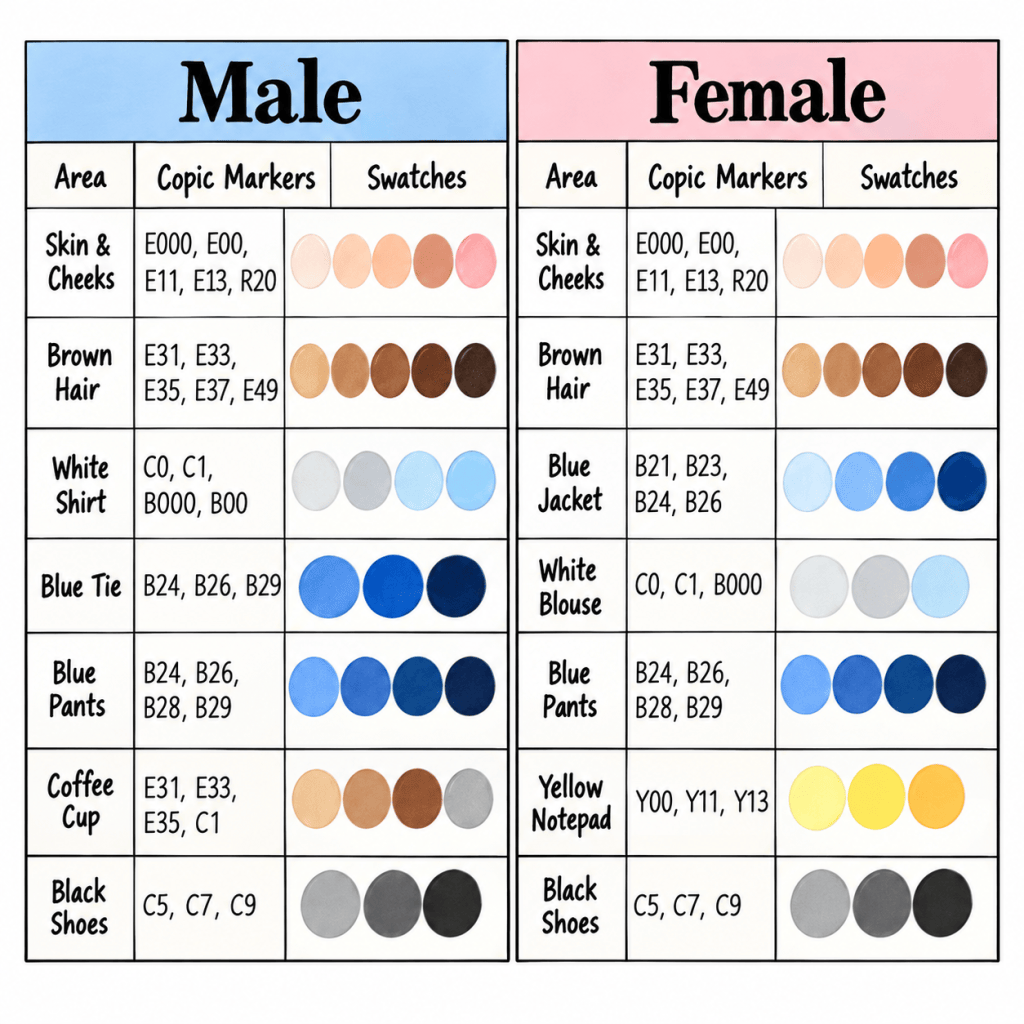
The sentiment says it all:

“Coffee Solves Most Problems”

I love the dimension created by the overlapping frames and circular elements. They give the card plenty of movement without overwhelming the stamped characters.

This is such a fun collection for creating cards for coworkers, friends, supervisors, or anyone who appreciates a little workplace humor.

Stretch Your Stash and Think Outside the Box

One of my favorite things about paper crafting is discovering new ways to use products I already own.

Before adding something to my collection, I like to imagine at least three different ways I could use it. These projects are great examples of how patterned papers, basic layering dies, sentiment banners, and specialty dies can work together to create something completely different.

Don’t be afraid to mix collections, experiment with unexpected color combinations, or use a specialty die without its intended interactive feature.

Featured Scrappy Boy Products

You can explore the September release and other fabulous collections at ScrappyBoy.com.

My Favorite Dry Adhesive!
Of course, all those beautiful layers need something to hold them together!

I love using my TapeRunner adhesive for assembling my projects. It’s especially handy when working with multiple layers of cardstock and patterned paper.

Shop at TapeRunner.com and use my exclusive promo code KELLY10 to save 10% off your cart.

Until Next Time!

Whether you’re counting down the minutes until Friday or enjoying another cup of coffee, I hope these projects inspire you to make a little time for creativity.

Happy crafting!

Kelly

Follow me on Facebook here>>>Stamped by Kelly

http://www.stampedbykelly.blog

Follow along on Instagram @stampedbykelly and YouTube @stamped_by_kelly for more crafty inspiration!
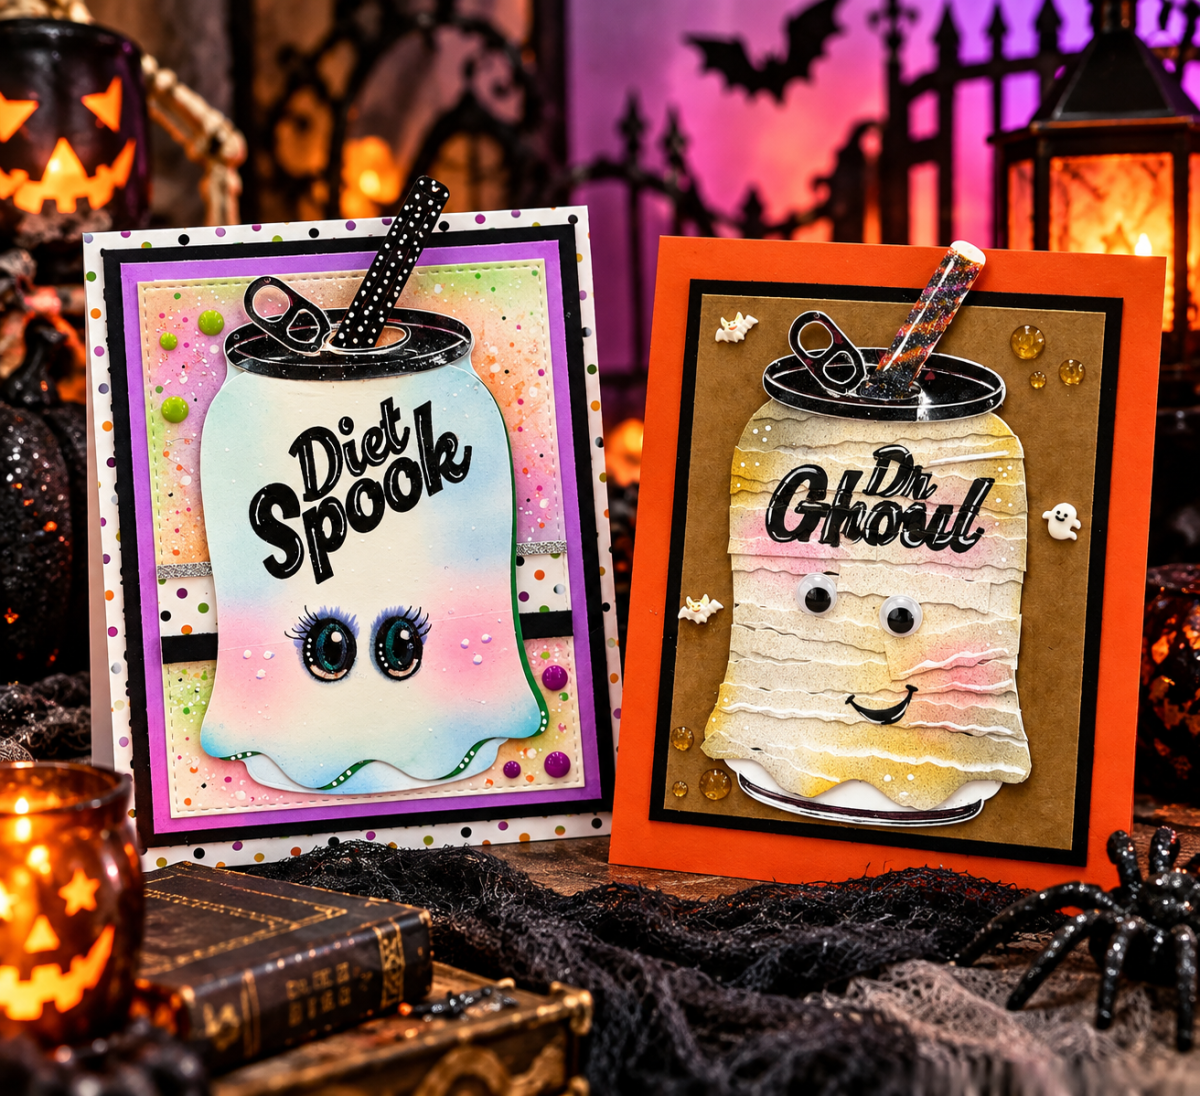
Meet Dr. Ghoul! 👻 A Spooky Soda Can Makeover

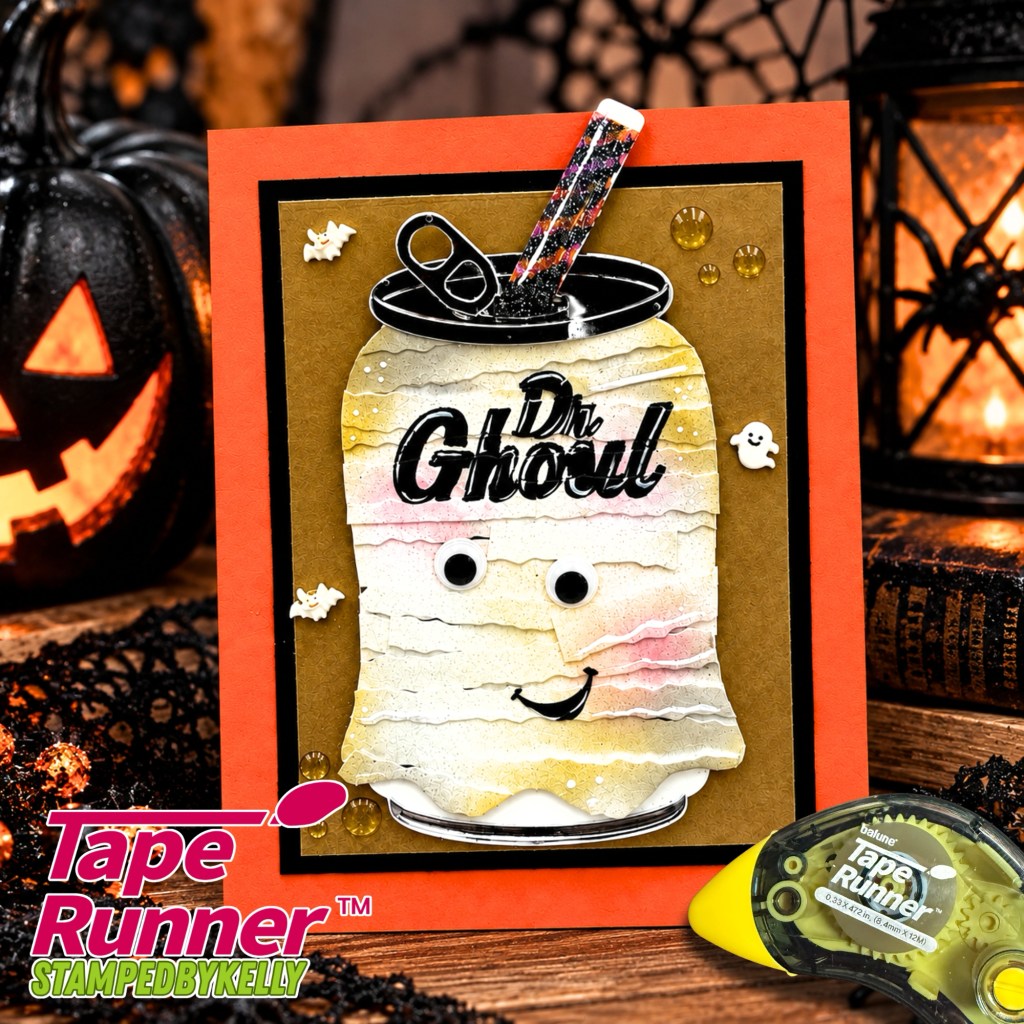
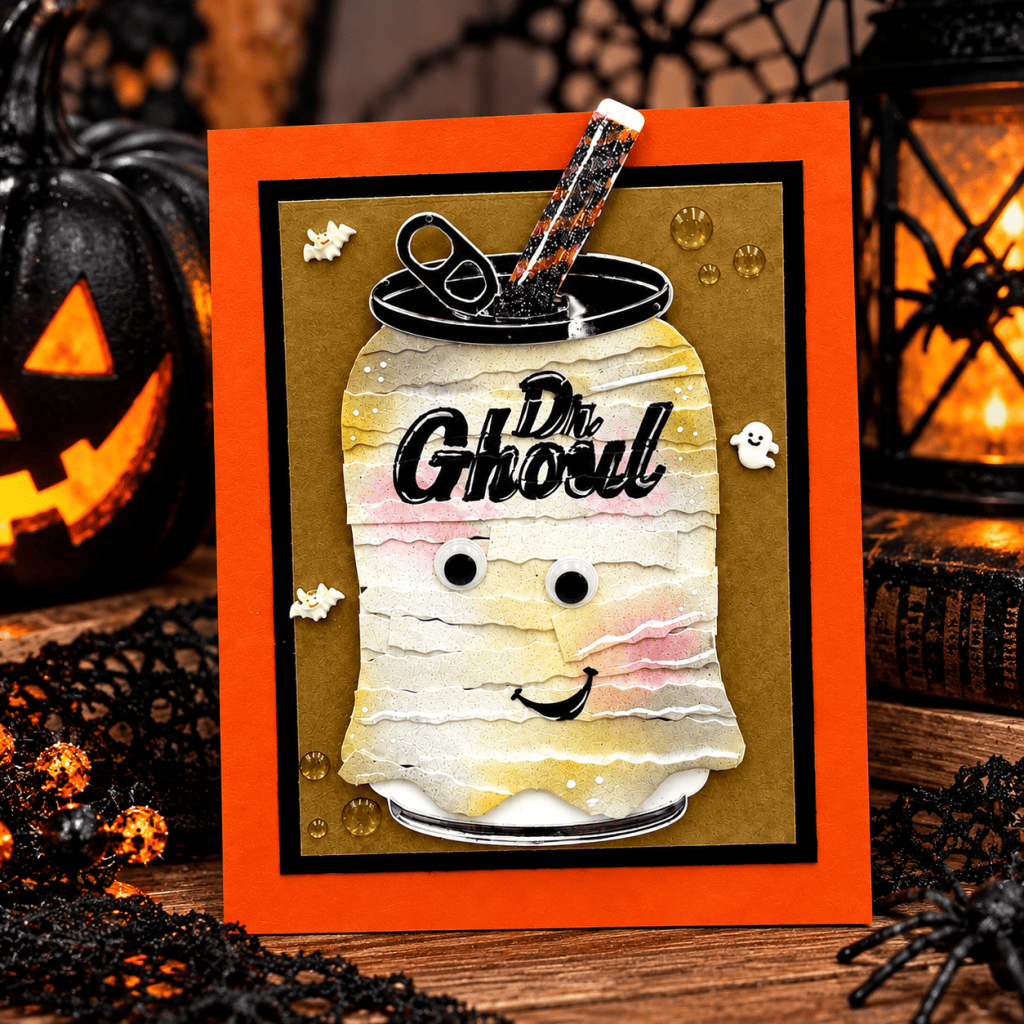
👻 Meet Dr. Ghoul, project #2 of my five spooky soda can makeovers! Inspired by crafty friend Sandi Powers, this adorable mummy features deckled-edge cardstock scraps, metallic details, and a glittery straw. See how I’m stretching my Sassy Club Stamps stash, and follow along for three more reveals! 🧡

Project #2 of 5 | Sassy Club Stamps | Stamped by Kelly

Who knew a soda can could be so SPOOK-tacular? 👻🥤

I’m back with my second Halloween creation featuring the Sassy Club Stamps Soda Can Die Set! Meet Dr. Ghoul, an adorable mummy made with cardstock scraps, a little ink, and plenty of crafty imagination!

If you’ve followed me for a while, you know my rule: Before purchasing a crafty product, I try to think of at least three different ways to use it. Well, this die set has inspired FIVE projects!

A Little Inspiration from a Crafty Friend 💕

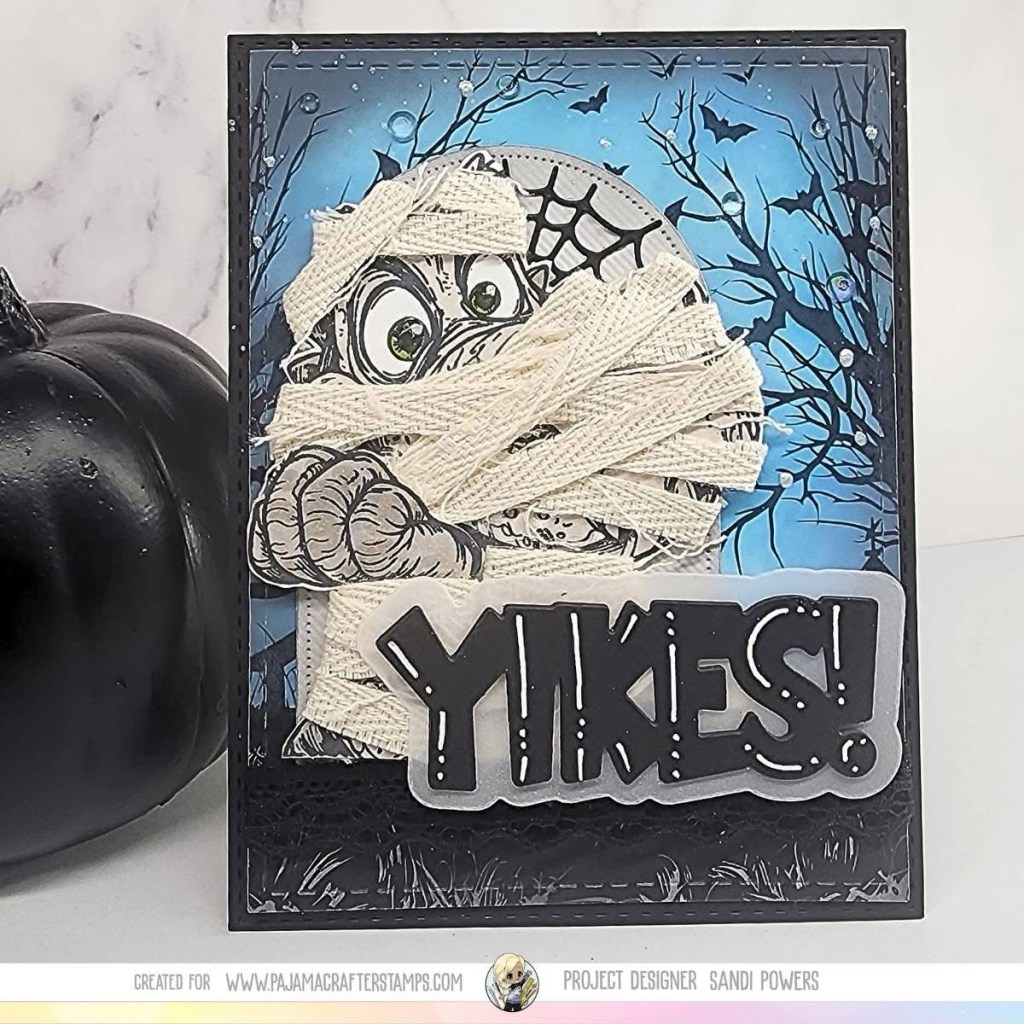
Several weeks ago, my talented friend Sandi Powers shared an adorable project where she transformed a dinosaur image from Pajama Crafter Stamps into a mummy!

Her creativity inspired me to look at my own supplies differently. Why not give my soda can a mummy makeover, too?

Photo and project credit: Sandi Powers.

Be sure to check out Sandi’s beautiful work! You can also explore Pajama Crafter Stamps through my affiliate link.

Affiliate disclosure: I may earn a small commission from qualifying purchases made through my affiliate link, at no additional cost to you.

Let’s Get Wrapped Up! 🧻

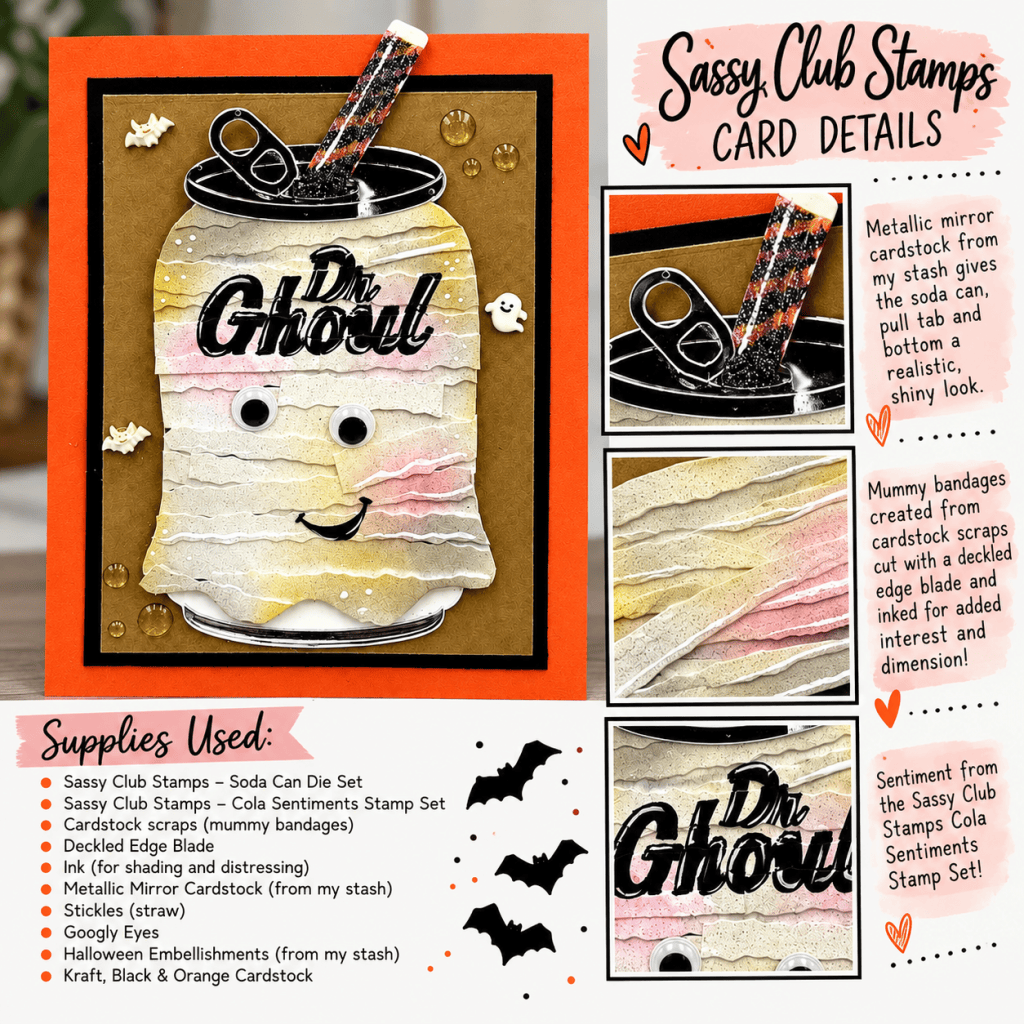
My favorite part of Dr. Ghoul is those mummy bandages, made entirely from cardstock scraps!

  • Mummy bandages: Cut scraps into strips with my deckled-edge blade, inked the edges, and layered them for dimension.
  • Metallic details: Mirror cardstock gives the soda can rim, pull tab, and bottom a realistic shine.
  • Halloween sparkle: Stickles on the straw add a little holiday glitz!
  • Card layers: Kraft, black, and orange cardstock.
  • Finishing touches: Googly eyes, white gel pen details, glossy dots, and Halloween embellishments from my stash.

Supplies Used 🛍️

Sassy Club Stamps

From My Stash

  • Cardstock scraps and deckled-edge blade
  • Ink for distressing
  • Metallic mirror cardstock
  • Stickles glitter glue
  • Kraft, black, and orange cardstock
  • Googly eyes, white gel pen, and Halloween embellishments

A Little Adhesive Love

Of course, a project with this many layers calls for dependable adhesive! I love using my TapeRunner to assemble my cards.

You can shop at TapeRunner.com and use code KELLY10.

More Spooky Sips Are Coming! 👀

Dr. Ghoul is project #2 of 5, and I’m revealing the remaining soda can creations over the next few days!

I hope these projects encourage you to look at your dies differently and stretch those crafty dollars a little further!

💕 Please LIKE and FOLLOW @StampedByKelly on Facebook and social media! Your likes, comments, and follows truly mean so much to me. They let me know you’re enjoying my projects and inspire me to keep sharing!

Now tell me — which is your favorite so far, Diet Spook or Dr. Ghoul? 👻🥤

Thanks for stopping by!

Stay crafty and keep stretching that stash!

Kelly 💕
Stamped by Kelly

#StampedByKelly #SassyClubStamps #DrGhoul #HalloweenCardmaking #StretchYourStash #HandmadeCards

A Little Hex Appeal + A Whole Lot of Franken-Fine!

Get spooky-cute with the NEWEST Hex Appeal release from Scrappy Boy Stamps! See how I used the August Card Sketch Inspiration to create this Franken-Fine Halloween card, complete with patterned papers, stitched dies, heat embossing, and my Copic color combinations. 💚💜🎃

I’m popping in with a little spooky-cute inspiration featuring the NEWEST release from Scrappy Boy Stamps — HEX APPEAL! 🎃💜💚

Featuring Hex Appeal & Coordinating Products

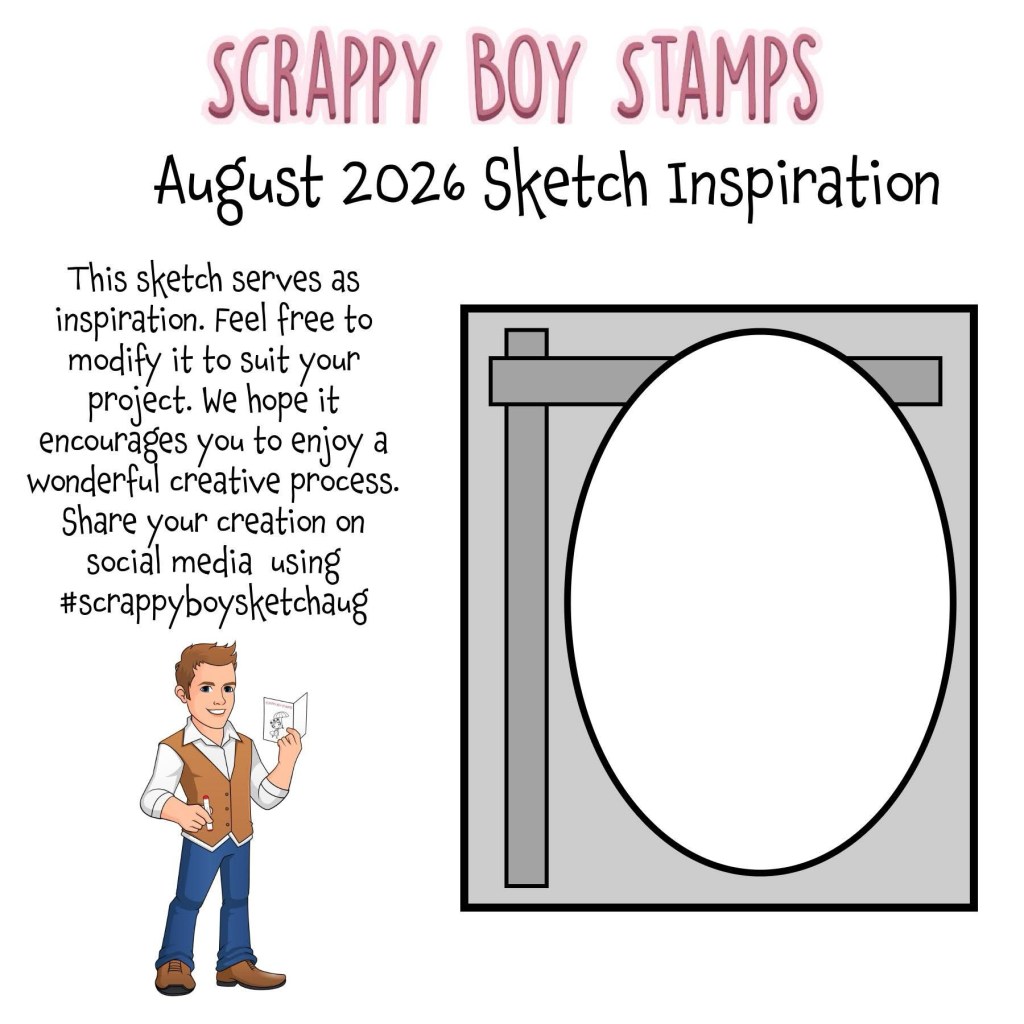
For this card, I also took inspiration from the Scrappy Boy Stamps August Card Sketch. There’s still a little time to play along, so grab your favorite Scrappy Boy goodies and put your own spin on the sketch!

One of my favorite things about sketches is that they take away that “where do I start?” moment. You already have the bones of the design—you just get to make it yours!

My Take on the Sketch

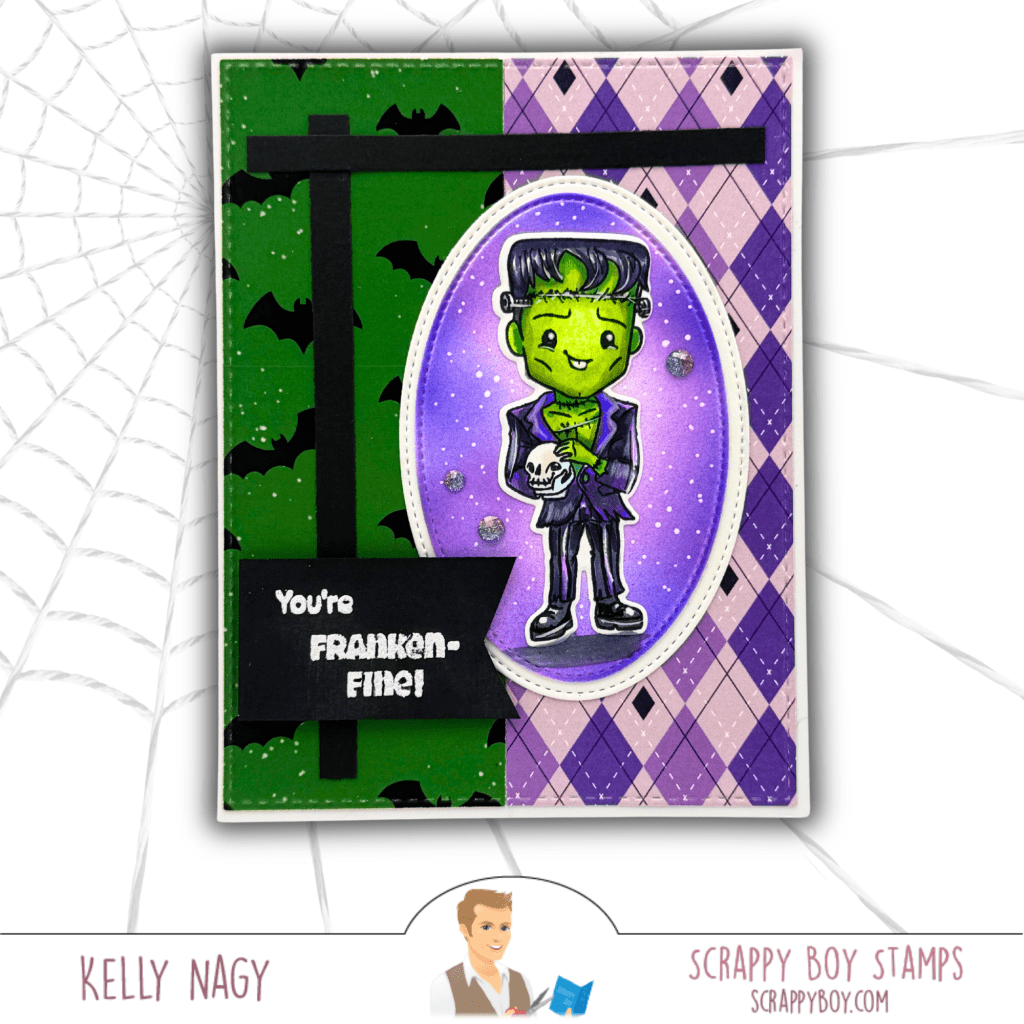
I stayed fairly close to the original layout, using two contrasting patterned papers for the background and bold black cardstock to recreate the strong horizontal and vertical elements.

Of course, the star had to be this adorable little Frankenstein! 💚

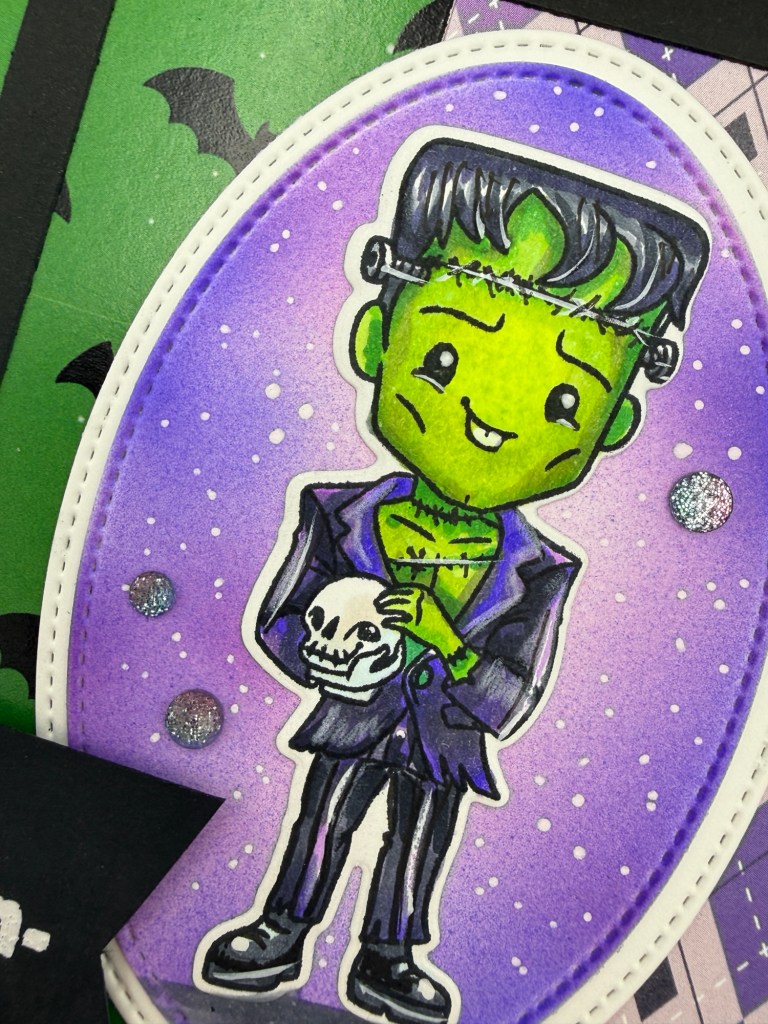
I placed him inside an Oval Stitched Nesting Die and gave the background a soft purple blend using my airbrush attachment from Copic to help him pop without competing with the image. A few white splatters and sparkly accents finished off the background.

And how could I resist…

“You’re Franken-Fine!” 😂

Close up to see white gel pen accents

Copic Coloring

I colored my little guy with Copic markers, using bright yellow-greens for that classic Frankenstein look and deep violets and cool grays to coordinate with the Hex Appeal patterned paper.

Copic Color Combinations:

💚 Skin: YG01 • YG03 • YG05 • YG07
💜 Purple: V12 • V15 • V17
🖤 Black/Gray: C3 • C5 • C7 • C9
🤍 Skull: C0 • C1 • C3

Feel free to substitute your favorite combinations—the fun is making these characters completely your own!

Scrappy Boy Supplies

🎃 HEX APPEAL STAMPS & OUTLINE DIES
👻 HEX APPEAL 6×9 PAPER PACK
✂️ OVAL STITCHED NESTING DIES
✂️ RECTANGLE STITCHED NESTING DIES

The Hex Appeal 6×9 Paper Pack made this sketch especially fun. Mixing the green bats with the purple argyle gave me plenty of pattern and color while still allowing my stamped image to remain the focal point.

For the sentiment, I heat embossed “You’re Franken-Fine!” in white on black cardstock. The crisp white embossing against the bold black gives the sentiment plenty of contrast and ties in perfectly with the black elements from the sketch. 🖤

My Go-To Dry Adhesive ✂️

With all these fun layers, I reach for my TapeRunner dry adhesive! It makes lining up and layering cardstock quick and easy, while helping keep my panels smooth and warp-free—especially when working with multiple layers.

Want to give it a try? Use promo code KELLY10 for 10% OFF your TapeRunner purchase! 💕

Come Play Along!

Remember, a card sketch is meant to inspire you—not limit you. Change the shapes, flip the design, rotate it, add another layer or simplify it. There’s no wrong way to interpret it!

You still have a little time to join the Scrappy Boy Stamps August Sketch Inspiration, so get those stamps, dies and papers out and PLAY!

When you share your creation on social media, be sure to use:

#scrappyboysketchaug

I can’t wait to see what you create!

Happy Crafting!
Kelly
Stamped By Kelly

Let Minnow How You’re Doing!

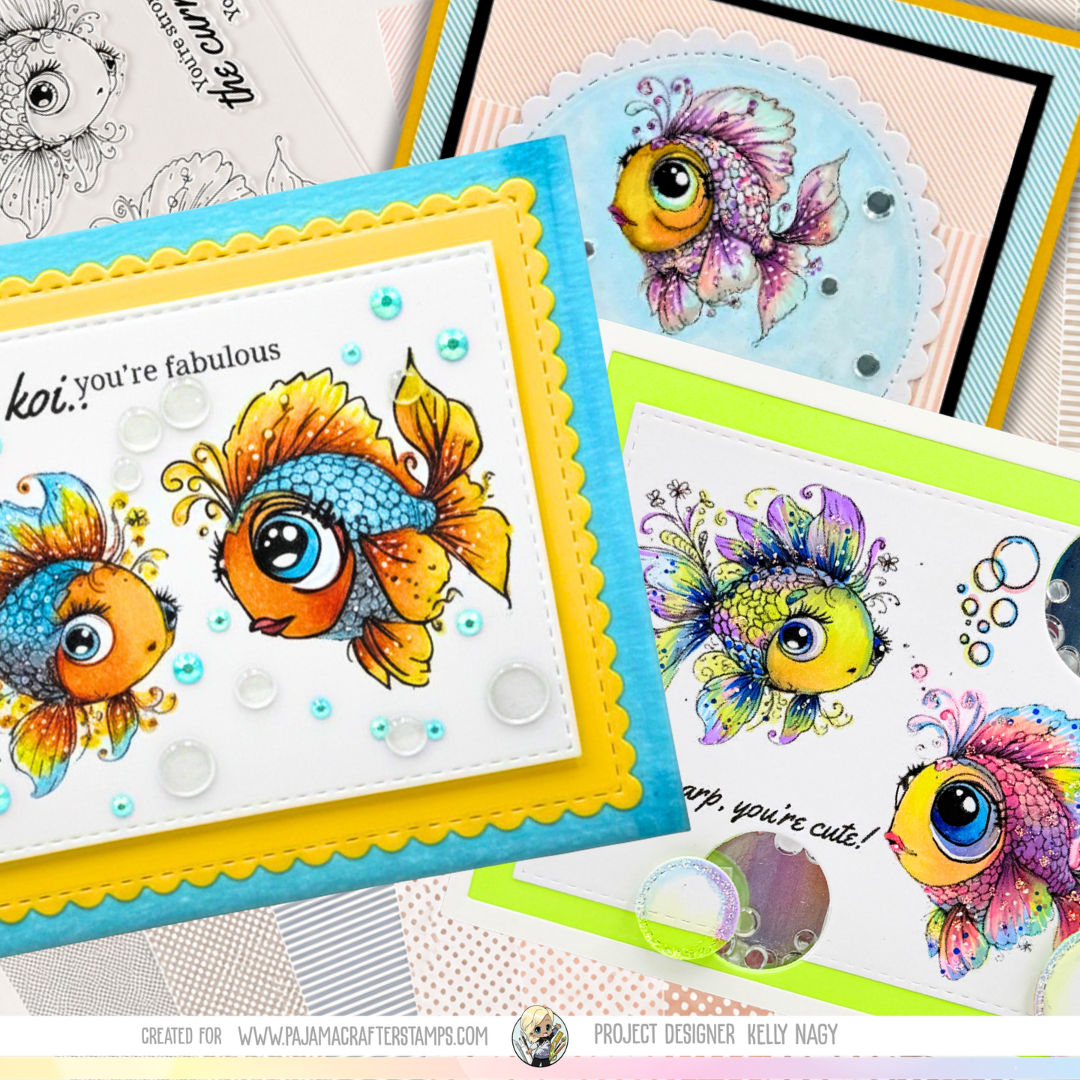
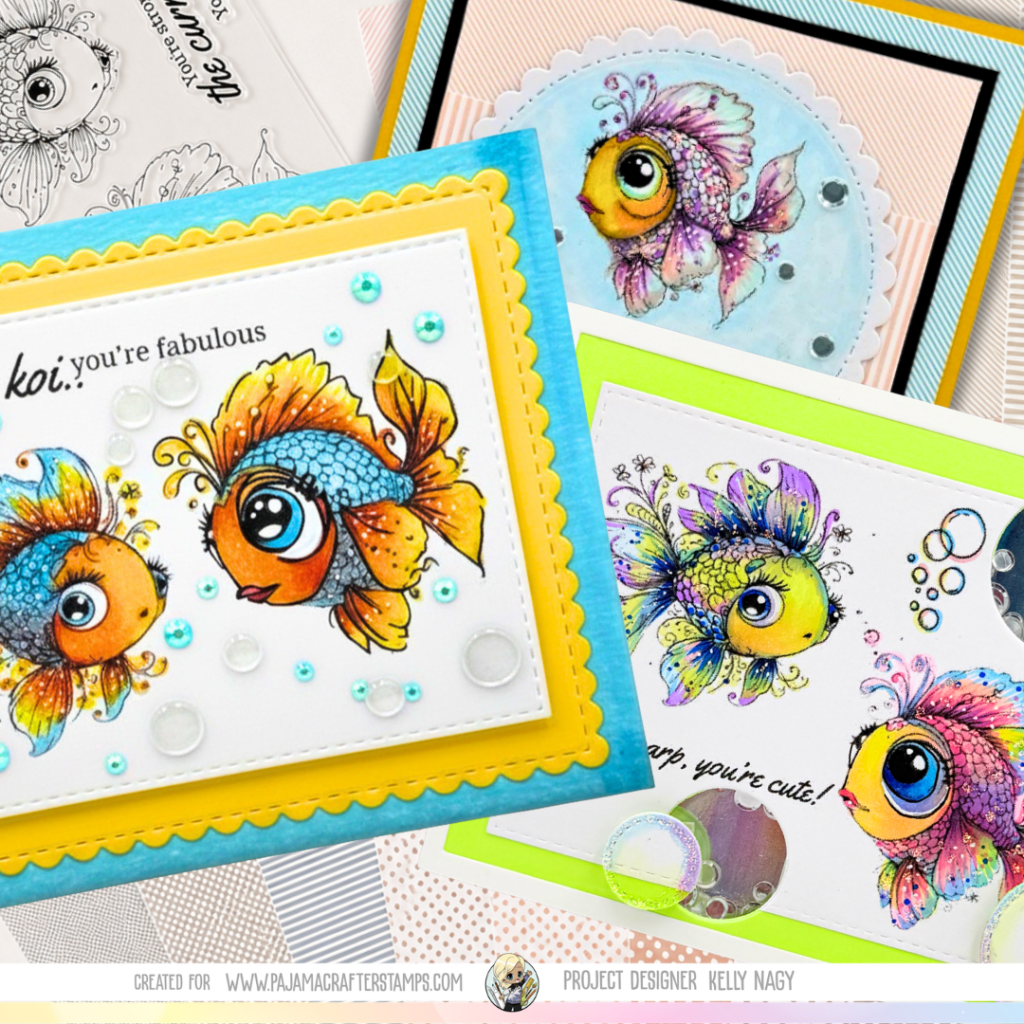
Bright colors, playful patterns, and a fish full of personality make today’s card impossible to resist! Using the Don’t Be Koi stamp set and coordinating patterns from the Savannah Neutrals 6×6 Paper Pack, I created a cheerful card that’s perfect for sending a smile. Stop by to see the simple layering technique, Copic color combination, and all the details that bring this adorable fish to life.

Featuring Don’t Be Koi from Pajama Crafter Stamps

Featuring the Don’t Be Koi Stamp Set from Pajama Crafter Stamps⁠

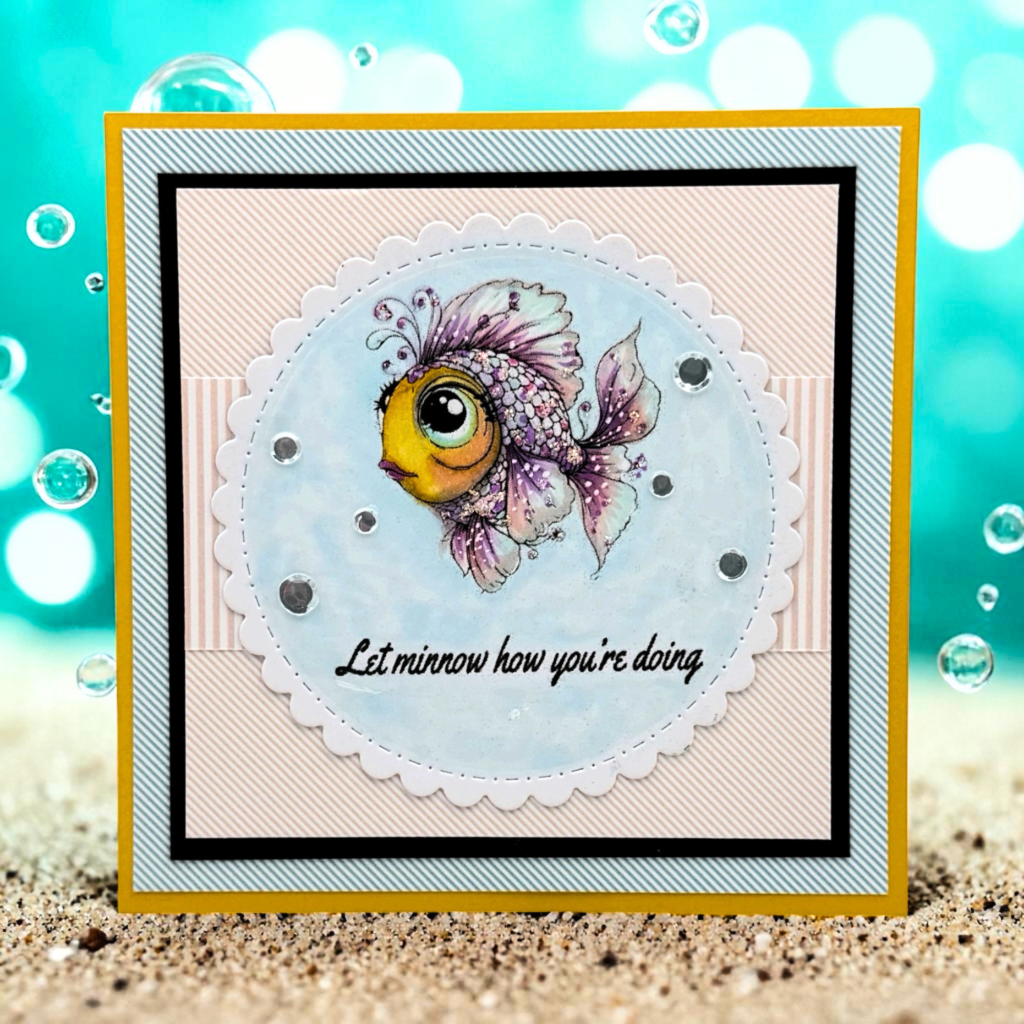
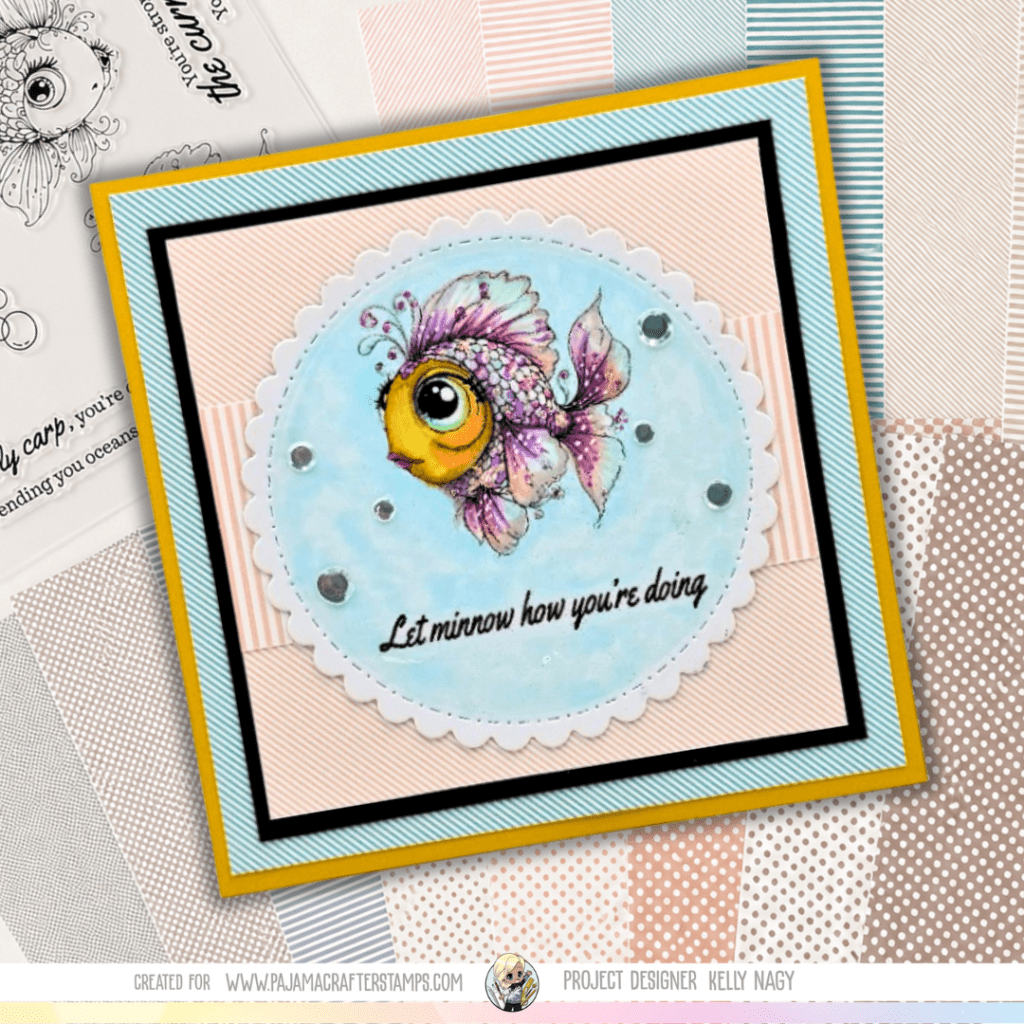
There is something so charming about a fish with a big personality, and the Don’t Be Koi stamp set delivers exactly that! For today’s card, I paired this adorable fish image with soft pastel patterns from the Savannah Neutrals 6×6 Paper Pack to create a cheerful, layered design that feels light, bright, and perfect for sending a little encouragement.

The combination of blush pink, aqua, black, and sunny yellow creates a fun color palette that helps the fish become the focal point while the patterned paper layers add interest without overwhelming the design. A scalloped circle frame and a few sequins finish the card with just the right amount of sparkle.

Shop Here ➜ Pajama Crafter Stamps


Copic Colors Used

Koi Body

  • Y15
  • Y17
  • Y38

Eye

  • BG10
  • BG13
  • BG15
  • C1

Scales & Fins

  • V12
  • V15
  • V17
  • RV52
  • RV55

Shading

  • BV00
  • BV02
  • C1

Highlights

  • White gel pen


Design Details

This card was created by layering several complementary patterns from the Savannah Neutrals 6×6 Paper Pack. Using multiple coordinating patterns helps build dimension while keeping the overall design cohesive.

Products Used

Pajama Crafter Stamps

  • Don’t Be Koi Stamp Set
  • Savannah Neutrals 6×6 Paper Pack
  • Marshmallow Cardstock
  • Coal Cardstock
  • Barely Art Precision Craft Glue

Additional Supplies

  • Scalloped Circle Die
  • Copic Markers
  • Clear Sequins
  • White Gel Pen
  • Taperunner Dry Adhesive
  • Bearly Arts Glue Wet Adhesive

Shop Here ➜ Pajama Crafter Stamps