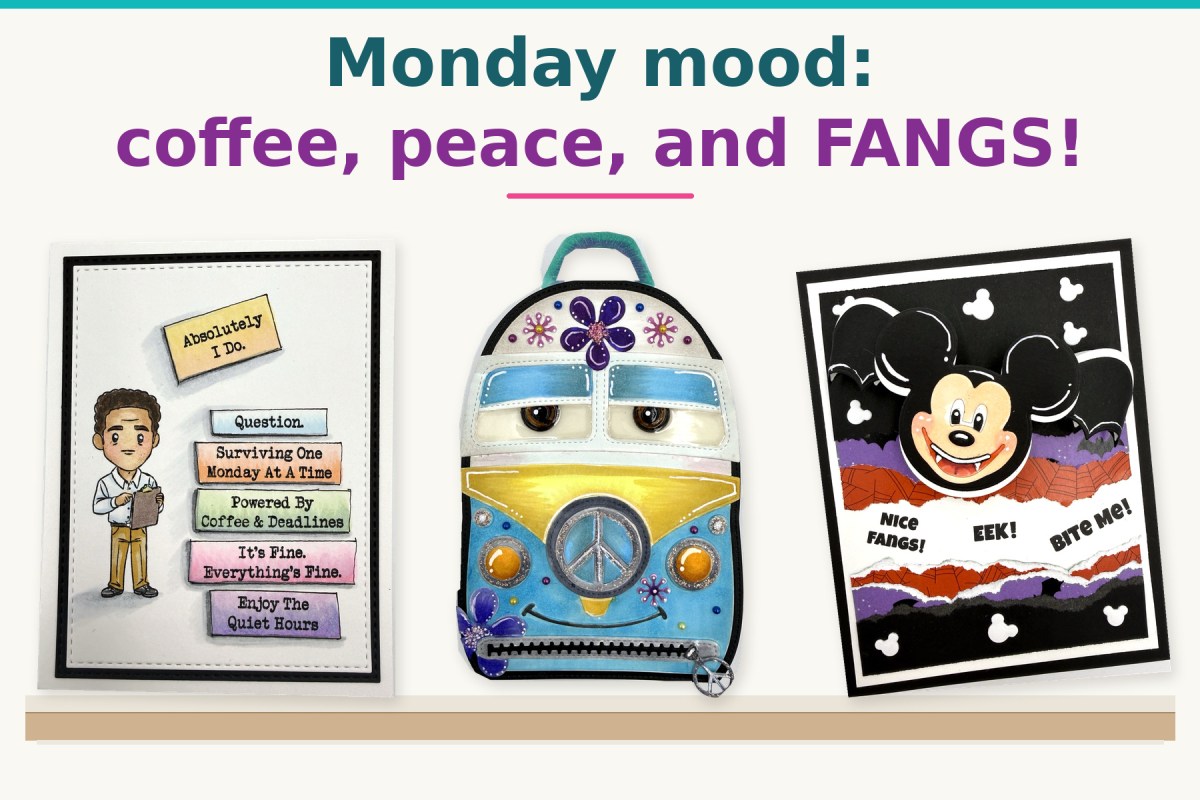
Monday Mood: Coffee, Peace & Fangs!

Coffee-fueled humor, groovy peace, and fang-tastic fun! Explore three handmade projects featuring Scrappy Boy stamps and dies, with colorful details and creative ways to mix your crafting stash.

October 5, 2026

Happy Monday, crafty friends! Today I’m sharing three playful projects featuring Scrappy Boy stamps and dies, with many of the layers and pieces adhered using dry adhesive from TapeRunner.com.

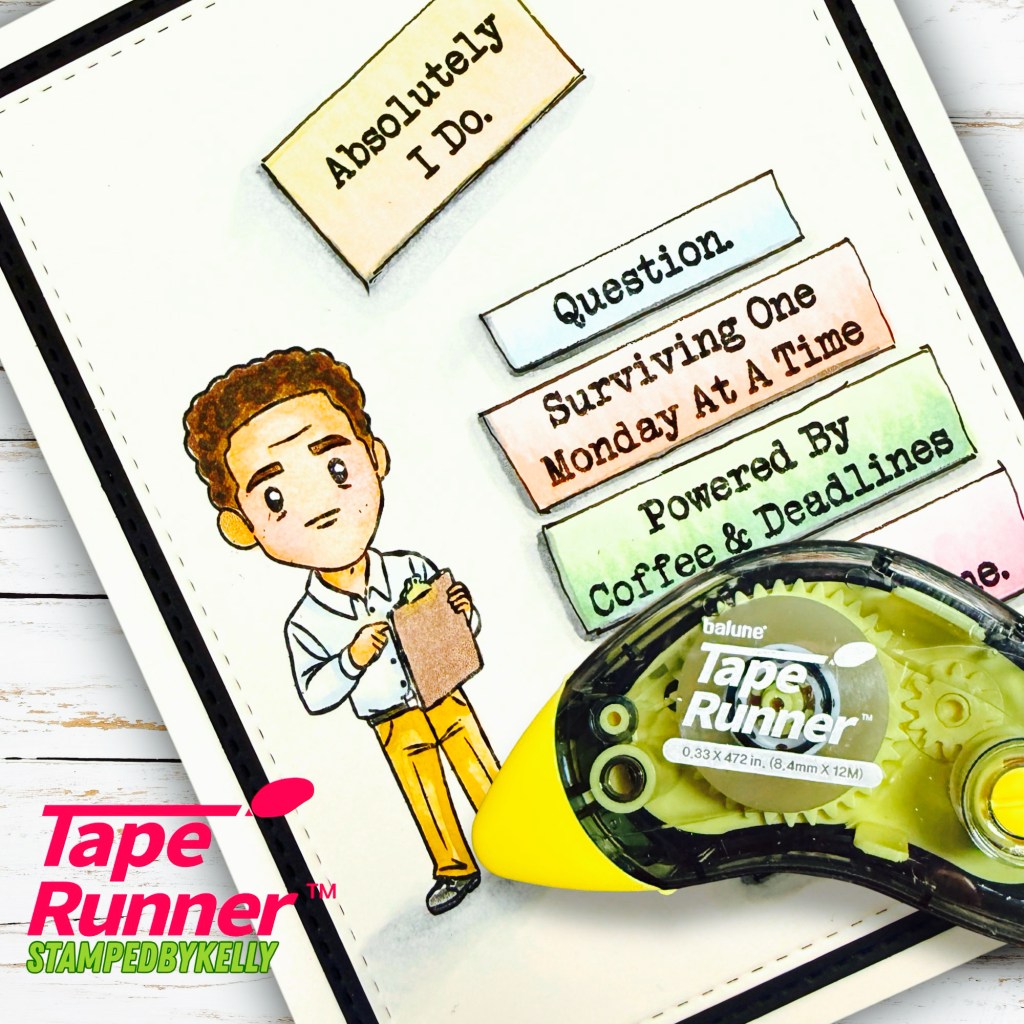
☕ Surviving One Monday at a Time
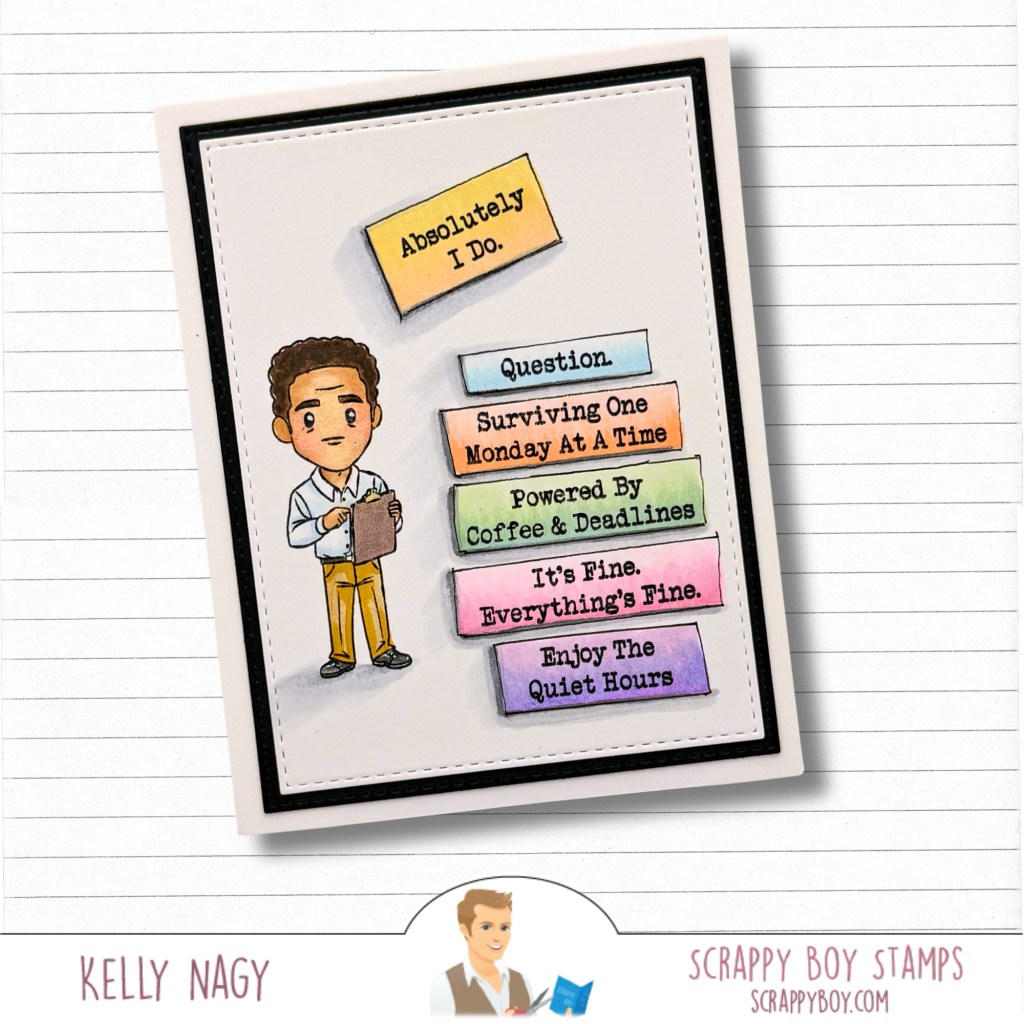
“Powered by Coffee & Deadlines” pretty much sums up Monday! Soft rainbow sentiment blocks, a clipboard-carrying character, and a crisp black frame bring this card together.

The main panel is actually a one layer card and gives the illusion of depth and dimension with simple shadows. I incorporated a pop of color by adding a simple rectangle mat with decorative stitched edge. I still enjoy having layers for a nice substantial weight on my card fronts, as well as the polished look of matting your one-layered panels by using a stitched nested rectangle die to give a small black border/frame and little added interest. 

🌼 Packed with Peace & Personality

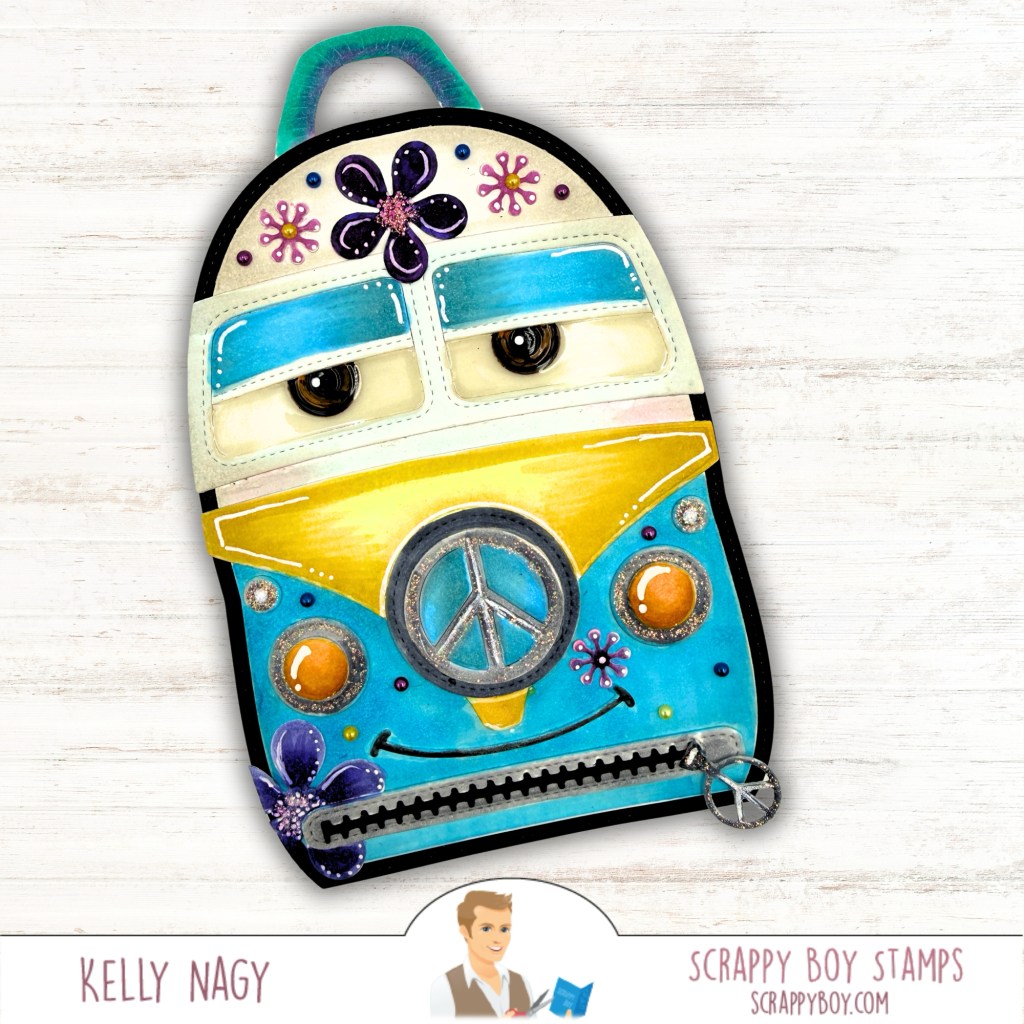
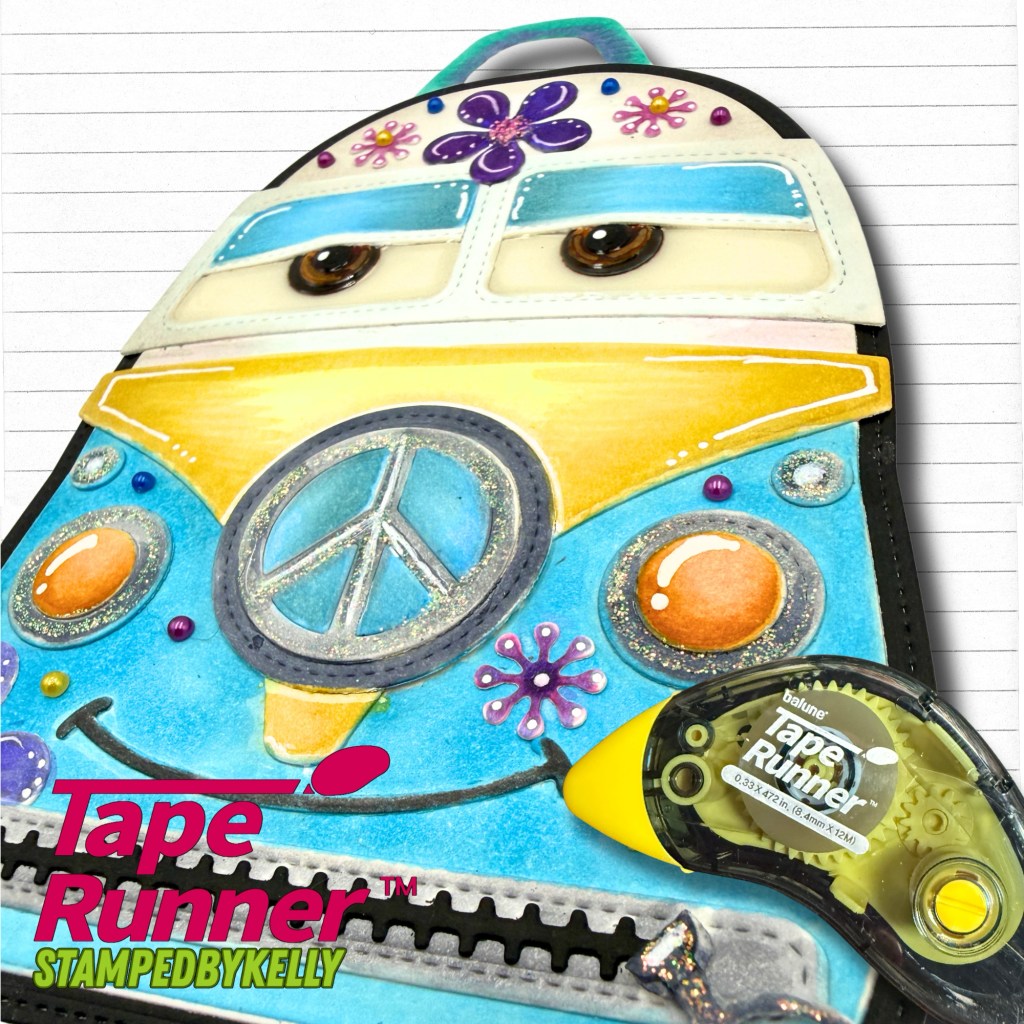
Turquoise, yellow, purple flowers, and sparkly peace signs give this smiling Vintage Van Back Pack Add-On plenty of flower-power personality!

The Vintage Van Backpack Add-On Die Set pairs with the Backpack Base Die Set, sold separately. The additional flowers were from the sweet rabbit backpack add-on set already in my stash.

The add-on pieces also work on other shapes! I’ve successfully used these sets with standard A2 bases, coffee cups, trash bins, and other standalone dies from Scrappy Boy’s collection.

  • Details: Flowers are from another back pack add-on called sweet-rabbit-backpack-add-on-die-set, silver peace signs, a decorative zipper pull, and white gel-pen highlights.
  • Copics: Turquoise BG01/BG05/BG09; yellow Y13/Y15/Y17; cream E50/E51/E53; purple V04/V06/V09; pink RV52/RV55/RV66; lights Y17/YR15/YR18; eyes E23/E25/E29.
🦇 Ear-resistibly Spooky
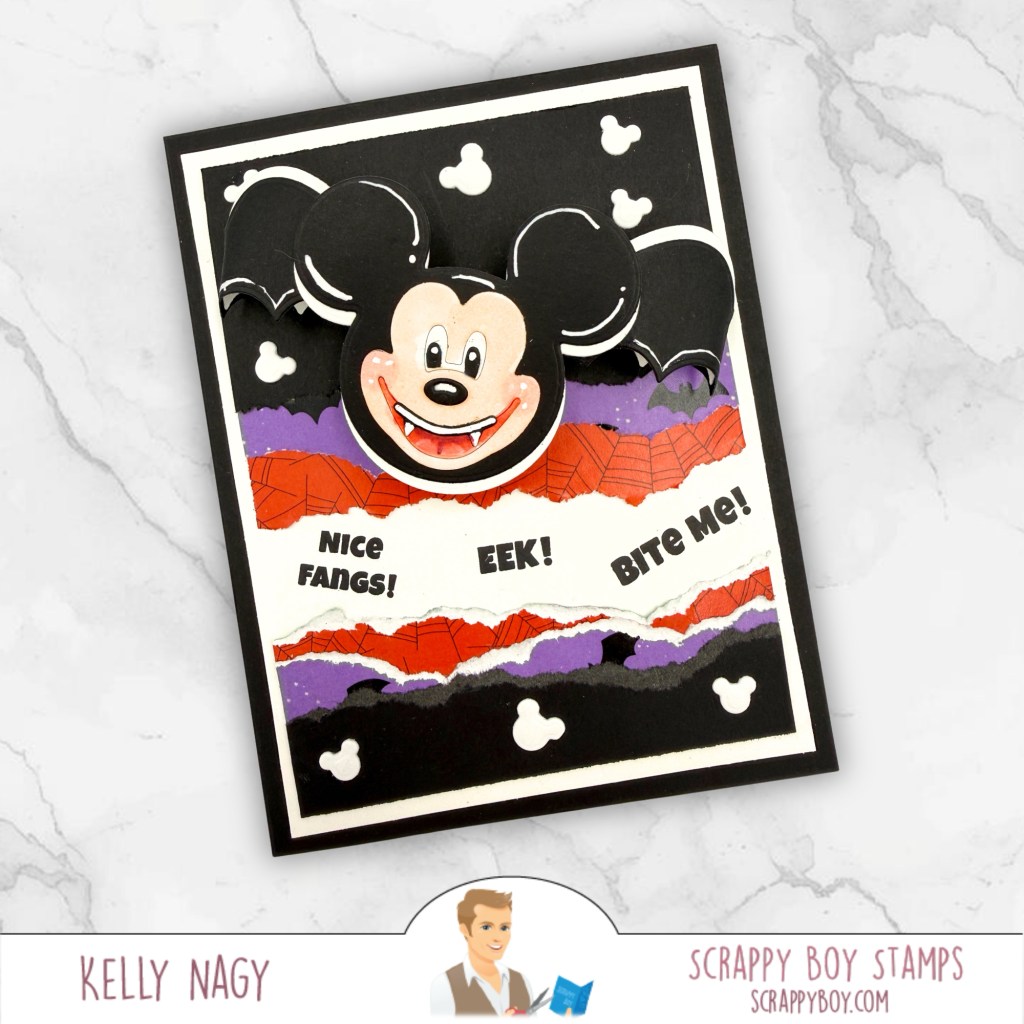
A familiar round-eared friend gets a fang-tastic makeover! Bat wings, torn HEX APPEAL PATTERNED PAPER layers, and cheeky sentiments make this Halloween card more sweet than scary.

  • Details: Black, purple, and orange layers; spiderweb paper; white highlights; and “Nice Fangs!,” “EEK!,” and “Bite Me!” sentiments.
  • I love how Scrappy Boy’s pattern paper has a substantial weight and luxurious feel and gloss coating. When torn towards you, there’s a white core, which is very beneficial when wanting to create added movement and texture on your cards without added bulk.
  • Copics: Face E000/E00/E11; cheeks R20/R22; mouth R14/R24/R29; shaded black details C5/C7/C9. Leave the fangs white! Add white gel pen accents.
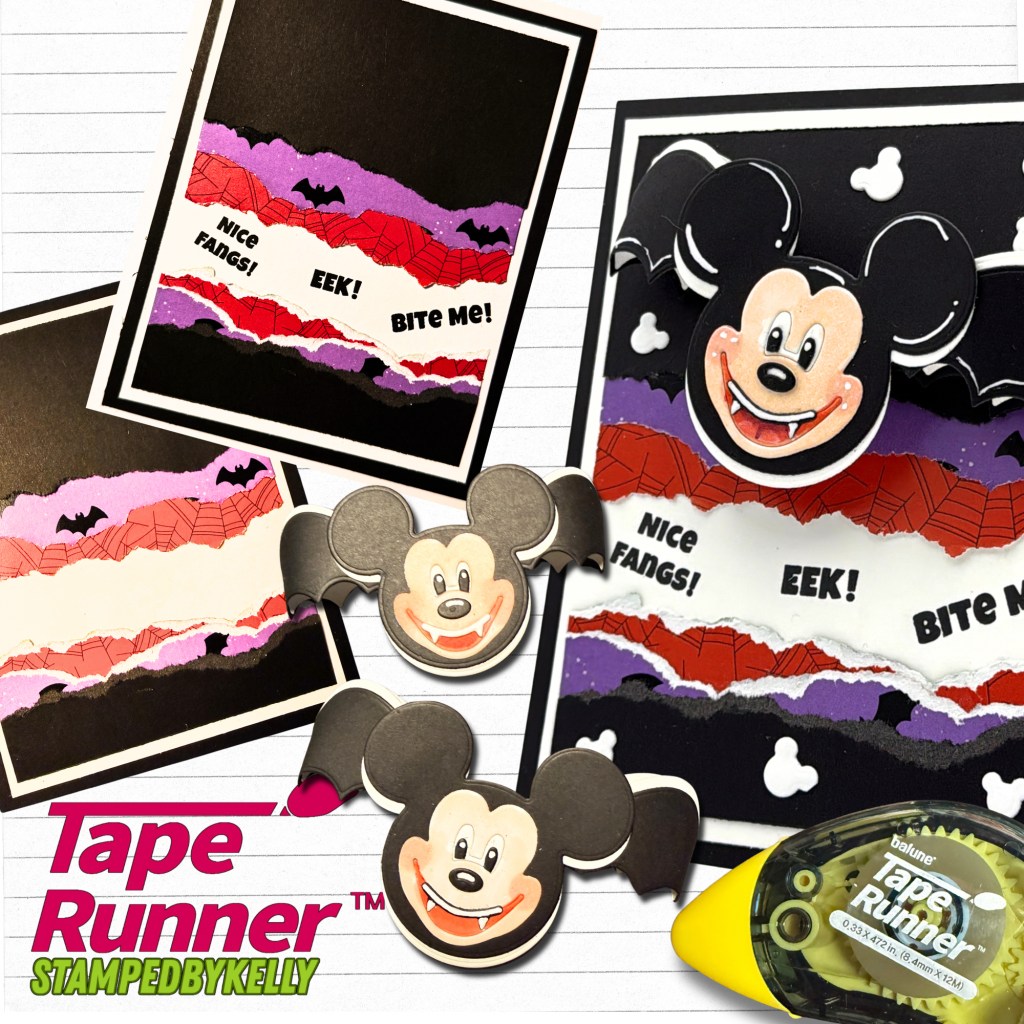
💛 Keeping It Together with TapeRunner

Many of my paper layers and die-cut pieces are adhered with TapeRunner.com dry adhesive. The adhesive comes on spools in handheld runners offered in different colors and shapes. They ultimately all serve essentially the same purpose—choose the style that feels comfortable in your hand and the color that makes you happy!
🛍️ Shop Small & Get Crafty

Support small businesses while creating something special! Find these products and coordinating supplies at www.scrappyboy.com⁠:

If an item is sold out, you may also find it at www.scrapbook.com⁠.

Which project matches your Monday mood—coffee, peace, or fangs? Tell me in the comments!

Happy crafting!
Kelly
@stampedbykelly
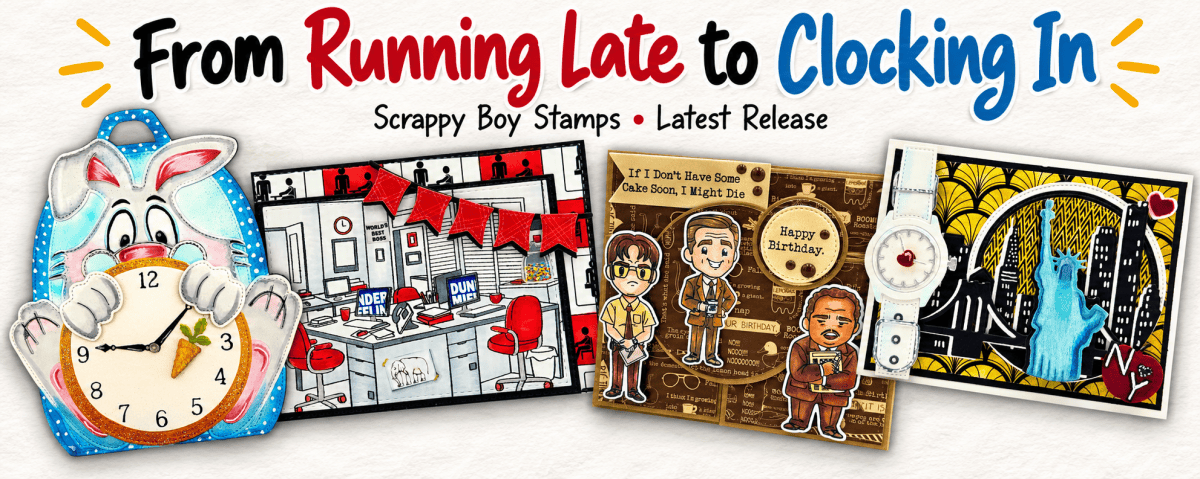
From Running Late to Clocking In: Four Projects from Scrappy Boy’s Latest Release

From running late to clocking in, these four Scrappy Boy projects are ready for a little adventure! I’m sharing the details, products used, and Copic color combos behind each one.

A rabbit with a clock, a watch in New York, and a few unforgettable coworkers—Scrappy Boy’s latest release gave me so many stories to tell! I made four separate projects, each with its own personality. I hope they inspire you to mix new products with the Scrappy Boy favorites already in your craft room.

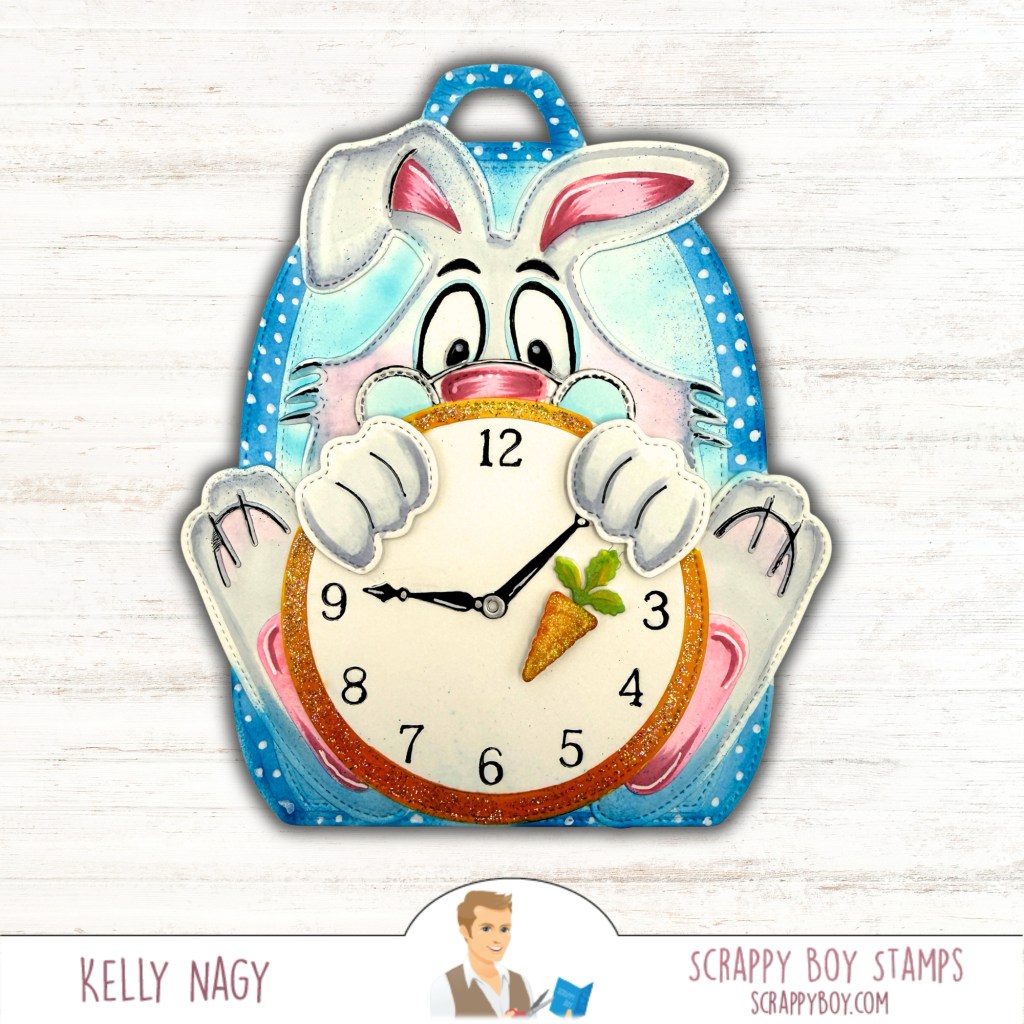
A Little Late? 🐰

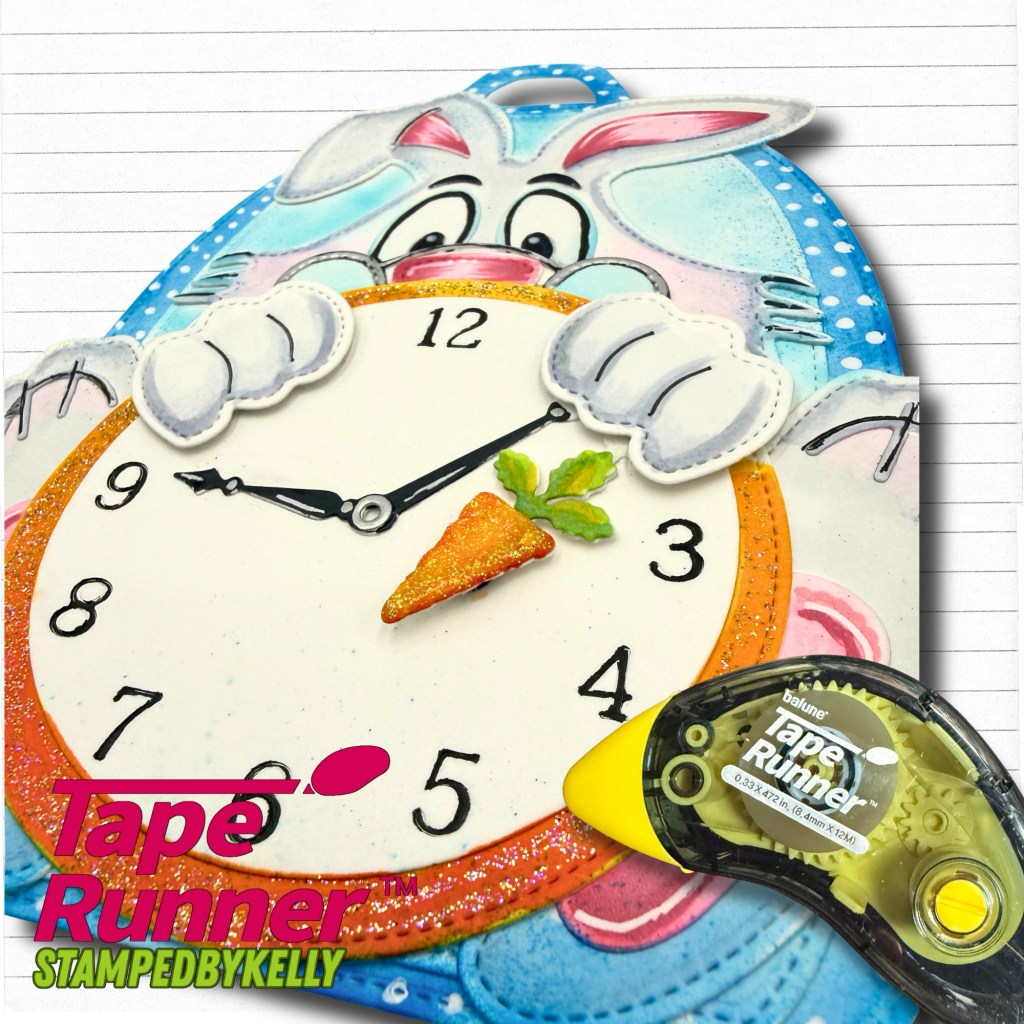
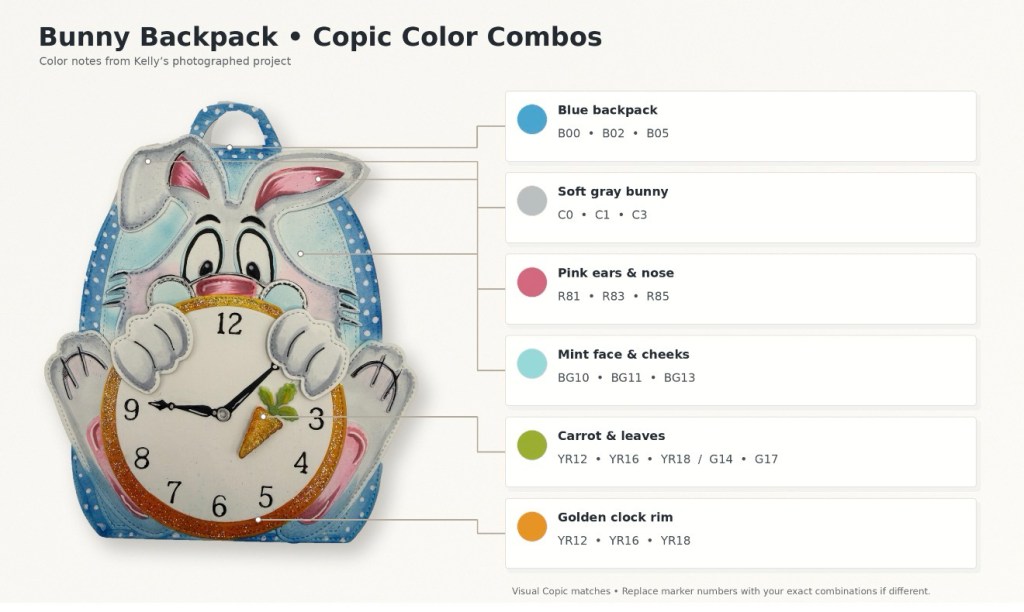
That built-in clock makes this bunny backpack feel ready for an adventure down the rabbit hole! I had fun coloring the bunny and adding little white accents to the blue backpack. I love putting together the different elements, like a puzzle, with my handy-dandy dry adhesive tape runner from Tape Runner. Use code KELLY10 only at Tape Runner for 10% OFF your cart.

I added Stickles to a variety of elements for added interest and sparkle.

Scrappy Boy Stamps’ Products used:

Copic color combinations:

New York Minute ⌚🏙️

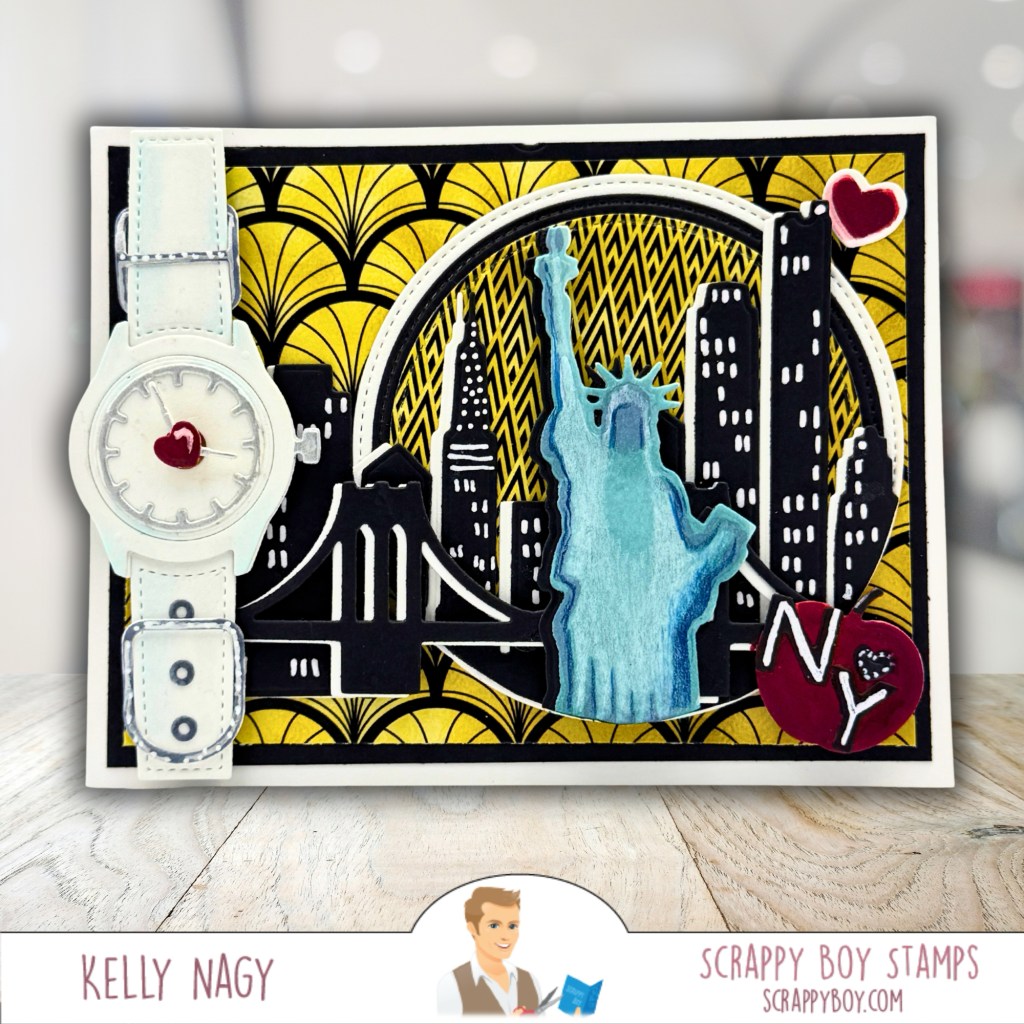
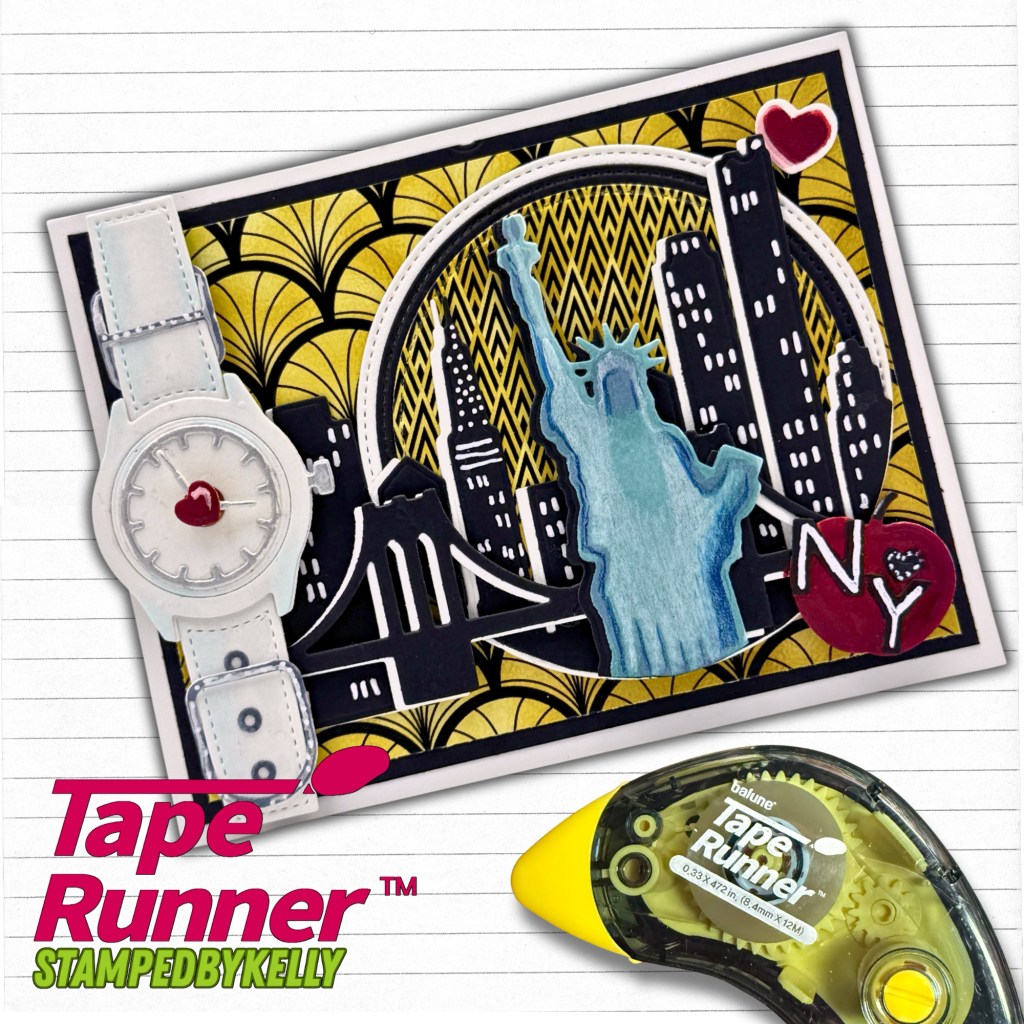
The new watch shaker die was a natural companion to Scrappy Boy’s NY Skyline Die Set, as we recognize the 25th Anniversary of 9/11 this year.

For this card, I paired Scrappy Boy’s new Shaker Watch Die with the New York skyline, their 1920’s Elegance bold patterned paper, stitched nested circle dies and a few bright accents.

I used a Spinner from my stash to make the arms on the watch-face rotate.

Products used:

Clocking In 🖥️

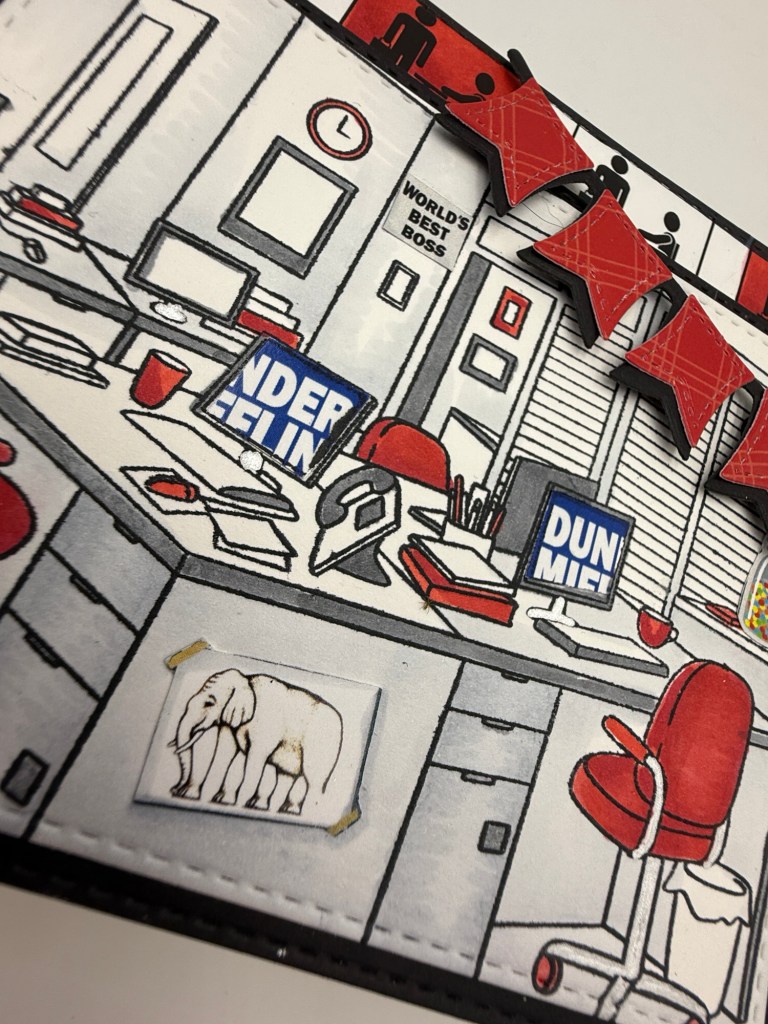
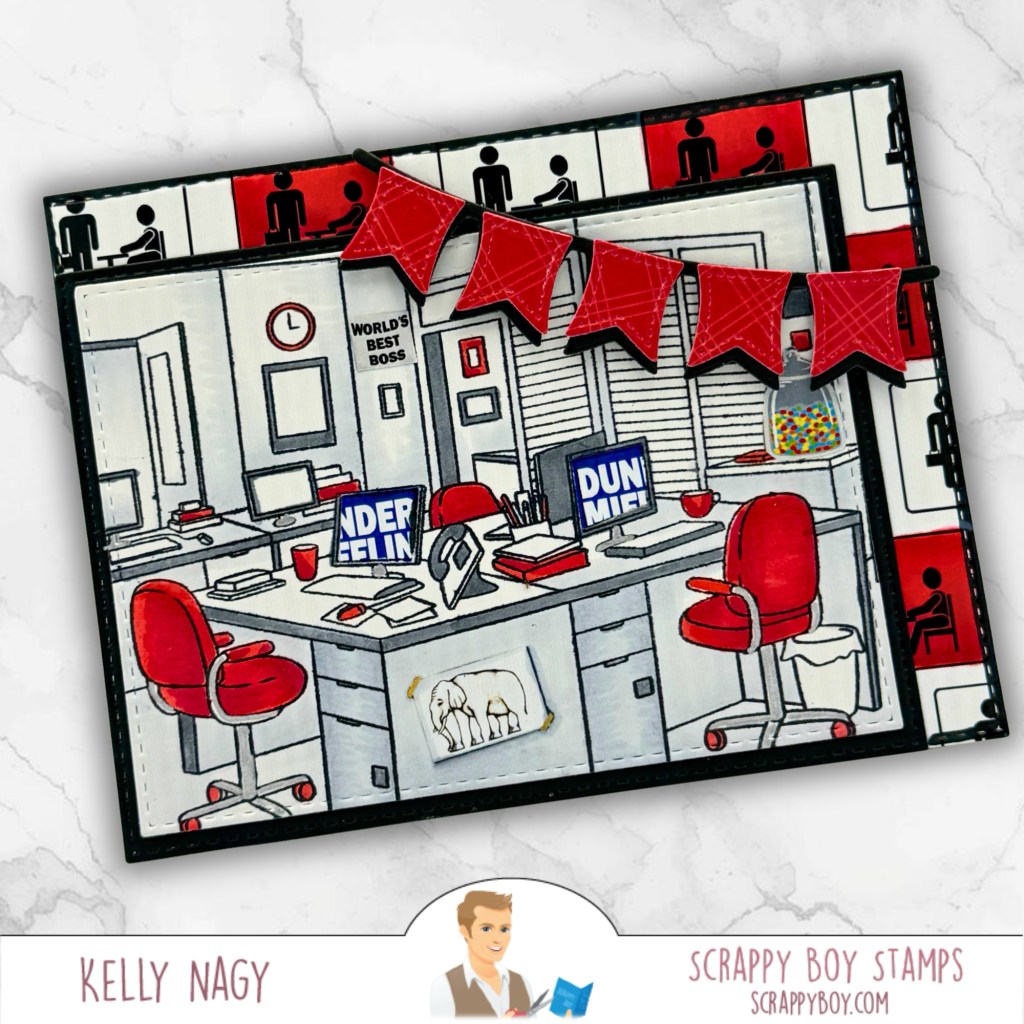
The workplace background stamp sets the scene for an office full of familiar little details. I kept the red, black, and white palette running through the whole card, from the chairs to the banner. I used elements from the coordinating paper pack to add visual interest and tie the stamp-set together.

Products used:

Copic color combinations:

  • Chairs and red details: R35, R37, R39
  • Desks and office details: BV20, BV23, N0, N2, N5
  • Stamp and Cut from Professionally Unhinged Patterned Paper

Coworkers Galore 🎂

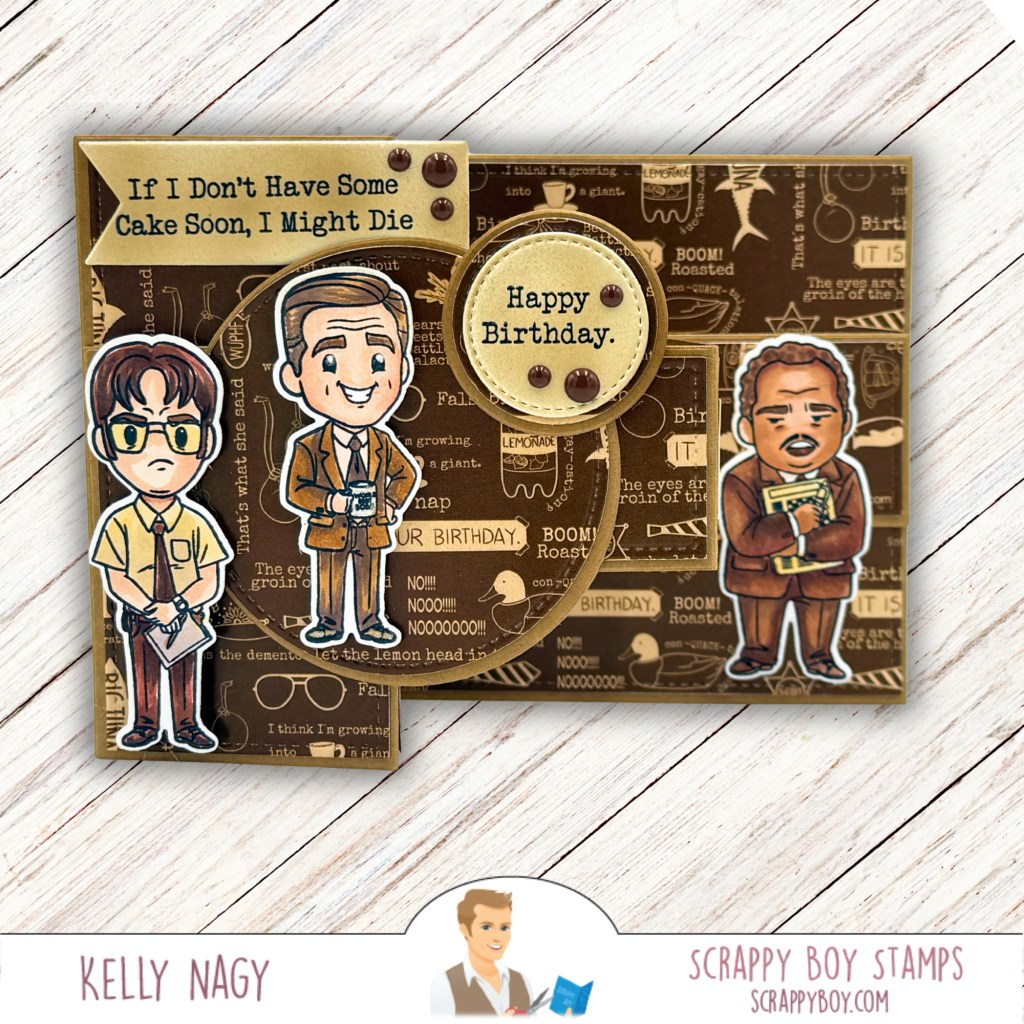
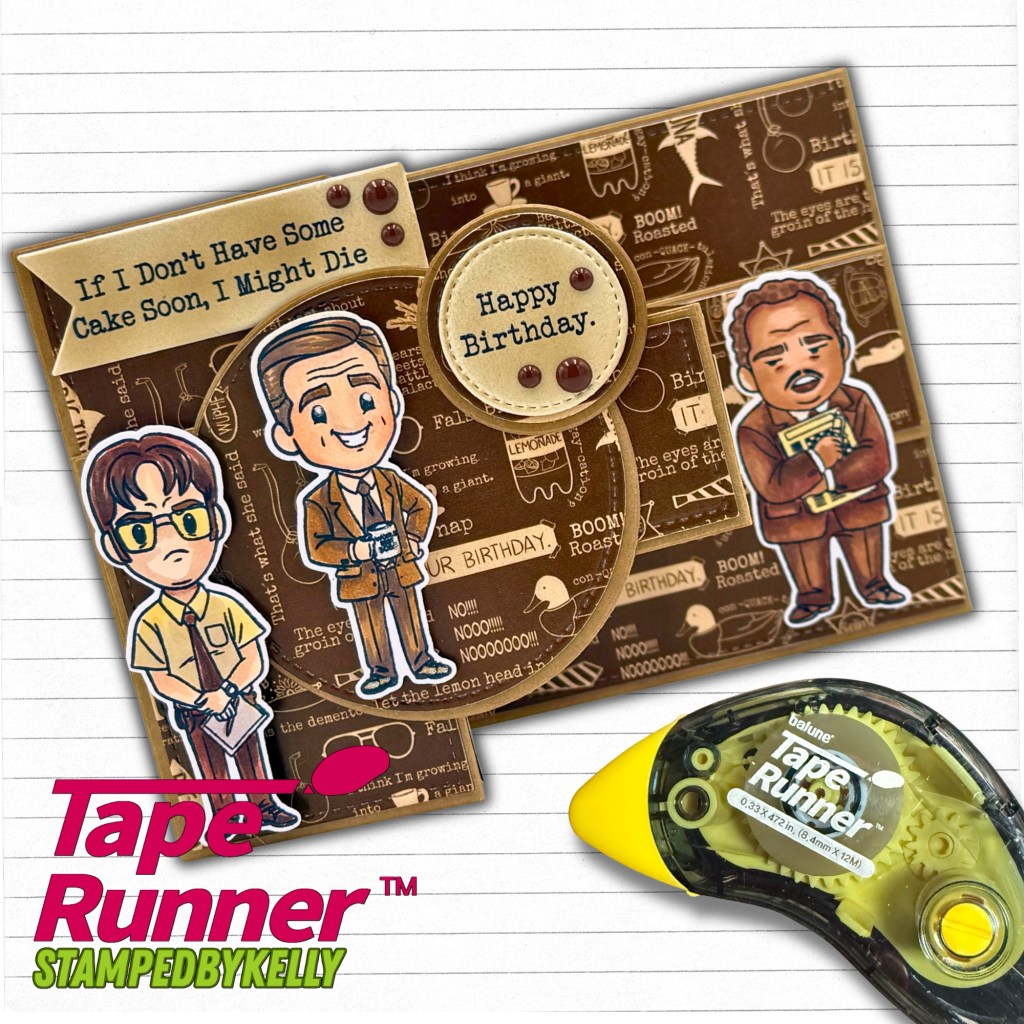
And what would an office release be without the coworkers? I brought a few of them together for a birthday card with plenty of personality—and a very relatable request for cake!

Products used:

Copic color combinations:

That’s what I love about a Scrappy Boy release: one product can spark an idea for another. The bunny’s clock led me to the watch, and the workplace scene led me straight to the coworkers. Which of these four projects is your favorite?

You can find the new release at ScrappyBoy.com.

Find great dry adhesive options in a variety of colors, sizes and shapes at TapeRunner.com. Use PROMO CODE KELLY10 for 10% OFF at TapeRunner.com

Happy crafting!
Kelly

Spooky Cute with the Scrappy Boy Stamps August Release! 🦇🎃

Get spooky cute with the Scrappy Boy Stamps August Release! I’m mixing stamps, dies, paper and a little unexpected inspiration to create Halloween projects filled with dimension, personality and fun—including a special treat box made for my grandson and one of our favorite Halloween traditions. 🎃🦇✨

If you know me, you know I LOVE finding unexpected ways to use my crafty supplies! Sometimes a stamp or die may have been designed with one idea in mind, but I immediately start thinking, “What else can I turn this into?” And living in Central Florida, it probably comes as no surprise that a little theme park inspiration frequently sneaks into my craft room!

For these projects, I pulled out some of the spooky-cute goodies from the Scrappy Boy Stamps August Release and gave them my own magical Halloween twist.

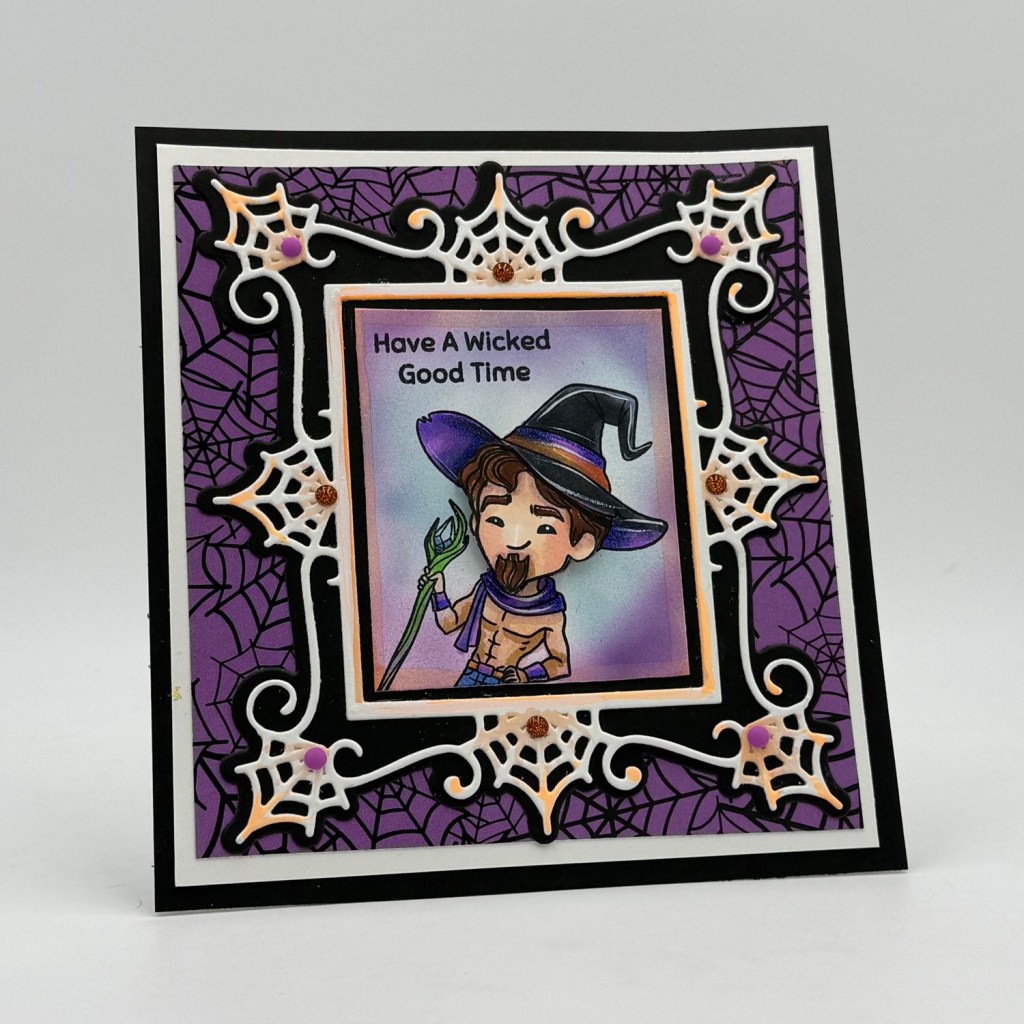
“Have a Wicked Good Time” Gothic Picture Frame card

The Gothic Picture Frame Die was perfect for framing one of the adorable images from Hex Appeal. I kept the traditional Halloween palette of purple, black, orange and white, adding little pops of sparkle to the spiderweb details. I love how the oversized frame makes the stamped image feel like a spooky portrait hanging inside a haunted mansion.

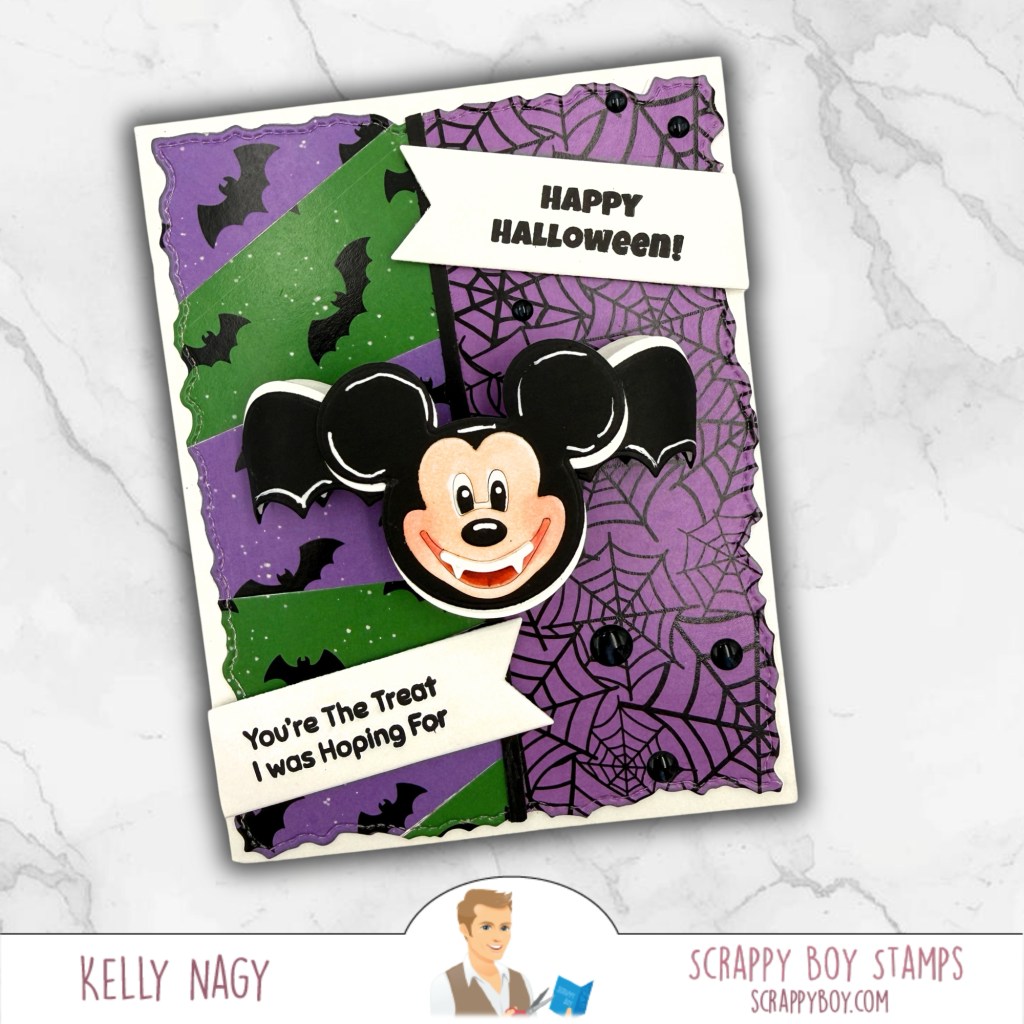
Mouse Bat card — “You’re the Treat I Was Hoping For

Then came those Mouse Bat Embellishment Dies! These were just begging for some theme park-inspired fun. I played with layers, patterned papers, torn edges and white gel-pen accents to create two completely different Halloween cards.

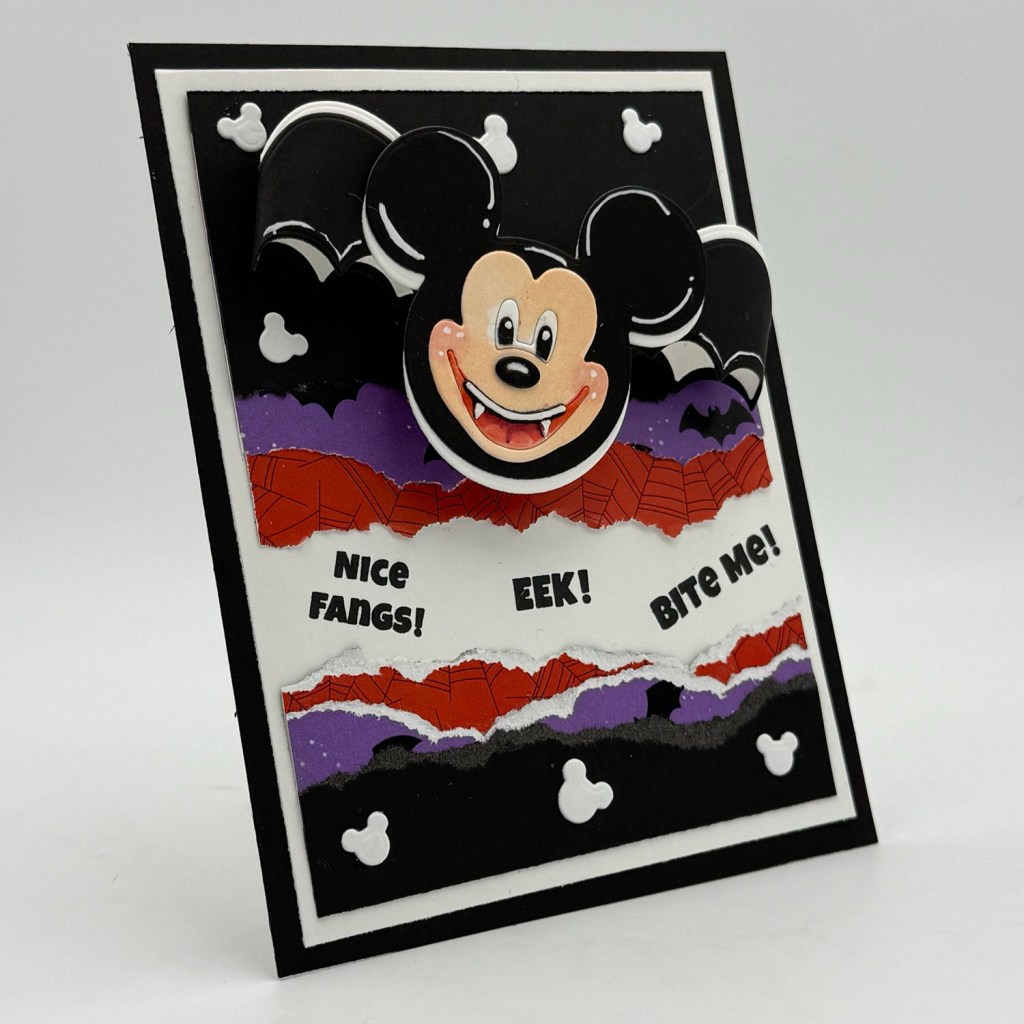
Mouse Bat card — “Nice Fangs! Eek! Bite Me!”

The dimensional bat ears make such a fun focal point, especially when paired with those classic Halloween colors. I especially love how differently the same basic die can look simply by changing the background, composition and embellishments.

And I couldn’t stop there!

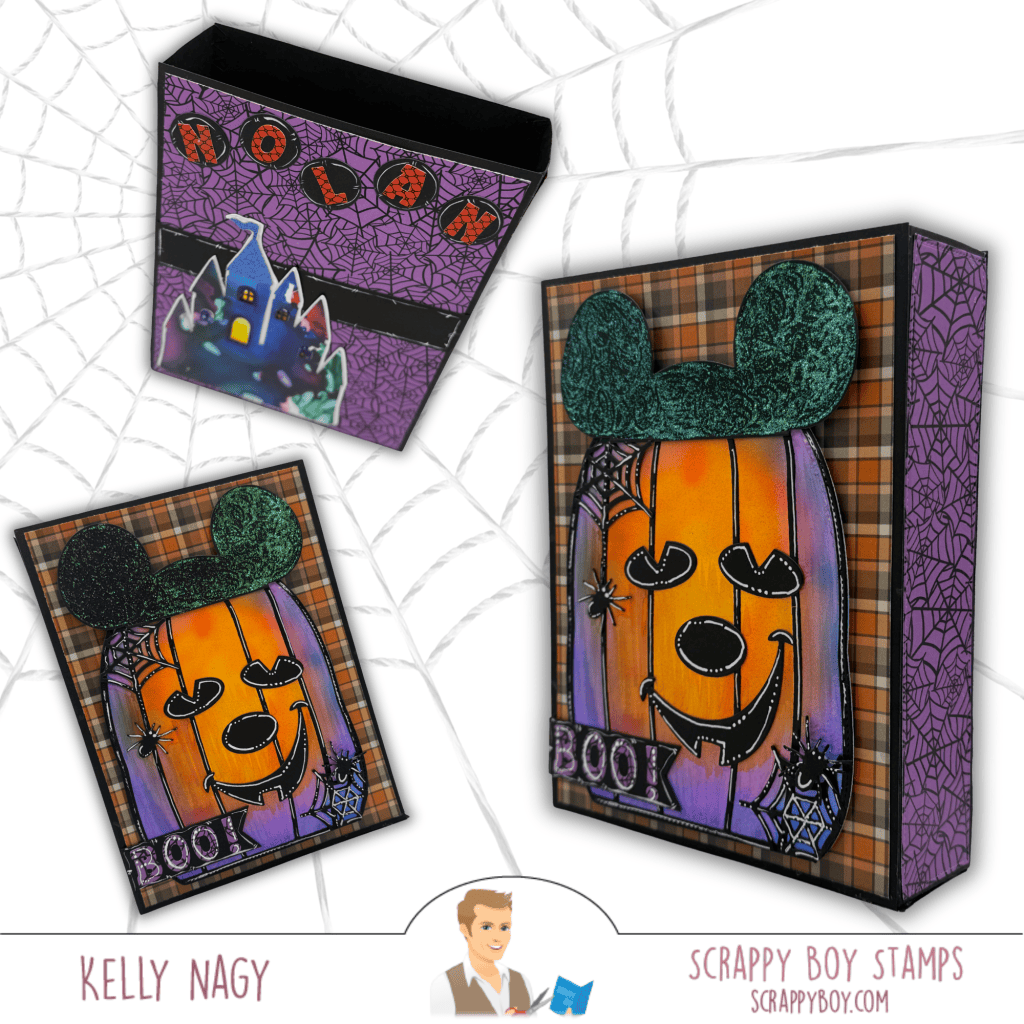
Full Pumpkin Mouse project showing both the card and dimensional folio/box

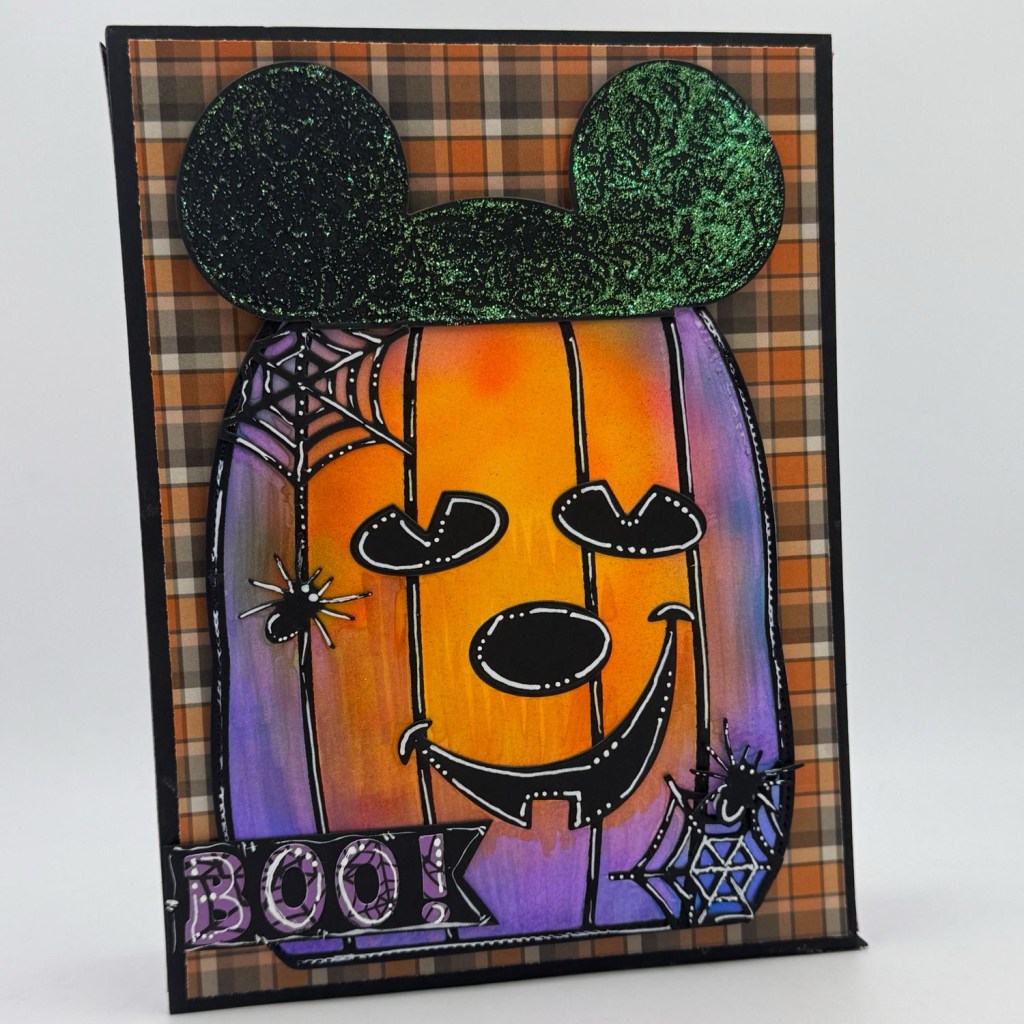
The Pumpkin Mouse Backpack Add-On became the star of one of my favorite projects. Instead of treating it simply as a backpack element, I transformed that big pumpkin into a dimensional Halloween centerpiece and paired it with plaid and spiderweb papers. A little tissue paper and some fun halloween treats and gift cards and you have a decorative, heartfelt gift and memory holder once emptied.

Close-up of Pumpkim

Lots of ink blending, deep shadows, white gel-pen highlights, lovingly put together with my hand-held adhesive from Tape Runner and a little shimmer helped bring all of those layers to life. The close-up really shows how much dimension and texture can be added to simple paper die cuts.

This treat box is especially close to my heart because I created it for our grandson, Nolan, as we prepare for our second annual visit to the Mouse’s Not-So-Scary Halloween Party at the theme park, a tradition that combines celebrating his birthday with officially kicking off the Halloween season here in Central Florida!

I personalized the back with his name and even pulled in the castle die from a previous Scrappy Boy Stamps release, which was the perfect way to add another little touch of magic. I love mixing pieces from different releases and finding completely new ways to use them, but even more, I love knowing that this project will become part of another special memory with our grandson. 🎃🏰🧡

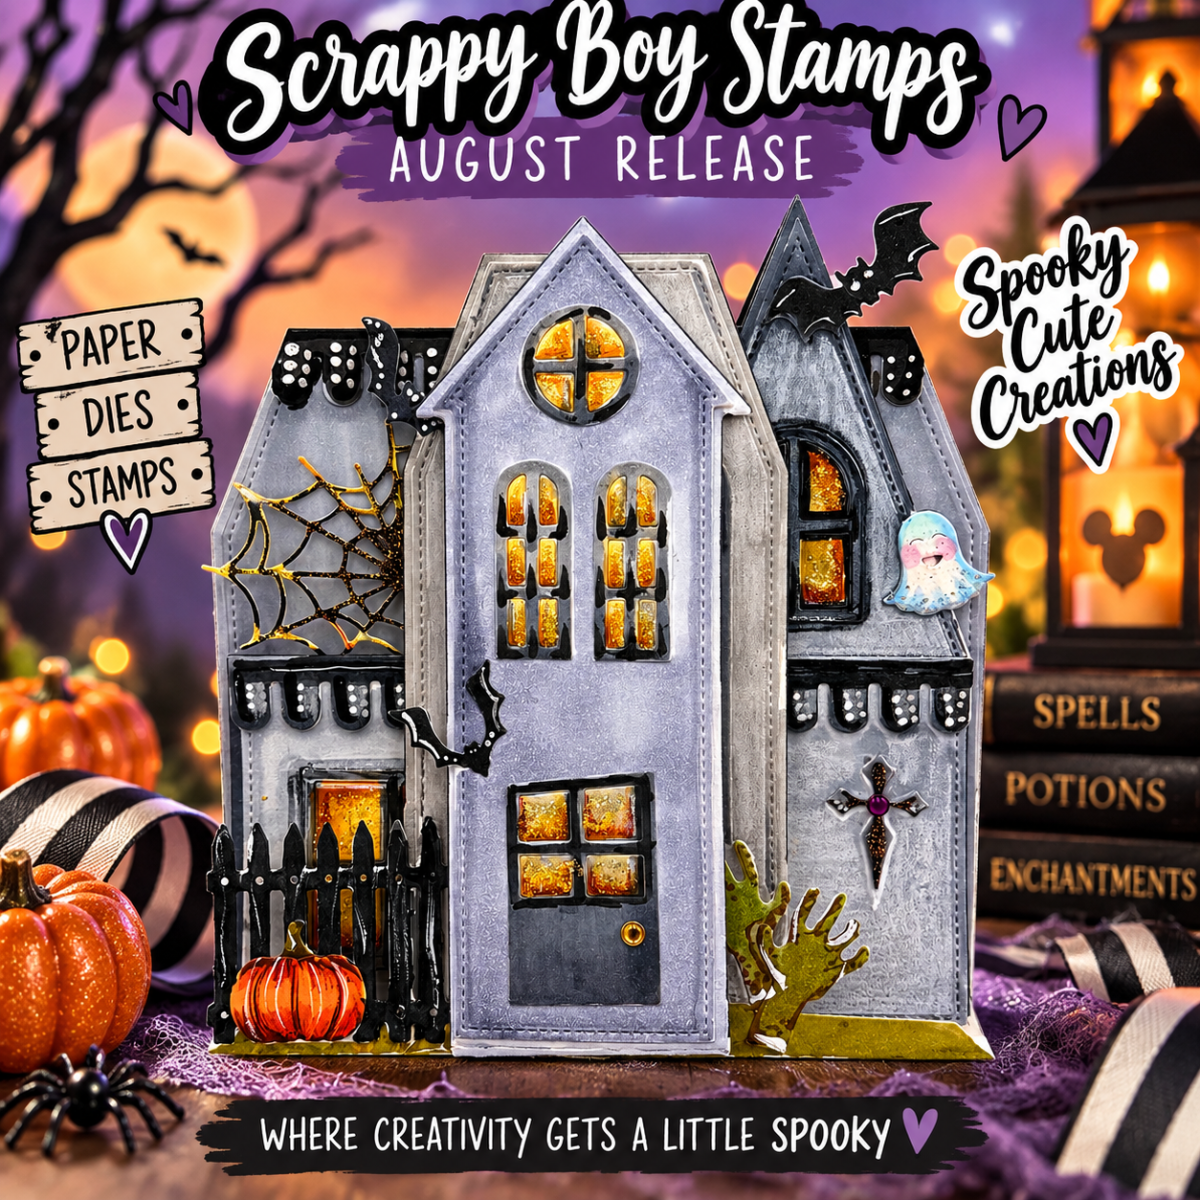
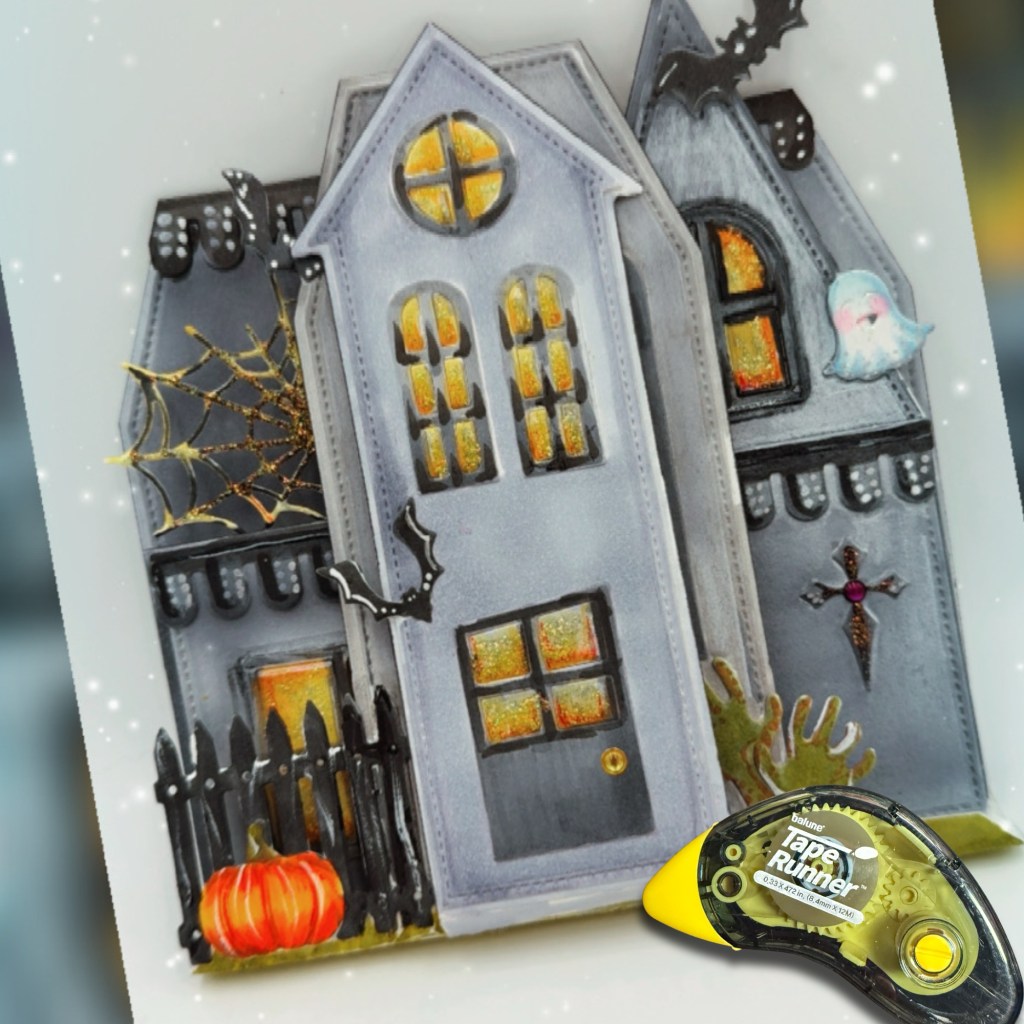
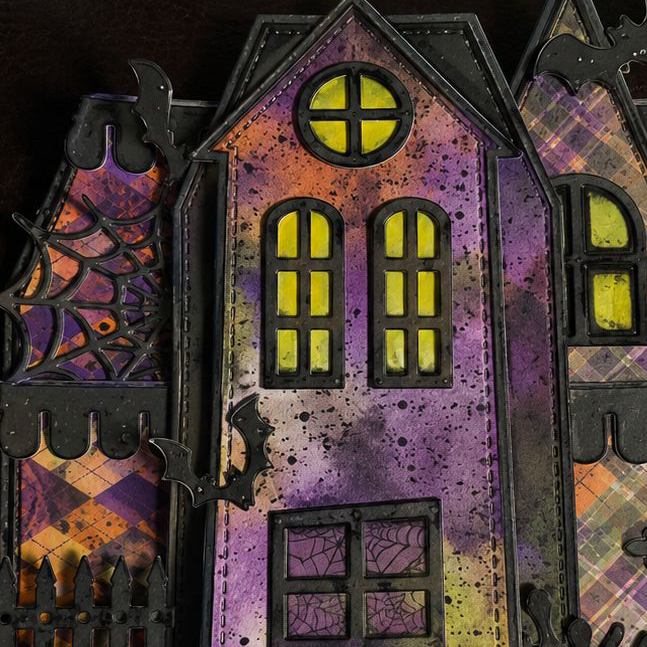
Finally, I had to play with the Haunted House Folio. I went for an eerie-but-cute abandoned mansion look with weathered grays, soft lavender, glowing golden windows, bats, spiderwebs, a pumpkin and even a creepy little hand reaching up from below. It was easy to position and adhere the smaller pieces with my hand-held Tape Runner. This project has so many tiny details to discover!

That’s probably my favorite part about crafting: the dies give you the pieces, but your imagination gets to decide what they become.

I hope these projects inspire you to pull out your supplies and look at them a little differently. Mix collections. Change the intended theme. Add unexpected colors. Turn an embellishment into the focal point. Most importantly, have fun creating something that’s completely you.

Happy crafting — and stay spooky! 🦇🎃✨

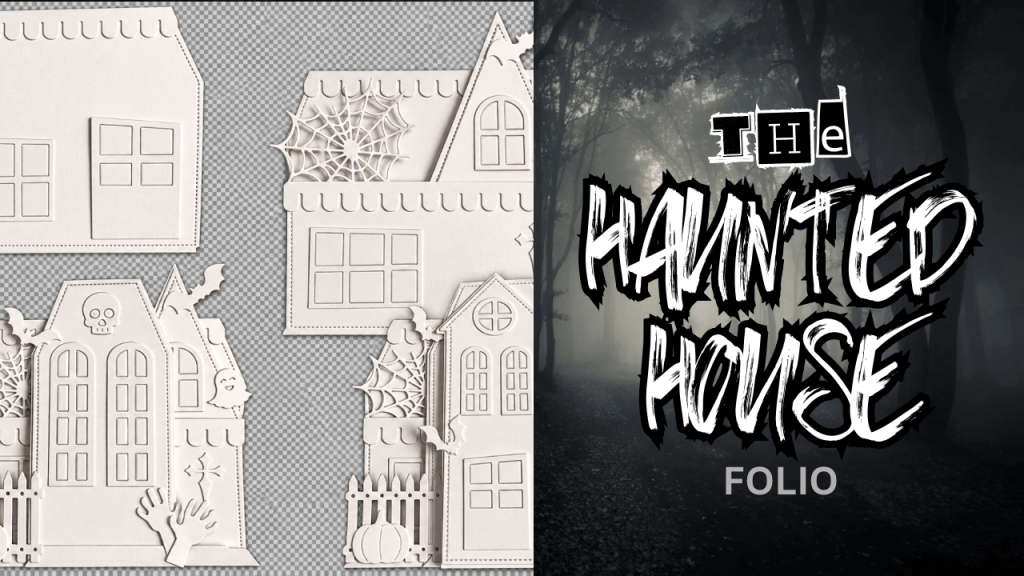
👻 Haunted House Folio Die | Scrappy Boy Stamps

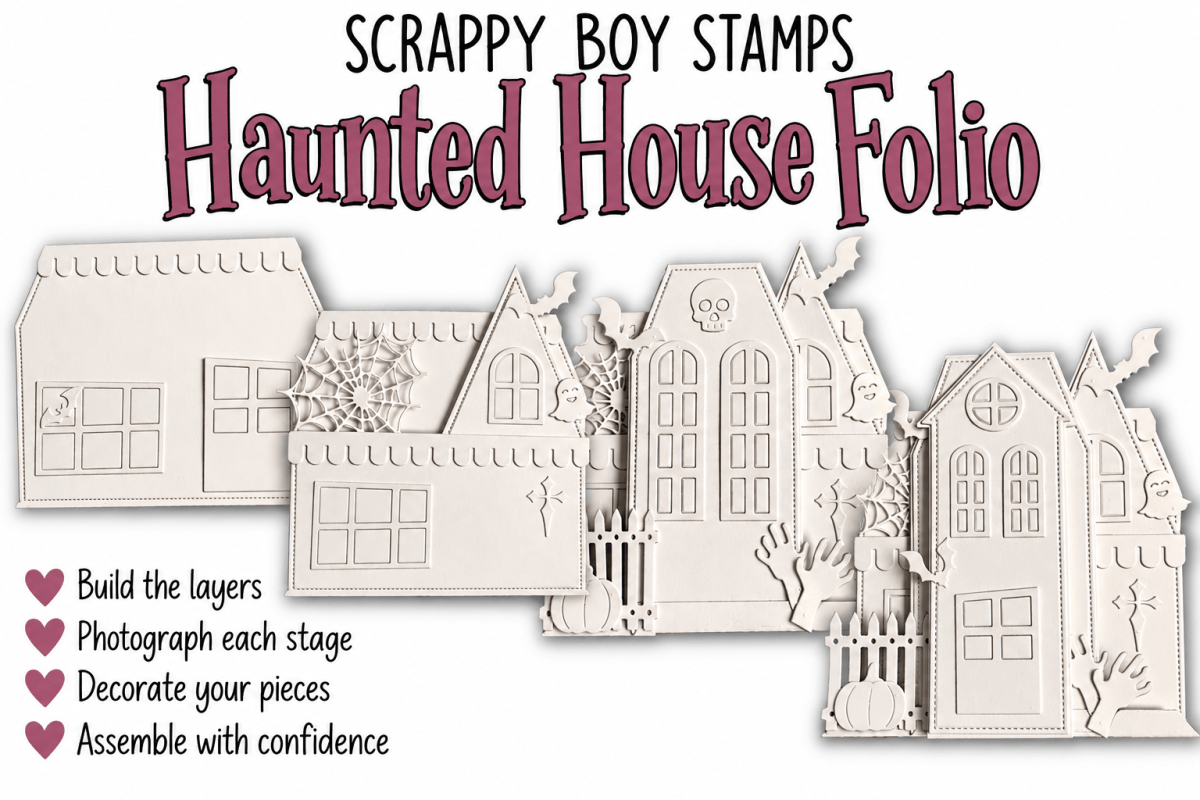
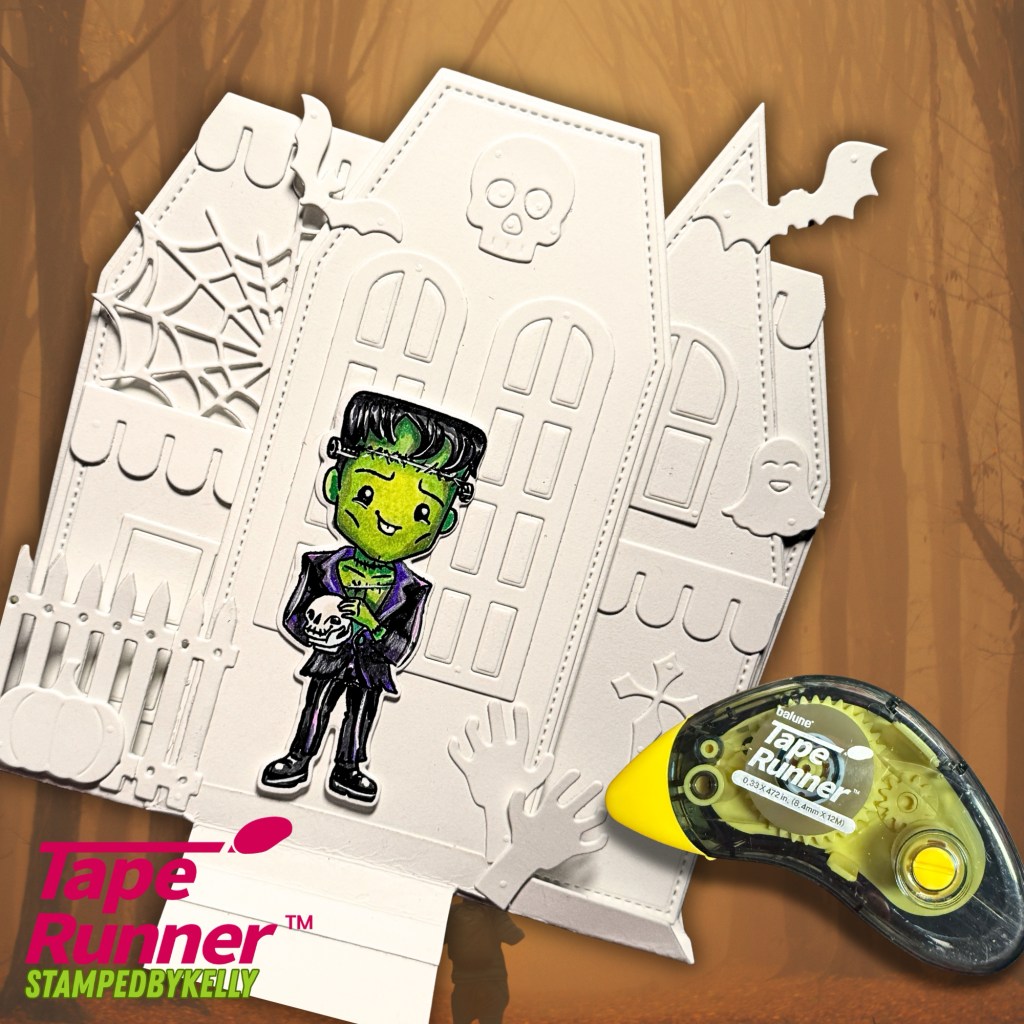
See how the Scrappy Boy Stamps Haunted House Folio Die comes together layer by layer! I first build the entire haunted house in white cardstock and photograph each stage as a reference. Then I can take it apart, add all the spooky color and details, and assemble everything using my favorite TapeRunner.com handheld adhesive tape runners. Use code KELLY10 to save 10%.

There’s something spooky happening at Stamped by Kelly! 🦇🏚️

Today I’m featuring the Haunted House Folio Die from the August Release from Scrappy Boy Stamps, and this one was SO much fun to create!

I love a die set that gives you plenty of room to make it your own, and this haunted house definitely delivers. I created two completely different looks to show just how versatile it can be.

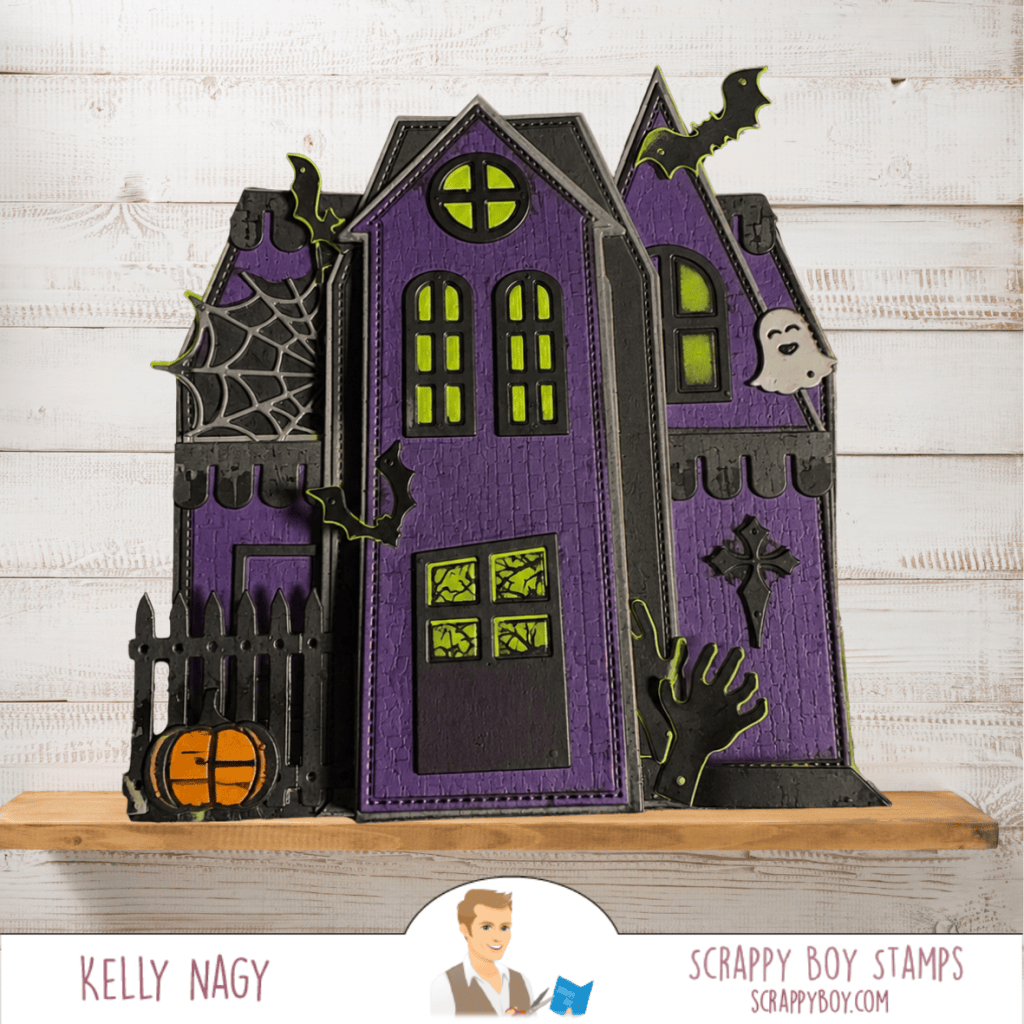
For my first version, I went with a classic Halloween palette of deep purple, black, gray and bright spooky green. I added texture to the house panels and layered all of those fabulous little details—the bats, spiderweb, ghost, creepy hand, fence, pumpkin and more. The bright green windows give it that perfect eerie glow!

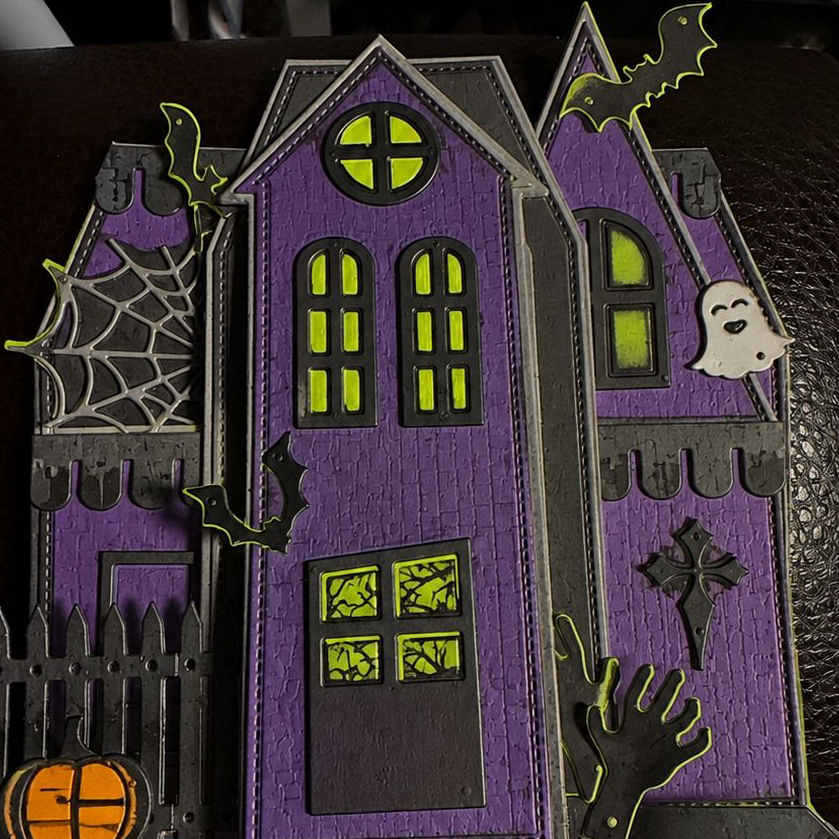
For my second version, I decided to get a little messier! I used a combination of inks, splatters and coordinating patterned papers from the Hex Appeal bundle to create a distressed, grungy haunted-house feel. I love how the oranges, purples and blacks work together while the bright yellow-green windows really pop against the darker colors.

One die set—two totally different haunted houses! That is exactly what I love about dies like this. You can keep it clean and coordinated or pull out the inks, patterned papers and splatters and make it wonderfully creepy.

The Haunted House Folio Die is part of Scrappy Boy Stamps’ August release and is packed with details that make it perfect for Halloween cards, folios, albums, home décor and more.

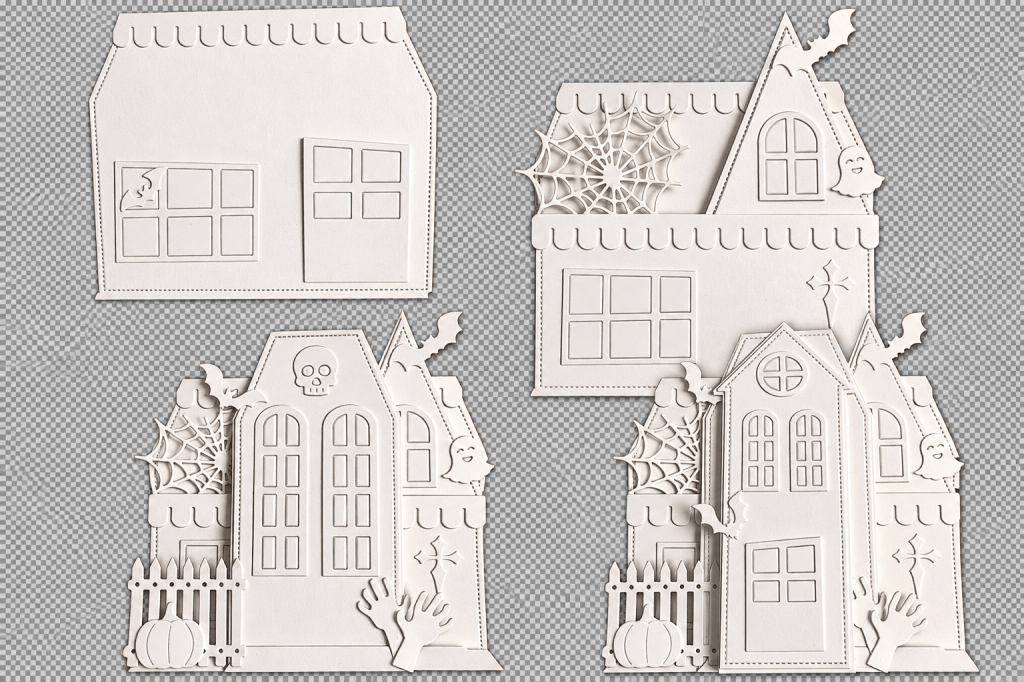
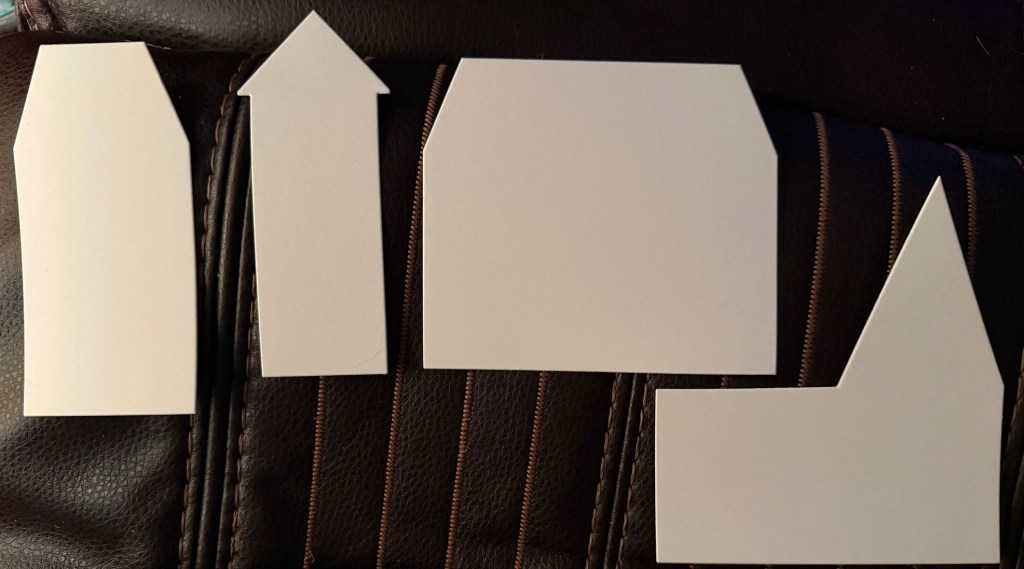
Started with 4 main layers.

Building the Haunted House Folio — Layer by Layer

Each layer builds upon the next to create this fun Haunted House Flipbook/Folio. Before adding color or patterned paper, I like to:

  • 🤍 Die-cut and assemble each layer in white cardstock to create a visual reference.
  • 📸 Photograph each stage so I can easily remember how all those little pieces fit together.
  • 🎨 Take everything back apart and decorate each panel individually with coloring, patterned papers, and embellishments.
  • 🏠 Reassemble and permanently adhere each layer using my favorite handheld adhesive tape runners from TapeRunner.com.

This little extra planning step makes decorating a detailed project so much easier—and I have my photos to reference when it’s time to put the whole haunted house back together!

SAVE 10%: Use promo code KELLY10 when shopping at TapeRunner.com.

Available at http://www.scrappyboy.com

You can find the new release and the Haunted House Folio Die at Scrappy Boy Stamps⁠.

Thanks so much for stopping by!

Happy Crafting!
Kelly
StampedbyKelly 🖤👻🦇

Three Different Projects, One Amazing Scrappy Boy Stamps’ Release!

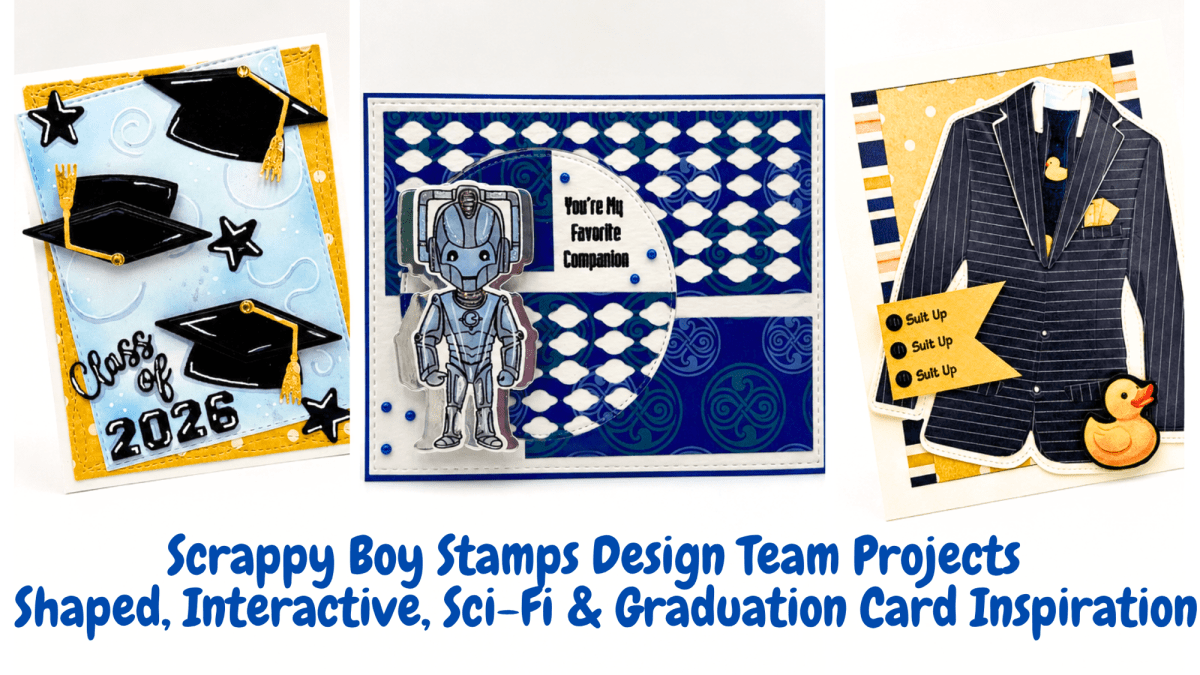
Create three unique handmade cards using the newest Scrappy Boy Stamps products including the Graduation Pop-Up Envelope Add-On, Wandering Time Keeper and Legendary Suit Builder. Plus learn about the current 25% Off Sale. TapeRunner.com use KELLY10 for 10% OFF.

There are releases that focus on one theme, and then there are releases like this one that offer something for everyone! This collection includes graduation, sci-fi inspired, and masculine designs, making it easy to create cards for a variety of occasions.

For today’s projects, I created three completely different cards, each highlighting a different new product while mixing in Scrappy Boy patterned papers and layered die-cut elements for added dimension and interest. Two have an INTERACTIVE element! Can you guess what they are?

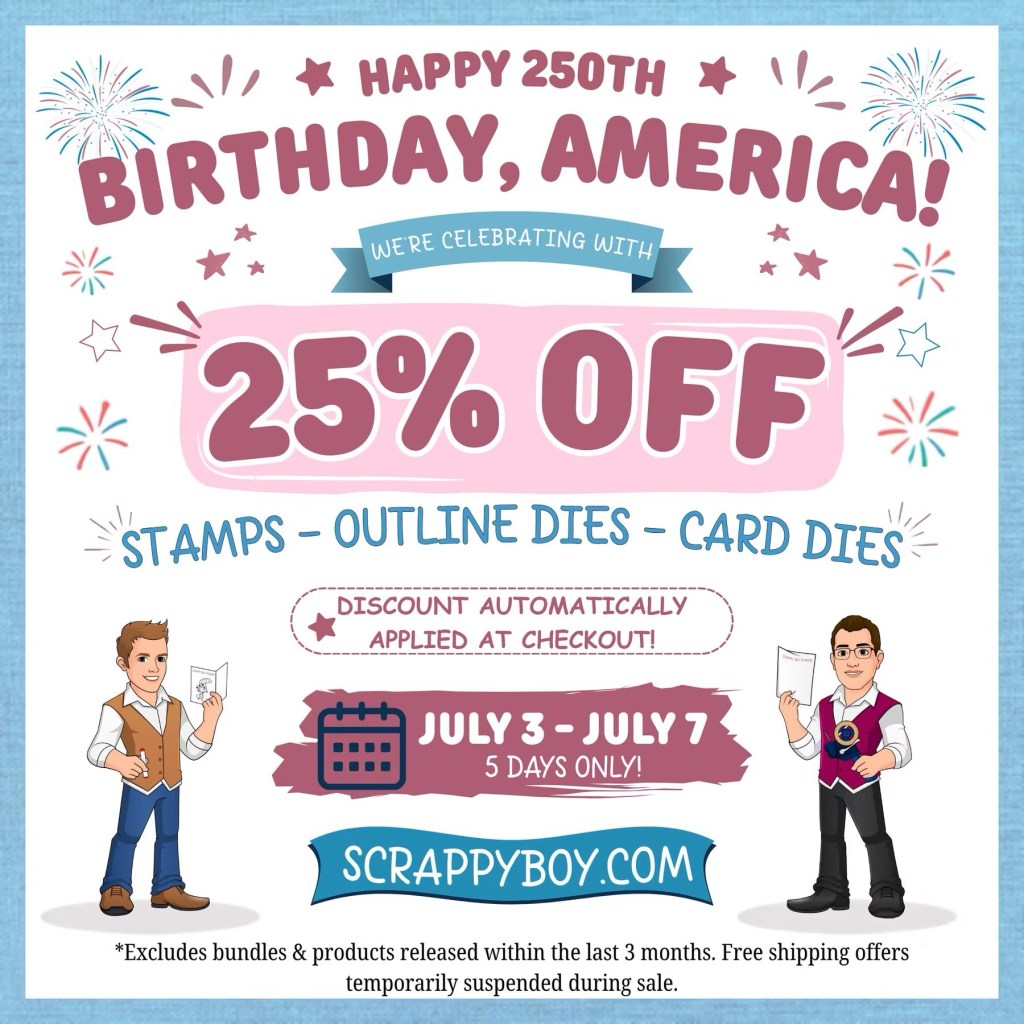
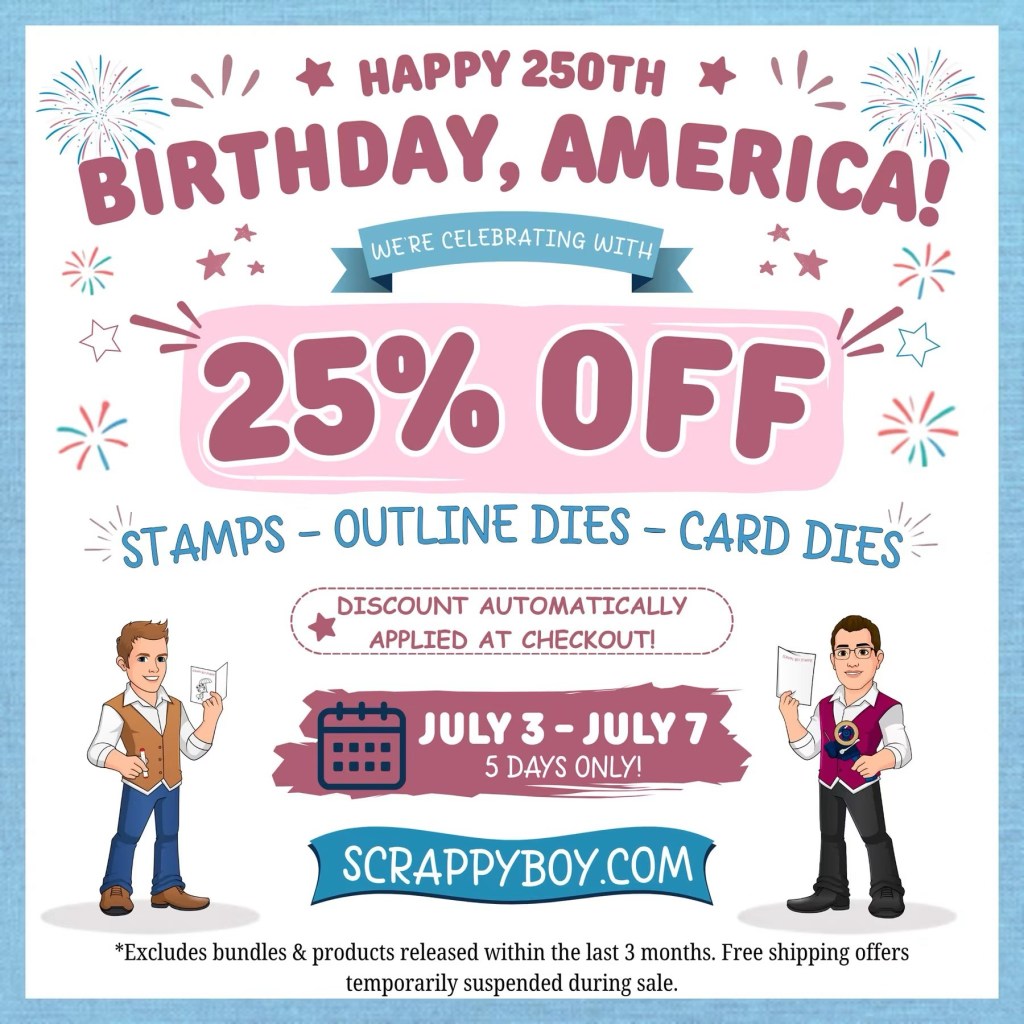
If you’ve had your eye on adding to your Scrappy Boy collection, now is also a great time to shop! Their Happy 250th Birthday, America! sale is happening through July 7, with 25% off stamps, outline dies, and card dies (excluding products released within the last three months).


Project 1 – A2 Card

Featuring Graduation Pop-Up Envelope Add-On Die Set

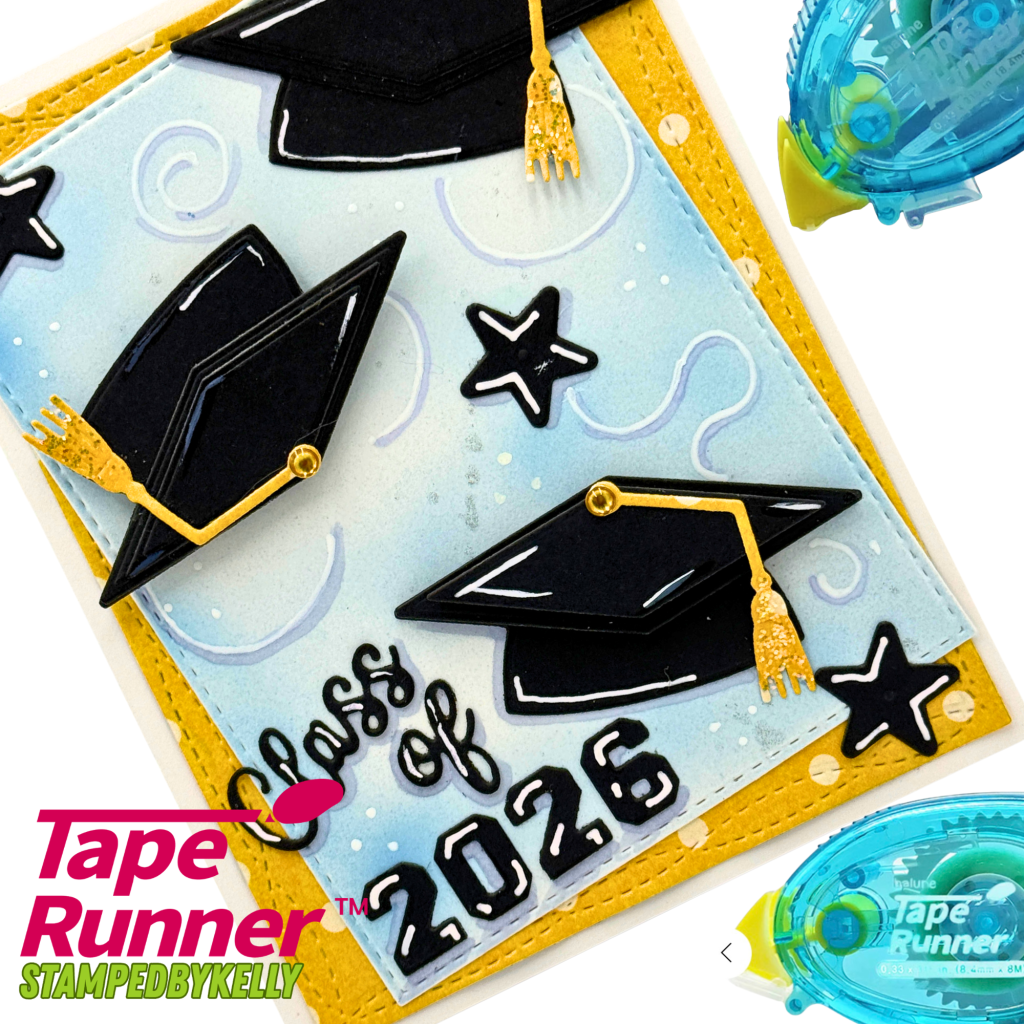
Celebrate the Class of 2026 with layered graduation caps, bright patterned paper, and clean embossed details. I layered a yellow polka-dot pattern to draw attention to the tassels using the LEGENDARY LOVE STORY 6×9 PAPER PACK. The overlapping caps create wonderful dimension while keeping the design simple and elegant. INTERACTIVE ELEMENT: One cap spins for added interest. Get your Motion Spinners here!

Check out how fun this is!!

Dots Tape Runner makes placement of detailed die cuts, a breeze! You can rub any overage easily off.

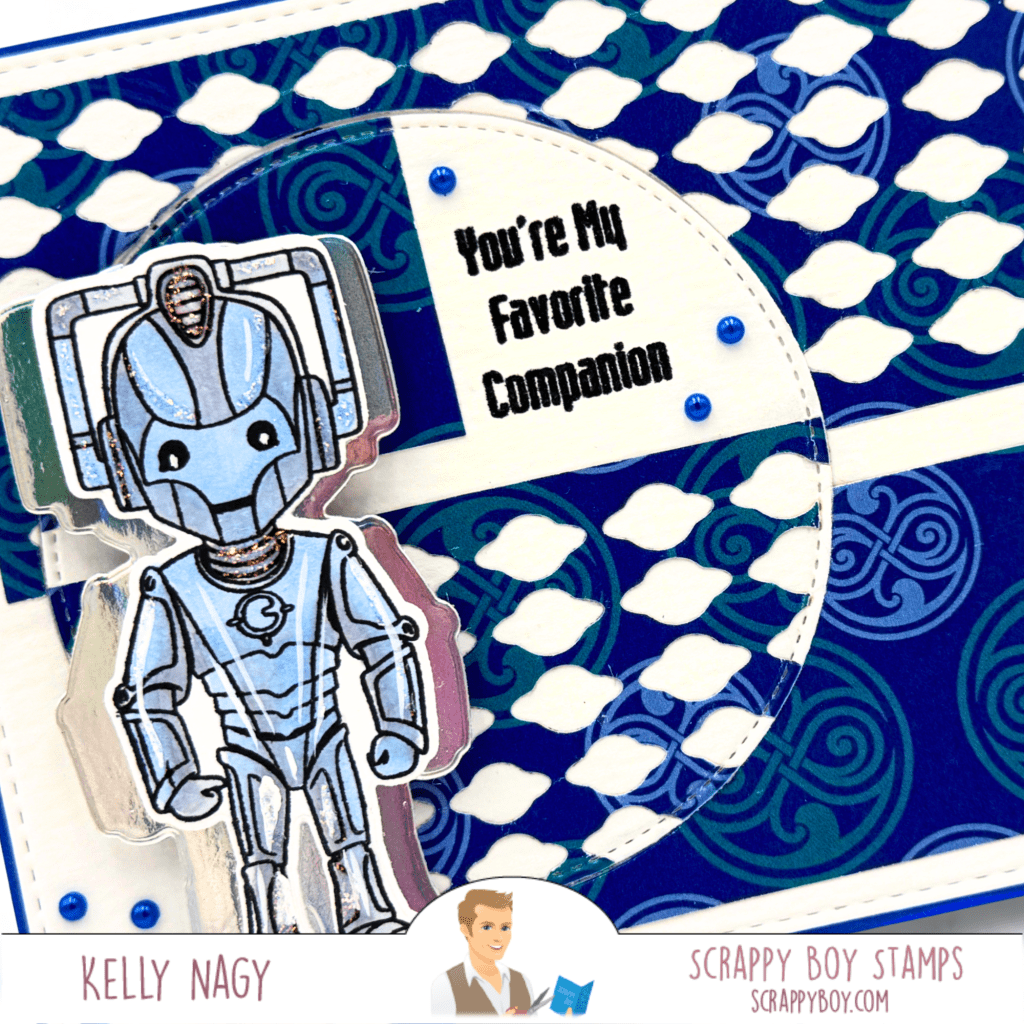
Project 2: A2 Card featuring fun scraps from the negative piece of the shaker bit plate with planets.

Wandering Time Keeper

This card pairs the adorable Wandering Time Keeper with the 6 x 9 Paper Pack of the same. I rendered an image hoping to show you how I used up my scraps to create this fun background.

Cut a metallic card with outline die, split down middle, to create a fun shadow to set off the robot!

Project 3

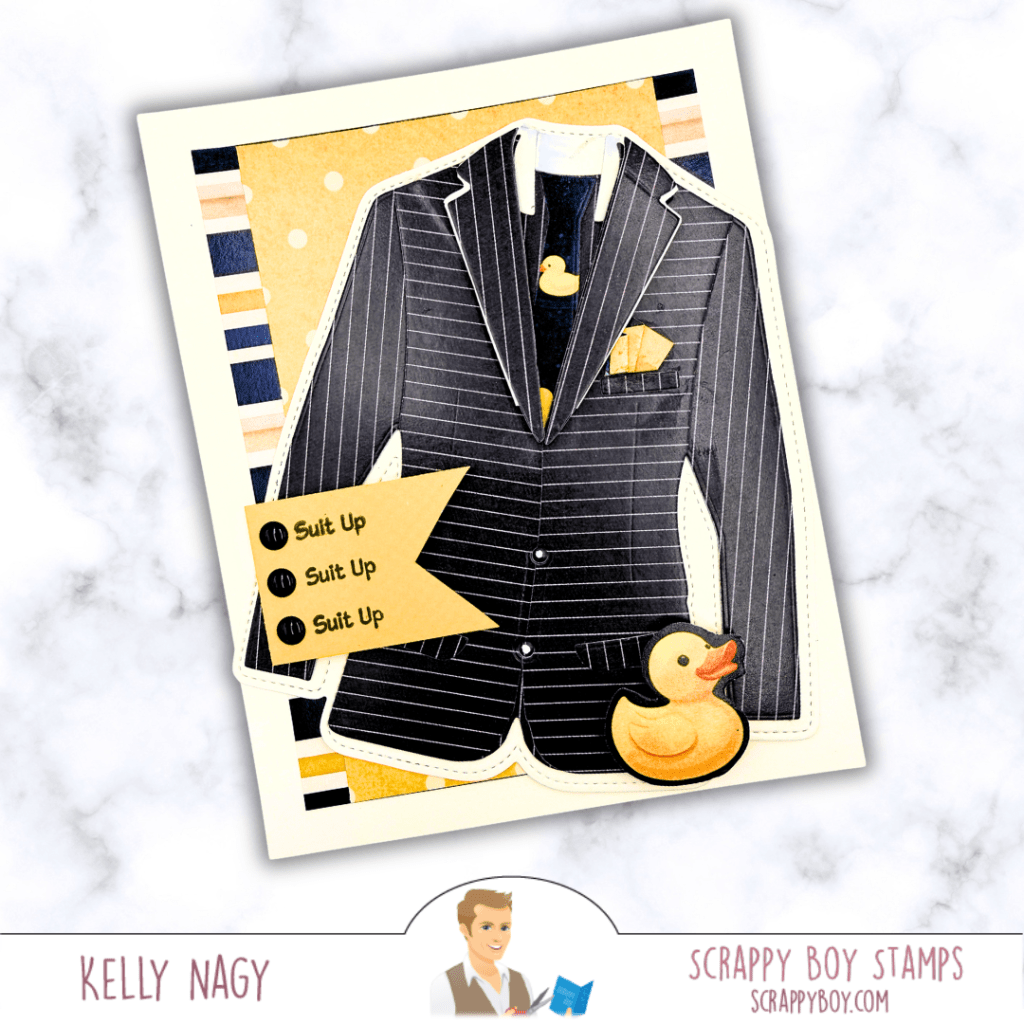
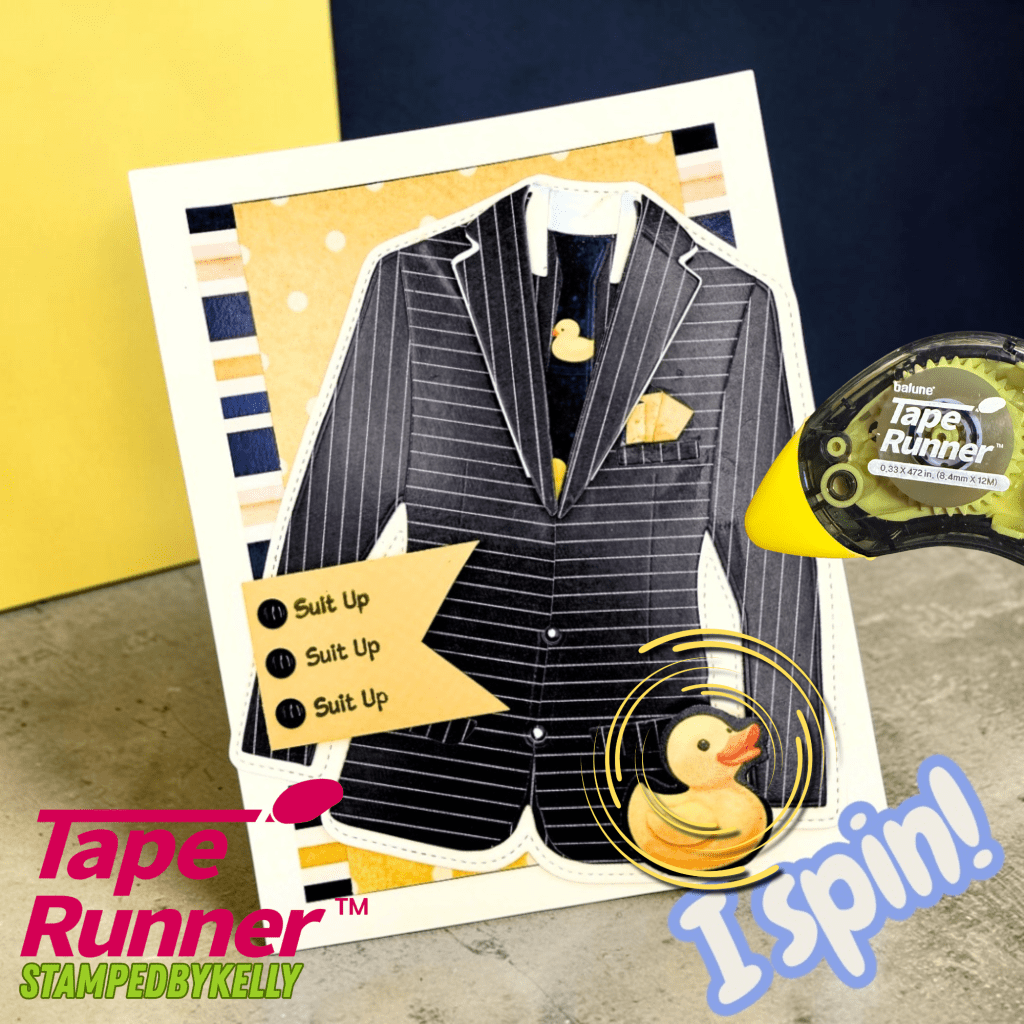
Legendary Suit Builder die featuring Legendary Love Story 6×9 Paper Pack

Masculine cards don’t have to be difficult! The Legendary Suit Builder creates a sophisticated focal point, while the tiny rubber duck adds a playful surprise. He spins, too!!!

Check it out below!👇


Scrappy Boy Products Used….


Adhesives

These projects were assembled using a combination of wet and dry adhesives. Foam double-Stick Squares.

My favorites continue to be:

• Bearly Art Precision Craft Glue for detailed die cuts and layered elements. Pajama Crafter Stamps

• TapeRunner.com adhesives for fast, clean assembly.

🛒 Save 10% with code KELLY10 on your cart only on TapeRunner.com


Current Sale

🇺🇸 Happy 250th Birthday, America!

🎉 25% OFF

  • Stamps
  • Outline Dies
  • Card Dies

📅 July 3–July 7

Discount automatically applied at checkout. Excludes products released within the last three months.


Shop & Connect

🛒 Shop:
https://scrappyboy.com

📘 Follow me on Facebook:
https://www.facebook.com/share/1AXb2TKCzt/?mibextid=wwXIfr

🧵 Threads:
https://www.threads.com/@stampedbykelly
📺 YouTube:
https://www.youtube.com/@StampedbyKelly
🌐 Blog:
https://stampedbykelly.blog/

🇺🇸 Celebrating Freedom and Milestones | Pajama Crafter Stamps Inspiration Hop

Celebrate freedom with a fun patriotic easel card featuring the NEW Freedom Isn’t Free stamp set paired with the versatile Forever 29 Cake stamp set and Vintage Americana 6×6 patterned papers from Pajama Crafter Stamps. See how these products come together to create a festive display card perfect for honoring those who serve. TapeRunner.com use promo code KELLY10 for discount.

Welcome friends! Today I’m excited to share my latest project for the Pajama Crafter Stamps Adventure Awaits Inspiration Hop! This special hop is filled with creative projects inspired by courage, patriotism, service, and unforgettable journeys.

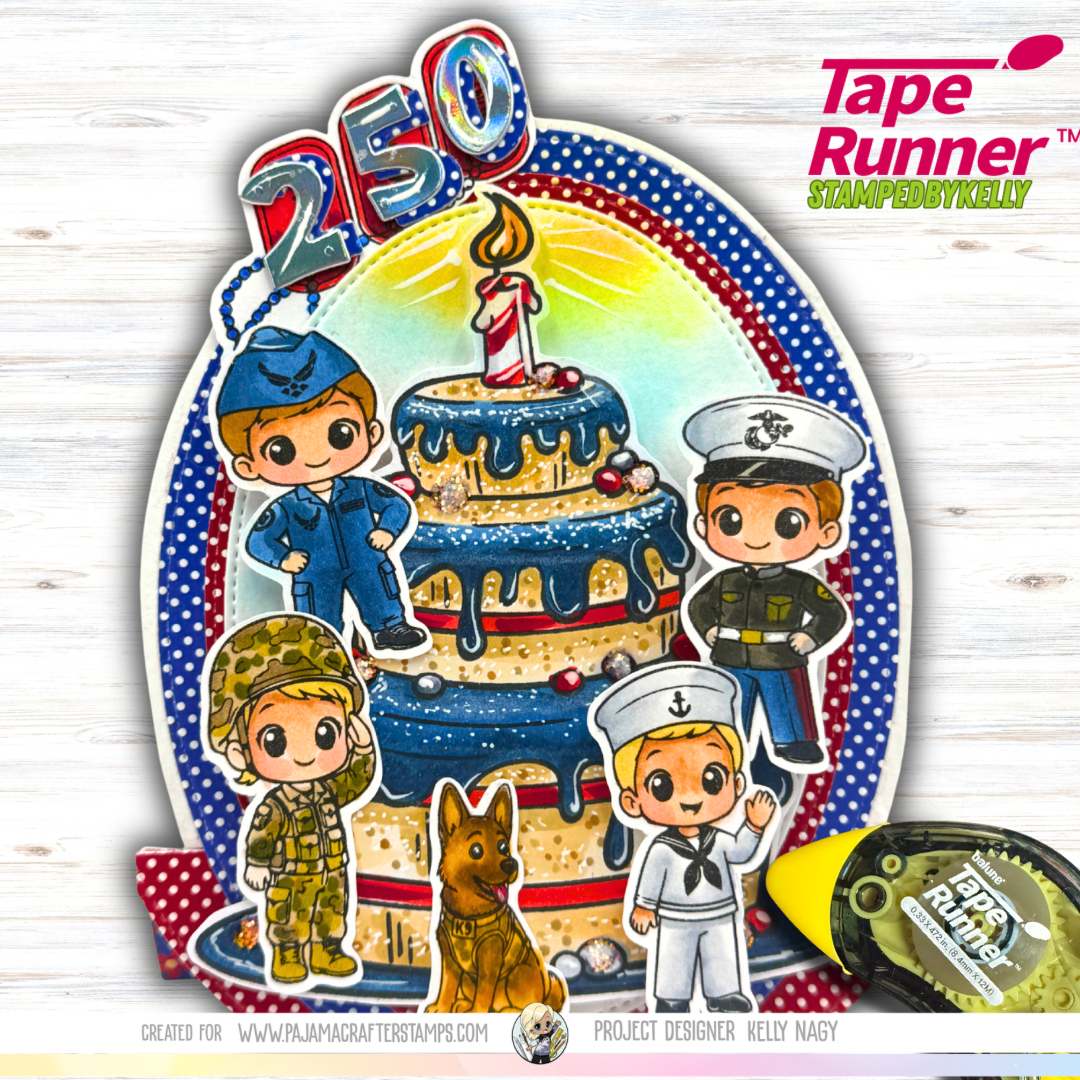
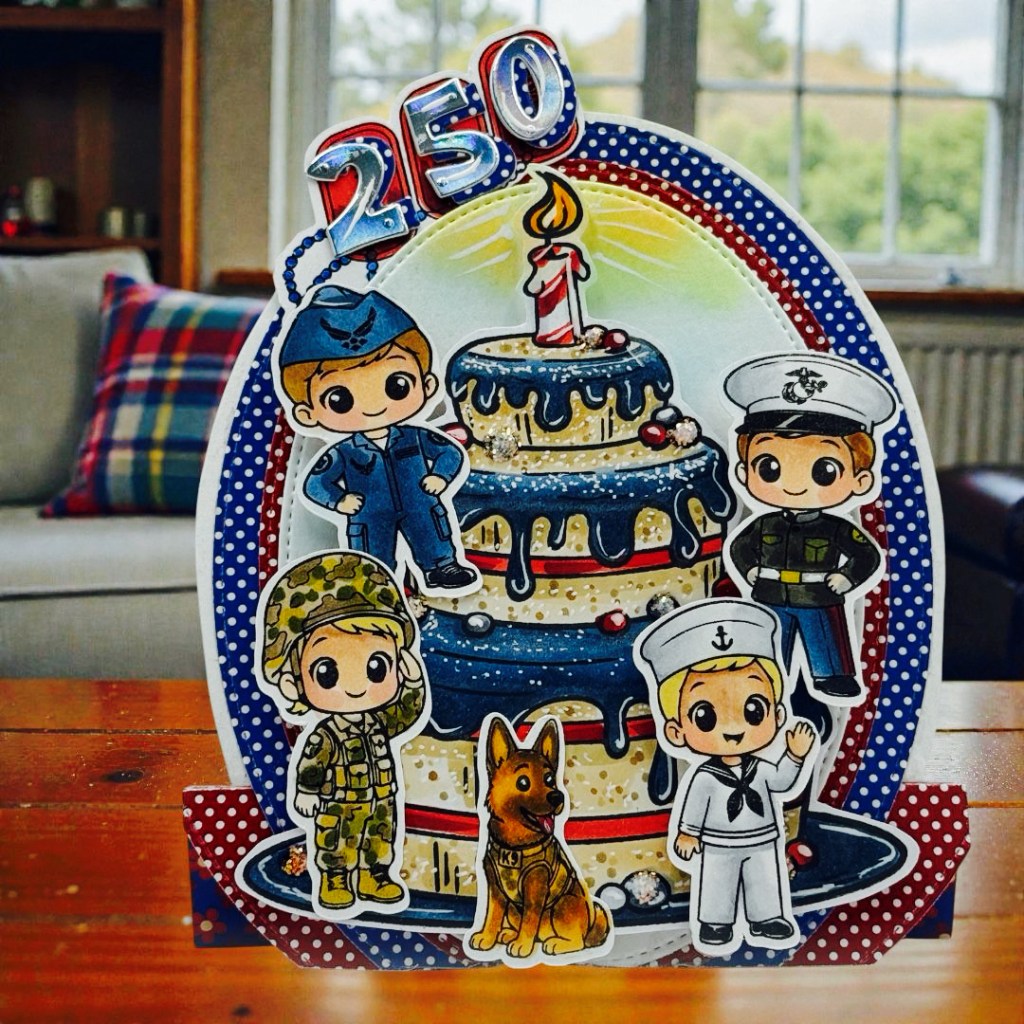
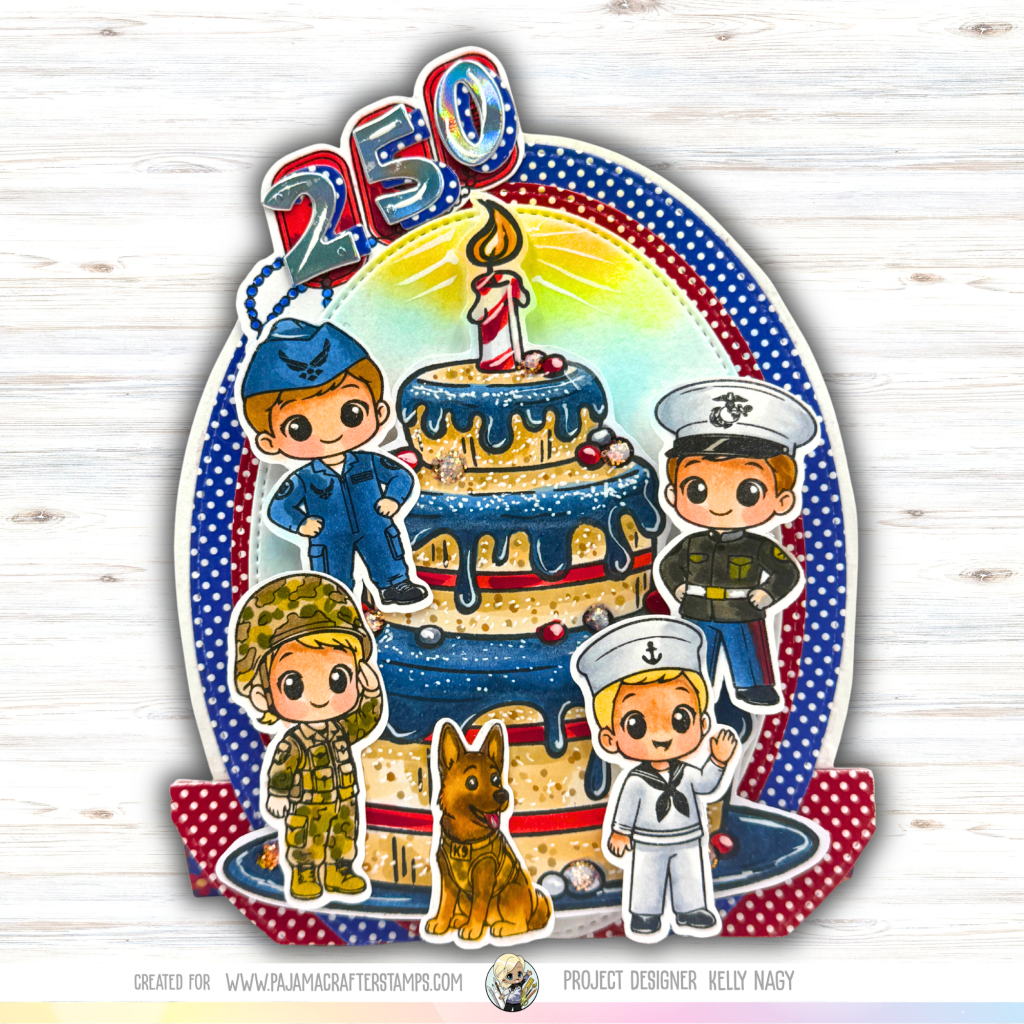
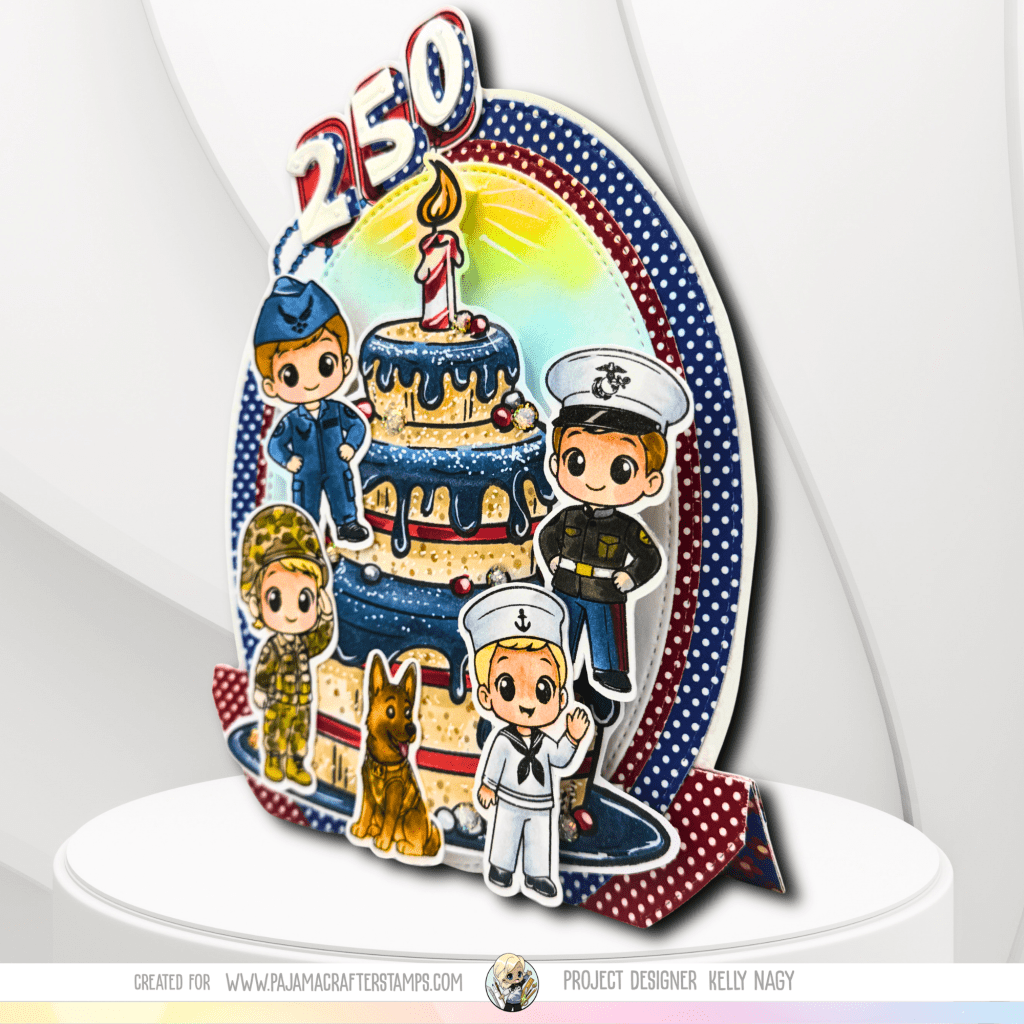
For my project, I wanted to celebrate a very special milestone—America’s 250th Birthday in 2026! I created a dimensional easel card featuring a festive red, white, and blue birthday cake surrounded by adorable service members representing the various branches of the military. A loyal K9 companion adds the perfect finishing touch to this tribute to those who serve.

Featuring Pajama Crafter Stamps June 2026 Release

🇺🇸 Join the Instagram Hop!

The Adventure Awaits Inspiration Hop is officially underway over on Instagram! Be sure to hop along with the Pajama Crafter Stamps Design Team for inspiration featuring themes of:
  • Adventure
  • Military and patriotic projects
  • Heroic journeys
  • Nautical fun
  • Courage and strength
  • Legendary tales and imaginative scenes

There are so many incredible projects to discover, and you won’t want to miss all the creativity!

Follow me on Instagram: @StampedByKelly

✨ About My Card
This easel card was designed to honor both our nation’s 250th anniversary and the men and women who serve. I combined bright patriotic colors, playful characters, and lots of sparkle to create a keepsake card that can be displayed and enjoyed long after the celebration.

The layered design creates wonderful dimension while the large “250” topper makes the occasion the star of the show.


❤️ Products Used

🇺🇸 New Release Product

❤️ Freedom Isn’t Free Stamp Set

🤍 Coordinating Products

🤍 Forever 29 Cake Stamp Set

💙 Vintage Americana 6×6 Patterned Paper Pack

❤️ Holographic Specialty Cardstock

🤍 Die-cutting machine

💙 Copic markers

❤️ White gel pen accents

🤍 Glitter embellishments and gems


🎨 Copic Marker Colors

Skin

  • E000
  • E00
  • E11
  • R20

Hair

  • Y21
  • Y26
  • E35

Navy Blue

  • B24
  • B26
  • B29

Red

  • R24
  • R27
  • R59

Gold

  • Y21
  • Y26
  • Y28

Gray/White Accents

  • C1
  • C3
  • C5

🇺🇸 A Card with Meaning

As we look ahead to celebrating America’s 250th birthday, I wanted this card to reflect gratitude and appreciation for the brave men and women who protect our freedoms. The combination of the NEW Freedom Isn’t Free Stamp Set with the versatile Forever 29 Cake Stamp Set made it easy to create a festive patriotic celebration with a meaningful message.

Thank you so much for stopping by! I hope this project inspires you to create something meaningful and to join us for the Pajama Crafter Stamps Adventure Awaits Inspiration Hop.

Happy crafting!

💕 Kelly


Shop the Products

If you’d like to recreate this project, you can find these products and so much more using my affiliate link:

Click here to see the whole release!

(Affiliate links are used at no additional cost to you. They simply help support my crafty adventures and are always appreciated!)

Supplies Used

🇺🇸 Freedom Isn’t Free Stamp Set (NEW!)
🇺🇸 Forever 29 Cake Stamp Set
🇺🇸 Vintage Americana 6×6 Patterned Paper Pack
🇺🇸 Holographic Specialty Cardstock
🇺🇸 Copic Markers
🇺🇸 White Gel Pen
🇺🇸 Glitter Embellishments and Gems

Check out Pajama Crafter Stamps

Spooky-Cute, Sweet & Coffee-Fueled Crafting with Scrappy Boy Stamps ☕🐰💜

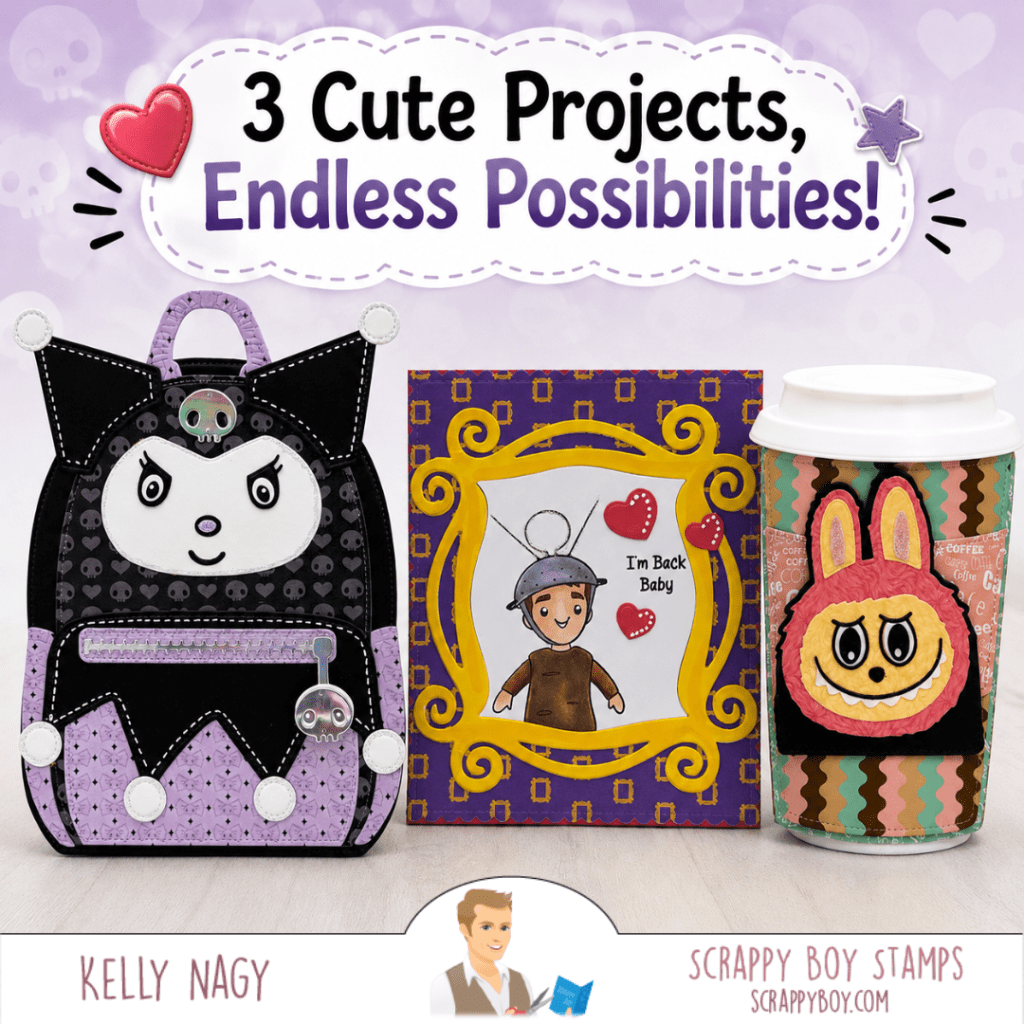
Create adorable handmade projects with Scrappy Boy Stamps including a spooky-cute Evil Bunny Backpack gift holder, Friends Forever handmade card, and coffee cup gift card holder die set. Get paper crafting inspiration, layering ideas, and interactive project inspiration using dies, stamps, and patterned paper.

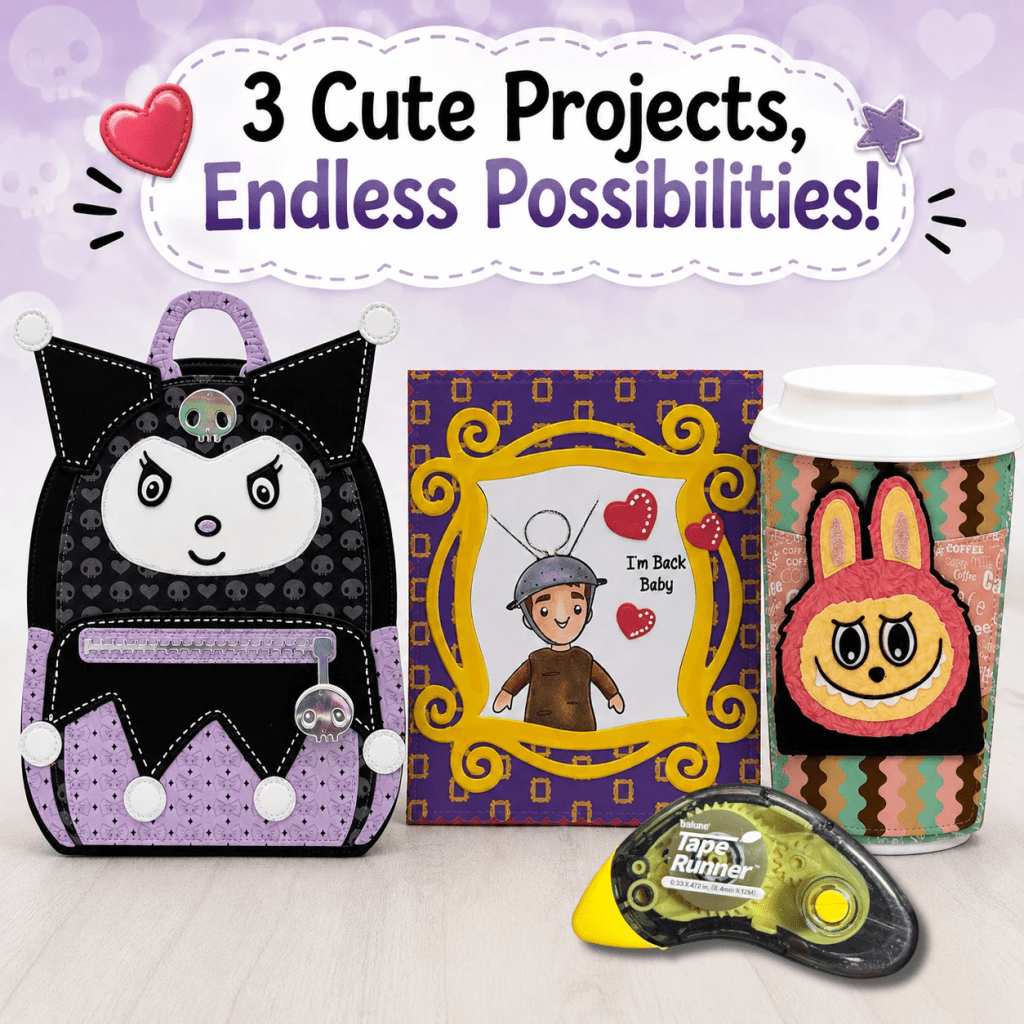
Today I’m sharing three fun handmade projects featuring products from Scrappy Boy Stamps! These projects are full of personality and include interactive elements, layered die cuts, and playful details that make paper crafting so much fun. putting them together’s really easy and clean when using the tape runner, my favorite dried adhesive. I also use a combination of wet glue and foam tape to create dimension. If you would like a coupon code for taperunner.com, use KELLY10 for 10% off your cart.

From a spooky-cute backpack gift holder to a friendship-themed card and an adorable coffee cup gift card holder, each project has its own unique style while still coordinating beautifully together.


Evil Bunny Backpack Gift Holder 🖤💜

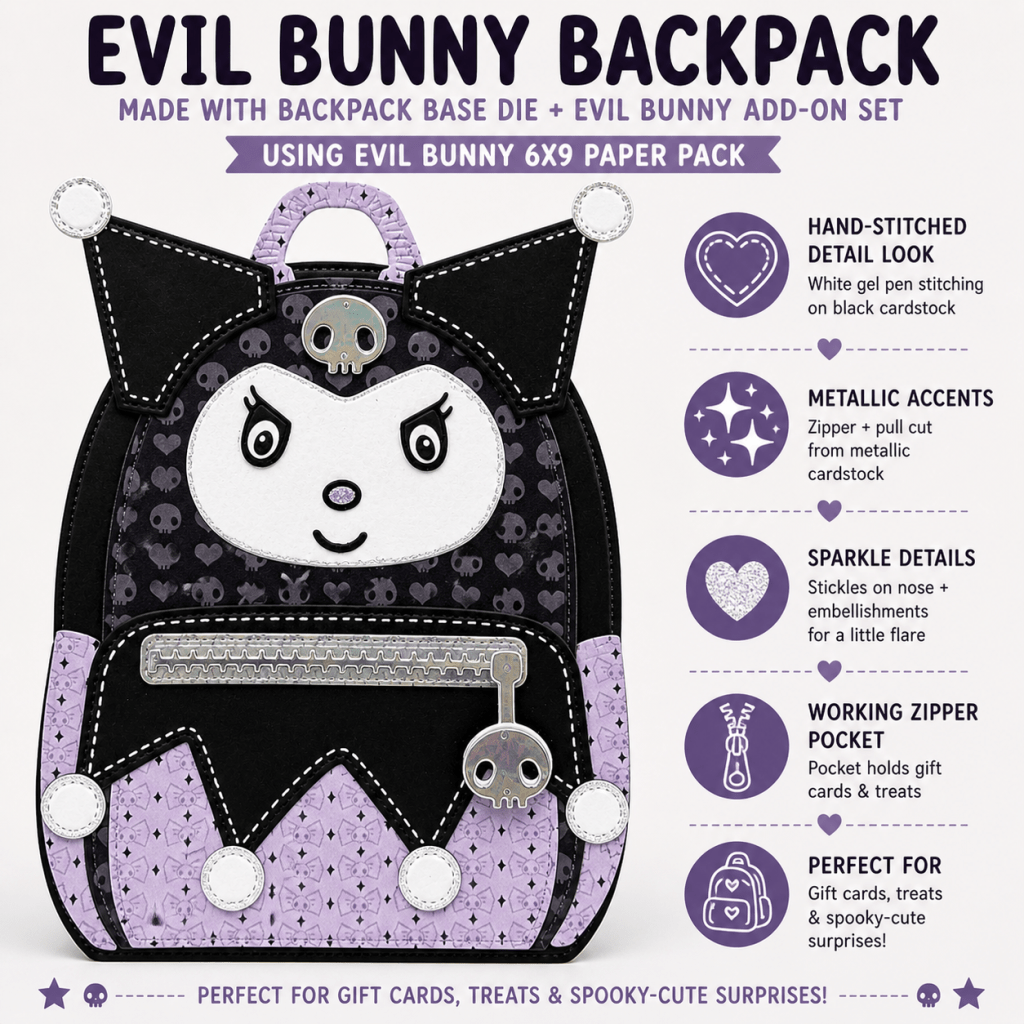
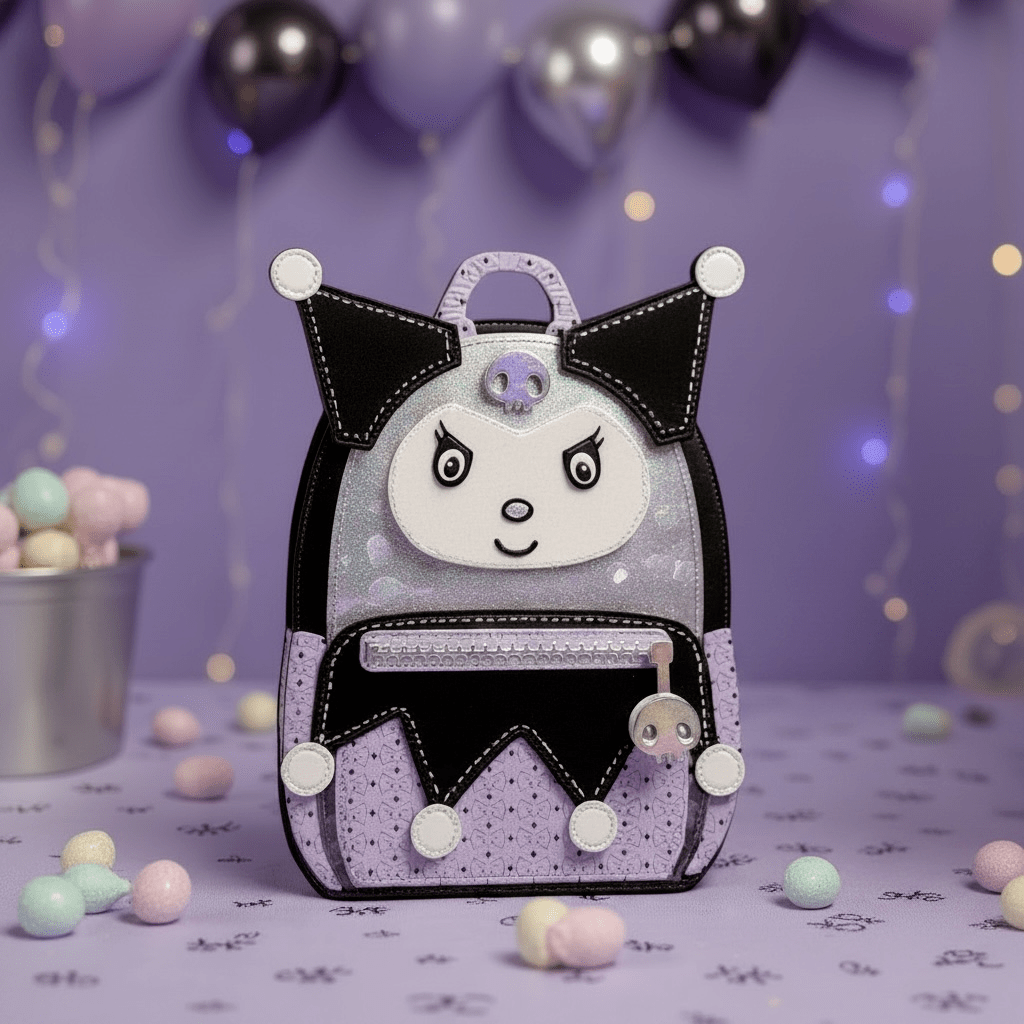
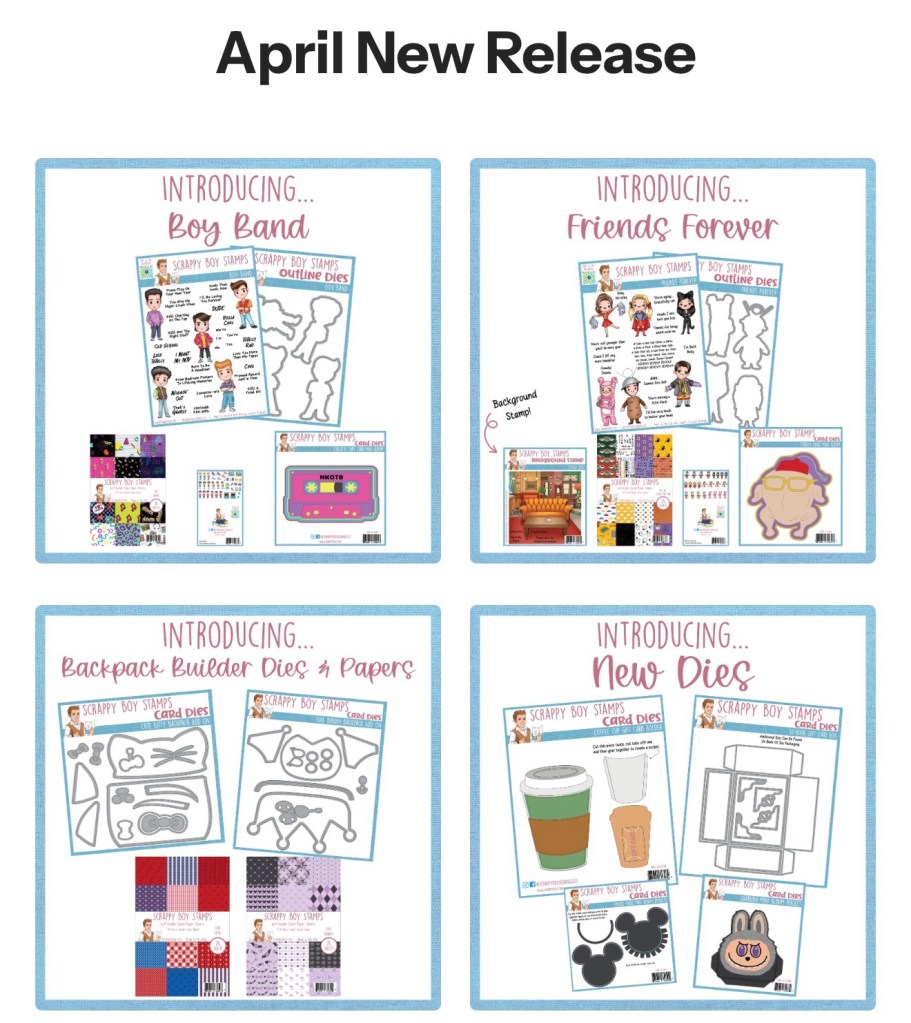
This backpack project was created using the Backpack Base Die paired with the Evil Bunny Backpack Add-On Set and coordinating patterned papers.

What I love most about this project:

  • Faux stitched details using a white gel pen
  • Metallic zipper accents
  • Interactive zipper pocket
  • Dimensional layered elements
  • Perfect size for treats or gift cards

The black and lavender color palette gives this project the perfect spooky-cute vibe while still keeping it playful and fun.

Supplies Used:

  • Backpack Base Die
  • Evil Bunny Backpack Add-On
  • Evil Bunny 6×9 Paper Pack
  • White gel pen
  • Metallic cardstock
  • Foam adhesive

Friends Forever Card 💛💜

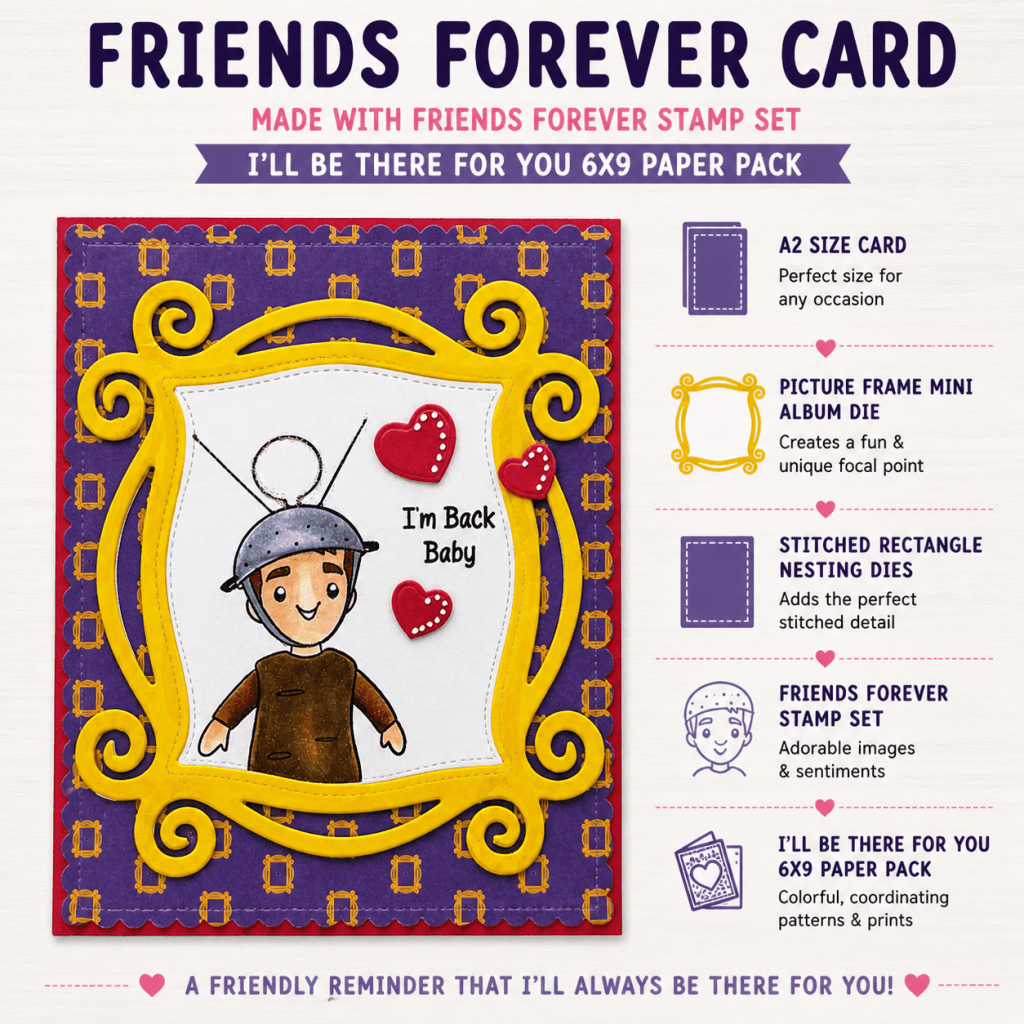
Next is this bright and cheerful friendship-themed card featuring the Friends Forever Stamp Set and the Picture Frame Mini Album Die.

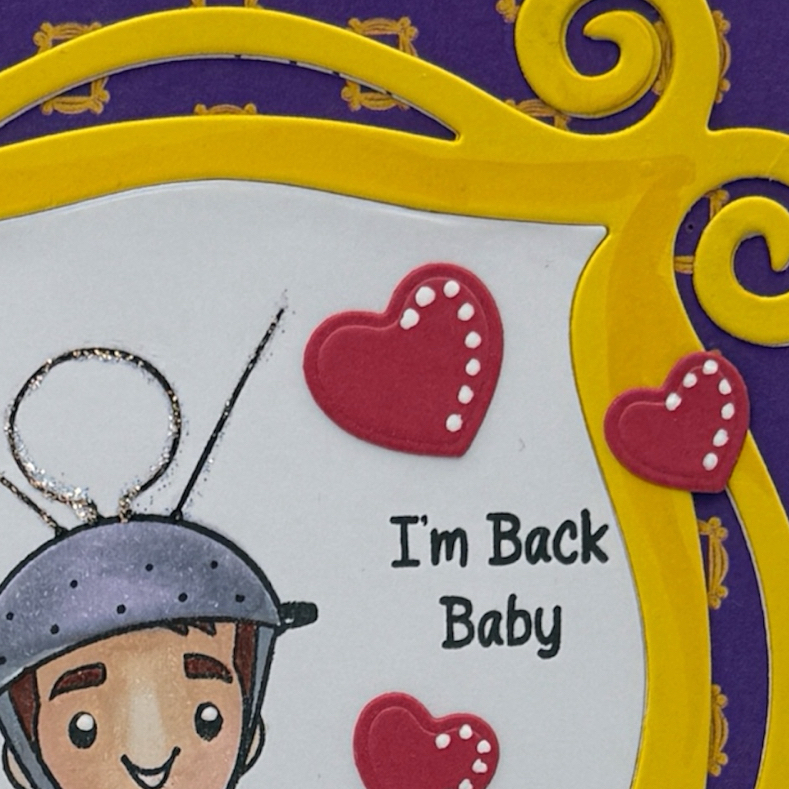
I love how the bold yellow frame pops against the purple patterned paper background. The layered hearts and sweet sentiment make this such a fun card for a friend or just-because greeting.

Details:

  • A2 sized card
  • Layered die cut frame focal point
  • Stitched rectangle details
  • Hand-colored stamped image
  • Coordinating patterned papers

This design would work for birthdays, encouragement cards, or simply sending happy mail to a friend.

Stickles & white gel pen accents add interest – hearts from SHAKER PLATES

Coffee Cup Gift Card Holder ☕💗

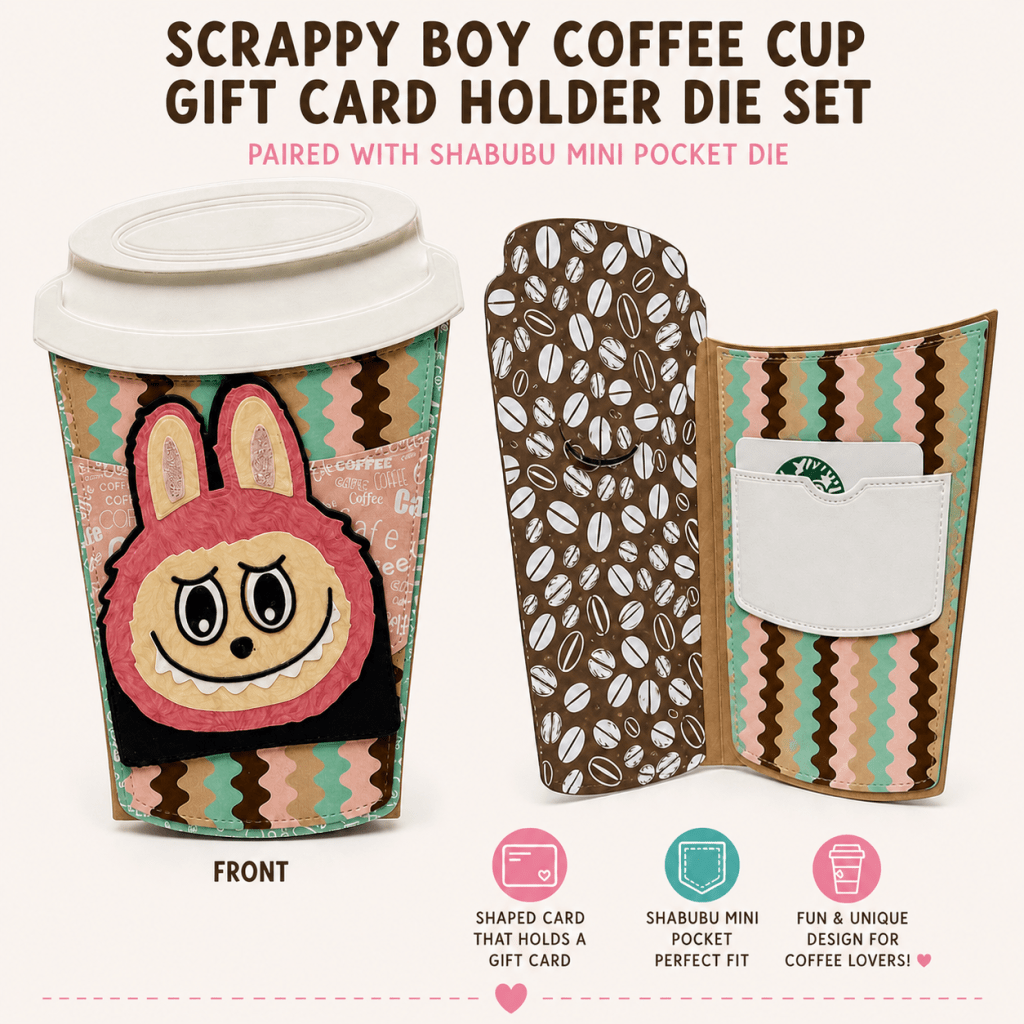
This coffee-themed project might be my favorite because it combines a shaped card with a hidden gift card pocket!

Created using the Coffee Cup Gift Card Holder Die Set and paired with the Shabubu Mini Pocket Die, this project is both cute and functional.

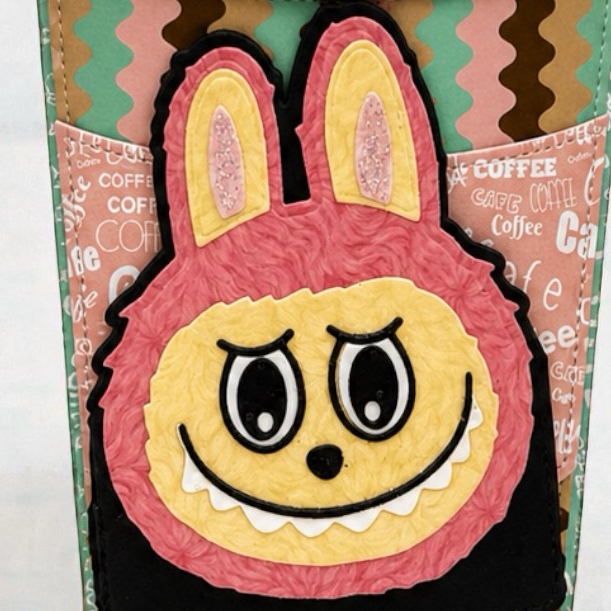
The fun patterned papers and dimensional bunny embellishment make this such a unique gift idea for coffee lovers.

Perfect For:

  • Gift cards
  • Teacher gifts
  • Coffee shop surprises
  • Birthday treats
  • Thank-you gifts

Shabubu Mini Pocket Die

Why I Love These Projects Together

Even though these projects each have a completely different theme, they all showcase what I love about crafting with Scrappy Boy Stamps:

  • Interactive designs
  • Fun layered dies
  • Coordinating products
  • Creative gift ideas
  • Endless customization options

Mixing stamps, dies, papers, and embellishments together helps create projects that feel cohesive while still allowing each design to stand on its own.


Final Thoughts

I had so much fun creating these projects and experimenting with different styles and themes. Whether you love spooky-cute designs, friendship cards, or gift card holders, there are so many ways to customize these products and make them your own.

Be sure to check out more inspiration and project details over on my blog:

Stamped By Kelly

And you can find the featured products here:

Scrappy Boy Stamps

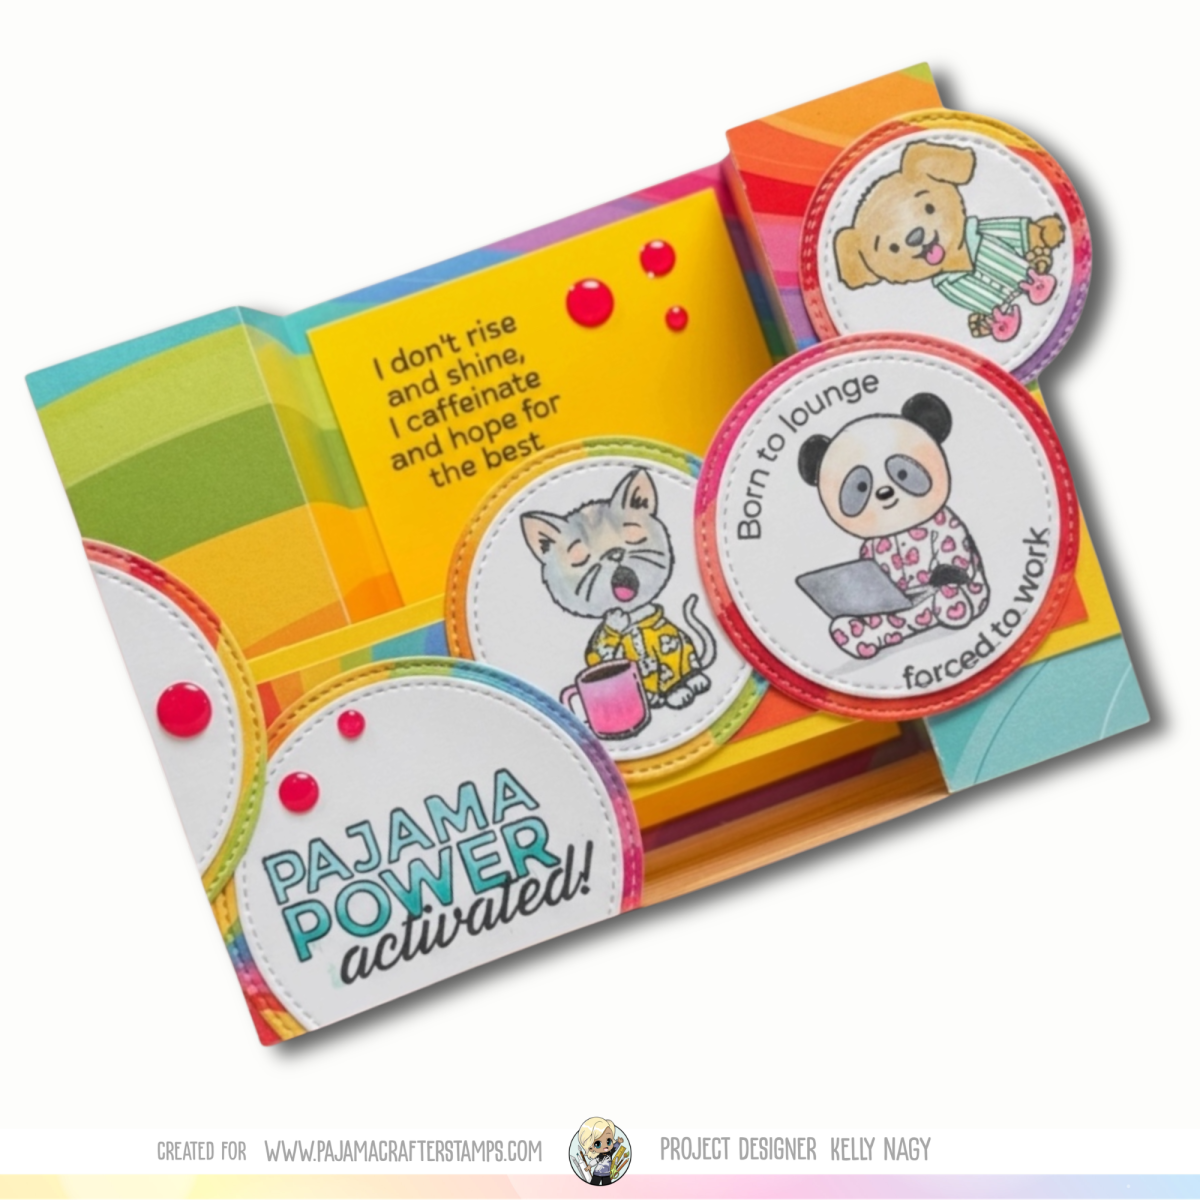
🎡 Craft Roulette Recap | Fruit Salad Bridge Card with Pajama Crafter Stamps

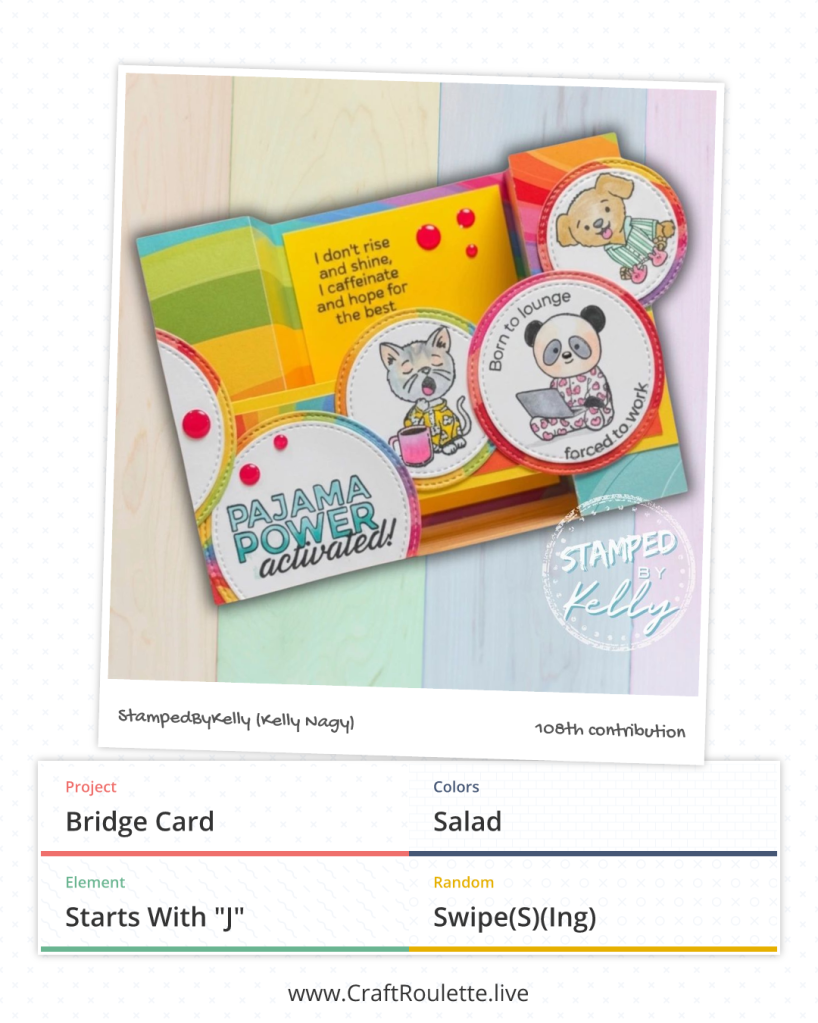
🎡 This week’s Craft Roulette challenge had me creating a bright and playful bridge card using fruit salad colors, a fun “J” element (hello, jammies! 😄), and bold swipe techniques that bring the whole design to life. Featuring adorable images from Pajama Crafter Stamps, this card is packed with color, dimension, and personality!

✨ Want to recreate this look or grab these stamps for yourself?

👉 Shop here: https://pajamacrafterstamps.com/STAMPEDBYKELLYBLOG

💥 This weekend only: Use code KELLY10 for an extra 10% OFF your order—on top of their already amazing prices!

There’s just something about Craft Roulette that pushes creativity in the best possible way! This week’s parameters came together for a project that is bright, playful, and just a little too relatable.

🎯 This Week’s Parameters:

Bridge Card Design , Salad Colors, Something that starts with “J” and Swipe or Swipes

🃏 Building the Card Design

I started with the bridge card base, which is one of my favorite interactive-style layouts. It creates dimension while still folding flat—perfect for mailing but with that extra wow factor when displayed.

From there, I leaned into the fruit salad color palette, pulling in bright, juicy tones that instantly give off happy, summery vibes. Think citrusy oranges, golden yellow pineapples, strawberry fuchsia, berry reds, and pops of fresh granny-smith apple greens—it’s impossible not to smile at this combination!

🔤 The “J” Element

For my “J,” I went with jammies—because honestly, what’s better than crafting in your comfiest clothes? 😄

I used adorable images from stamp set called PAJAMA POWER available at Pajama Crafter Stamps and paired them with the perfectly fitting sentiment:

“Born to Lounge, Forced to Work”

I mean… if that doesn’t sum up real life, I don’t know what does!

🎨 Swipe Details

The “swipes” bring this card to life. I incorporated:

Rainbow swipes in the background to add movement and energy A coordinating swipe across the bridge panel, tying everything together visually

To anchor the design, I added matted circle elements across the bridge, each highlighting the stamped images and helping guide your eye across the card.

💡 Final Thoughts

This project is the perfect example of how a structured challenge can spark unexpected creativity. The mix of:

dimensional design bold color choices playful theme

…made this one such a joy to create!

🛍️ Shop & Save

If you’re inspired to recreate this look or try your own Craft Roulette spin, you can shop the products I used here:

👉 https://pajamacrafterstamps.com/STAMPEDBYKELLYBLOG

💥 Bonus for this weekend only:

Use code KELLY10 for 10% OFF your cart!

And yes—this is on top of their already super affordable prices, which makes it even better!

💬 Join the Fun

Are you playing along with Craft Roulette? I’d love to know:

Which parameter would you have started with first?

Be sure to share your creations and tag me so I can see what you’re making!

✨ Don’t forget to follow me for more crafty inspiration:

Facebook & Instagram: @StampedbyKelly

In today’s feature, I’m sharing three distinct card designs created using Scrappy Boy Stamps’ newest release. Each project highlights a different product and aesthetic:

Exploring the newest Scrappy Boy Stamps release has been such a creative journey! For this set of projects, I challenged myself to take three very different elements—the Spooky Farmhouse background, the Wings & Sun dies, and the Little Pig Backpack add-on—and design cards that each tell their own story. From moody and textured to bright and uplifting to sweet and playful, these cards may look completely different at first glance—but there’s a common thread in how they were built. Take a closer look and see if you can spot what ties them all together! It’s my adhesive from TAPERUNNER.COM! Use Kelly10 for 10%OFF only at TapeRunner.com website.

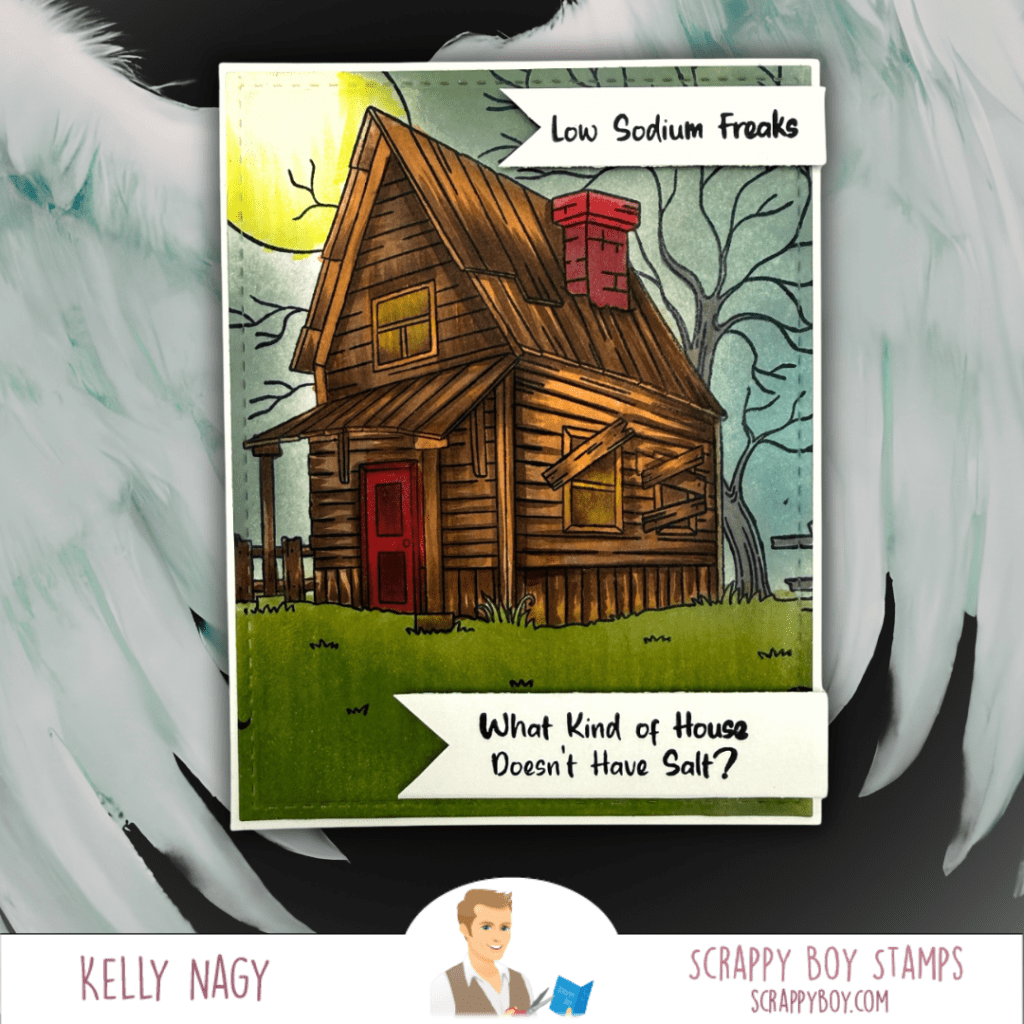
The Spooky Farmhouse 6×6 Background Stamp brings in layered texture and seasonal depth. I cut it down to fit a standard A2 sized card front.

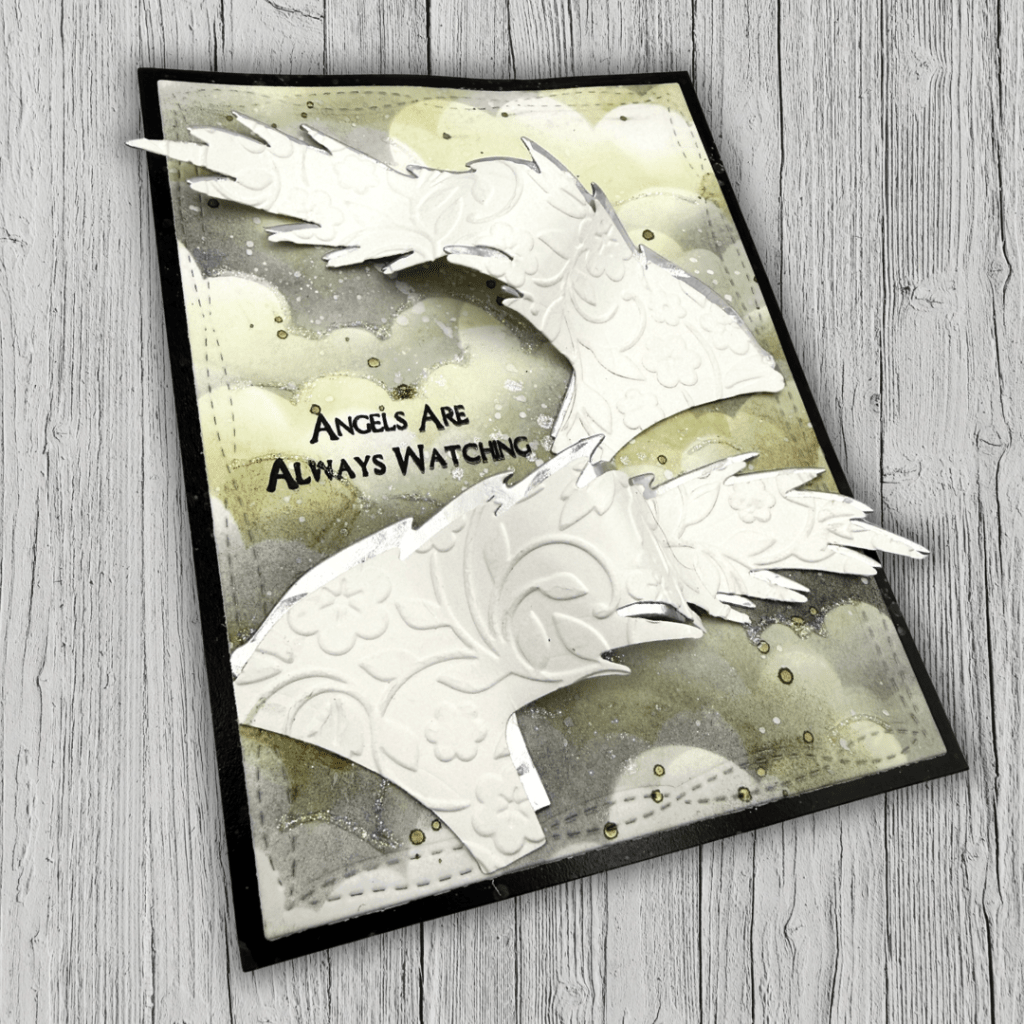
The Wings & Sun Dieset offers a softer, uplifting focal point with dimension. I ran the diecut wings through an embossing machine using a folder from my stash. I think it adds fun dimension, but not necessary. I then applied foam tape in thin strips to create waves and movement. The sentiment is from Bump In The Night and great to send an uplifting message, “Angels Are Always Watching.”

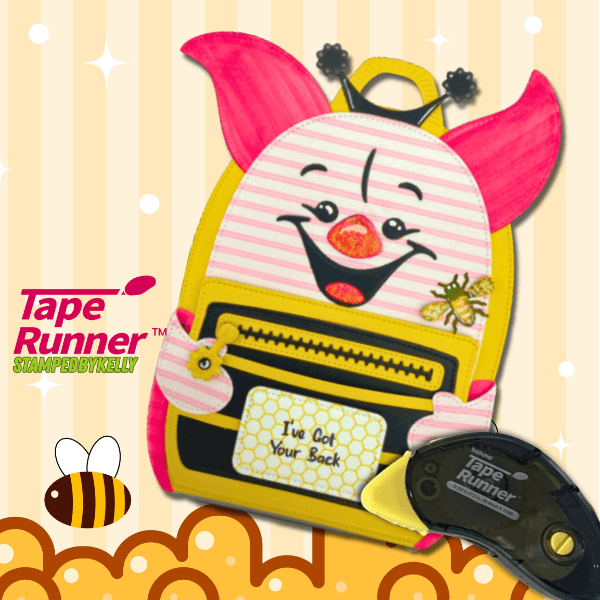
The Little Pig Back-Pack Add On adds a whimsical, character-driven element. Featuring the dry adhesive from TapeRunner and use PROMO CODE KELLY10 for 10%OFF your TapeRunner Cart.

Love putting my layers together with TapeRunner dry adhesive. Less Mess! Convenience ❤️

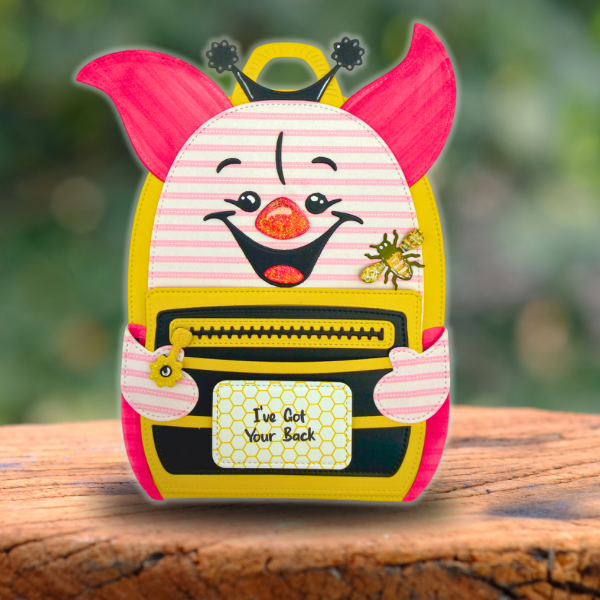
I wanted the pig to be dressed like a bee, so I used yellow snd black card for the body and ran the mouth diecut through a second time and cut the flower zipper pull a teo times in black to create a bee antennae. The bee is from the Honey Bear Back Pack Add-On Set.. Patterned papers are from the Honey Bear 6×9 paper pack. All of the Little Pig’s body cut from the pink striped patterned papers, with some elements colored with alcohol markers, white gel pen and crystal glaze for added shine.

Coincidentally, I found delight in the “I’ve Got Your Back” sentiment from Bump In The Night, which is a perfect for those who love a GOOD PUN! Perfect for ANY backpack project, LOL!

While each project stands on its own stylistically, they were intentionally designed with a unifying creative approach. Support small businesses and find these products and so much more at Scrappy Boy Stamps

I invite you to explore the projects and consider this:

👉 What is your favorite design element or technique?

Engagement and shared perspective are what makes this creative community so impactful.  Thanks for following, liking and commenting below!👇

Unlocking Creativity: How Die Cuts Transform Your Card Making! ✂️✨

Unlocking Creativity with Die Cuts in Card Making! ✂️✨

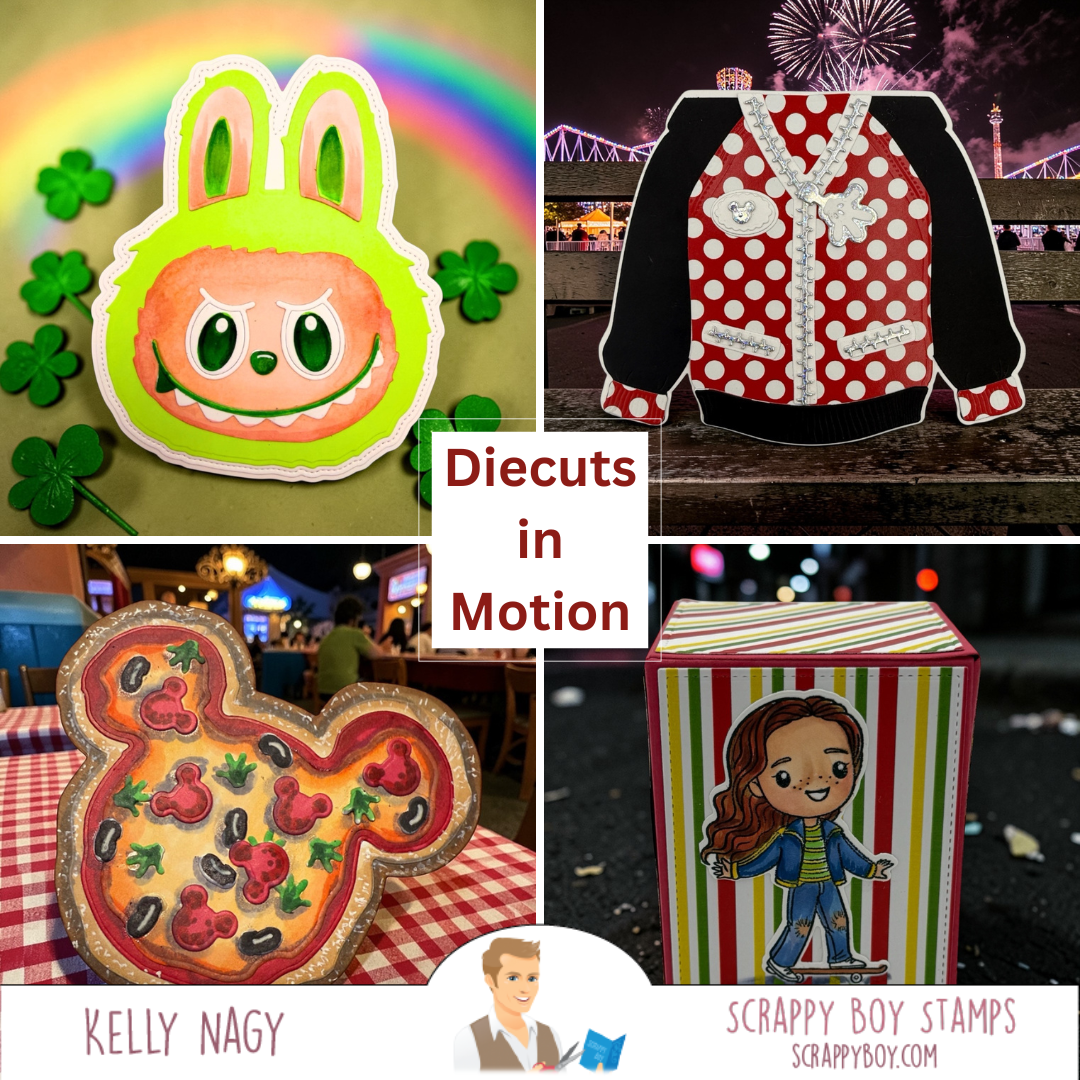
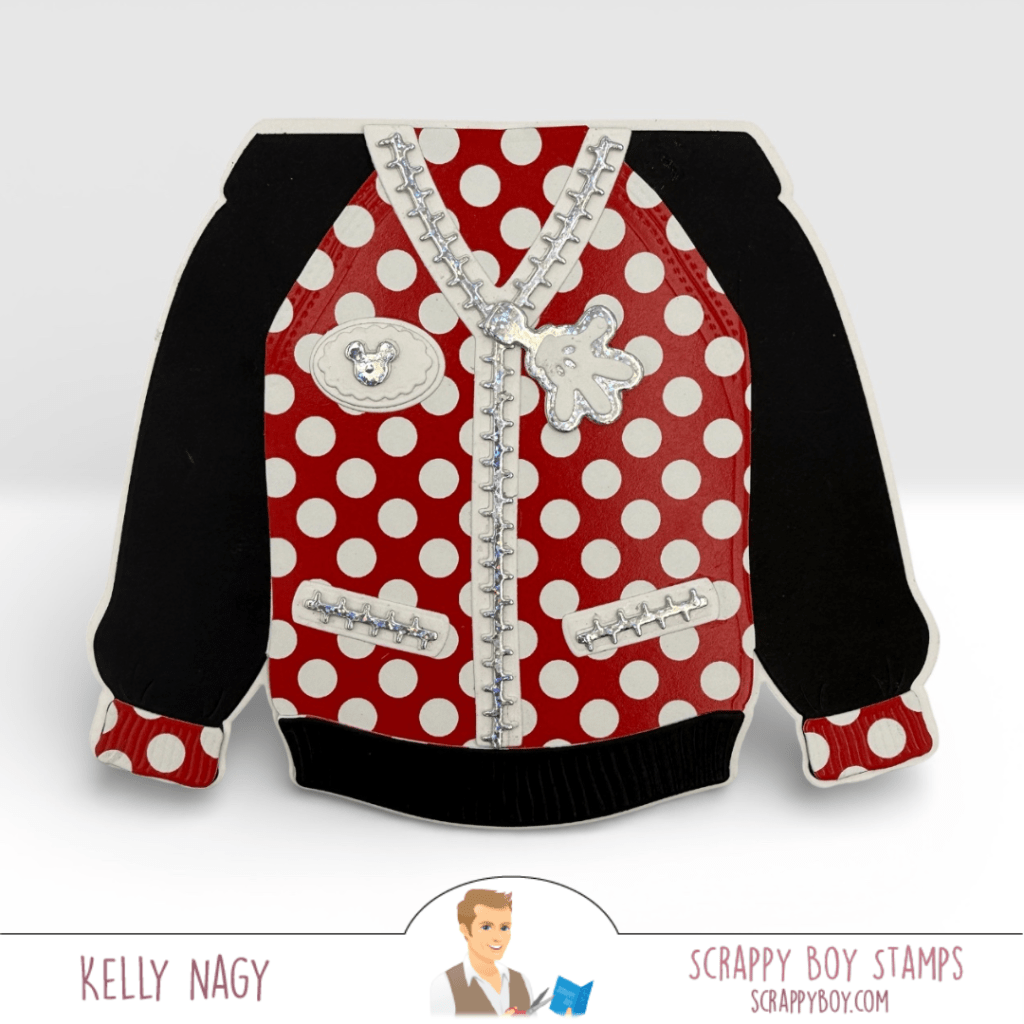
Welcome back, crafty friends! Today, I’m excited to share how die cuts can transform your card making and elevate your projects to new heights. From festive designs like the Shabubu Head Die Set for St. Patrick’s Day to cozy creations with the Hoodie Shaped Card, the possibilities are endless!

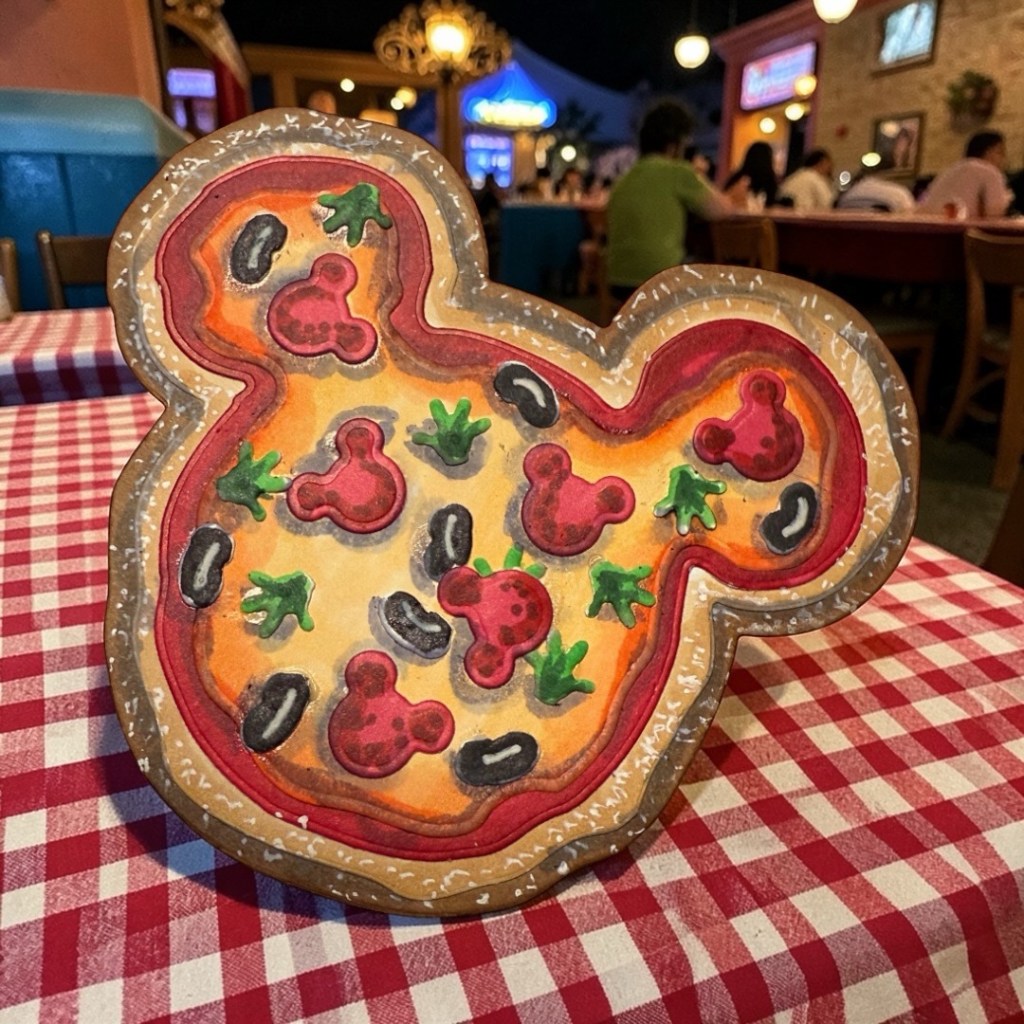
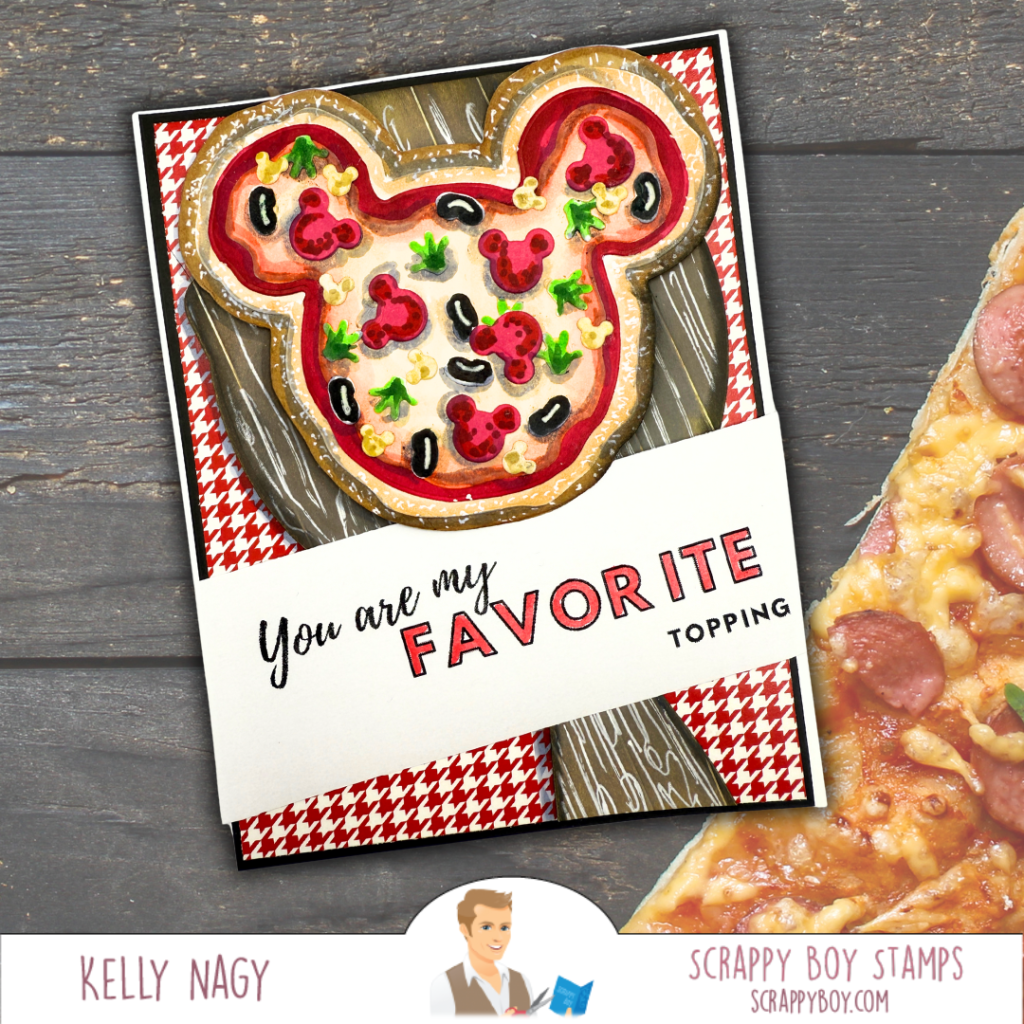
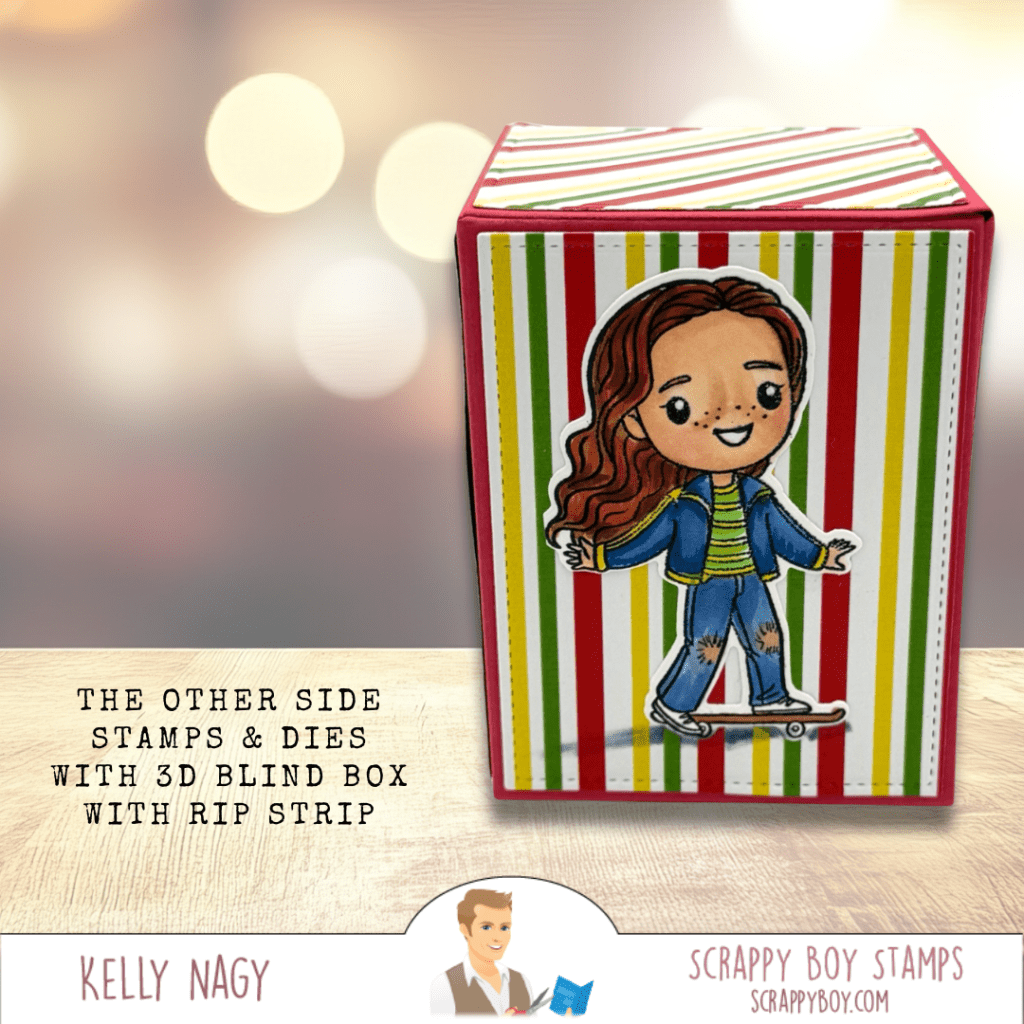
Get inspired by the fun Mouse Pizza Builder Die Set and the creative Blind Box with Rip Strip for unique gift card presentations. With die cuts, you can add dimension and personality to your cards, making them truly special. Ready to unleash your creativity? Let’s dive into these amazing projects together! 💖🎉

Hey there, crafty friends! Are you ready to take your card making and paper crafting to the next level? Let’s dive into four fabulous projects that showcase how die cuts can truly transform your creations!

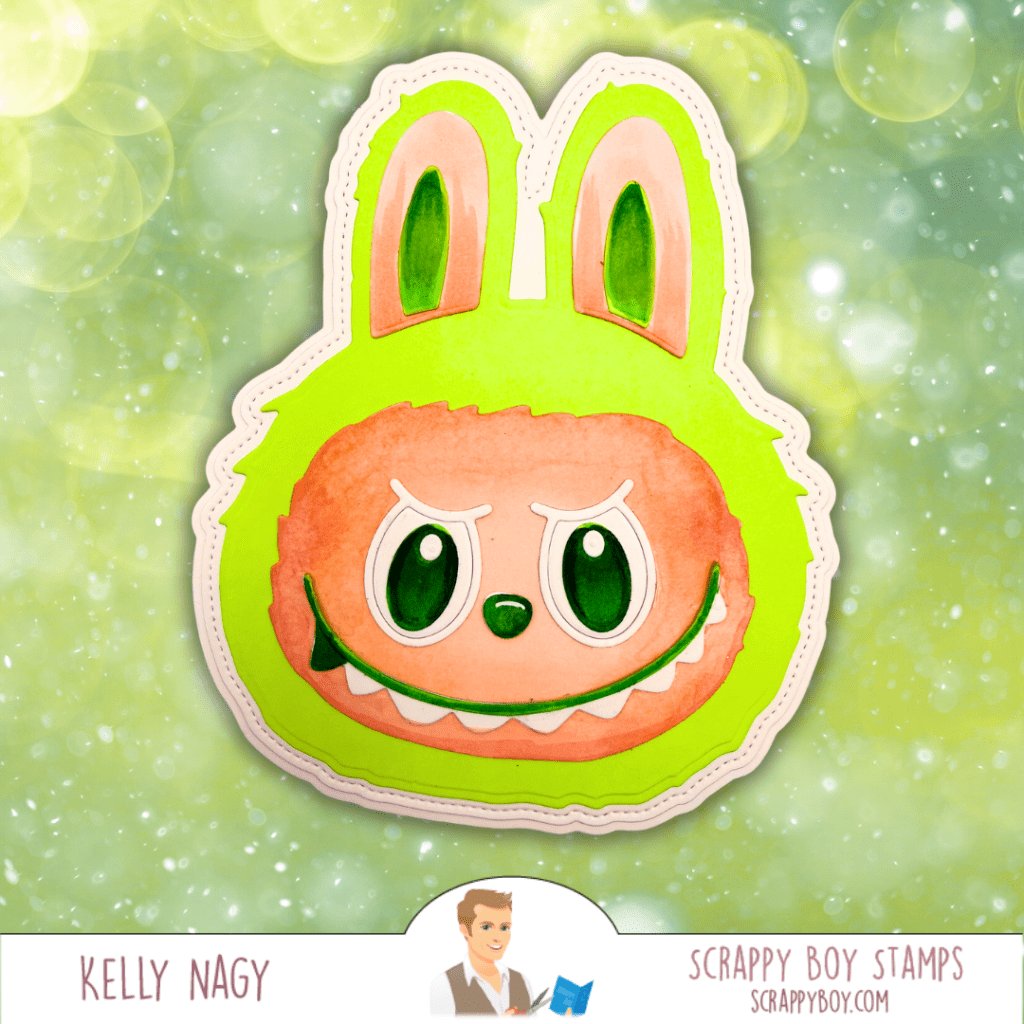
1️⃣ Shabubu Head Die Set: Just in time for St. Patrick’s Day, this die set lets you customize adorable characters in vibrant green! With die cuts, you can add dimension and personality to your cards, making them extra special. 🎉💚

2️⃣ Hoodie Shaped Card & Add-On Die Set: Say goodbye to basic cards! This hoodie die set allows you to create cozy, themed cards that can be zip-up or feature front pockets. Customization is key, and with just a few die cuts, you can create a professional-looking design that’s full of warmth and fun. 👕✨

3️⃣ Mouse Pizza Builder Die Set: This set proves that die cuts can do much more than just cut flat shapes! Use them creatively, like I did when I transformed a piece from the Magic Mirror Mini Die Set into a pizza board. Experiment with cutting your dies in plain white cardstock and let your imagination run wild with colors and arrangements! 🍕🐭

4️⃣ Blind Box with Rip Strip: This project combines playful design with functionality! Using patterned paper and an image from The Other Side Stamp Set, I created a gift box that’s perfect for presenting a gift card. The rip strip adds an exciting reveal, making gift-giving even more delightful! 🎁✨

With die cuts, the sky’s the limit! You can add dimension by layering your cuts, and even more depth by adding shadows and colors using your favorite mediums or simple ink blending on the edges.

So, are you ready to unleash your creativity? Dive into these projects and see how die cuts can elevate your crafting game! Share your favorites in the comments below, and let’s inspire each other to create something amazing!

I use dry adhesive and liquid adhesive for my projects. There are specific times when one works better than the other. Follow me for more tips on that and if you wish to visit taperunner.com you can use code Kelly10 for 10% off your cart.

💖 #ScrappyBoyStamps #DieCutMagic #StampedbyKelly #SSBE