Spooky Cute with the Scrappy Boy Stamps August Release! 🦇🎃

Get spooky cute with the Scrappy Boy Stamps August Release! I’m mixing stamps, dies, paper and a little unexpected inspiration to create Halloween projects filled with dimension, personality and fun—including a special treat box made for my grandson and one of our favorite Halloween traditions. 🎃🦇✨

If you know me, you know I LOVE finding unexpected ways to use my crafty supplies! Sometimes a stamp or die may have been designed with one idea in mind, but I immediately start thinking, “What else can I turn this into?” And living in Central Florida, it probably comes as no surprise that a little theme park inspiration frequently sneaks into my craft room!

For these projects, I pulled out some of the spooky-cute goodies from the Scrappy Boy Stamps August Release and gave them my own magical Halloween twist.
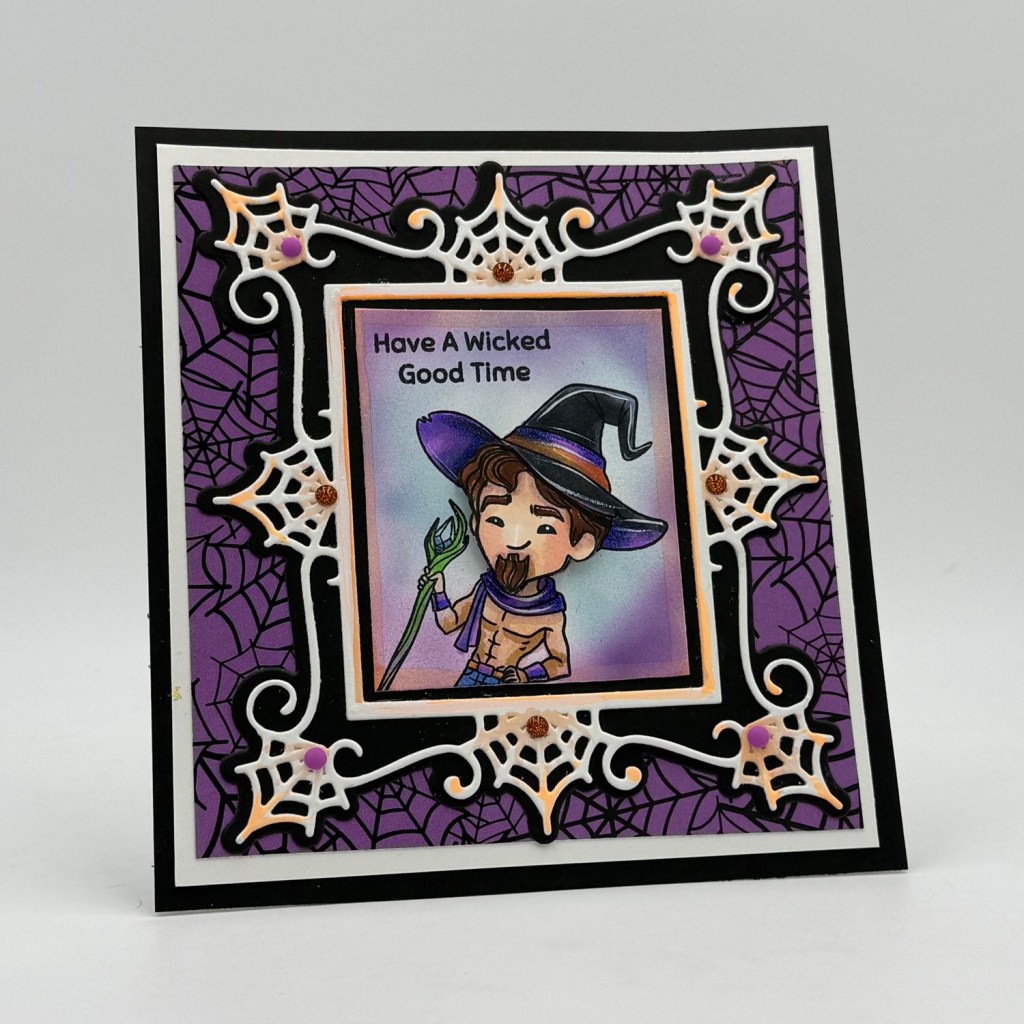
“Have a Wicked Good Time” Gothic Picture Frame card

The Gothic Picture Frame Die was perfect for framing one of the adorable images from Hex Appeal. I kept the traditional Halloween palette of purple, black, orange and white, adding little pops of sparkle to the spiderweb details. I love how the oversized frame makes the stamped image feel like a spooky portrait hanging inside a haunted mansion.
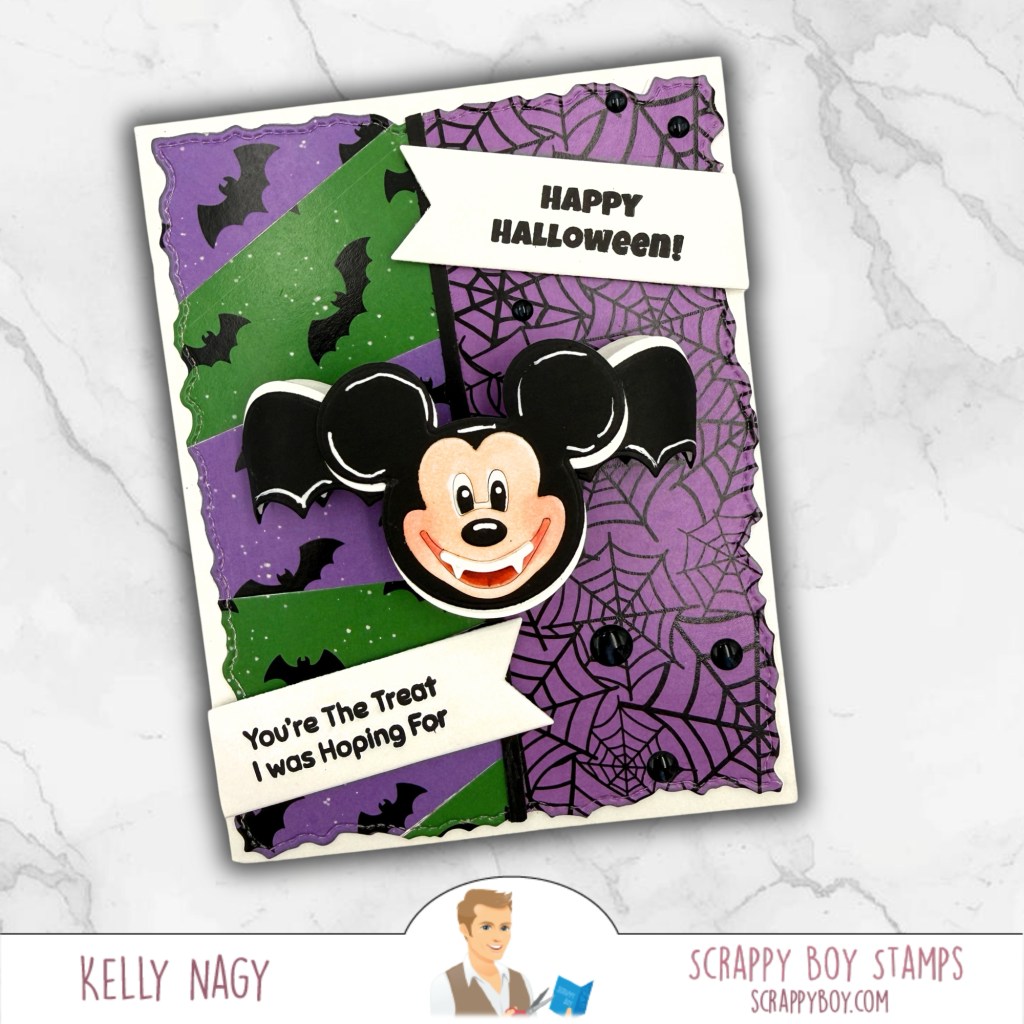
Mouse Bat card — “You’re the Treat I Was Hoping For

Then came those Mouse Bat Embellishment Dies! These were just begging for some theme park-inspired fun. I played with layers, patterned papers, torn edges and white gel-pen accents to create two completely different Halloween cards.
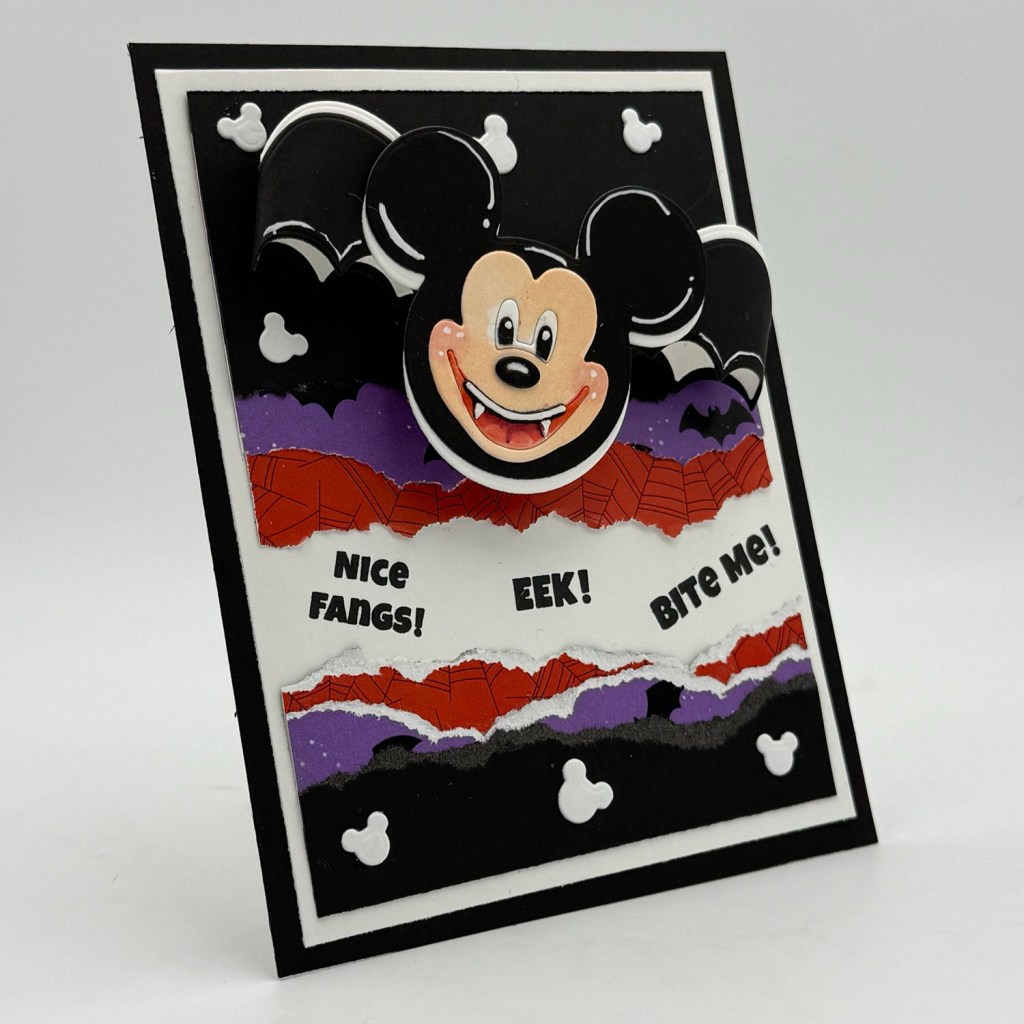
Mouse Bat card — “Nice Fangs! Eek! Bite Me!”

The dimensional bat ears make such a fun focal point, especially when paired with those classic Halloween colors. I especially love how differently the same basic die can look simply by changing the background, composition and embellishments.

And I couldn’t stop there!
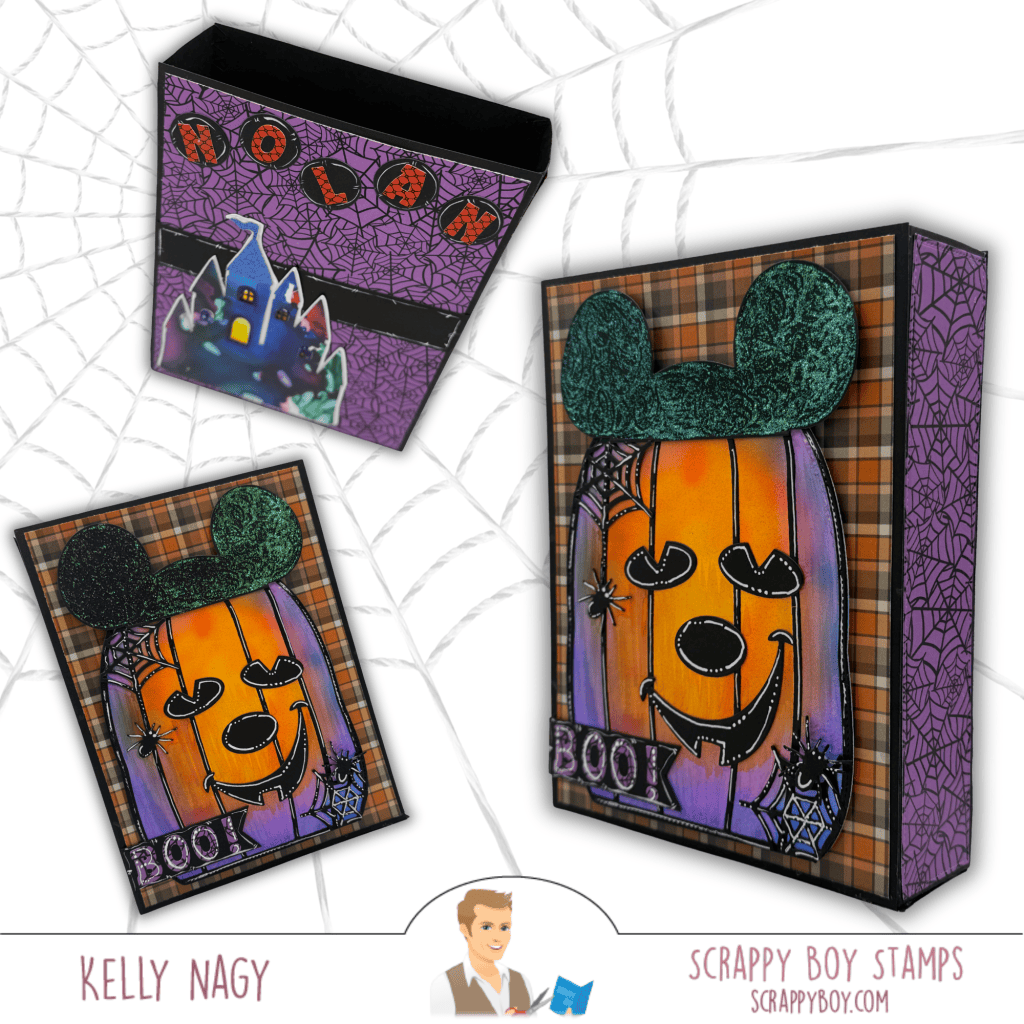
Full Pumpkin Mouse project showing both the card and dimensional folio/box

The Pumpkin Mouse Backpack Add-On became the star of one of my favorite projects. Instead of treating it simply as a backpack element, I transformed that big pumpkin into a dimensional Halloween centerpiece and paired it with plaid and spiderweb papers. A little tissue paper and some fun halloween treats and gift cards and you have a decorative, heartfelt gift and memory holder once emptied.
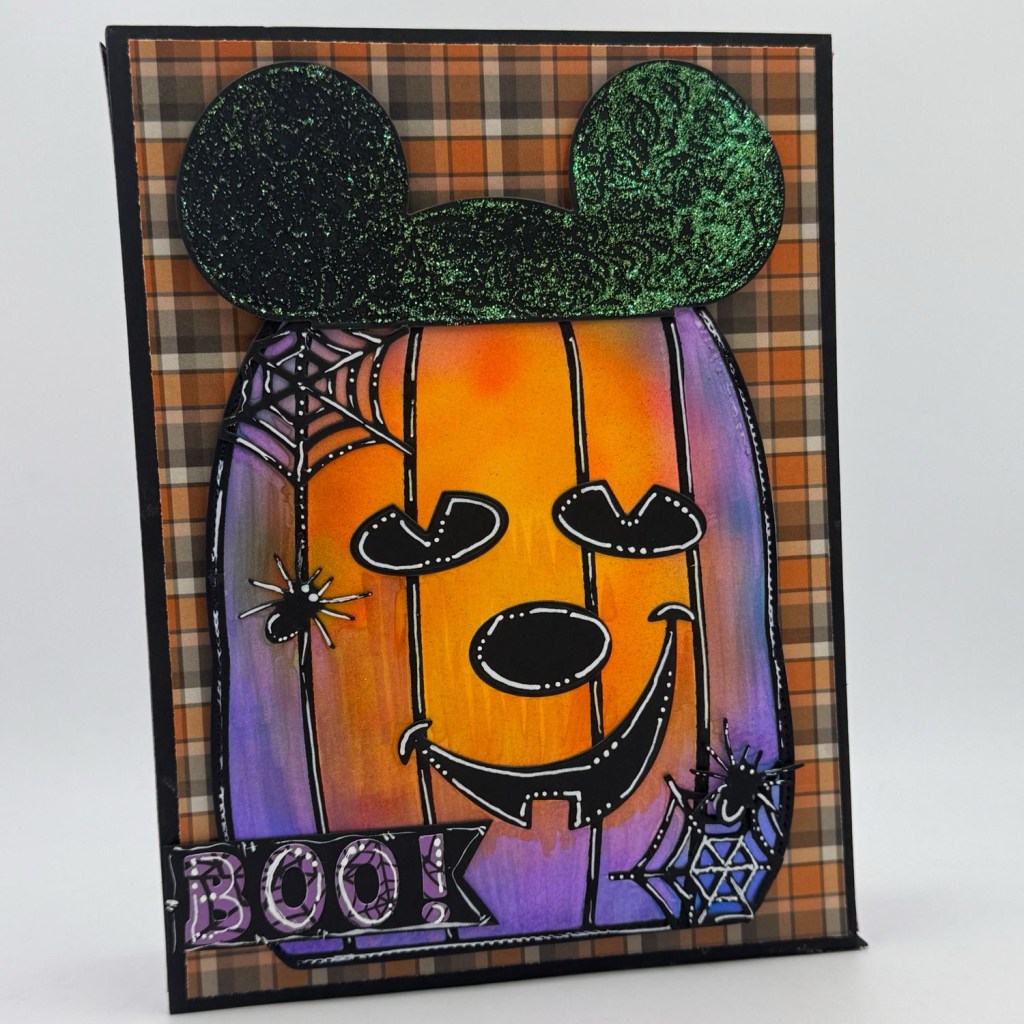
Close-up of Pumpkim

Lots of ink blending, deep shadows, white gel-pen highlights, lovingly put together with my hand-held adhesive from Tape Runner and a little shimmer helped bring all of those layers to life. The close-up really shows how much dimension and texture can be added to simple paper die cuts.

This treat box is especially close to my heart because I created it for our grandson, Nolan, as we prepare for our second annual visit to the Mouse’s Not-So-Scary Halloween Party at the theme park, a tradition that combines celebrating his birthday with officially kicking off the Halloween season here in Central Florida!

I personalized the back with his name and even pulled in the castle die from a previous Scrappy Boy Stamps release, which was the perfect way to add another little touch of magic. I love mixing pieces from different releases and finding completely new ways to use them, but even more, I love knowing that this project will become part of another special memory with our grandson. 🎃🏰🧡
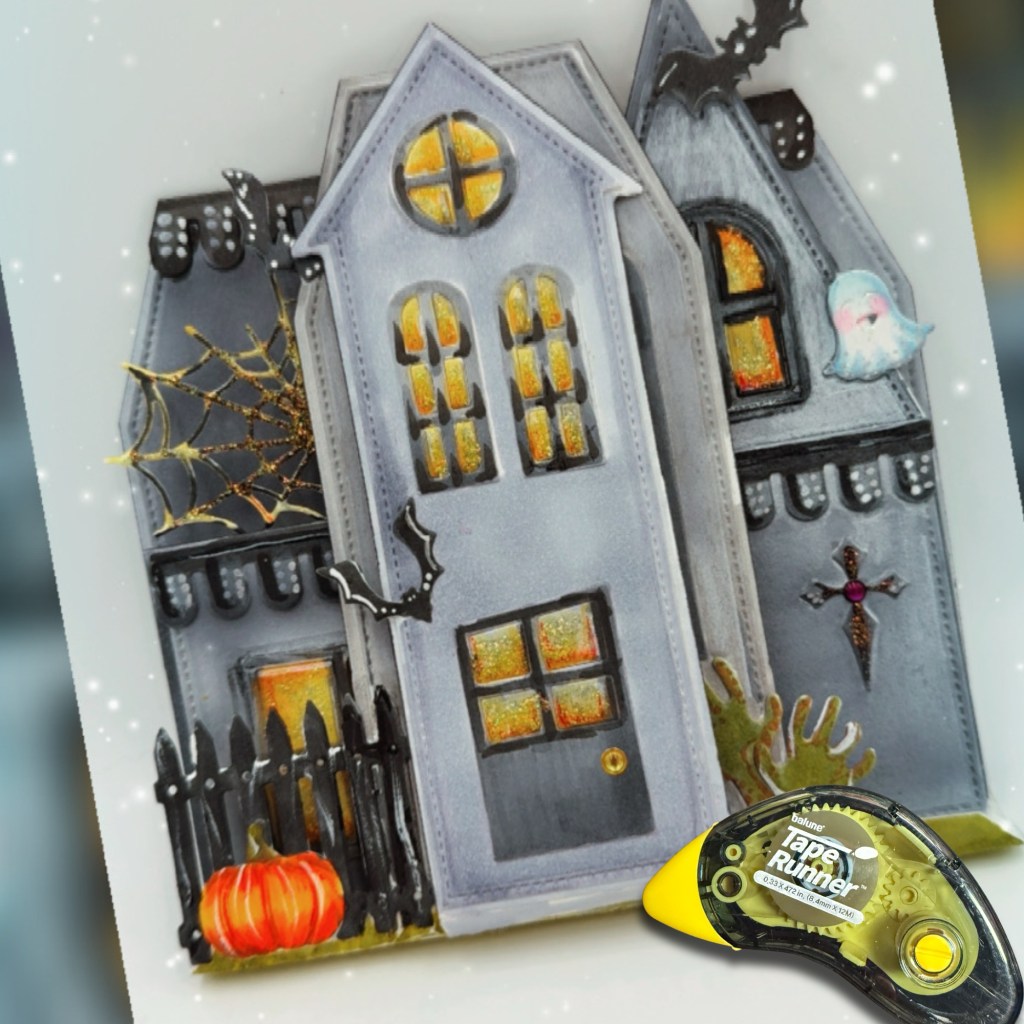
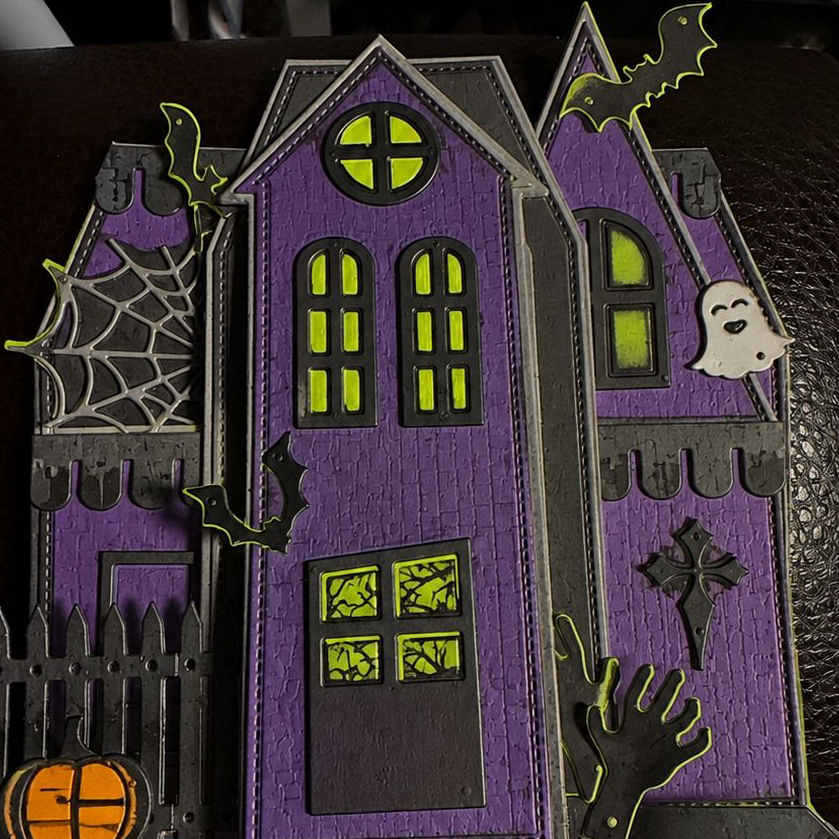
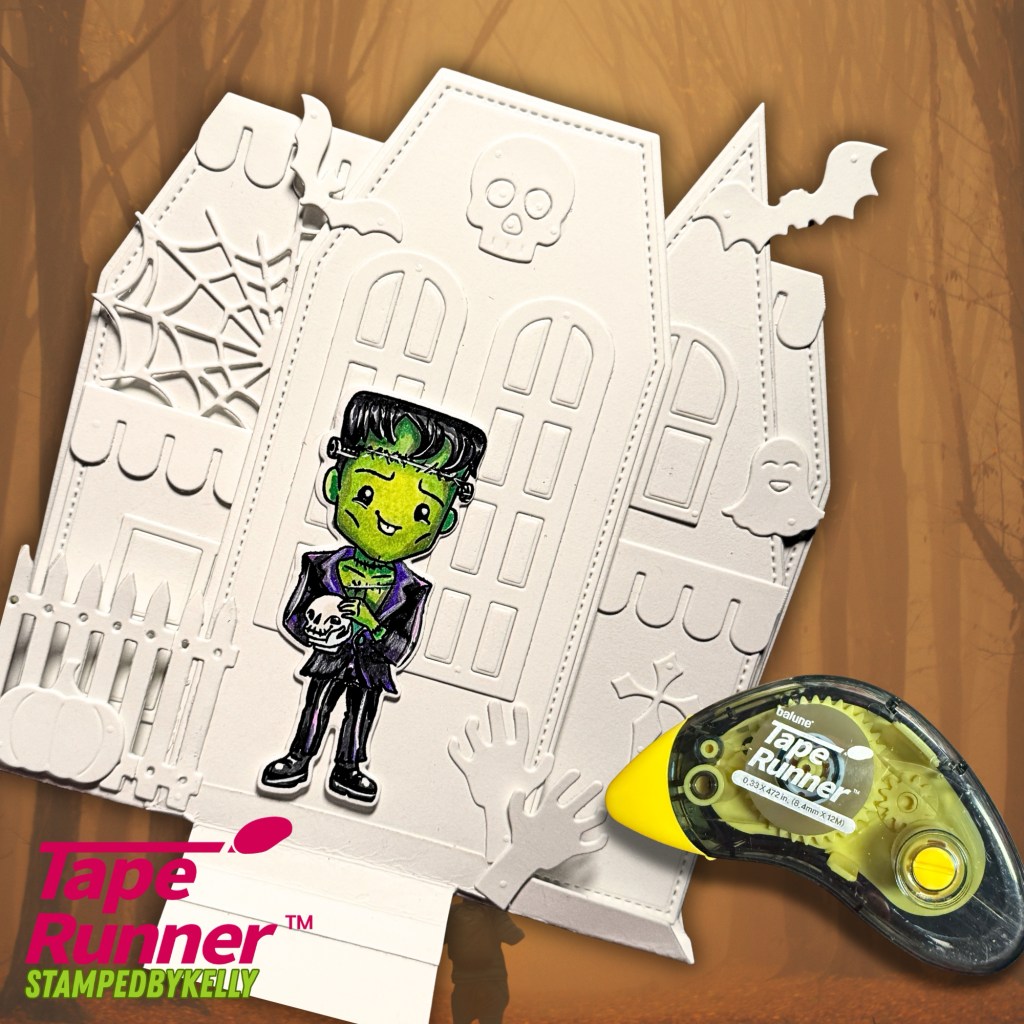
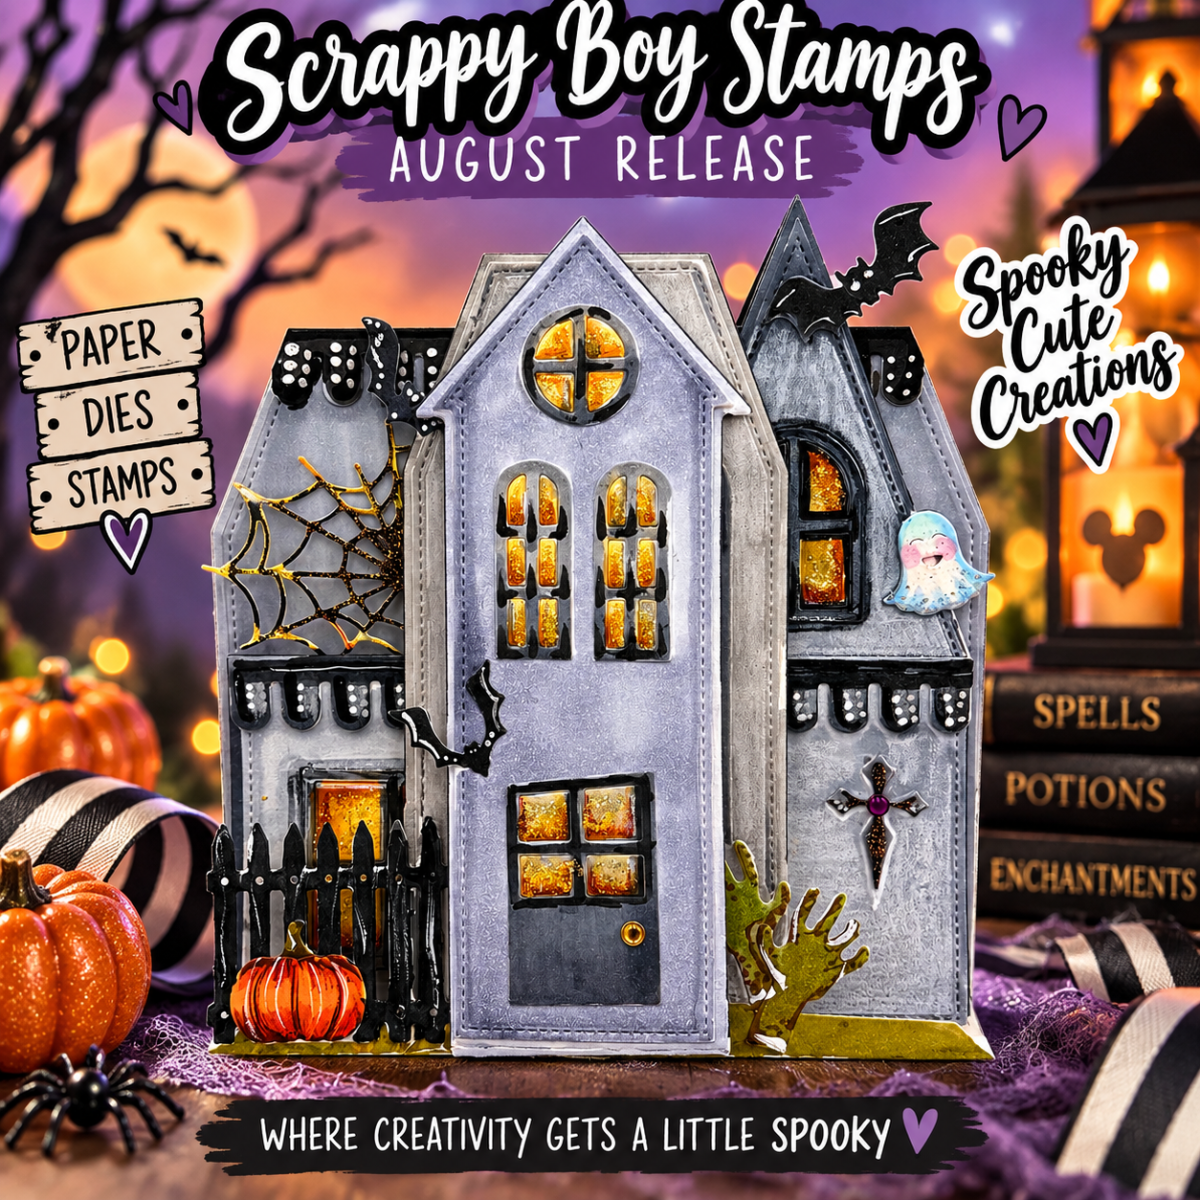
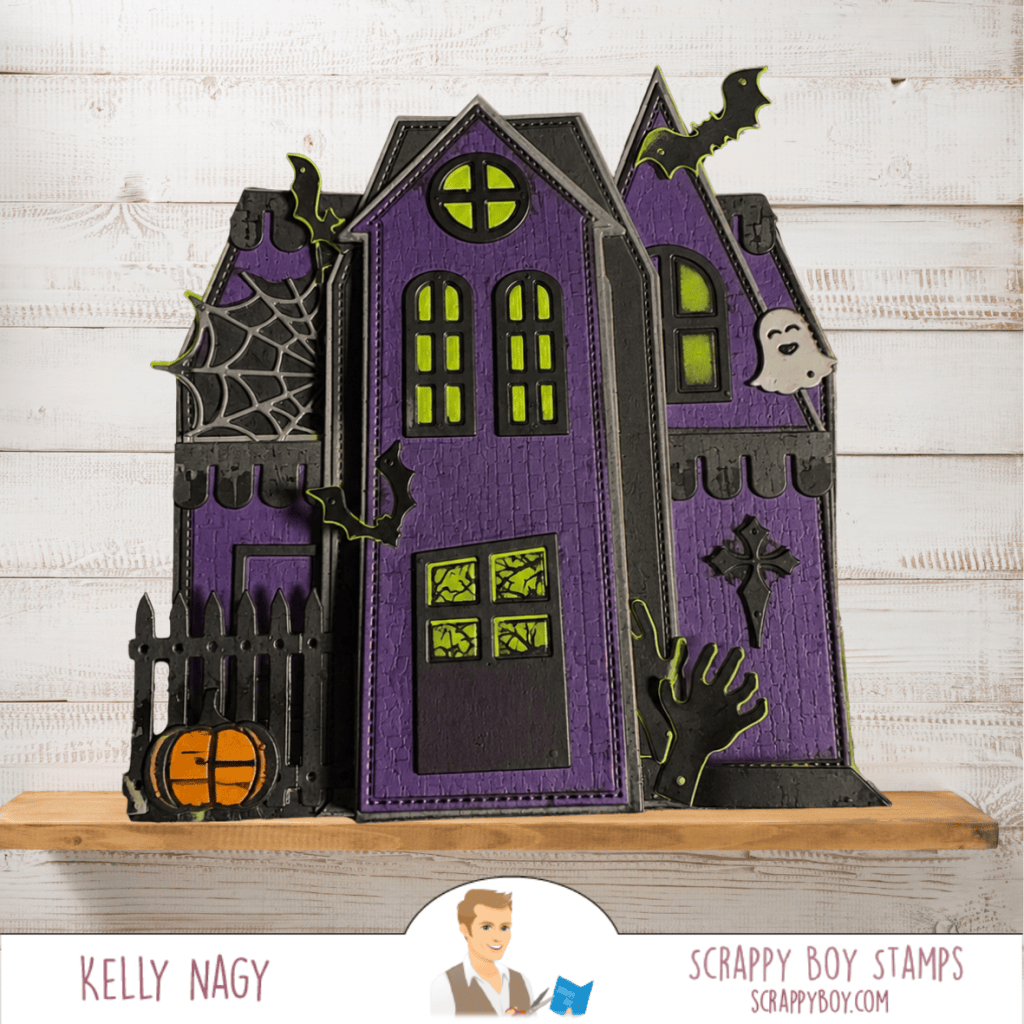
Finally, I had to play with the Haunted House Folio. I went for an eerie-but-cute abandoned mansion look with weathered grays, soft lavender, glowing golden windows, bats, spiderwebs, a pumpkin and even a creepy little hand reaching up from below. It was easy to position and adhere the smaller pieces with my hand-held Tape Runner. This project has so many tiny details to discover!

That’s probably my favorite part about crafting: the dies give you the pieces, but your imagination gets to decide what they become.
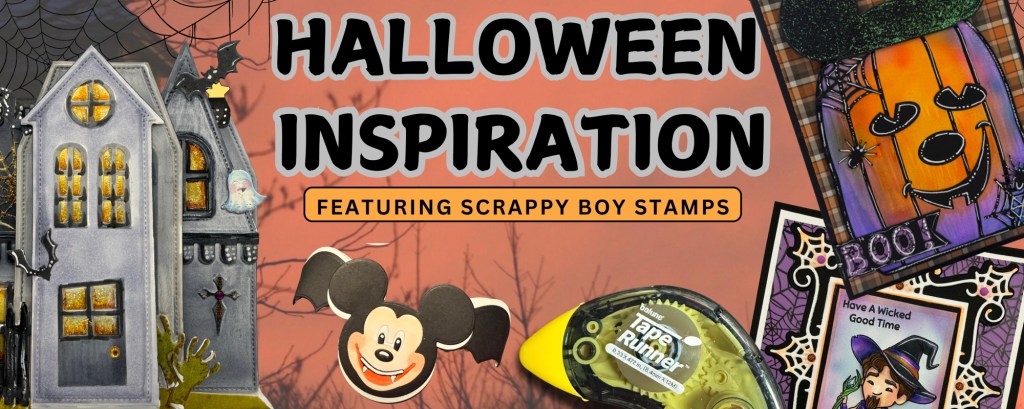
I hope these projects inspire you to pull out your supplies and look at them a little differently. Mix collections. Change the intended theme. Add unexpected colors. Turn an embellishment into the focal point. Most importantly, have fun creating something that’s completely you.
Happy crafting — and stay spooky! 🦇🎃✨
👻 Haunted House Folio Die | Scrappy Boy Stamps

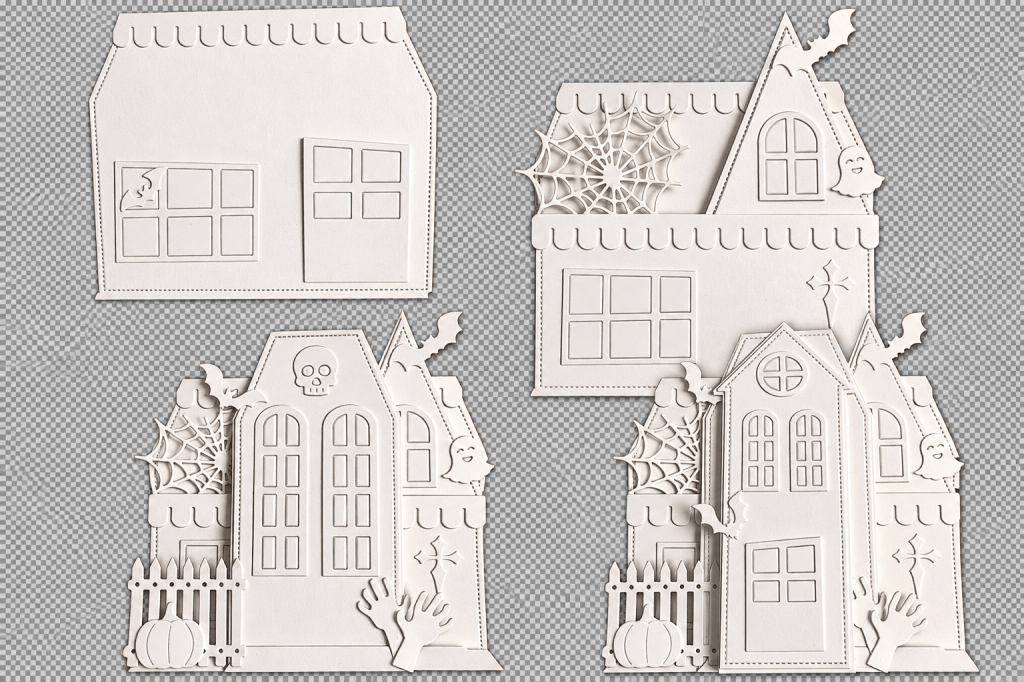
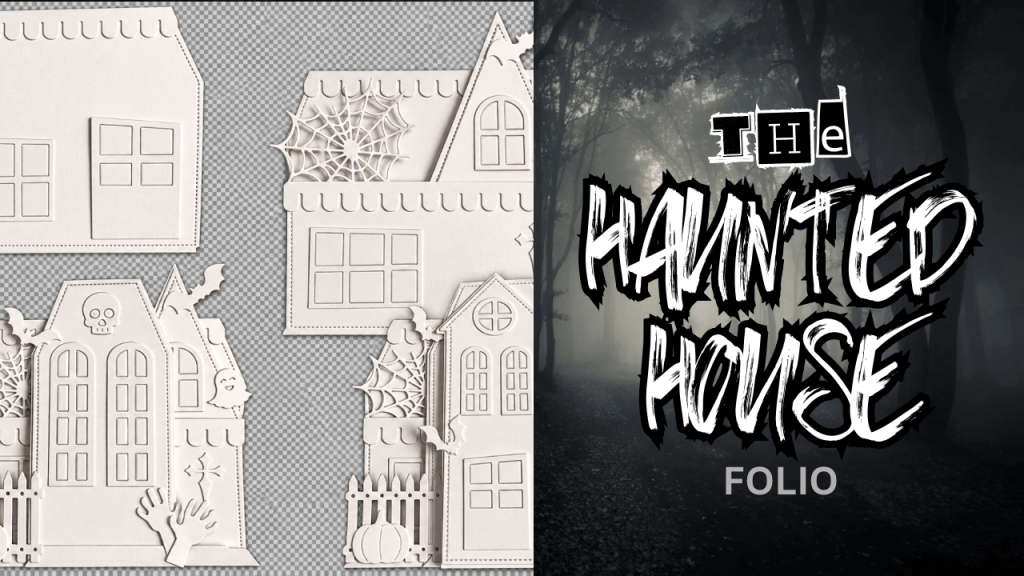
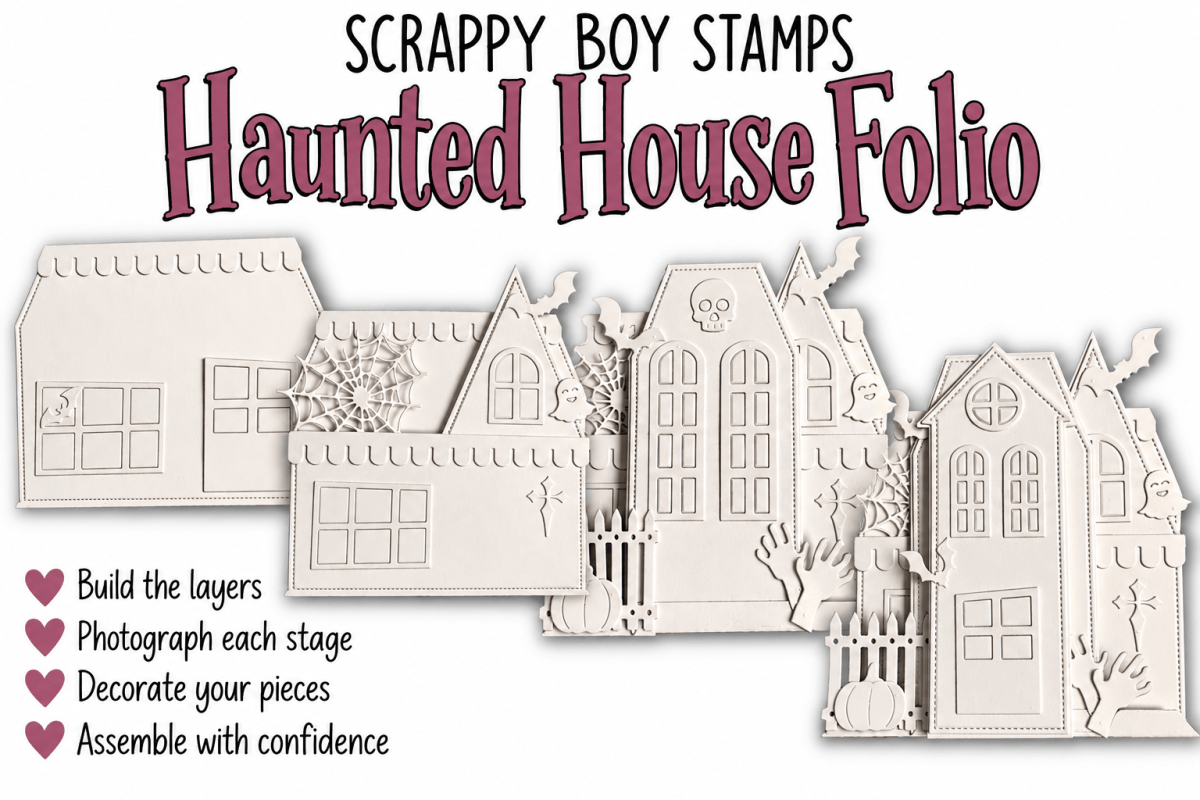
See how the Scrappy Boy Stamps Haunted House Folio Die comes together layer by layer! I first build the entire haunted house in white cardstock and photograph each stage as a reference. Then I can take it apart, add all the spooky color and details, and assemble everything using my favorite TapeRunner.com handheld adhesive tape runners. Use code KELLY10 to save 10%.

There’s something spooky happening at Stamped by Kelly! 🦇🏚️

Today I’m featuring the Haunted House Folio Die from the August Release from Scrappy Boy Stamps, and this one was SO much fun to create!

I love a die set that gives you plenty of room to make it your own, and this haunted house definitely delivers. I created two completely different looks to show just how versatile it can be.

For my first version, I went with a classic Halloween palette of deep purple, black, gray and bright spooky green. I added texture to the house panels and layered all of those fabulous little details—the bats, spiderweb, ghost, creepy hand, fence, pumpkin and more. The bright green windows give it that perfect eerie glow!

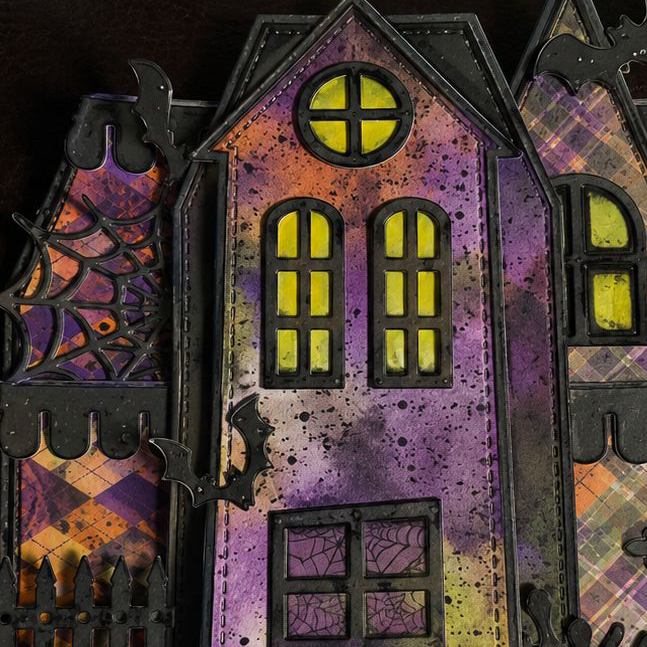
For my second version, I decided to get a little messier! I used a combination of inks, splatters and coordinating patterned papers from the Hex Appeal bundle to create a distressed, grungy haunted-house feel. I love how the oranges, purples and blacks work together while the bright yellow-green windows really pop against the darker colors.

One die set—two totally different haunted houses! That is exactly what I love about dies like this. You can keep it clean and coordinated or pull out the inks, patterned papers and splatters and make it wonderfully creepy.

The Haunted House Folio Die is part of Scrappy Boy Stamps’ August release and is packed with details that make it perfect for Halloween cards, folios, albums, home décor and more.

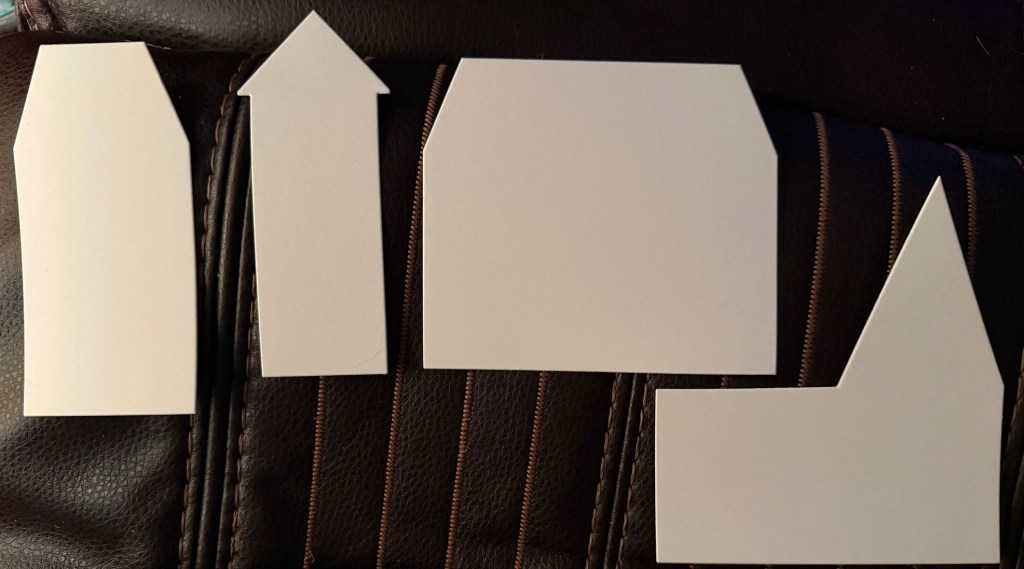
Started with 4 main layers.

Building the Haunted House Folio — Layer by Layer

Each layer builds upon the next to create this fun Haunted House Flipbook/Folio. Before adding color or patterned paper, I like to:

  • 🤍 Die-cut and assemble each layer in white cardstock to create a visual reference.
  • 📸 Photograph each stage so I can easily remember how all those little pieces fit together.
  • 🎨 Take everything back apart and decorate each panel individually with coloring, patterned papers, and embellishments.
  • 🏠 Reassemble and permanently adhere each layer using my favorite handheld adhesive tape runners from TapeRunner.com.

This little extra planning step makes decorating a detailed project so much easier—and I have my photos to reference when it’s time to put the whole haunted house back together!

SAVE 10%: Use promo code KELLY10 when shopping at TapeRunner.com.

Available at http://www.scrappyboy.com

You can find the new release and the Haunted House Folio Die at Scrappy Boy Stamps⁠.

Thanks so much for stopping by!

Happy Crafting!
Kelly
StampedbyKelly 🖤👻🦇

Going Batty with the New Scrappy Boy Stamps Halloween Release!

Create two colorful Halloween cards featuring the newest Scrappy Boy Stamps release—the Hex Appeal I Want It All Bundle, Spooky Bat Mouse Embellishment Die, Mouse Ears Alphabet & Numbers Dies and Gothic Picture Frame.

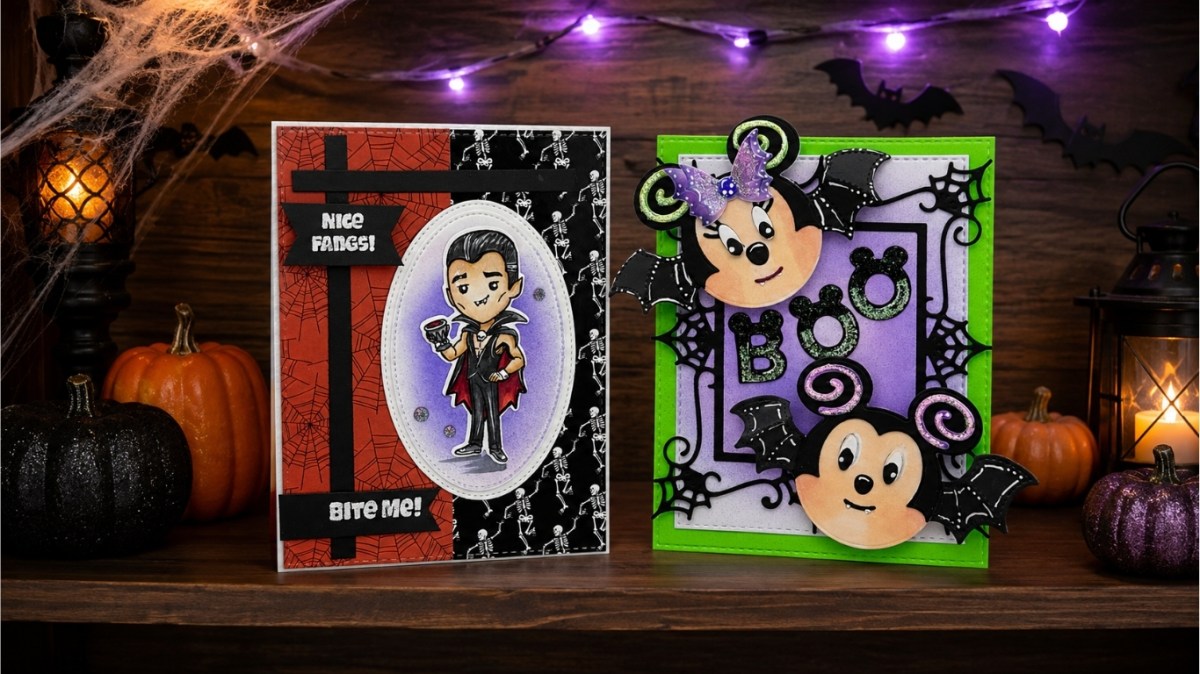
Halloween crafting is in full swing, and today I’m sharing two frightfully fun projects featuring the newest release from Scrappy Boy Stamps! From a charming vampire to the cutest little bat mice, these cards are filled with bright colors, playful details, and just the right amount of spooky sparkle.

Two Halloween cards featuring the newest release from Scrappy Boy Stamps

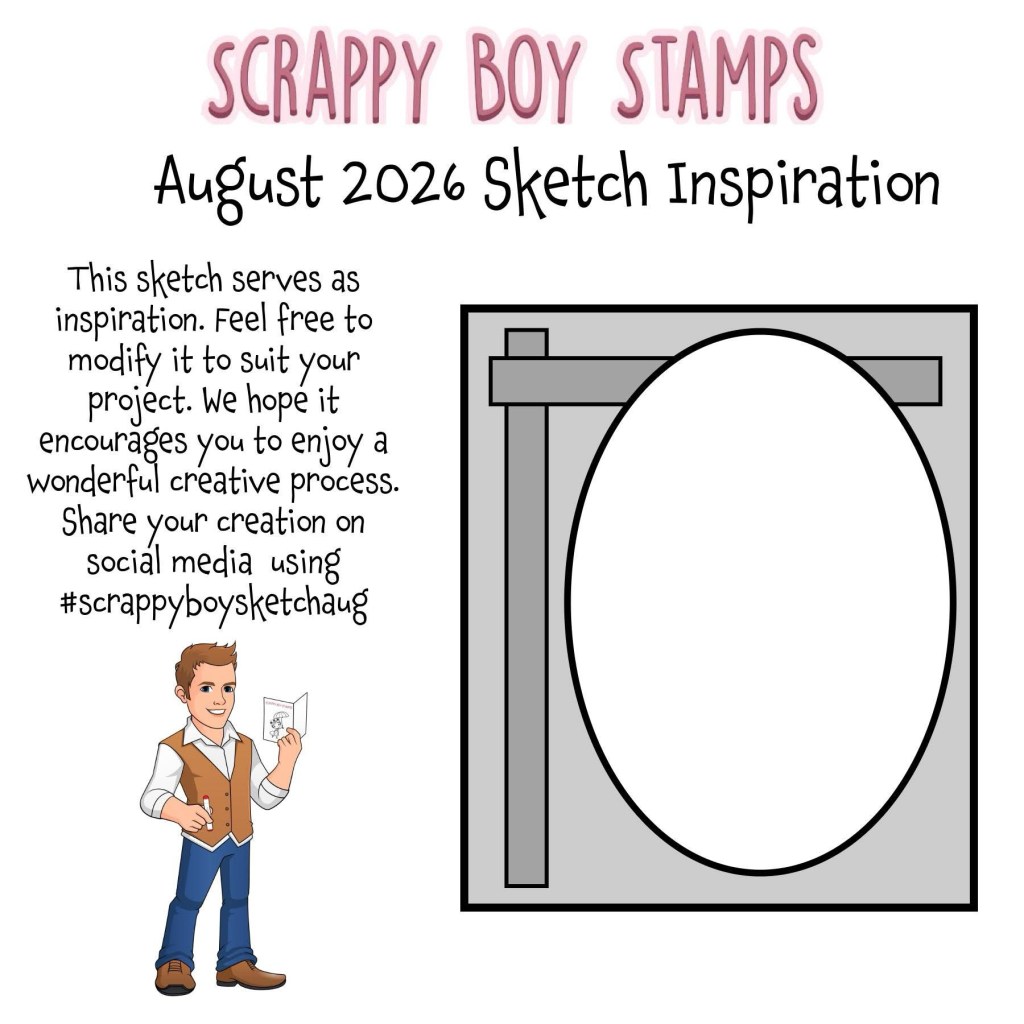
Hex Appeal August Sketch Challenge Card

My first project is squeaking in just in time for the final day of the Scrappy Boy Stamps August Sketch Challenge!

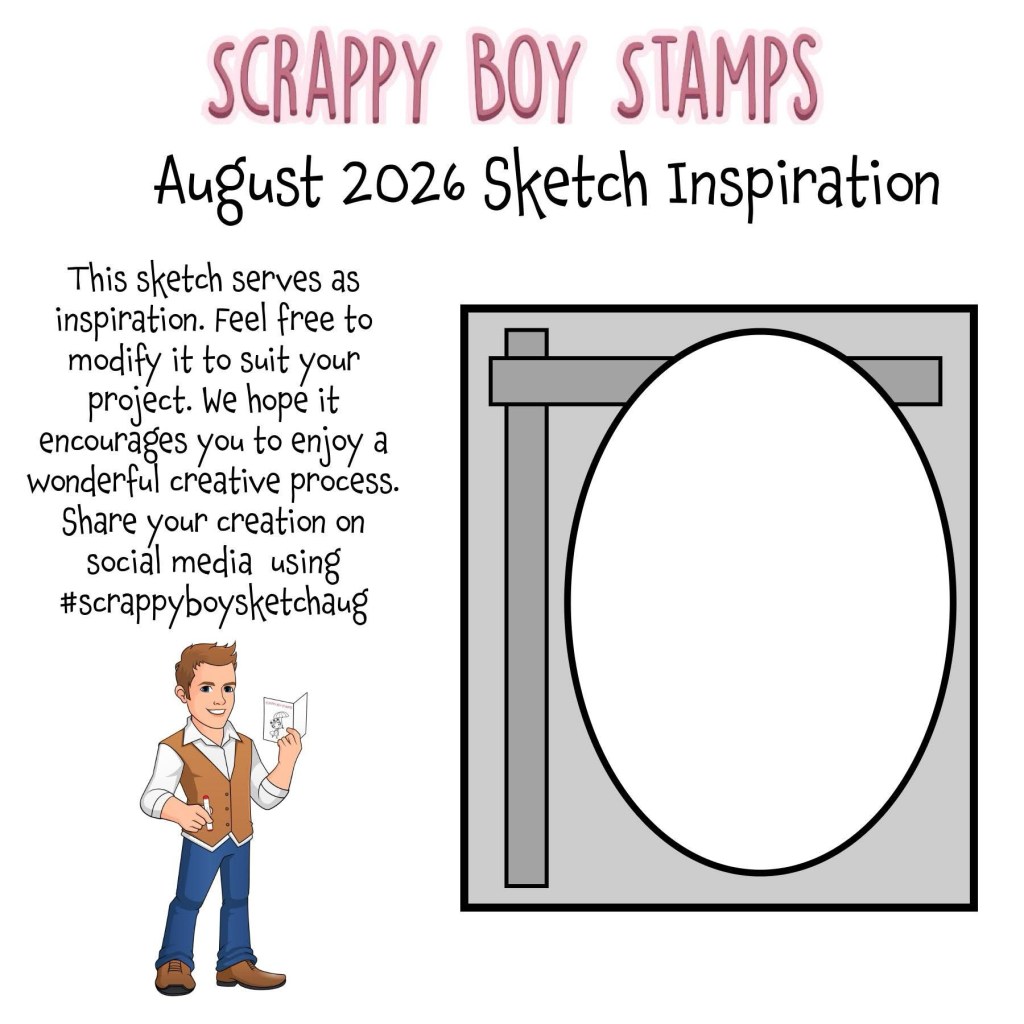
Scrappy Boy Stamps August 2026 Sketch Inspiration.

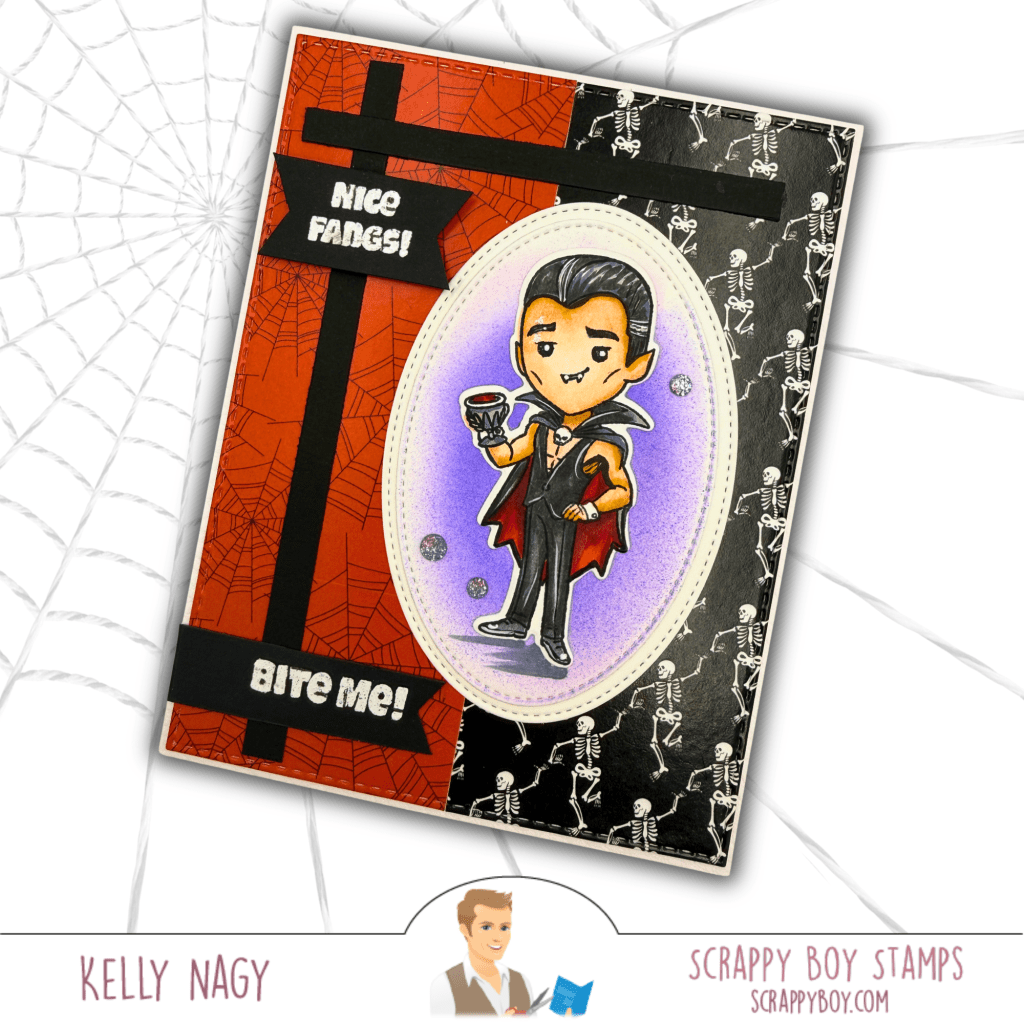
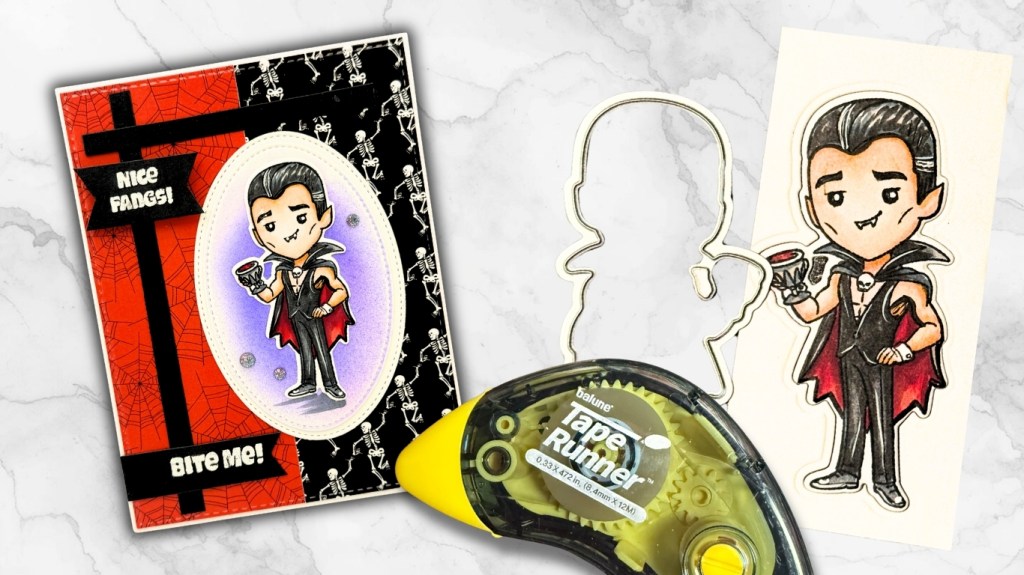
I used the Hex Appeal I Want It All Bundle to create this handsome little vampire card. The August sketch inspired the bold layout, including the vertical and horizontal cardstock strips and the large oval focal point.

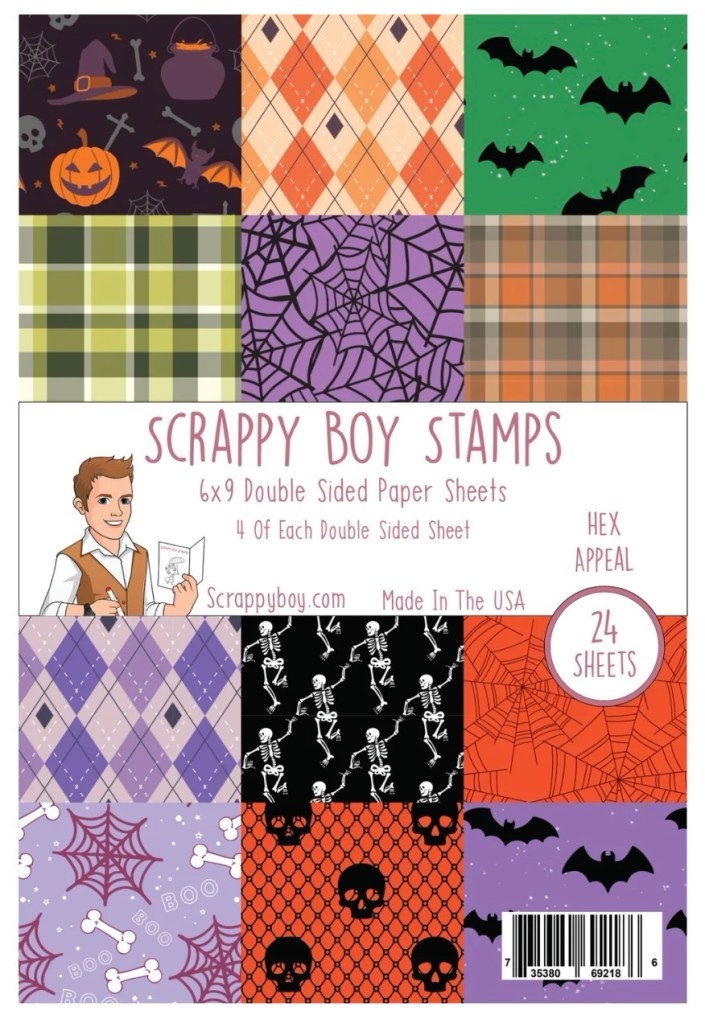
The orange spiderweb paper and black skeleton pattern create a classic Halloween color combination, while the softly colored purple background helps the vampire stand out. The heat-embossed “Nice Fangs!” and “Bite Me!” sentiments add a playful finishing touch.

Hex Appeal Coordinating Paper Pack

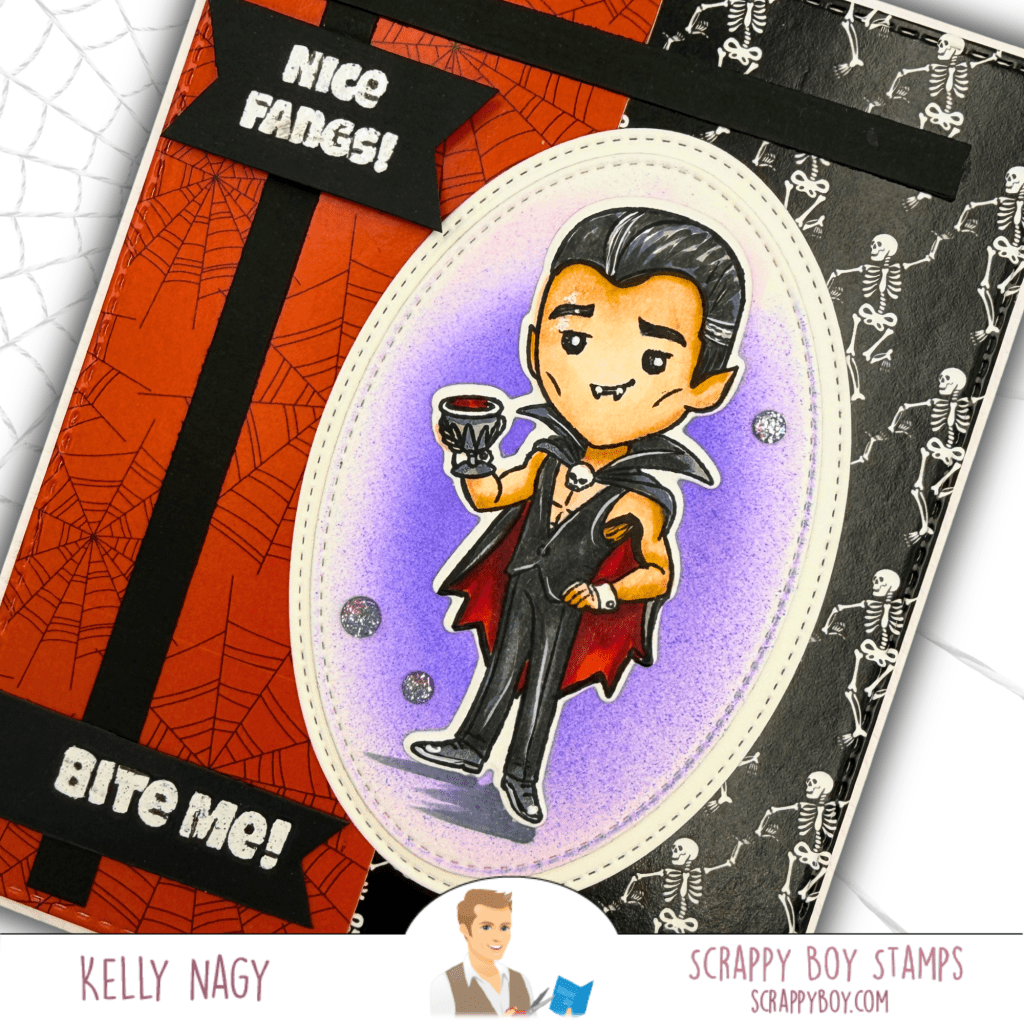
A few sparkly embellishments, dimensional layers, and stitched details complete this fang-tastic design!

Close Up to show layers. Stitched Oval Nesting Dies from Scrappy Boy Stamps

Spooky Bat Mouse Halloween Card

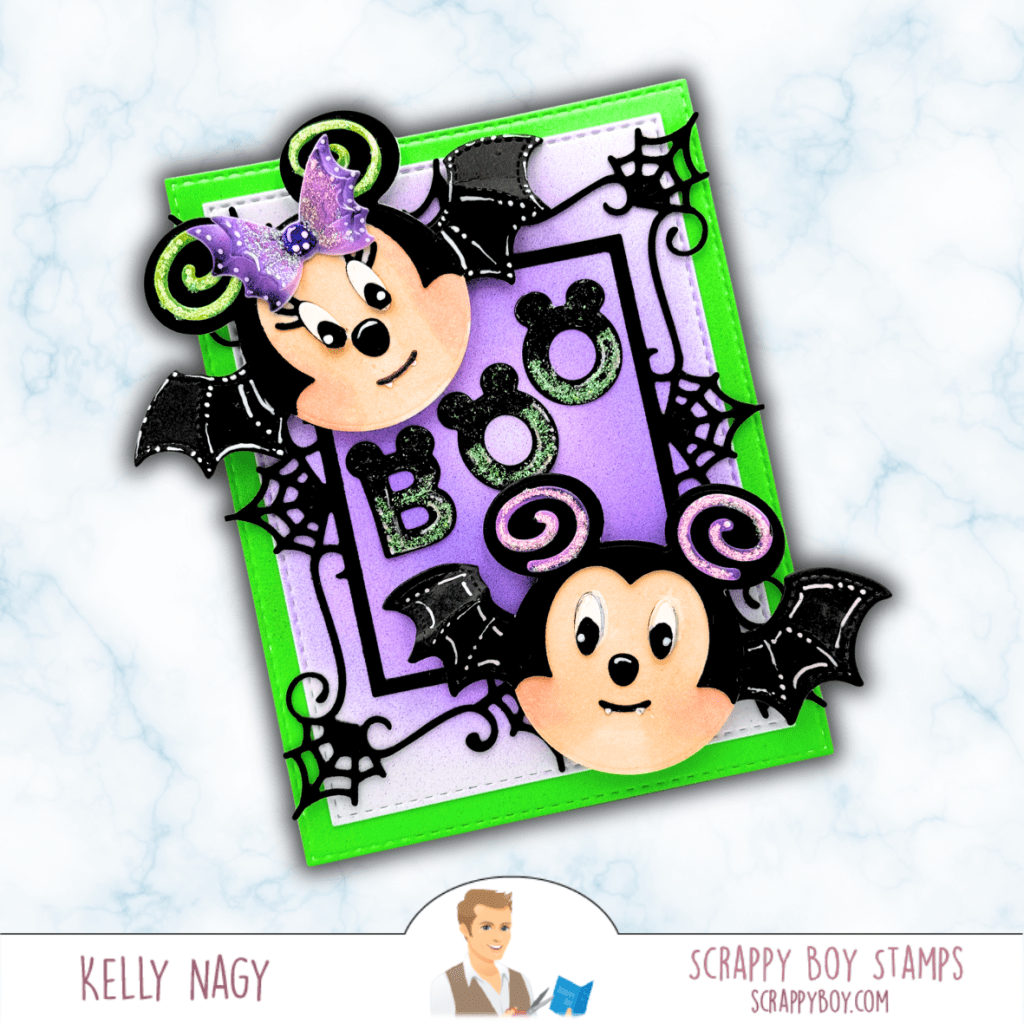
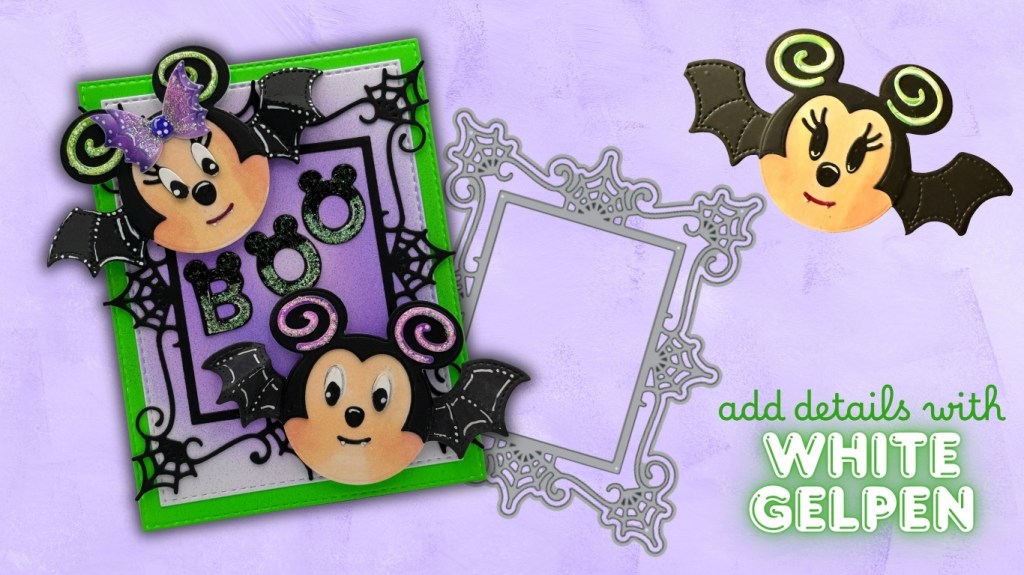
For my second project, I paired the adorable Spooky Bat Mouse Embellishment Die with the dramatic Gothic Picture Frame.

Spooky Bat Mouse Embellishment Dies paired with the Gothic Picture Frame

These little bat mice are almost too cute to spook! I used bright green, purple, and black for a playful Halloween color palette and added white highlights to bring out the details in their wings and faces.

The Gothic Picture Frame creates the perfect backdrop, while the spiderweb accents, sparkly swirls, and bold BOO sentiment add extra texture and personality. The Mouse Ears alphabet dies are a cute addition and nod to the mouse! I love how the bright green border makes the entire card pop!

Glitter, white highlights, and whimsical die-cut details make these bat mice ready for Halloween.

Both projects show how easily the newest Scrappy Boy Stamps products can be mixed and matched to create Halloween cards ranging from delightfully spooky to cute and whimsical.

Suggested Copic combinations: Skin: E000, E00, E11, E13; hair and clothing: C3, C5, C7, C9; cape and wine: R29, R39, R59; and purple airbrushed background: V04, V06, V09. I used the Copic Airbrush System to create the soft purple glow behind the vampire.

I used my favorite dry adhesive from TapeRunner.com⁠ to assemble all the layers of this card. Shop their selection of crafty adhesives and use promo code KELLY10 to save 10% on your entire cart! This costs you nothing extra and helps support my creative journey.

Ready to create your own Halloween projects? Purchase the Hex Appeal I Want It All Bundle, Spooky Bat Mouse Embellishment Die, Gothic Picture Frame, and more at ScrappyBoy.com. Scrappy Boy links are NOT affiliate links, just added for convenience. If you do happen to make a purchase, please let them know in the comments that I inspired you in some way.

Happy crafting!
Kelly
Stamped by Kelly

A Little Hex Appeal + A Whole Lot of Franken-Fine!

Get spooky-cute with the NEWEST Hex Appeal release from Scrappy Boy Stamps! See how I used the August Card Sketch Inspiration to create this Franken-Fine Halloween card, complete with patterned papers, stitched dies, heat embossing, and my Copic color combinations. 💚💜🎃

I’m popping in with a little spooky-cute inspiration featuring the NEWEST release from Scrappy Boy StampsHEX APPEAL! 🎃💜💚

Featuring Hex Appeal & Coordinating Products

For this card, I also took inspiration from the Scrappy Boy Stamps August Card Sketch. There’s still a little time to play along, so grab your favorite Scrappy Boy goodies and put your own spin on the sketch!

One of my favorite things about sketches is that they take away that “where do I start?” moment. You already have the bones of the design—you just get to make it yours!

My Take on the Sketch

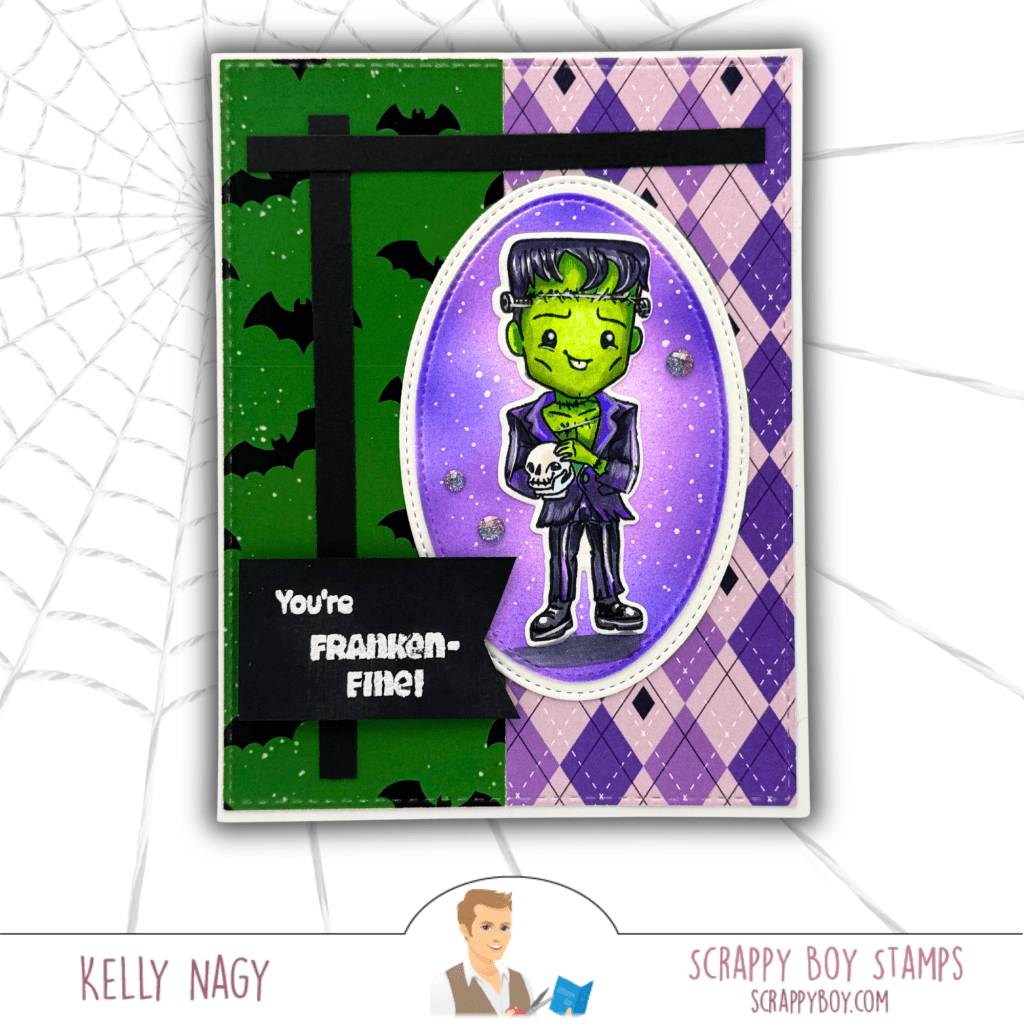
I stayed fairly close to the original layout, using two contrasting patterned papers for the background and bold black cardstock to recreate the strong horizontal and vertical elements.

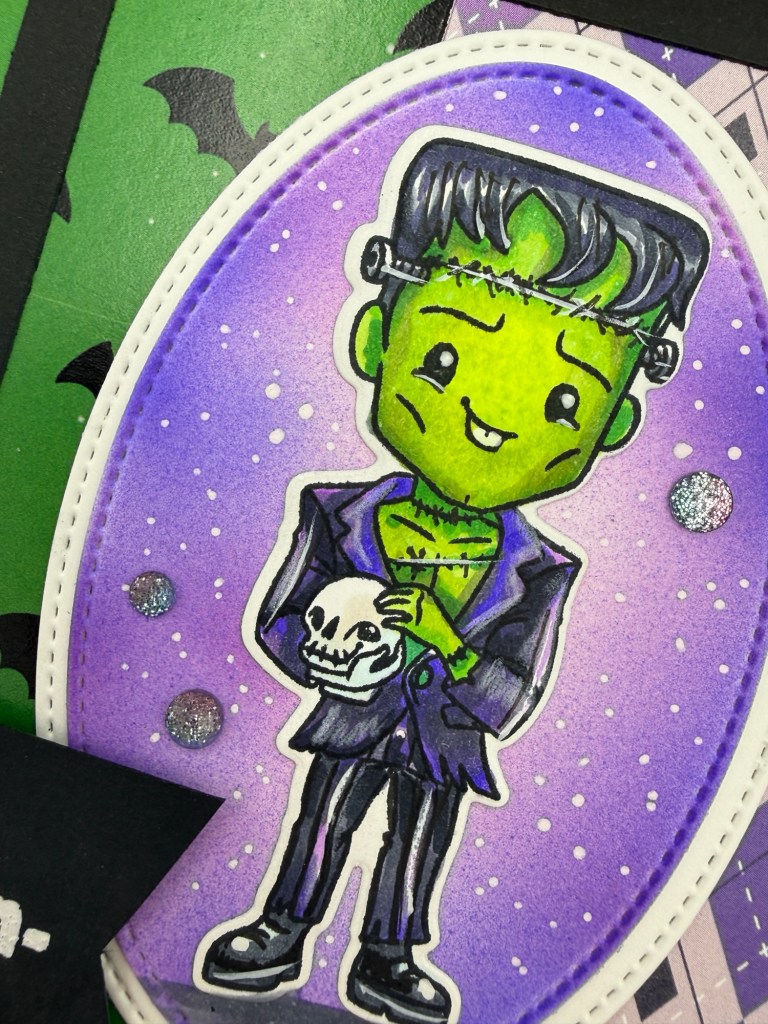
Of course, the star had to be this adorable little Frankenstein! 💚

I placed him inside an Oval Stitched Nesting Die and gave the background a soft purple blend using my airbrush attachment from Copic to help him pop without competing with the image. A few white splatters and sparkly accents finished off the background.

And how could I resist…

“You’re Franken-Fine!” 😂

Close up to see white gel pen accents

Copic Coloring

I colored my little guy with Copic markers, using bright yellow-greens for that classic Frankenstein look and deep violets and cool grays to coordinate with the Hex Appeal patterned paper.

Copic Color Combinations:

💚 Skin: YG01 • YG03 • YG05 • YG07
💜 Purple: V12 • V15 • V17
🖤 Black/Gray: C3 • C5 • C7 • C9
🤍 Skull: C0 • C1 • C3

Feel free to substitute your favorite combinations—the fun is making these characters completely your own!

Scrappy Boy Supplies

🎃 HEX APPEAL STAMPS & OUTLINE DIES
👻 HEX APPEAL 6×9 PAPER PACK
✂️ OVAL STITCHED NESTING DIES
✂️ RECTANGLE STITCHED NESTING DIES

The Hex Appeal 6×9 Paper Pack made this sketch especially fun. Mixing the green bats with the purple argyle gave me plenty of pattern and color while still allowing my stamped image to remain the focal point.

For the sentiment, I heat embossed “You’re Franken-Fine!” in white on black cardstock. The crisp white embossing against the bold black gives the sentiment plenty of contrast and ties in perfectly with the black elements from the sketch. 🖤

My Go-To Dry Adhesive ✂️

With all these fun layers, I reach for my TapeRunner dry adhesive! It makes lining up and layering cardstock quick and easy, while helping keep my panels smooth and warp-free—especially when working with multiple layers.

Want to give it a try? Use promo code KELLY10 for 10% OFF your TapeRunner purchase! 💕

Come Play Along!

Remember, a card sketch is meant to inspire you—not limit you. Change the shapes, flip the design, rotate it, add another layer or simplify it. There’s no wrong way to interpret it!

You still have a little time to join the Scrappy Boy Stamps August Sketch Inspiration, so get those stamps, dies and papers out and PLAY!

When you share your creation on social media, be sure to use:

#scrappyboysketchaug

I can’t wait to see what you create!

Happy Crafting!
Kelly
Stamped By Kelly

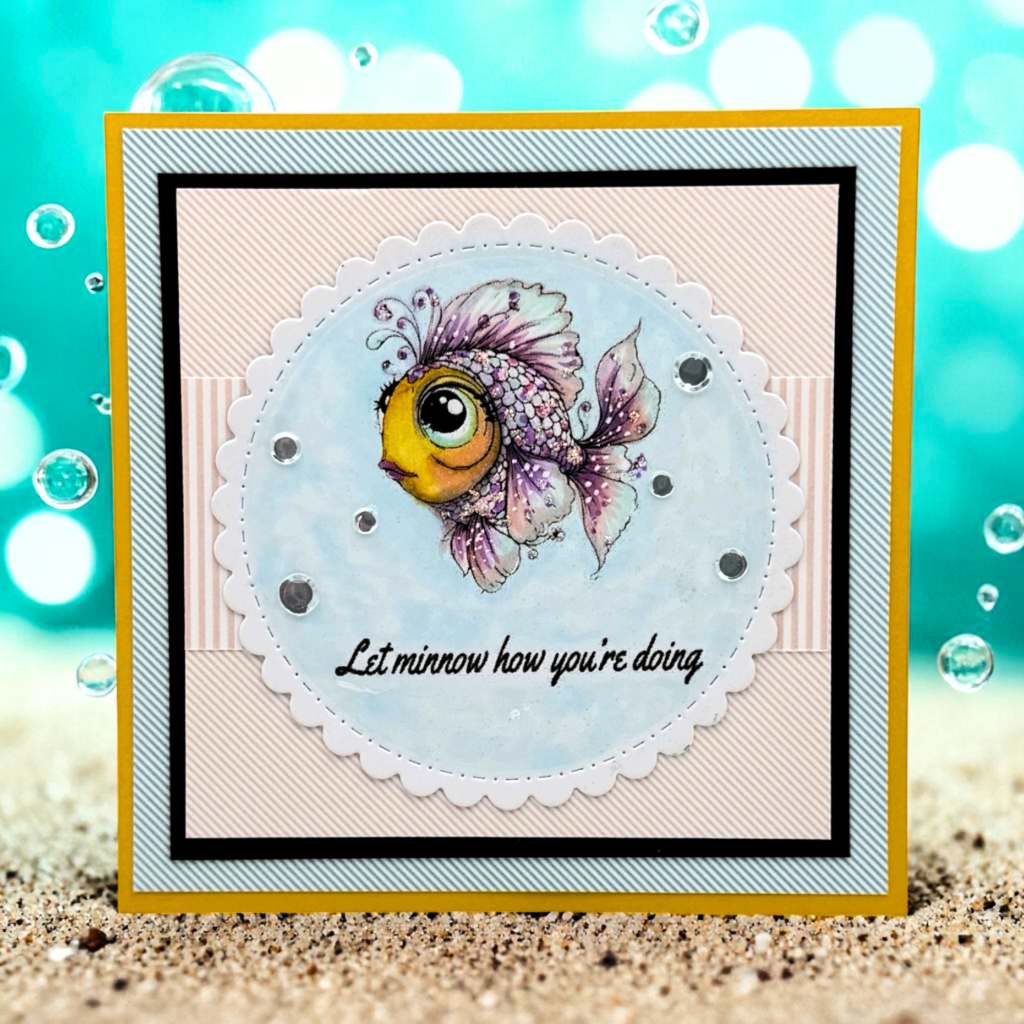
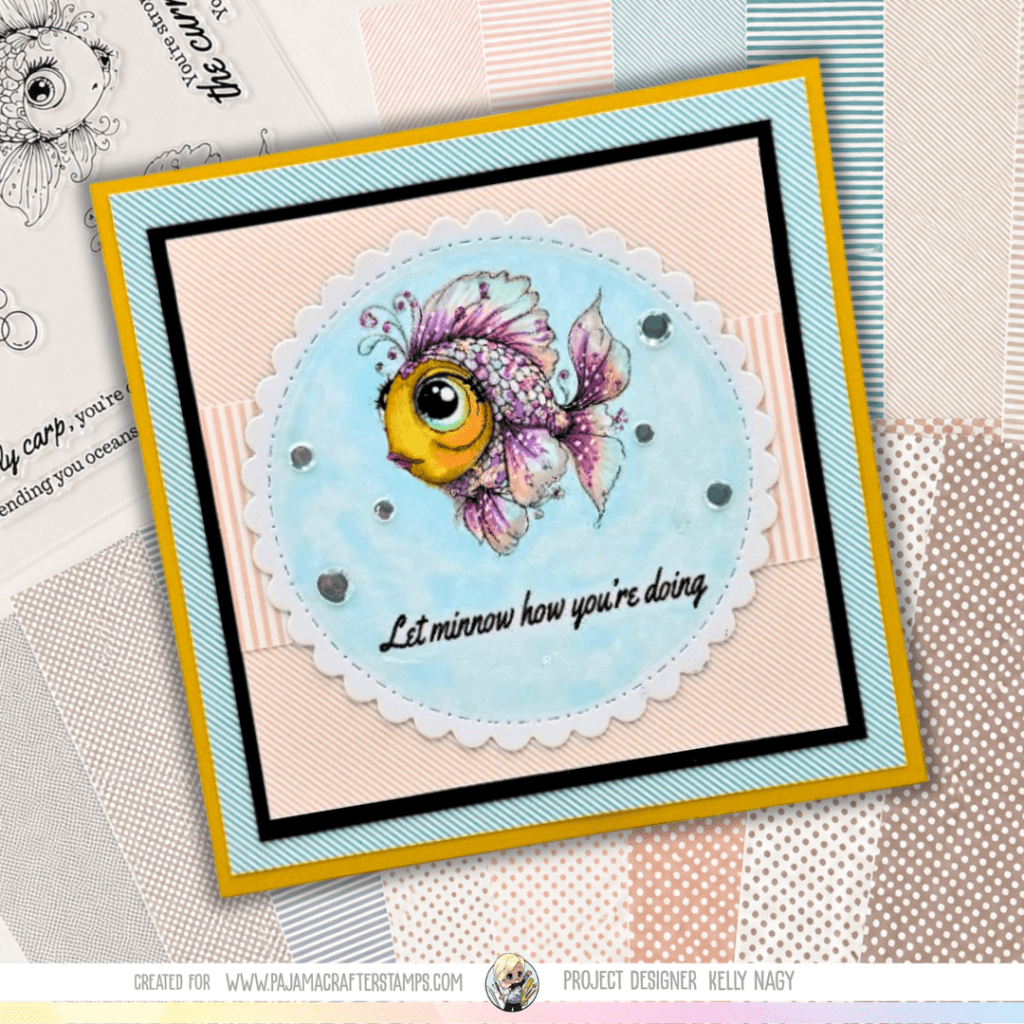
Let Minnow How You’re Doing!

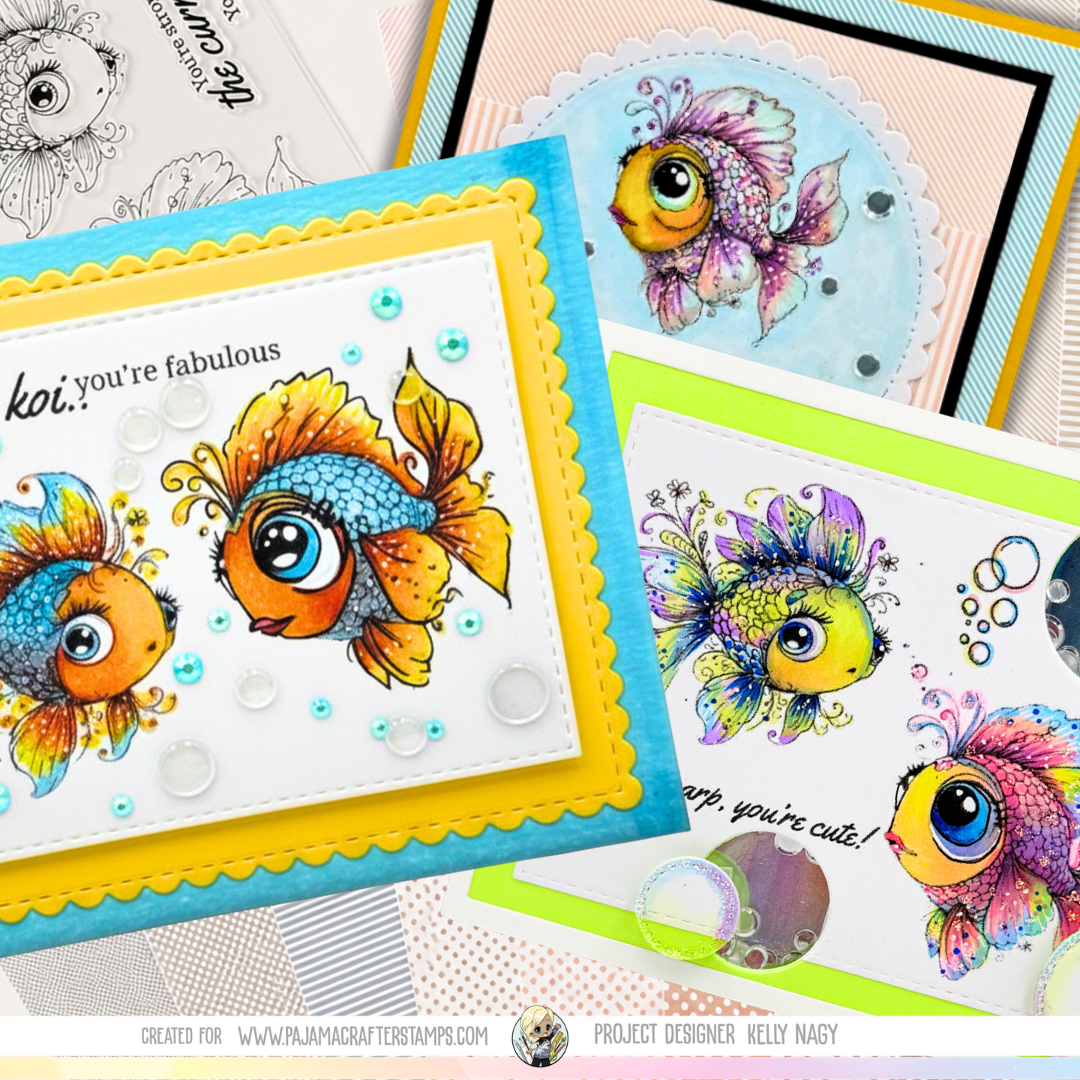
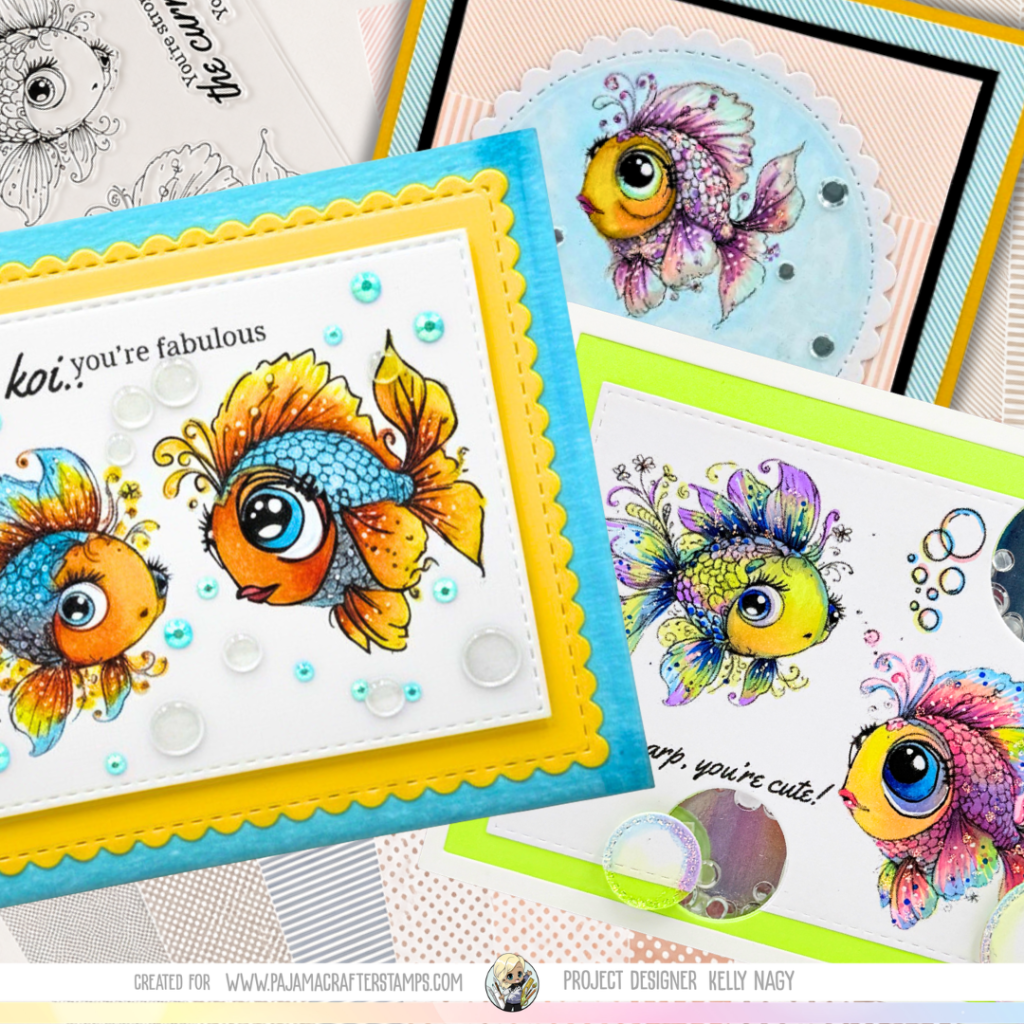
Bright colors, playful patterns, and a fish full of personality make today’s card impossible to resist! Using the Don’t Be Koi stamp set and coordinating patterns from the Savannah Neutrals 6×6 Paper Pack, I created a cheerful card that’s perfect for sending a smile. Stop by to see the simple layering technique, Copic color combination, and all the details that bring this adorable fish to life.

Featuring Don’t Be Koi from Pajama Crafter Stamps

Featuring the Don’t Be Koi Stamp Set from Pajama Crafter Stamps⁠

There is something so charming about a fish with a big personality, and the Don’t Be Koi stamp set delivers exactly that! For today’s card, I paired this adorable fish image with soft pastel patterns from the Savannah Neutrals 6×6 Paper Pack to create a cheerful, layered design that feels light, bright, and perfect for sending a little encouragement.

The combination of blush pink, aqua, black, and sunny yellow creates a fun color palette that helps the fish become the focal point while the patterned paper layers add interest without overwhelming the design. A scalloped circle frame and a few sequins finish the card with just the right amount of sparkle.

Shop Here Pajama Crafter Stamps


Copic Colors Used

Koi Body

  • Y15
  • Y17
  • Y38

Eye

  • BG10
  • BG13
  • BG15
  • C1

Scales & Fins

  • V12
  • V15
  • V17
  • RV52
  • RV55

Shading

  • BV00
  • BV02
  • C1

Highlights

  • White gel pen


Design Details

This card was created by layering several complementary patterns from the Savannah Neutrals 6×6 Paper Pack. Using multiple coordinating patterns helps build dimension while keeping the overall design cohesive.

Products Used

Pajama Crafter Stamps

  • Don’t Be Koi Stamp Set
  • Savannah Neutrals 6×6 Paper Pack
  • Marshmallow Cardstock
  • Coal Cardstock
  • Barely Art Precision Craft Glue

Additional Supplies

  • Scalloped Circle Die
  • Copic Markers
  • Clear Sequins
  • White Gel Pen
  • Taperunner Dry Adhesive
  • Bearly Arts Glue Wet Adhesive

Shop Here ➜ Pajama Crafter Stamps