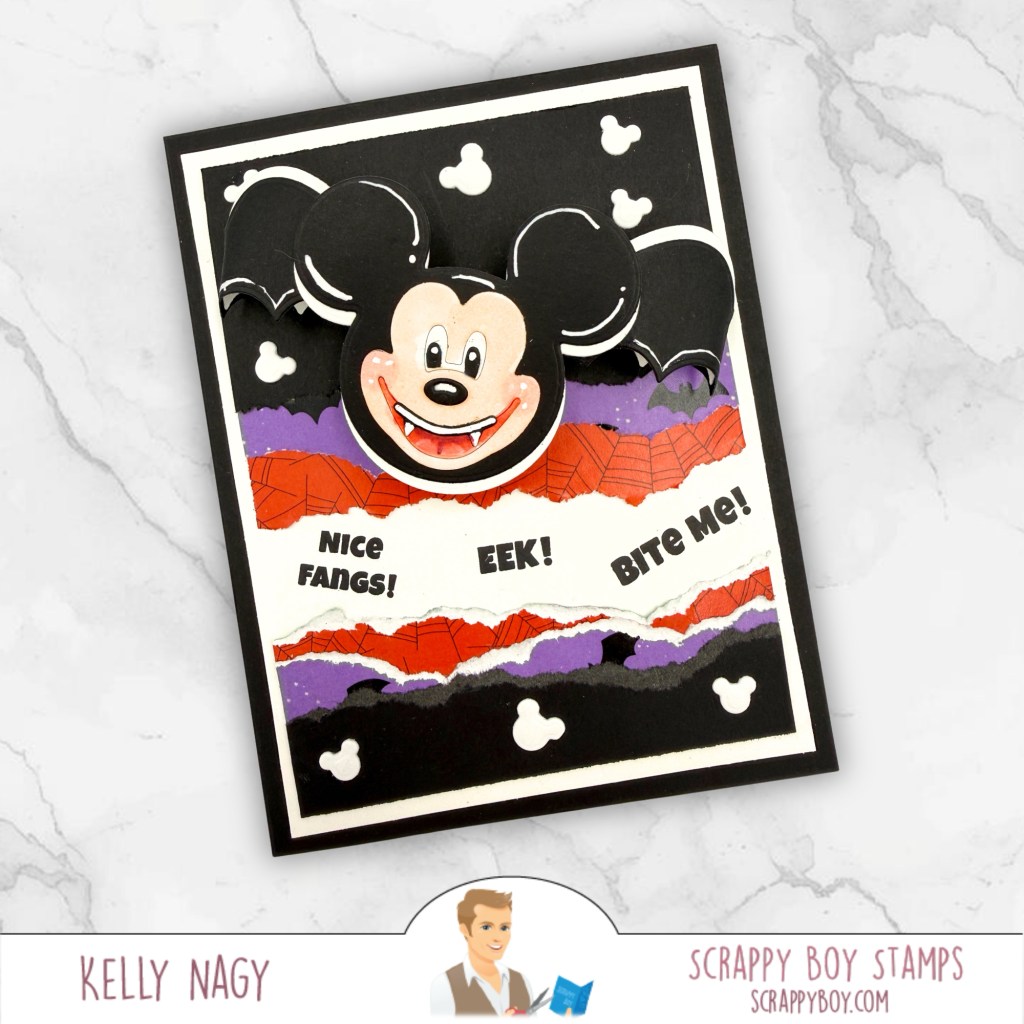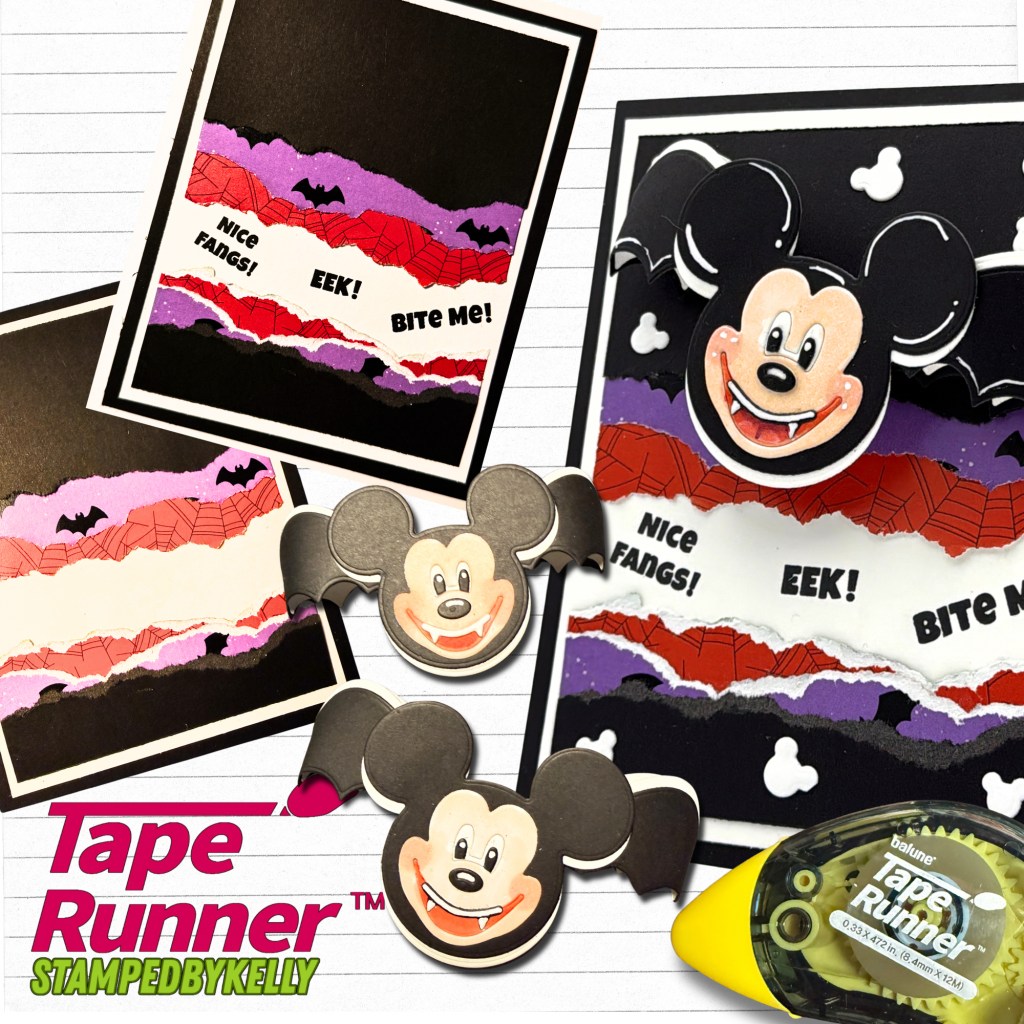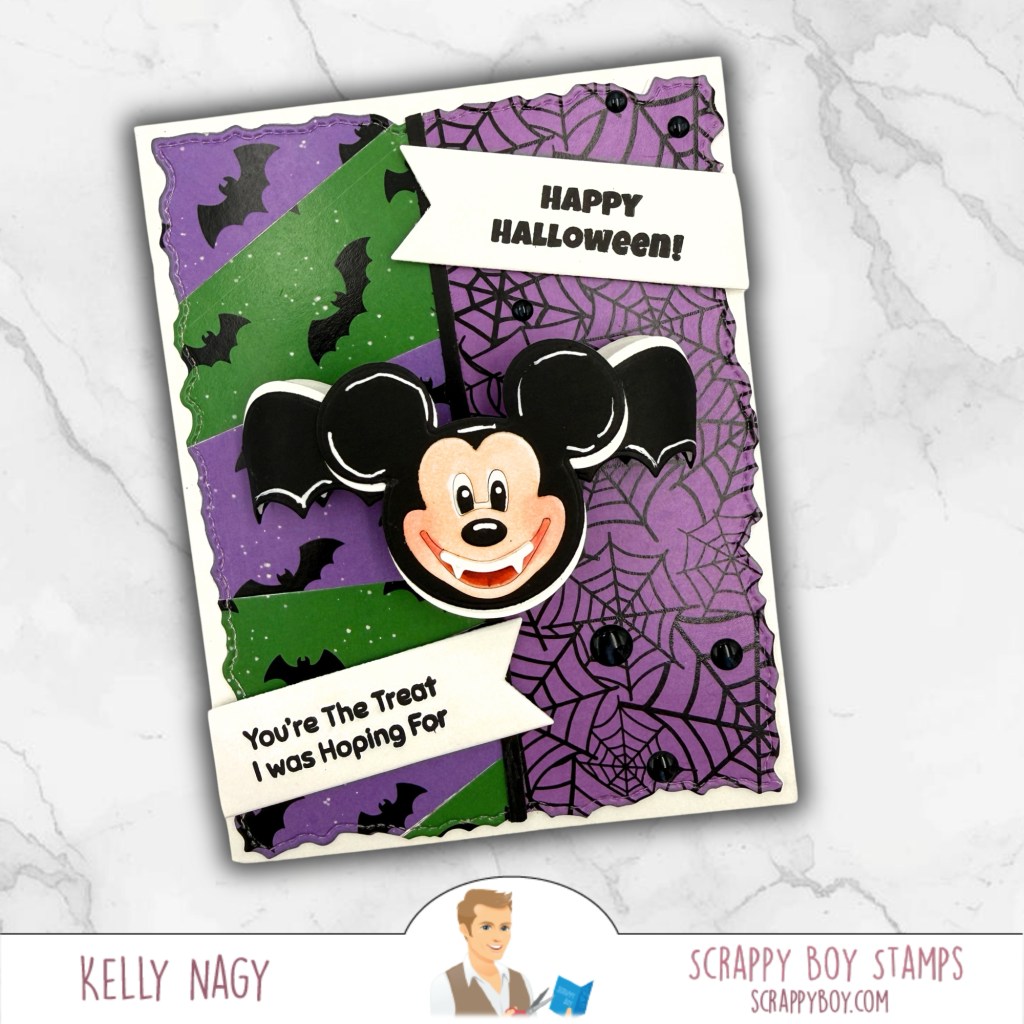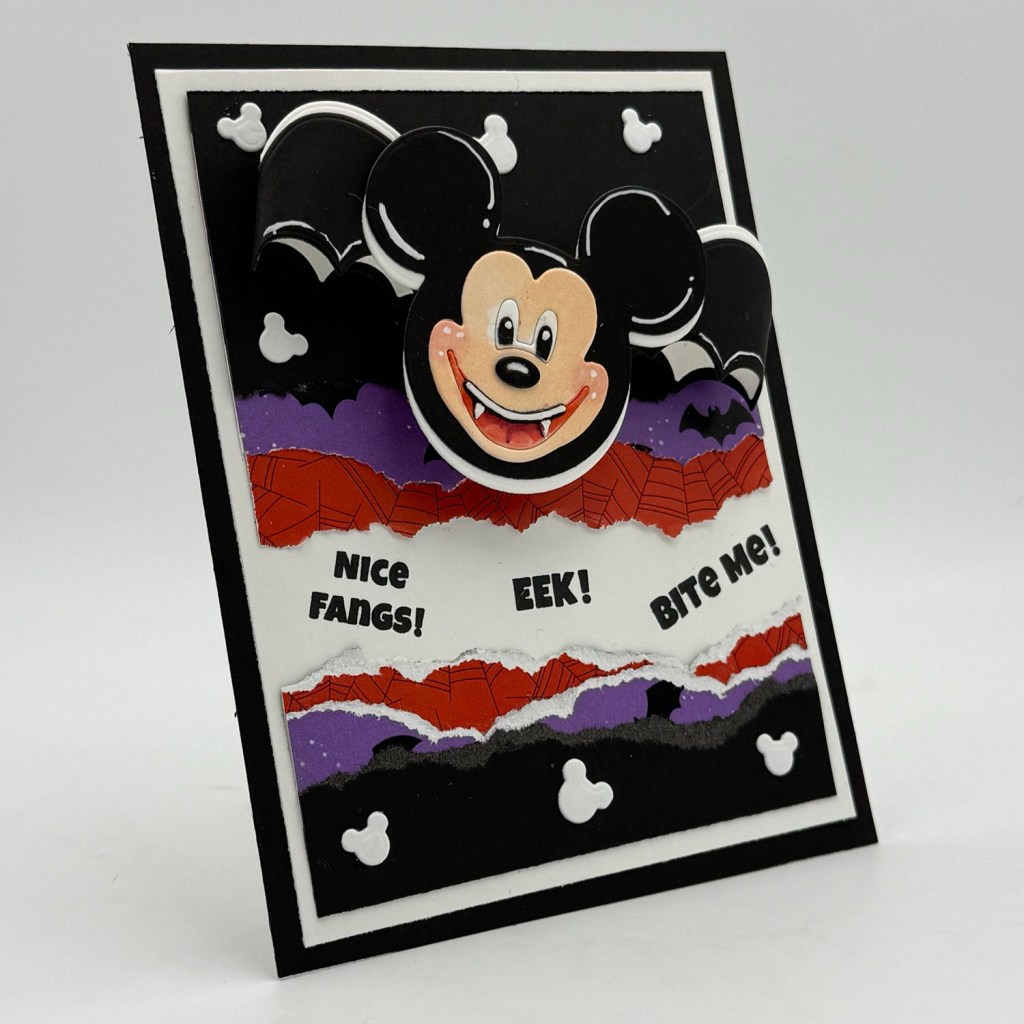
A Little Hex Appeal + A Whole Lot of Franken-Fine!

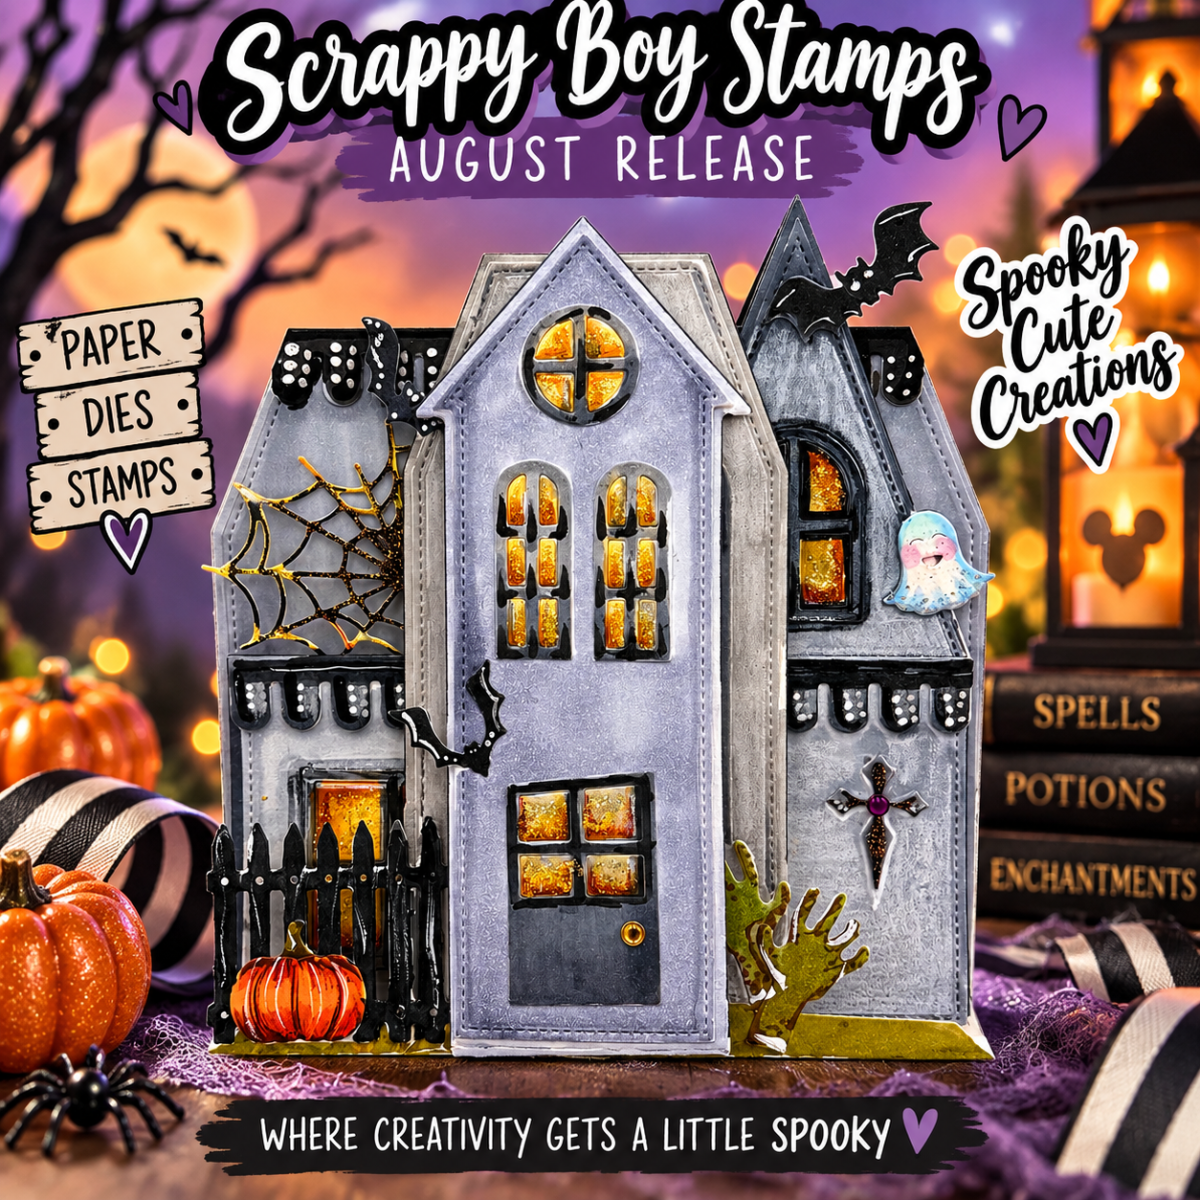
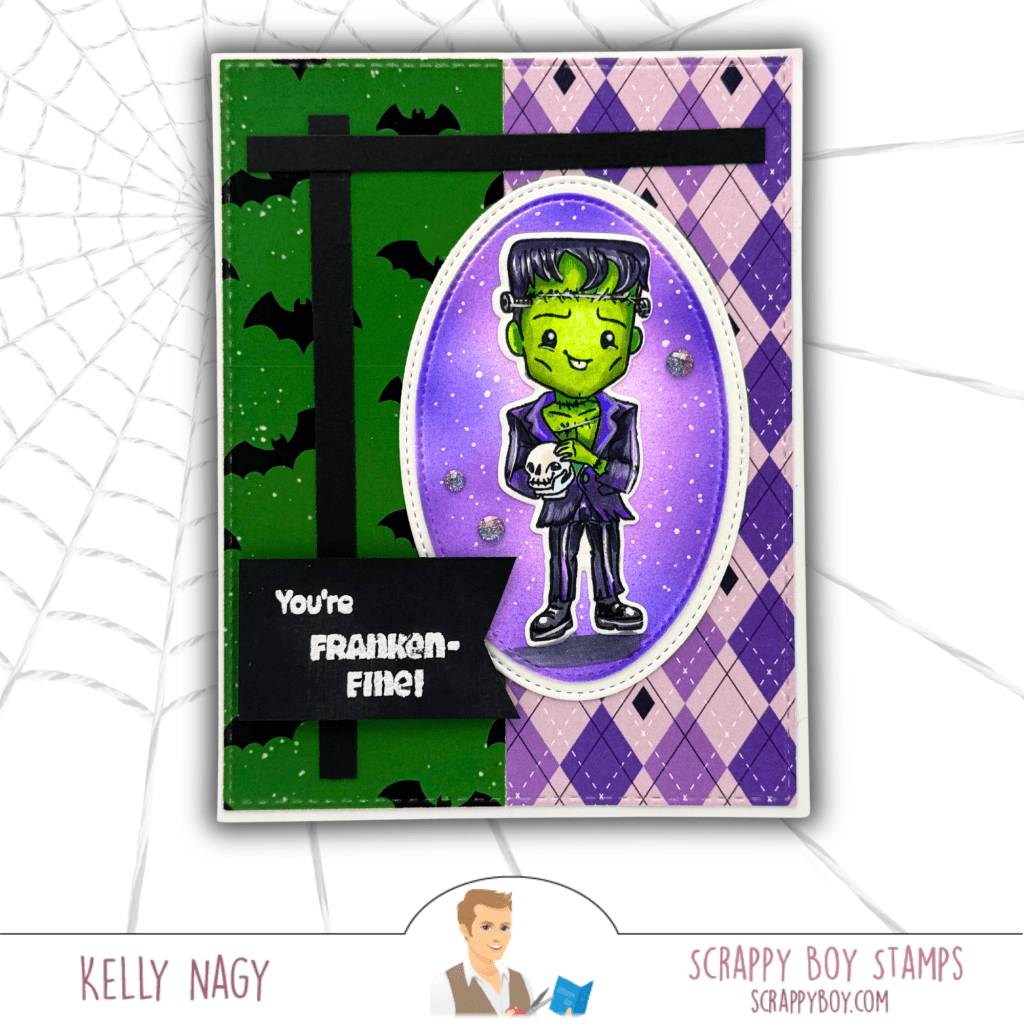
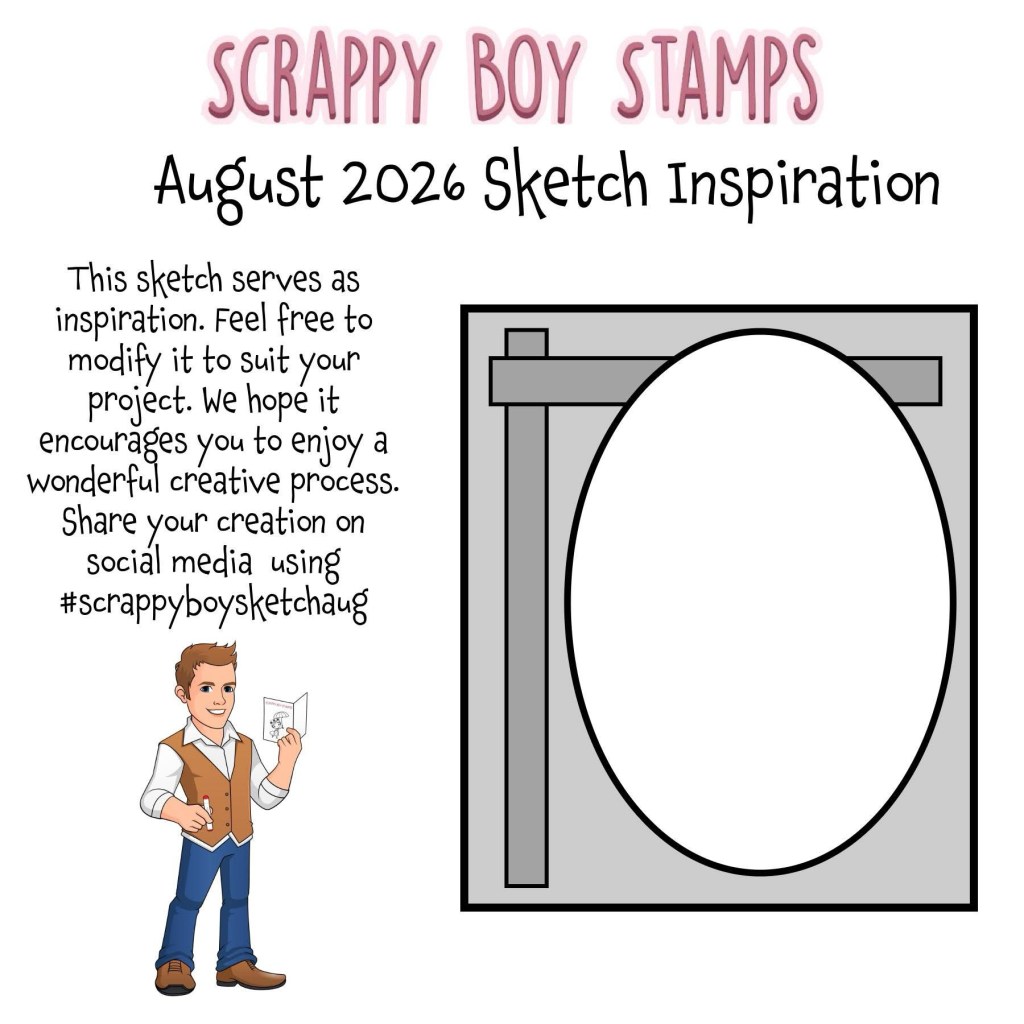
Get spooky-cute with the NEWEST Hex Appeal release from Scrappy Boy Stamps! See how I used the August Card Sketch Inspiration to create this Franken-Fine Halloween card, complete with patterned papers, stitched dies, heat embossing, and my Copic color combinations. 💚💜🎃

I’m popping in with a little spooky-cute inspiration featuring the NEWEST release from Scrappy Boy StampsHEX APPEAL! 🎃💜💚

Featuring Hex Appeal & Coordinating Products

For this card, I also took inspiration from the Scrappy Boy Stamps August Card Sketch. There’s still a little time to play along, so grab your favorite Scrappy Boy goodies and put your own spin on the sketch!

One of my favorite things about sketches is that they take away that “where do I start?” moment. You already have the bones of the design—you just get to make it yours!

My Take on the Sketch

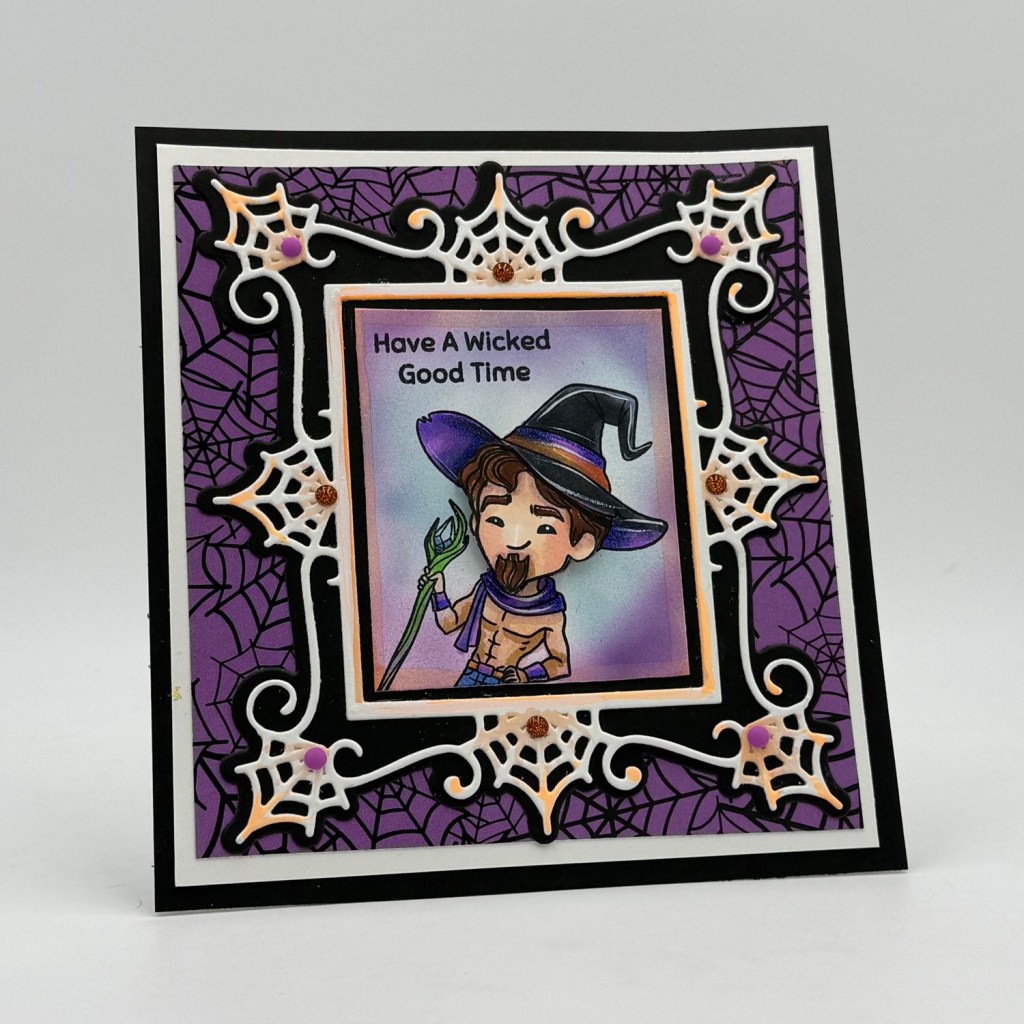
I stayed fairly close to the original layout, using two contrasting patterned papers for the background and bold black cardstock to recreate the strong horizontal and vertical elements.

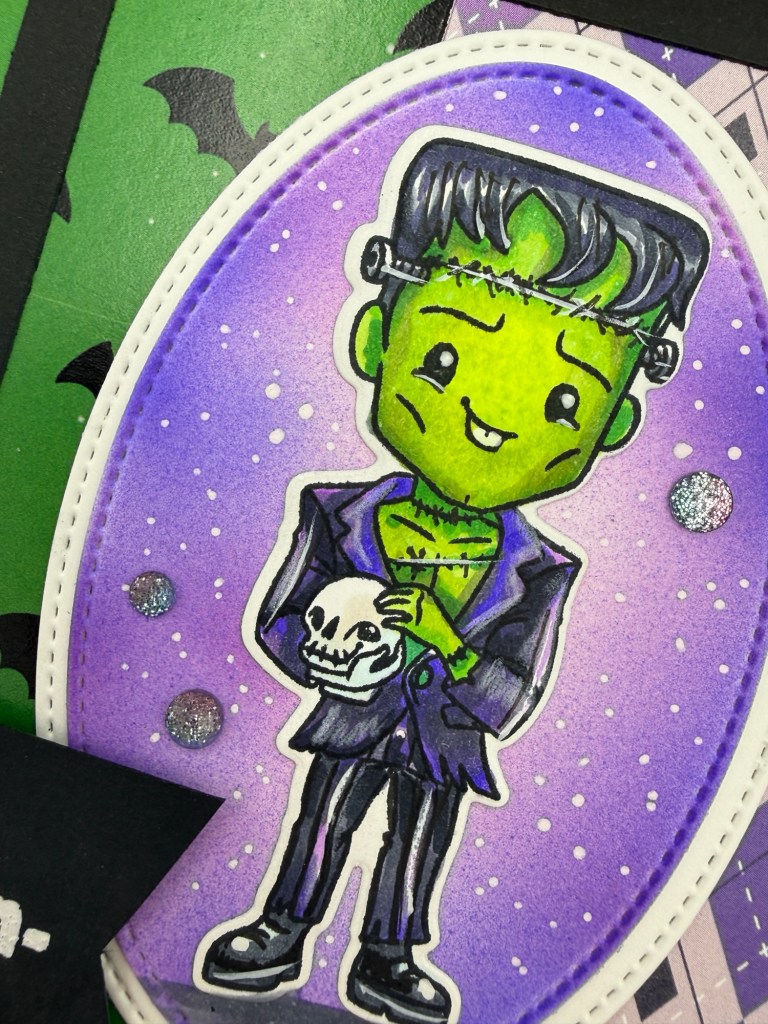
Of course, the star had to be this adorable little Frankenstein! 💚

I placed him inside an Oval Stitched Nesting Die and gave the background a soft purple blend using my airbrush attachment from Copic to help him pop without competing with the image. A few white splatters and sparkly accents finished off the background.

And how could I resist…

“You’re Franken-Fine!” 😂

Close up to see white gel pen accents

Copic Coloring

I colored my little guy with Copic markers, using bright yellow-greens for that classic Frankenstein look and deep violets and cool grays to coordinate with the Hex Appeal patterned paper.

Copic Color Combinations:

💚 Skin: YG01 • YG03 • YG05 • YG07
💜 Purple: V12 • V15 • V17
🖤 Black/Gray: C3 • C5 • C7 • C9
🤍 Skull: C0 • C1 • C3

Feel free to substitute your favorite combinations—the fun is making these characters completely your own!

Scrappy Boy Supplies

🎃 HEX APPEAL STAMPS & OUTLINE DIES
👻 HEX APPEAL 6×9 PAPER PACK
✂️ OVAL STITCHED NESTING DIES
✂️ RECTANGLE STITCHED NESTING DIES

The Hex Appeal 6×9 Paper Pack made this sketch especially fun. Mixing the green bats with the purple argyle gave me plenty of pattern and color while still allowing my stamped image to remain the focal point.

For the sentiment, I heat embossed “You’re Franken-Fine!” in white on black cardstock. The crisp white embossing against the bold black gives the sentiment plenty of contrast and ties in perfectly with the black elements from the sketch. 🖤

My Go-To Dry Adhesive ✂️

With all these fun layers, I reach for my TapeRunner dry adhesive! It makes lining up and layering cardstock quick and easy, while helping keep my panels smooth and warp-free—especially when working with multiple layers.

Want to give it a try? Use promo code KELLY10 for 10% OFF your TapeRunner purchase! 💕

Come Play Along!

Remember, a card sketch is meant to inspire you—not limit you. Change the shapes, flip the design, rotate it, add another layer or simplify it. There’s no wrong way to interpret it!

You still have a little time to join the Scrappy Boy Stamps August Sketch Inspiration, so get those stamps, dies and papers out and PLAY!

When you share your creation on social media, be sure to use:

#scrappyboysketchaug

I can’t wait to see what you create!

Happy Crafting!
Kelly
Stamped By Kelly

Beyond Christmas: Copic Airbrushing + One Stamp, So Many Celebrations!

Stretch your Christmas stamps beyond the holidays! See how simple color changes turn one festive stamp set into handmade cards for any celebration.

I have a new technique obsession to share today!

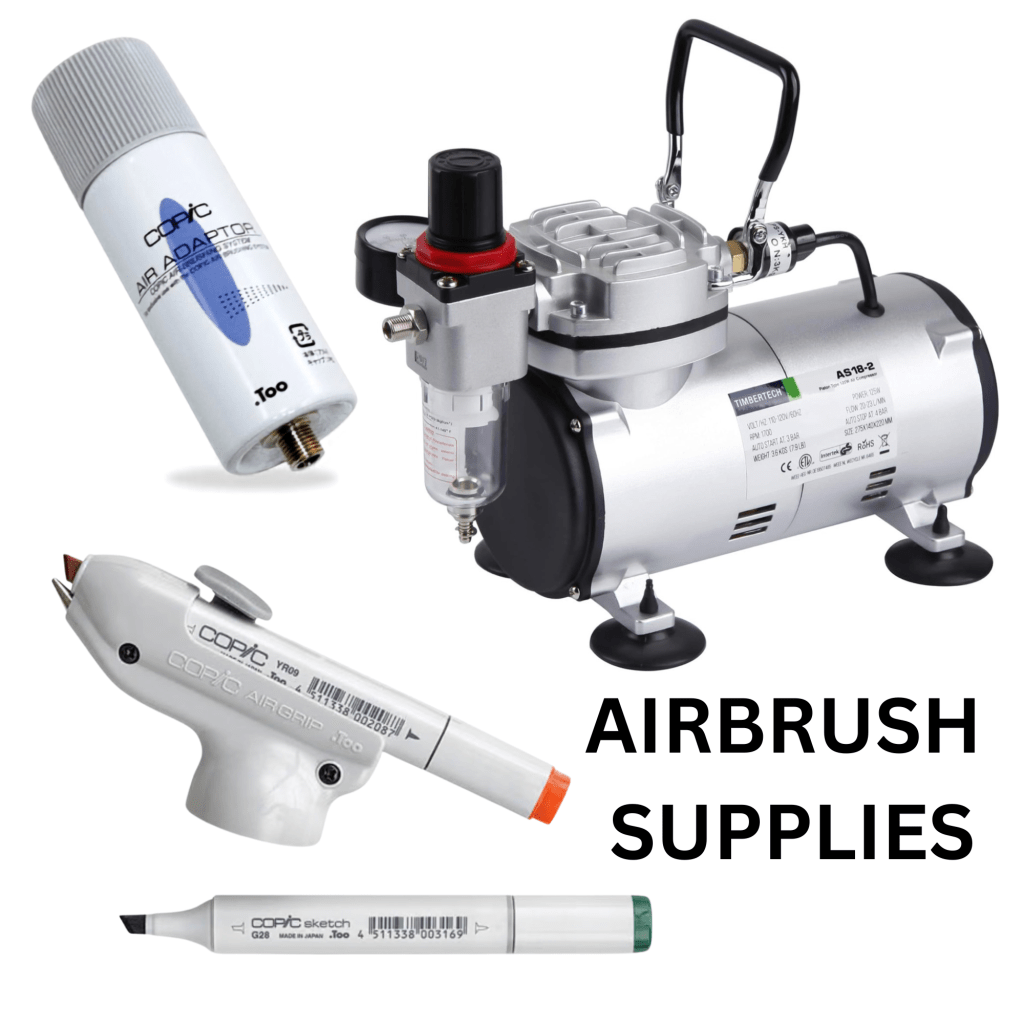
Example of what I used to create airbrushed backgrounds

I’ve been experimenting with my Copic markers and an air compressor attachment, and I LOVE the soft, blended backgrounds I can create. Even better? This technique is easy to customize simply by changing your colors.

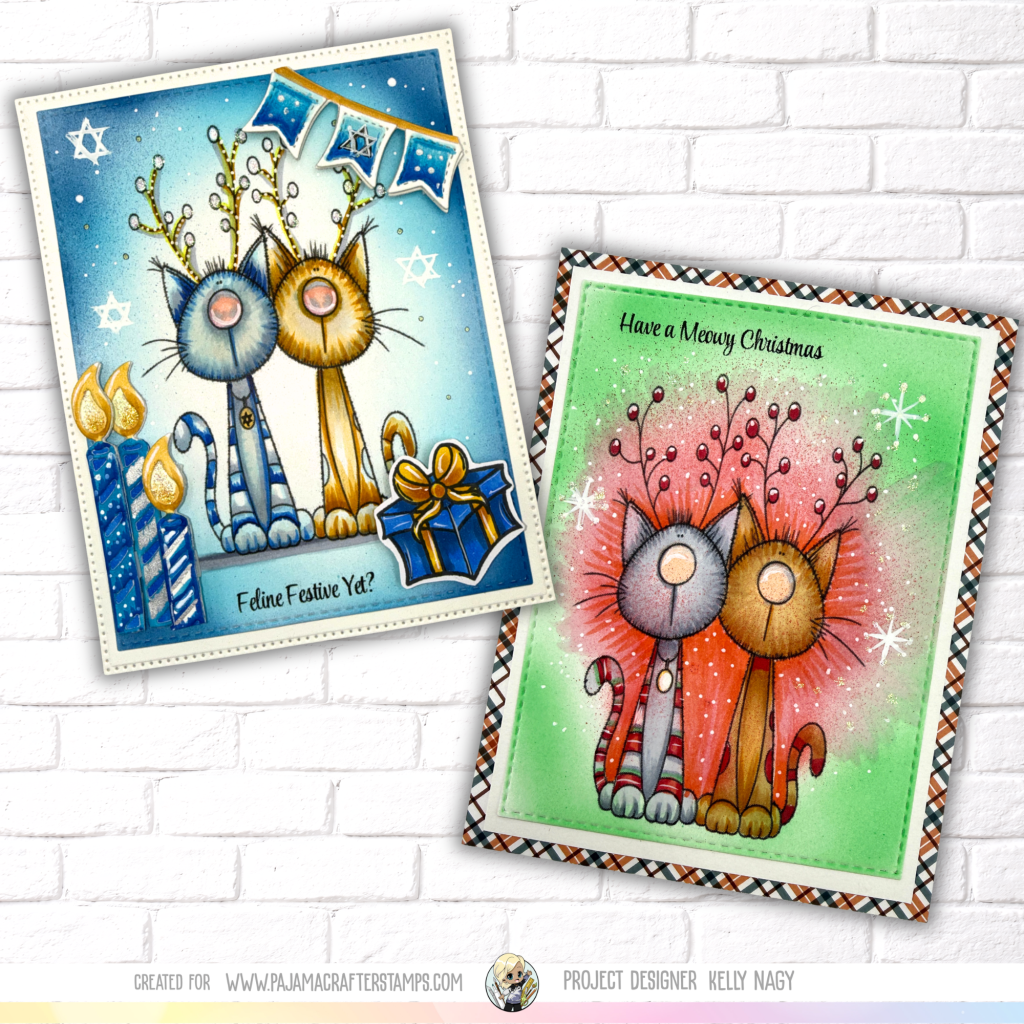
That got me thinking about the adorable new MERRY MEOWMAS stamp set from the Pajama Crafter Stamps August Release.

Yes, it’s designed for Christmas—but who says it has to stay there?

🐱 Same Stamp. Different Celebration.

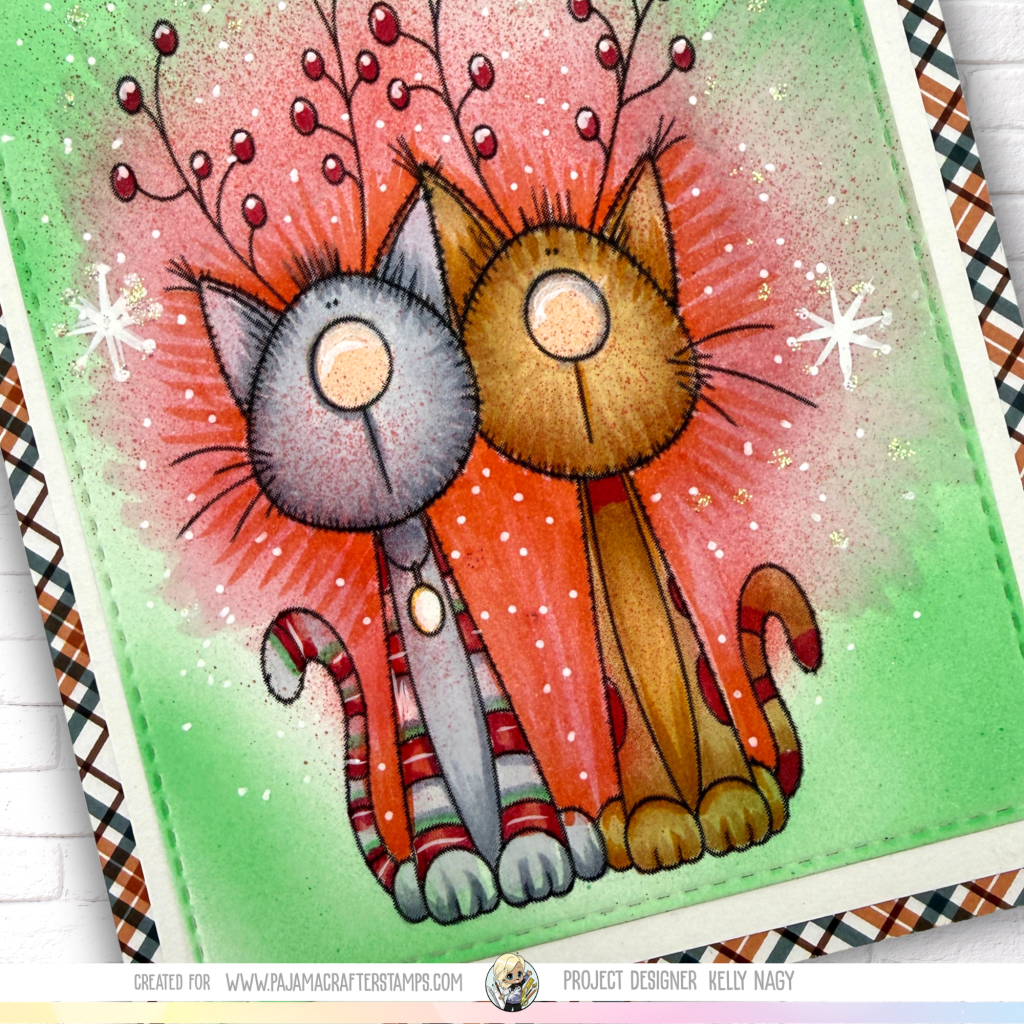
For one card, I embraced Christmas with festive reds and greens.

❤️ 💚 🤍 CHRISTMAS

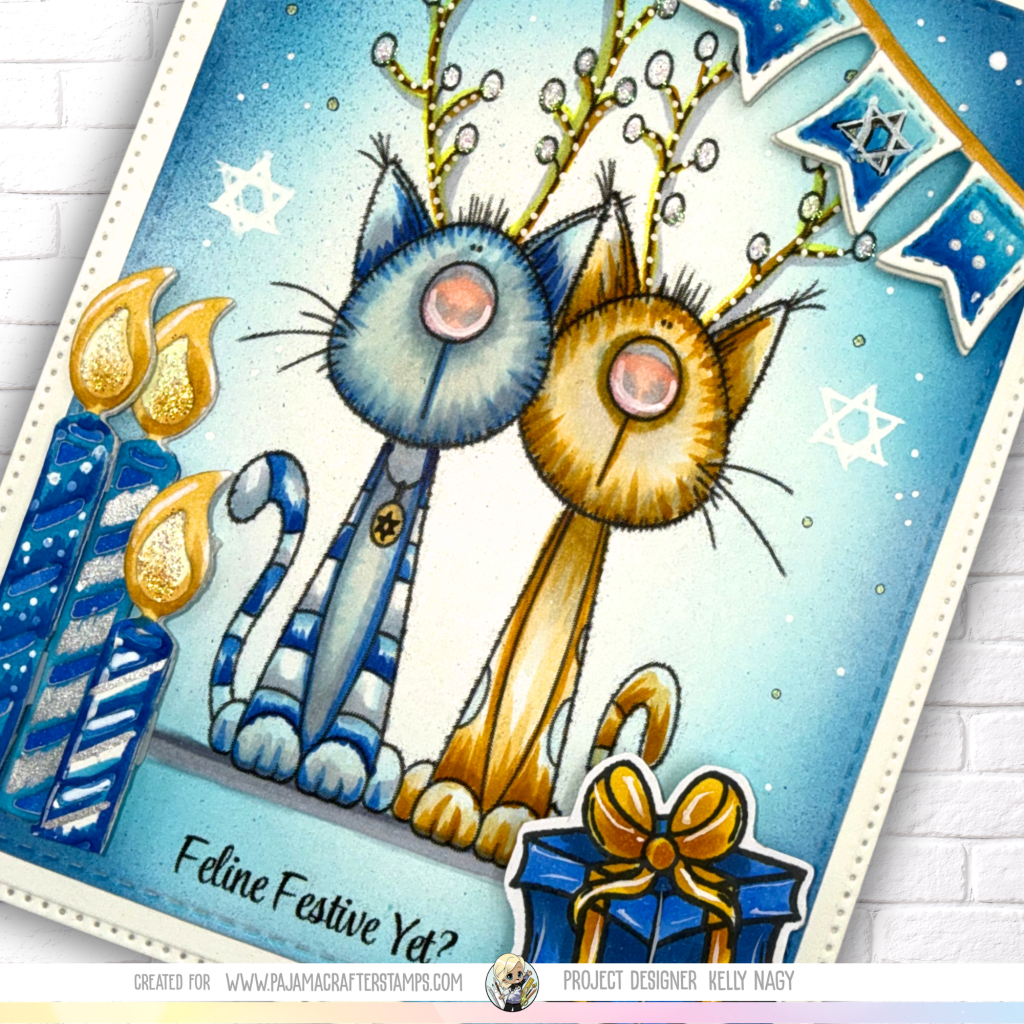
Then I took the same MERRY MEOWMAS image, changed my Copic colors and added a few elements from my stash to create a Hanukkah-inspired card.

💙 🤍 💛 HANUKKAH

The air compressor attachment made it easy to coordinate each background with my Copic coloring. I simply sprayed light layers of color and gradually built the intensity until I was happy with the result.

No complicated blending—just spray, layer and have fun!

💙 Why This Project Is Personal

We are a blended family. My husband’s children from his first marriage were raised Jewish by their mom while also celebrating Christmas with us. Today, they have families of their own who continue to recognize both traditions.

That makes creating for different celebrations especially meaningful to me.

It also reminds me that our stamps don’t have to be limited by the holiday printed on the package!

❤️ 🖤 💚 KWANZAA

❤️ 🩷 🤍 VALENTINE’S DAY

🧡 🤎 💛 THANKSGIVING

🖤 🤍 💛 NEW YEAR’S

❤️ 🧡 💛 💚 💙 💜 BIRTHDAYS

Change the colors. Add something from your stash. Change the sentiment.

Make it YOUR celebration!

🎨 Try It Yourself!

Grab a stamp that was designed for one specific holiday and ask yourself:

“What ELSE could this become?”

For me, MERRY MEOWMAS went from Christmas kitties to a completely different celebration with little more than Copic color choices, some airbrushing and a few creative additions.

That’s exactly the kind of crafting I love—using what we have in unexpected ways!

Use KELLY10 for 10% Off your cart at TapeRunner.com

🛍️ Supplies

🐱 MERRY MEOWMAS – Pajama Crafter Stamps

🎨 Copic Markers + Air Compressor Attachment
(not an affiliate link- Blick Website)

Tape Runner Adhesive – PROMO CODE: KELLY10

Additional Supplies

You can also see more inspiration from the newest Pajama Crafter Stamps August Release here:

👉 PAJAMA CRAFTER STAMPS

One stamp. New colors. A little airbrush magic. So many reasons to celebrate! 🐱🎨💨

Happy crafting!

Kelly | Stamped by Kelly

Check out Instagram Hop
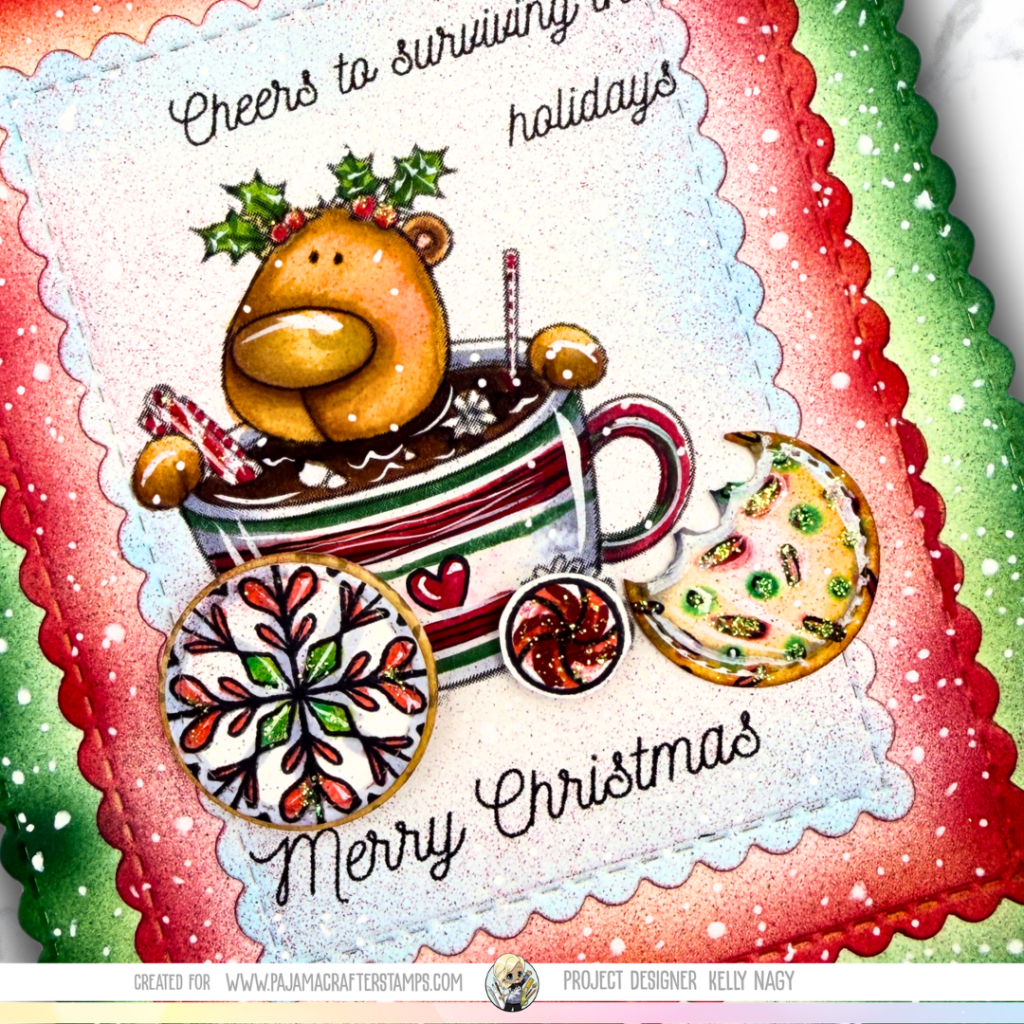
My featured HOP card! The cookies SPIN!!!

Scrappy Boy Stamps Mystery Box 2026: Five Card Projects & a Whole Lot of Nostalgia!

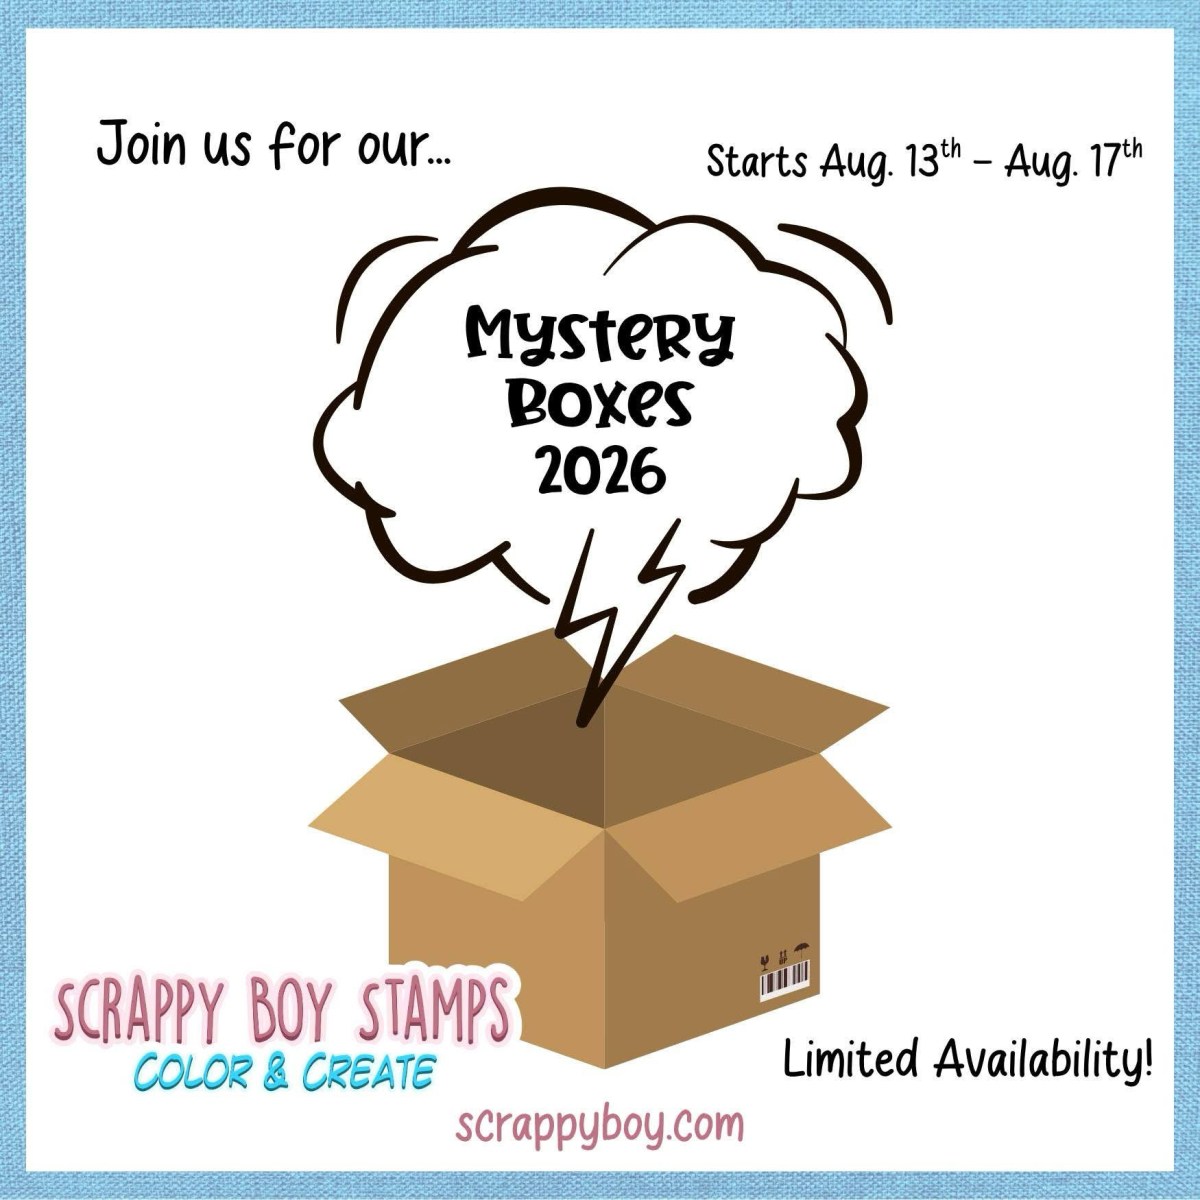
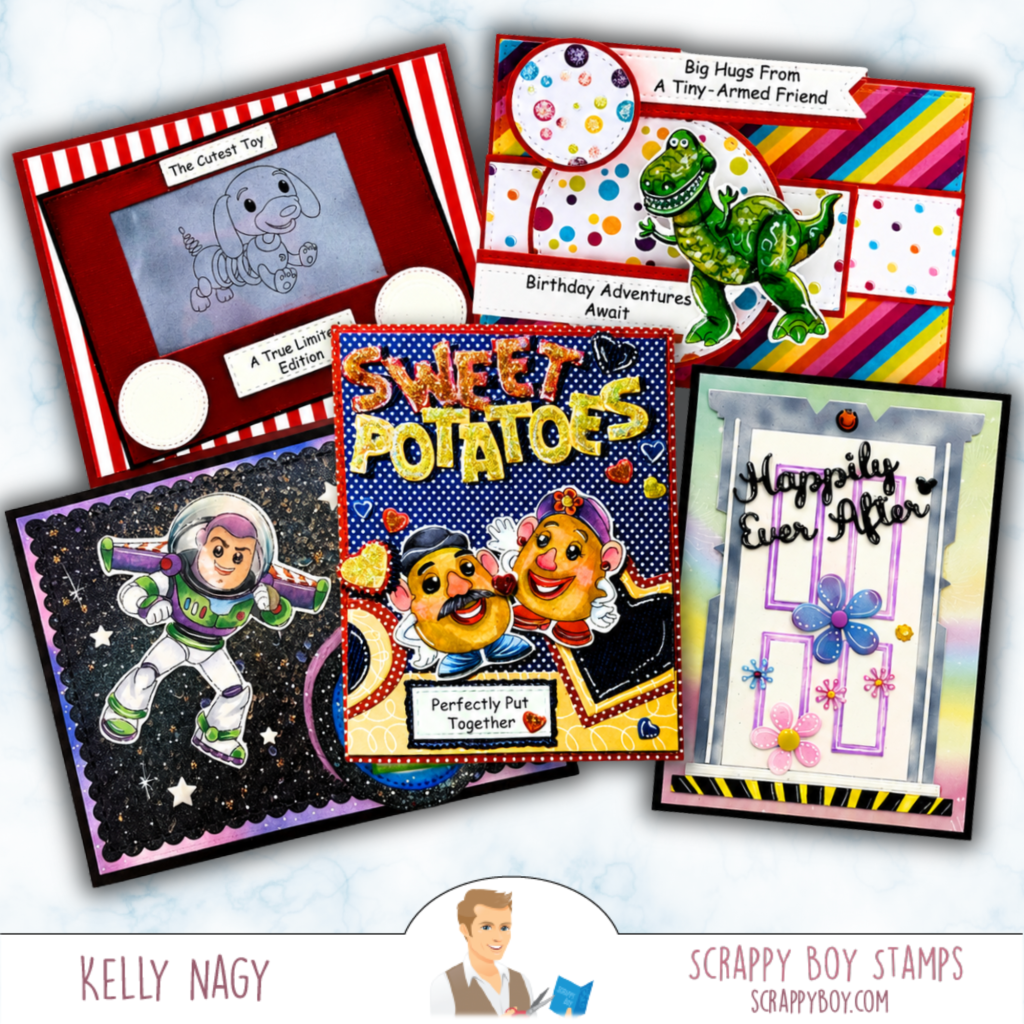
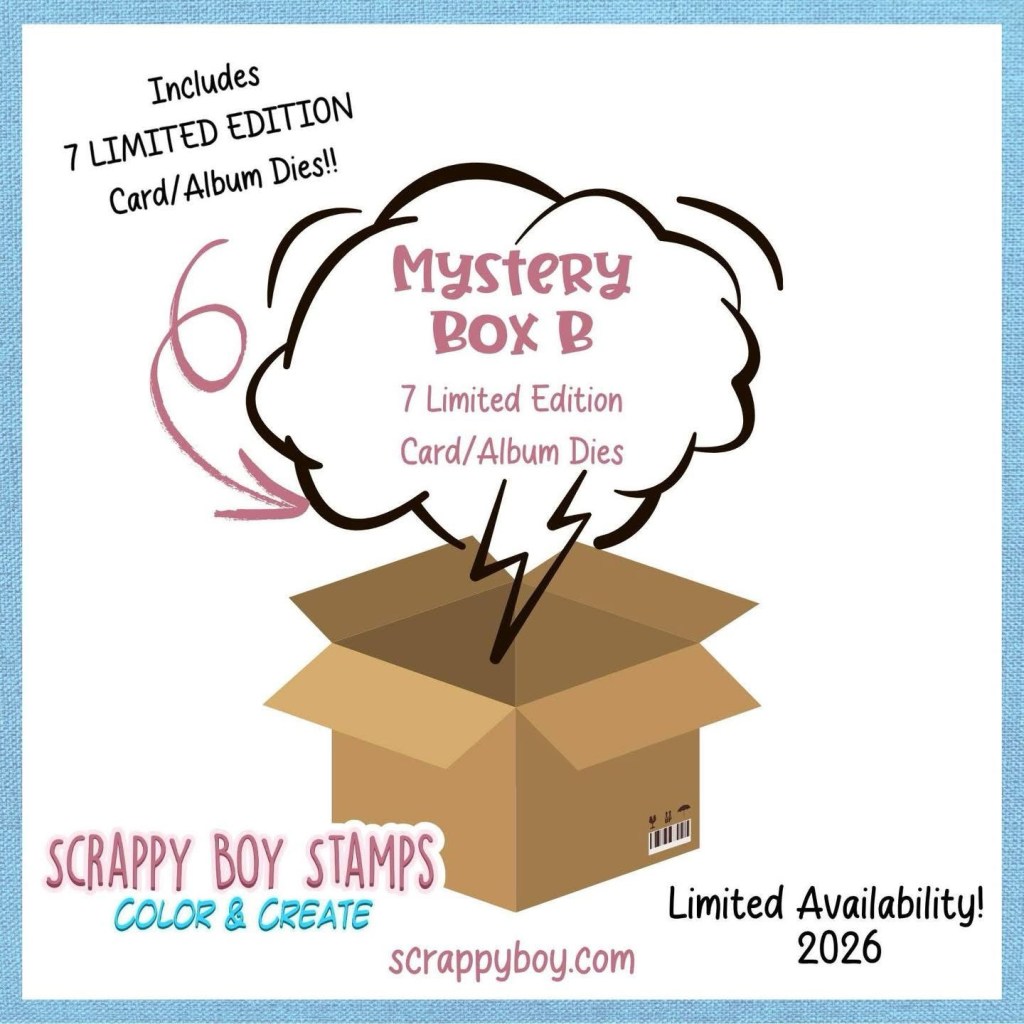
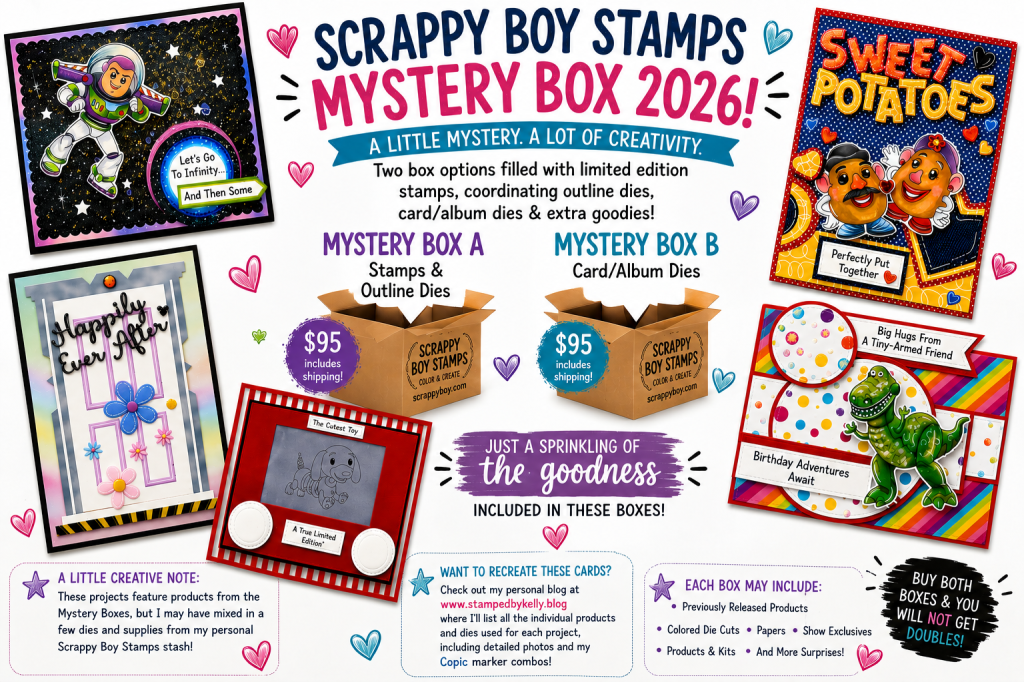
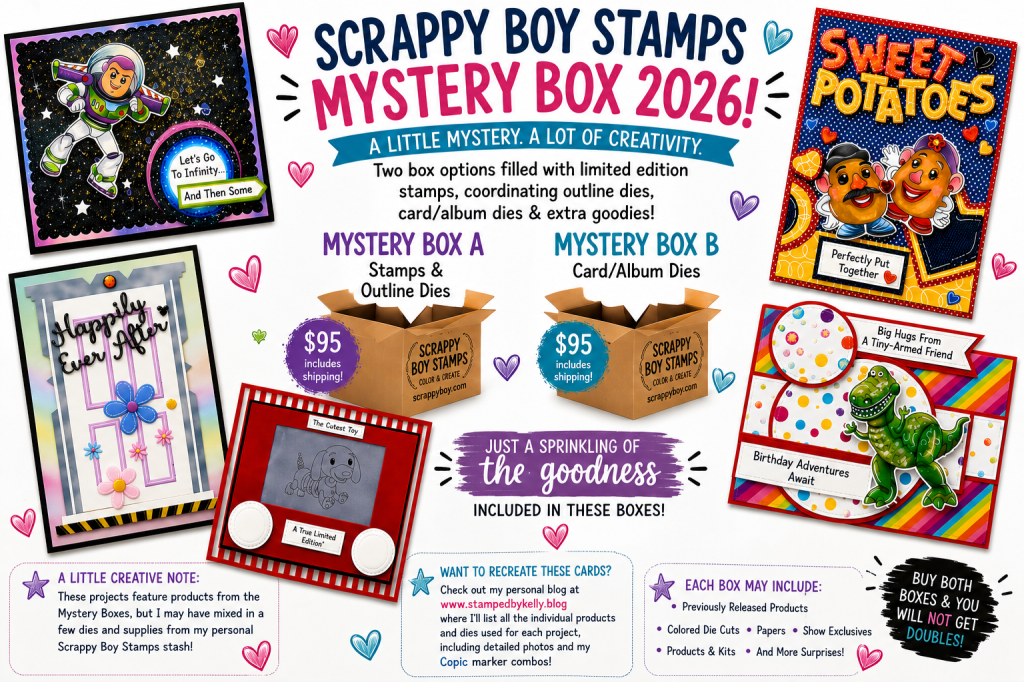
Get ready for the Scrappy Boy Stamps Mystery Box 2026! I’m sharing five nostalgia-inspired card projects featuring goodies from this year’s boxes, along with a few creative twists from my Scrappy Boy stash. The Mystery Box Event runs August 13–17, while supplies last—and these limited-edition goodies won’t be around forever!

There is something extra fun about a mystery box—especially when you know it is packed with exclusive crafty goodies! The Scrappy Boy Stamps Mystery Box Event is coming August 13–17, 2026, while supplies last, and I had the opportunity to create five projects inspired by some of the products you may find inside.

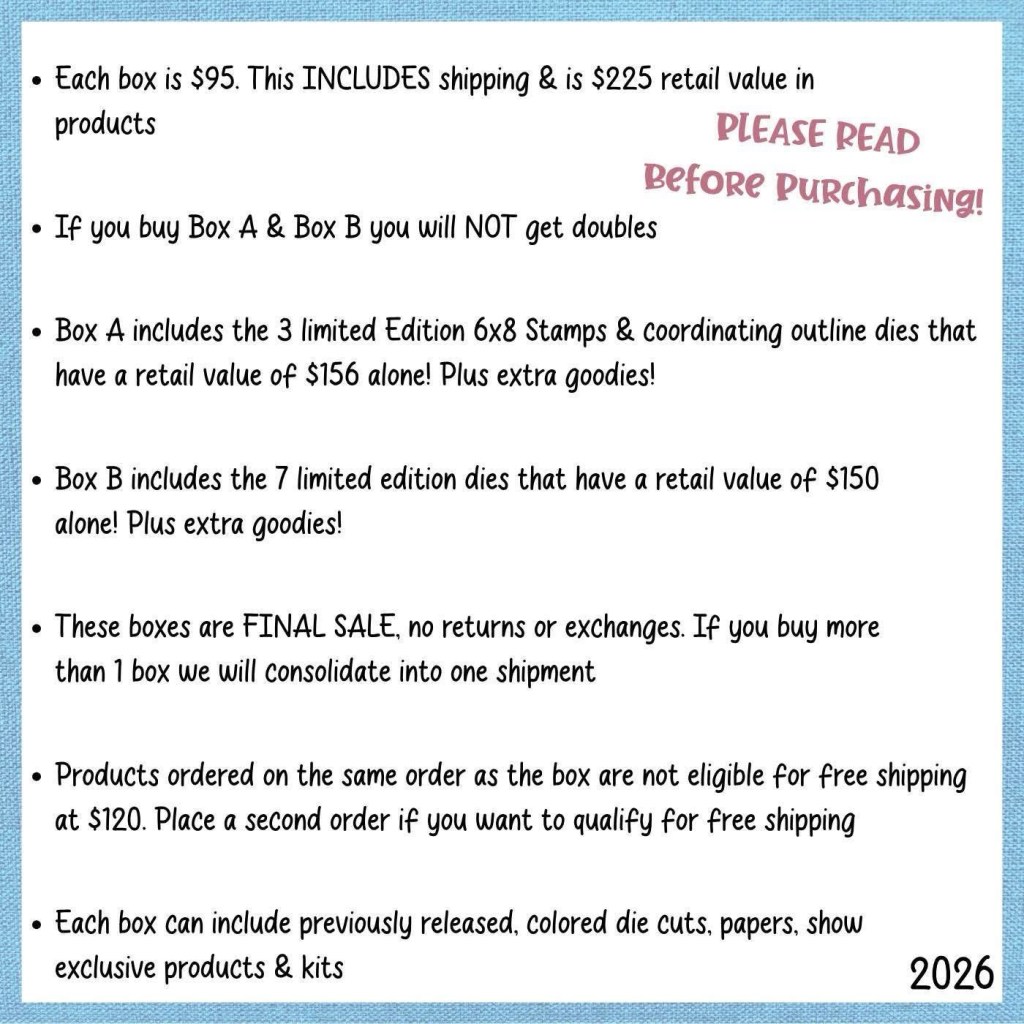
Before we jump into the projects, here are the important Mystery Box details:

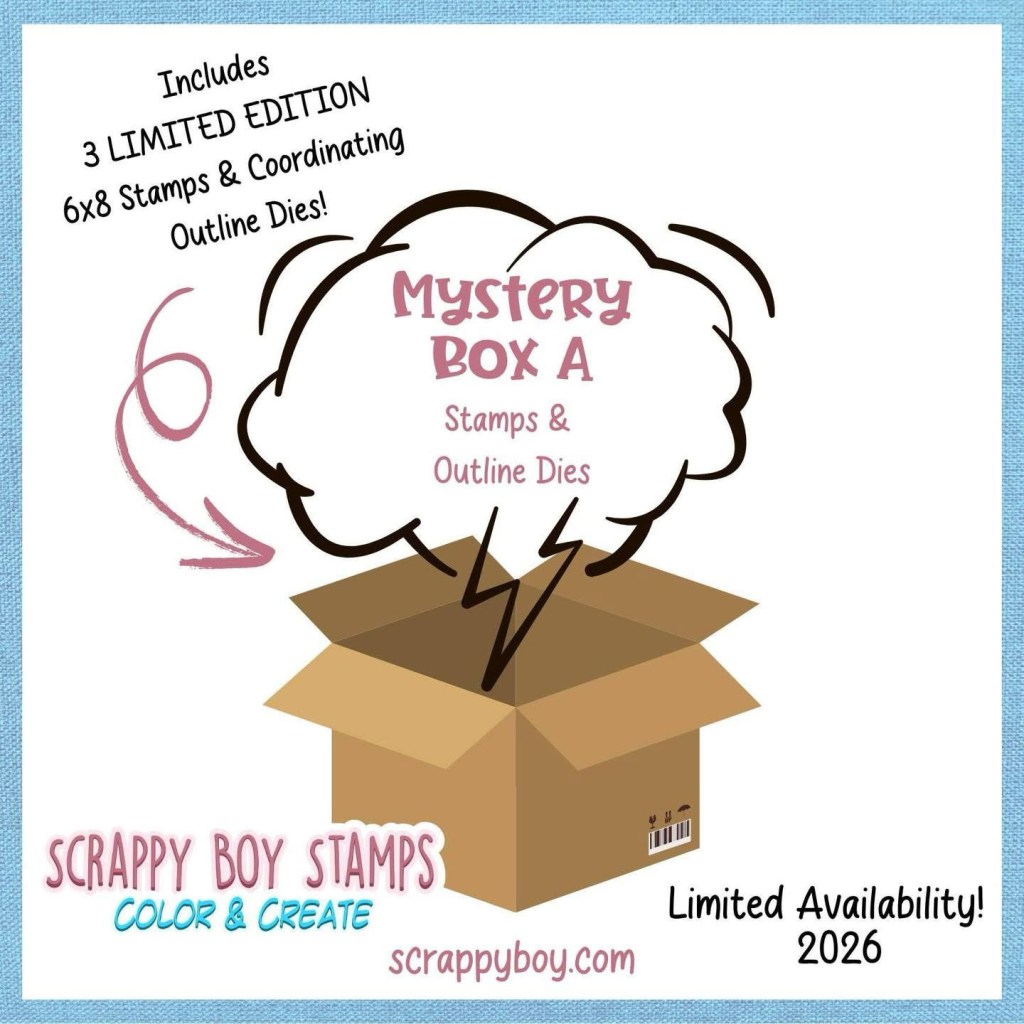
🎁 Mystery Box A

$95, including shipping
Includes 3 limited-edition 6×8 stamp sets with coordinating outline dies, plus extra goodies. The stamps and dies alone have a stated retail value of $156.

🎁 Mystery Box B

$95, including shipping
Includes 7 limited-edition card/album die sets, plus extra goodies. The dies alone have a stated retail value of $150.

Each box contains approximately $225 in retail value, and if you purchase both Box A and Box B, you will not receive duplicate products between the two boxes.

These are FINAL SALE and available only while supplies last, so August 13 is definitely a date to put on your crafty calendar!

Shop Scrappy Boy Stamps⁠

A Creative Note: My projects feature products from the Mystery Boxes, but I mixed in some dies, papers and supplies from my personal Scrappy Boy Stamps stash. That’s part of the fun—seeing how these new goodies can work with products you may already own!


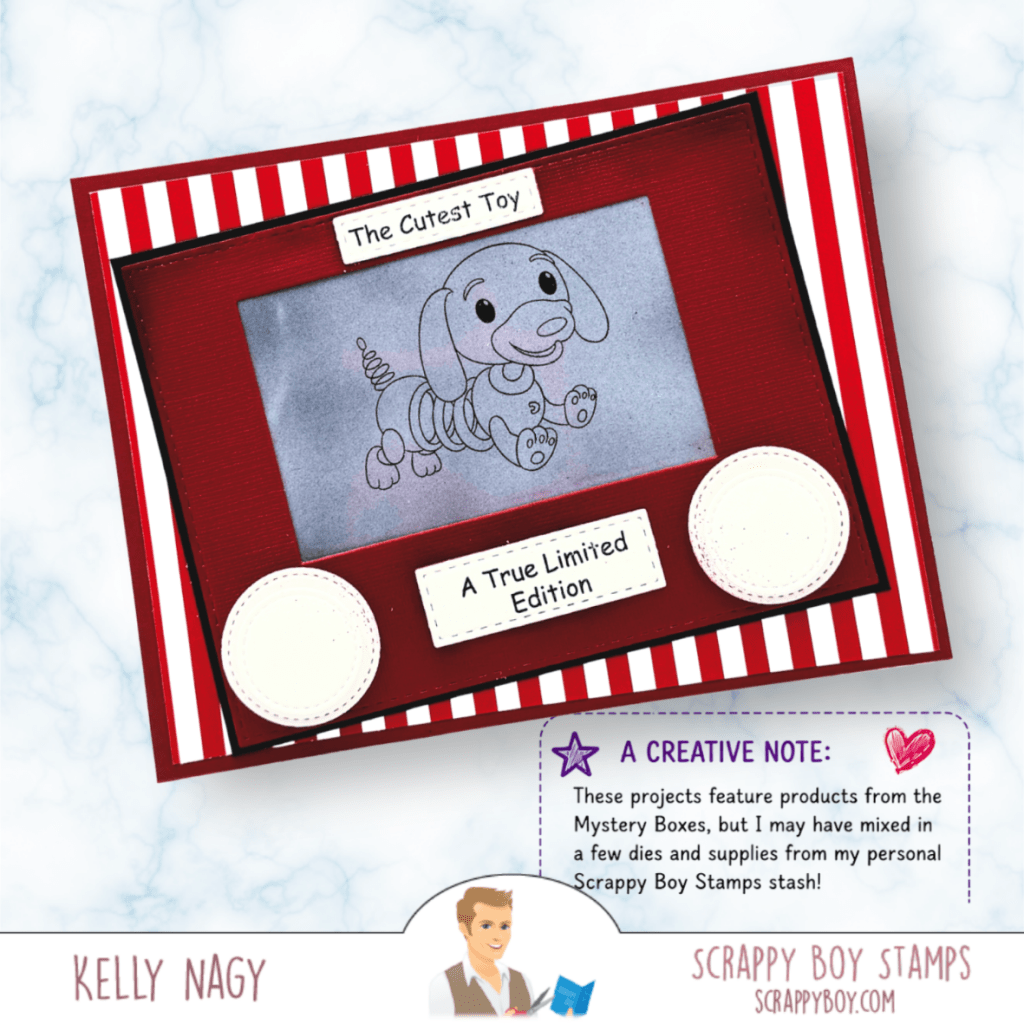
🐶 Project #1: The Cutest Toy

“THE CUTEST TOY / A TRUE LIMITED EDITION” CARD

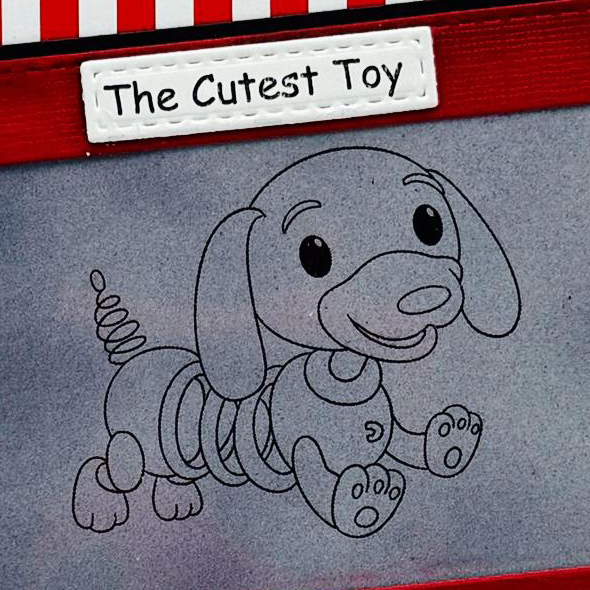
This one immediately took me back to childhood! I created a fun retro toy-inspired card with the adorable tiny-armed pup front and center.

And there is an important detail about this project: the toy-inspired frame is NOT a special die included in the Mystery Box. I created that look by combining simple geometric dies from my existing stash.

I love finding unexpected ways to stretch basic dies and turn them into something completely different. The bold red, white and black palette gives this card that classic toy-box feel, while the sentiments “The Cutest Toy” and “A True Limited Edition” couldn’t be more perfect for a Mystery Box project.

Copic Color Combos

Dog – C3 & C5 Airbrushed on white

You can achieve the same look ink blending with gray pigment ink or stamping on solid gray paper with black ink. I made this card with scraps. These circle knobs can be found on the following products:

Stitched Circle Nesting Dies

Stitched Nested Rectangle Dies

Red Striped Paper – Love The Mouse 4×9 Paper Pack

Quick & Easy – No Color
Made with simple geometric shapes

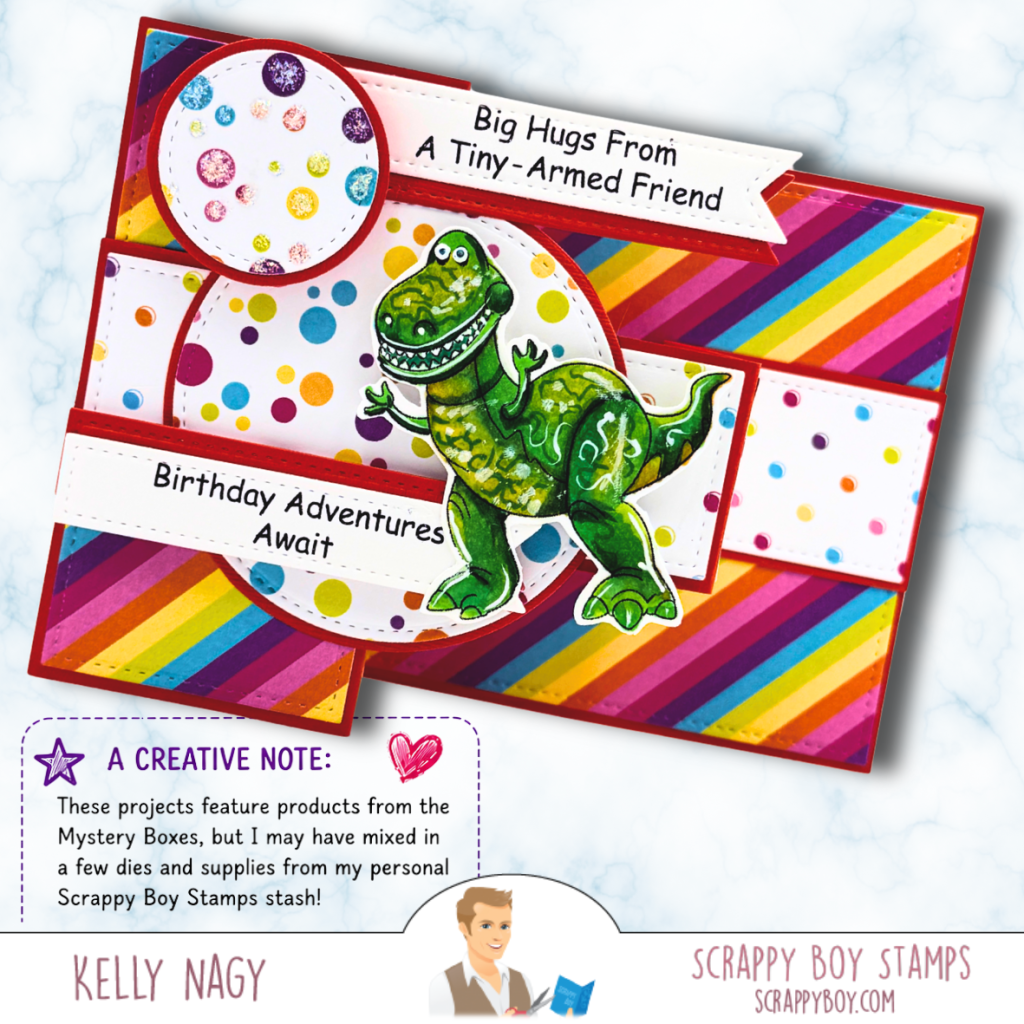
🦖 Project #2: Big Hugs From a Tiny-Armed Friend

Dinosaur Birthday Card

How could I resist this little guy?

This project became a bright, cheerful birthday card filled with rainbow stripes, colorful dots and one very happy green dinosaur. I layered different shapes and patterns to give the card lots of movement without taking attention away from the image. I used my new favorite die from my stash called Tri-Fold Card Die w/ stitched layers.

“Big Hugs From A Tiny-Armed Friend” makes me smile every time, and I paired it with “Birthday Adventures Await” to make this one ready for a celebration.

Copic Colors

Dinosaur – light green – YG01, YG03, YG05

Dinosaur – medium green – YG06, YG09

Deep green shadows – G07, G17, G28

Belly/highlights -YG21, YG23

Mouth – R20, R22

Teeth – C0, C1

Grounding/deep shadows – C3, C5


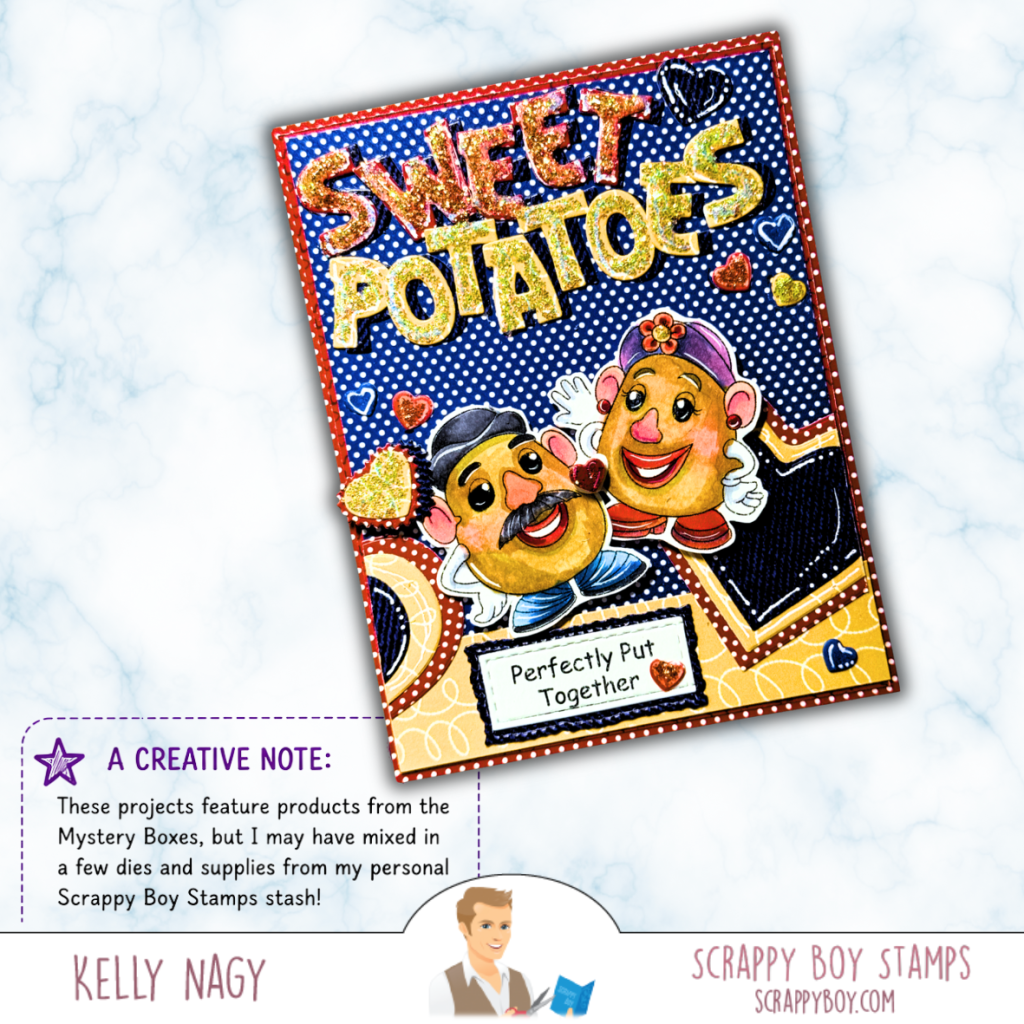
🥔 Project #3: Perfectly Put Together

Sweet Potato Card

This might be one of my favorites simply because it is so wonderfully silly!

I turned my card into a playful “Sweet Potatoes” design featuring a familiar pair of spud-inspired friends. The bold letters, glitter, hearts, polka dots and layered elements make this card feel like pure childhood fun.

The “Perfectly Put Together” sentiment was the finishing touch.

This is also a great example of why I love Mystery Box events. The new products can be the starting point, but you can pull out your existing Scrappy Boy supplies and completely run with an idea.

Copic Colors

Potato bodies – Y21, Y23, Y26, Y28

Warm brown shading – E31, E33, E35

Pink/red features -R20, R22, R24

Orange details – YR04, YR07

Purple details – V12, V15, V17

Blue details – B21, B24, B26

Black/gray details -C5, C7, C9

White highlights – C0, C1

Other Scrappy Boy Products:


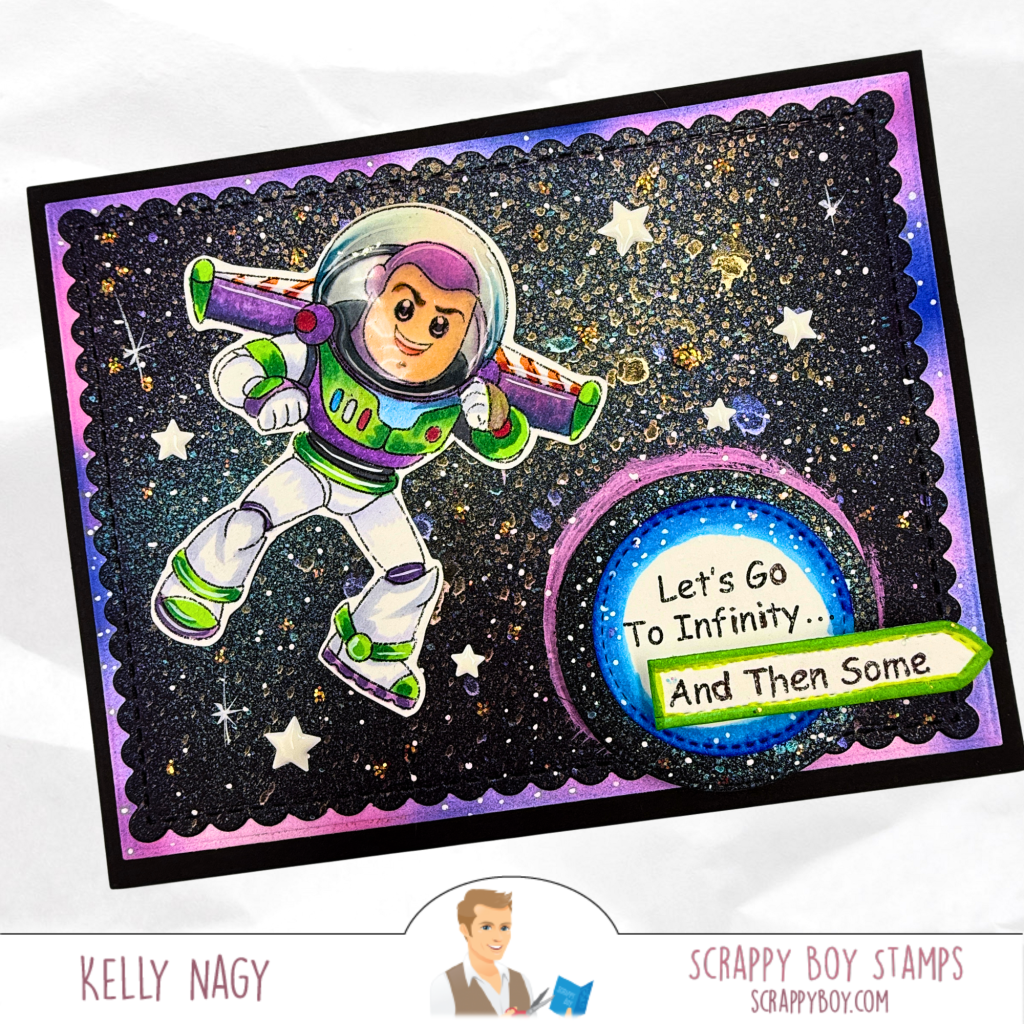
🚀 Project #4: To Infinity…And Then Some

Space Ranger Card

We’re heading to infinity—and then some!

For this project, I went with a dramatic black space background so the green, purple and white coloring of my space ranger would really pop. The stars, splatters and circular galaxy-inspired sentiment element give the card plenty of dimension while keeping the character as the focal point.

This one is another fun nod to childhood memories without needing the entire card to be literal. I used the stitched nested rectangles and the stitched scalloped nested A2 card dies.

Copic Colors

Suit whites – C0, C1, C3

Green accents – YG03, YG06, YG09

Purple accents – V04, V06, V09

Skin – E000, E00, E11, E21

Hair/brows – E23, E25, E27

Blue accents – B23, B26, B28

Shadows – C3, C5


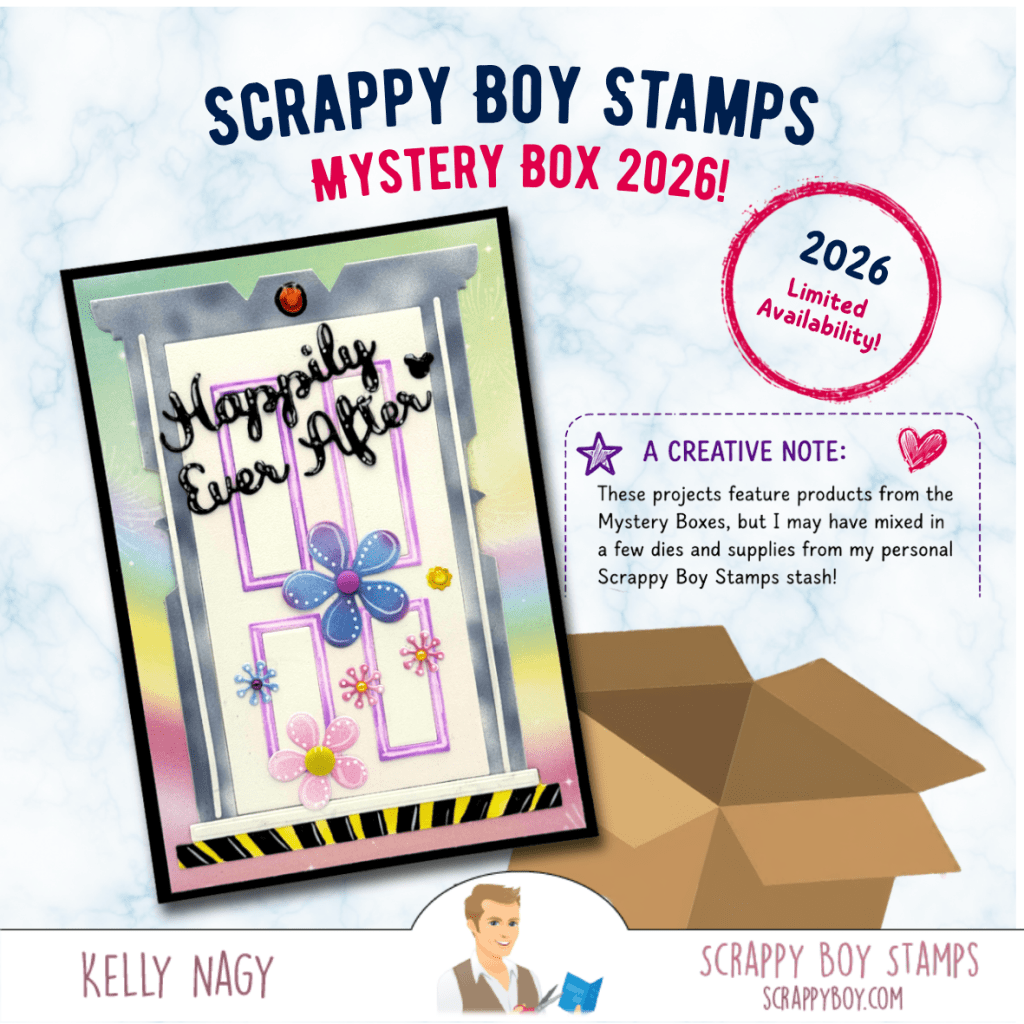
🌸 Project #5: Happily Ever After

Happily Ever After Door Card

My final project takes the Mystery Box inspiration in a completely different direction.

Instead of a character-focused design, I created a whimsical door card filled with soft pastels, flowers and a little bit of magic. The pink and purple door details contrast beautifully against the soft background, while the dimensional flowers add a sweet, playful finish. Flowers are from the Sweet Rabbit Back Pack Add On Die Set.

And, of course, “Happily Ever After” seemed like exactly the right sentiment.

Copic Colors

Purple door details – V01, V04, V06

Blue flower – B21, B23, B26

Pink flower – RV10, RV13, RV14

Small flowers – RV04, YR04, B04

Yellow centers – Y13, Y15, Y17

Gray structure – C0, C2, C4, C5

Soft shadows – C0, BV20


📦 Ready for the Mystery?

Mystery Box A Graphic

Mystery Box B Graphic

The Scrappy Boy Stamps Mystery Box Event runs August 13–17, 2026, while supplies last. With only a limited quantity available, I would not count on these boxes lasting through the entire event.

Remember:

  • Box A: 3 limited-edition 6×8 stamp sets + coordinating outline dies + extra goodies
  • Box B: 7 limited-edition card/album dies + extra goodies
  • $95 per box, shipping included
  • Approximately $225 retail value in each box
  • Purchase A + B and there are no duplicates between the boxes
  • Final sale — no returns or exchanges
  • Mystery Boxes may also contain previously released products, colored die cuts, papers, show-exclusive products and kits.
“PLEASE READ BEFORE PURCHASING”

I will be sharing more detailed looks at these five projects, including the Scrappy Boy products I mixed in from my stash, but because these Mystery Boxes are available for such a short time, I wanted to share all five projects together first.

If these projects have you wondering what might be hiding inside those boxes…well, that’s exactly what makes a Mystery Box so much fun! 💗

🛍️ Mystery Box Event

August 13–17, 2026 • While Supplies Last

Shop the Scrappy Boy Stamps website⁠

Happy crafting!

Kelly
StampedbyKelly

#ScrappyBoyStamps #ScrappyBoyMysteryBox #MysteryBox2026 #CardMaking #HandmadeCards #CopicColoring #PaperCrafting #CardMaker #Stamping #DieCutting #CraftyInspiration #StampedByKelly

🦖 Dinosaur Week Goes Extinct—with a Little Halloween Magic!

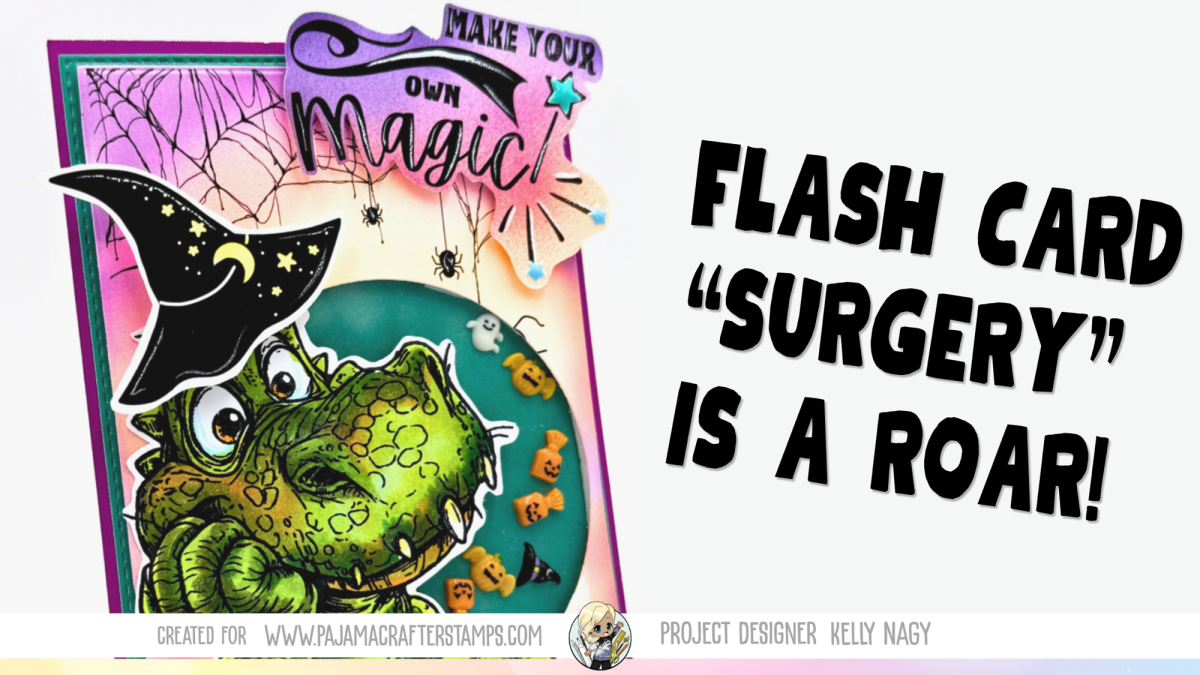
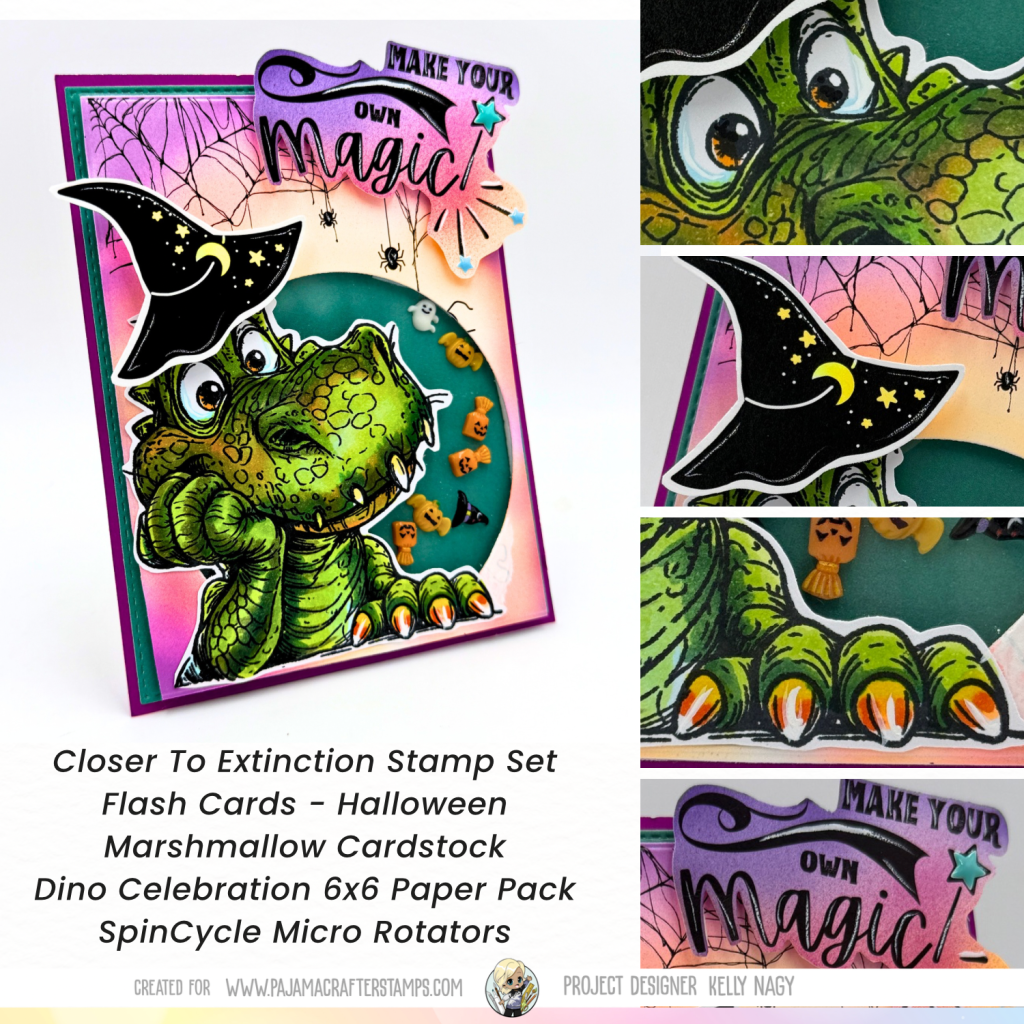
Celebrate Dinosaur Week with a fun Halloween shaker card featuring the Close to Extinction Stamp Set, creative Flash Card Surgery, and spooky interactive details from Pajama Crafter Stamps.

I’m closing out Dinosaur Week with one last dino-mite project—and this little guy from the Close To Extinction Stamp Set decided he was ready for Halloween! 🎃🦖

For this card, I did what I’m calling a little Flash Card Surgery! ✂️ I cut into two Halloween Flash Cards, using the skeleton/spiderweb design to create my circle shaker and borrowing the witch hat and “Make Your Own Magic” sentiment from another card.

I love finding ways to stretch products beyond their original design. A little cutting, mixing and matching turned these Flash Cards into something completely different—and gave my dinosaur the perfect spooky-season makeover!

🛍️ What I Used

  • Close To Extinction Stamp Set
  • Halloween Flash Cards
  • Dino Celebration 6×6 Paper Pack
  • Marshmallow Cardstock
  • SpinCycle Micro Rotators

🦖 Has This Dino Already Gone Extinct?

The Close To Extinction set has been so popular that you may find it temporarily out of stock. If so, hit the Notify Me button! He’s expected to make a comeback, and you’ll know when it’s time to swoop in and fill that cart before he disappears again.

You can shop Pajama Crafter Stamps using my affiliate link:

https://pajamacrafterstamps.com/STAMPEDBYKELLYBLOG

This post contains an affiliate link. I may earn a small commission from qualifying purchases at no additional cost to you. Thank you for supporting my crafting and Stamped by Kelly!

And that’s a wrap on Dinosaur Week! I think sending this little guy into extinction dressed for Halloween was the perfect way to end it. 😂

Until the next crafty adventure—Make Your Own Magic!

#PajamaCrafterStamps #DinosaurWeek #CloseToExtinction #StampedByKelly #HalloweenCard #DinosaurCard #ShakerCard #Cardmaking #HalloweenCardmaking #FlashCardSurgery

🚀 Create an Interactive Card That’s Out of This World!

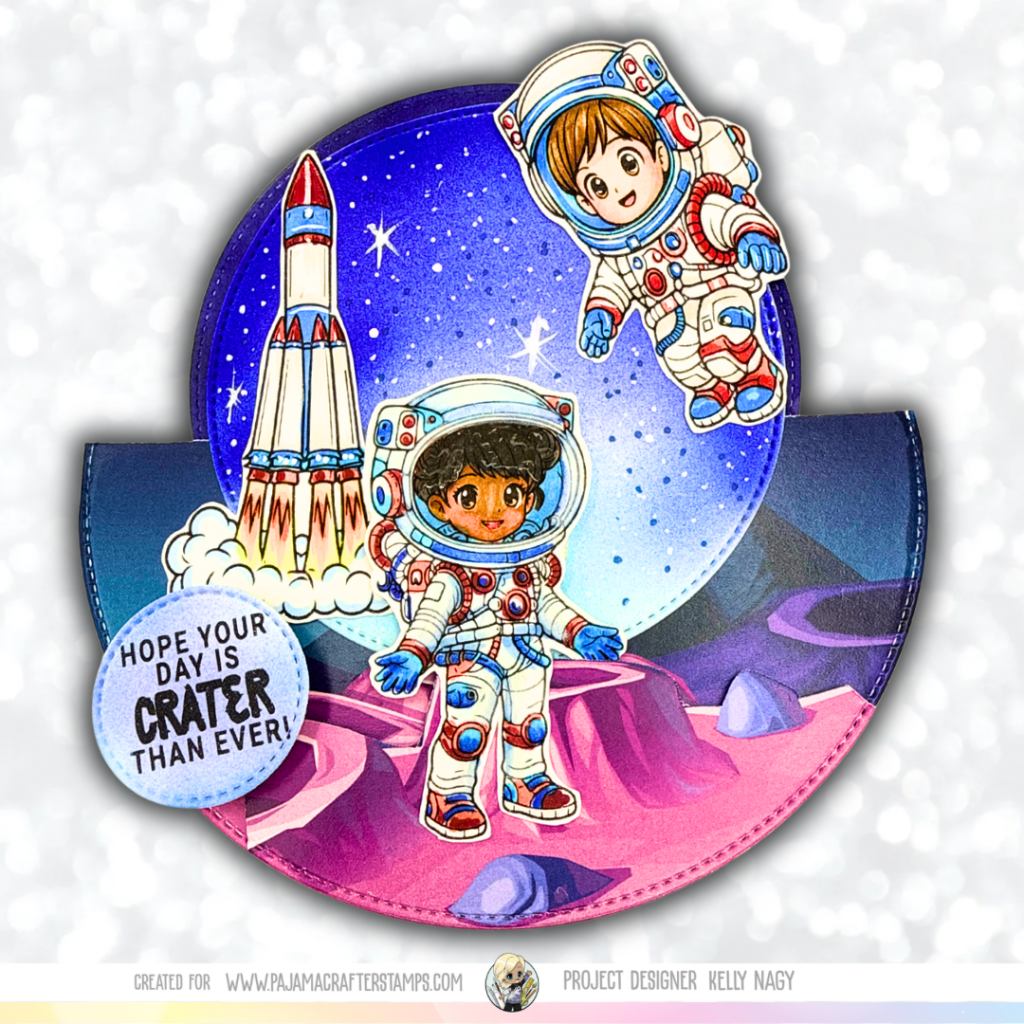
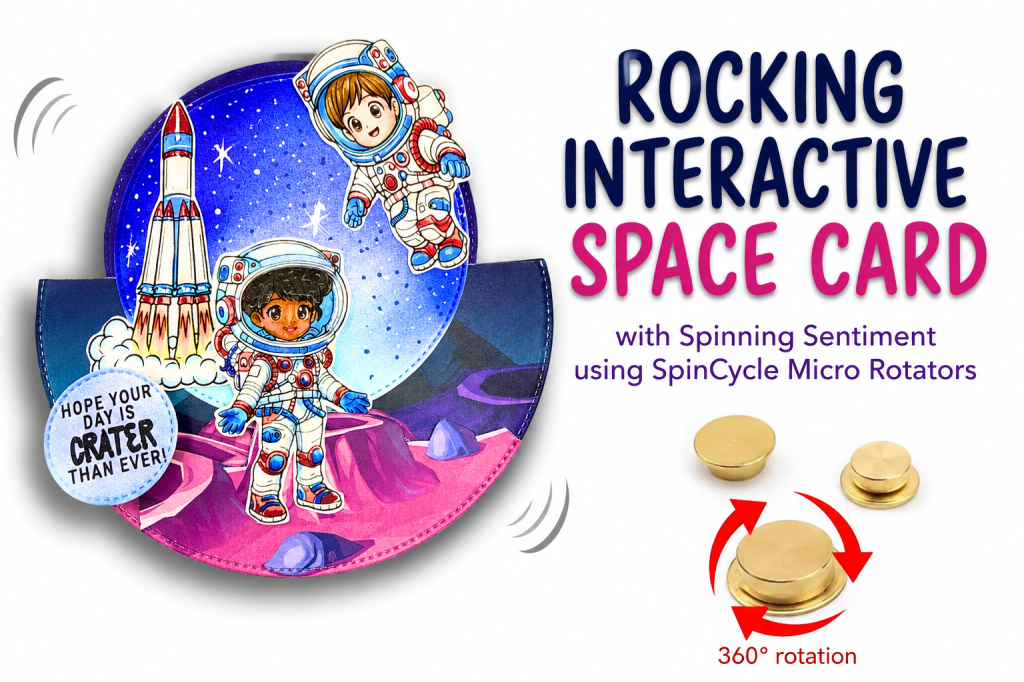
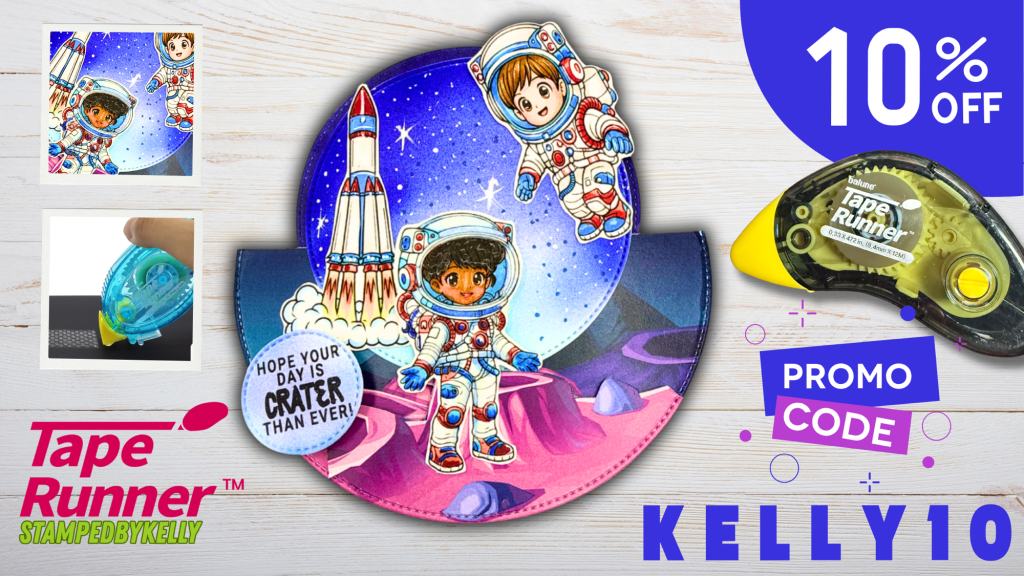
Create an interactive space-themed rocking card with easy Copic coloring and a 360° spinning sentiment using the new SpinCycle Micro Rotators. Put together with a combination of my favorite wet and dry adhesives. Perfect for making someone smile!

One of my favorite things about cardmaking is combining Copic coloring with interactive elements. There’s just something magical about handing someone a card that actually moves. It immediately brings a smile to their face!

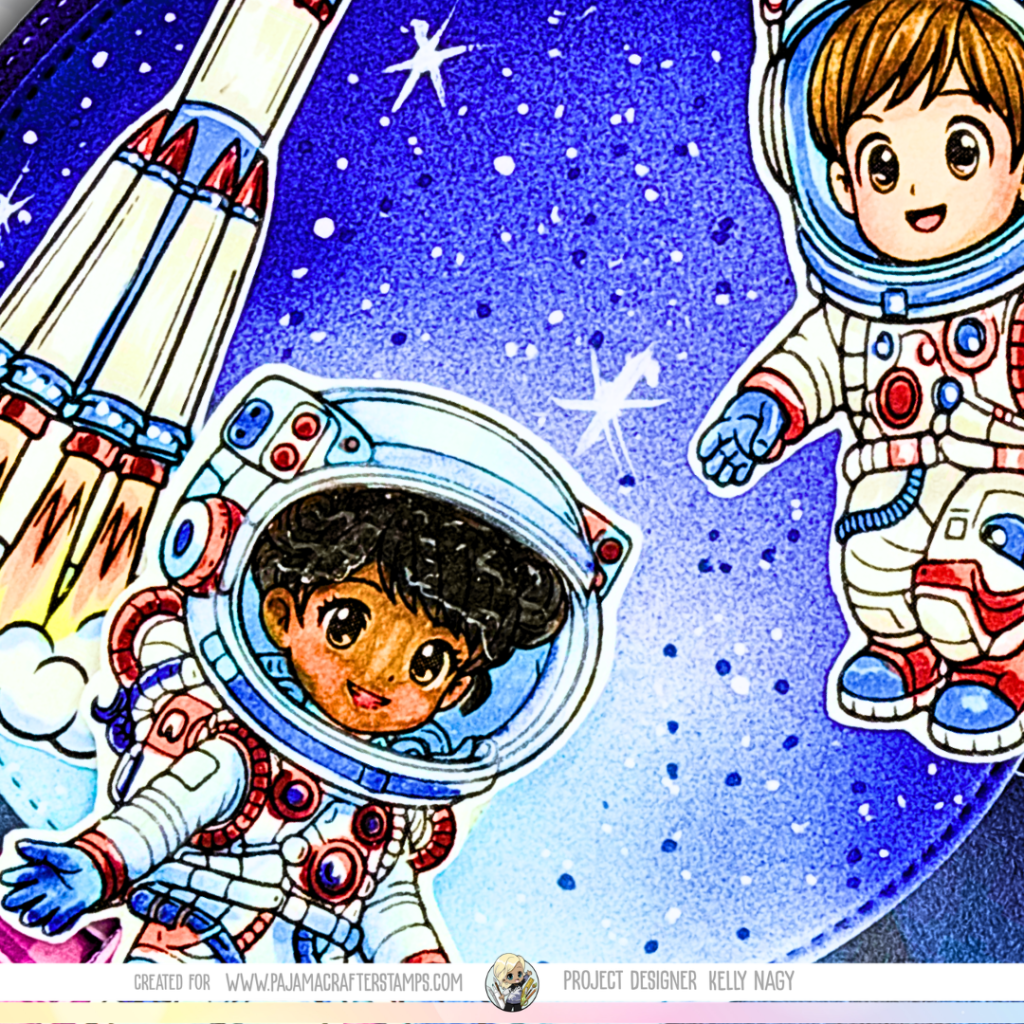
For today’s project, I reached for the adorable Such an Asteroid stamp set and created a rocking card that features not one—but two interactive elements!

The entire card gently rocks back and forth, while the sentiment spins a full 360 degrees.


Color First…Then Build Your Scene

Before I even think about assembling my card, I always start with the coloring.

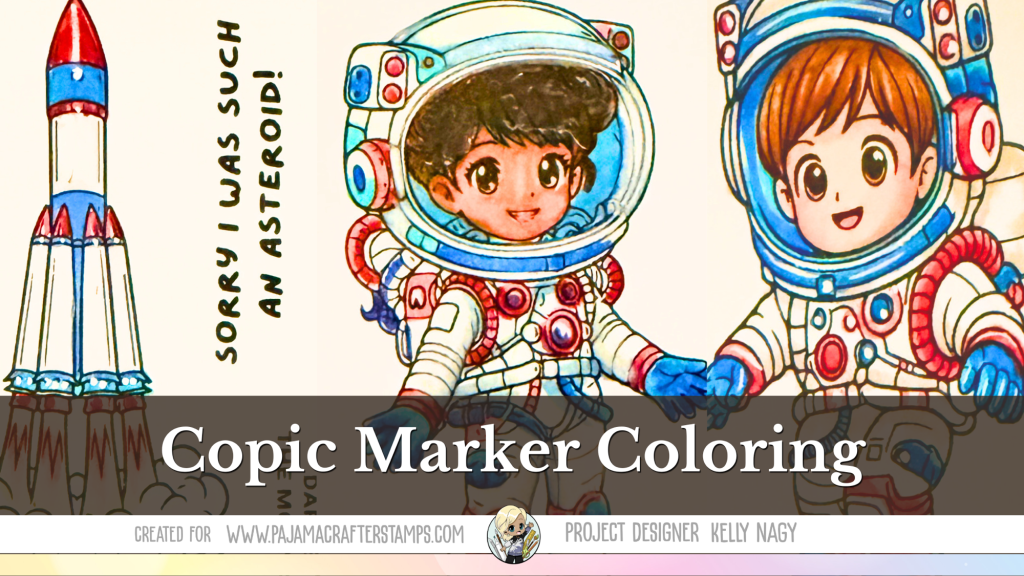
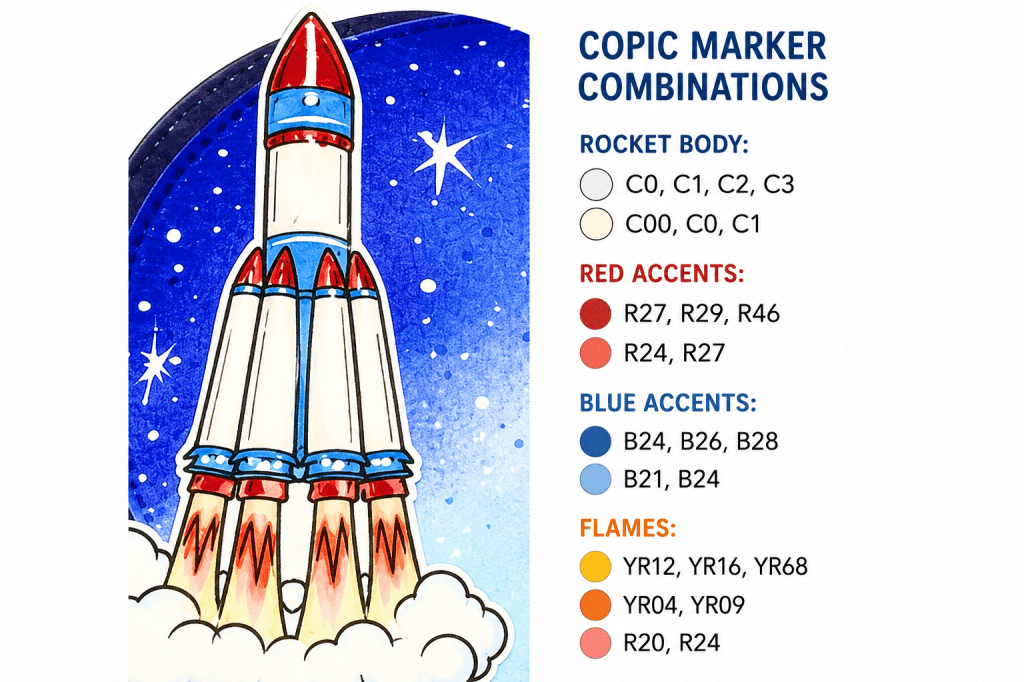
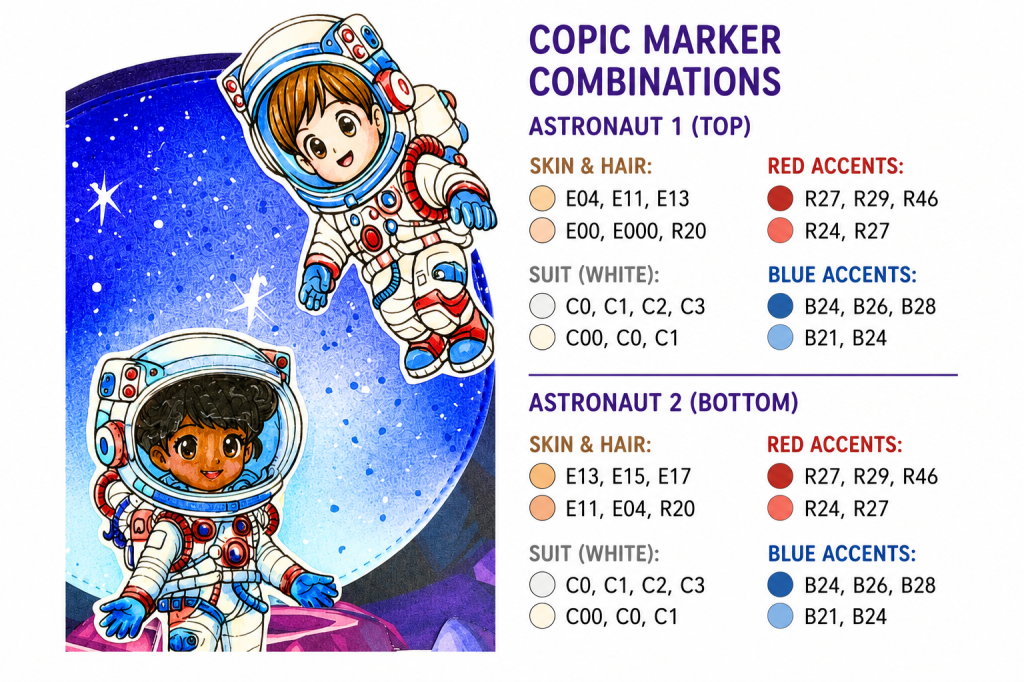
These sweet astronauts from Such An Asteroid stamp set were an absolute joy to color with Copics. I kept the spacesuits bright and clean using cool grays and added pops of vibrant reds and blues to coordinate with the rocket. For the night sky, I blended rich blues into a soft glow behind the astronauts before splattering white paint to create the stars.

One of my favorite things about space-themed cards is that there’s no right or wrong. You can create colorful galaxies, glowing planets, or simply let your imagination take over.


Interactive Cards Don’t Have to Be Complicated

If you’ve never made a rocking card before, don’t let it intimidate you.

In fact, you probably already have everything you need!

Look through your craft room for:

  • Circle dies
  • A circle cutter
  • Bowls or plates to trace
  • Or simply fold your cardstock in half and cut a half-circle, just like we all learned in kindergarten.

Sometimes the simplest supplies create the most memorable cards.


Add Even More Movement

Want to take your interactive cards to the next level?

The new SpinCycle Micro Rotators from Pajama Crafter Stamps make it incredibly easy to add spinning elements to your projects.

I used one behind my sentiment so it spins a full 360°, but that’s only the beginning!

Imagine adding them to:

  • planets
  • stars
  • balloons
  • flowers
  • steering wheels
  • snowflakes
  • pinwheels
  • ornaments
  • little critters
  • anything you want to twirl!

You can even add multiple SpinCycle Micro Rotators to a single card to create several independently spinning elements. The possibilities are almost endless, and they add such a fun surprise for the recipient.


Copic Color Combinations

I always enjoy sharing the colors I use in case you’d like to recreate the look or adapt it to your own project.


Products Used


Final Thoughts

Interactive cards may look impressive, but they’re surprisingly easy to create—and they’re always the cards people remember.

Whether you use supplies already in your craft room or decide to try the new SpinCycle Micro Rotators, I hope this project inspires you to add a little movement to your next handmade card.

After all, handmade cards should be just as fun to play with as they are to create! To let me know you like what I post, please follow me on social media @stampedbykelly and subscribe to my Youtube channel. I am hoping if I get enough subscribers and interest, I hope to be encouraged to start my YouTube channel journey.
Happy Crafting!

Kelly


Shop & Connect

🛍️ Shop Pajama Crafter Stamps using my affiliate link:
https://pajamacrafterstamps.com/STAMPEDBYKELLYBLOG

🌐 Visit my blog:
https://www.stampedbykelly.blog


Affiliate Disclosure

As a Pajama Crafter Stamps and TapeRunner Design Team member, I may earn a small commission if you shop using my affiliate links at no additional cost to you. Your interest and support encourages me to begin creating process tutorials, sharing alcohol marker and pencil coloring inspiration, and bringing interactive card ideas to the crafting community. Thank you!

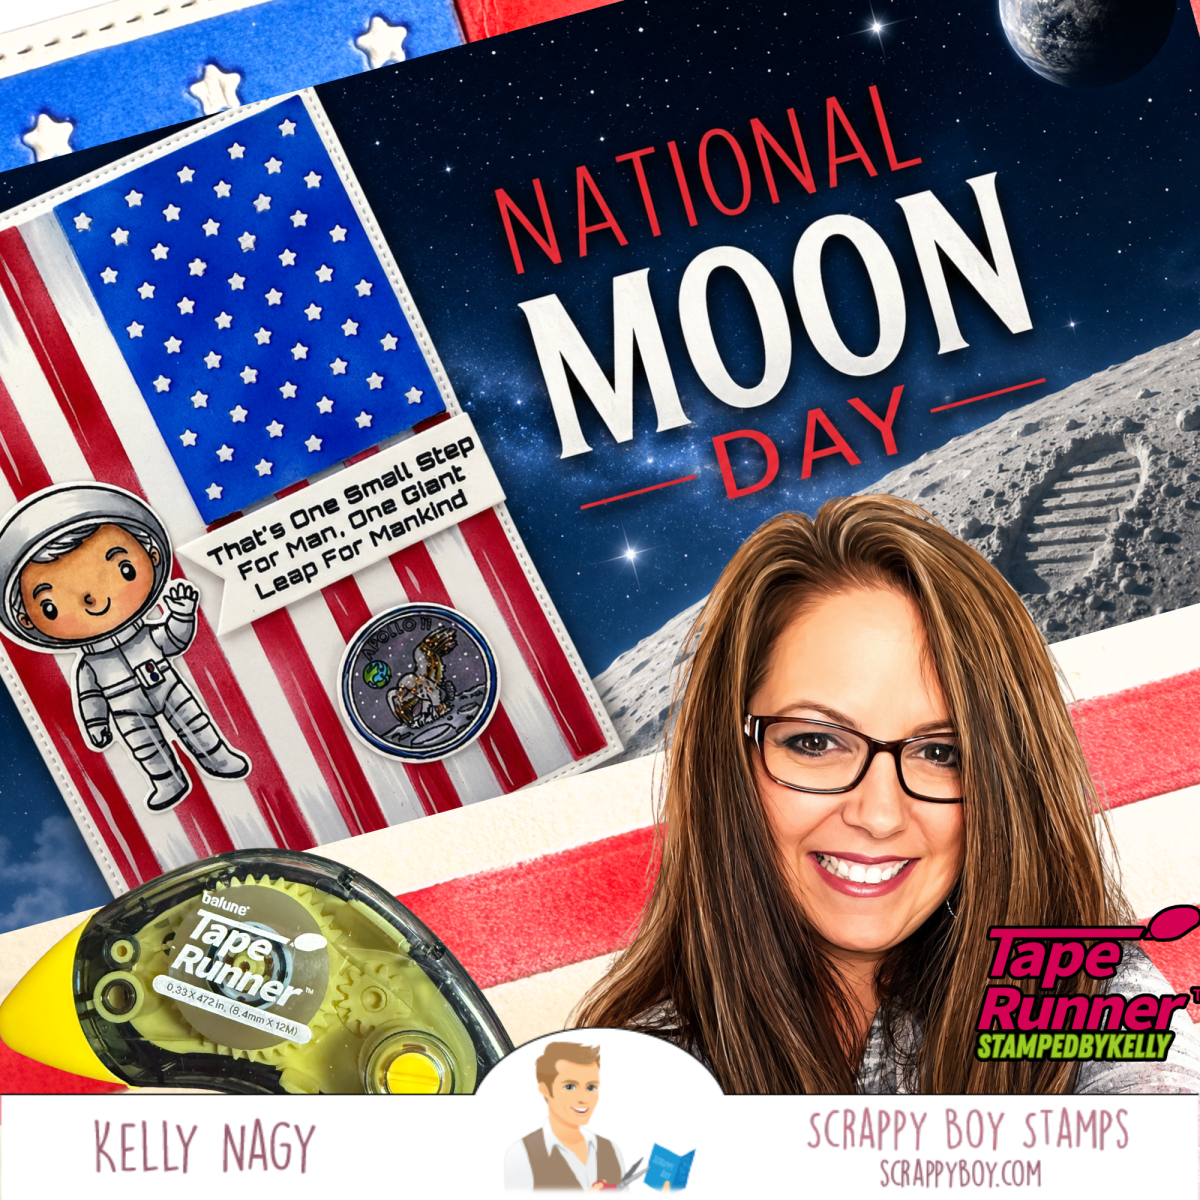
🌙 One Small Step for Creativity | Celebrating National Moon Day

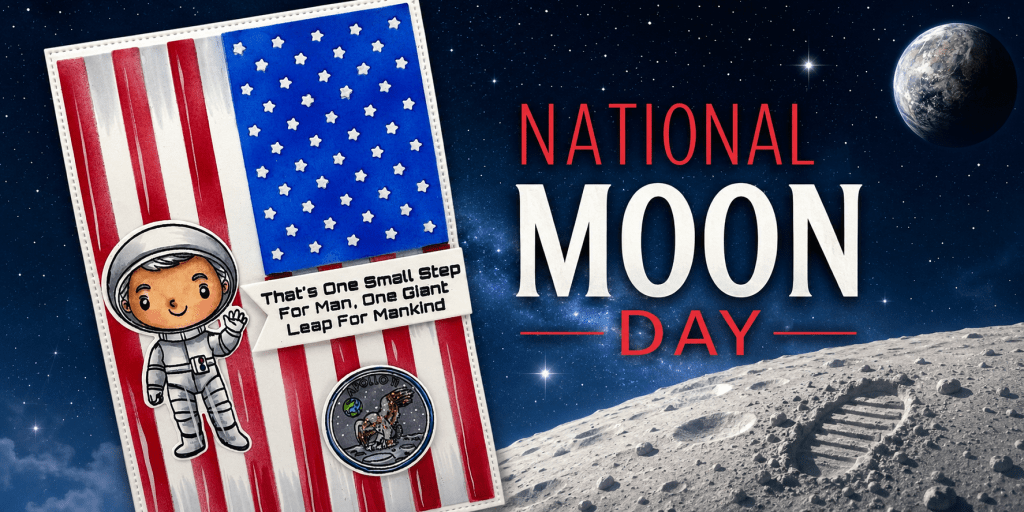
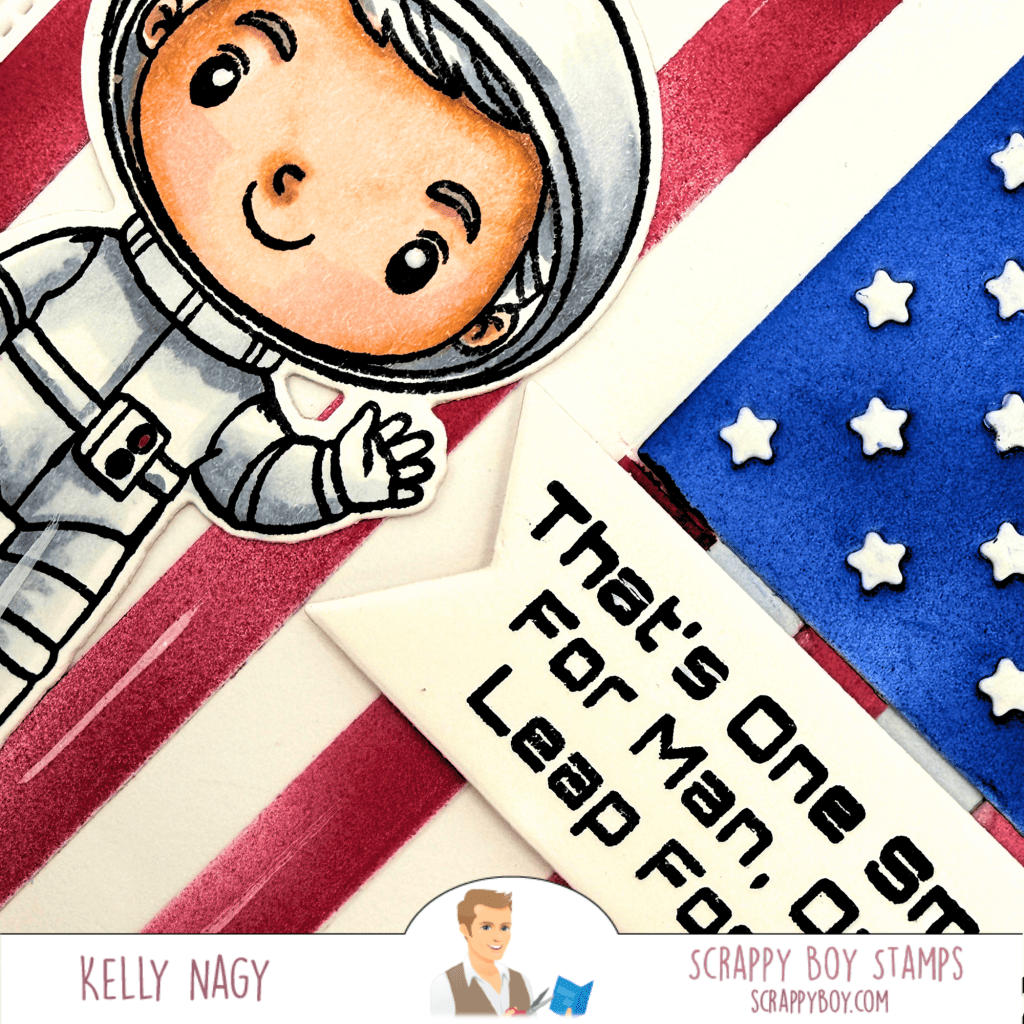
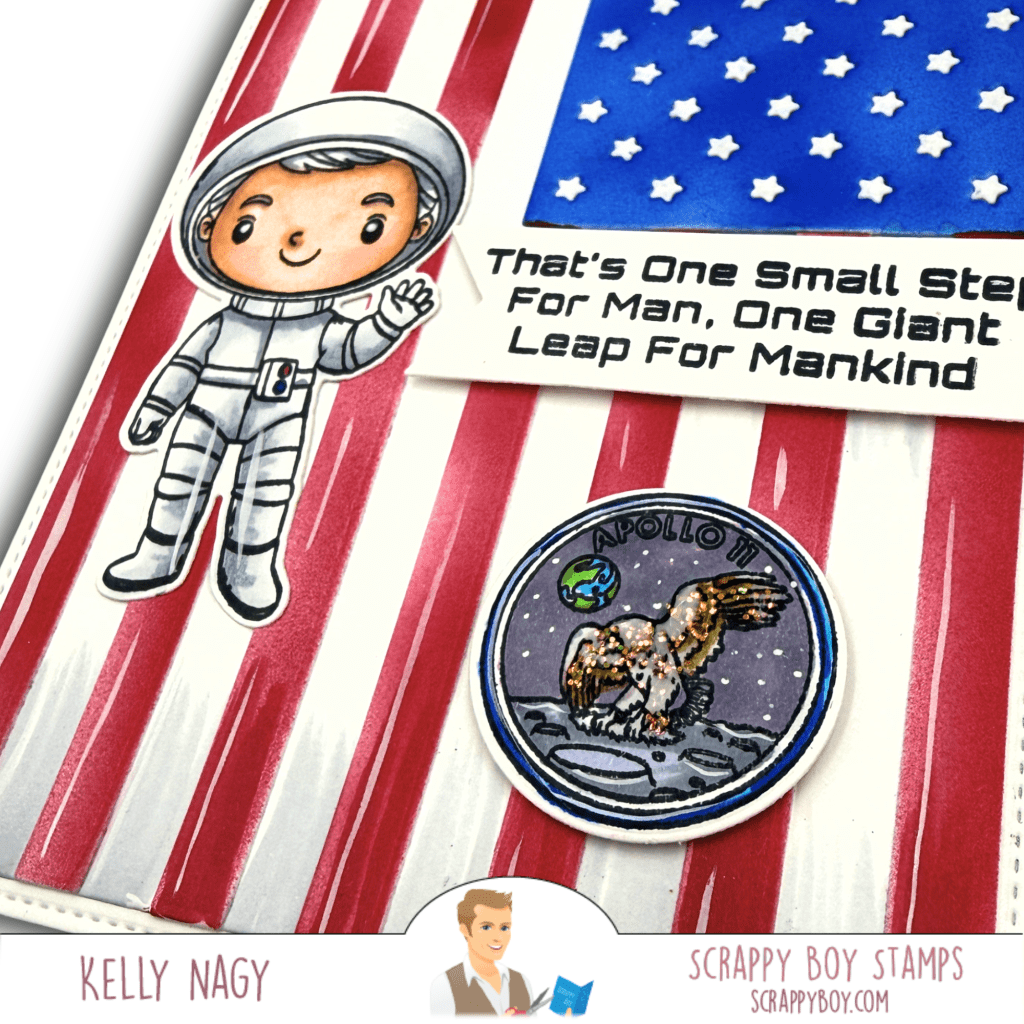
In celebration of Apollo 11 and National Moon Day, this card captures the wonder of humanity’s first steps on the Moon. Featuring the Moon Landing Stamp & Coordinating Outline Dies paired with the bold American Flag Die Set from Scrappy Boy Stamps, this design pays tribute to the courage, innovation, and patriotism of one of history’s greatest achievements. With Copic coloring, held together by TapeRunner.com tape runners and a touch of sparkle, it’s a heartfelt reminder to always reach for the stars.

Apollo 11 Inspired Card featuring. Scrappy Boy Stamps

Today we’re celebrating National Moon Day, which commemorates the historic Apollo 11 moon landing on July 20, 1969. What better way to honor that incredible achievement than with a handmade card inspired by one of history’s greatest adventures?

For this patriotic design, I paired the adorable Moon Landing Stamp & Outline Dies with the absolutely stunning American Flag Die Set from Scrappy Boy Stamps. The bold flag creates the perfect backdrop for our little astronaut, while the Apollo 11 emblem adds a fun nod to the mission that inspired generations to dream big.

Easy & No Mess Dry Adhesive TAPERUNNER

To give the flag rich, vibrant color, I airbrushed the die cuts with my Copic Airbrush System using:

  • R46 for the red stripes
  • B29 for the blue field
  • C2 lightly airbrushed over the white stripes to create soft dimension without losing the crisp patriotic look

The astronaut was colored with Copics using:

Copic Colors

Skin

  • E04
  • E11
  • E13
  • E00
  • E000
  • R20

Spacesuit

  • C2
  • C4
  • C7
  • Copic Opaque White for highlights

To finish everything off, I added a touch of Stickles from my stash to the Apollo 11 patch for just the right amount of sparkle—because even space deserves a little shimmer!

I love how this card combines patriotism, history, and a sweet whimsical character into one clean design. Sometimes all it takes is one small stamp set to inspire a giant leap in creativity!

Scrappy Boy Products Used

  • 🌙 Moon Landing Stamp & Outline Dies
  • 🇺🇸 American Flag Die Set

Both are available at:

Dry Adhesive of Choice Used

Happy National Moon Day, friends! I hope this project inspires you to reach for the stars and create something out of this world! 🚀✨

Affiliate Disclosure

Some of the links I share may be affiliate links. If you choose to shop through them, thank you for supporting my crafting journey at no additional cost to you. If you order from Scrappy Boy Stamps, I’d love it if you’d mention that Stamped by Kelly inspired your visit!

Summer Week with Pajama Crafter Stamps

Set sail for Summer Week with Pajama Crafter Stamps! This cheerful square card features the adorable Kraken Good Day stamp set paired with layered ocean waves created using the Stitched Scalloped Border Dies, a textured Circle Peek-a-Boo Die, and a sentiment cut with the Banner Die Set. See how I combined scene building, Copic coloring, and dimensional die cutting to create a bright beach-inspired card that’s perfect for celebrating all the fun of summer! 🐙🌊☀️

Set Sail for Summer with the Kraken Good Day Stamp Set

When I think of summer, I immediately picture sunny skies, sparkling water, and fun adventures on the ocean. My featured card layout is versatile enough to be a backdrop for so many different beach scenes. I hope you use these ideas as a springboard to create your own!

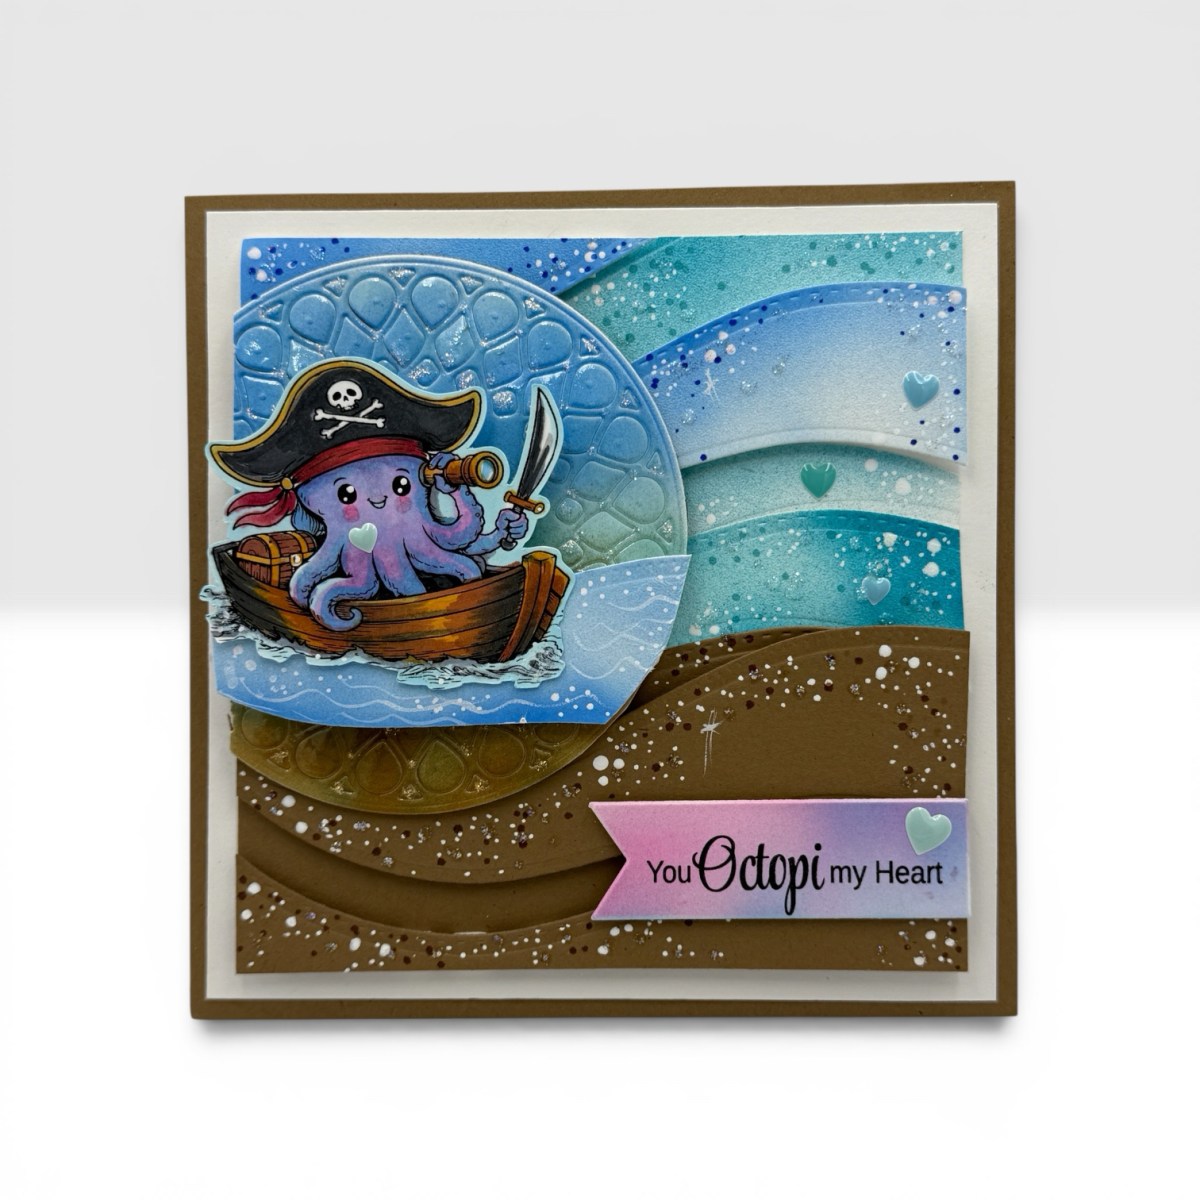
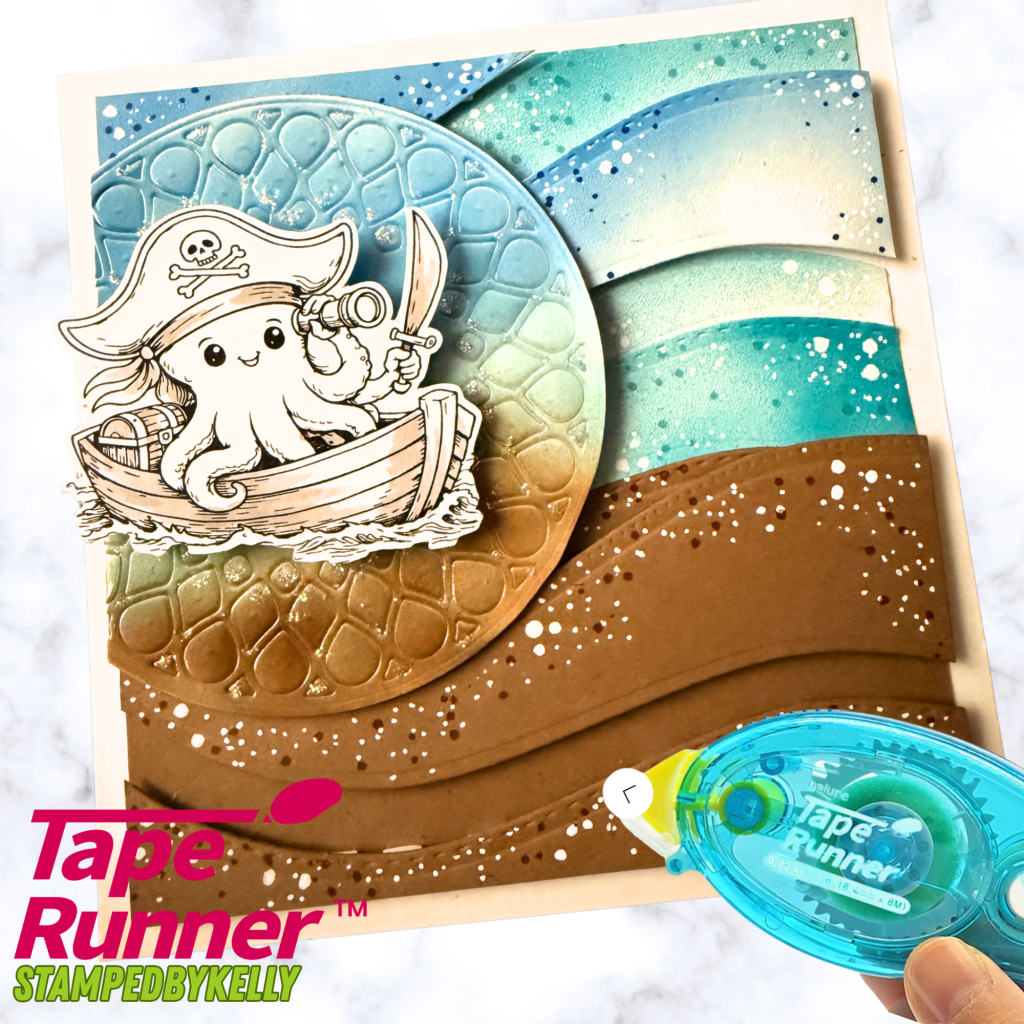
For my Pajama Crafter Stamps Summer Week project, I created a bright, beach-inspired square card featuring the adorable pirate octopus from the Kraken Good Day Stamp Set. It’s a playful reminder that summer is all about making waves, exploring new adventures, and having fun!

One of my favorite things about themed weeks is seeing how every designer interprets the same challenge in completely different ways. While some may create camping scenes or floral gardens, I decided to head straight to the beach with layered ocean waves and a cute little kraken pirate ready to sail into summer.


Creating the Background

The background is where this card really comes to life.

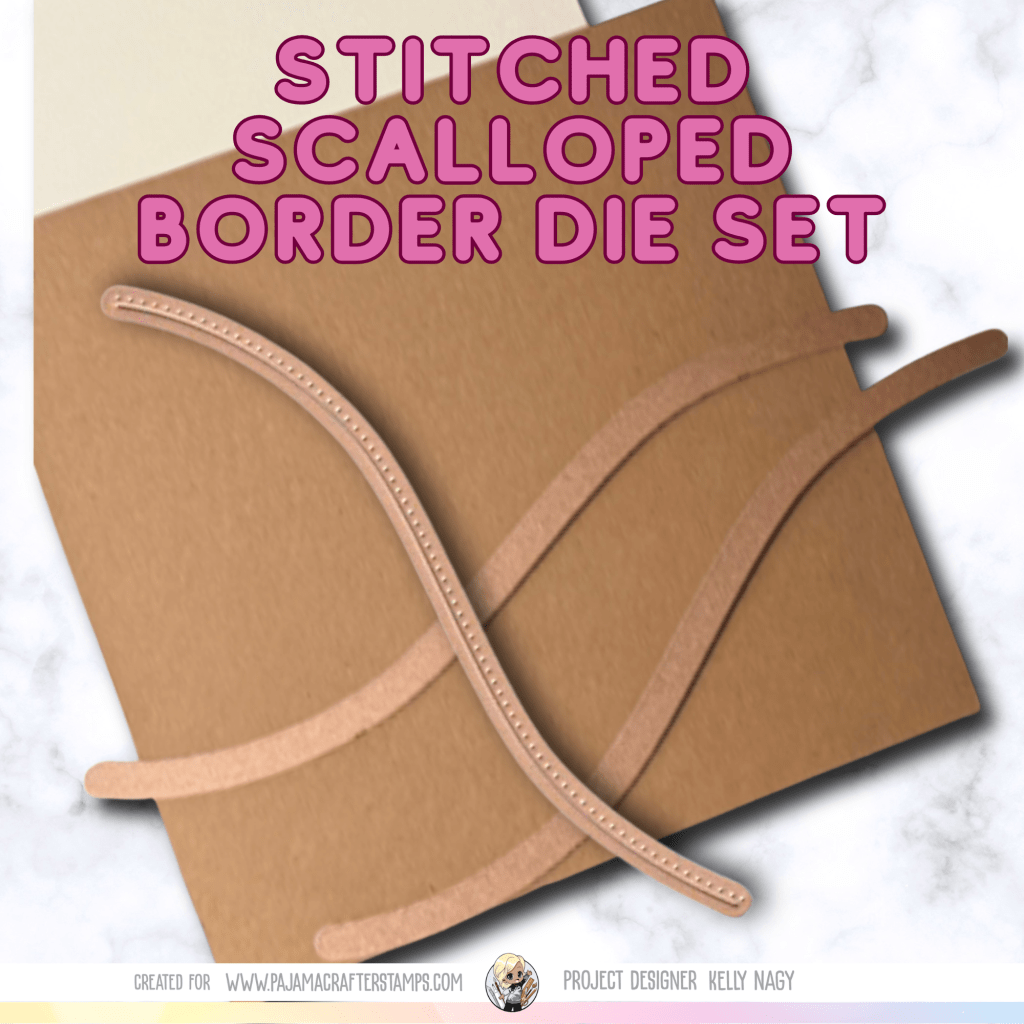
I began by die cutting multiple wave sections using the Stitched Scalloped Border Dies. Each layer was ink blended with shades of aqua, turquoise, and soft blue to create movement and depth. A few darker blue marker dots and plenty of white gel pen to create splatter to help give the look of sparkling ocean spray.

To ground the scene, I created sandy shoreline layers using warm kraft cardstock and added additional white dots with my white gel pen to create “splatter” for a whimsical beach feel. I do the same with brown marker dots in different sizes for added interest and texture, think “grains of sand.”


Adding Dimension & Movement

One of my favorite design elements is the large circle focal point. I cut a hole in the middle of the circle to allow me to pop-up a SPIN-CYCLE Micro Rotator, so my boat ROCKS!!!! Follow me on social media @stampedbykelly to see my reel in action!!!

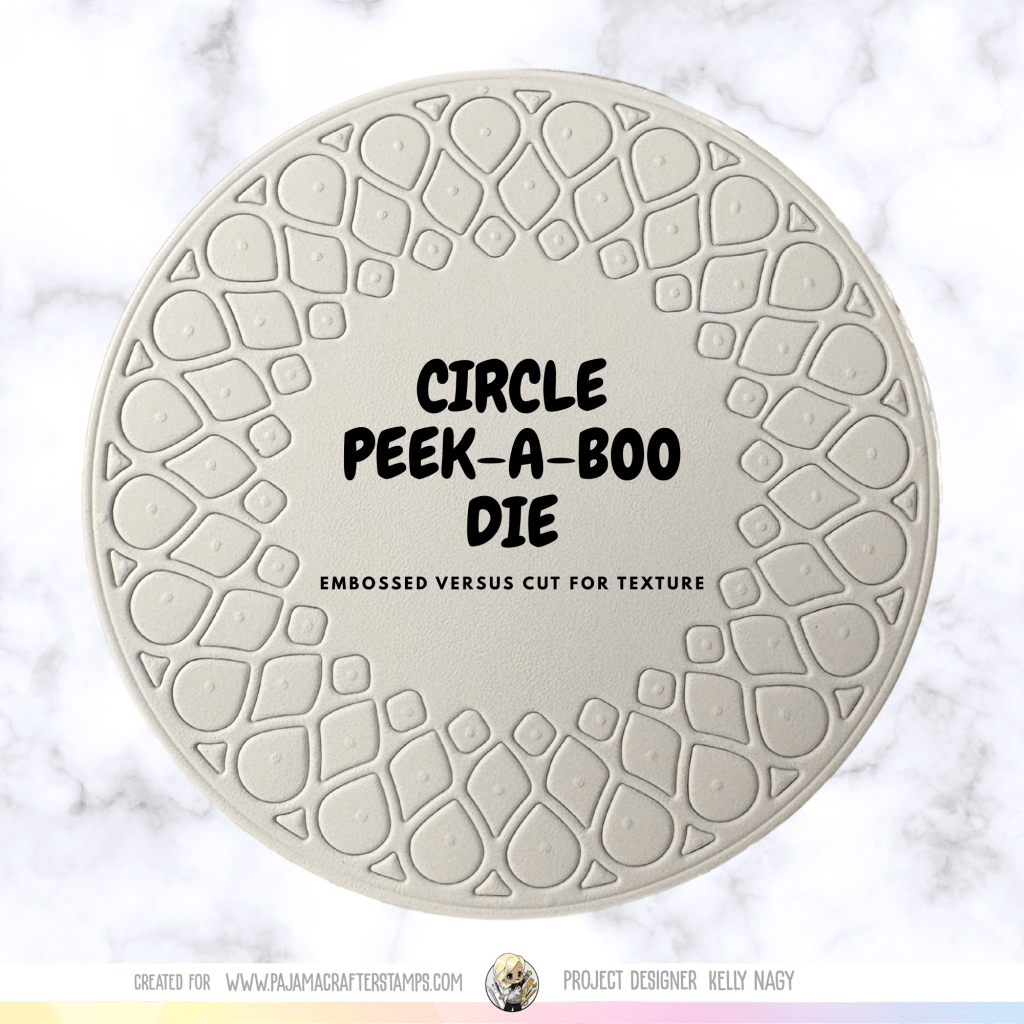
I used the Circle Peek-a-Boo Die to create a layered window effect behind my stamped image. The embossed circle adds wonderful texture while helping draw your eye directly to the adorable pirate octopus. I used 3D Galaxy Gloss, but you can achieve the same end result with items already in your stash! Do you have Crystal Effects, Glaze, Heat emboss with clear powder over your ink blended circle, clear Nuvo drops, clear paste or emboss or cut out of glossy cardstock.) These are all ways I add interest without added bulk.

The circle overlaps the waves and shoreline, giving the entire card a dimensional scene-building effect.


Coloring the Kraken

The star of the card is, of course, this sweet pirate octopus from the Kraken Good Day Stamp Set.

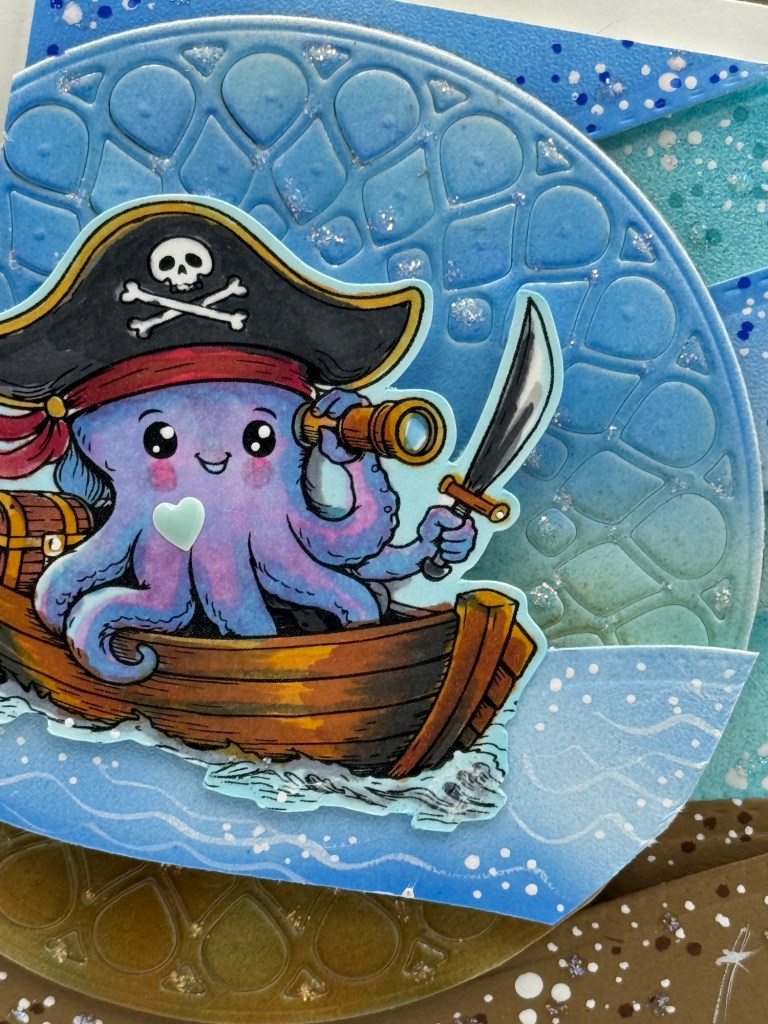
I colored him with Copic markers in cheerful shades of lavender and purple before adding warm wood tones to the boat and rich blacks and reds to his pirate hat. Small white gel pen highlights help bring the image to life.

His little telescope, treasure chest, and pirate sword make him ready for a full day of summer adventures.


Finishing Touches

To complete the design, I stamped the sentiment:

“You Octopi My Heart”

and die cut it using the Banner Die Set. The soft pink banner adds just enough contrast while balancing the overall composition.

Finally, I finished everything with:

  • White gel pen dots for splatter
  • Small heart embellishments
  • Foam adhesive for added dimension
  • Dry Adhesive at TapeRunner.com – use PROMO CODE KELLY10 for 10% off your cart.

Products Used


Summer Week at Pajama Crafter Stamps

This card is part of Summer Week at Pajama Crafter Stamps, where the design team is sharing projects inspired by everything summer means to us! From beach days and vacations to flowers, camping, fireworks, and sunshine, you’ll find a wide variety of creative ideas all week long using Pajama Crafter Stamps products.

Be sure to check out the inspiration from the entire Design Team—you’ll love seeing how everyone puts their own unique spin on the same summer theme!


Copic Color Suggestions

Octopus

  • V20
  • V22
  • V25
  • RV63 (cheeks)

Water

  • BG10
  • BG11
  • BG13
  • B00
  • B02

Boat

  • E33
  • E35
  • E37

Sand

  • E41
  • E43
  • E44

Hat

  • C7
  • C9
  • R24
  • R27

Tape Runner

I assembled my layered die cuts using my favorite adhesives from Tape Runner. Foam adhesive from my stash adds wonderful dimension between the waves and circle focal point, making the scene really pop.

🛒 Save 10% with my affiliate code KELLY10 at TapeRunner.com!


Affiliate Disclosure

This post contains affiliate links. If you choose to shop using my links or discount code, I may earn a small commission at no additional cost to you. Thank you for supporting my crafting journey!


Shop & Connect

🛍️ Shop Pajama Crafter Stamps:
https://pajamacrafterstamps.com/STAMPEDBYKELLYBLOG

🌐 Personal Blog:
https://stampedbykelly.blog/

📘 Facebook:
https://www.facebook.com/share/1AXb2TKCzt/?mibextid=wwXIfr

🧵 Threads:
https://www.threads.com/@stampedbykelly
Thank you so much for stopping by! I hope this cheerful pirate octopus inspires you to create something that reminds you of summer. Whether it’s sunshine, sandy beaches, or sailing off on a new adventure, there’s no wrong way to celebrate the season with stamps! 🌊🐙☀️

Three Different Projects, One Amazing Scrappy Boy Stamps’ Release!

Create three unique handmade cards using the newest Scrappy Boy Stamps products including the Graduation Pop-Up Envelope Add-On, Wandering Time Keeper and Legendary Suit Builder. Plus learn about the current 25% Off Sale. TapeRunner.com use KELLY10 for 10% OFF.

There are releases that focus on one theme, and then there are releases like this one that offer something for everyone! This collection includes graduation, sci-fi inspired, and masculine designs, making it easy to create cards for a variety of occasions.

For today’s projects, I created three completely different cards, each highlighting a different new product while mixing in Scrappy Boy patterned papers and layered die-cut elements for added dimension and interest. Two have an INTERACTIVE element! Can you guess what they are?

If you’ve had your eye on adding to your Scrappy Boy collection, now is also a great time to shop! Their Happy 250th Birthday, America! sale is happening through July 7, with 25% off stamps, outline dies, and card dies (excluding products released within the last three months).


Project 1 – A2 Card

Featuring Graduation Pop-Up Envelope Add-On Die Set

Celebrate the Class of 2026 with layered graduation caps, bright patterned paper, and clean embossed details. I layered a yellow polka-dot pattern to draw attention to the tassels using the LEGENDARY LOVE STORY 6×9 PAPER PACK. The overlapping caps create wonderful dimension while keeping the design simple and elegant. INTERACTIVE ELEMENT: One cap spins for added interest. Get your Motion Spinners here!

Check out how fun this is!!

Dots Tape Runner makes placement of detailed die cuts, a breeze! You can rub any overage easily off.

Project 2: A2 Card featuring fun scraps from the negative piece of the shaker bit plate with planets.

Wandering Time Keeper

This card pairs the adorable Wandering Time Keeper with the 6 x 9 Paper Pack of the same. I rendered an image hoping to show you how I used up my scraps to create this fun background.

Cut a metallic card with outline die, split down middle, to create a fun shadow to set off the robot!

Project 3

Legendary Suit Builder die featuring Legendary Love Story 6×9 Paper Pack

Masculine cards don’t have to be difficult! The Legendary Suit Builder creates a sophisticated focal point, while the tiny rubber duck adds a playful surprise. He spins, too!!!

Check it out below!👇


Scrappy Boy Products Used….


Adhesives

These projects were assembled using a combination of wet and dry adhesives. Foam double-Stick Squares.

My favorites continue to be:

Bearly Art Precision Craft Glue for detailed die cuts and layered elements. Pajama Crafter Stamps

TapeRunner.com adhesives for fast, clean assembly.

🛒 Save 10% with code KELLY10 on your cart only on TapeRunner.com


Current Sale

🇺🇸 Happy 250th Birthday, America!

🎉 25% OFF

  • Stamps
  • Outline Dies
  • Card Dies

📅 July 3–July 7

Discount automatically applied at checkout. Excludes products released within the last three months.


Shop & Connect

🛒 Shop:
https://scrappyboy.com

📘 Follow me on Facebook:
https://www.facebook.com/share/1AXb2TKCzt/?mibextid=wwXIfr

🧵 Threads:
https://www.threads.com/@stampedbykelly
📺 YouTube:
https://www.youtube.com/@StampedbyKelly
🌐 Blog:
https://stampedbykelly.blog/

🇺🇸 Celebrating Freedom and Milestones | Pajama Crafter Stamps Inspiration Hop

Celebrate freedom with a fun patriotic easel card featuring the NEW Freedom Isn’t Free stamp set paired with the versatile Forever 29 Cake stamp set and Vintage Americana 6×6 patterned papers from Pajama Crafter Stamps. See how these products come together to create a festive display card perfect for honoring those who serve. TapeRunner.com use promo code KELLY10 for discount.

Welcome friends! Today I’m excited to share my latest project for the Pajama Crafter Stamps Adventure Awaits Inspiration Hop! This special hop is filled with creative projects inspired by courage, patriotism, service, and unforgettable journeys.

For my project, I wanted to celebrate a very special milestone—America’s 250th Birthday in 2026! I created a dimensional easel card featuring a festive red, white, and blue birthday cake surrounded by adorable service members representing the various branches of the military. A loyal K9 companion adds the perfect finishing touch to this tribute to those who serve.

Featuring Pajama Crafter Stamps June 2026 Release

🇺🇸 Join the Instagram Hop!

The Adventure Awaits Inspiration Hop is officially underway over on Instagram! Be sure to hop along with the Pajama Crafter Stamps Design Team for inspiration featuring themes of:
  • Adventure
  • Military and patriotic projects
  • Heroic journeys
  • Nautical fun
  • Courage and strength
  • Legendary tales and imaginative scenes

There are so many incredible projects to discover, and you won’t want to miss all the creativity!

Follow me on Instagram: @StampedByKelly

✨ About My Card
This easel card was designed to honor both our nation’s 250th anniversary and the men and women who serve. I combined bright patriotic colors, playful characters, and lots of sparkle to create a keepsake card that can be displayed and enjoyed long after the celebration.

The layered design creates wonderful dimension while the large “250” topper makes the occasion the star of the show.


❤️ Products Used

🇺🇸 New Release Product

❤️ Freedom Isn’t Free Stamp Set

🤍 Coordinating Products

🤍 Forever 29 Cake Stamp Set

💙 Vintage Americana 6×6 Patterned Paper Pack

❤️ Holographic Specialty Cardstock

🤍 Die-cutting machine

💙 Copic markers

❤️ White gel pen accents

🤍 Glitter embellishments and gems


🎨 Copic Marker Colors

Skin

  • E000
  • E00
  • E11
  • R20

Hair

  • Y21
  • Y26
  • E35

Navy Blue

  • B24
  • B26
  • B29

Red

  • R24
  • R27
  • R59

Gold

  • Y21
  • Y26
  • Y28

Gray/White Accents

  • C1
  • C3
  • C5

🇺🇸 A Card with Meaning

As we look ahead to celebrating America’s 250th birthday, I wanted this card to reflect gratitude and appreciation for the brave men and women who protect our freedoms. The combination of the NEW Freedom Isn’t Free Stamp Set with the versatile Forever 29 Cake Stamp Set made it easy to create a festive patriotic celebration with a meaningful message.

Thank you so much for stopping by! I hope this project inspires you to create something meaningful and to join us for the Pajama Crafter Stamps Adventure Awaits Inspiration Hop.

Happy crafting!

💕 Kelly


Shop the Products

If you’d like to recreate this project, you can find these products and so much more using my affiliate link:

Click here to see the whole release!

(Affiliate links are used at no additional cost to you. They simply help support my crafty adventures and are always appreciated!)

Supplies Used

🇺🇸 Freedom Isn’t Free Stamp Set (NEW!)
🇺🇸 Forever 29 Cake Stamp Set
🇺🇸 Vintage Americana 6×6 Patterned Paper Pack
🇺🇸 Holographic Specialty Cardstock
🇺🇸 Copic Markers
🇺🇸 White Gel Pen
🇺🇸 Glitter Embellishments and Gems

Check out Pajama Crafter Stamps

Best Day Ever! A Summer Throwback with Scrappy Boy Stamps

Looking for creative ways to stretch your stash? Today I’m sharing a fun summer beach card featuring the Scrappy Boy Stamps Butt Cracker Fairies set. This throwback project transforms a whimsical Christmas stamp into a cheerful Father’s Day and summer-themed card with creative color placement, Copic coloring, and scene-building dies. If you love humorous cards, beach scenes, and finding new ways to use older stamp sets, this project is sure to bring a smile!​

Sometimes the best inspiration comes from revisiting older favorites!

With sneak peeks for the upcoming Scrappy Boy Stamps release beginning later this week, I thought it would be fun to dust off an older set and give it a completely different look. Who says Christmas stamps have to stay Christmas?

Using one of the adorable characters from the Butt Cracker Fairies set, I transformed his pink tutu into a colorful inner tube and created a relaxing beach scene that is perfect for Father’s Day, National Smile Power Day, or just celebrating summer.


Stretch Your Stash with Creative Color Placement

One of my favorite things about cardmaking is finding unexpected ways to use products already in my collection. A simple change in color can completely change the mood and purpose of a stamp.

What began as a whimsical Christmas image became a happy summer scene featuring:

  • A peaceful sunset
  • Sparkling ocean waves
  • Sandy beaches
  • A curious little crab
  • A message in a bottle
  • And one happy beach bum enjoying the “Best Day Ever!”

Products Used

Stamps

  • Butt Cracker Fairies – Scrappy Boy Stamps

Dies

  • Under the Sea Builder Die
    • Crab
    • Fish
    • Bottle accent
  • Stitched Clouds, Sun and Lightning Bolt Die Set
    • Sun
    • Clouds

Sentiments

  • “Best Day Ever”
  • “Whee!”


Copic Marker Combinations

Skin

  • E000
  • E00
  • E11
  • R20 (cheeks)

Hair and Beard

  • E25
  • E27
  • E29
  • E49
  • Copic Multiliner Pen 0.05

Green Swimsuit

  • YG03
  • YG17
  • G05
  • G07

Rainbow Inner Tube

Red

  • R24
  • R27
  • R59

Yellow

  • Y11
  • Y15
  • Y38

Blue

  • B02
  • B05
  • B18

Sand

  • E41
  • E42
  • E43
  • W3
  • White GellyRoll Pen 10

Ocean

  • BG72
  • BG75
  • B97

Sunset Sky

  • YR000
  • YR04
  • RV10
  • RV13

Clouds

  • C00
  • C1

Sun

  • Y11
  • Y15
  • Y38

Crab

  • R22
  • R24
  • R29

Fish

  • BV00
  • BV02
  • BV04


Where to Find These Products

Most of the products used on this card can be found at:

Scrappy Boy Stamps

http://www.scrappyboy.com

You may also find some products through:

Scrapbook.com

I always recommend checking both sites. Sometimes an item may be sold out at one retailer but still available at the other, making it easier to track down those favorite sets and dies.


Thank you for stopping by today! I hope this little throwback project inspires you to revisit some older favorites and discover new ways to use the products already in your stash.

And be sure to stay tuned—Scrappy Boy Stamps sneak peeks begin later this week, with the newest release arriving this weekend. I can’t wait to share what’s coming next!

Happy crafting!

Kelly
@StampedByKelly