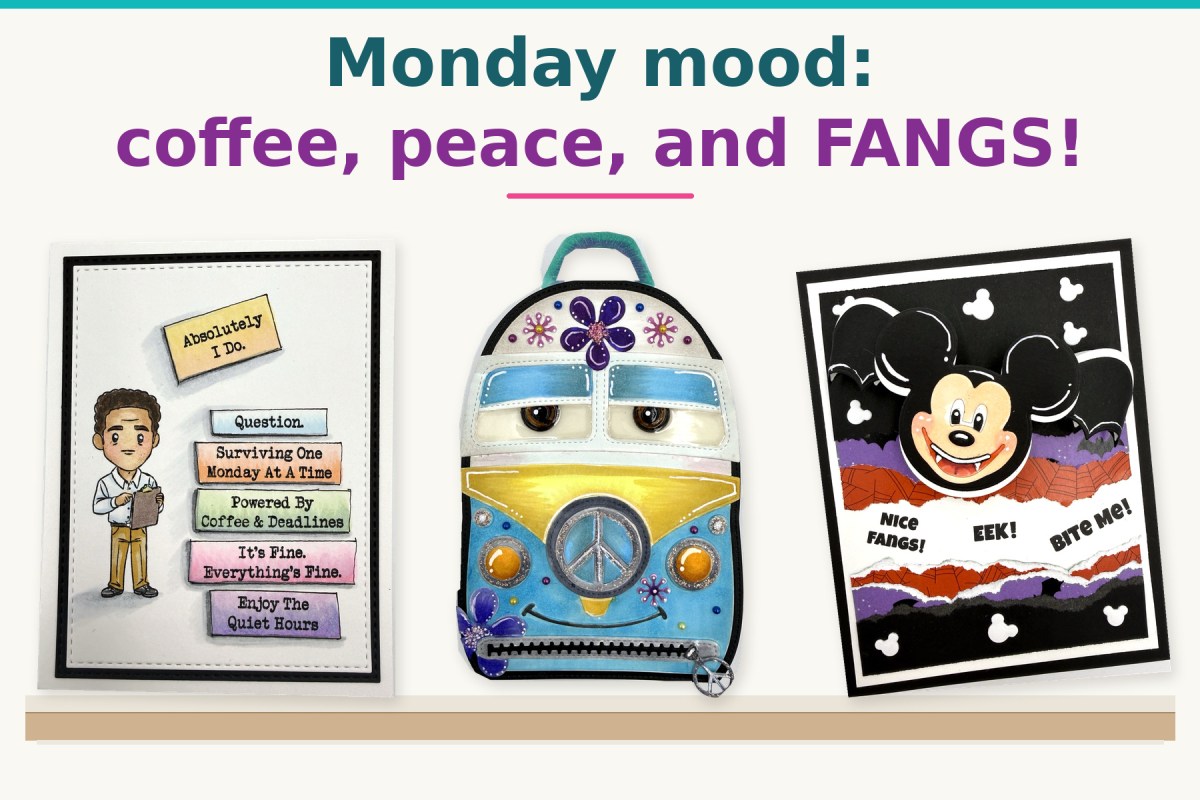
Going Batty with the New Scrappy Boy Stamps Halloween Release!

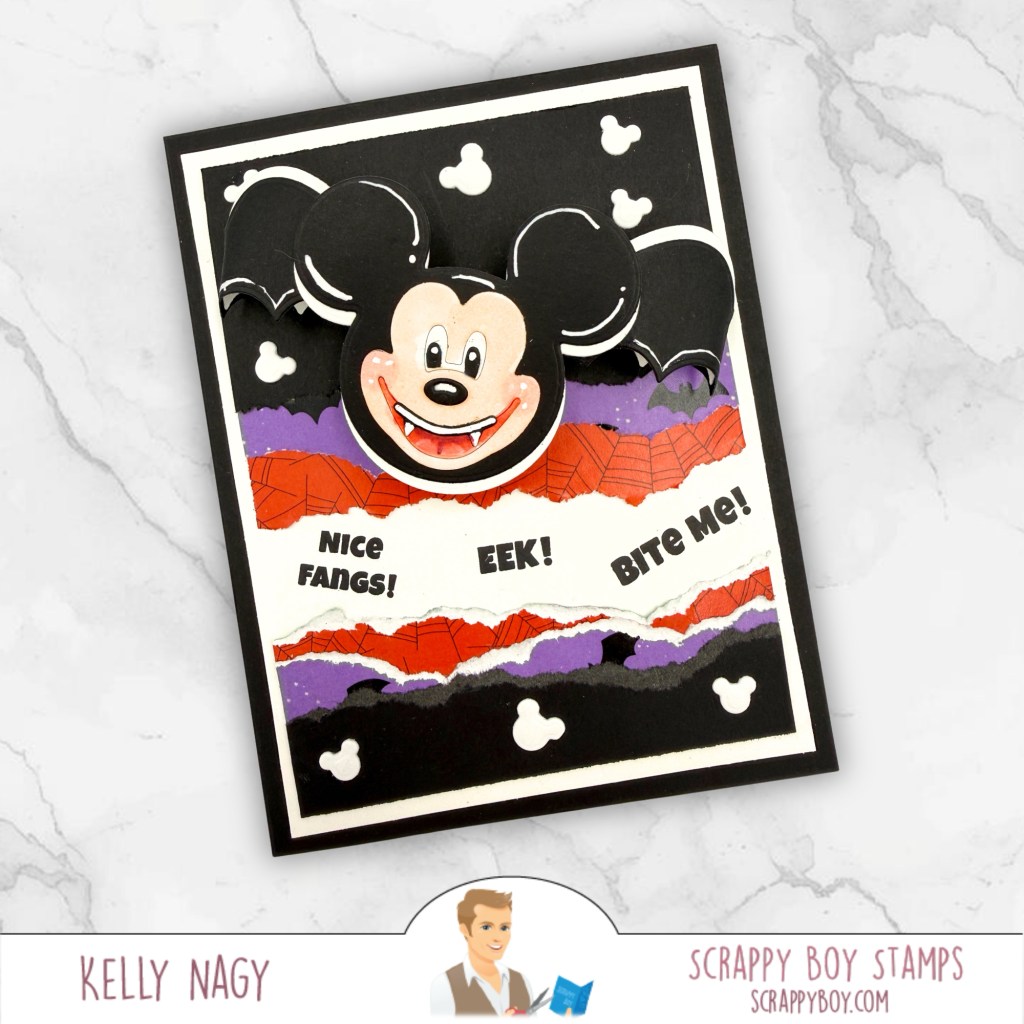
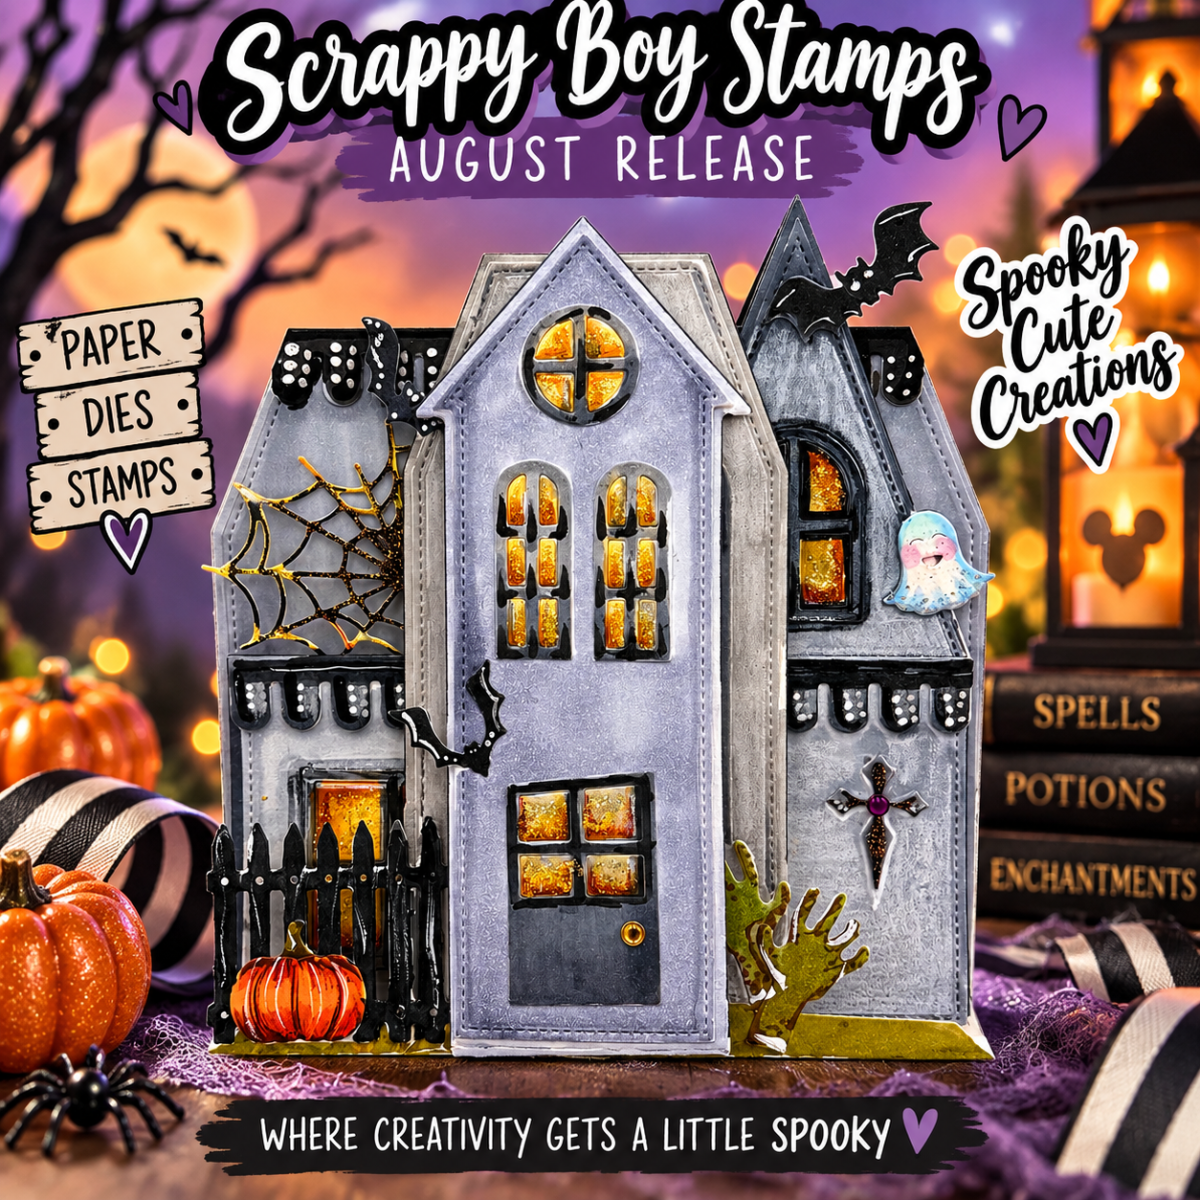
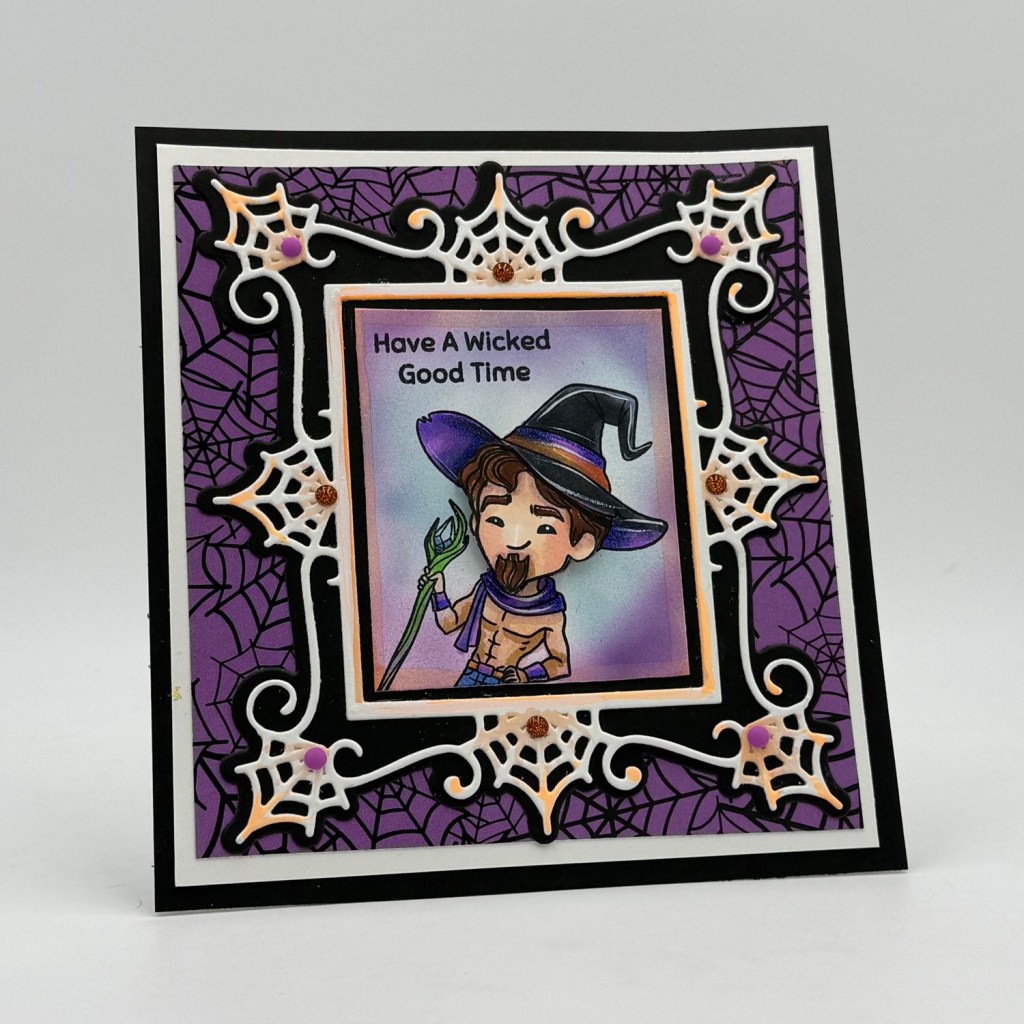
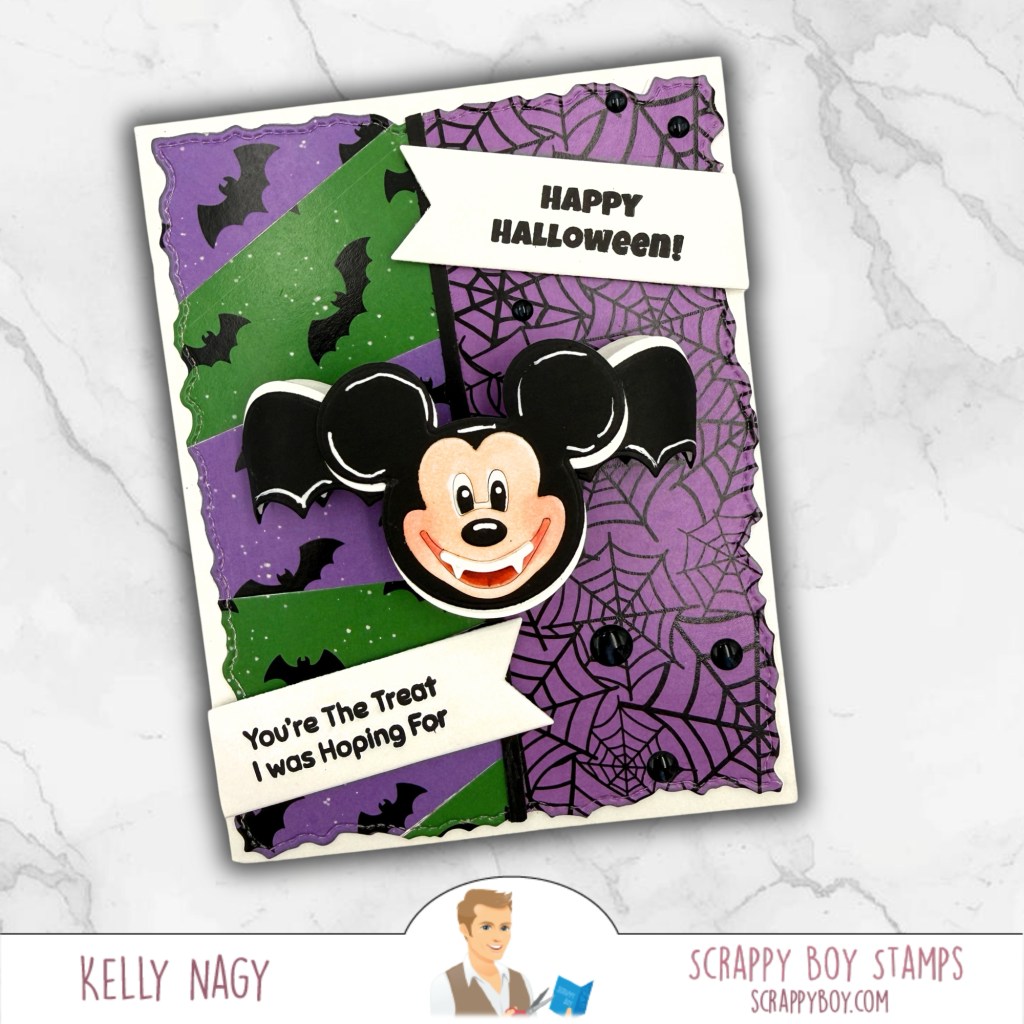
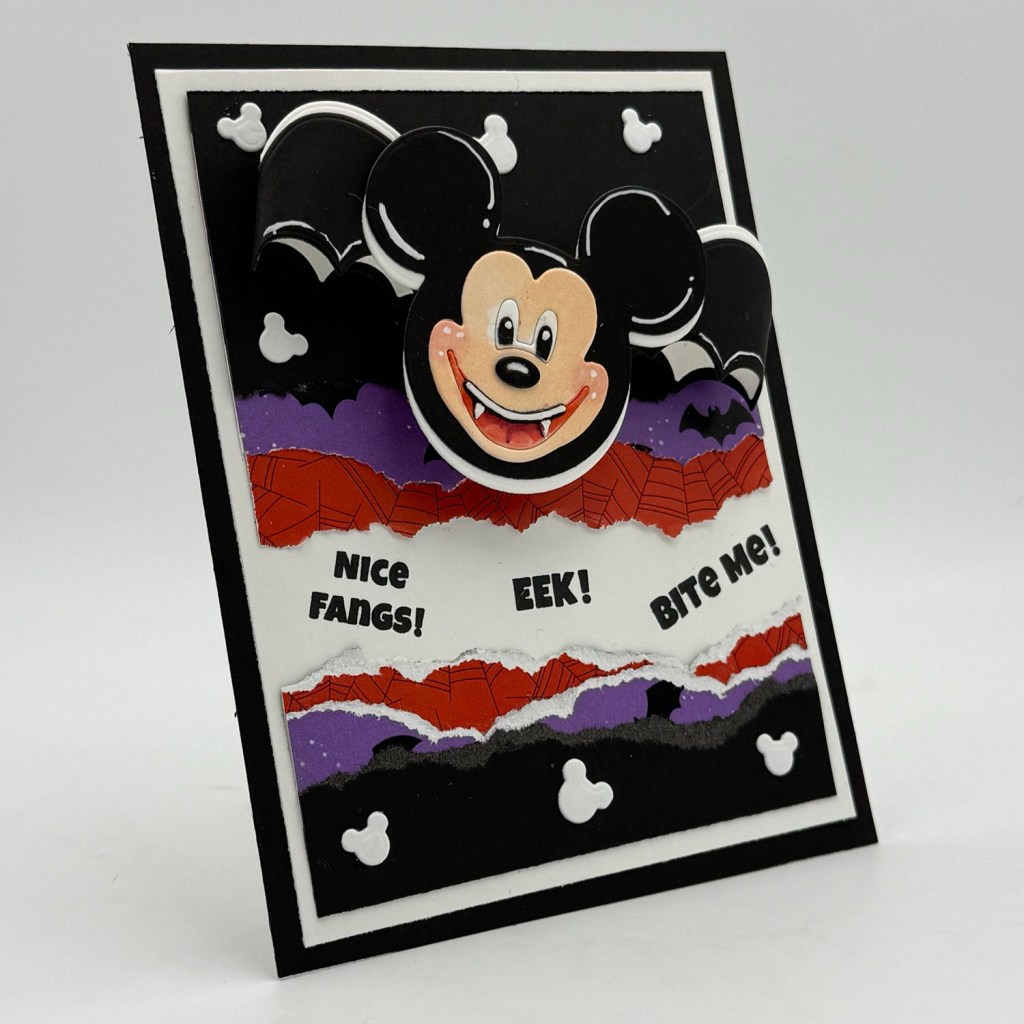
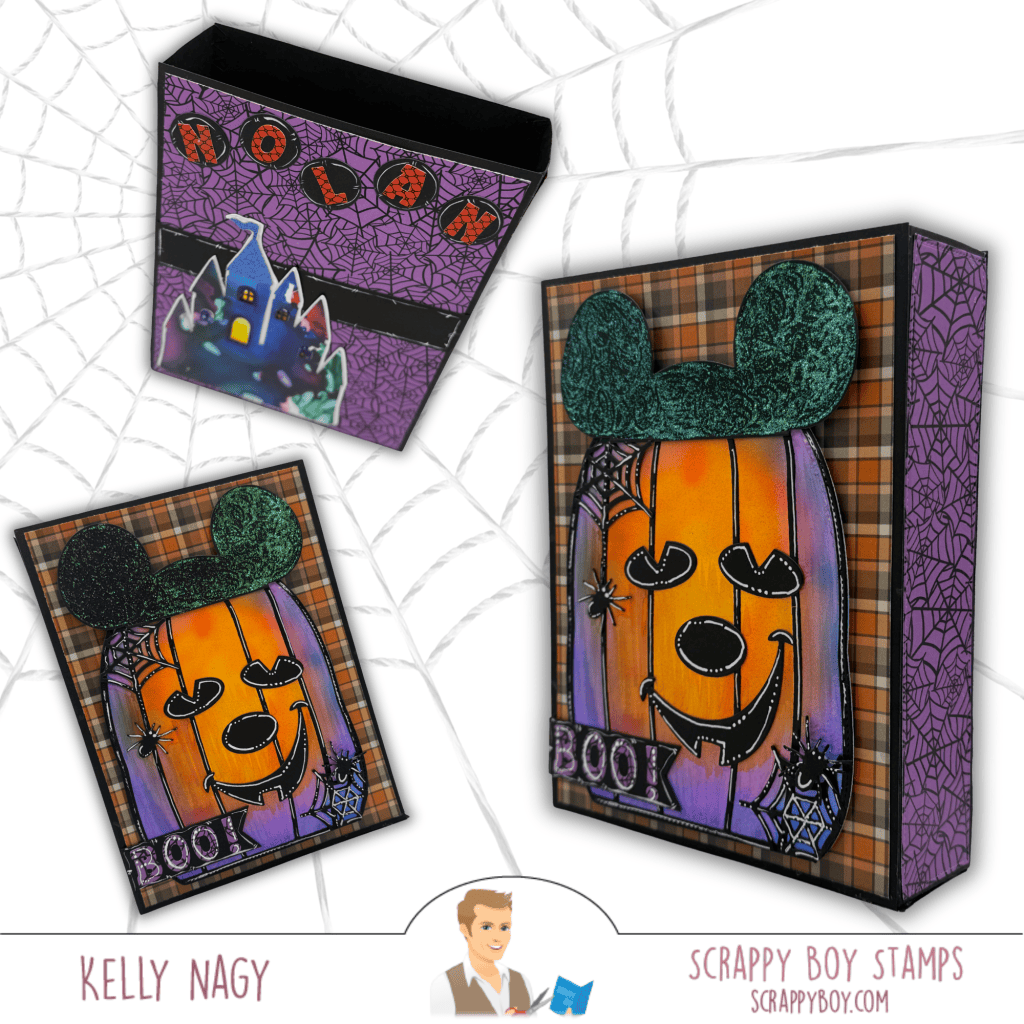
Create two colorful Halloween cards featuring the newest Scrappy Boy Stamps release—the Hex Appeal I Want It All Bundle, Spooky Bat Mouse Embellishment Die, Mouse Ears Alphabet & Numbers Dies and Gothic Picture Frame.

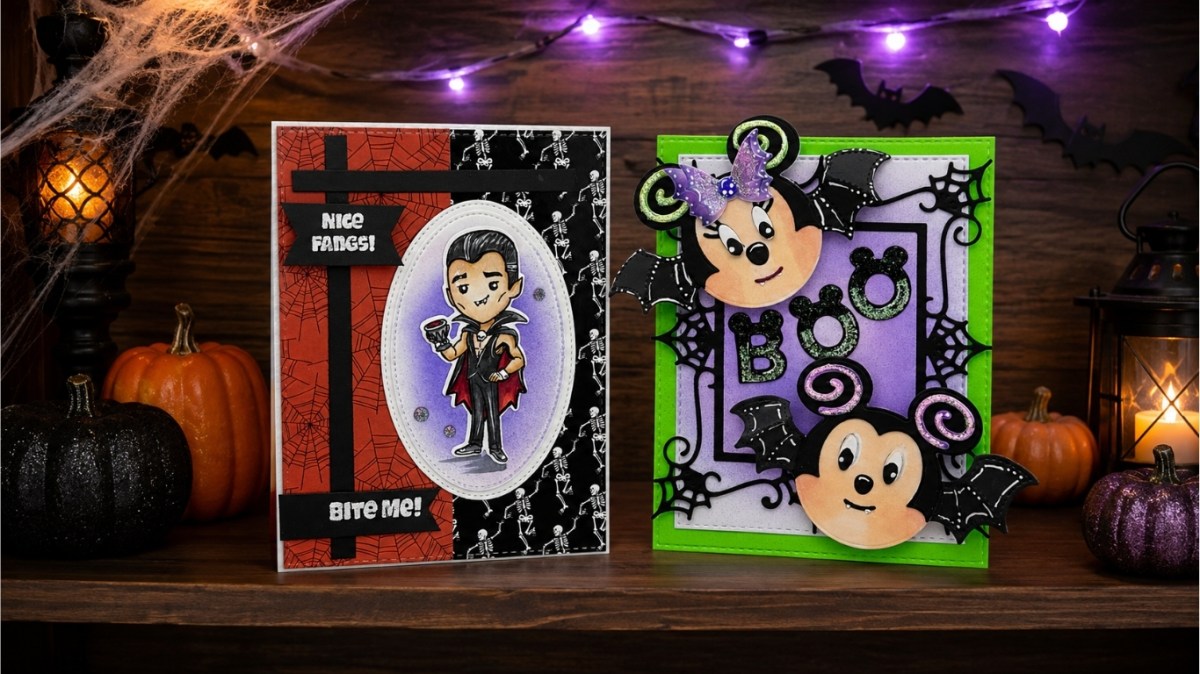
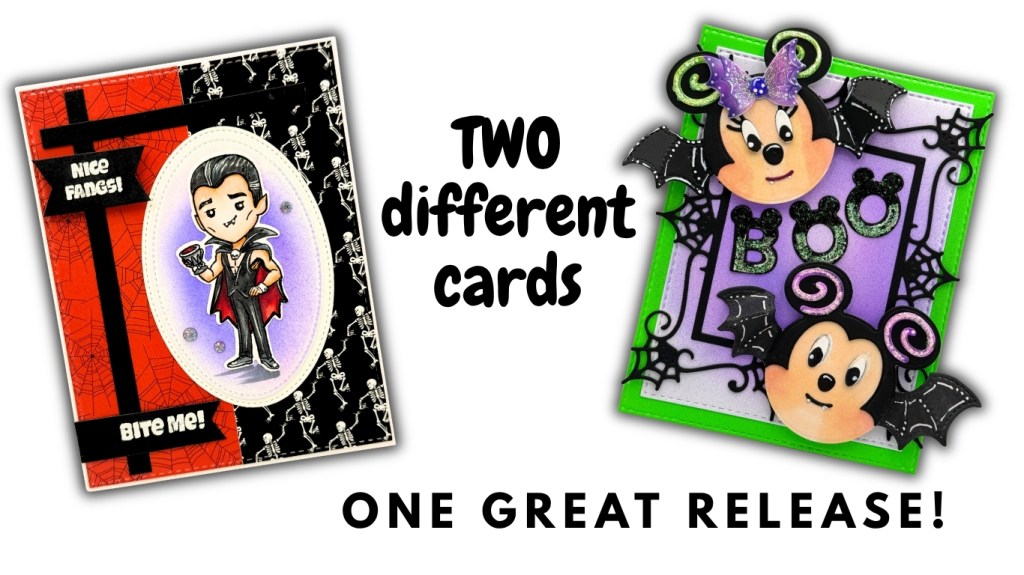
Halloween crafting is in full swing, and today I’m sharing two frightfully fun projects featuring the newest release from Scrappy Boy Stamps! From a charming vampire to the cutest little bat mice, these cards are filled with bright colors, playful details, and just the right amount of spooky sparkle.

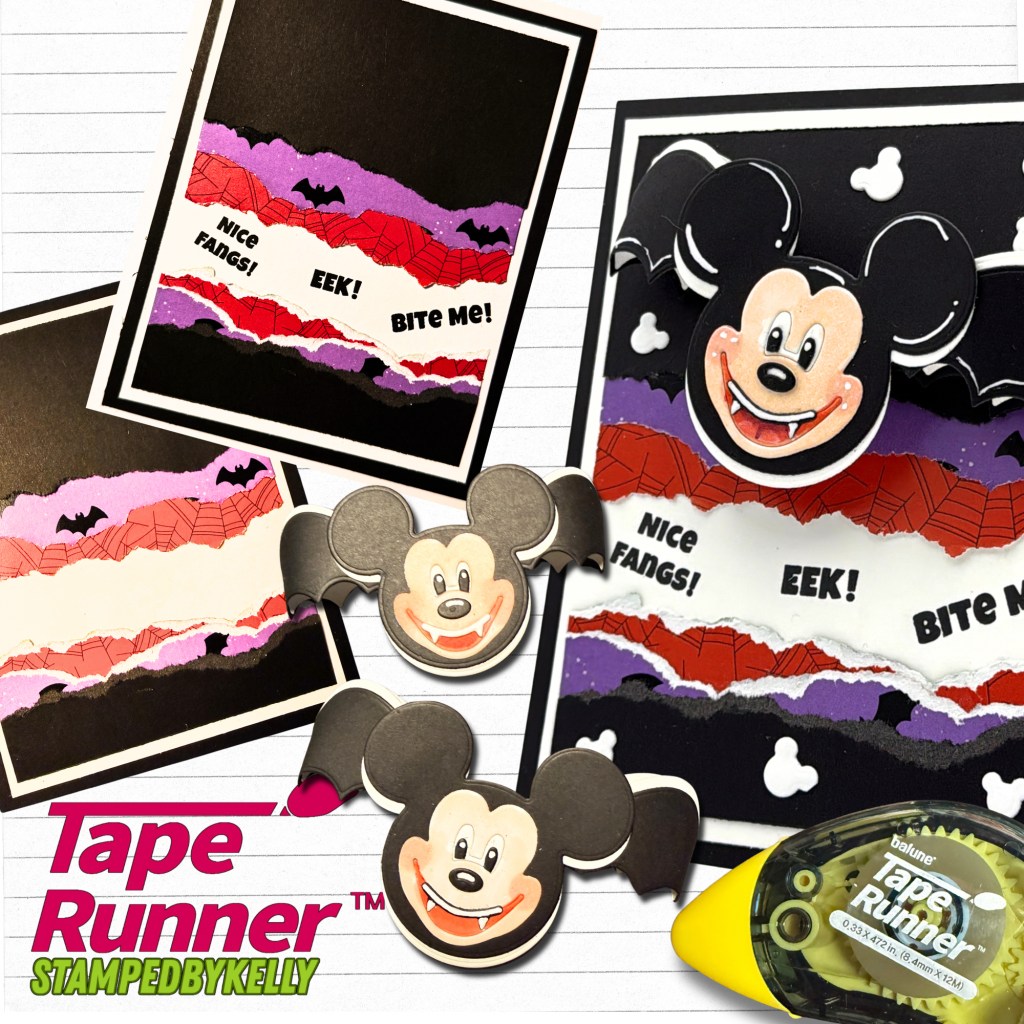
Two Halloween cards featuring the newest release from Scrappy Boy Stamps

Hex Appeal August Sketch Challenge Card

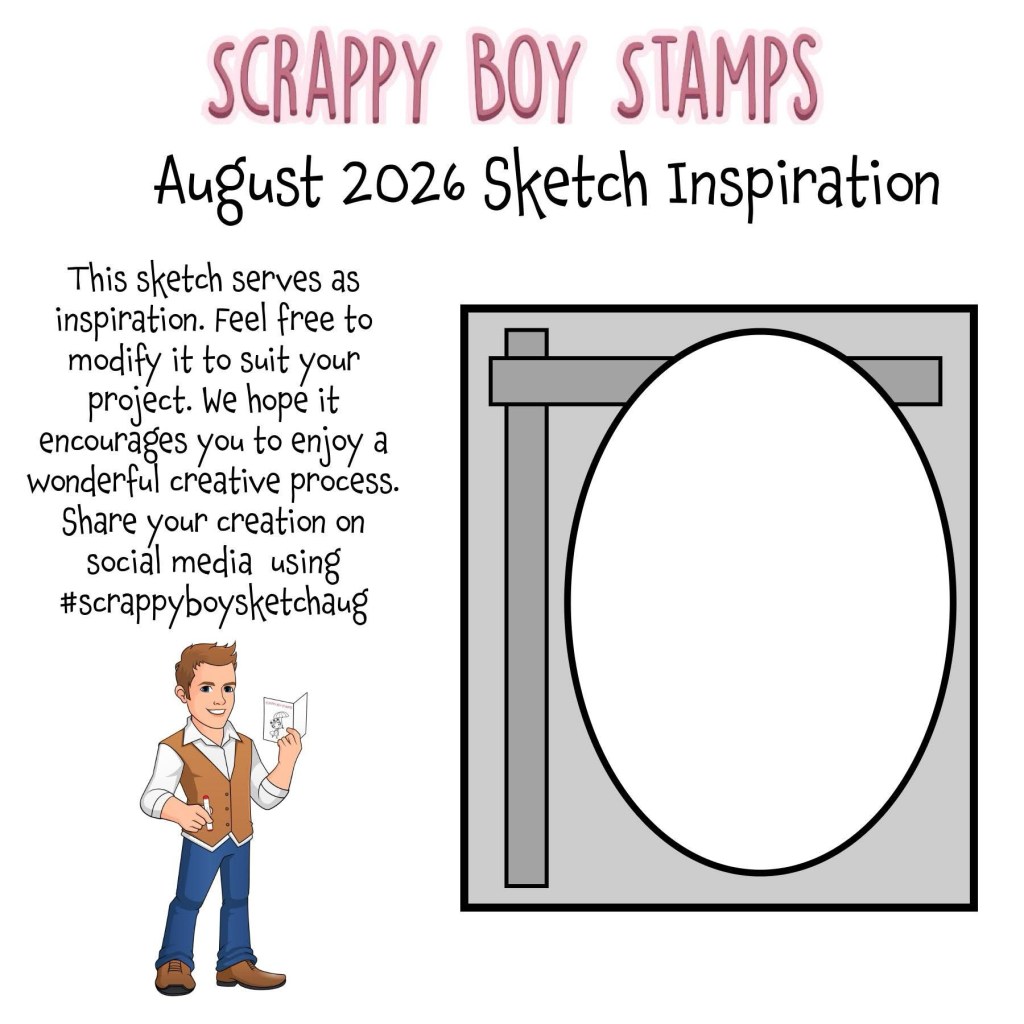
My first project is squeaking in just in time for the final day of the Scrappy Boy Stamps August Sketch Challenge!

Scrappy Boy Stamps August 2026 Sketch Inspiration.

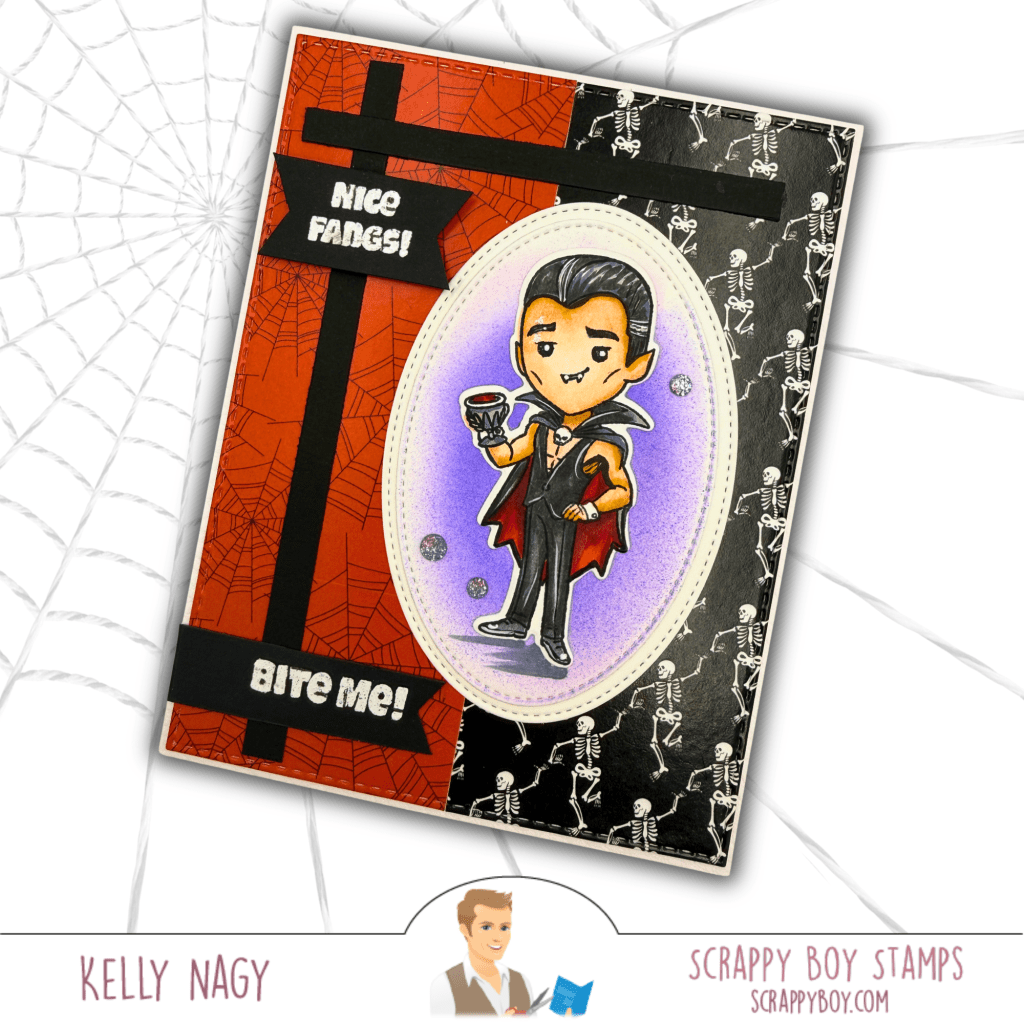
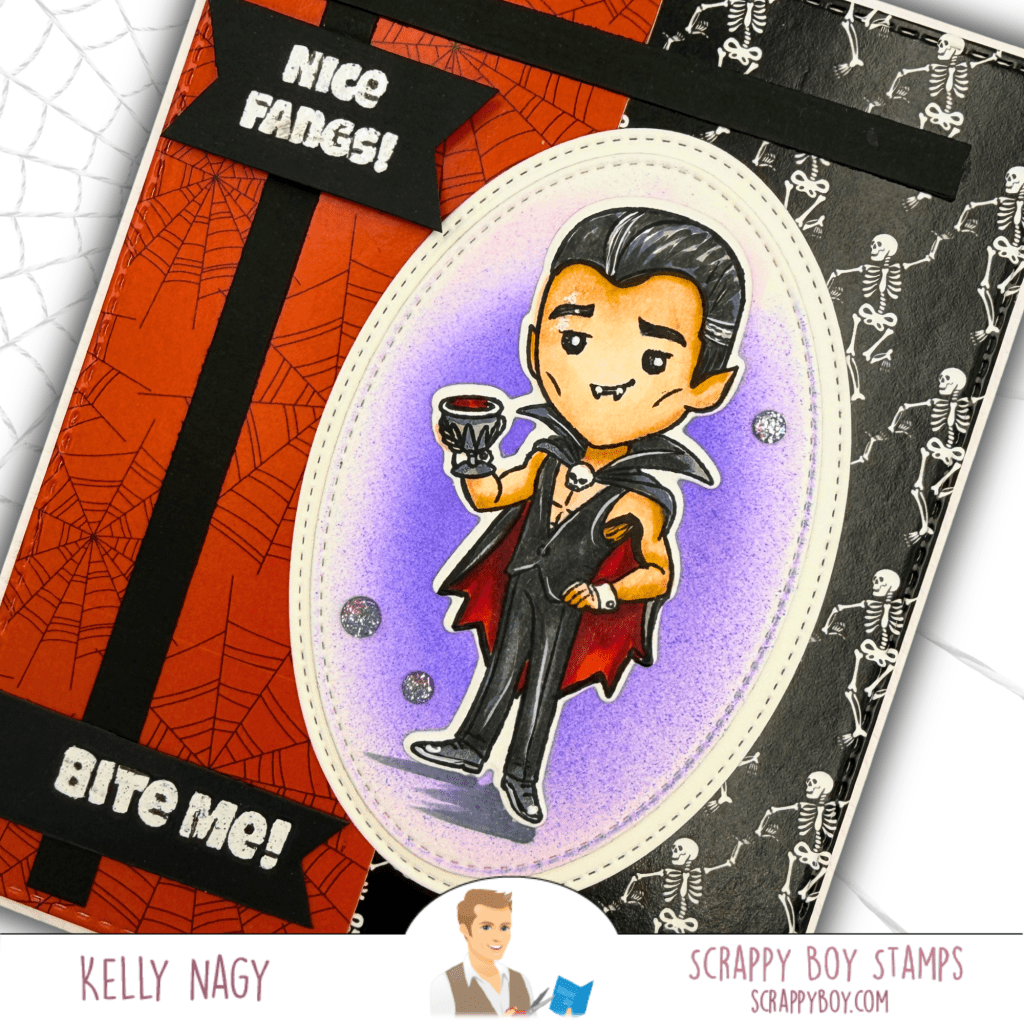
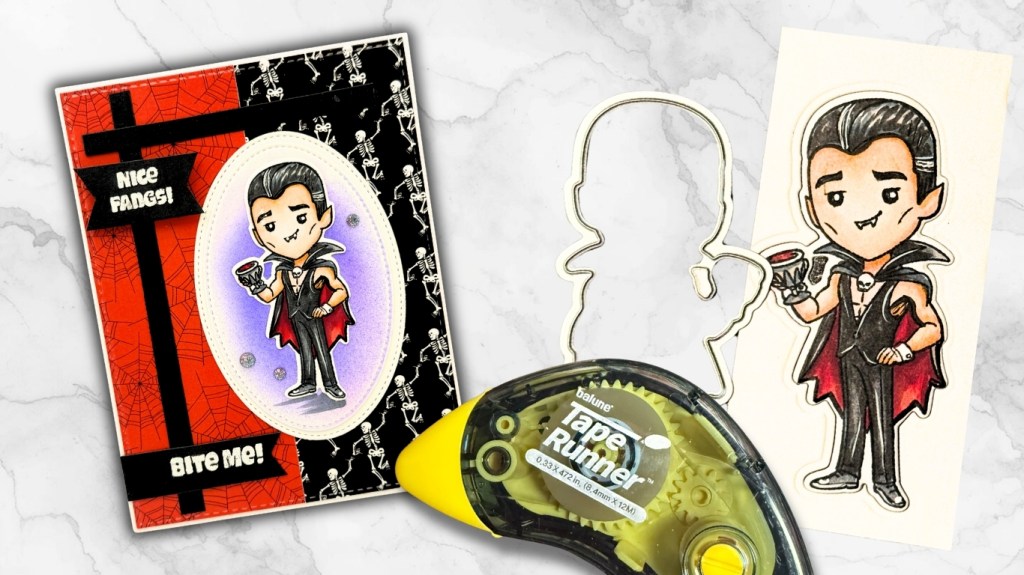
I used the Hex Appeal I Want It All Bundle to create this handsome little vampire card. The August sketch inspired the bold layout, including the vertical and horizontal cardstock strips and the large oval focal point.

The orange spiderweb paper and black skeleton pattern create a classic Halloween color combination, while the softly colored purple background helps the vampire stand out. The heat-embossed “Nice Fangs!” and “Bite Me!” sentiments add a playful finishing touch.

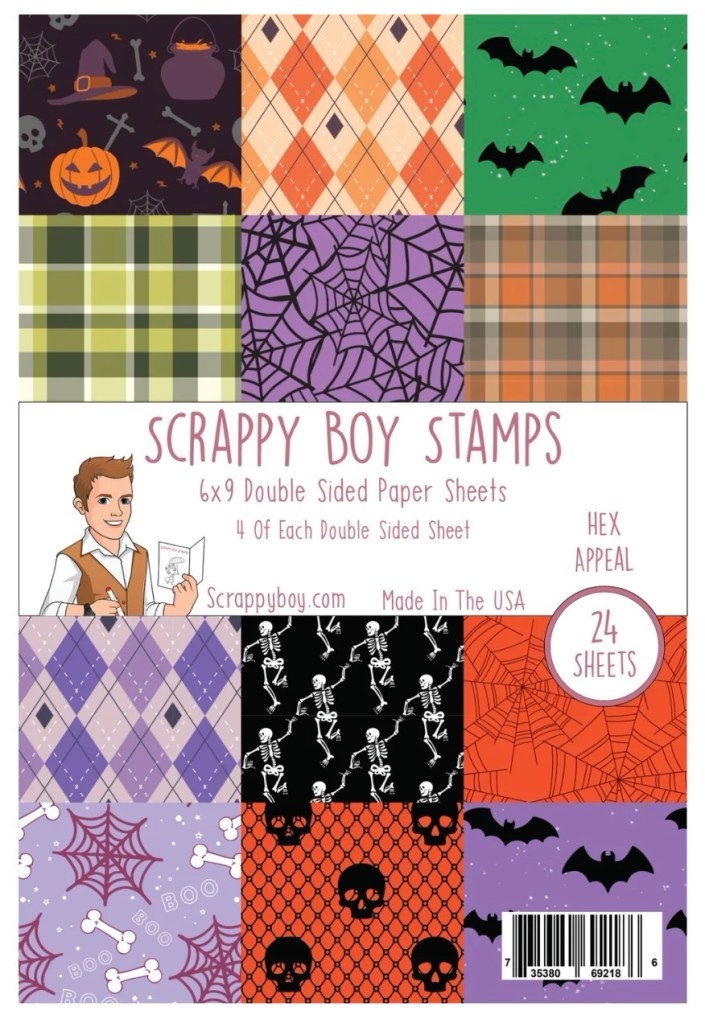
Hex Appeal Coordinating Paper Pack

A few sparkly embellishments, dimensional layers, and stitched details complete this fang-tastic design!

Close Up to show layers. Stitched Oval Nesting Dies from Scrappy Boy Stamps

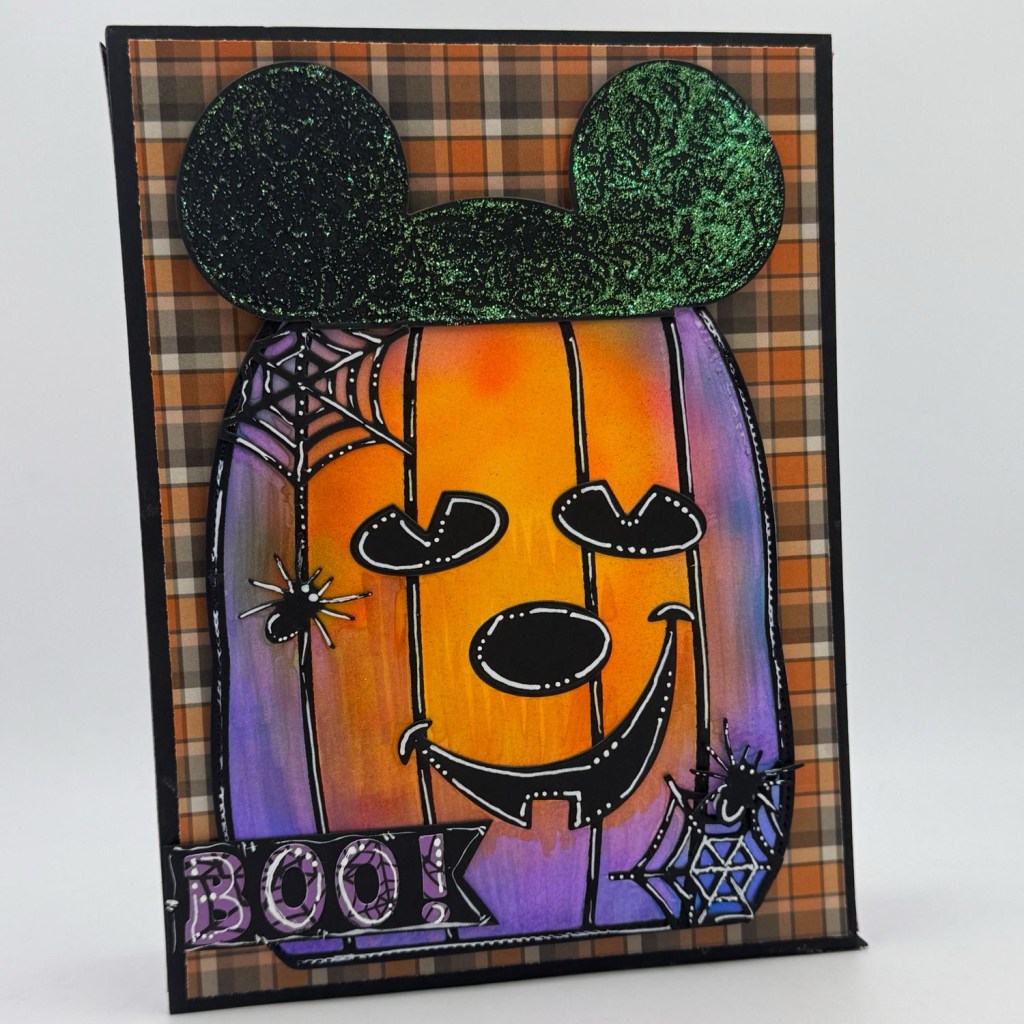
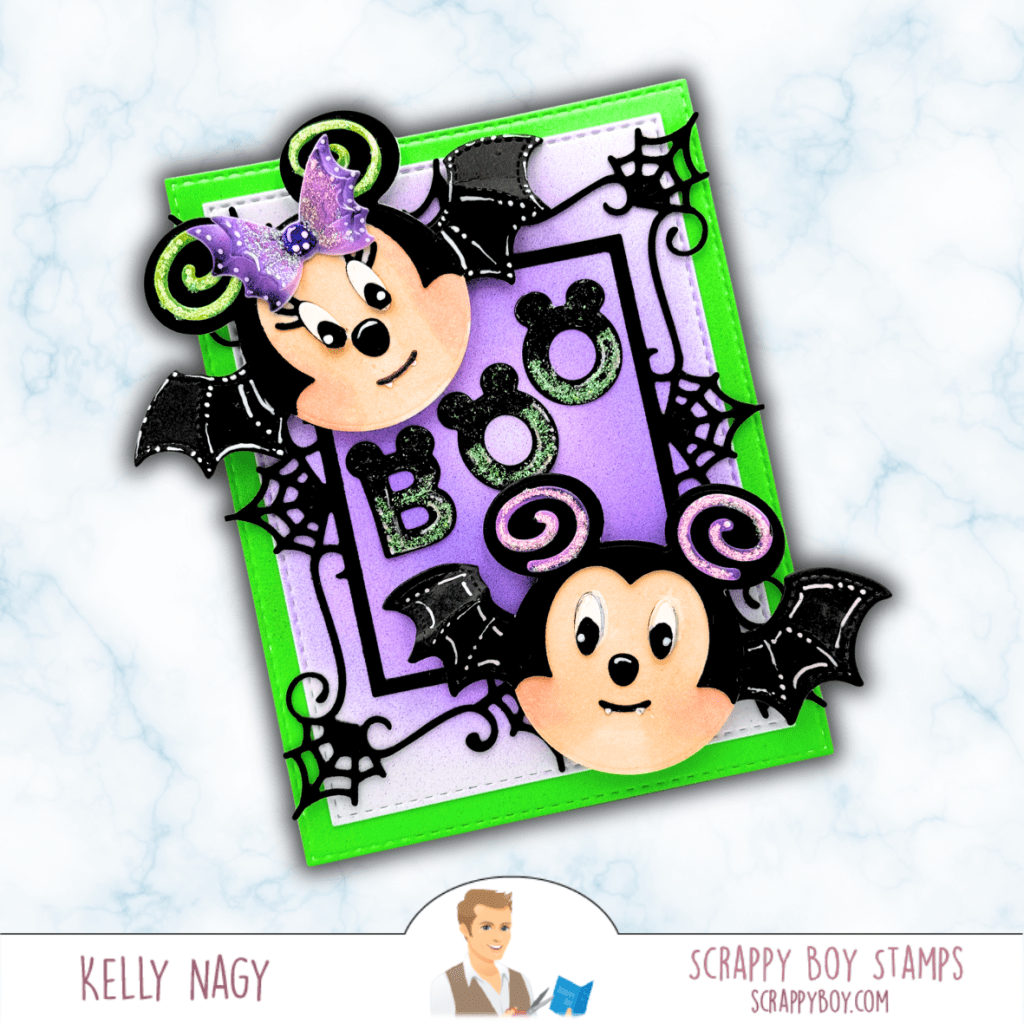
Spooky Bat Mouse Halloween Card

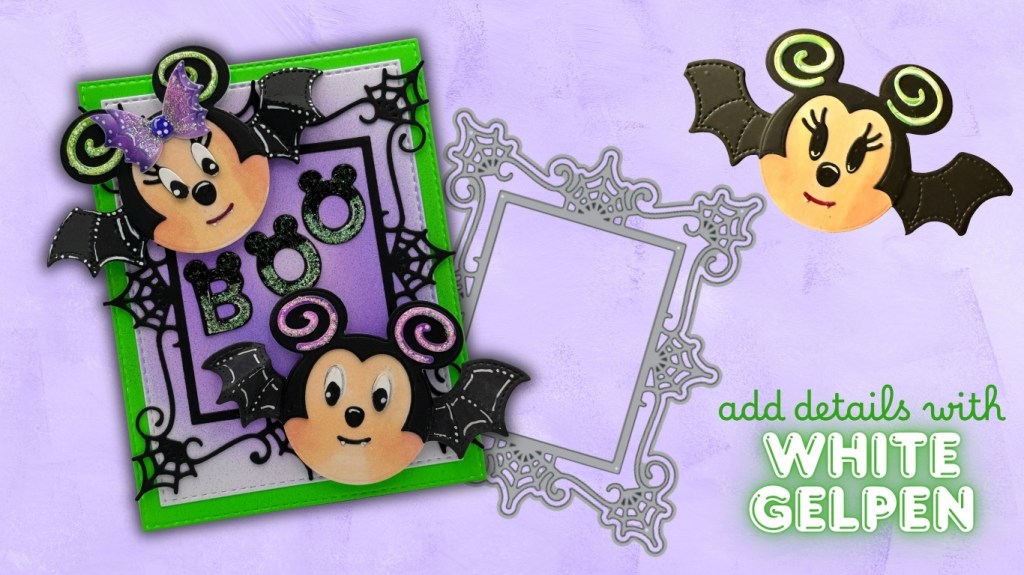
For my second project, I paired the adorable Spooky Bat Mouse Embellishment Die with the dramatic Gothic Picture Frame.

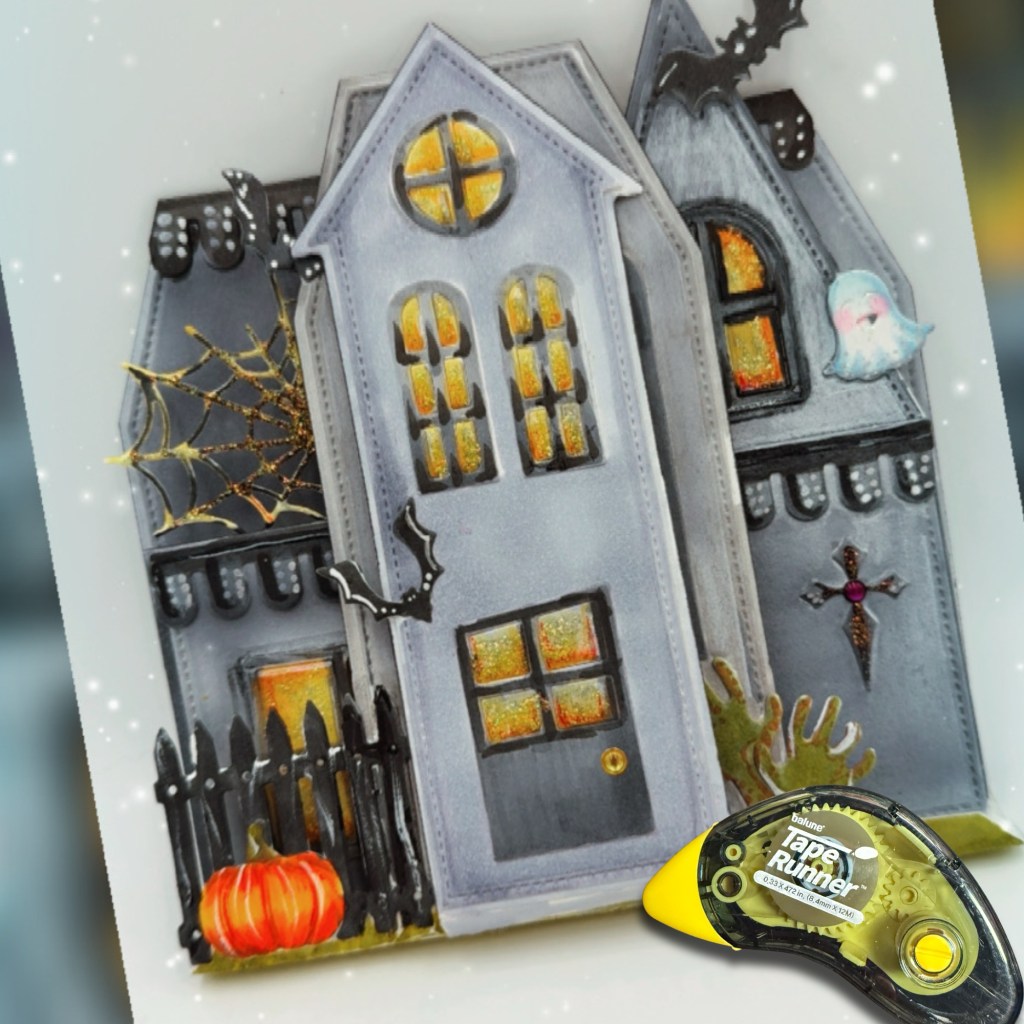
Spooky Bat Mouse Embellishment Dies paired with the Gothic Picture Frame

These little bat mice are almost too cute to spook! I used bright green, purple, and black for a playful Halloween color palette and added white highlights to bring out the details in their wings and faces.

The Gothic Picture Frame creates the perfect backdrop, while the spiderweb accents, sparkly swirls, and bold BOO sentiment add extra texture and personality. The Mouse Ears alphabet dies are a cute addition and nod to the mouse! I love how the bright green border makes the entire card pop!

Glitter, white highlights, and whimsical die-cut details make these bat mice ready for Halloween.

Both projects show how easily the newest Scrappy Boy Stamps products can be mixed and matched to create Halloween cards ranging from delightfully spooky to cute and whimsical.

Suggested Copic combinations: Skin: E000, E00, E11, E13; hair and clothing: C3, C5, C7, C9; cape and wine: R29, R39, R59; and purple airbrushed background: V04, V06, V09. I used the Copic Airbrush System to create the soft purple glow behind the vampire.

I used my favorite dry adhesive from TapeRunner.com⁠ to assemble all the layers of this card. Shop their selection of crafty adhesives and use promo code KELLY10 to save 10% on your entire cart! This costs you nothing extra and helps support my creative journey.

Ready to create your own Halloween projects? Purchase the Hex Appeal I Want It All Bundle, Spooky Bat Mouse Embellishment Die, Gothic Picture Frame, and more at ScrappyBoy.com. Scrappy Boy links are NOT affiliate links, just added for convenience. If you do happen to make a purchase, please let them know in the comments that I inspired you in some way.

Happy crafting!
Kelly
Stamped by Kelly

Cheers to Christmas: A Whimsical Postage Stamp Card 🎄🐻

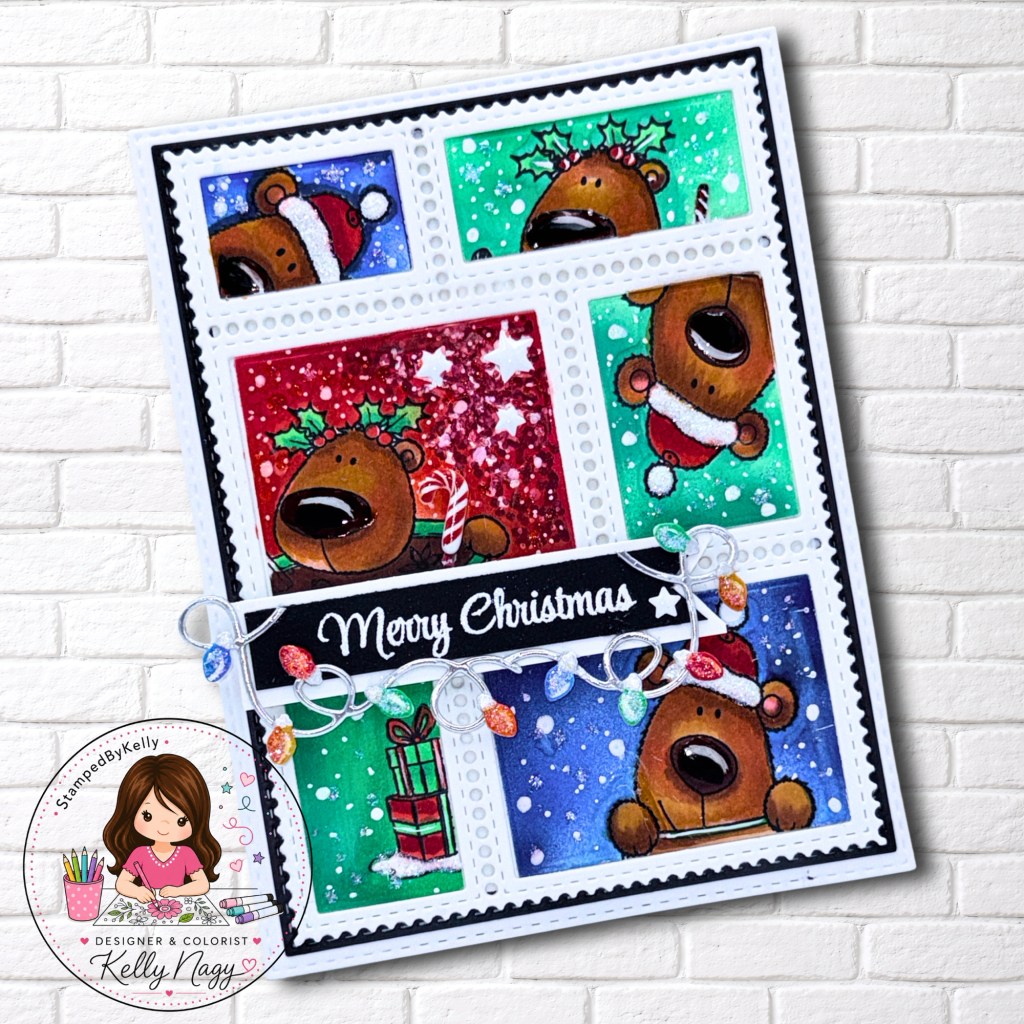
Create a whimsical A2 Christmas card with the Cheers to the Season stamp set, simple masking, Copic airbrushing, and bold red, green, and blue backgrounds. Learn how to make playful postage-stamp scenes, color coordinating bear images, and add festive sparkle to your handmade holiday cards.

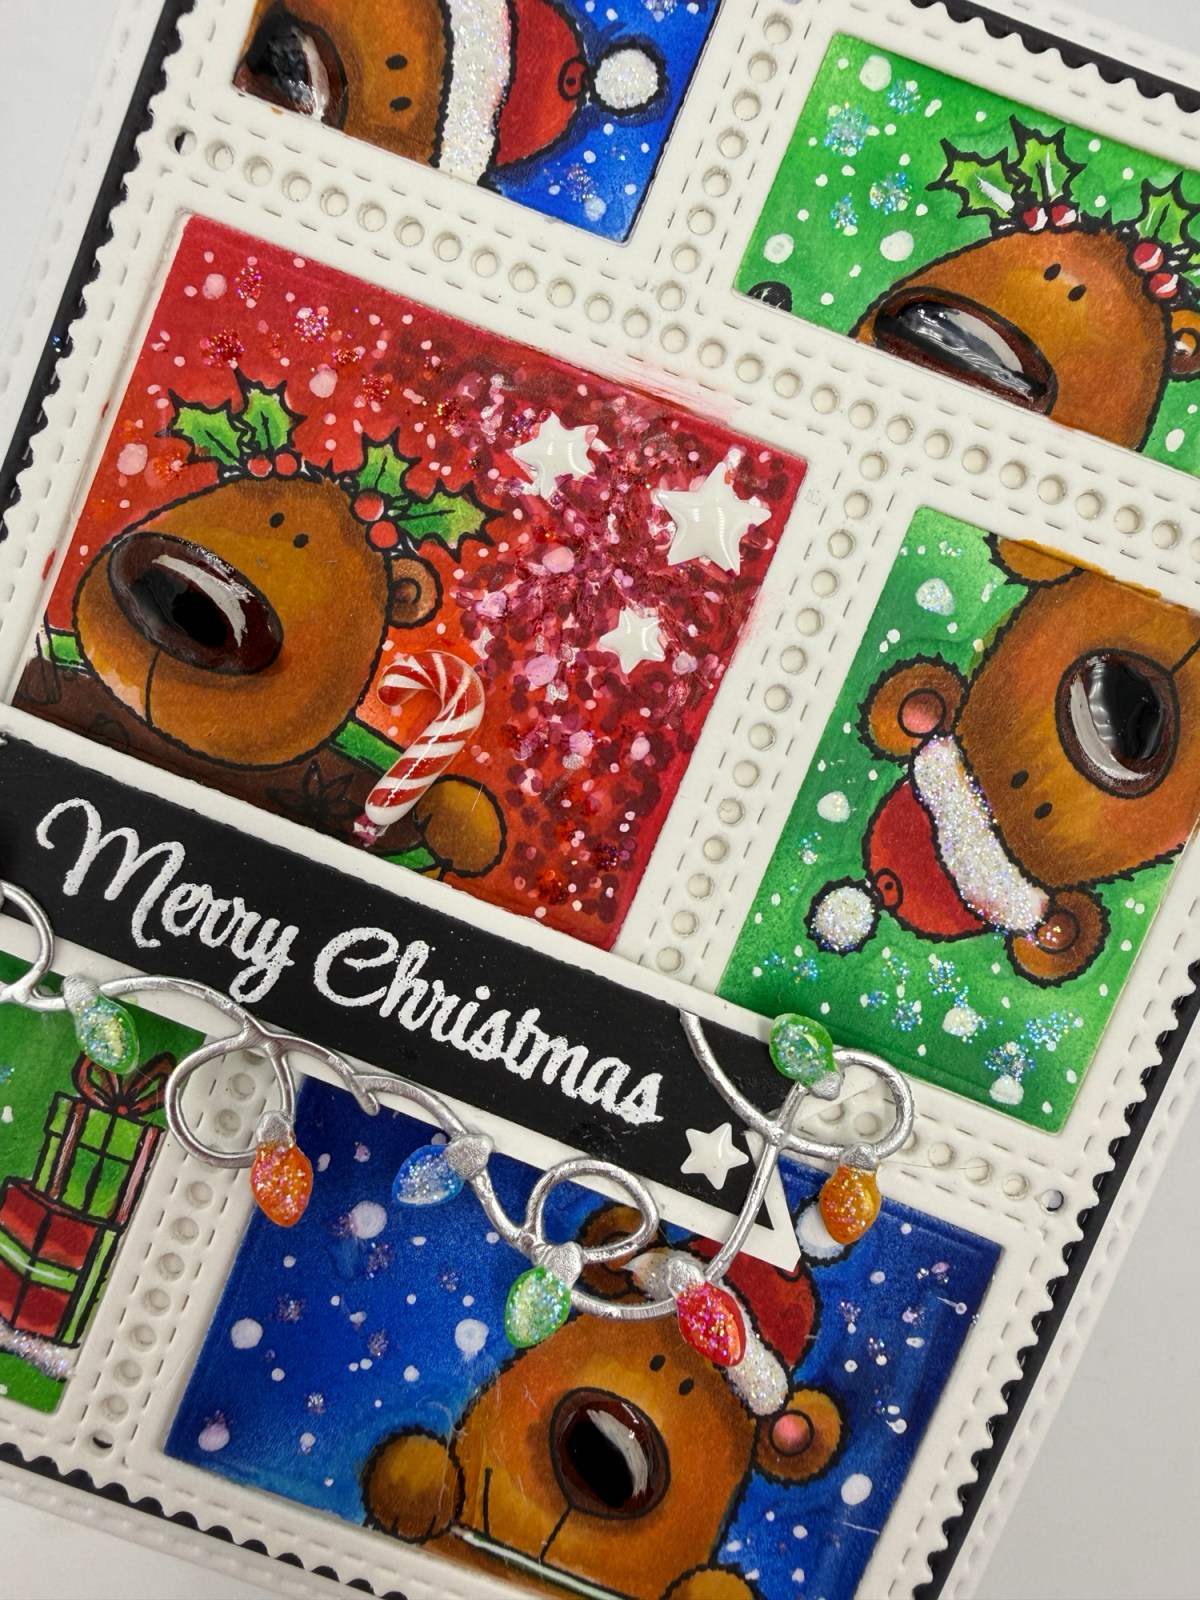
Sometimes the most fun cards begin with looking at your stamps in a new way! For this A2 Christmas card, I created a whimsical postage-stamp design with Waffle Flower’s Postage Die paired with the adorable Cheers to the Season stamp set, simple masking, and my Copic Airbrush System.

The Cheers to the Season stamp set is available from Pajama Crafter Stamps. Although I am no longer on their design team, they are a favored small business that offers whimsical stamps and coordinating products, including fun tools that can double as decor in your craft room. Be sure to check them out, and tell them Kelly sent you!

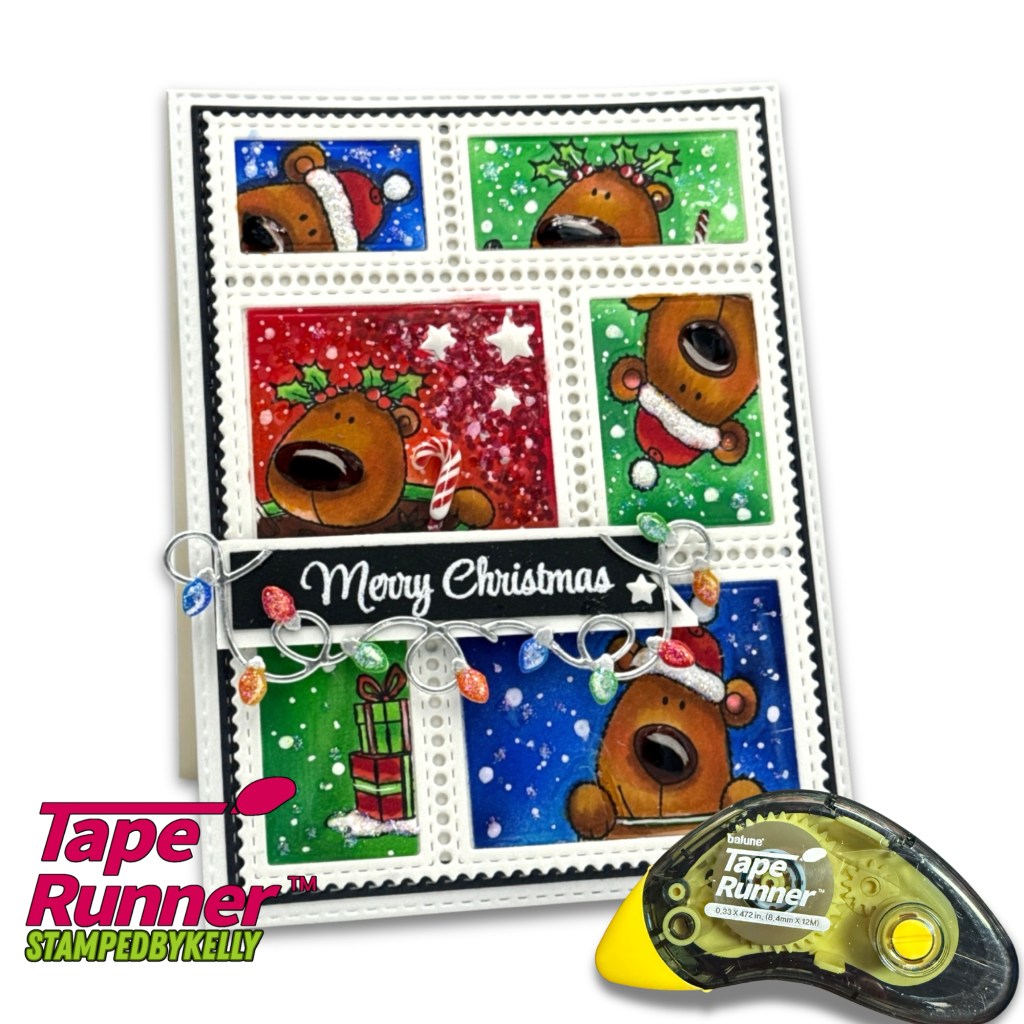
Finished Card Front

Creating the Postage Collage

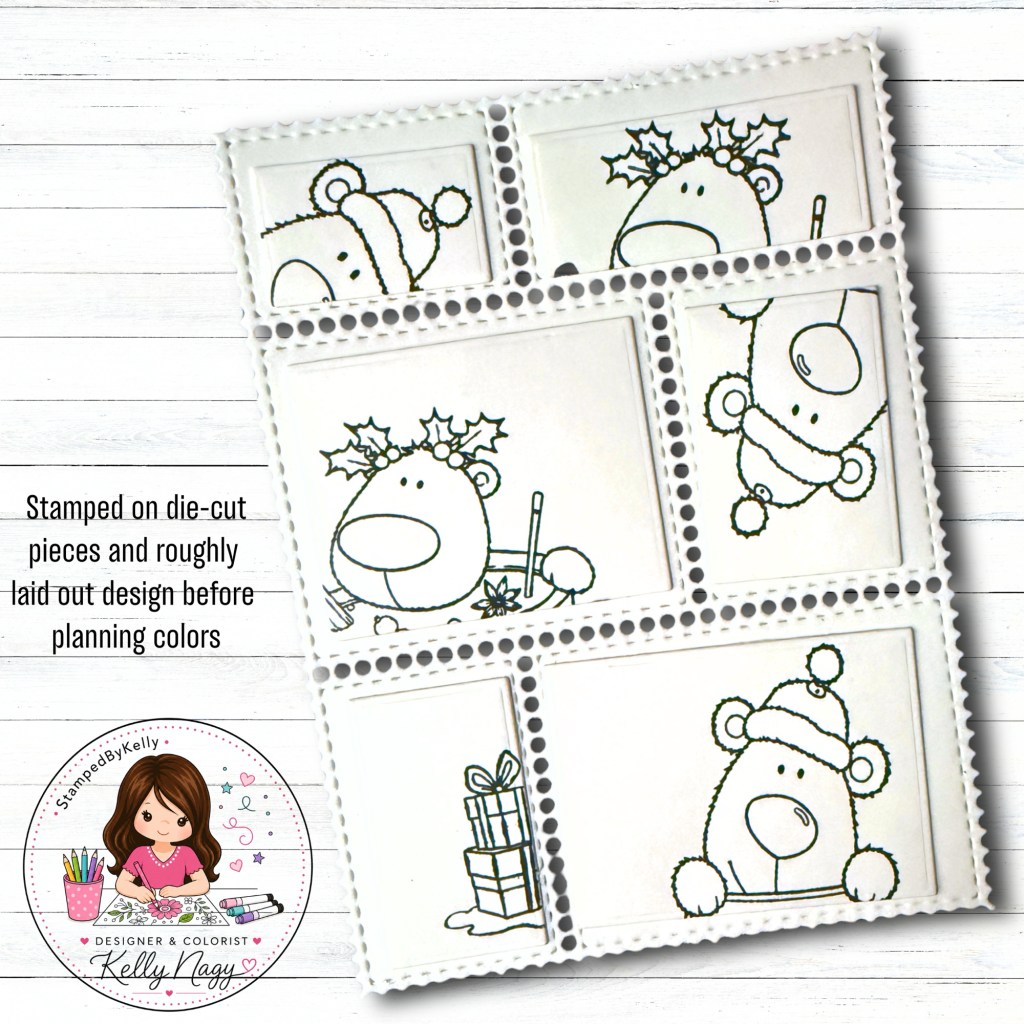
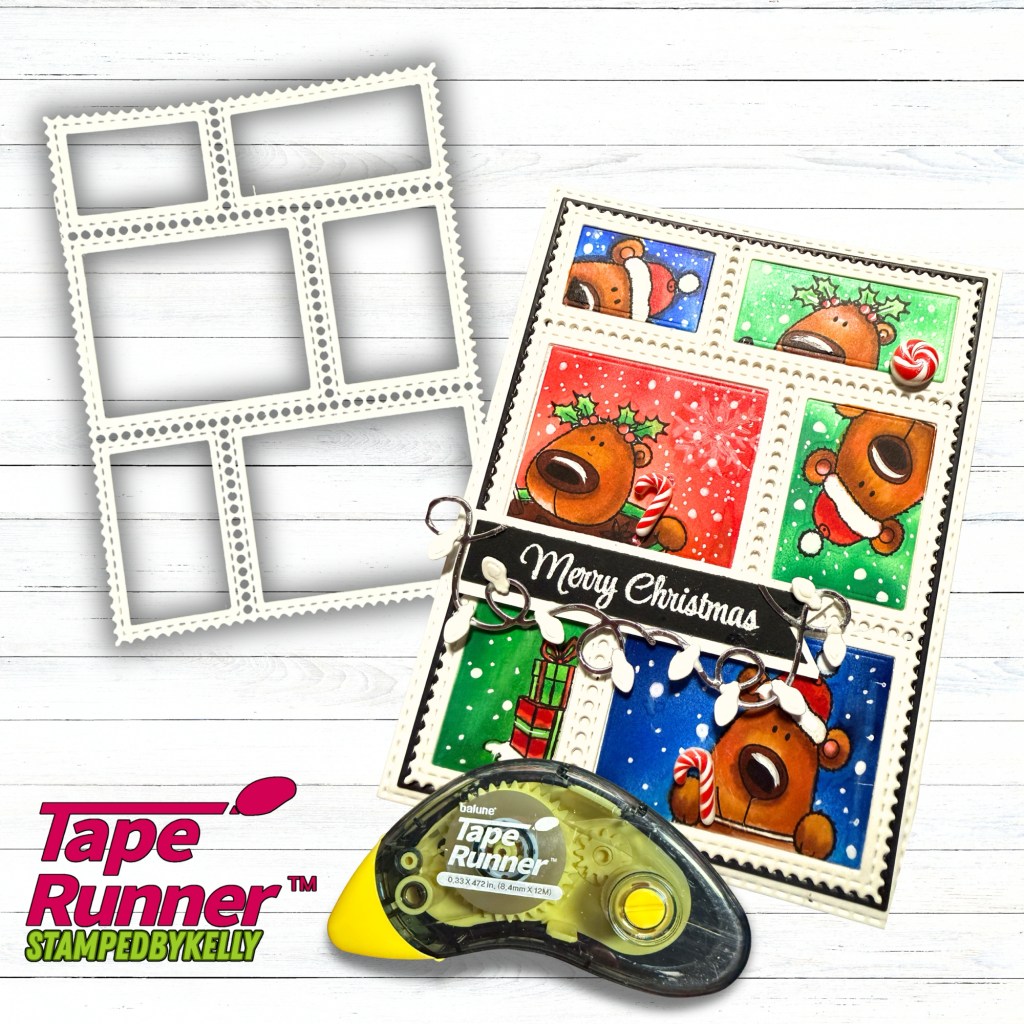
The fun postage-style layout for this A2 card was created using the Waffle Flower Postage Collage Die. I love how the six connected postage areas create little spaces for each stamped scene while still coming together as one cohesive design. The die is currently listed as pre-order/backordered on Waffle Flower’s website. I am not an affiliate—I’m simply sharing the link for your convenience in case you’d like to check it out for yourself. (waffleflower.com)

Shop the Postage Collage Die:
Waffle Flower Postage Collage Die

Creating the Postage Scenes

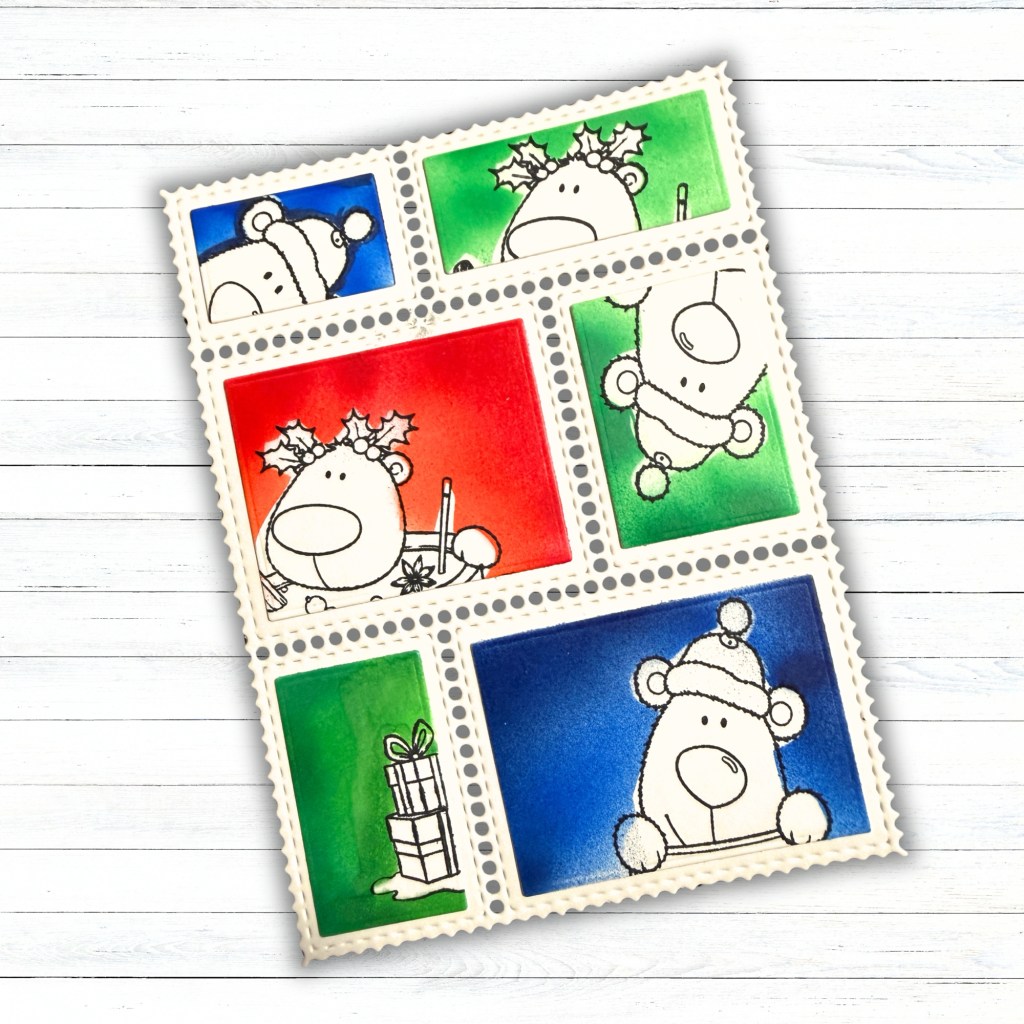
I stamped the bears throughout the postage openings without worrying about perfect placement. Some peek in from the sides, turn sideways, or extend beyond the edges, giving each little scene its own personality.

Using the same stamp set in several different ways keeps the card playful and cohesive.

Masking and Airbrushing

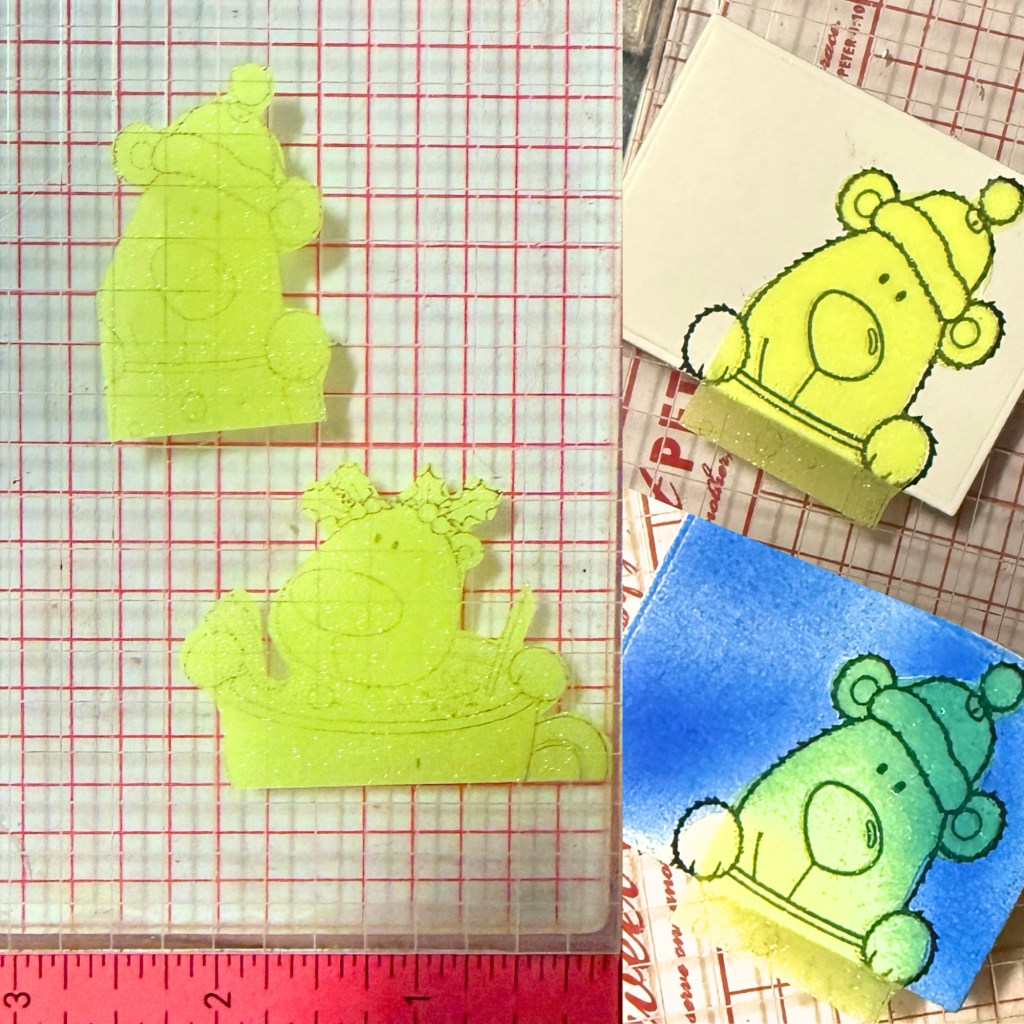
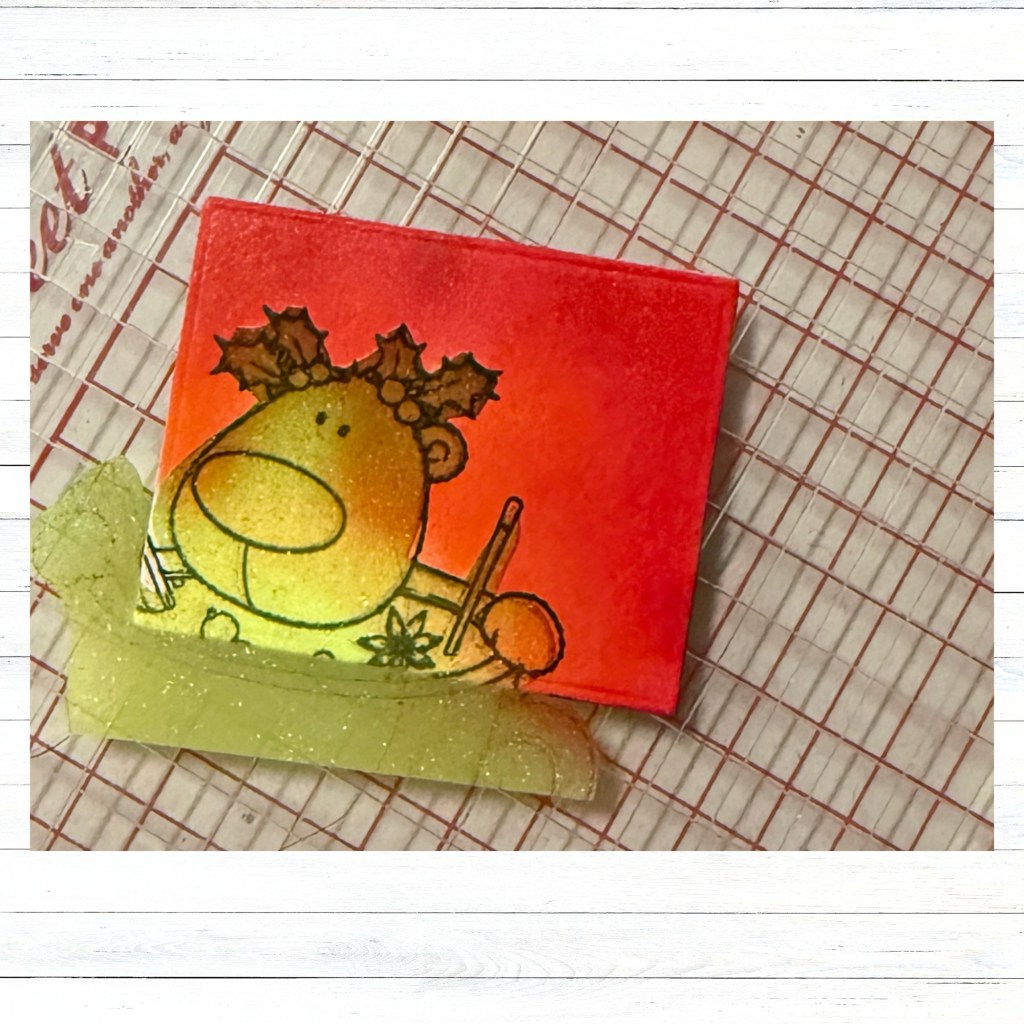
To protect the stamped bears, I created simple masks with Post-it notes. Then I used my Copic Airbrush System to fill the openings with a bold Christmas palette of vibrant red, green, and blue.

The airbrush made it easy to build saturated backgrounds while keeping the images clean.

Mask your stamped images with Post-it Notes

Copic Airbrush Color Combinations

For the bold backgrounds, I used my Copic Airbrush System and layered a combination of colors rather than relying on a single marker. For the red backgrounds, I used R08, R27 and R46; for the green backgrounds, I used G03, G05 and YG09; and for the blue backgrounds, I combined B02 with fluorescent FB and FBG. Layering two or more colors within each color family gave the backgrounds more depth and variation while still keeping that bright, whimsical Christmas feel. I love how the airbrush allows the colors to blend softly without competing with the stamped images!

Post it note blocks ink overspray & allows for crisp white paper to finalize your coloring of images

❤️ Vibrant Red
💚 Bright Green
💙 Bold Blue

Keeping the Bears Simple

Because the backgrounds are so colorful, I kept all of the bears in the same warm brown color palette. This creates continuity and keeps their coloring from competing with the bold airbrushed backgrounds.

Copic Colors for the Images

To keep the colorful backgrounds as the star of the show, I kept my stamped images fairly simple and consistent. For the bears, I used E31, E33, E35, E37 and E29, creating warm brown tones with deeper shades for contrast and dimension. I also went ahead and took my YR23 marker over the browns on my bears to add some warmth and blend out the layers. For the festive details, I pulled from R27 and R29 for the reds, YG03, YG17, G05 and G07 for the greens, and E49 and 100 for the deepest shadows and details. Keeping the bears within the same color family helped unify all of the little postage-stamp scenes without competing with those vibrant airbrushed backgrounds.

I finished the bears’ noses with 3D GALAXY GLASS for a little extra dimension and shine. I also pulled out my WHITE GEL PEN and added dots for snow on the background. I adds texture, interest and a festive, snowy feel!

Assembling the Card

Once everything was colored, I assembled the layers with my TapeRunner Dry Adhesive. If you wish to purchase from there and receive 10% off everything in your cart, you can use promo code KELLY10 at check out.

Living in Florida means HUMIDITY! ☀️🌴 Whenever possible, I avoid adding extra moisture to my cardstock. A tape runner adhesive provides a clean, strong bond without the wet adhesive that can contribute to warping—especially on cardstock that has already been colored and airbrushed.

Finishing Touches ✨

I added the bold black “Merry Christmas” sentiment across the center, then finished the card with colorful Christmas lights, snowy splatters, sparkle, and shine. I colored the bulbs in coordinating colors and added some Stickles Glitter Glaze for some festive glitz!

Love the lights? They are from my Scrappy Boy Stamps‘ stash and I’m not sure if they’re available on their website any longer. There are plenty of other options to add bling or a festive element. All you have to do is think outside of the box and use what you have already.

I love how the finished design feels like a collection of tiny Christmas snapshots!

Remember, you don’t have to use a stamp exactly as you see it. Turn it sideways. Let it peek into a window. Mask it. Crop it. Airbrush around it. Finding new ways to use the stamps you already have is part of the fun!

I hope this inspires you to grab some Post-it notes, your favorite stamps, and your Copic markers to create something uniquely yours.

I can’t wait to see what you make! ❤️💚💙

Happy crafting!
Kelly | Stamped by Kelly

A Little Hex Appeal + A Whole Lot of Franken-Fine!

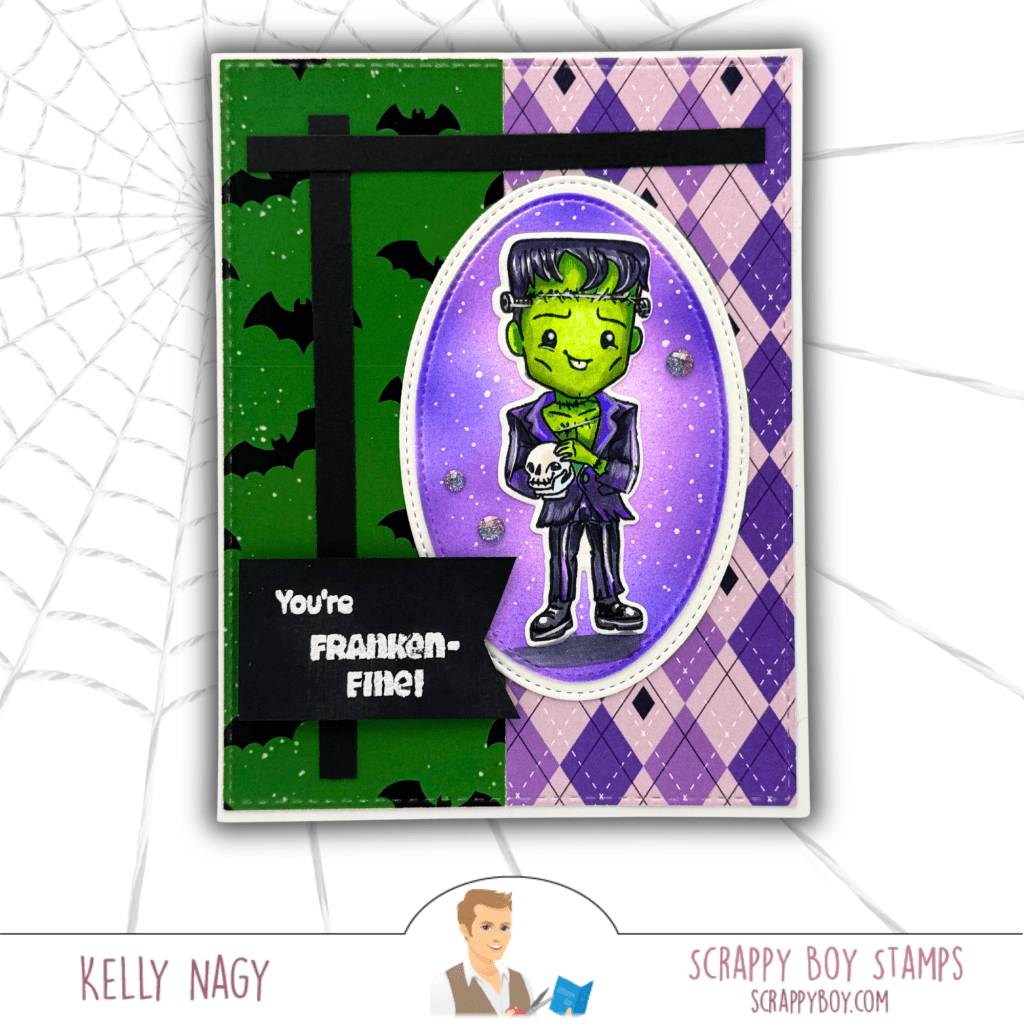
Get spooky-cute with the NEWEST Hex Appeal release from Scrappy Boy Stamps! See how I used the August Card Sketch Inspiration to create this Franken-Fine Halloween card, complete with patterned papers, stitched dies, heat embossing, and my Copic color combinations. 💚💜🎃

I’m popping in with a little spooky-cute inspiration featuring the NEWEST release from Scrappy Boy StampsHEX APPEAL! 🎃💜💚

Featuring Hex Appeal & Coordinating Products

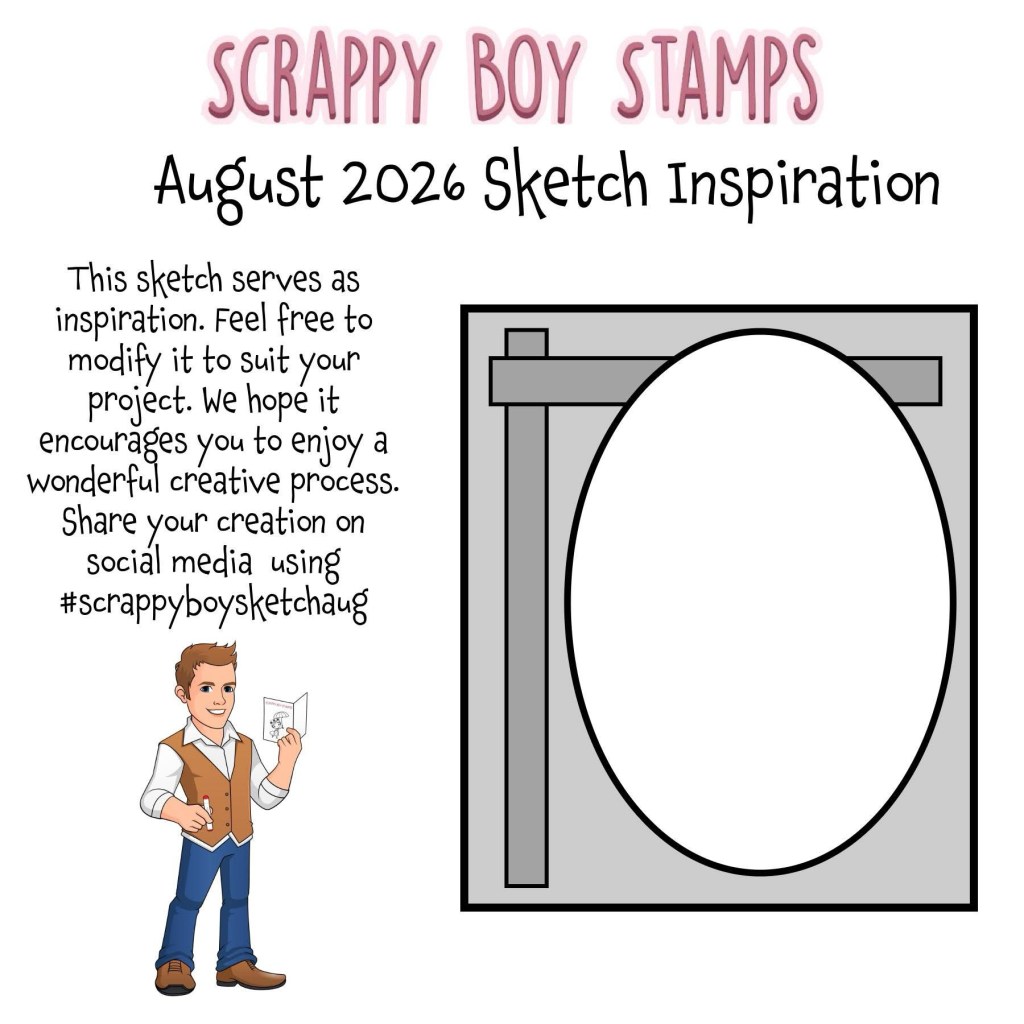
For this card, I also took inspiration from the Scrappy Boy Stamps August Card Sketch. There’s still a little time to play along, so grab your favorite Scrappy Boy goodies and put your own spin on the sketch!

One of my favorite things about sketches is that they take away that “where do I start?” moment. You already have the bones of the design—you just get to make it yours!

My Take on the Sketch

I stayed fairly close to the original layout, using two contrasting patterned papers for the background and bold black cardstock to recreate the strong horizontal and vertical elements.

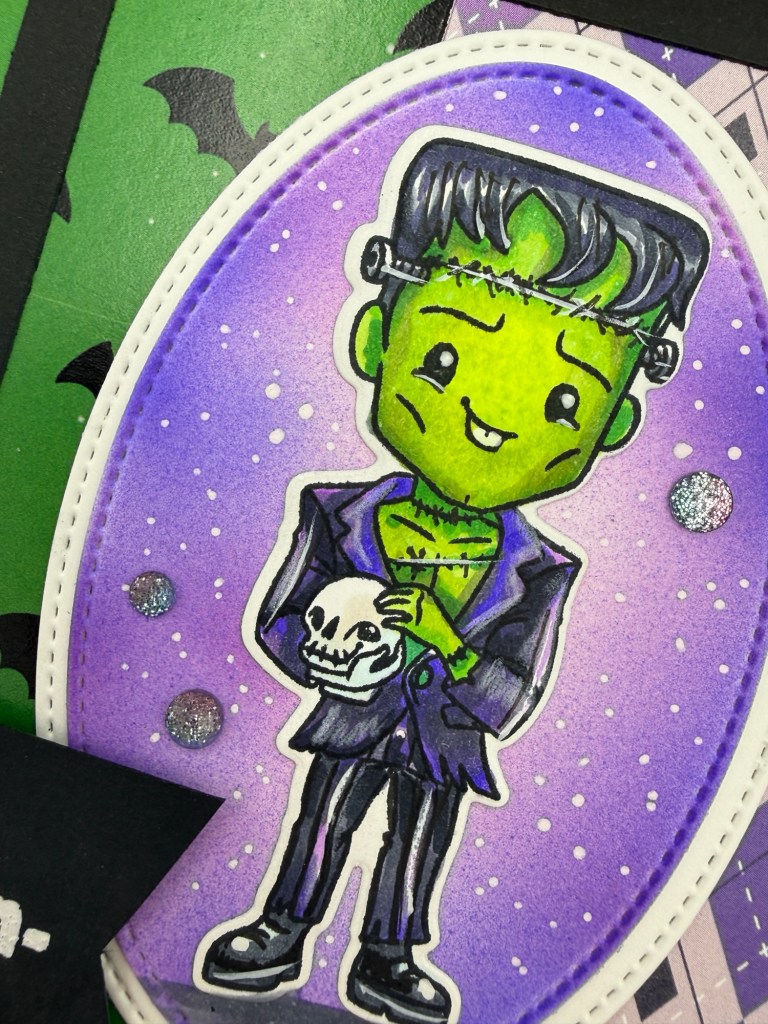
Of course, the star had to be this adorable little Frankenstein! 💚

I placed him inside an Oval Stitched Nesting Die and gave the background a soft purple blend using my airbrush attachment from Copic to help him pop without competing with the image. A few white splatters and sparkly accents finished off the background.

And how could I resist…

“You’re Franken-Fine!” 😂

Close up to see white gel pen accents

Copic Coloring

I colored my little guy with Copic markers, using bright yellow-greens for that classic Frankenstein look and deep violets and cool grays to coordinate with the Hex Appeal patterned paper.

Copic Color Combinations:

💚 Skin: YG01 • YG03 • YG05 • YG07
💜 Purple: V12 • V15 • V17
🖤 Black/Gray: C3 • C5 • C7 • C9
🤍 Skull: C0 • C1 • C3

Feel free to substitute your favorite combinations—the fun is making these characters completely your own!

Scrappy Boy Supplies

🎃 HEX APPEAL STAMPS & OUTLINE DIES
👻 HEX APPEAL 6×9 PAPER PACK
✂️ OVAL STITCHED NESTING DIES
✂️ RECTANGLE STITCHED NESTING DIES

The Hex Appeal 6×9 Paper Pack made this sketch especially fun. Mixing the green bats with the purple argyle gave me plenty of pattern and color while still allowing my stamped image to remain the focal point.

For the sentiment, I heat embossed “You’re Franken-Fine!” in white on black cardstock. The crisp white embossing against the bold black gives the sentiment plenty of contrast and ties in perfectly with the black elements from the sketch. 🖤

My Go-To Dry Adhesive ✂️

With all these fun layers, I reach for my TapeRunner dry adhesive! It makes lining up and layering cardstock quick and easy, while helping keep my panels smooth and warp-free—especially when working with multiple layers.

Want to give it a try? Use promo code KELLY10 for 10% OFF your TapeRunner purchase! 💕

Come Play Along!

Remember, a card sketch is meant to inspire you—not limit you. Change the shapes, flip the design, rotate it, add another layer or simplify it. There’s no wrong way to interpret it!

You still have a little time to join the Scrappy Boy Stamps August Sketch Inspiration, so get those stamps, dies and papers out and PLAY!

When you share your creation on social media, be sure to use:

#scrappyboysketchaug

I can’t wait to see what you create!

Happy Crafting!
Kelly
Stamped By Kelly

🦖 Dinosaur Week Goes Extinct—with a Little Halloween Magic!

Celebrate Dinosaur Week with a fun Halloween shaker card featuring the Close to Extinction Stamp Set, creative Flash Card Surgery, and spooky interactive details from Pajama Crafter Stamps.

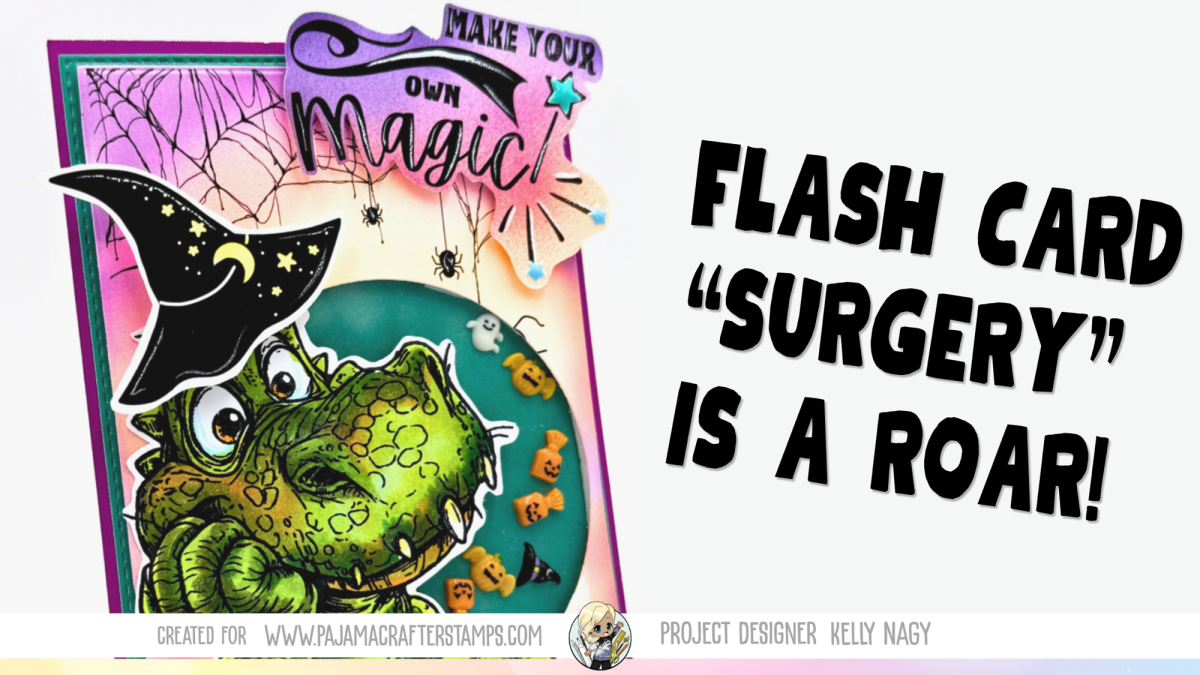
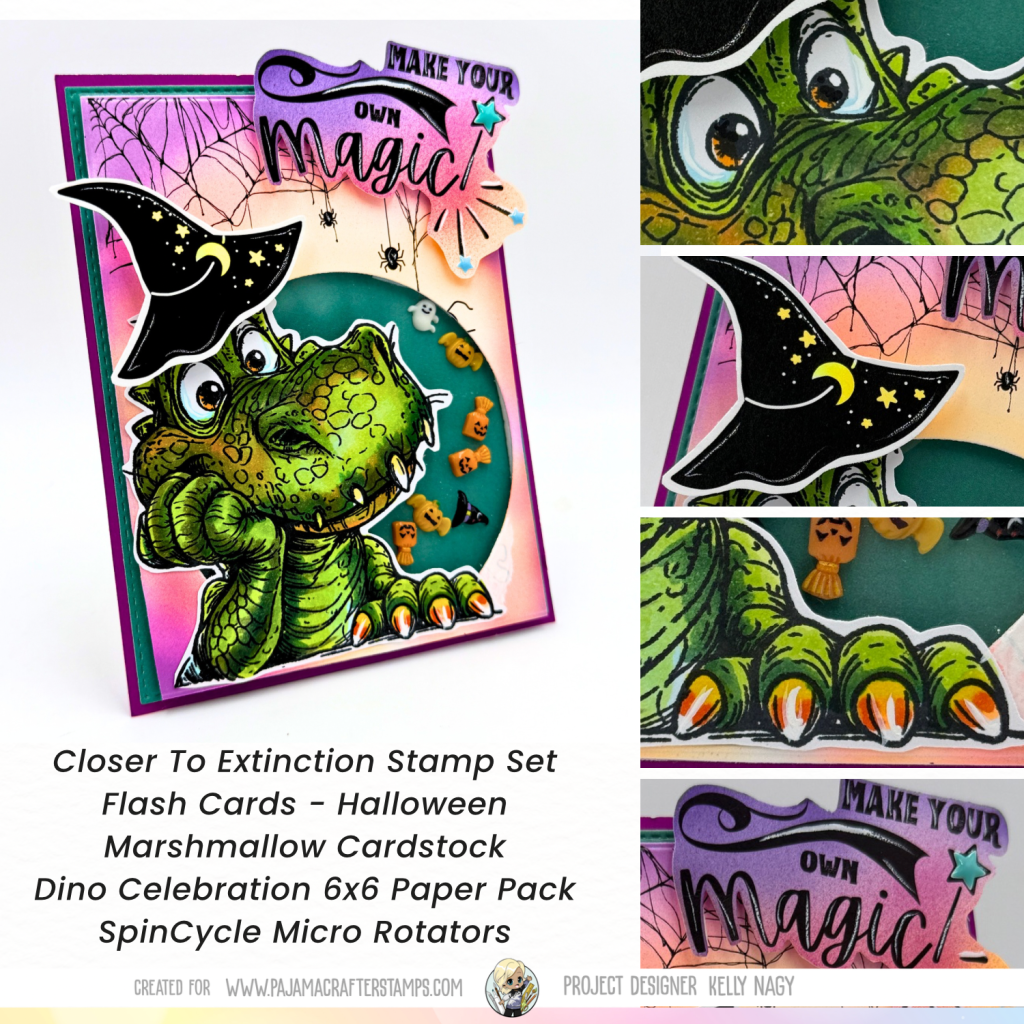
I’m closing out Dinosaur Week with one last dino-mite project—and this little guy from the Close To Extinction Stamp Set decided he was ready for Halloween! 🎃🦖

For this card, I did what I’m calling a little Flash Card Surgery! ✂️ I cut into two Halloween Flash Cards, using the skeleton/spiderweb design to create my circle shaker and borrowing the witch hat and “Make Your Own Magic” sentiment from another card.

I love finding ways to stretch products beyond their original design. A little cutting, mixing and matching turned these Flash Cards into something completely different—and gave my dinosaur the perfect spooky-season makeover!

🛍️ What I Used

  • Close To Extinction Stamp Set
  • Halloween Flash Cards
  • Dino Celebration 6×6 Paper Pack
  • Marshmallow Cardstock
  • SpinCycle Micro Rotators

🦖 Has This Dino Already Gone Extinct?

The Close To Extinction set has been so popular that you may find it temporarily out of stock. If so, hit the Notify Me button! He’s expected to make a comeback, and you’ll know when it’s time to swoop in and fill that cart before he disappears again.

You can shop Pajama Crafter Stamps using my affiliate link:

https://pajamacrafterstamps.com/STAMPEDBYKELLYBLOG

This post contains an affiliate link. I may earn a small commission from qualifying purchases at no additional cost to you. Thank you for supporting my crafting and Stamped by Kelly!

And that’s a wrap on Dinosaur Week! I think sending this little guy into extinction dressed for Halloween was the perfect way to end it. 😂

Until the next crafty adventure—Make Your Own Magic!

#PajamaCrafterStamps #DinosaurWeek #CloseToExtinction #StampedByKelly #HalloweenCard #DinosaurCard #ShakerCard #Cardmaking #HalloweenCardmaking #FlashCardSurgery

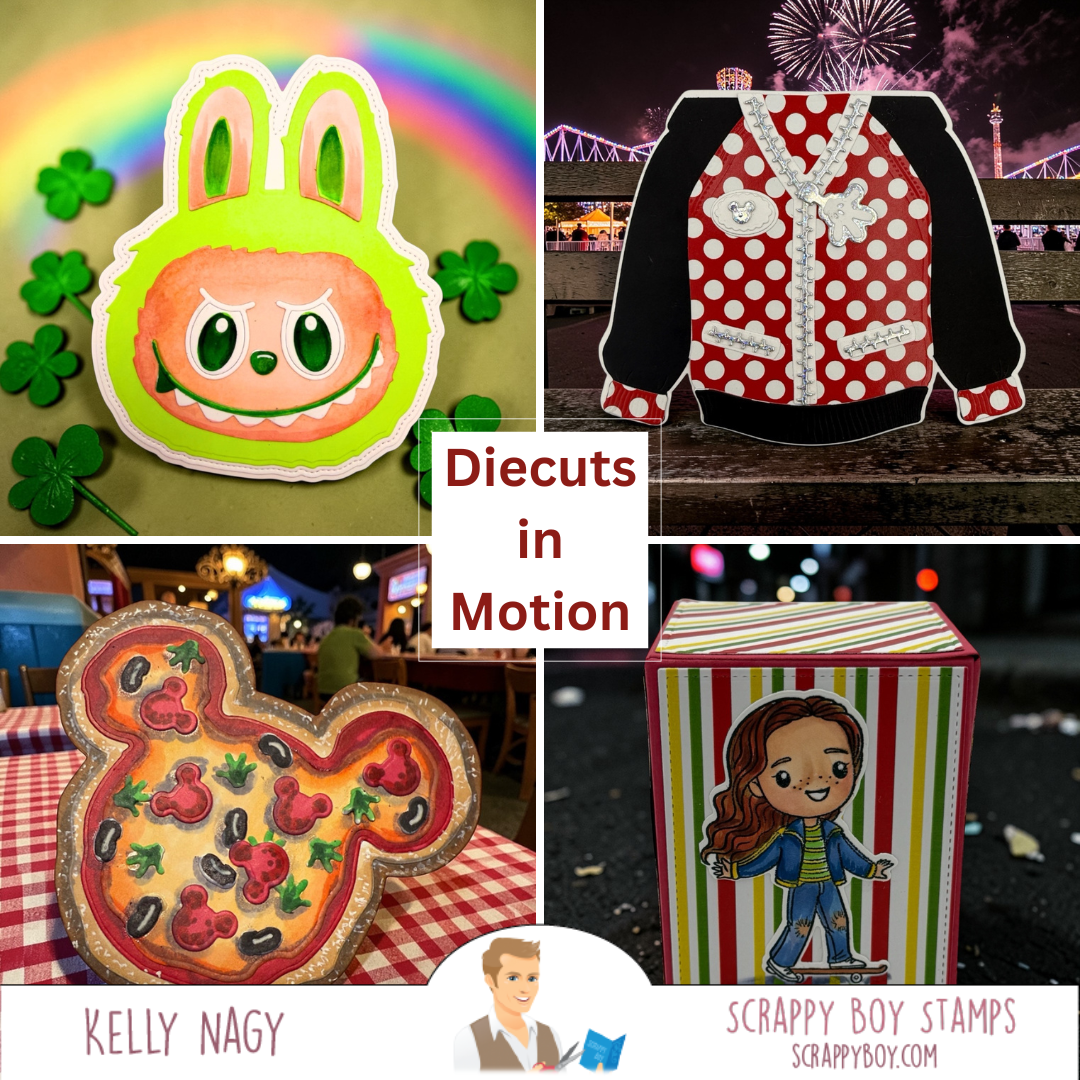
Unlocking Creativity: How Die Cuts Transform Your Card Making! ✂️✨

Unlocking Creativity with Die Cuts in Card Making! ✂️✨

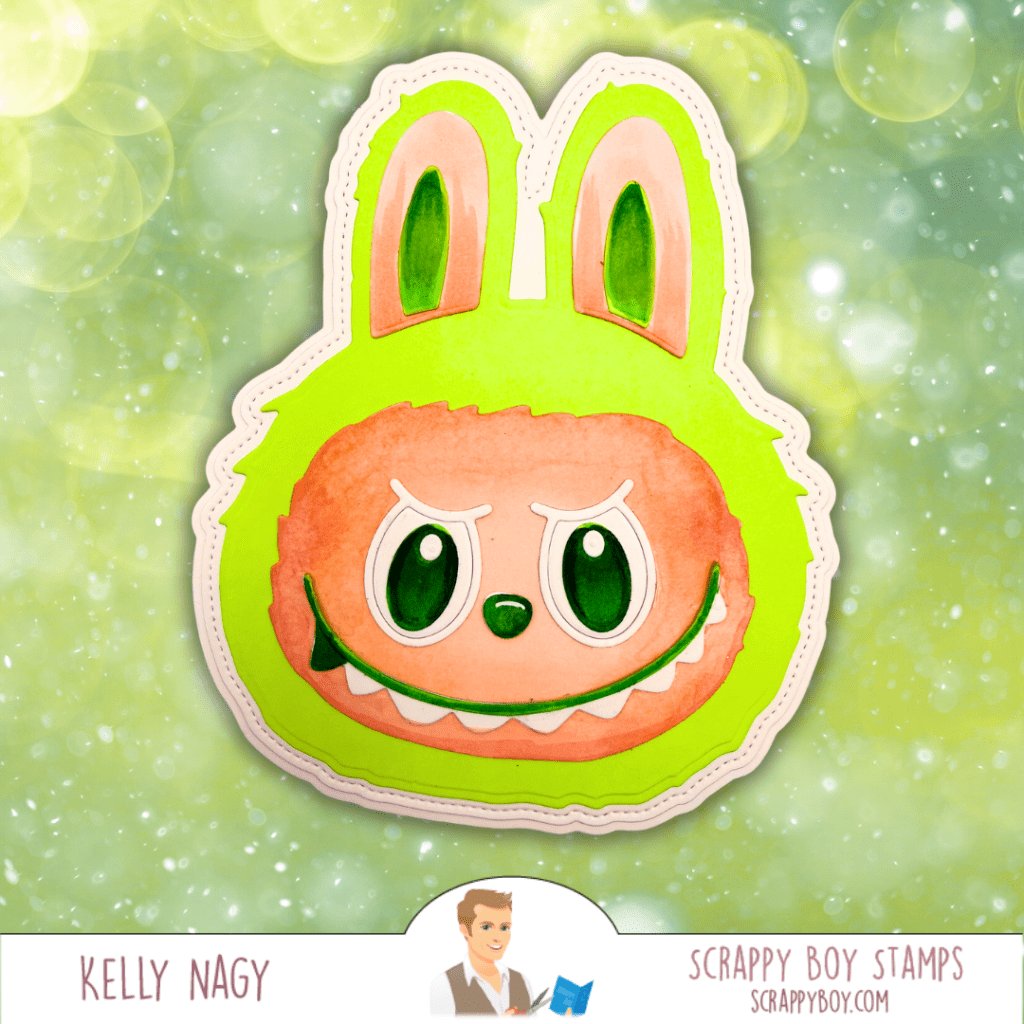
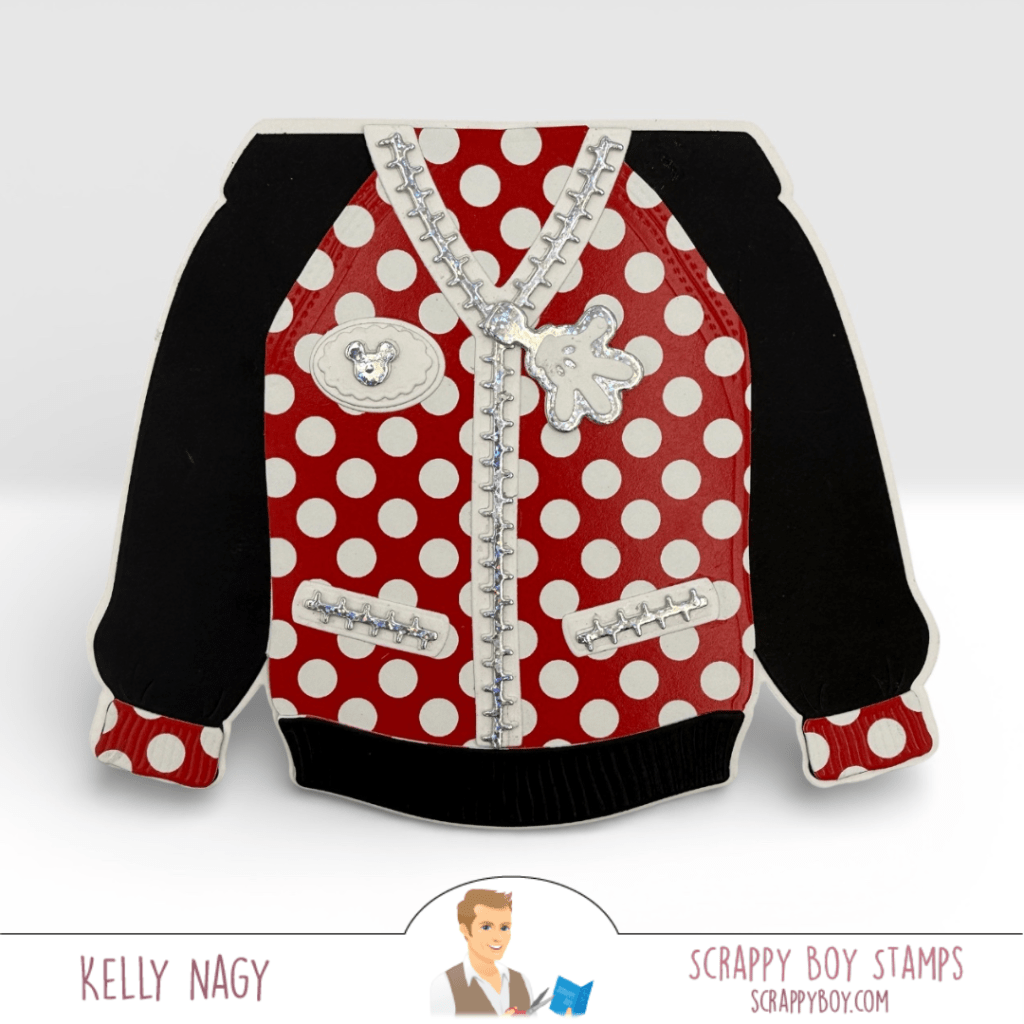
Welcome back, crafty friends! Today, I’m excited to share how die cuts can transform your card making and elevate your projects to new heights. From festive designs like the Shabubu Head Die Set for St. Patrick’s Day to cozy creations with the Hoodie Shaped Card, the possibilities are endless!

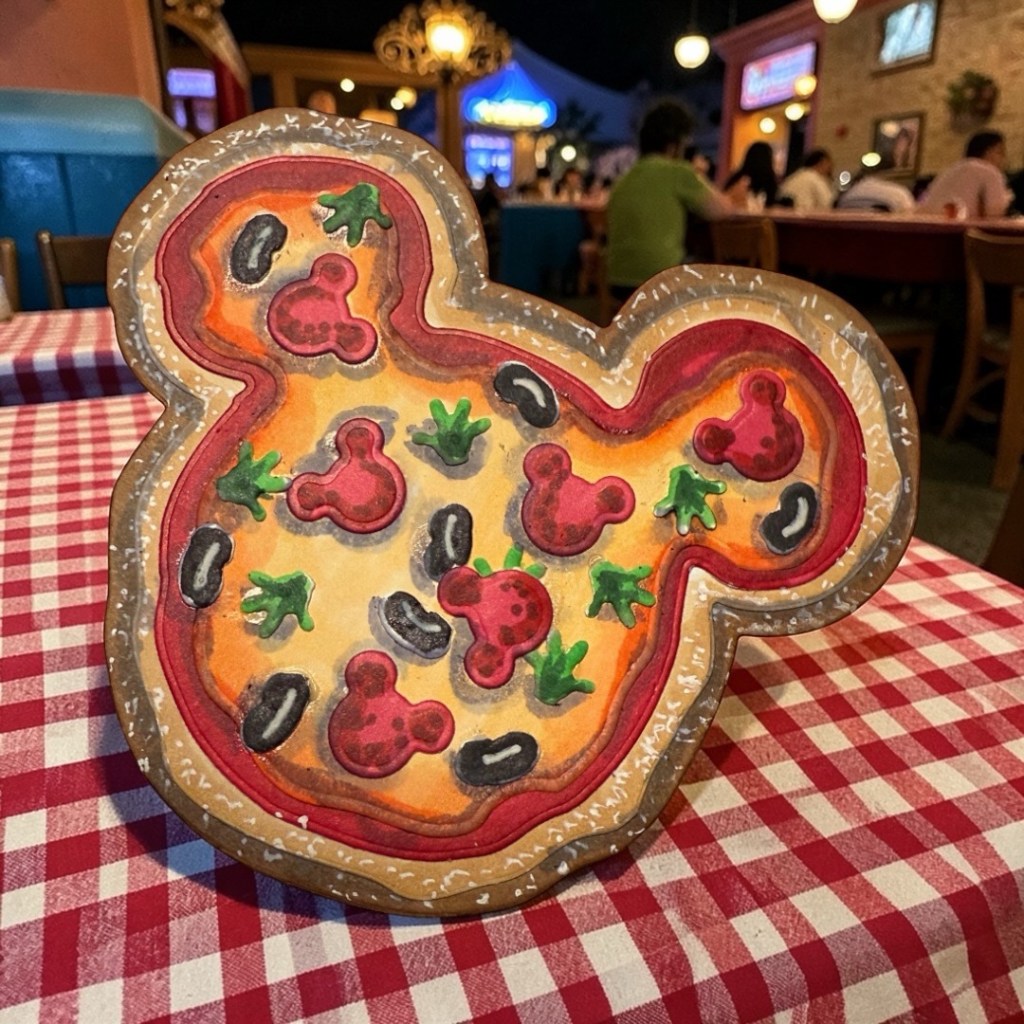
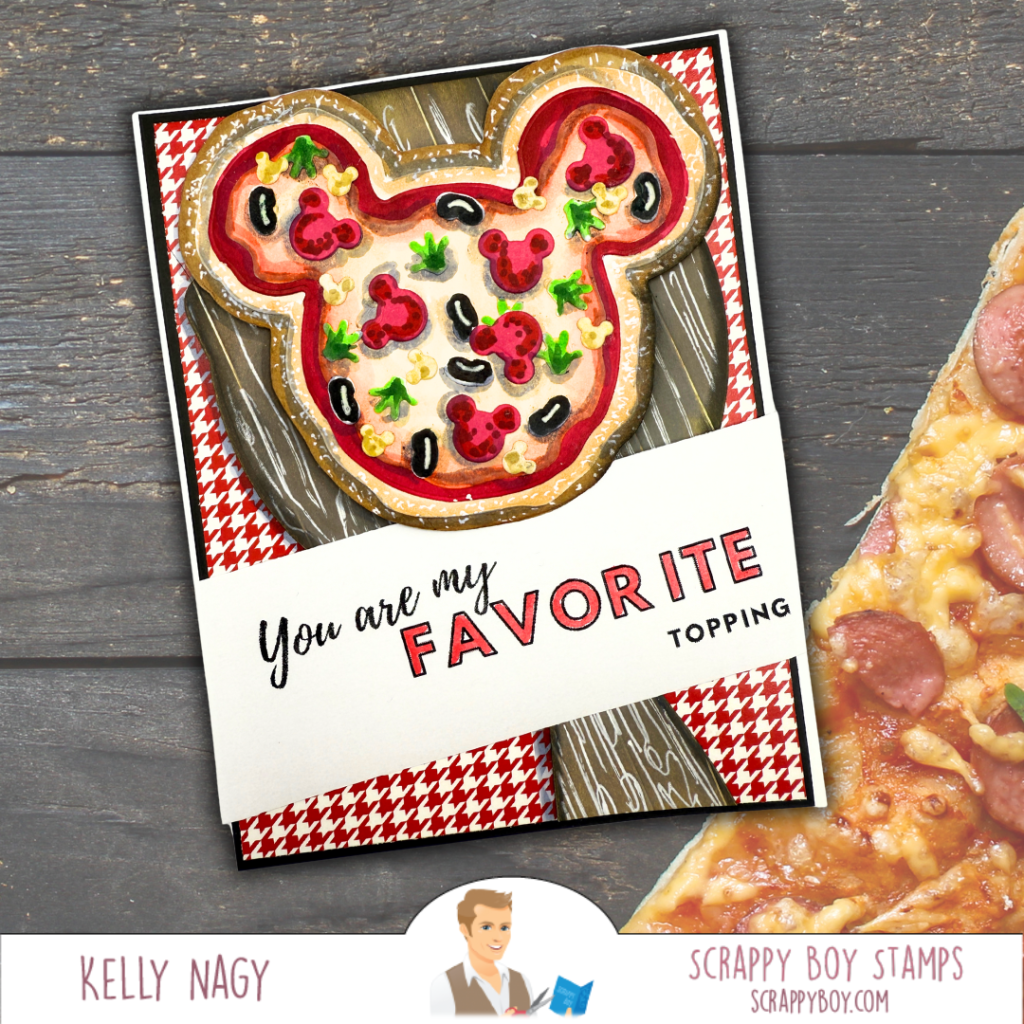
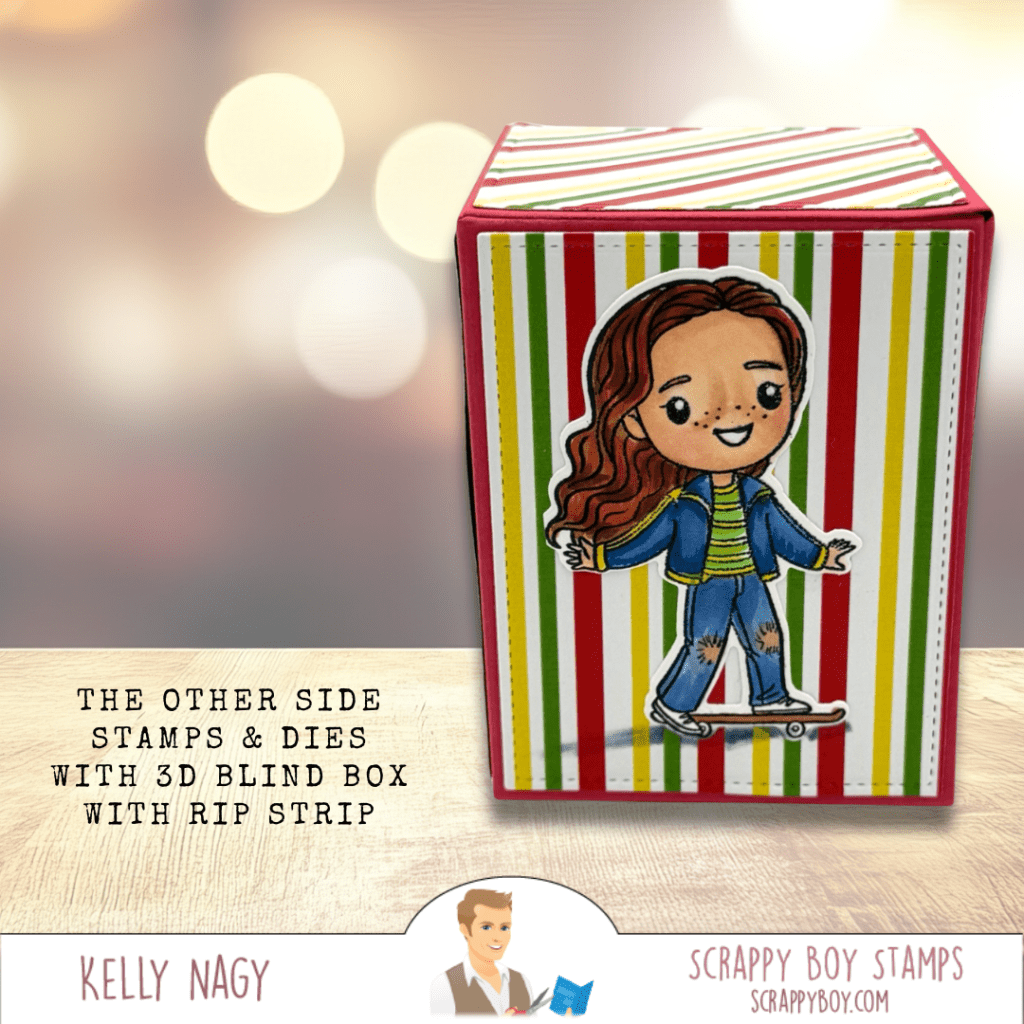
Get inspired by the fun Mouse Pizza Builder Die Set and the creative Blind Box with Rip Strip for unique gift card presentations. With die cuts, you can add dimension and personality to your cards, making them truly special. Ready to unleash your creativity? Let’s dive into these amazing projects together! 💖🎉

Hey there, crafty friends! Are you ready to take your card making and paper crafting to the next level? Let’s dive into four fabulous projects that showcase how die cuts can truly transform your creations!

1️⃣ Shabubu Head Die Set: Just in time for St. Patrick’s Day, this die set lets you customize adorable characters in vibrant green! With die cuts, you can add dimension and personality to your cards, making them extra special. 🎉💚

2️⃣ Hoodie Shaped Card & Add-On Die Set: Say goodbye to basic cards! This hoodie die set allows you to create cozy, themed cards that can be zip-up or feature front pockets. Customization is key, and with just a few die cuts, you can create a professional-looking design that’s full of warmth and fun. 👕✨

3️⃣ Mouse Pizza Builder Die Set: This set proves that die cuts can do much more than just cut flat shapes! Use them creatively, like I did when I transformed a piece from the Magic Mirror Mini Die Set into a pizza board. Experiment with cutting your dies in plain white cardstock and let your imagination run wild with colors and arrangements! 🍕🐭

4️⃣ Blind Box with Rip Strip: This project combines playful design with functionality! Using patterned paper and an image from The Other Side Stamp Set, I created a gift box that’s perfect for presenting a gift card. The rip strip adds an exciting reveal, making gift-giving even more delightful! 🎁✨

With die cuts, the sky’s the limit! You can add dimension by layering your cuts, and even more depth by adding shadows and colors using your favorite mediums or simple ink blending on the edges.

So, are you ready to unleash your creativity? Dive into these projects and see how die cuts can elevate your crafting game! Share your favorites in the comments below, and let’s inspire each other to create something amazing!

I use dry adhesive and liquid adhesive for my projects. There are specific times when one works better than the other. Follow me for more tips on that and if you wish to visit taperunner.com you can use code Kelly10 for 10% off your cart.

💖 #ScrappyBoyStamps #DieCutMagic #StampedbyKelly #SSBE

Creative Fun with the New Scrappy Boy Stamps Release

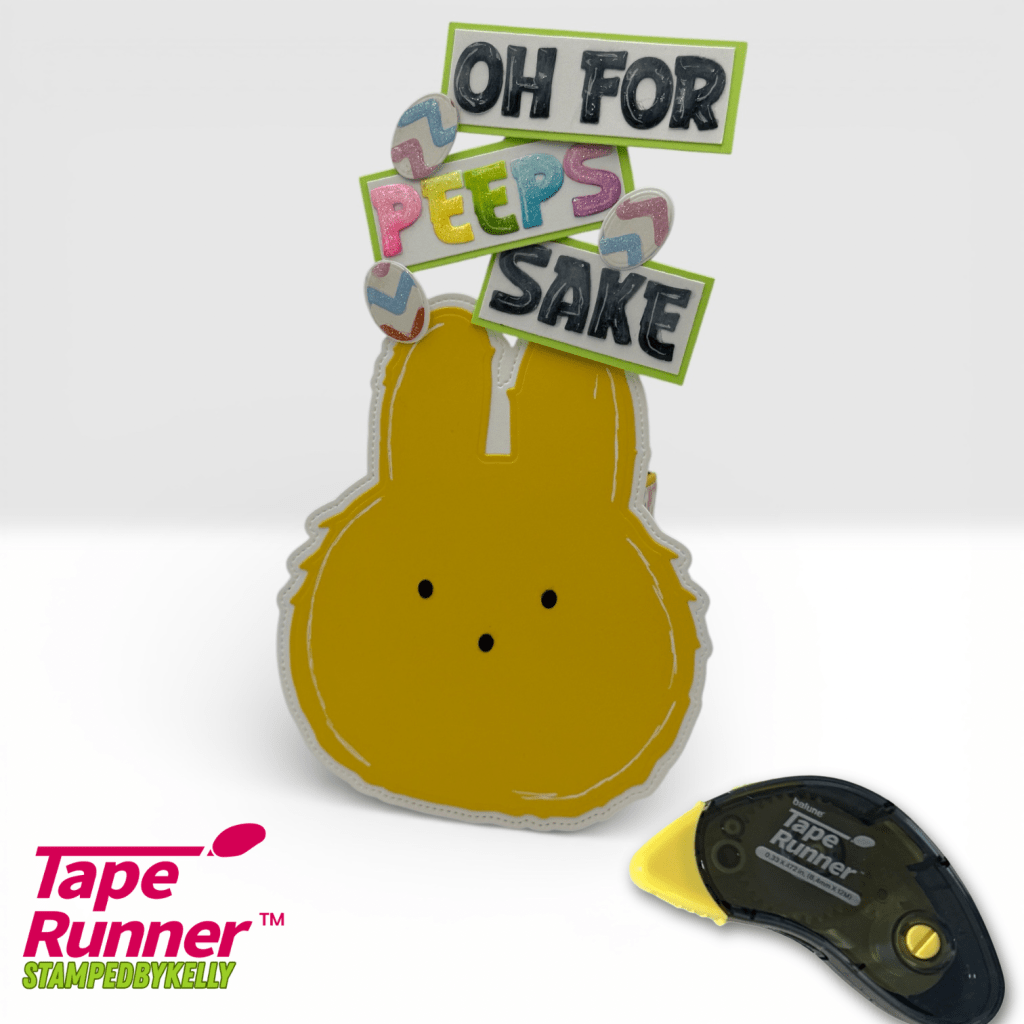
Discover three fun paper crafting projects featuring the newest release from Scrappy Boy Stamps! In this post, I’m sharing an A2 scene card, a playful mini slimline card, and a creative Easter favor made with the Shabubu Head Card Die and Blind Box Die. I’m also sharing one of my favorite crafting tips—using dry adhesive from Tape Runner to keep layers smooth and warp-free while assembling detailed card designs. ✂️✨

The newest release from Scrappy Boy Stamps is packed with playful characters, creative dies, and fun papers that make crafting an absolute joy! Today I’m sharing three different paper projects featuring items from this release. Each project highlights how easily these products can be mixed, matched, and customized to create something truly unique.

Before we jump into the projects, I also want to share one of my favorite crafting essentials. When assembling my cards and layered die cuts, I almost always reach for dry adhesive from Tape Runner. Dry adhesive is fantastic for cardmaking because it helps keep papers—especially lighter weighted papers—from warping or developing ripples, which can sometimes happen with wetter adhesives.

Another reason I love using dry adhesive is that it’s a bit more forgiving at the start. If something isn’t perfectly aligned, you can gently warm the adhesive with a heat tool and carefully lift the piece to reposition it before it fully bonds. This makes it much easier to straighten layers and fine-tune placement while assembling your design.

If you’d like to give it a try, you can visit taperunner.com and use the promo code KELLY10 to receive 10% off your entire cart.

A2 Landscape Card – The Other Side

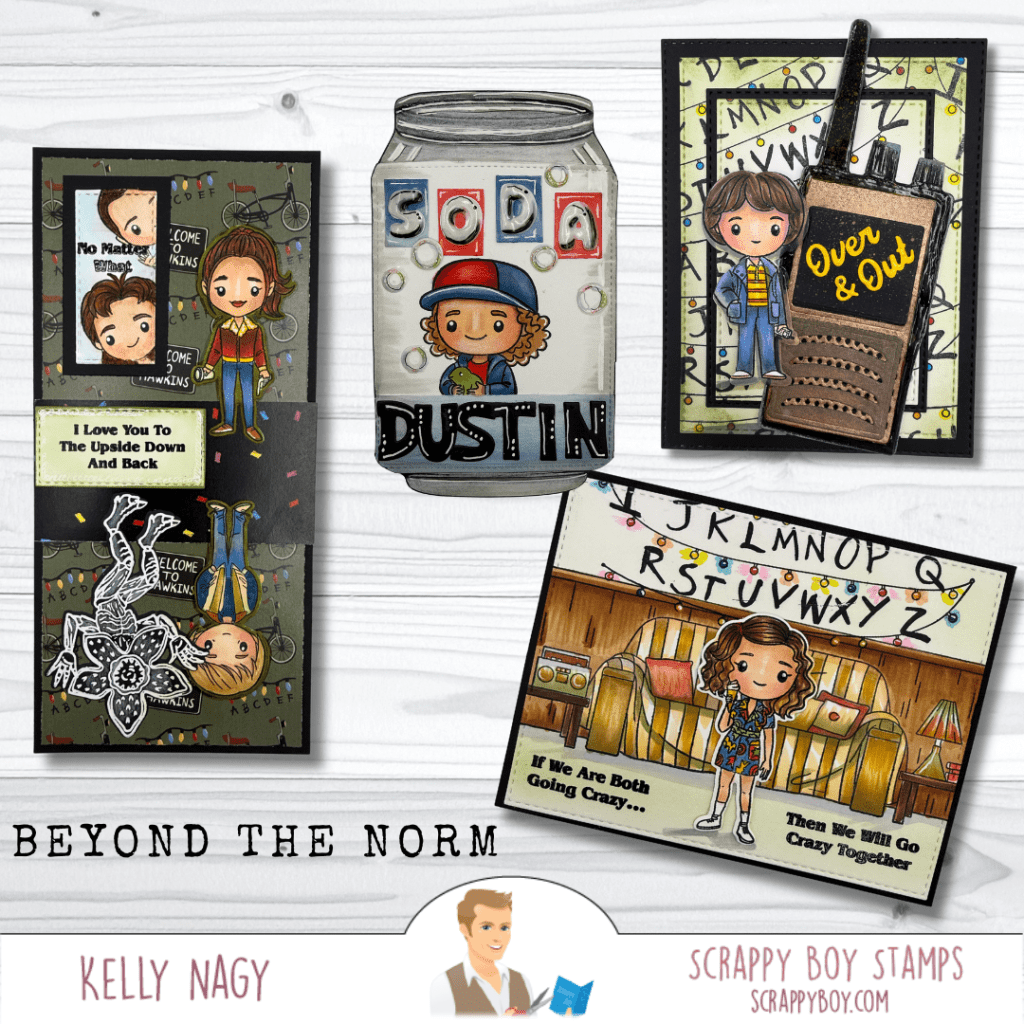
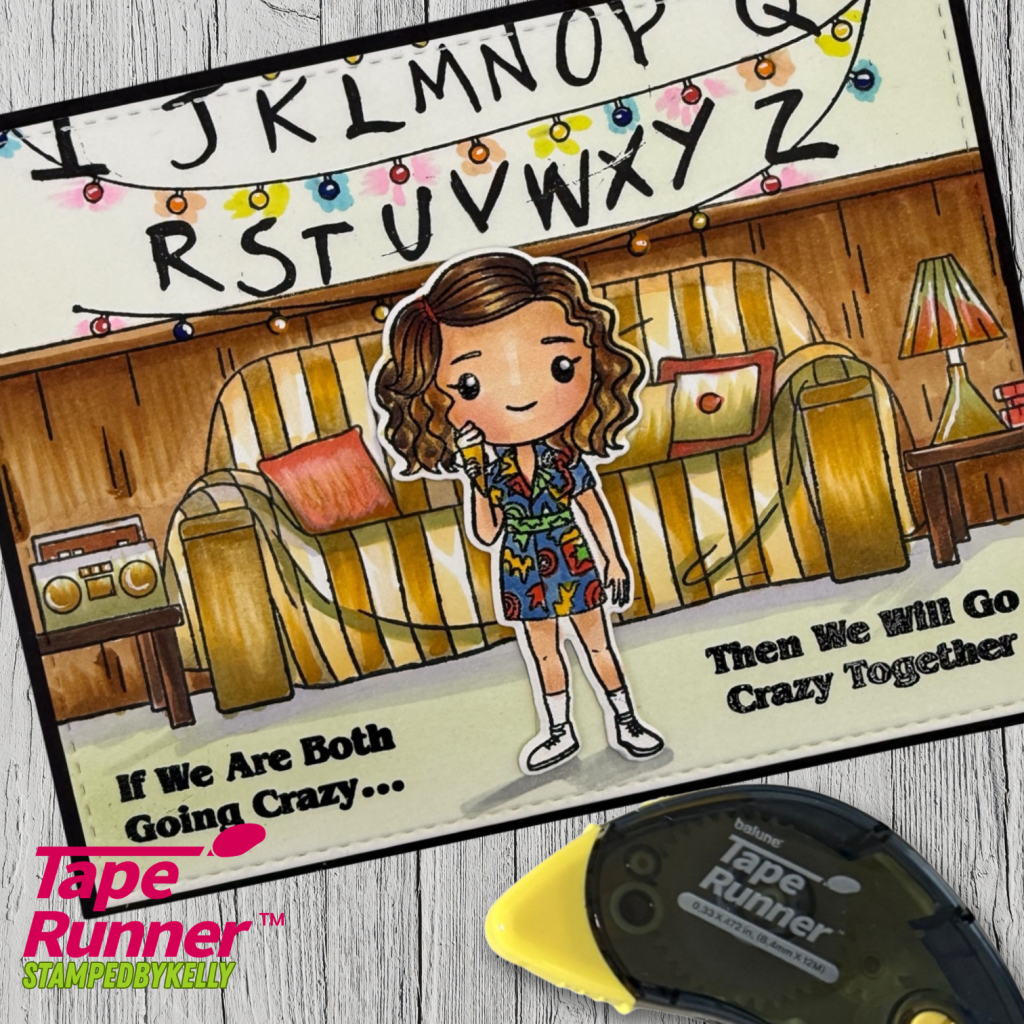
For my first project, I created an A2 landscape card using the The Other Side Stamps & Outline Dies. I paired the images with the Beyond The Normal Living Room Background Stamp to build a fun and detailed scene.

To pull the design together, I used patterned papers from the Beyond the Normal 6×9 Paper Pack. The papers coordinate beautifully with the stamped images and really help bring the entire card to life. I love how easy it is to create a full scene with this collection—it almost feels like stepping right into the story.

When layering the stamped images and patterned papers, I used dry adhesive from Tape Runner to keep everything smooth and flat. Scene cards often include multiple layers, and dry adhesive helps prevent bubbling or distortion in the patterned paper.

Products Used

The Other Side Stamps & Outline Dies Beyond The Normal Living Room Background Stamp (6×6) Beyond The Normal 6×9 Paper Pack

Mini Slimline Card – Ham It Up

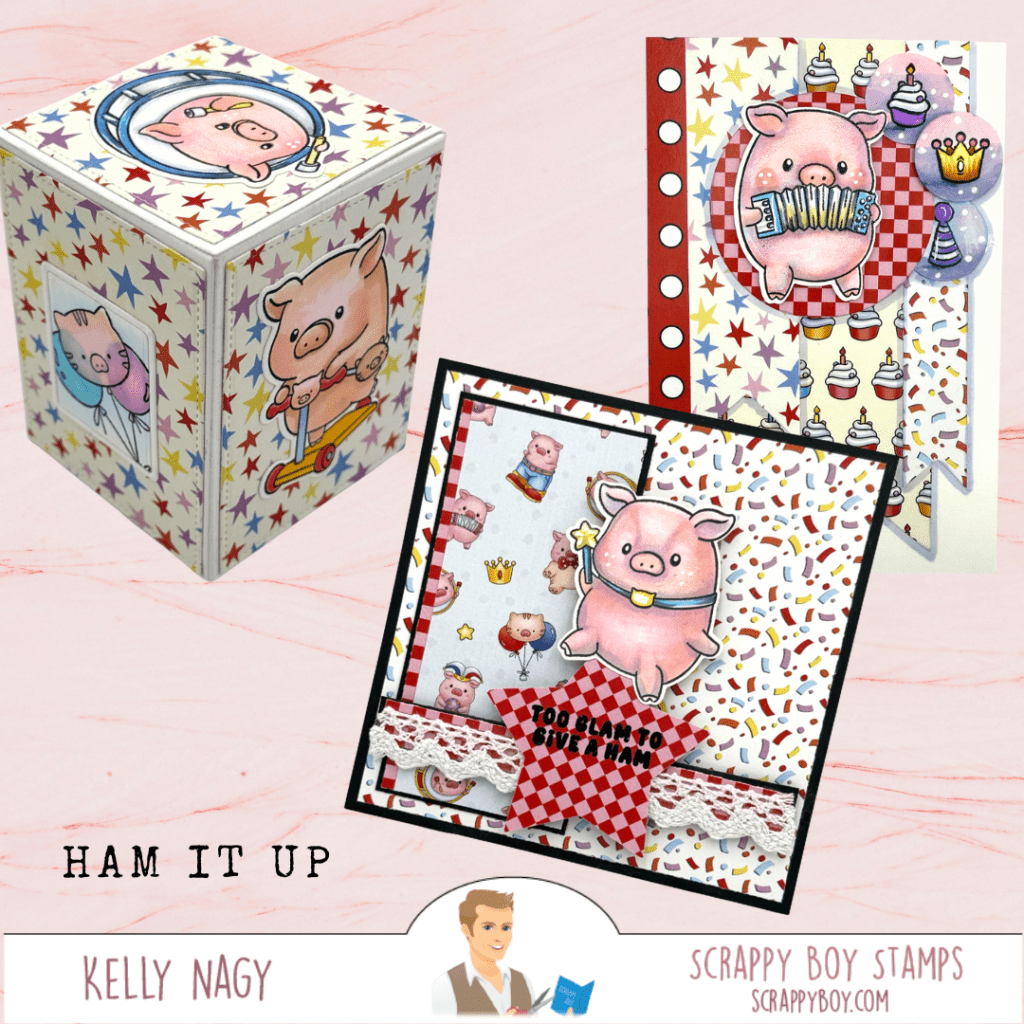
Next, I created a playful mini slimline card using the adorable Ham It Up collection.

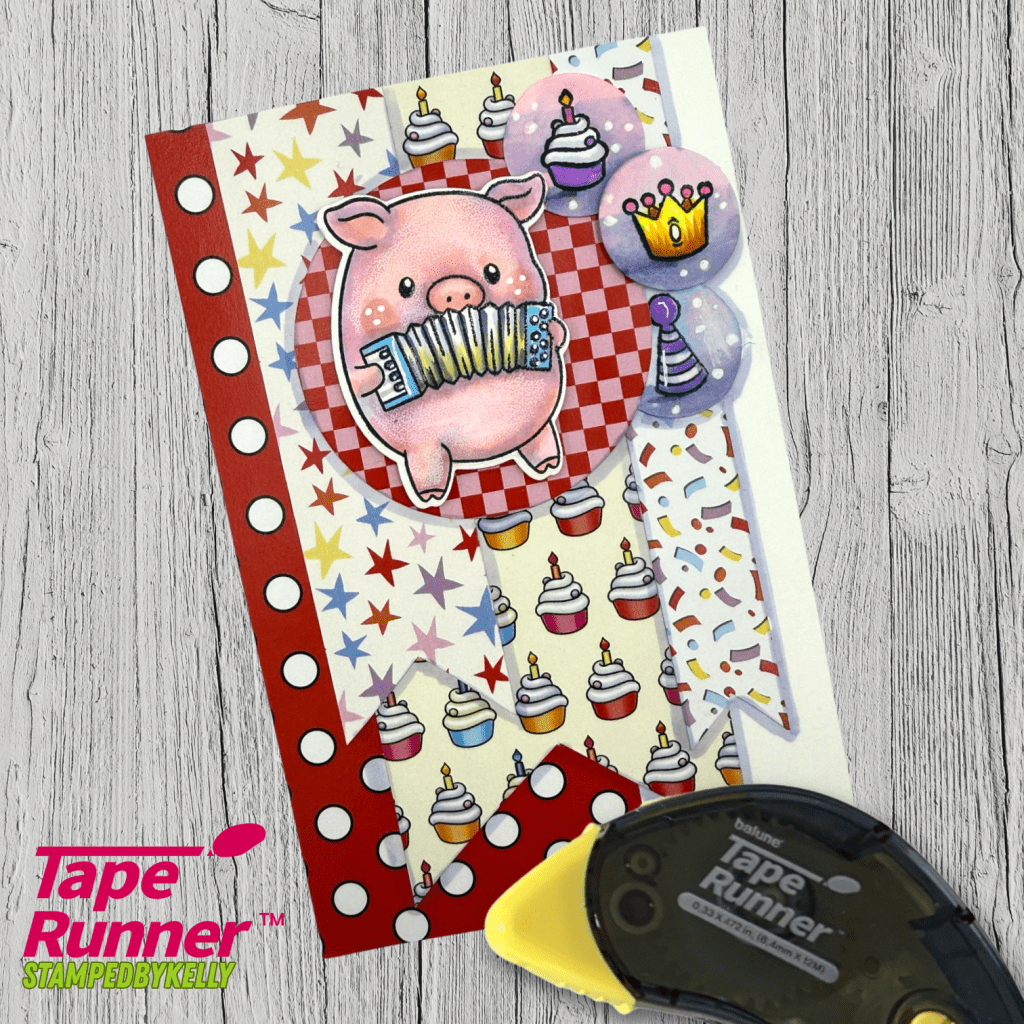
This project features the Ham It Up Stamps, Outline Dies, and the coordinating 6×9 Paper Pack. The patterned papers add the perfect pop of color, while the stamped images bring so much personality to the card.

Mini slimline cards are such a fun format when you want something a little different while still keeping the design simple and eye-catching. I again used dry adhesive from Tape Runner while assembling the layers and die cuts because it works wonderfully for stacking die-cut elements while keeping everything smooth and wrinkle-free.

Products Used

Ham It Up Stamps Ham It Up Outline Dies Ham It Up 6×9 Paper Pack

Shabubu Easter Favor – A Fun Surprise Project

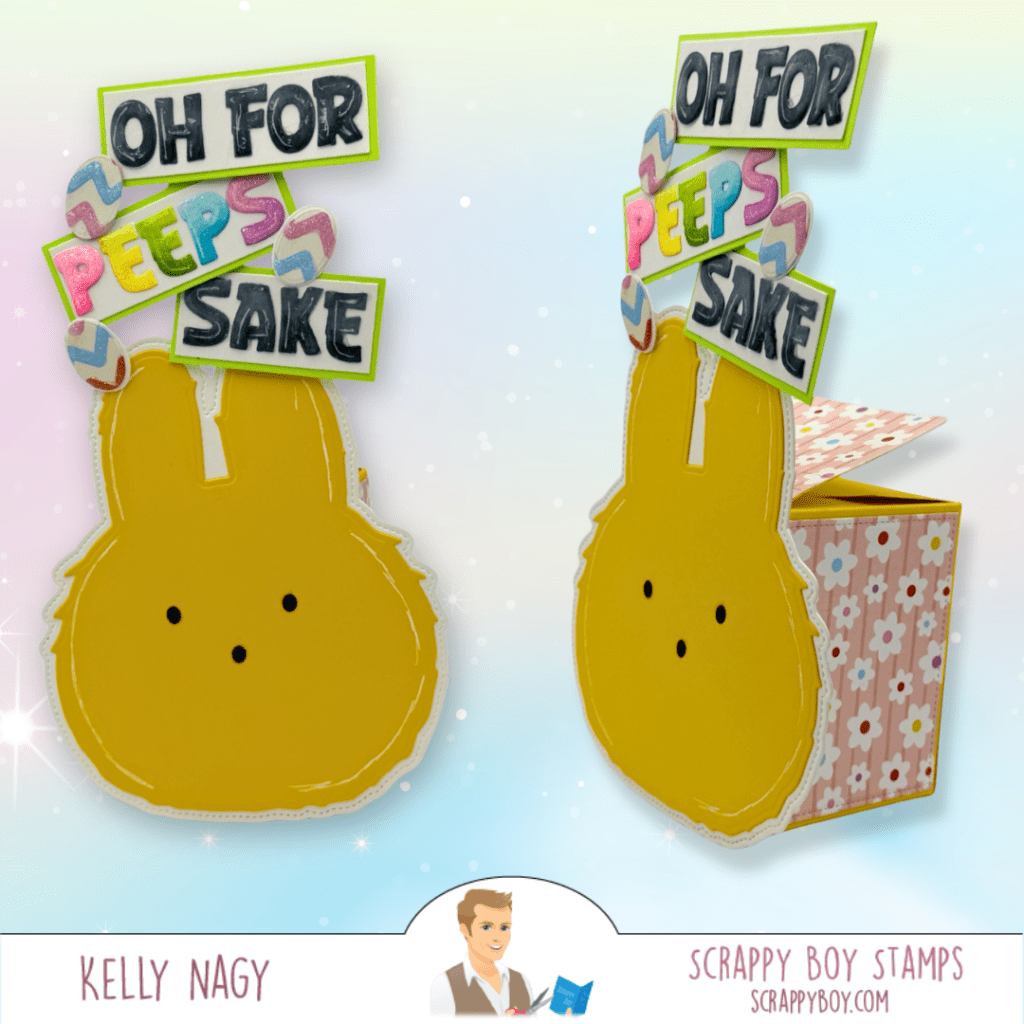
For my third project, I wanted to create something a little unexpected! I used the Shabubu Head Card Die and paired it with the Blind Box Die with Rip Strip to design a fun Easter favor or small gift project.

The Blind Box die creates a playful interactive element with the rip strip, making the project feel like opening a surprise package. To personalize the favor, I added a custom message using the Scrappy Boy Alphabet Die.

This would be perfect for Easter treats, small gifts, or party favors, and I love how these dies can be combined in creative ways to create something completely new. While building up the layered die pieces for the Shabubu design, dry adhesive from Tape Runner made it easy to stack the layers neatly while keeping everything perfectly flat.

Products Used

Shabubu Head Card Die Blind Box Die with Rip Strip Scrappy Boy Alphabet Die

So Many Creative Possibilities

This newest release from Scrappy Boy Stamps offers so many fun ways to create cards, gifts, and interactive projects. Whether you’re making detailed scene cards, mini slimlines, or surprise gift packaging, these products make it easy to craft something memorable.

And when it comes to assembling those layers, dry adhesive from Tape Runner is one of my favorite tools for keeping papers smooth, preventing warping, and allowing a little flexibility while putting everything together.

If you’re interested in these products, you can find Scrappy Boy Stamps products at scrappyboy.com as well as at Scrapbook.com.

Happy crafting! ✂️✨

#ScrappyBoyStamps #StampedbyKelly #Peeps #Easter #Copic

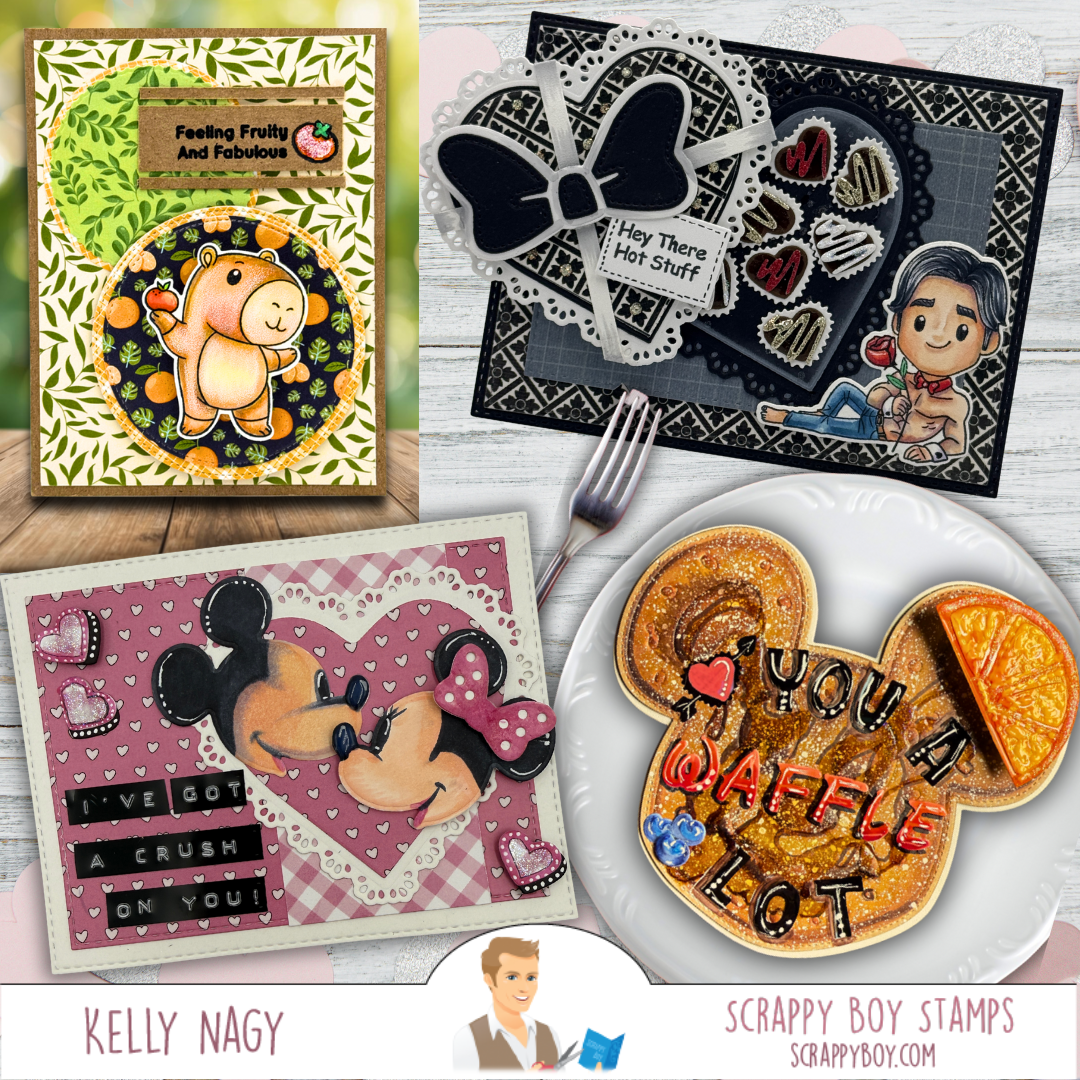
Exciting New Projects Featuring Scrappy Boy Stamps’ January 2026 Release! 🎉

Featuring projects from SCRAPPY BOY STAMPS January 2026 Release.

I’m thrilled to share some fabulous projects I created using Scrappy Boy Stamps’ January 2026 release! Here’s a quick look at the amazing products I used:

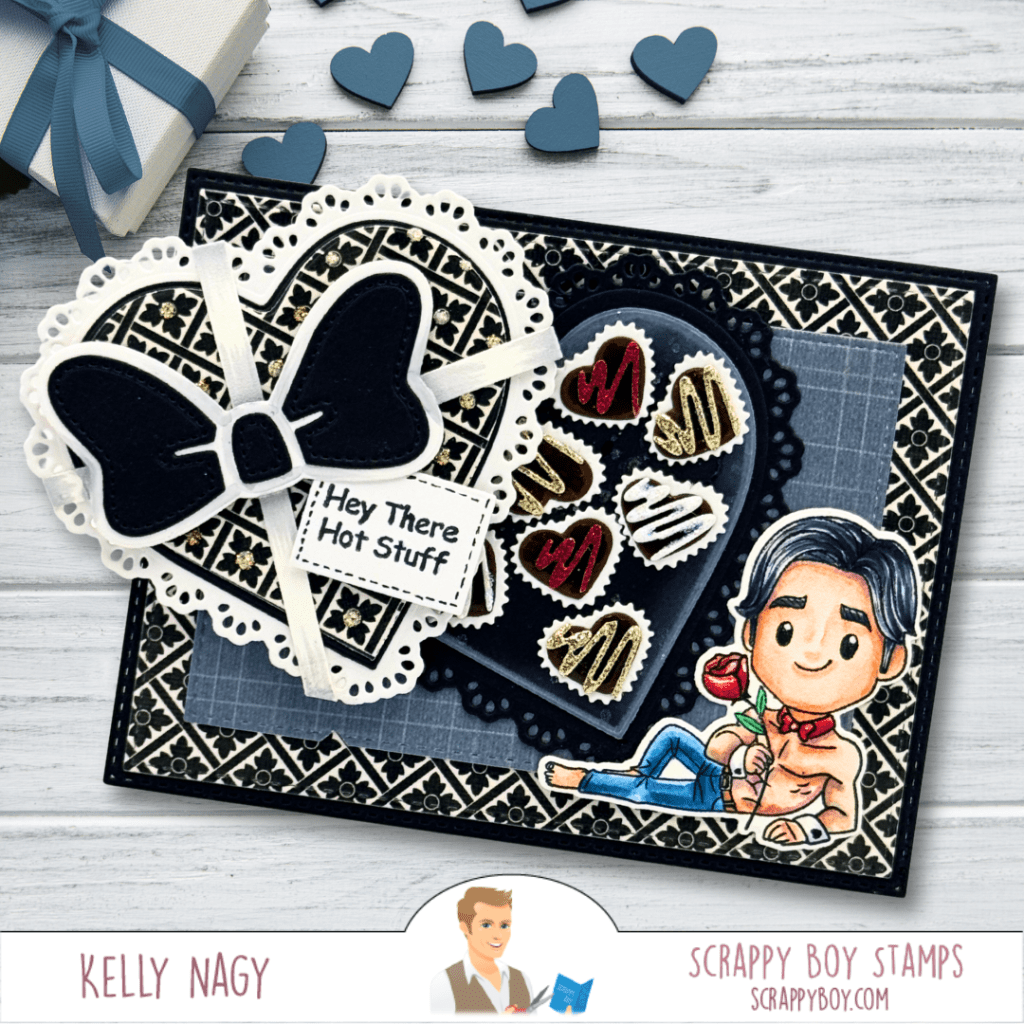
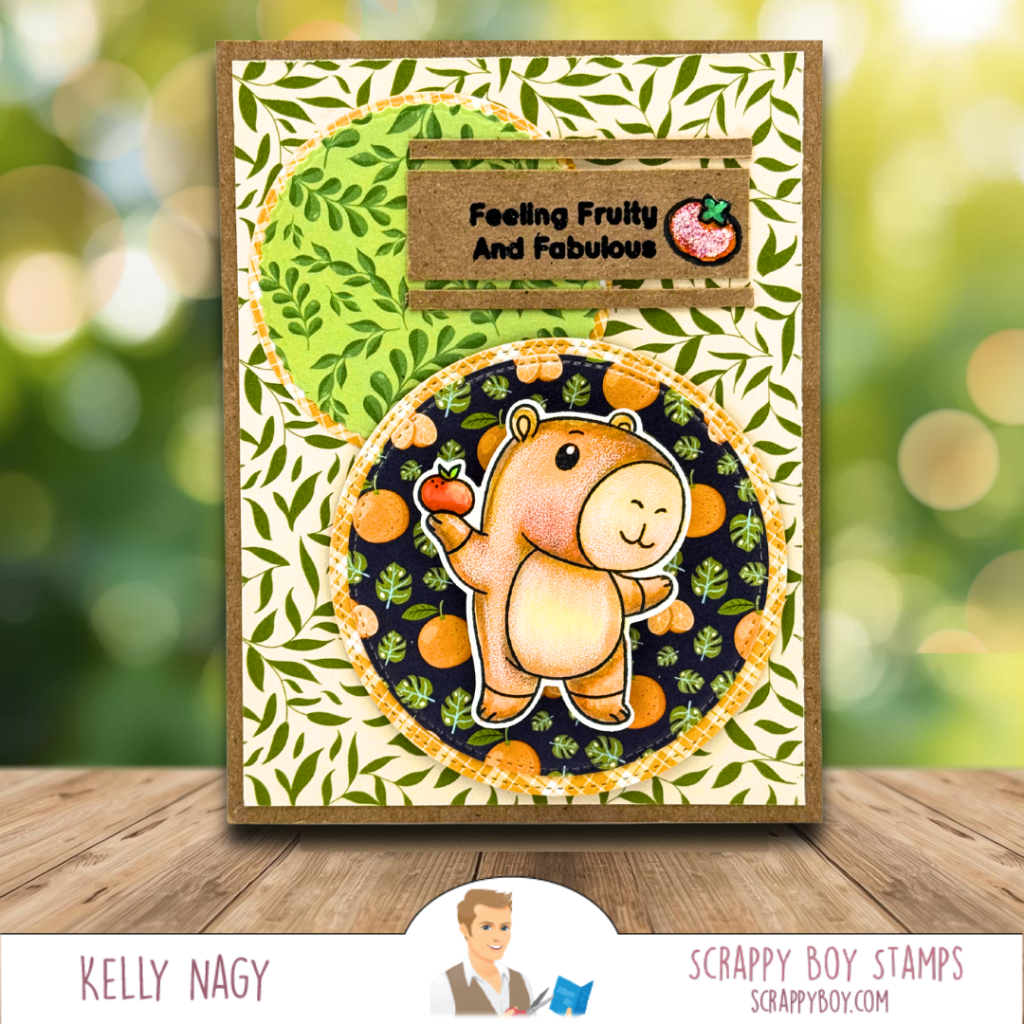
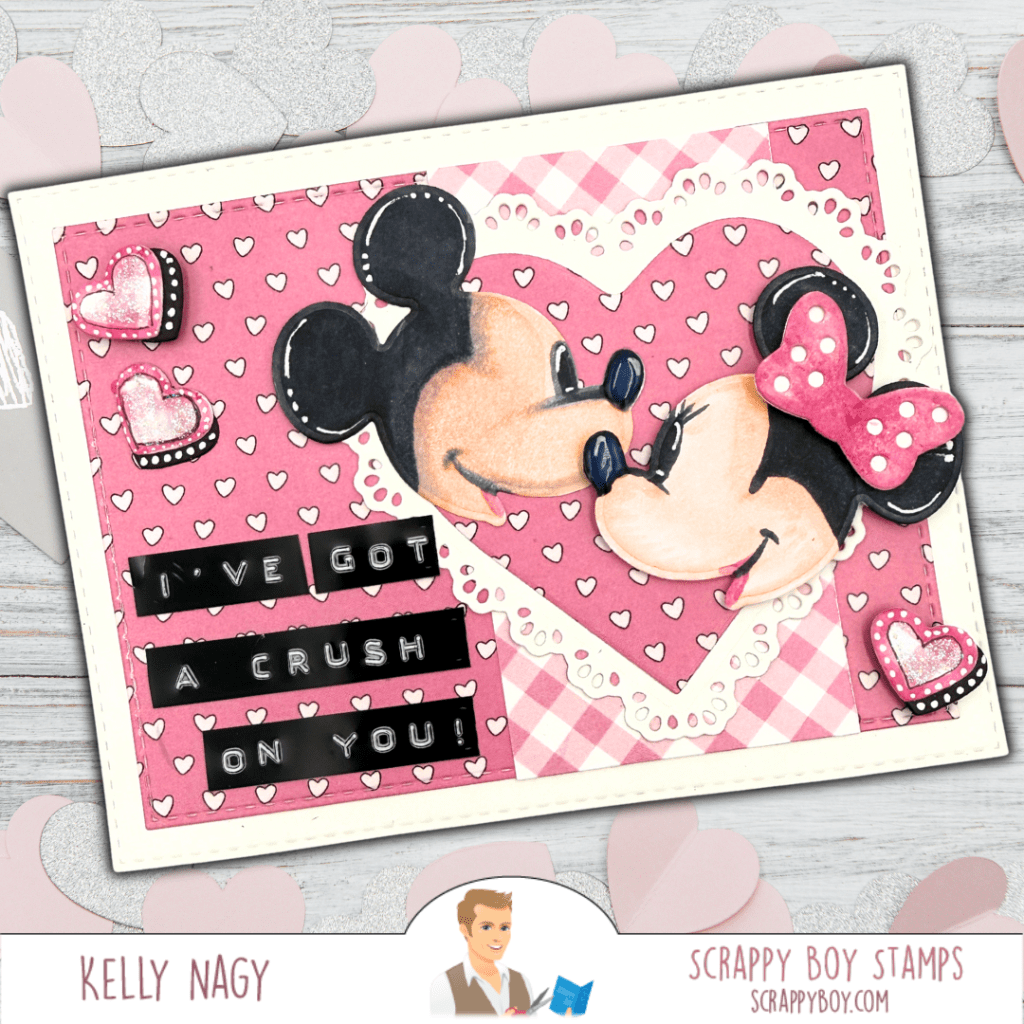
🌹 Charmed & Chiseled Stamps & Outline Dies as well as the new Valentine Heart and Nested Chocolate Heart Dies!! Perfect for adding dimension to your cards!

🌹 Valentine Heart & Nested Chocolate Heart
These are wonderful for all your love-themed projects!

🌹 4 x 9 Coordinating Paper Pack
Great patterns that complement your designs beautifully!

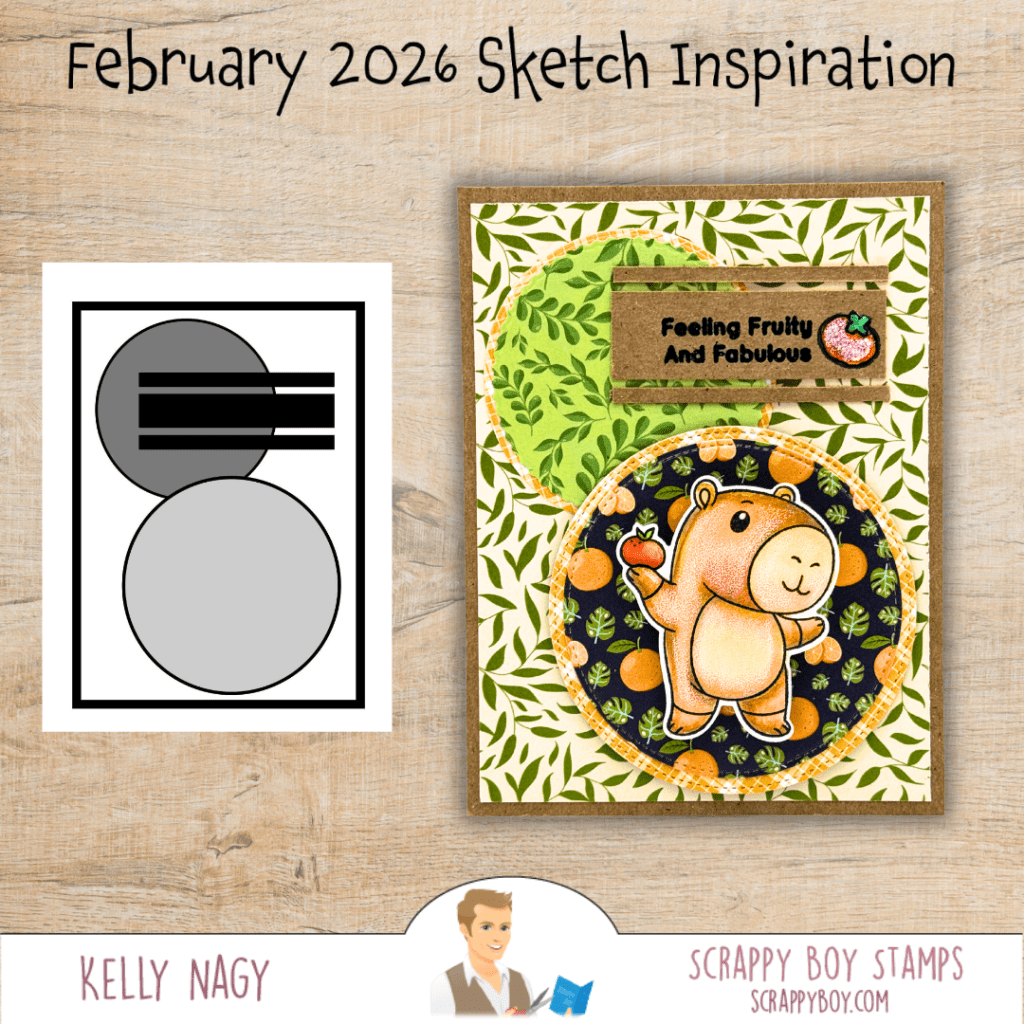
🍊 Cute Capybara Stamp + Dies
Adorable capybaras that are sure to charm everyone!

🍊 Cute Capybara Paper Pack
Fun and whimsical designs for your creations!

🍊 A2 Stitched Rectangle Nesting Dies
Ideal for layering and finishing touches!

🍊 Magnifying Glass Die (Circle)
Adds a playful element to your projects!

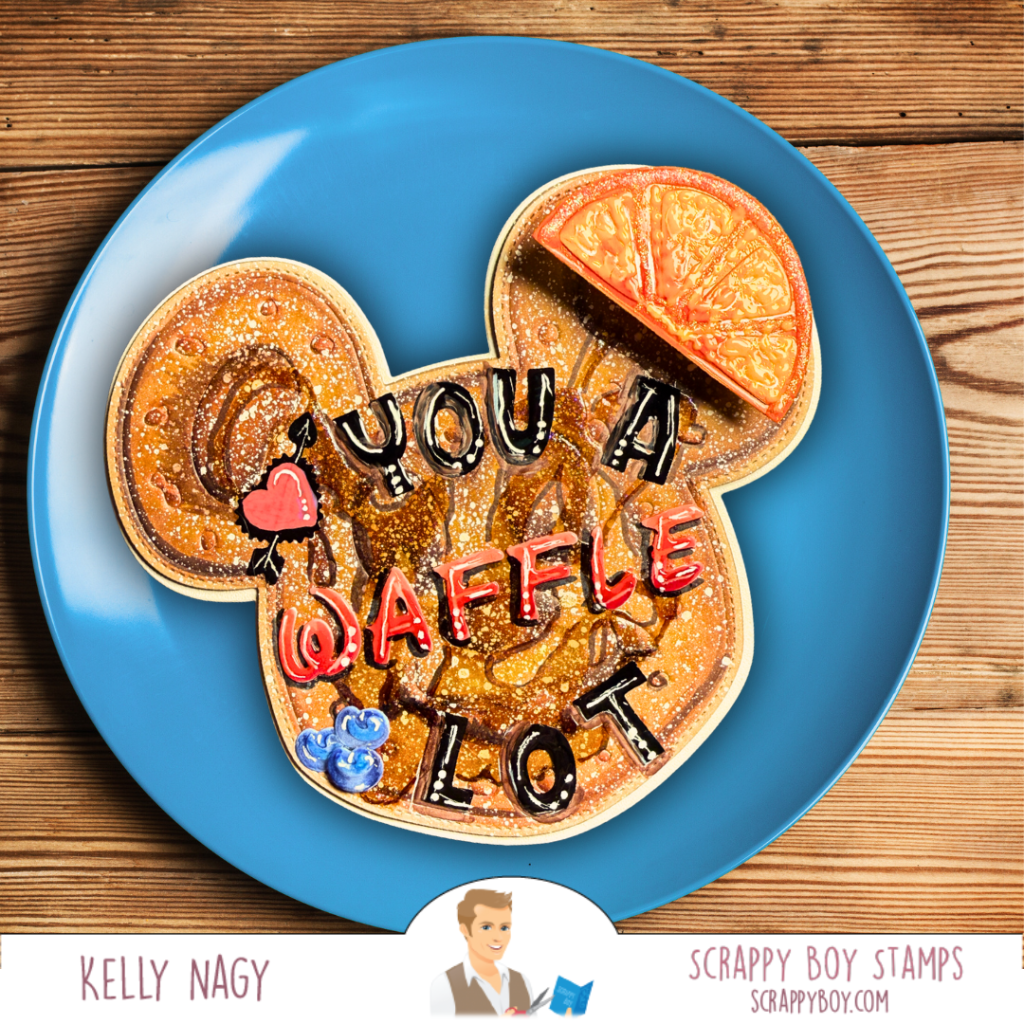
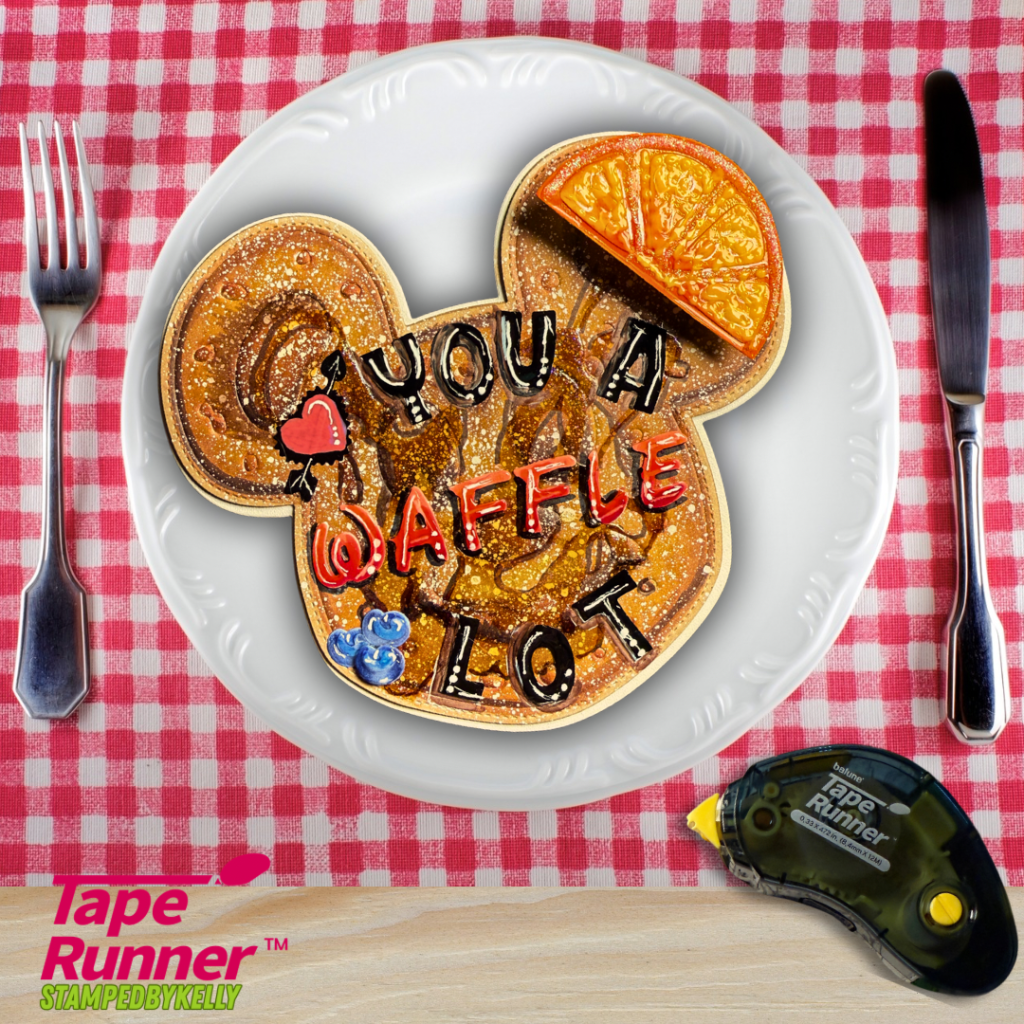
🥨 Mouse Pretzel Mini Album Die
Create fun mini albums in the shape of pretzels! But don’t limit your imagination to just pretzels! I made a waffle!!!!!

🥨 Scrappy Boy Alphabet Die Set
Personalize your cards and projects with style!

🥨 Believe in Magic Alphabet Die Set
Perfect for magical-themed creations!

🐭 Mouse Shaker Die Set
Add some fun with these shaker elements!

🐭 Valentine Heart & Nesting Chocolate Heart Dies
Great for enhancing your Valentine’s projects!

🌟 Follow me on Social Media @stampedbykelly and follow my crafting Facebook Page, Crafting Chaos & Creativity!
I’d love to hear your thoughts! What’s your preferred video length for card-making tutorials—long or short? Let me know in the comments!

Thank you for supporting small businesses like http://www.Scrappyboy.com (http://www.Scrappyboy.com)! 💖

ScrappyBoyStamps #CardMaking #StampedbyKelly #NewRelease #Valentine


Creating with Love: My Pajama Crafter Stamps Card Adventure

Take a journey with me on how you can use simple shapes and fun patterned paper to create textures and interest.

Hey there, crafty friends! 🌟 I’m excited to share a special card-making journey I recently embarked on, showcasing the products from Pajama Crafter Stamps. I created a heartwarming Valentine using the delightful Meowentine Stamps and some festive feline and heart filled patterned paper that truly brought my vision to life.

Crafting Details

I had a blast layering cardstock and matting it with Coal cardstock to give my card some extra flair. To add that special sparkle, I incorporated Stickles and used an embossing folder for texture. The assembly was easy with my favorite liquid glue and the fantastic Tape Runner from http://www.taperunner.com (https://www.taperunner.com). If you decide to grab one, don’t forget to use promo code KELLY10 for 10% off your entire cart!

A Cute Touch of Inspiration

To make my crafting space even more enjoyable, I added an adorable cupcake glue holder. It’s both functional and fun, making it a perfect gift for any crafter in your life! Plus, it offers all the sweetness without the calories! 🧁💖

For everything you need, including the Meowentine Stamps, patterned papers, and cute desktop accessories, be sure to check out my affiliate link: Pajama Crafter Stamps (https://pajamacrafterstamps.com/STAMPEDBYKELLYBLOG).

Join the Crafting Journey

I genuinely believe in the joy of crafting and how it connects us all. I’d love to see your interpretations of this project, so please share your creations! Together, we can inspire each other and foster a wonderful crafting community.

Happy crafting, friends! Your support means the world to me! 💌

With love,
StampedbyKelly

#PajamaCrafterStamps #MeowentineStamps #ValentinesDayCards #StampedbyKelly #CraftyChaosandCreativity

Wonky Christmas Toy Card inspired by Craft Roulette

🌟 Exciting news, everyone! I’m thrilled to share the inspiration behind my newest card creation featuring Pajama Crafter stamps! 🎨✨

Join us today on Instagram as we kick off our Rewind Hop, starting at the Pajama Crafter Stamps INSTAGRAM page. We’re showcasing our favorite products and projects from 2025 that are sure to spark your creativity! Don’t forget to comment, like, and follow each designer in the HOP for a chance to win a gift card to the Pajama Crafter Stamps shop! 💖🎁

Let’s get crafting together! 🛌💌 #PajamaCrafterStamps #StampedbyKelly #HamdmadeCards

Craft Roulette inspired me this week — the challenge was a fun mash-up:
Project: HOLIDAY card
Colors: Forest Colors
Element: Toy(s)
Random: Wonky

I leaned into cozy, rustic holiday vibes and made a wonky, toy-themed holiday card using Pajama Crafter Stamps’ products. I started with a kraft colored card base, layered a white card layer using a smaller stitched panel and 3 separate stitched strips of paper 1 5/8 inch tall with my stitched die and placed them in a wonky format to give the design playful movement. The sketch came from a Pinterest post I loved by Creative Juice by Loni, but I modified it with my stitched dies to add texture and interest, plus I wanted my patterned papers to be more centered and cut them down a bit to approximately 1 5/8 inch x 3 3/4 inch wide.

Design highlights

  • Forest palette: deep pine greens, warm browns, golden yellow sunlight peeking through the trees and berry red accents for a classic holiday feel.
  • Toys element: I used the dinosaur playing drums from Dino-mite Birthday Stamp Set, ornament images from the Weinerful Christmas Stamp Set, pine branch from the Rustic Christmas Owl Stamp Set and the sentiment from the Holly Jolly Christmas Stamp Set.
  • Wonky layout: the tilted stitched panels using 3 different patterned papers from the 6×6 paper pack called WINTER PARADE. plus a slightly askew sentiment strip makes the card feel fun and handmade.
  • Finishing touches: foam tape to pop up focal images, a dusting of white gel pen “snow,” and crystal 3-d glaze and Stickles for some glitz.

Products I used (affiliate link)
https://pajamacrafterstamps.com/STAMPEDBYKELLYBLOG (https://pajamacrafterstamps.com/STAMPEDBYKELLYBLOG)

  1. Winter Parade 6×6 paper pack
  2. Dino-mite Birthday Stamp Set
  3. Holly Jolly Christmas Stamp Set
  4. Rustic Christmas Owl Stamp Set
  5. Weinerful Christmas

Quick how-to (5 minutes)

  1. Cut card base out of Kraft card stock. 5 1/2 x 4 1/4.
  2. Cut a white cardstock out if a slightly smaller stitched A2 sized stitched rectangle to allow some kraft color base to perk through.
  3. Cut 3 strips of patterned paper from the Christmas Parade Paper Pack at 1 5/8 in x 4 or use a size smaller A2 layering rectangle to add stitches on the edge of slightly smaller stitched panel; adhere each panel a little wonky/askew. See photo.
  4. Stamp the dinosaur playing drums image towards the bottom of a white piece if cardstock measuring 1 3/4 2 in x 3 3/4 in. Color with your favorite medium. I used Olo and Copic together, with some white pencil.
  5. Stamp pine branch on top and select 3 small ornaments and stamp haphazardly under the branch, connecting each ornament to the tree using a straight edge and a black fine liner pen.
  6. Adhere the stamped panel to a piece of kraft cardstock 2×4 inches. using dry adhesive mini tape runner. I used the Tape Runner MINI.
  7. Adhere all pieces except the stamped and colored matted panel using the Tape Runner Mini from http://www.TapeRunner.com. For 10% off use code: KELLY10
  8. Add sentiment, Stickles, crystal effects glaze and white gel pen snow; this allows you to tuck a sparkly accent or two.
  9. Add the stamped panel with double-sided foam tape for added dimension.
  10. I used a dirty ink-blending brush with some leftover Walnut Stain Distress Oxide Ink from Ranger. It took a little of the brightness out of the stark white panels to give a rustic or dreamy feel. You can simply add a small amount of the ink to a clean brush snd ink blend off most onto a piece of scrap paper and THEN to your project. It’s very subtle.

If you liked this, try the same sketch with different color combos or swap the images for other critters, toys or ornaments. Thanks for stopping by — and if you shop Pajama Crafter Stamps, I’d appreciate you using my affiliate link above!

Great news — there’s an Instagram hop today, Friday, December 19! Stop by the Pajama Crafter Stamps Instagram page to get started for your chance to win a gift card to use in the shop. HOP on over to my INSTAGRAM page at StampedByKelly to start. We’d love to see you join the fun — hop, comment, and enter to win!

Happy Crafting!

Crafting Magic with Scrappy Boy’s YARN MINI ALBUM / CARD DIE: Snowman Edition!

Fun downloadable to pair with items in your SCRAPPY BOY stash…or any circle dies, cutters or cut your own out of construction paper. Great activity for kids, grandchildren and everyone in between!

Happy Monday, crafty friends! 🎉✨ Today, I’m excited to share a delightful project using the Scrappy Boy YARN MINI ALBUM / CARD DIE. With just a few simple steps, you can create an adorable snowman that’s perfect for the winter season! Plus, I’ll showcase two additional projects featuring Scrappy Boy stamp sets to highlight the versatility of this die. Let’s get started!

Step 1: Print the Free Download

Head over to my blog at http://www.stampedbykelly.com (http://www.stampedbykelly.com) to grab your fun download, which includes a step-by-step guide and templates for your snowman project.

Tip: Make sure to print on cardstock for better durability!

Step 2: Cut Your Pieces

Using the YARN MINI ALBUM / CARD DIE, cut out the snowman pieces from white cardstock:

  • Base: This will be the mat underneath the head of your snowman.
  • I cut my top layer out of white glitter cardstock for extra interest.
  • Accessories: Cut out scarf and “coal” from colored cardstock or white (easy) and color up with Black Markers.

If you own the TRAILER MINI ALBUM / CARD DIE, you can also create wheels by cutting circles from black cardstock instead of the printed coal circles!

I cut in white card and colored up with my COPIC 100.

Step 3: Color Your Accessories

Bring your snowman to life by coloring the accessories. Use markers, colored pencils, or your favorite coloring medium to add personality to your snowman!

Step 4: Assemble Your Snowman. I used the TAPE RUNNER MINI to put my snowman together. You can get 10% OFF your purchase at http://taperunner.com using PROMO CODE: KELLY10

Now it’s time to put it all together!

  1. Start with the base: Attach the snowman’s head (the smaller winky circle) die to the base (the larger circle).
  2. Add accessories: Glue scarf and buttons (Scrappy Boy Shirt Mini Album Card Die), circles (tires and hubcaps from the TRAILER MINI ALBUM AND CARD DIE) or a circle punch from your stash. If you like to fussy-cut, the circles are on the printable page.
  3. Final touches: Add white gel pen accents to eyes, carrot nose and mouth.

Additional Projects to Inspire You

  1. Yarn Ball Card
    Using the same die, I created a cheerful yarn ball card perfect for any crafting enthusiast. Just cut and decorate with bright, fun colors—it’s a great way to brighten someone’s day! Stamp set is the CUTE GIRLS CAT LOVERS: https://scrappyboy.com/products/cute-girls-cat-lovers-6×8-stamp-set
  2. Volleyball Encouragement Card
    I transformed the YARN MINI ALBUM / CARD DIE into a volleyball for a fun volleyball-themed card! Just ink blend over with a gray or extremely light handed-blending with black and use the embossed die-cut piece,. The ink reveals and accentuates the texture.

Share Your Creations

I can’t wait to see your snowman and other projects! Be sure to tag me @stampedbykelly and share your creations on the Scrappy Boy Friends and Inspiration Facebook page.
FOLLOW ME ON FACEBOOK

Happy crafting and Happy Holidays! 🎅✨ Don’t forget to check out the YARN DIE and more at http://www.scrappyboy.com (http://www.scrappyboy.com)! 🌟