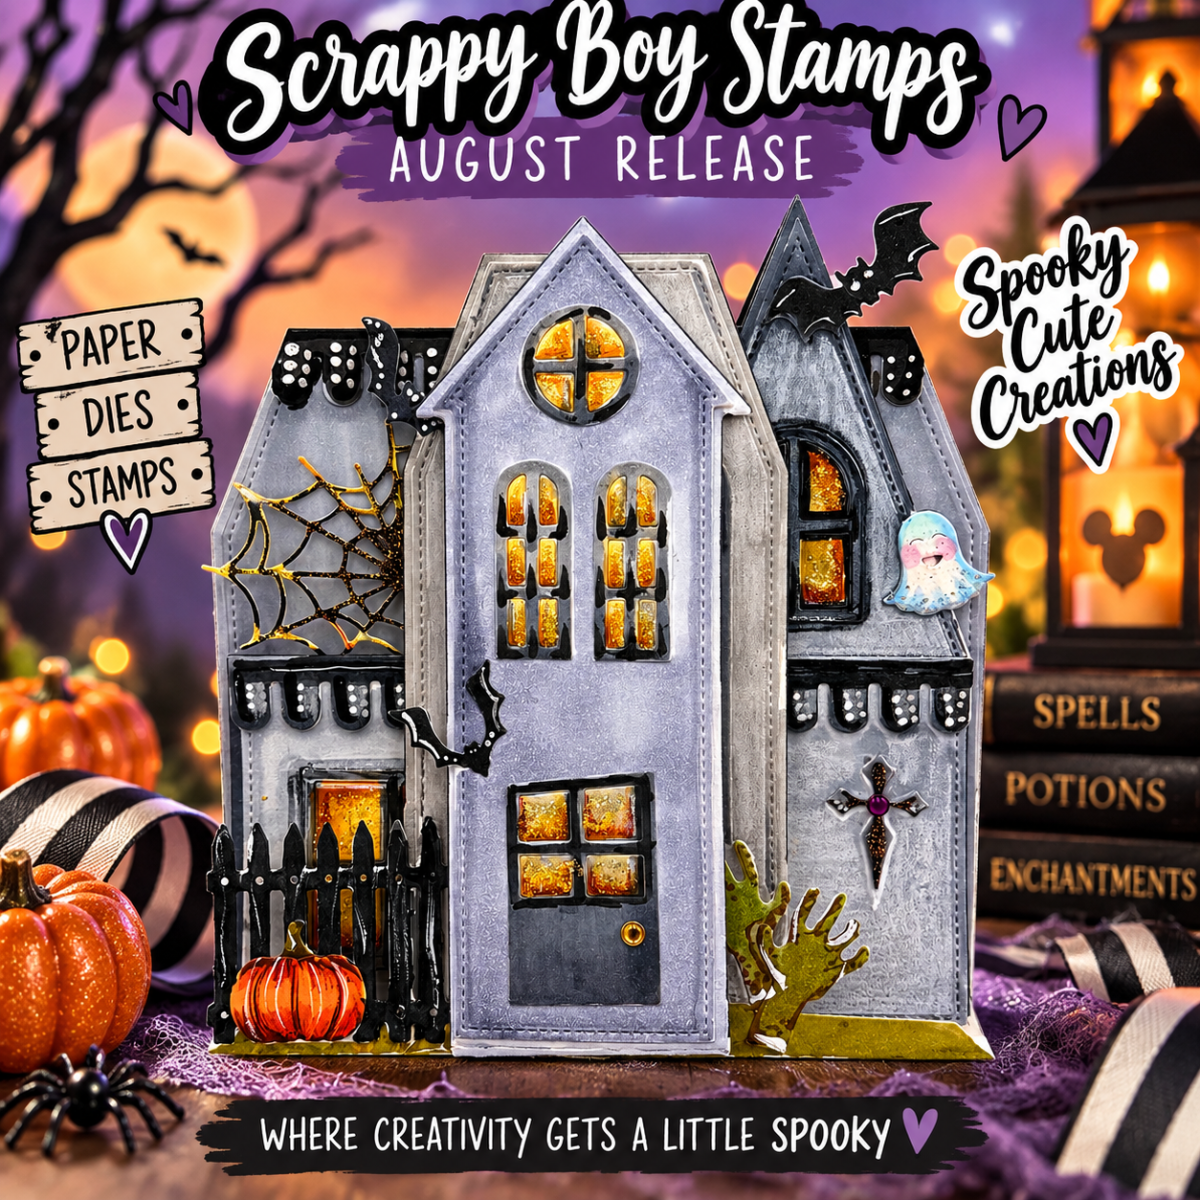
Spooky Cute with the Scrappy Boy Stamps August Release! 🦇🎃

Get spooky cute with the Scrappy Boy Stamps August Release! I’m mixing stamps, dies, paper and a little unexpected inspiration to create Halloween projects filled with dimension, personality and fun—including a special treat box made for my grandson and one of our favorite Halloween traditions. 🎃🦇✨

If you know me, you know I LOVE finding unexpected ways to use my crafty supplies! Sometimes a stamp or die may have been designed with one idea in mind, but I immediately start thinking, “What else can I turn this into?” And living in Central Florida, it probably comes as no surprise that a little theme park inspiration frequently sneaks into my craft room!

For these projects, I pulled out some of the spooky-cute goodies from the Scrappy Boy Stamps August Release and gave them my own magical Halloween twist.
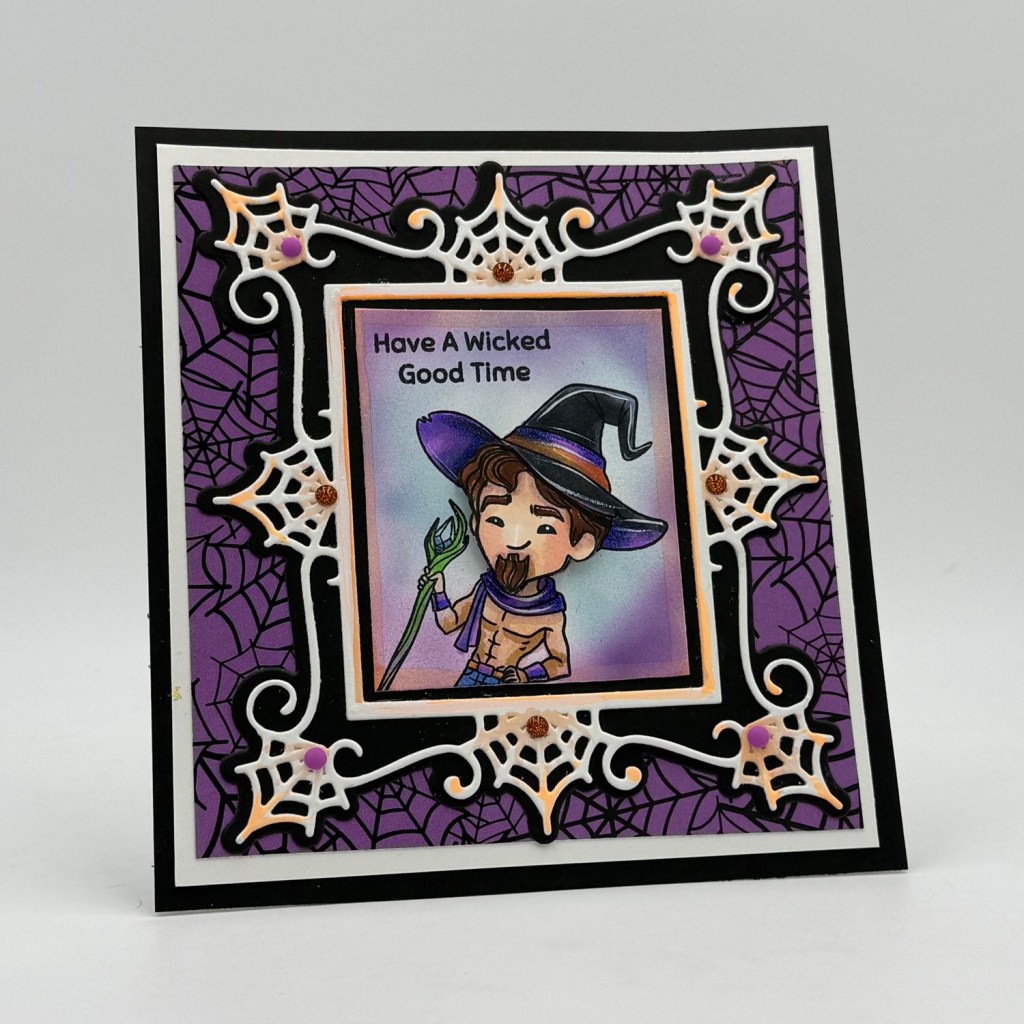
“Have a Wicked Good Time” Gothic Picture Frame card

The Gothic Picture Frame Die was perfect for framing one of the adorable images from Hex Appeal. I kept the traditional Halloween palette of purple, black, orange and white, adding little pops of sparkle to the spiderweb details. I love how the oversized frame makes the stamped image feel like a spooky portrait hanging inside a haunted mansion.
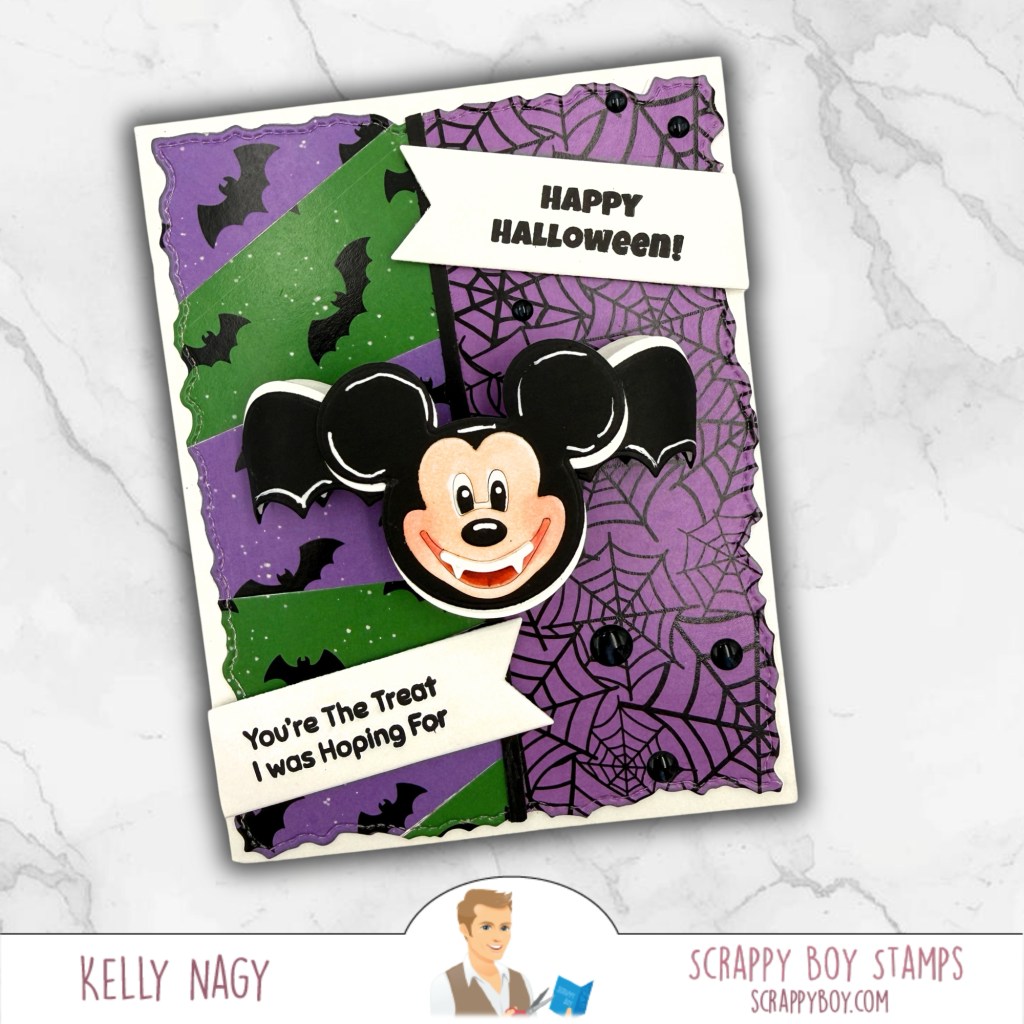
Mouse Bat card — “You’re the Treat I Was Hoping For

Then came those Mouse Bat Embellishment Dies! These were just begging for some theme park-inspired fun. I played with layers, patterned papers, torn edges and white gel-pen accents to create two completely different Halloween cards.
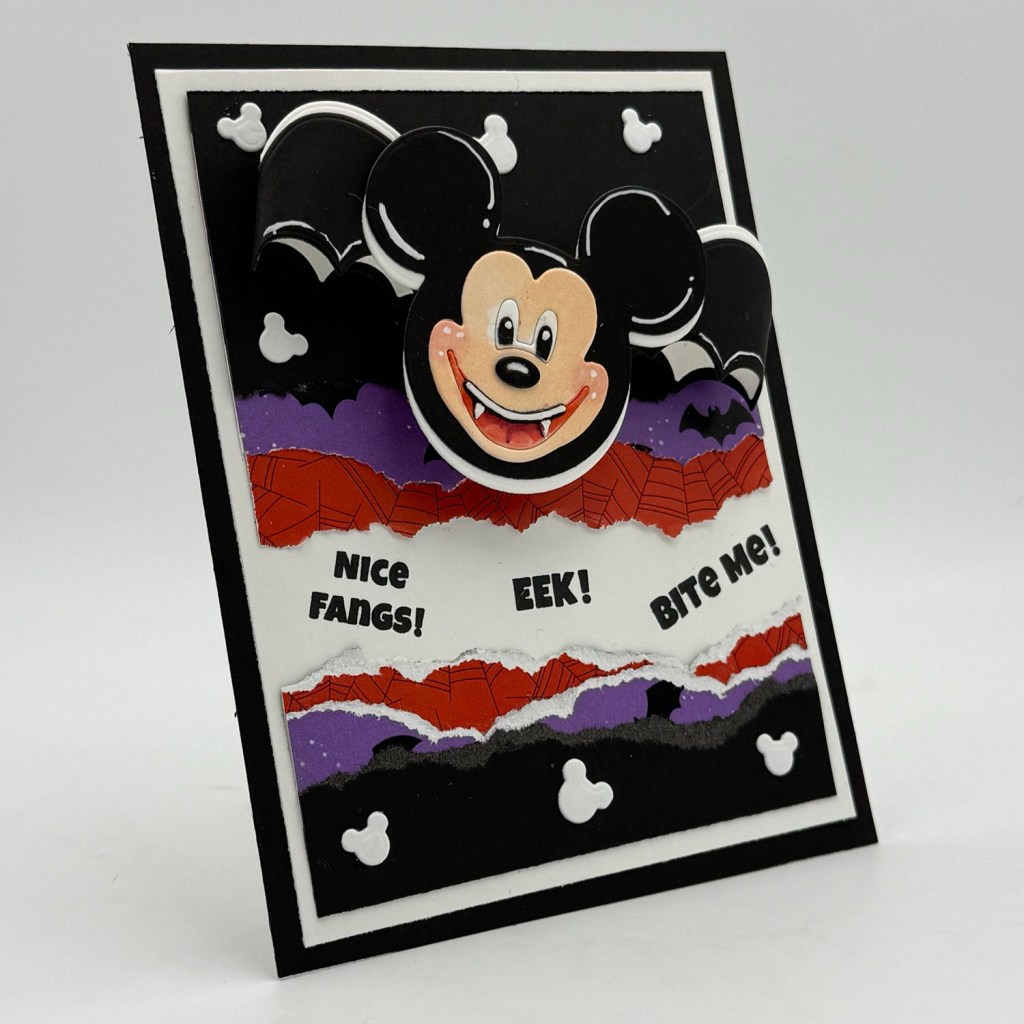
Mouse Bat card — “Nice Fangs! Eek! Bite Me!”

The dimensional bat ears make such a fun focal point, especially when paired with those classic Halloween colors. I especially love how differently the same basic die can look simply by changing the background, composition and embellishments.

And I couldn’t stop there!
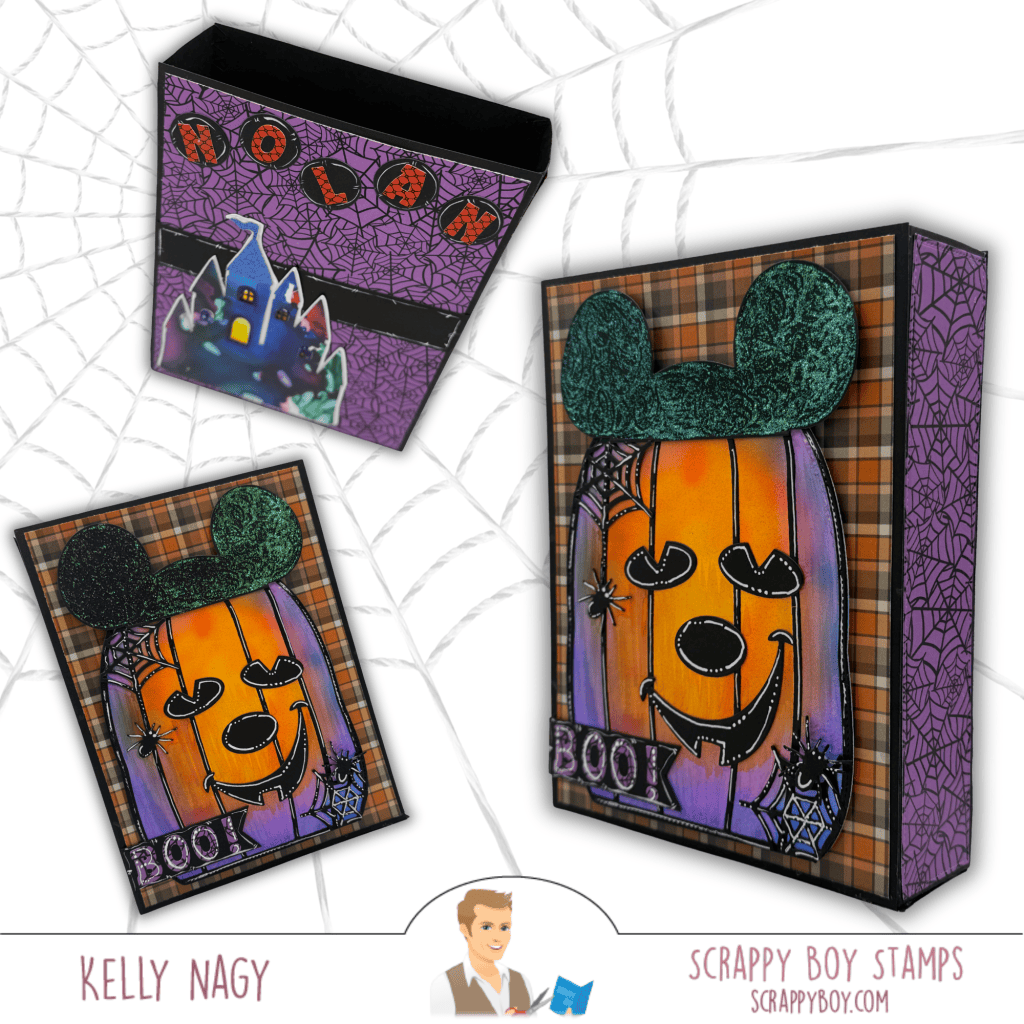
Full Pumpkin Mouse project showing both the card and dimensional folio/box

The Pumpkin Mouse Backpack Add-On became the star of one of my favorite projects. Instead of treating it simply as a backpack element, I transformed that big pumpkin into a dimensional Halloween centerpiece and paired it with plaid and spiderweb papers. A little tissue paper and some fun halloween treats and gift cards and you have a decorative, heartfelt gift and memory holder once emptied.
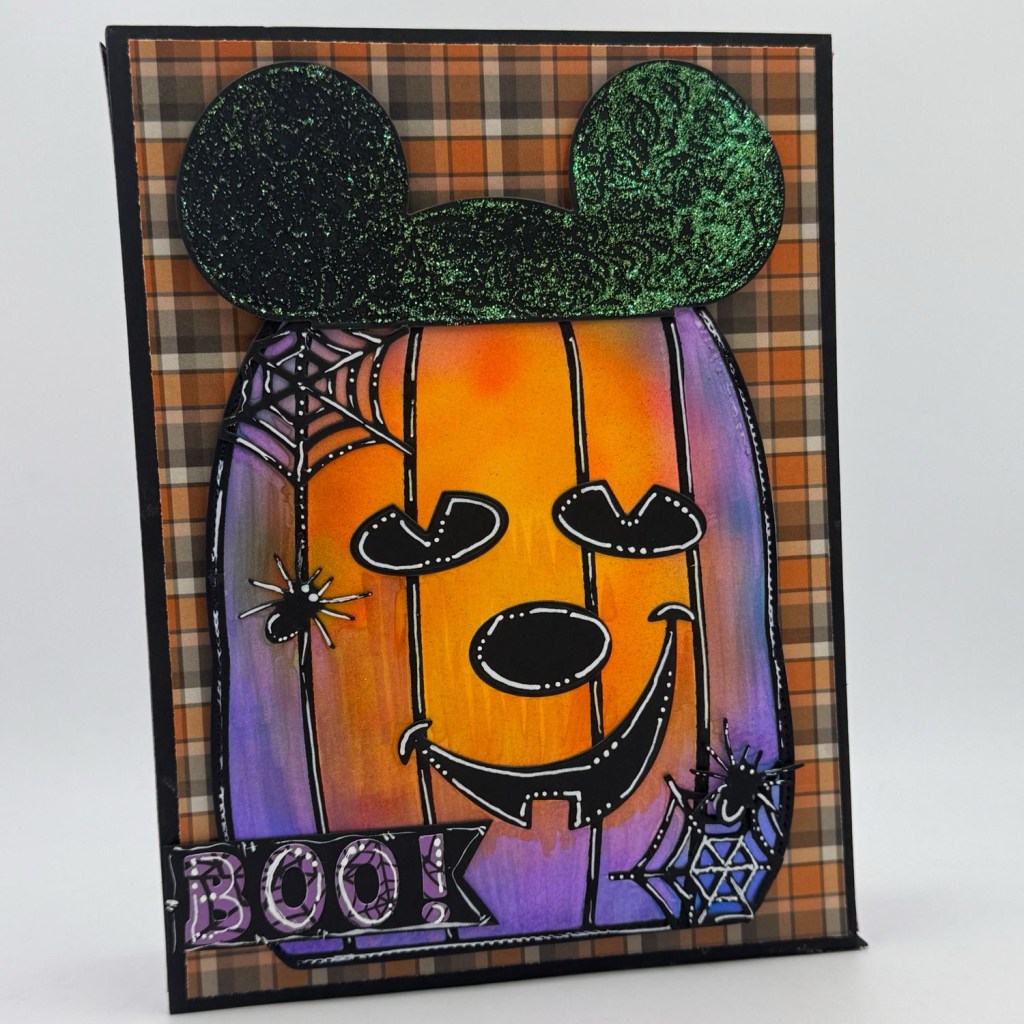
Close-up of Pumpkim

Lots of ink blending, deep shadows, white gel-pen highlights, lovingly put together with my hand-held adhesive from Tape Runner and a little shimmer helped bring all of those layers to life. The close-up really shows how much dimension and texture can be added to simple paper die cuts.

This treat box is especially close to my heart because I created it for our grandson, Nolan, as we prepare for our second annual visit to the Mouse’s Not-So-Scary Halloween Party at the theme park, a tradition that combines celebrating his birthday with officially kicking off the Halloween season here in Central Florida!

I personalized the back with his name and even pulled in the castle die from a previous Scrappy Boy Stamps release, which was the perfect way to add another little touch of magic. I love mixing pieces from different releases and finding completely new ways to use them, but even more, I love knowing that this project will become part of another special memory with our grandson. 🎃🏰🧡
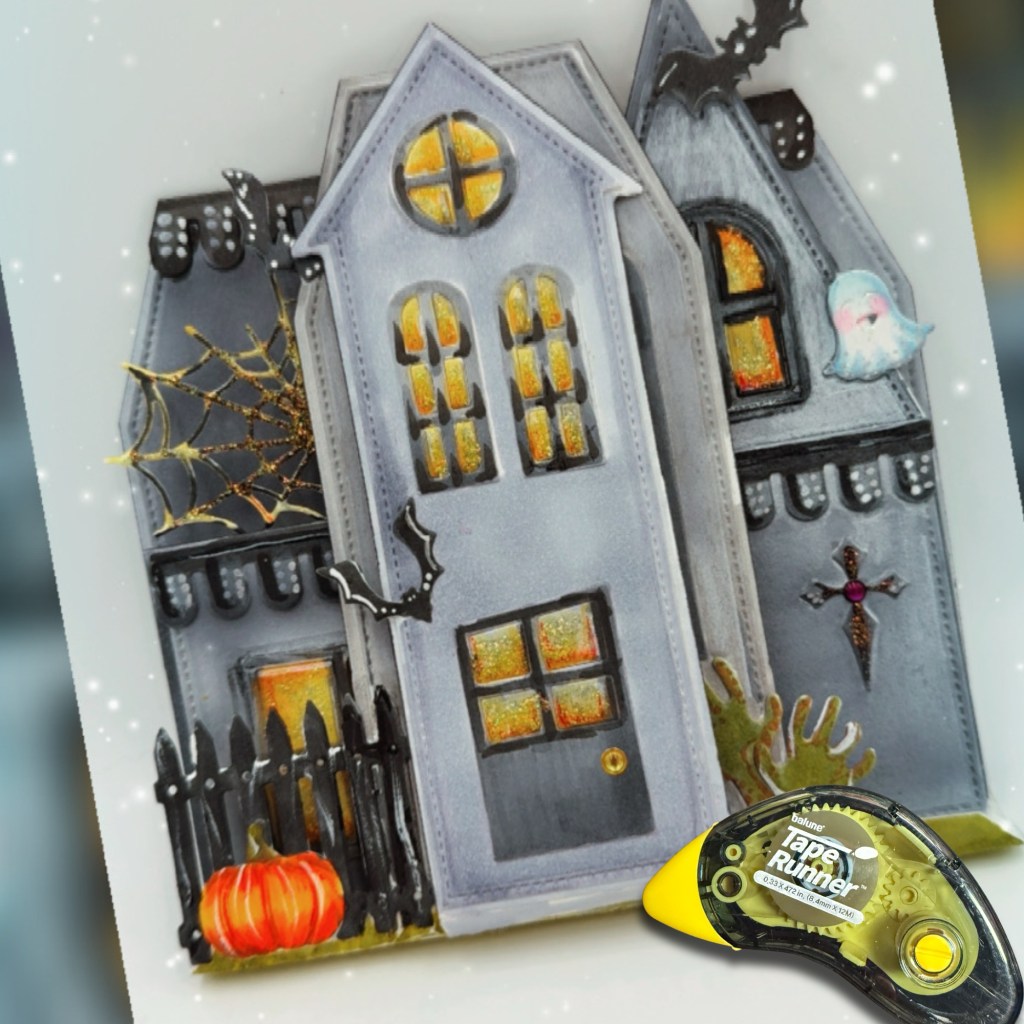
Finally, I had to play with the Haunted House Folio. I went for an eerie-but-cute abandoned mansion look with weathered grays, soft lavender, glowing golden windows, bats, spiderwebs, a pumpkin and even a creepy little hand reaching up from below. It was easy to position and adhere the smaller pieces with my hand-held Tape Runner. This project has so many tiny details to discover!

That’s probably my favorite part about crafting: the dies give you the pieces, but your imagination gets to decide what they become.
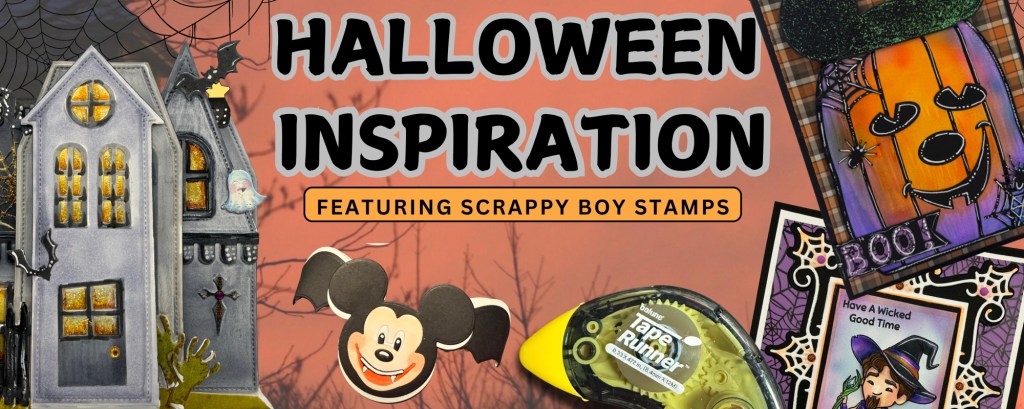
I hope these projects inspire you to pull out your supplies and look at them a little differently. Mix collections. Change the intended theme. Add unexpected colors. Turn an embellishment into the focal point. Most importantly, have fun creating something that’s completely you.
Happy crafting — and stay spooky! 🦇🎃✨
🦖 Dinosaur Week Goes Extinct—with a Little Halloween Magic!

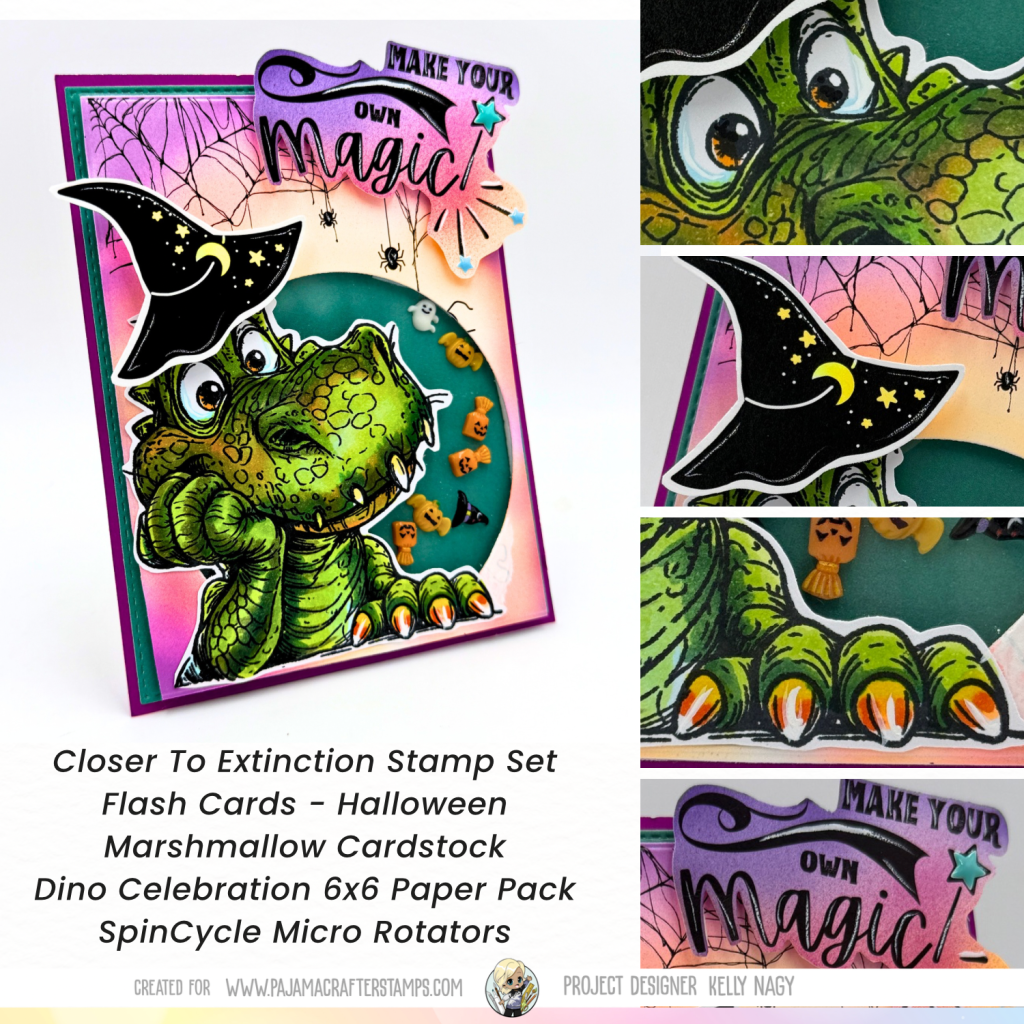
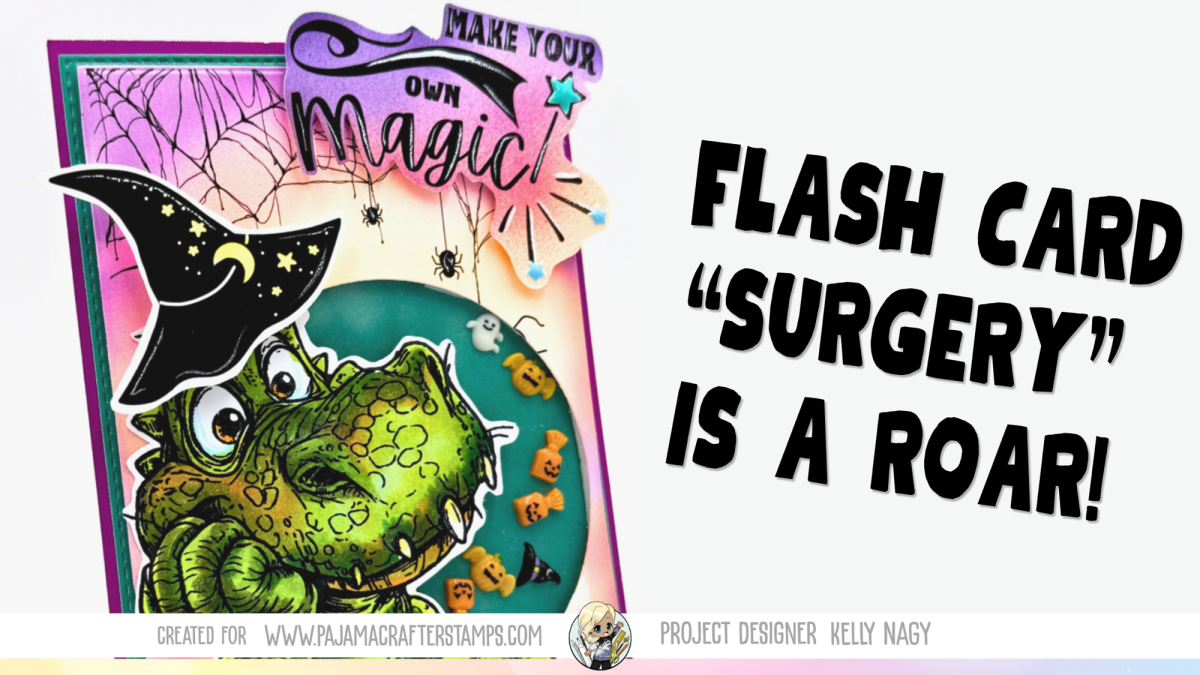
Celebrate Dinosaur Week with a fun Halloween shaker card featuring the Close to Extinction Stamp Set, creative Flash Card Surgery, and spooky interactive details from Pajama Crafter Stamps.

I’m closing out Dinosaur Week with one last dino-mite project—and this little guy from the Close To Extinction Stamp Set decided he was ready for Halloween! 🎃🦖

For this card, I did what I’m calling a little Flash Card Surgery! ✂️ I cut into two Halloween Flash Cards, using the skeleton/spiderweb design to create my circle shaker and borrowing the witch hat and “Make Your Own Magic” sentiment from another card.

I love finding ways to stretch products beyond their original design. A little cutting, mixing and matching turned these Flash Cards into something completely different—and gave my dinosaur the perfect spooky-season makeover!

🛍️ What I Used

  • Close To Extinction Stamp Set
  • Halloween Flash Cards
  • Dino Celebration 6×6 Paper Pack
  • Marshmallow Cardstock
  • SpinCycle Micro Rotators

🦖 Has This Dino Already Gone Extinct?

The Close To Extinction set has been so popular that you may find it temporarily out of stock. If so, hit the Notify Me button! He’s expected to make a comeback, and you’ll know when it’s time to swoop in and fill that cart before he disappears again.

You can shop Pajama Crafter Stamps using my affiliate link:

https://pajamacrafterstamps.com/STAMPEDBYKELLYBLOG

This post contains an affiliate link. I may earn a small commission from qualifying purchases at no additional cost to you. Thank you for supporting my crafting and Stamped by Kelly!

And that’s a wrap on Dinosaur Week! I think sending this little guy into extinction dressed for Halloween was the perfect way to end it. 😂

Until the next crafty adventure—Make Your Own Magic! ✨

#PajamaCrafterStamps #DinosaurWeek #CloseToExtinction #StampedByKelly #HalloweenCard #DinosaurCard #ShakerCard #Cardmaking #HalloweenCardmaking #FlashCardSurgery

From Shells to Flowers

Who says seashells have to stay at the beach? In today’s card, I’m transforming shell images into beautiful flowers with a fun, unexpected twist using the SHARK-UTERIE stamp set from Pajama Crafter Stamps! Stop by for step-by-step details, close-up photos, and a creative technique that will have you looking at your stamps in a whole new way.

Sometimes the smallest stamp in a set becomes the biggest surprise!

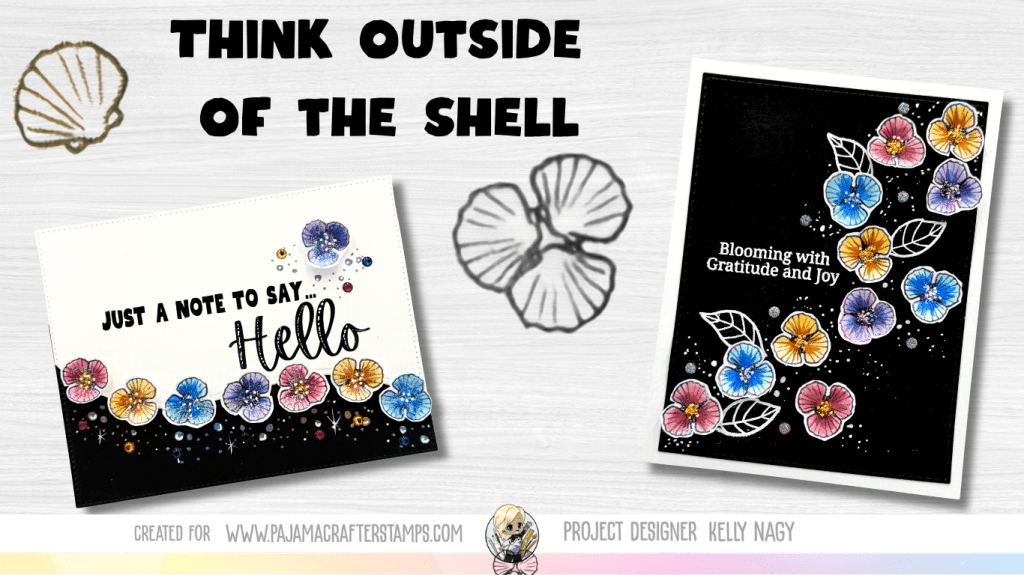
When I was first designing this SHARKuterie Board stamp set from the July Pajama Crafter Stamps’ Release, I added this cute little shell, which is perfect for beach scenes. But after playing around with it, I discovered that stamping three shells together created the sweetest little flowers!

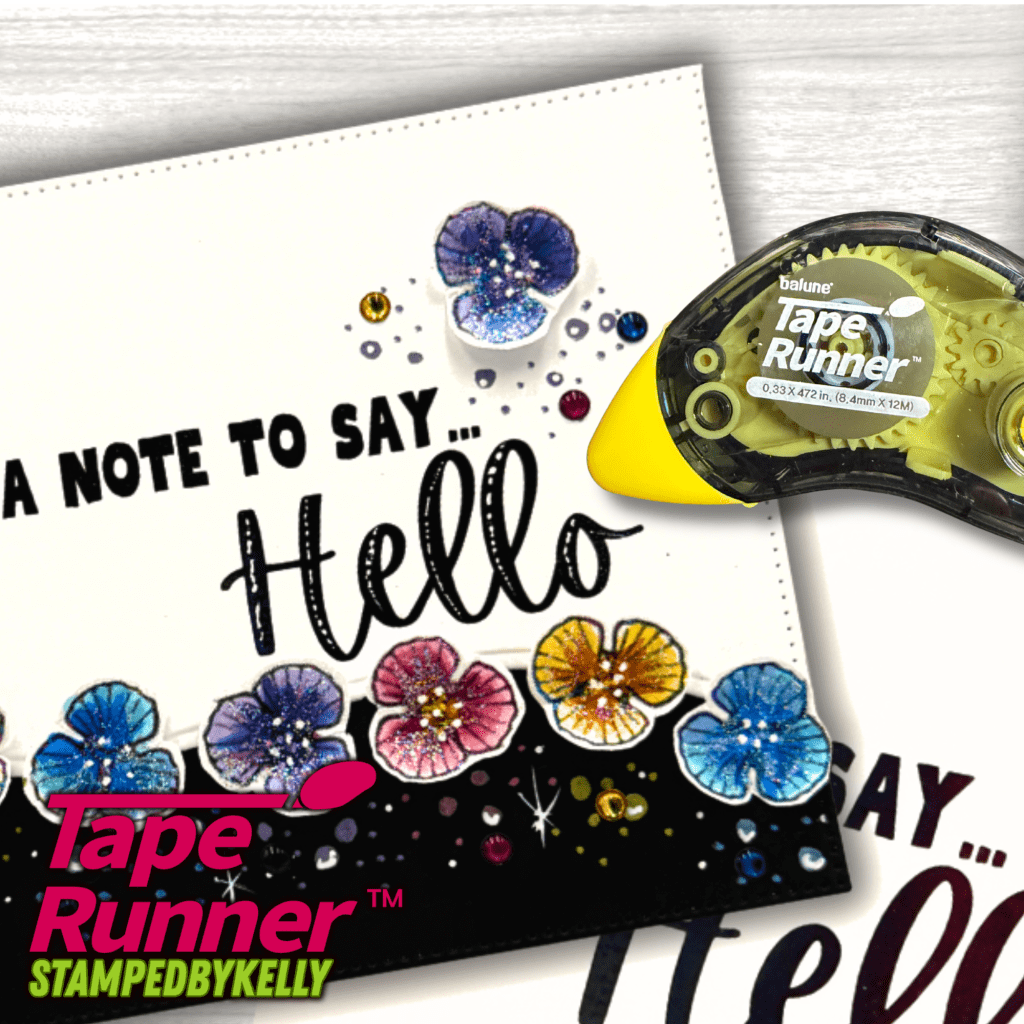
I loved this concept so much that I designed two completely different cards using the same shell flowers—proving that a single stamp can inspire so many creative possibilities.

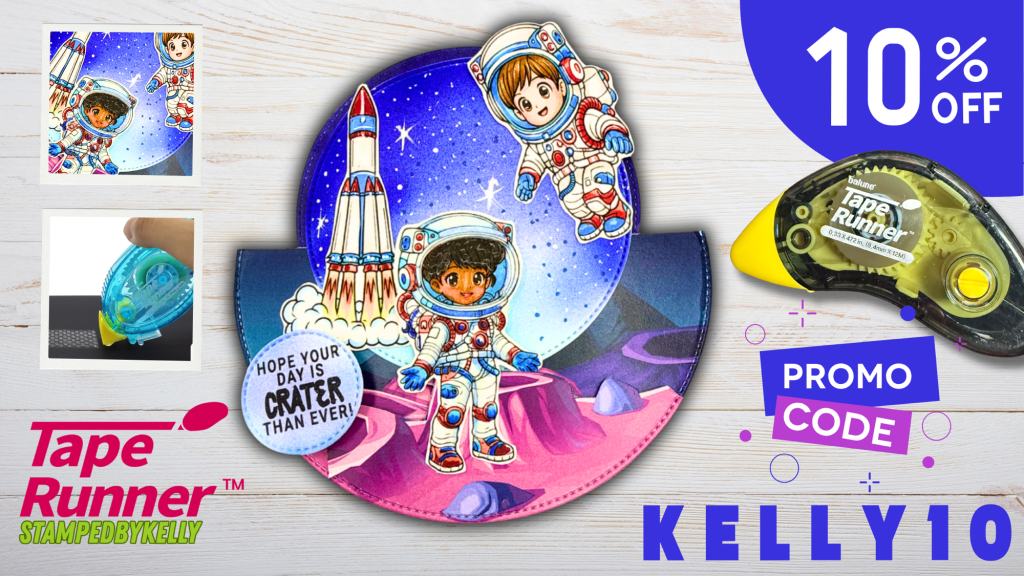
USE PROMO CODE: KELLY10 for
10% OFF on TapeRunner.com

Rather than sharing all the details here, I invite you to visit the Pajama Crafter Stamps Blog, where I post all the fun details! You’ll find:

If you’re looking for inspiration to stretch your stamps and think outside the box, I hope you’ll stop by and check it out!

👉 Read my August 1 featured post on the Pajama Crafter Stamps’ Blog here: https://pjcrafterstamps.com/

Thanks so much for visiting, and as always…

Happy Crafting! 💜

Kelly

💜 Affiliate Link: If you shop using my link below, I may earn a small commission at no additional cost to you. Thank you for supporting my crafting journey!

#StampedByKelly #PajamaCrafterStamps #SharkuterieBoard #SharkWeek #CreativeInspiration

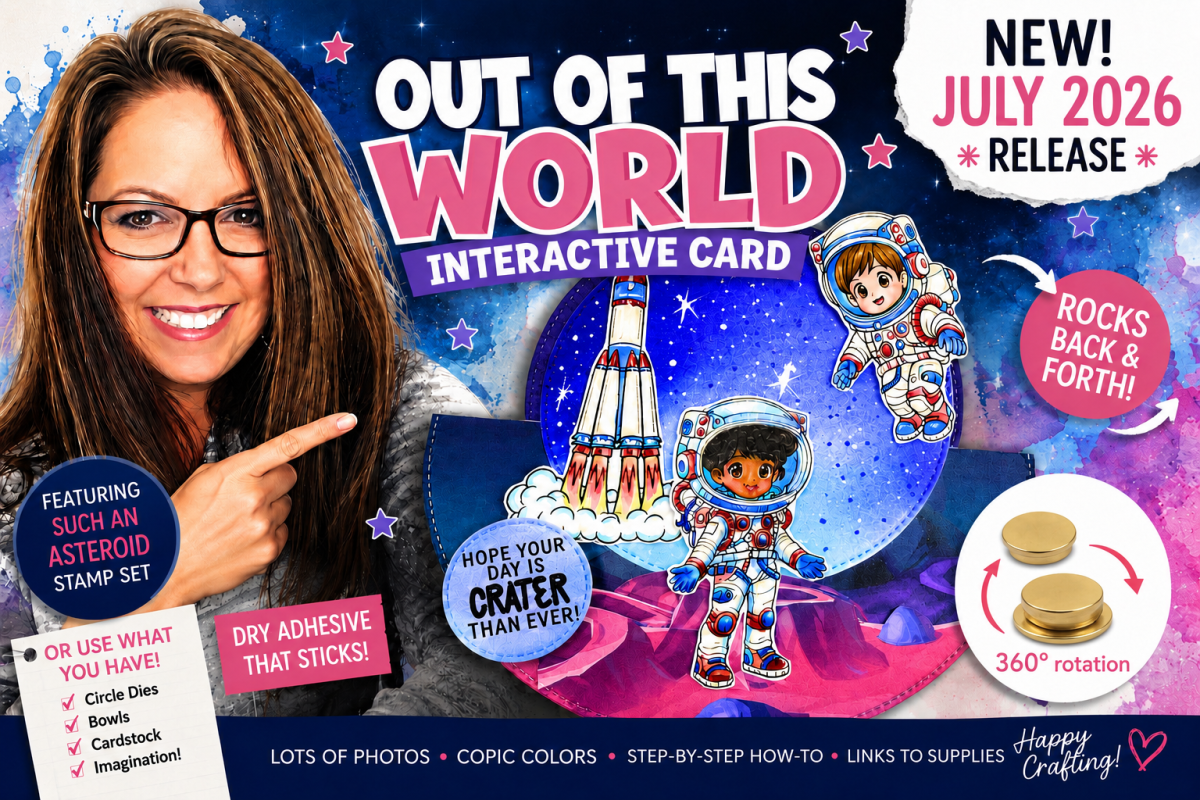
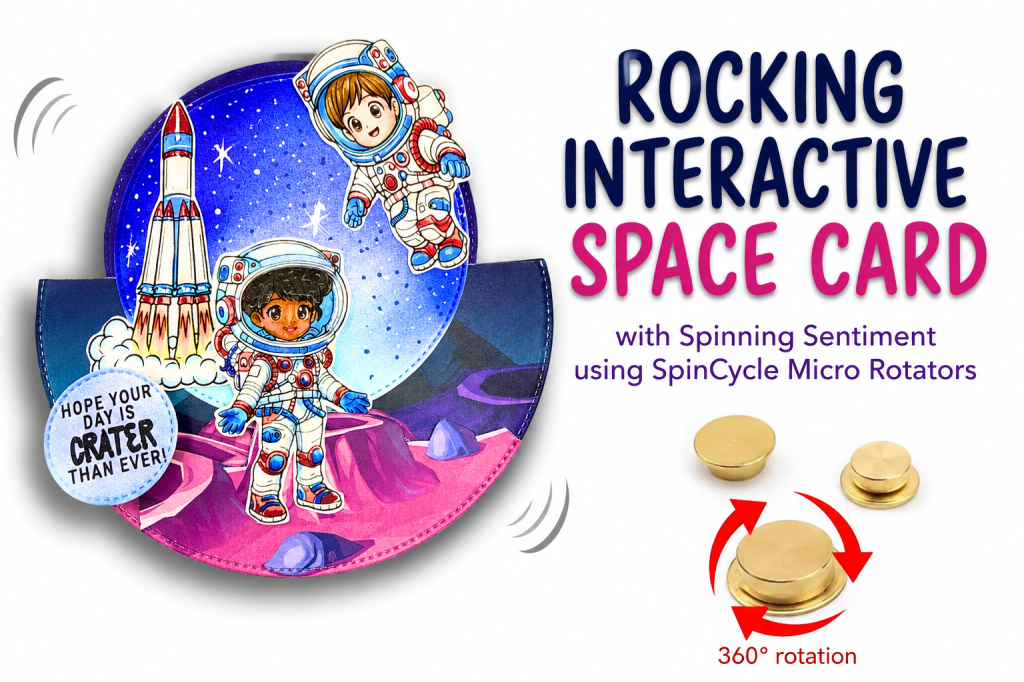
🚀 Create an Interactive Card That’s Out of This World!

Create an interactive space-themed rocking card with easy Copic coloring and a 360° spinning sentiment using the new SpinCycle Micro Rotators. Put together with a combination of my favorite wet and dry adhesives. Perfect for making someone smile!

One of my favorite things about cardmaking is combining Copic coloring with interactive elements. There’s just something magical about handing someone a card that actually moves. It immediately brings a smile to their face!

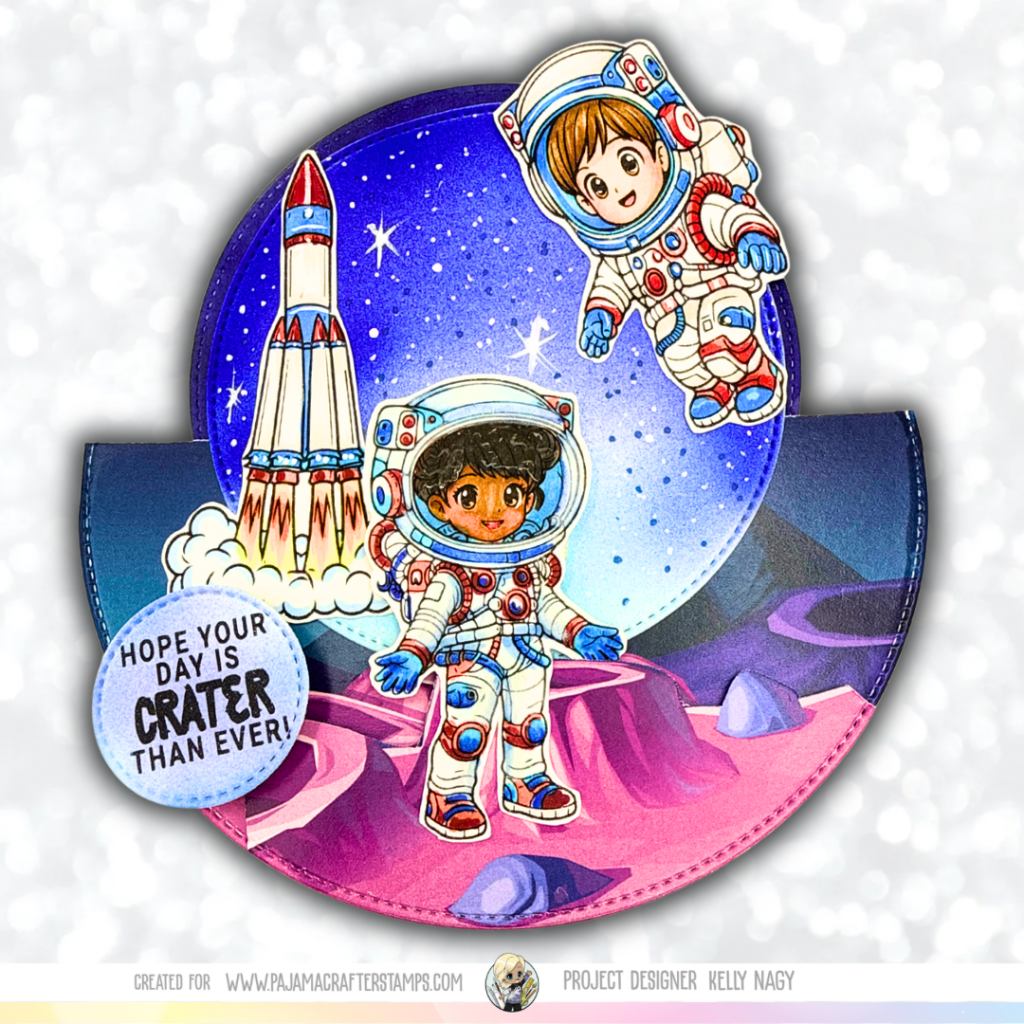
For today’s project, I reached for the adorable Such an Asteroid stamp set and created a rocking card that features not one—but two interactive elements!

The entire card gently rocks back and forth, while the sentiment spins a full 360 degrees.


Color First…Then Build Your Scene

Before I even think about assembling my card, I always start with the coloring.

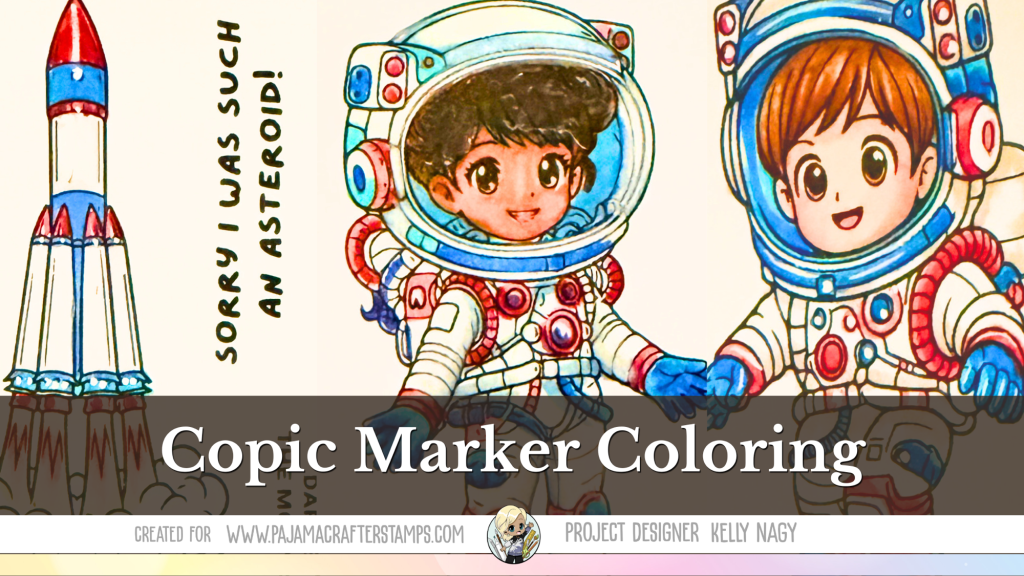
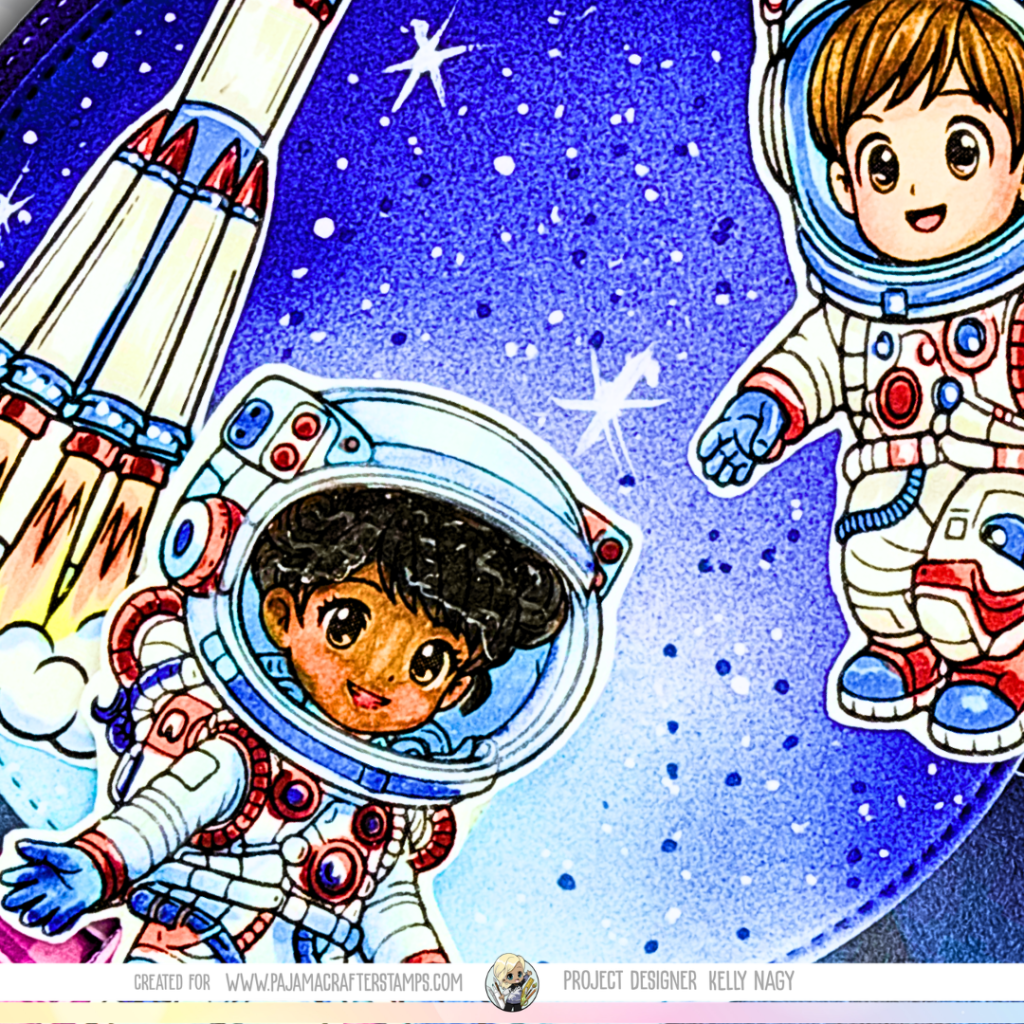
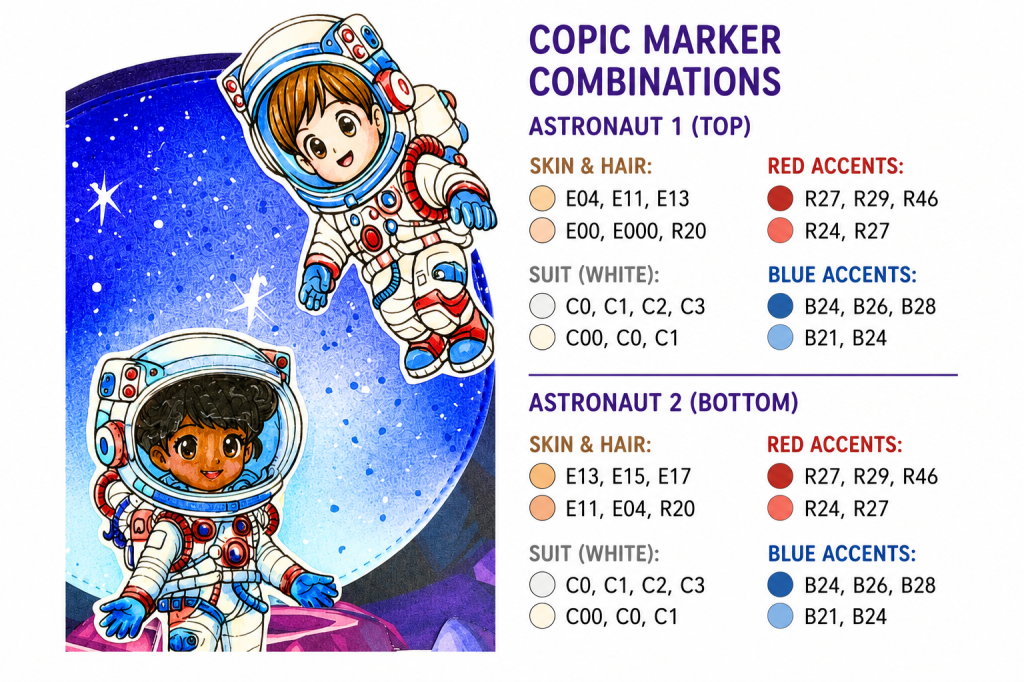
These sweet astronauts from Such An Asteroid stamp set were an absolute joy to color with Copics. I kept the spacesuits bright and clean using cool grays and added pops of vibrant reds and blues to coordinate with the rocket. For the night sky, I blended rich blues into a soft glow behind the astronauts before splattering white paint to create the stars.

One of my favorite things about space-themed cards is that there’s no right or wrong. You can create colorful galaxies, glowing planets, or simply let your imagination take over.


Interactive Cards Don’t Have to Be Complicated

If you’ve never made a rocking card before, don’t let it intimidate you.

In fact, you probably already have everything you need!

Look through your craft room for:

  • Circle dies
  • A circle cutter
  • Bowls or plates to trace
  • Or simply fold your cardstock in half and cut a half-circle, just like we all learned in kindergarten.

Sometimes the simplest supplies create the most memorable cards.


Add Even More Movement

Want to take your interactive cards to the next level?

The new SpinCycle Micro Rotators from Pajama Crafter Stamps make it incredibly easy to add spinning elements to your projects.

I used one behind my sentiment so it spins a full 360°, but that’s only the beginning!

Imagine adding them to:

  • planets
  • stars
  • balloons
  • flowers
  • steering wheels
  • snowflakes
  • pinwheels
  • ornaments
  • little critters
  • anything you want to twirl!

You can even add multiple SpinCycle Micro Rotators to a single card to create several independently spinning elements. The possibilities are almost endless, and they add such a fun surprise for the recipient.


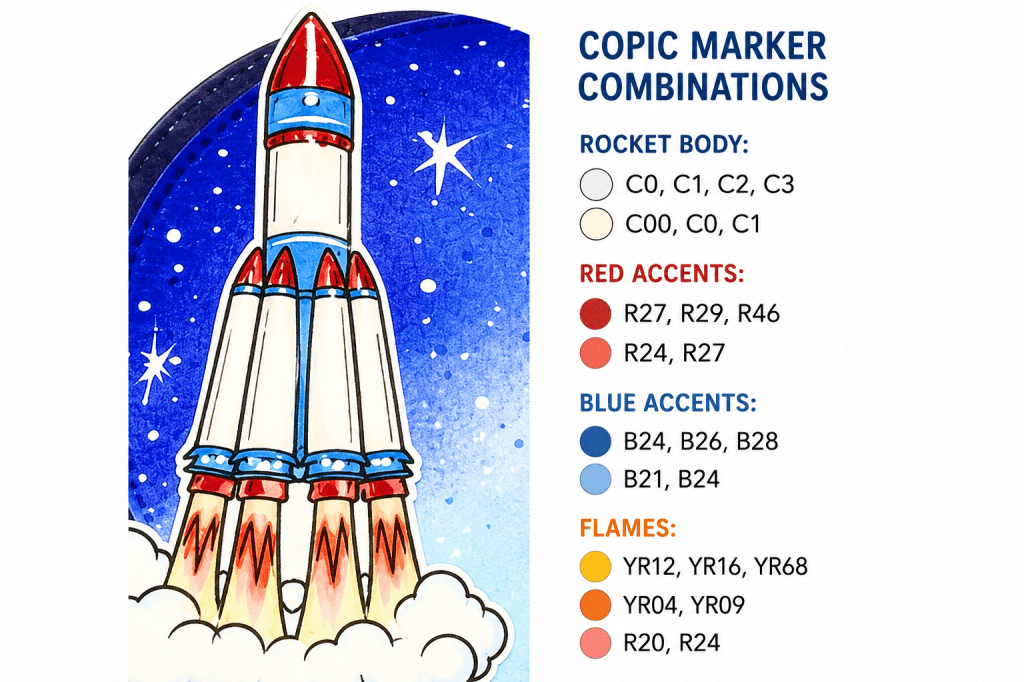
Copic Color Combinations

I always enjoy sharing the colors I use in case you’d like to recreate the look or adapt it to your own project.


Products Used


Final Thoughts

Interactive cards may look impressive, but they’re surprisingly easy to create—and they’re always the cards people remember.

Whether you use supplies already in your craft room or decide to try the new SpinCycle Micro Rotators, I hope this project inspires you to add a little movement to your next handmade card.

After all, handmade cards should be just as fun to play with as they are to create! To let me know you like what I post, please follow me on social media @stampedbykelly and subscribe to my Youtube channel. I am hoping if I get enough subscribers and interest, I hope to be encouraged to start my YouTube channel journey.

Happy Crafting!

Kelly


Shop & Connect

🛍️ Shop Pajama Crafter Stamps using my affiliate link:
https://pajamacrafterstamps.com/STAMPEDBYKELLYBLOG

🌐 Visit my blog:
https://www.stampedbykelly.blog


Affiliate Disclosure

As a Pajama Crafter Stamps and TapeRunner Design Team member, I may earn a small commission if you shop using my affiliate links at no additional cost to you. Your interest and support encourages me to begin creating process tutorials, sharing alcohol marker and pencil coloring inspiration, and bringing interactive card ideas to the crafting community. Thank you!

Interactive Card Inspiration with Scrappy Boy Stamps

Create beautiful interactive handmade cards with Scrappy Boy Stamps! Featuring a Waterfall Gift Card Holder, Spinning Umbrella Card, and Fairy Tale silhouette card with product links and inspiration.

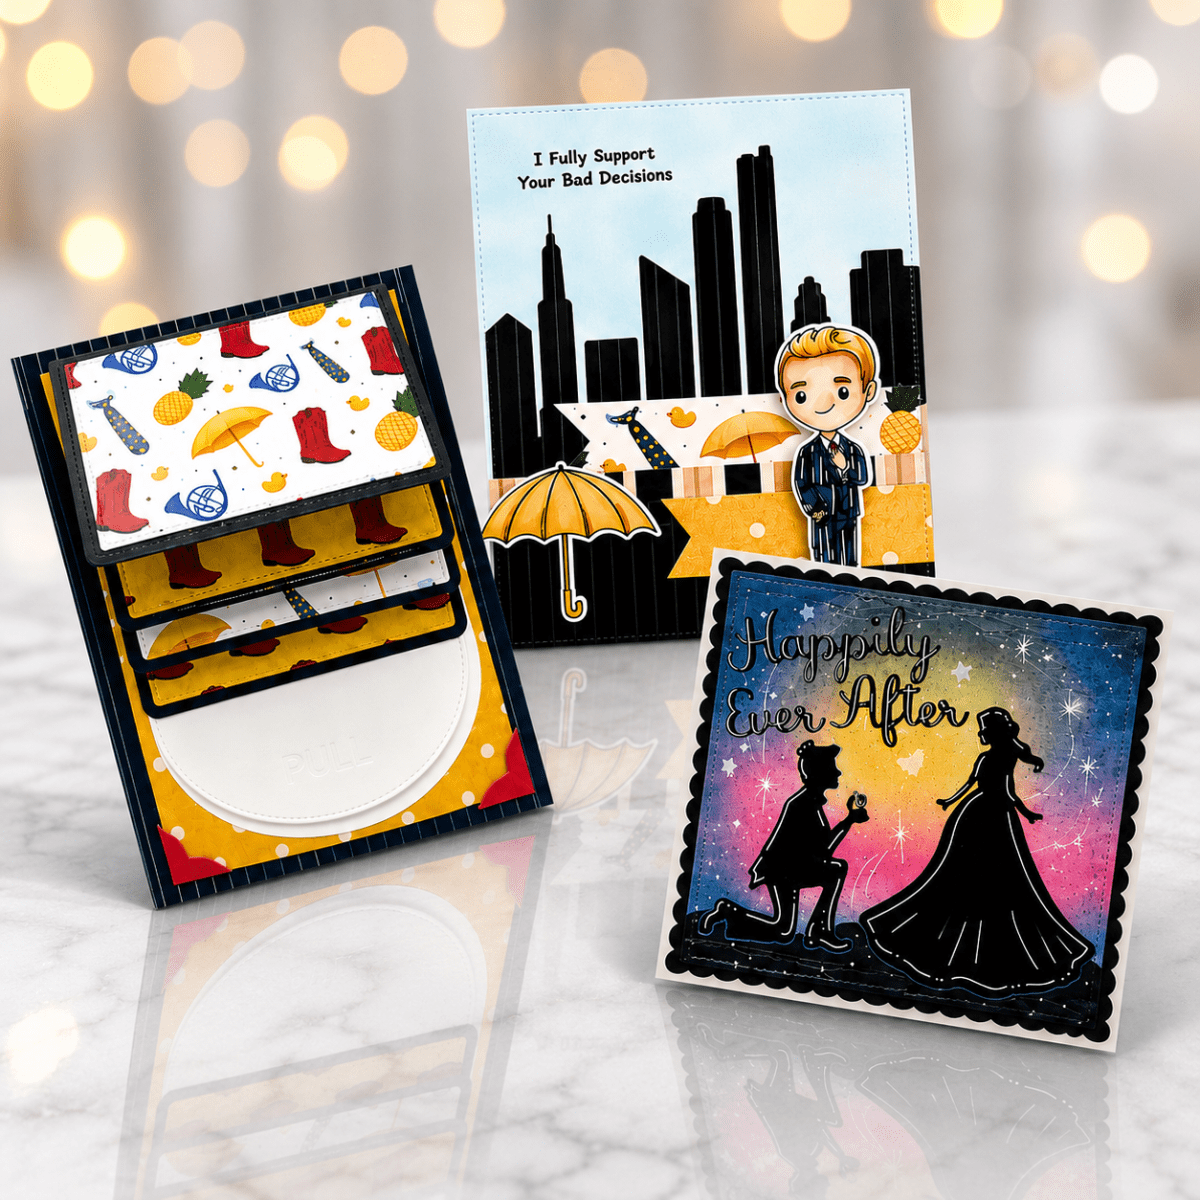
If you love interactive cards, fun folds, and storytelling through paper crafting, today’s projects are for you! I’m sharing three handmade cards featuring Scrappy Boy Stamps—including a Waterfall Gift Card Holder, a whimsical Spinning Umbrella Card, and a romantic Fairy Tale silhouette card.

These projects are perfect for birthdays, weddings, engagements, anniversaries, or simply making someone smile with a handmade creation.

Featured Projects

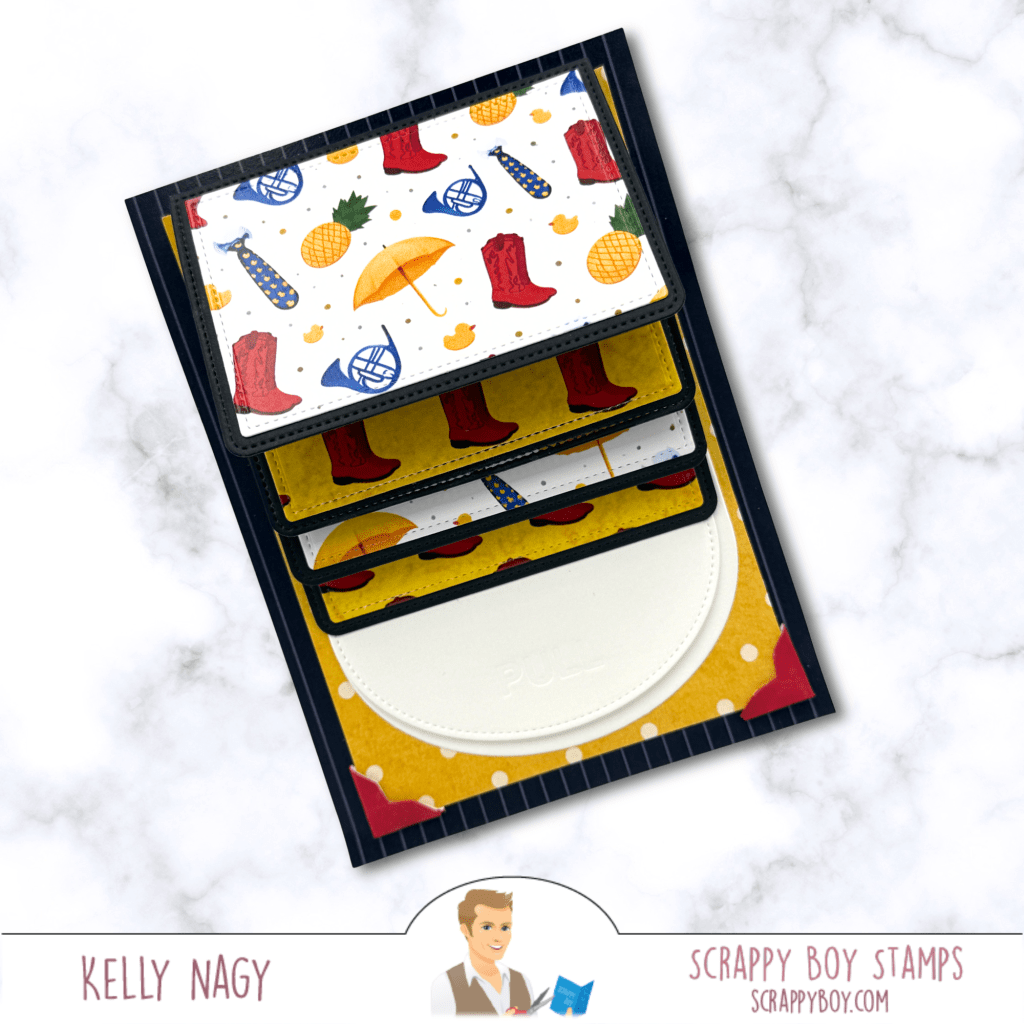
💛 Project 1 – Waterfall Gift Card Holder

An interactive gift card holder with multiple waterfall panels that reveal beautiful patterned papers and a hidden gift card.

Products Used


☔ Project 2 – Spinning Umbrella Card

This A2 card features a fun spinning umbrella that brings the scene to life with just a gentle touch!

Products Used


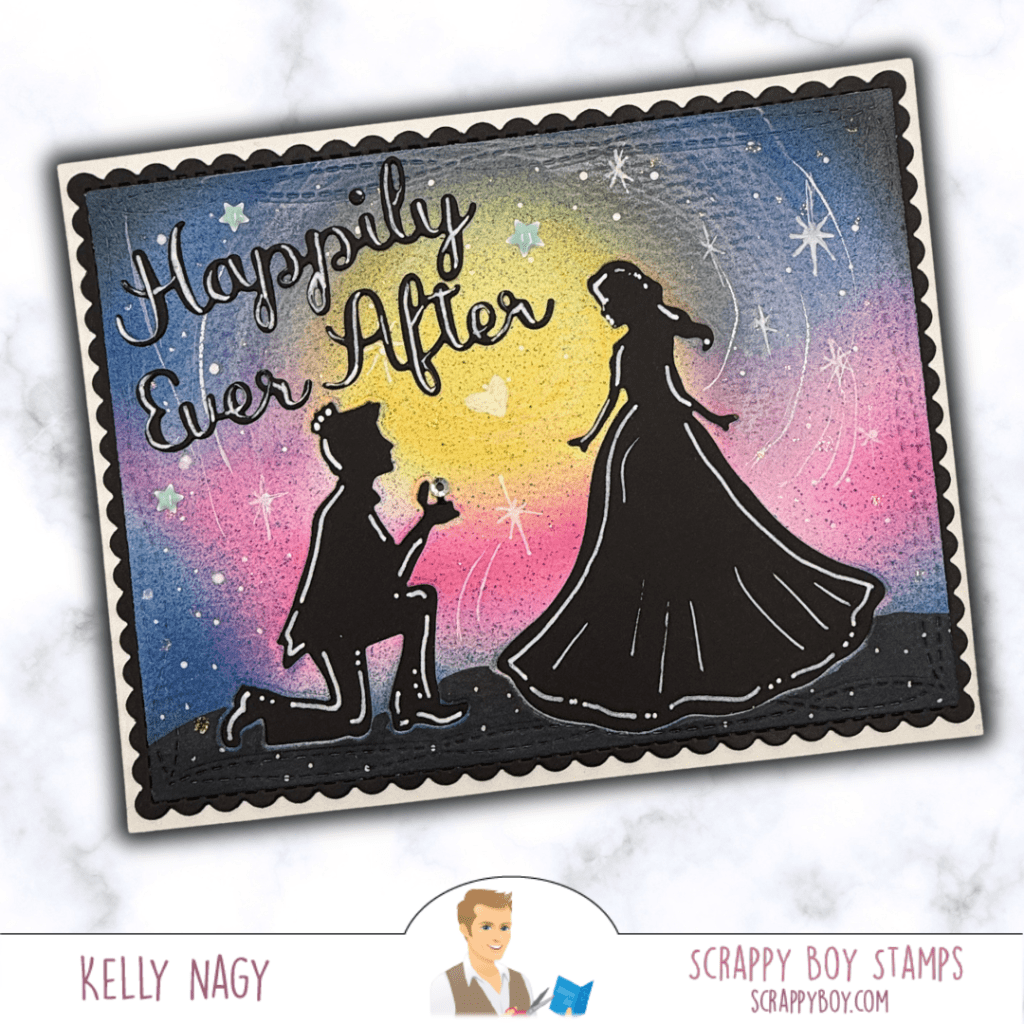
💍 Project 3 – Fairy Tale Romance

A dreamy silhouette card celebrating happily ever after with layered dies and vibrant ink blending.

Products Used


I hope these projects inspire you to add a little movement, creativity, and storytelling to your next handmade card!

🛍️ Visit www.ScrappyBoy.com for these products and so much more inspiration.

I’d love to connect with you! Follow me on all my social channels @StampedByKelly for more cardmaking ideas, tutorials, and crafty inspiration.

Happy Crafting! ❤️