You’re a Classic! 🐭❤️ | My 118th Craft Roulette Submission

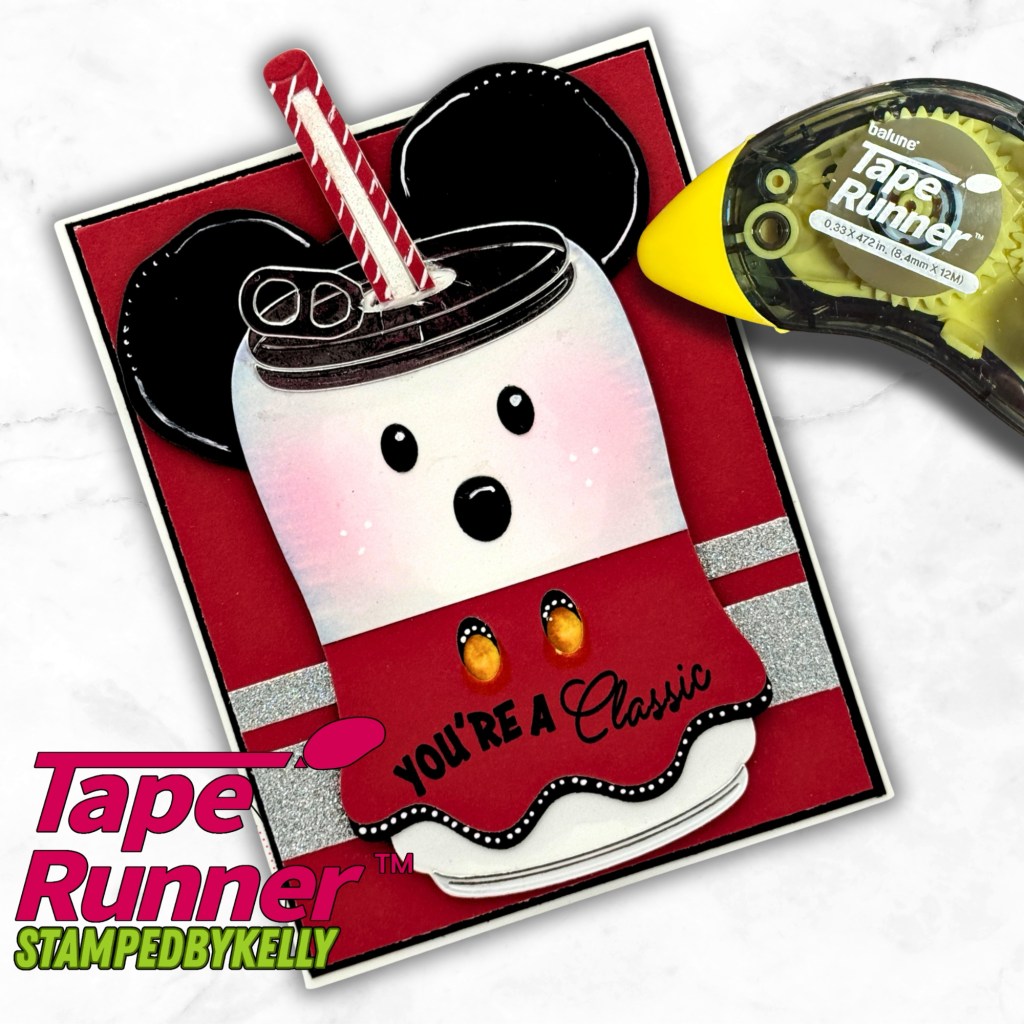
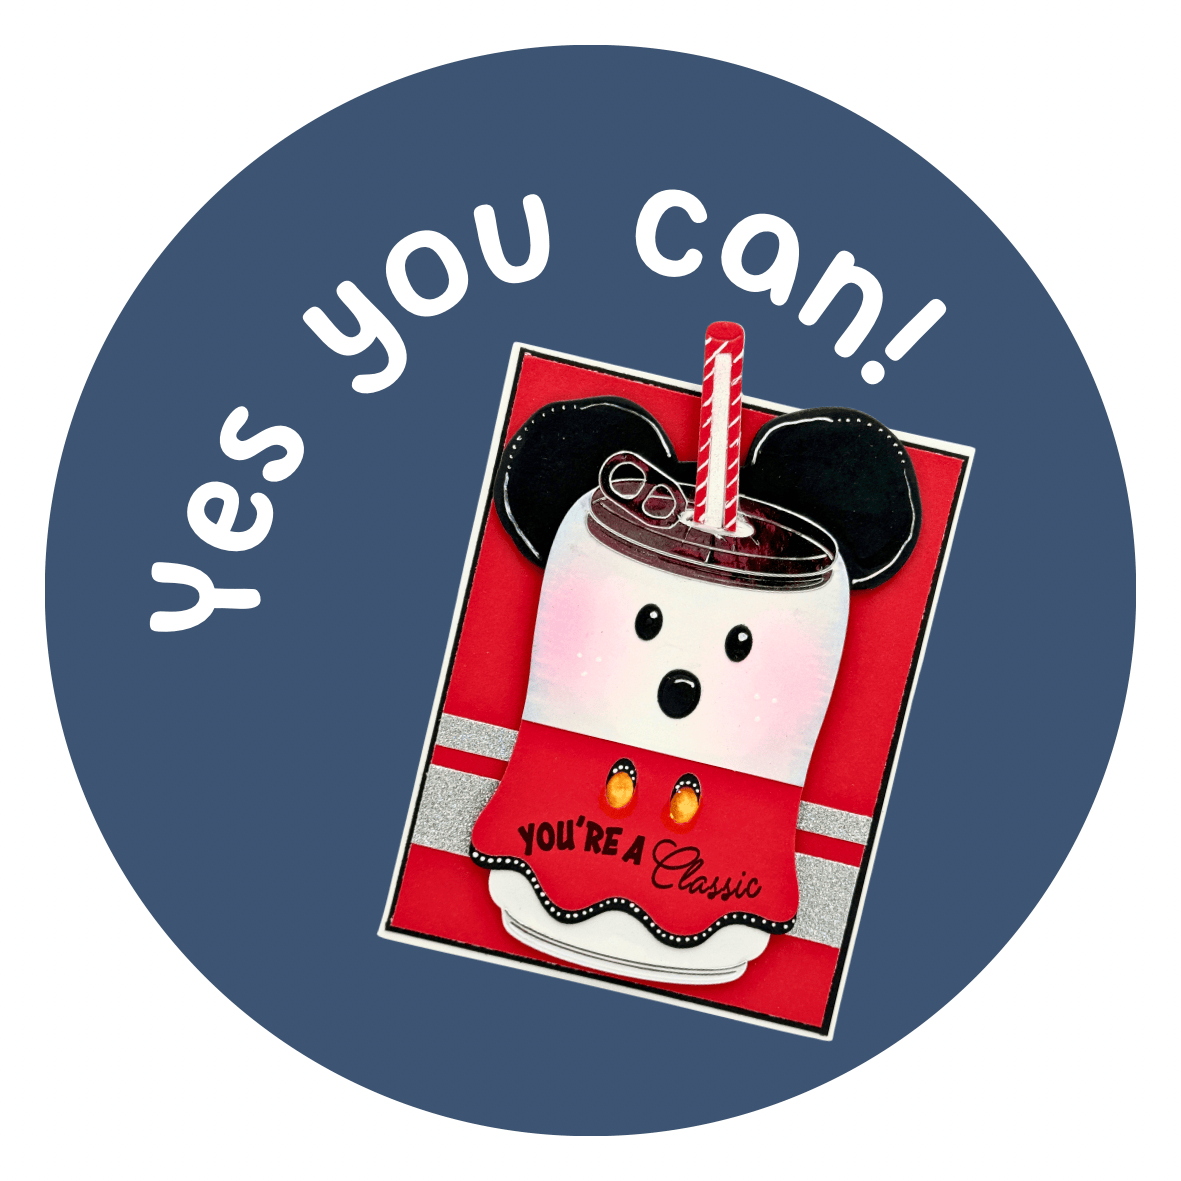
Celebrating my 118th Craft Roulette submission with a classic mouse-inspired soda can card using The Sassy Club Stamps Cola Pop Stamp Set and Soda Can Die! Discover how I interpreted planetary colors, created wonky mouse ears, and incorporated two folds — including a clever scored flap that lifts to reveal a hidden handwritten message!

A Little Wonky, A Little Disney Magic, and a Whole Lot of Crafty Fun!

Hello, crafty friends! 💕

I’m back with another creative adventure, and this week I’m celebrating my 118th submission to Craft Roulette! Can you believe it?

One of my favorite things about Craft Roulette is how four completely random parameters can take you in a direction you might never have considered. This week was no exception!
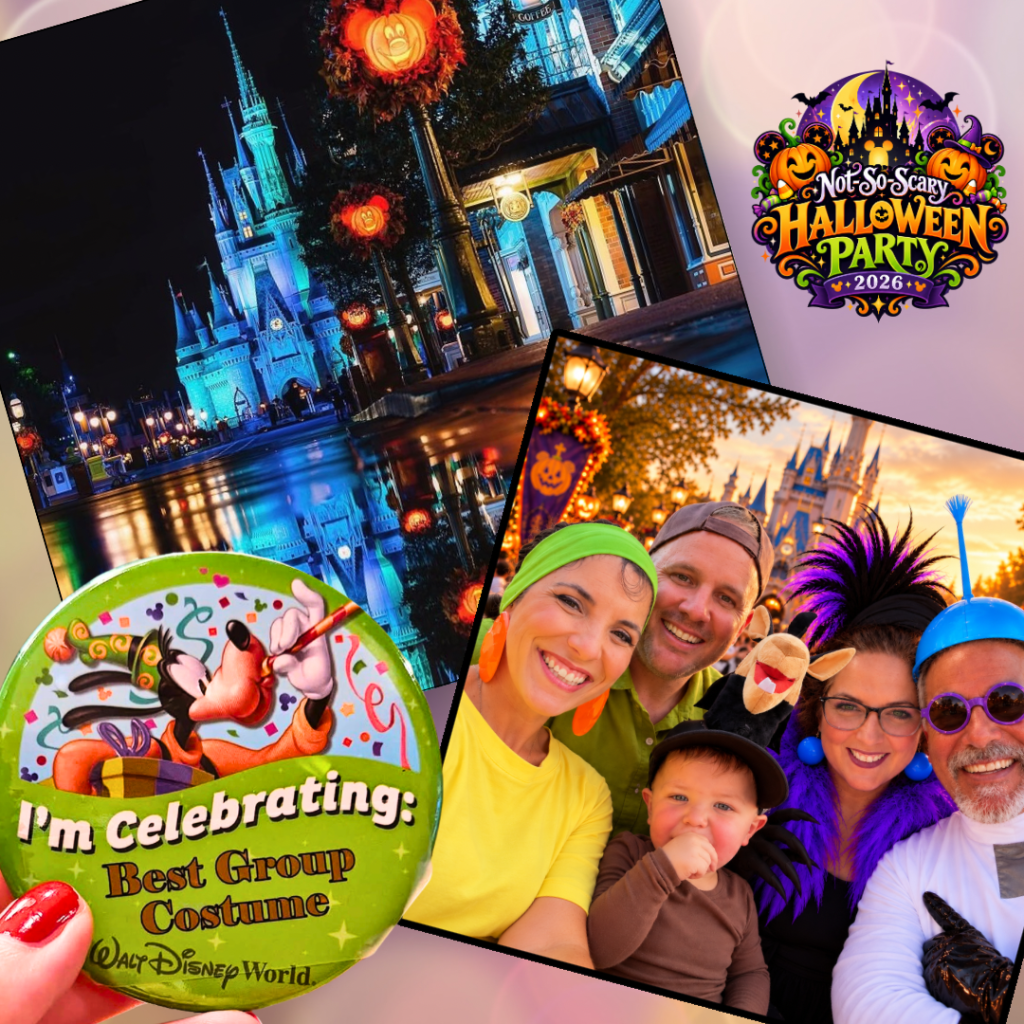
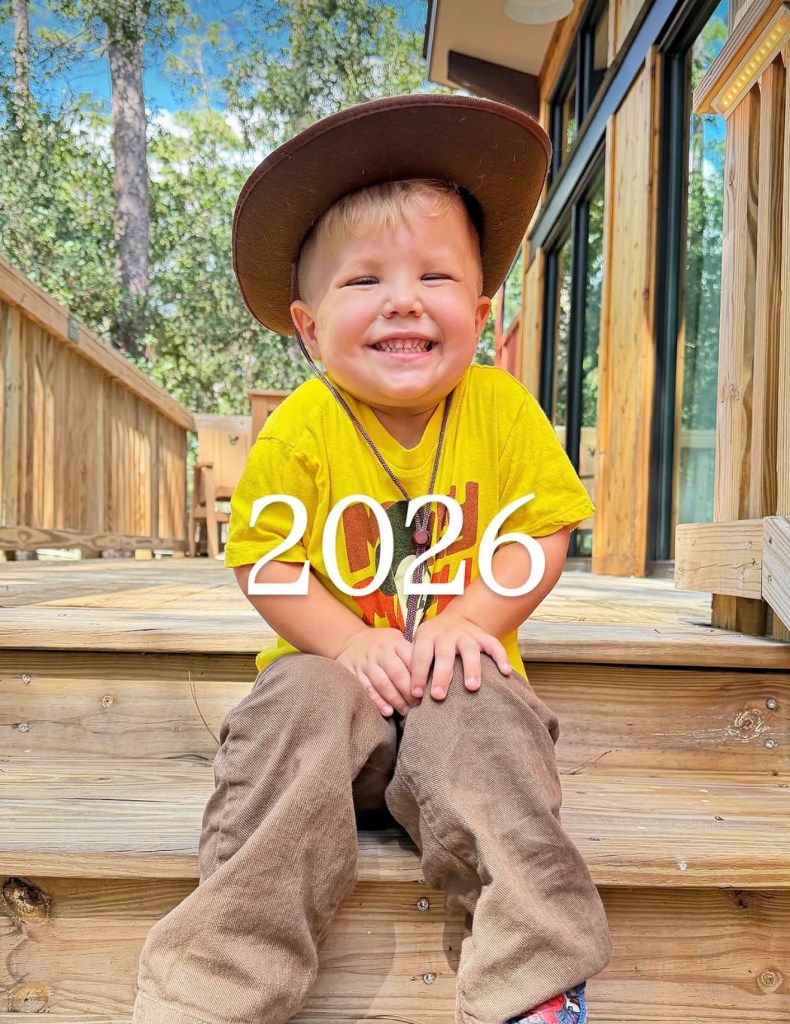
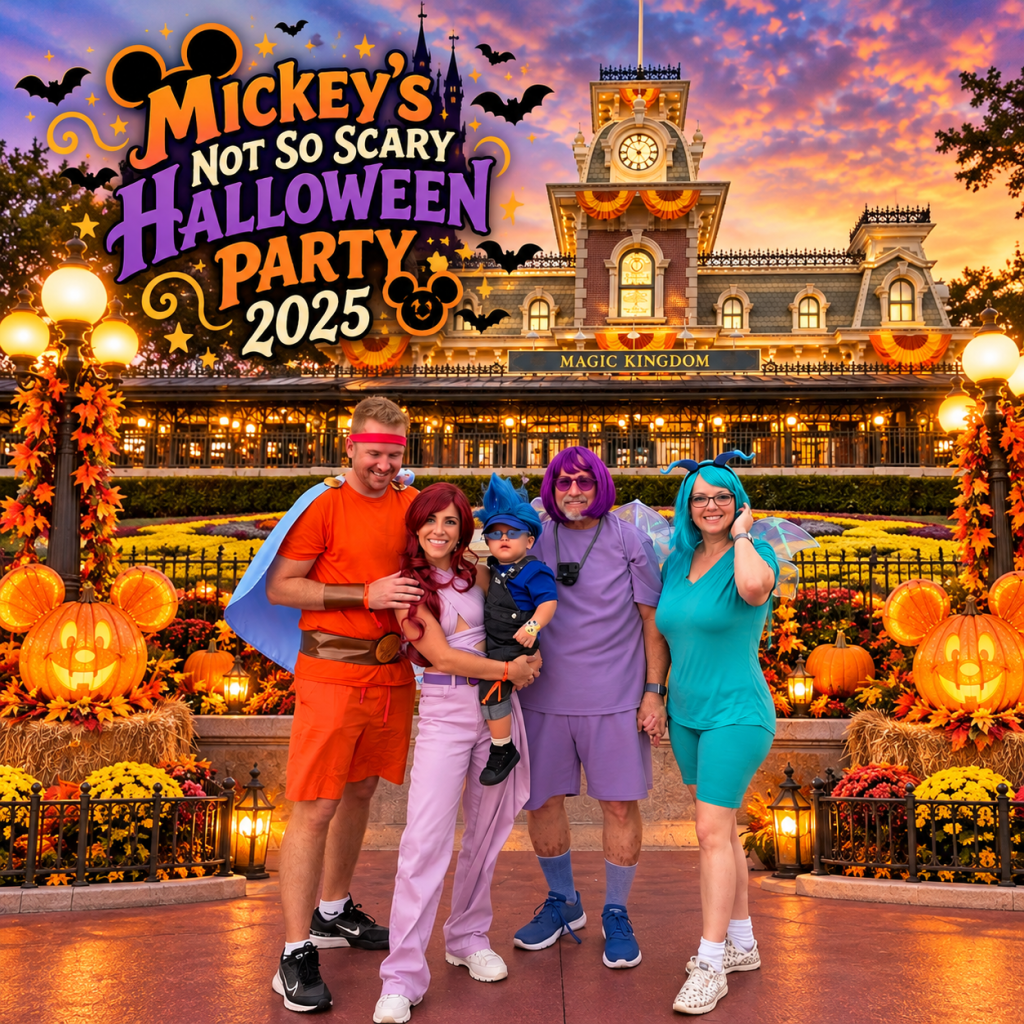
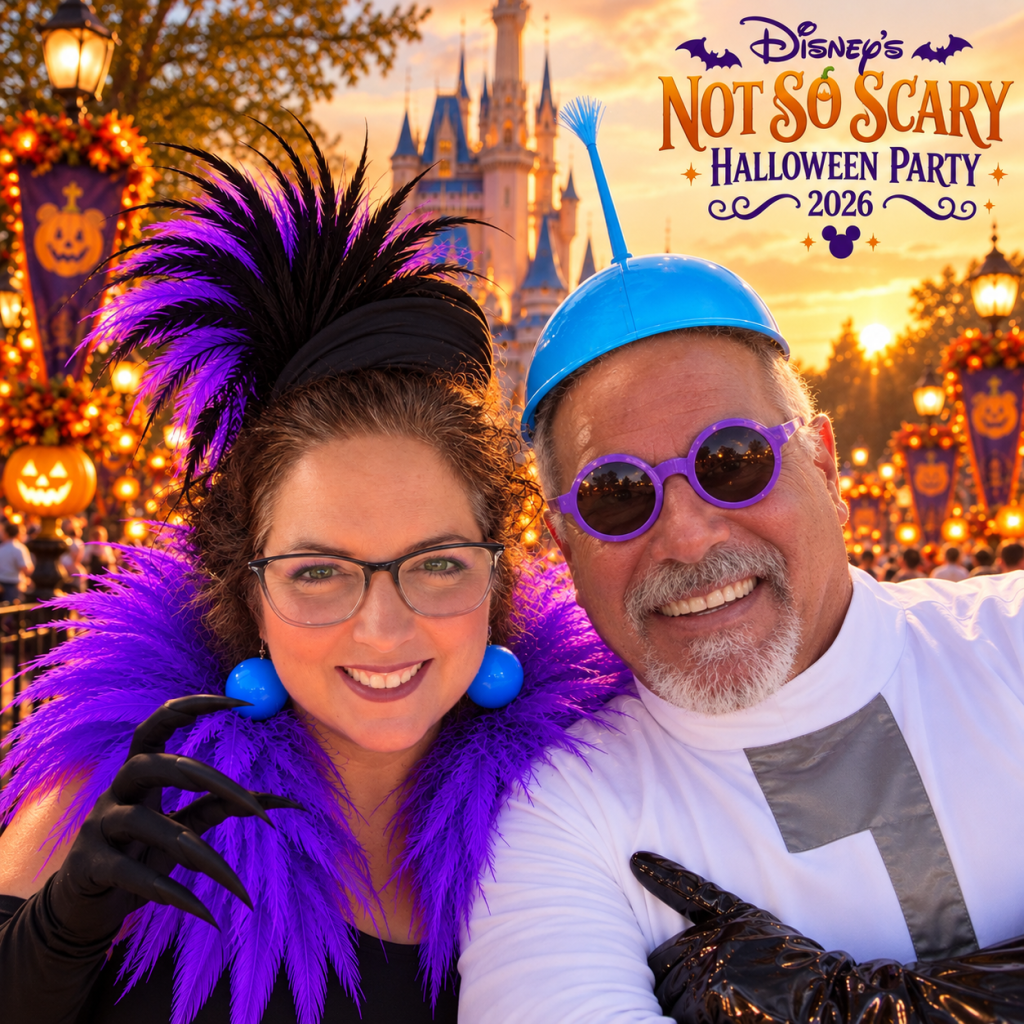
My family as The Emperor’s New Groove this year!

I reached for The Sassy Club Stamps Cola Pop Stamp Set and the Sassy Club Stamps Soda Can Die, then after a visit to Mickey’s Not So Scary Halloween Party, was inspired to create this fun modification that combines a classic color palette, a little wonky personality, and a secret place to write a special message.

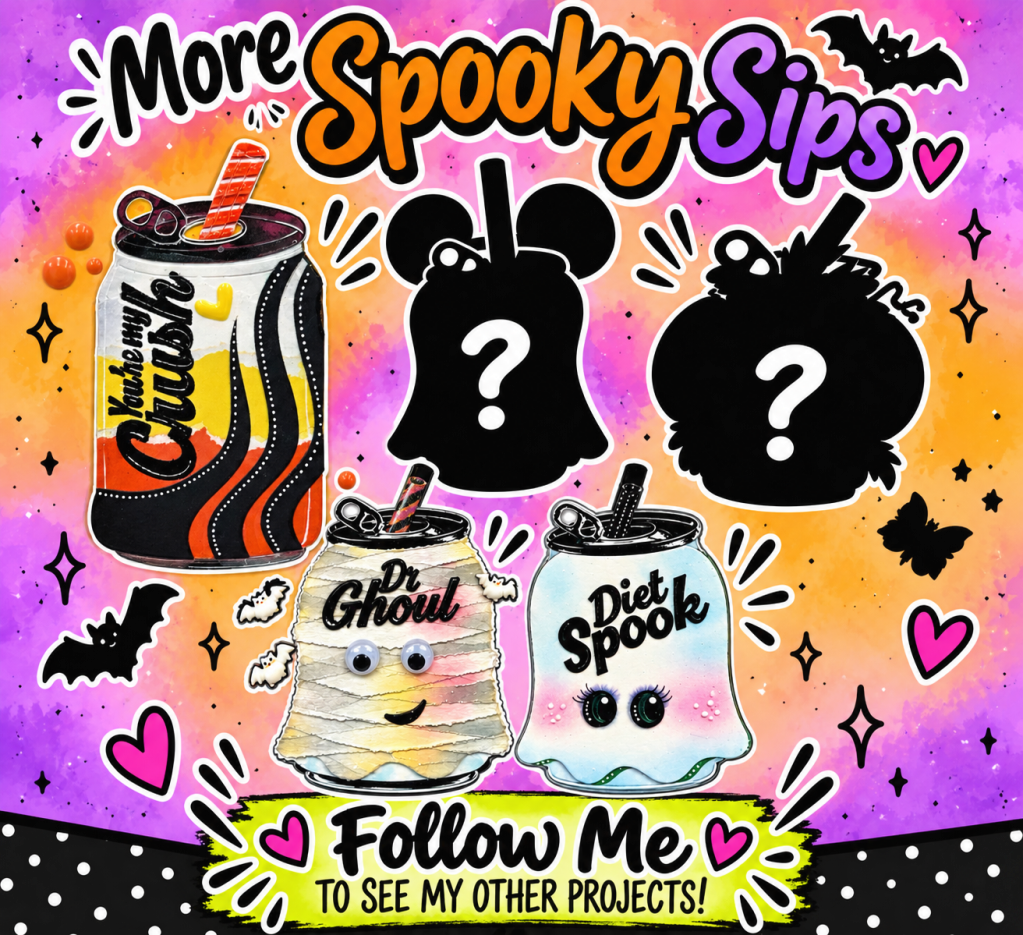
And yes, this little cutie is another addition to my More Spooky Sips collection! Follow me on Facebook at Stampedbykelly.
🎰 This Week’s Craft Roulette Parameters

  • Project: Card with 2 Folds
  • Colors: Planets
  • Element: Beautiful
  • Random: Wonky

Let’s see how I brought all four parameters together!
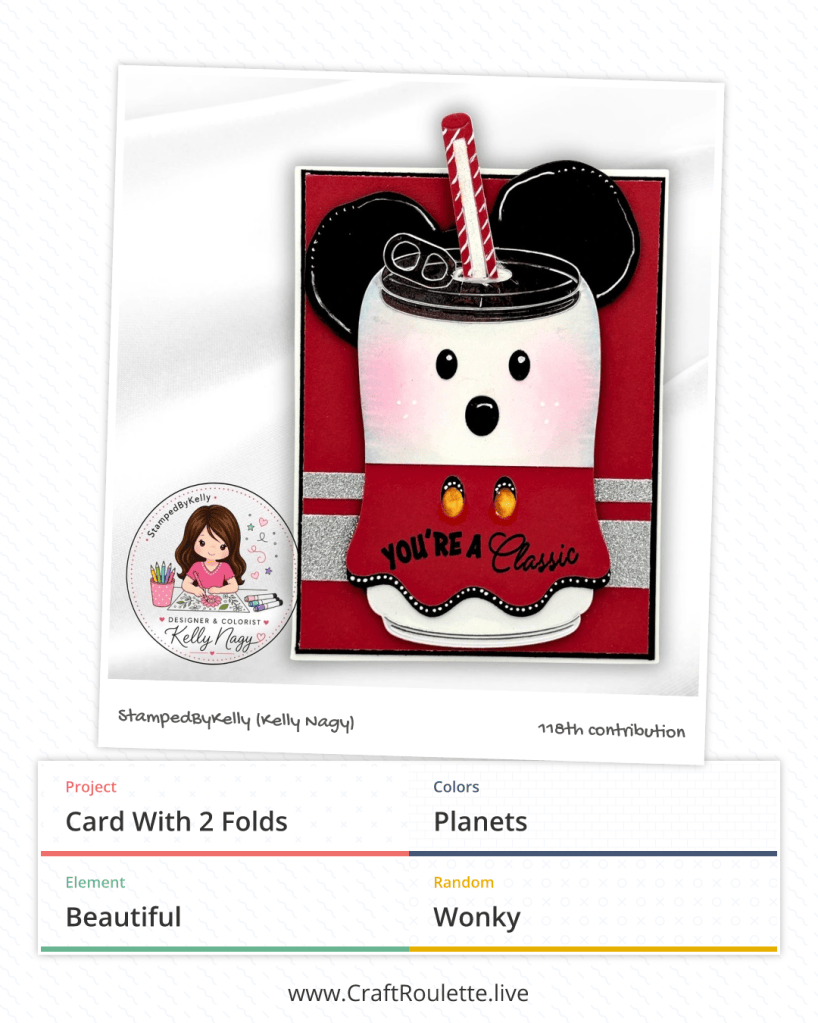
🪐 Planetary Colors — A Little Creative Interpretation!

When the wheel landed on Planets, I immediately started thinking about the beautiful colors found throughout our solar system.

Rather than trying to represent every planet, I focused on a few planetary color inspirations that would complement my mouse-inspired design.

My deep red cardstock reminds me of Mars, the Red Planet, while the soft pink and creamy white blending on my soda can brings to mind the beautiful cloud colors associated with Venus. I incorporated black accents for the darkness of space and sparkling silver elements inspired by the metallic and icy appearances we often associate with celestial landscapes.

Of course, I couldn’t resist adding those cheerful yellow buttons for a little extra sunshine!

I love how a color parameter can be interpreted creatively while still maintaining the overall personality of a project.

🐭 You’re a Classic!

For my main focal point, I used The Sassy Club Stamps Cola Pop Stamp Set along with the Sassy Club Stamps Soda Can Die to create this adorable classic mouse-inspired character.

The black mouse ears, rosy cheeks, striped straw, and bright yellow buttons immediately give this little can its personality!

The sentiment “YOU’RE A Classic” seemed especially fitting. After all, some things just never go out of style!

I also added a shiny metallic can lid and pull tab, along with little white gel pen highlights and dotted details.

Behind my character, I layered red cardstock over a thin black mat and added horizontal strips of silver glitter cardstock for just the right amount of sparkle.
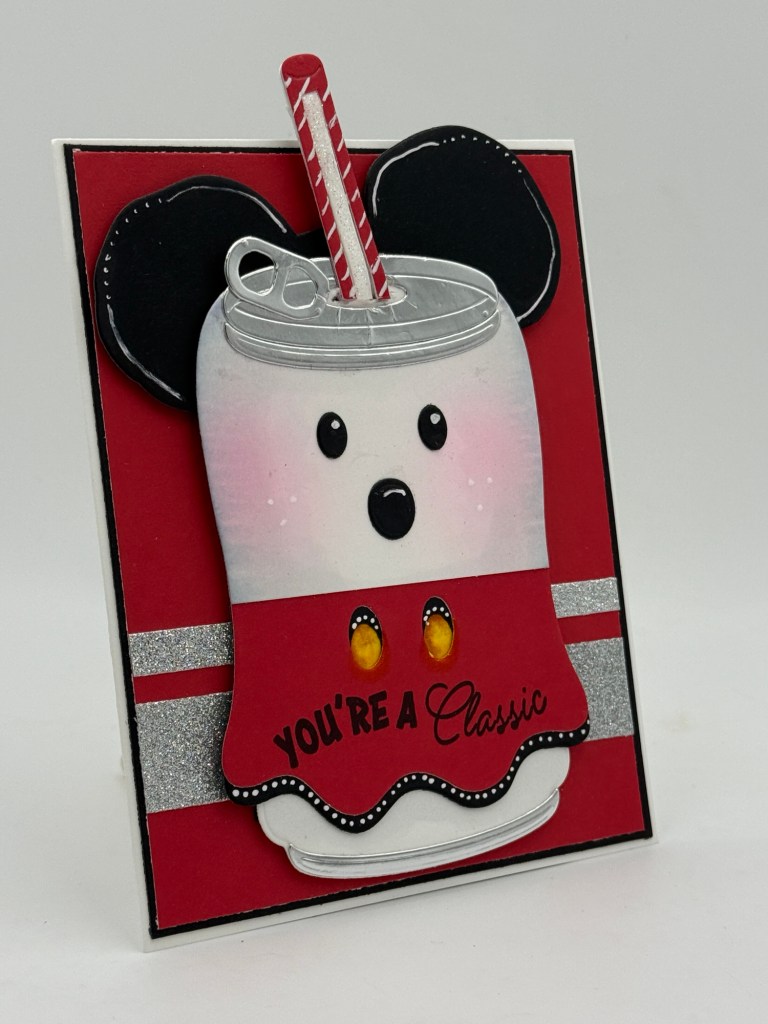
✂️ Two Folds — With a Little Creative Paper Engineering!

Now, this is where I had some fun interpreting the Card with 2 Folds parameter!

My first fold is the traditional fold used to create my A2-size card base. This gives me the familiar greeting card format that opens to reveal the inside.

My decorated card front sits on top of that folded A2 card base.

But I wasn’t finished there! This is a photo dramatization of my “second” fold.
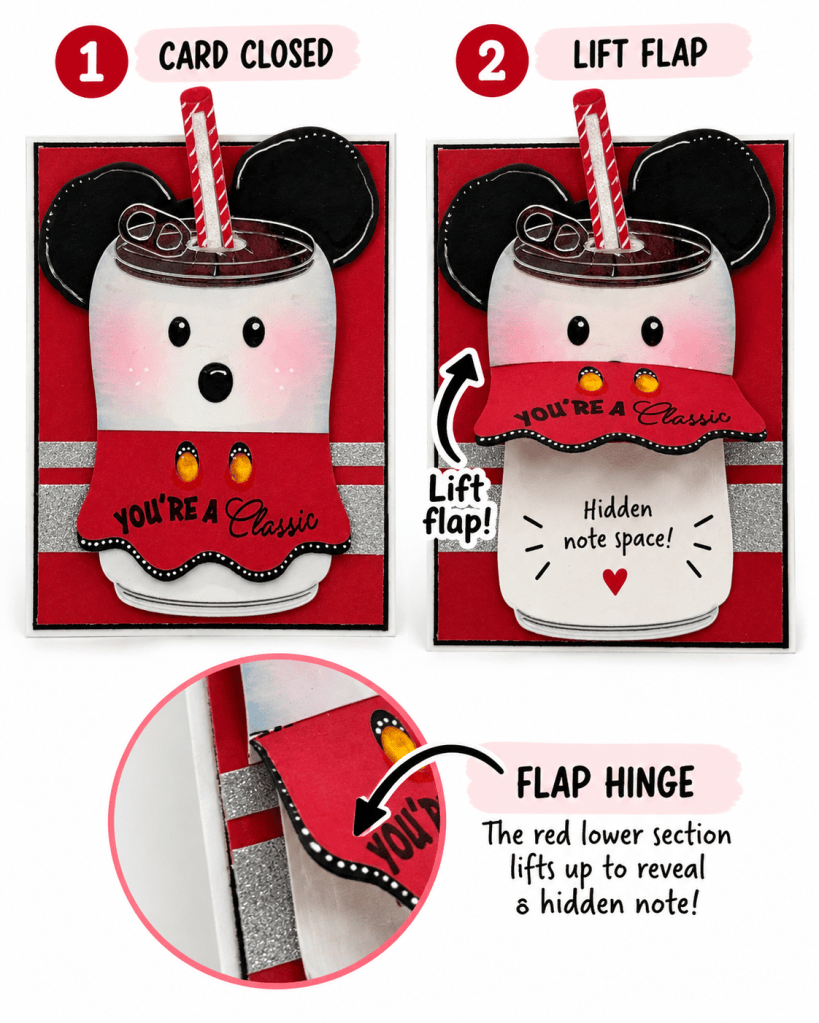
For my second fold, I created a scored hinge on the red lower portion of my soda can character.

That scored line allows the red section to fold upward like a little flap, revealing a hidden space underneath where a personal message can be written!

So technically, my second fold isn’t another fold in the actual card base. Instead, it’s a functional scored fold incorporated into the decorative element attached to the card front.

And I’m counting it! 😄

I love how it adds a fun interactive surprise without changing the overall appearance of the card.
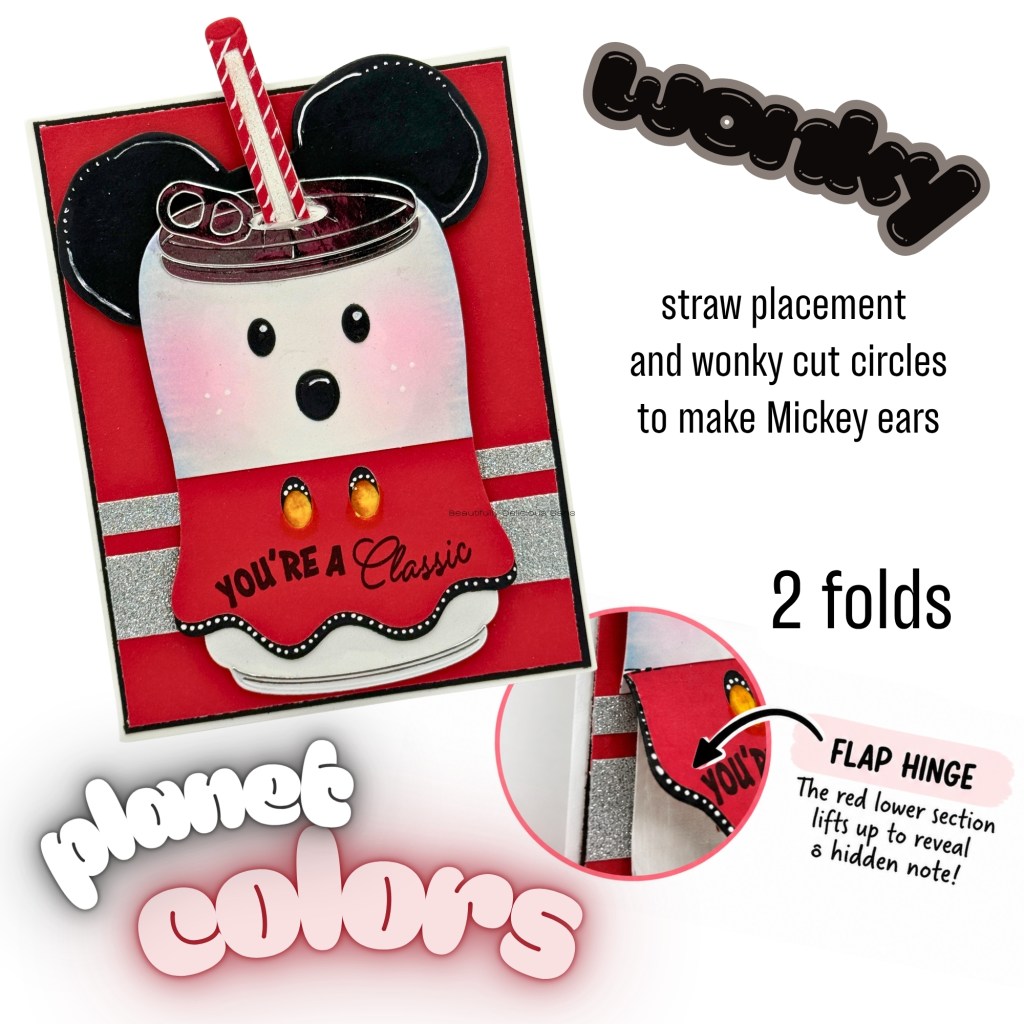
A little note tucked behind that adorable character makes the card even more personal. After all, part of the joy of handmade cards is giving someone a reason to smile!

🤪 Wonky Is Wonderful!

The Wonky parameter was another opportunity to have some fun!

Instead of using perfectly symmetrical die-cut circles, I cut my black mouse ears by hand, allowing them to have slightly uneven, wonky shapes.

I also placed the striped straw at an angle rather than straight up and down.

These little imperfections give the character personality and remind me that handmade doesn’t have to mean perfectly measured or perfectly symmetrical.

Sometimes wonky is exactly what makes something wonderful!
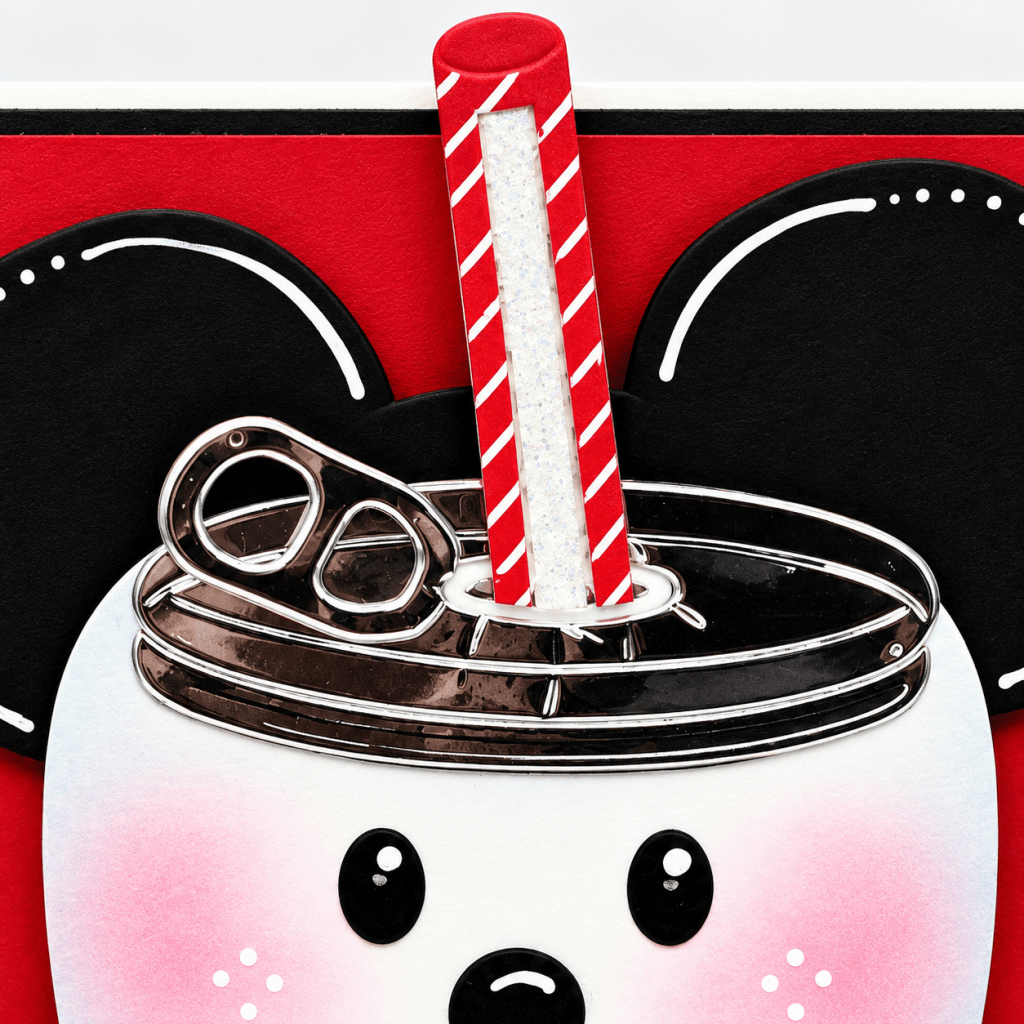
✨ The Beautiful Little Details

For the Beautiful parameter, I focused on all those little finishing touches that make a handmade card feel special.

From the softly blended rosy cheeks and the silver metallic lid to the glittery horizontal accents and tiny white gel pen dots, each detail adds a little charm.

I especially love the contrast between the bold red cardstock and the shimmer of the silver accents.

It’s amazing how a few small details can bring an entire character to life!
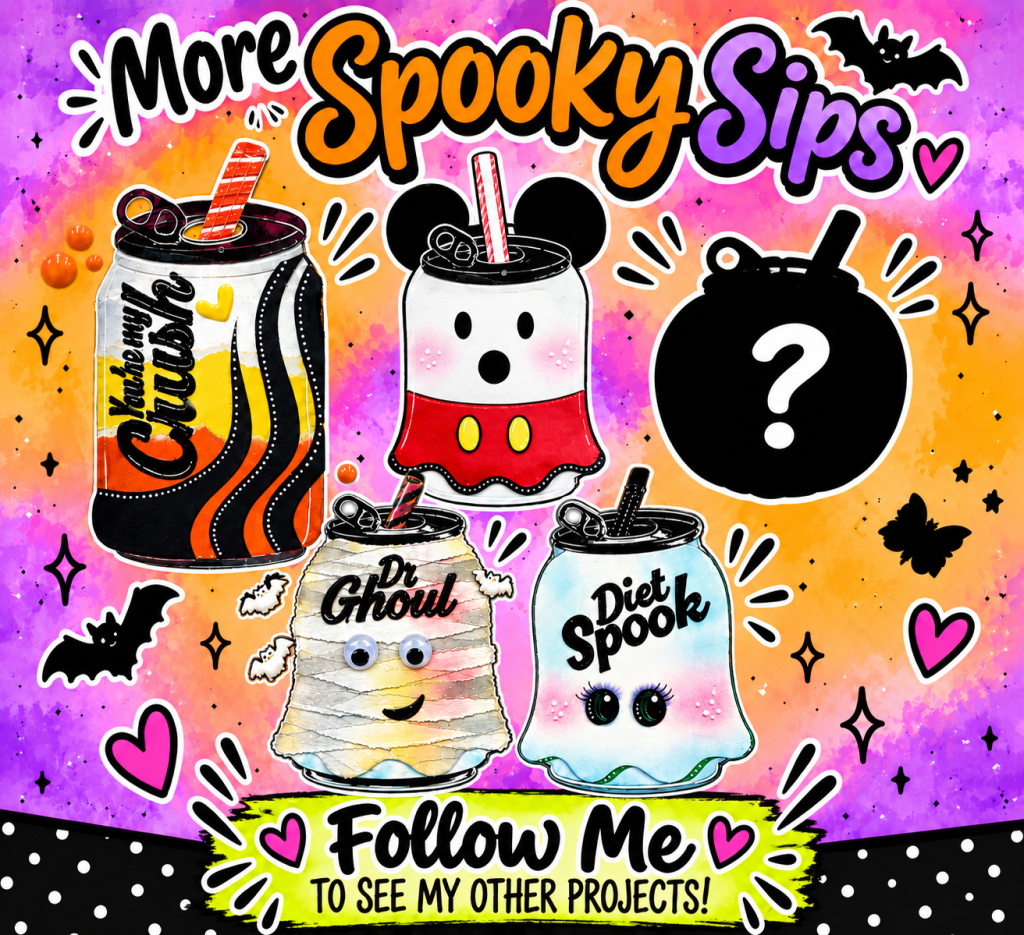
🥤 More Spooky Sips with The Sassy Club!

This little mouse-inspired soda can is another addition to my More Spooky Sips series featuring The Sassy Club Stamps Cola Pop Stamp Set and the Sassy Club Stamps Soda Can Die.

I’ve been having so much fun transforming the same basic soda can shape into different personalities!

Each new creation reminds me how versatile our crafting supplies can be when we start looking beyond their original purpose.

And there’s still another spooky sip waiting to be revealed!

💕 118 Submissions and Still Having Fun!

After 118 Craft Roulette submissions, I still get excited to see what those spinning wheels will challenge us to create next!

Some weeks the parameters come together easily. Other weeks they require a little imagination, a little experimenting, and maybe even a few creative interpretations.

But that’s the fun of it!

Whether you’re an experienced cardmaker or someone who has never picked up a stamp or die-cutting machine, I hope my projects encourage you to give something creative a try.

You don’t need to be an artist to enjoy creating. Sometimes all you need is paper, a few favorite supplies, and a crafty friend to inspire you along the way.

Thank you for stopping by and sharing a little craft therapy with paper with me today!

Until next time, keep crafting, keep smiling, and never be afraid to get a little wonky!

Happy crafting! 💗

Kelly
StampedbyKelly


🛍️ Supplies Used

Use Code: KELLY10 at TapeRunner.com for 10% OFF

🌸 Follow Along for More Crafty Inspiration!

Blog: http://www.stampedbykelly.blog
Instagram: @stampedbykelly
YouTube: @stamped_by_kellyb
Craft Roulette: http://www.CraftRoulette.live
Oh, Boy! Three Years of Magic! ✨ | A Personalized Autograph Mini Album

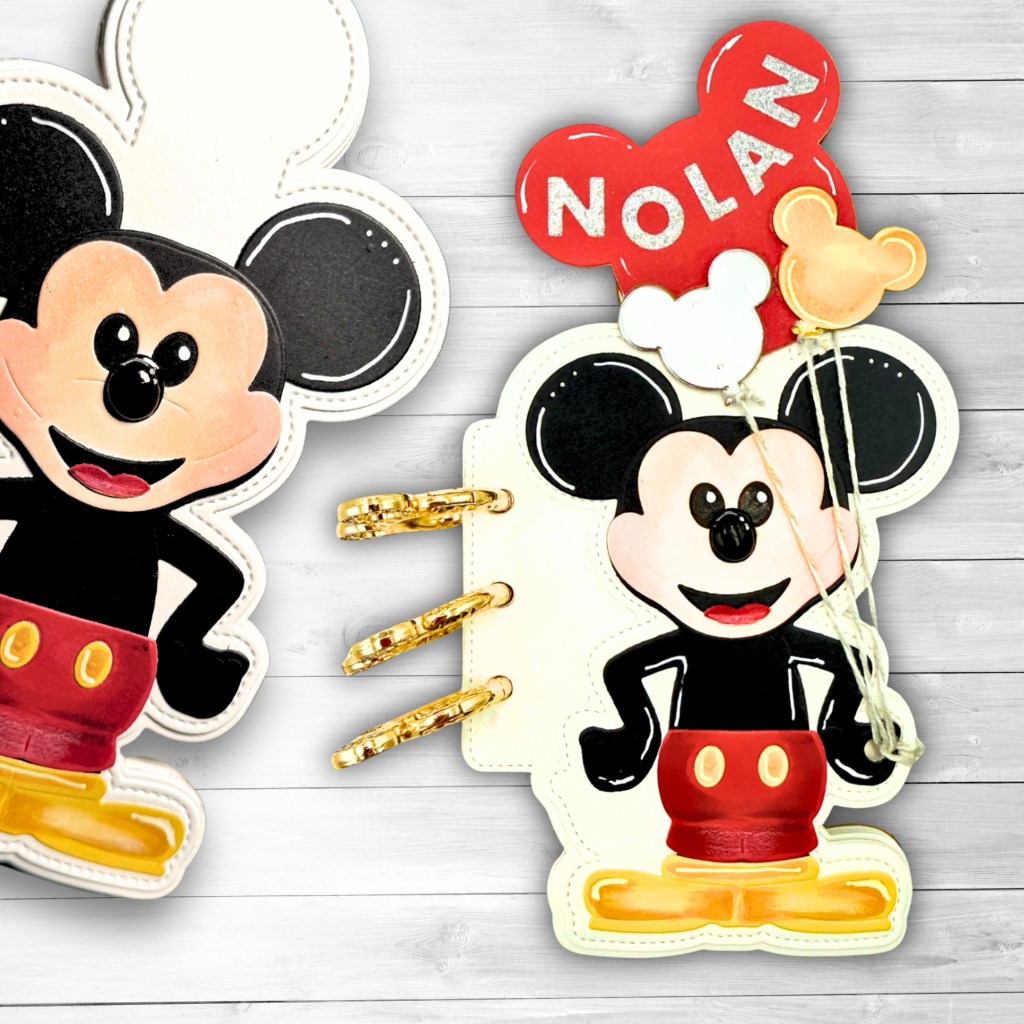
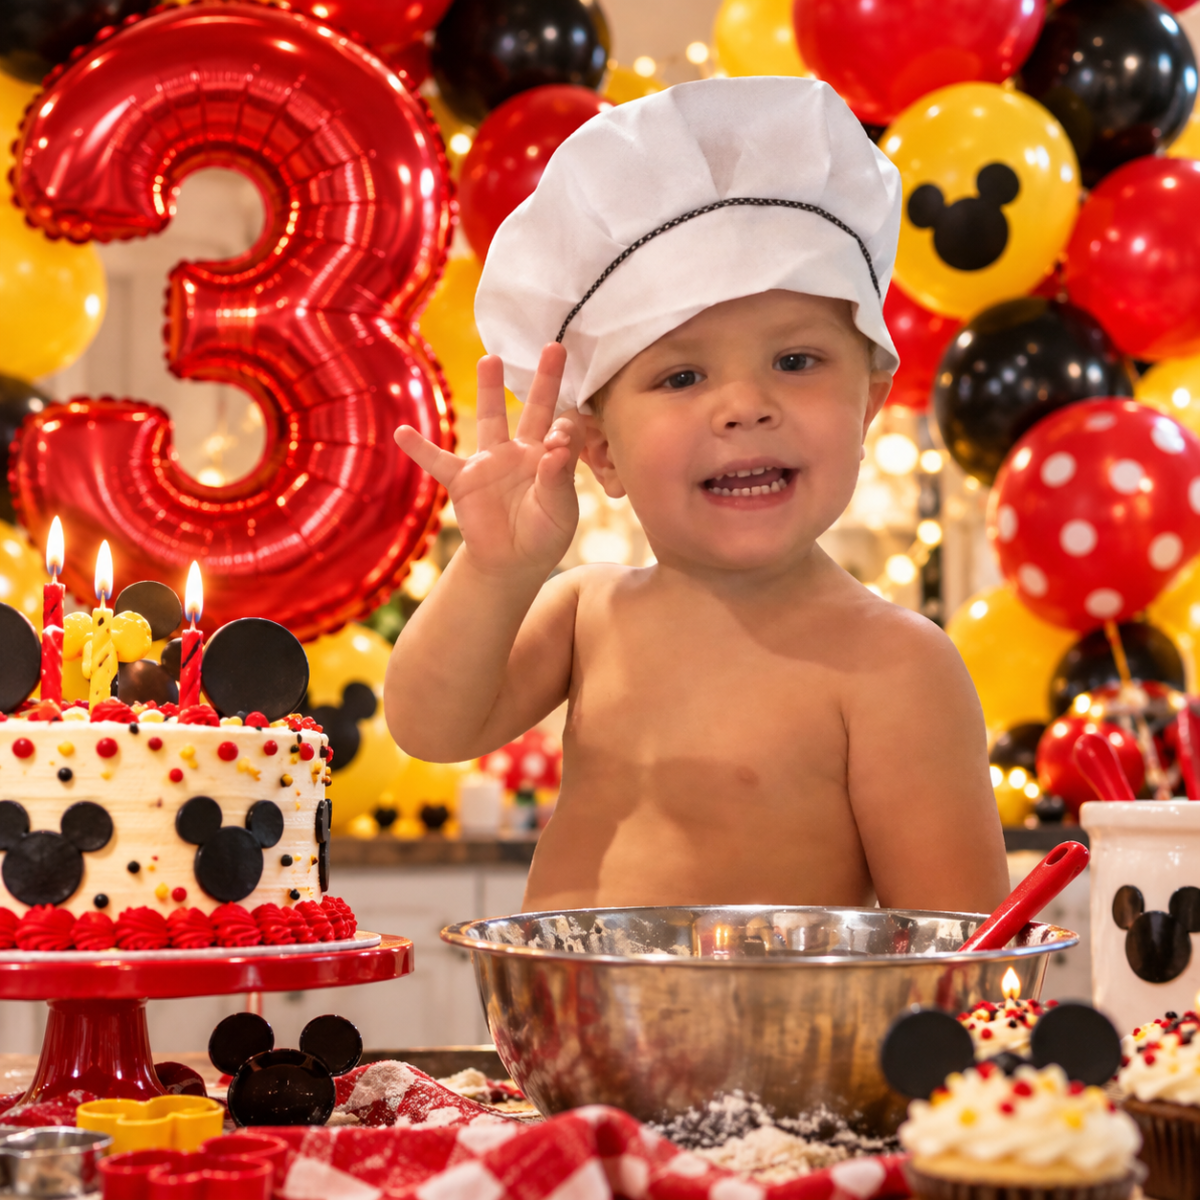
Some memories are simply too magical not to preserve! ✨ As we celebrate Nolan’s third birthday at Mickey’s Not-So-Scary Halloween Party, I’m sharing a personalized autograph mini album created with Scrappy Boy products. From handmade keepsakes to treasured family traditions, discover how paper crafting turns life’s sweetest moments into memories that last a lifetime! ❤️🖤💛

Some memories are simply too magical not to preserve! ❤️🏰

Our grandson Nolan is turning 3, and we’re celebrating with a family tradition we love: a visit to Mickey’s Not-So-Scary Halloween Party! Last year, we dressed as characters from Hercules,

Last Year’s First Annual MNSSHP with our family.

…..and this year we’re stepping into The Emperor’s New Groove! More photos to come from the event when we are with our family. Sneak Peek – Dress Rehearsal! 🦙💜

Before we head off on this year’s adventure, I created something special for Nolan—a personalized autograph album to hold signatures, photos, and memories from all the Disney magic still to come.

A Little Album for BIG Memories!

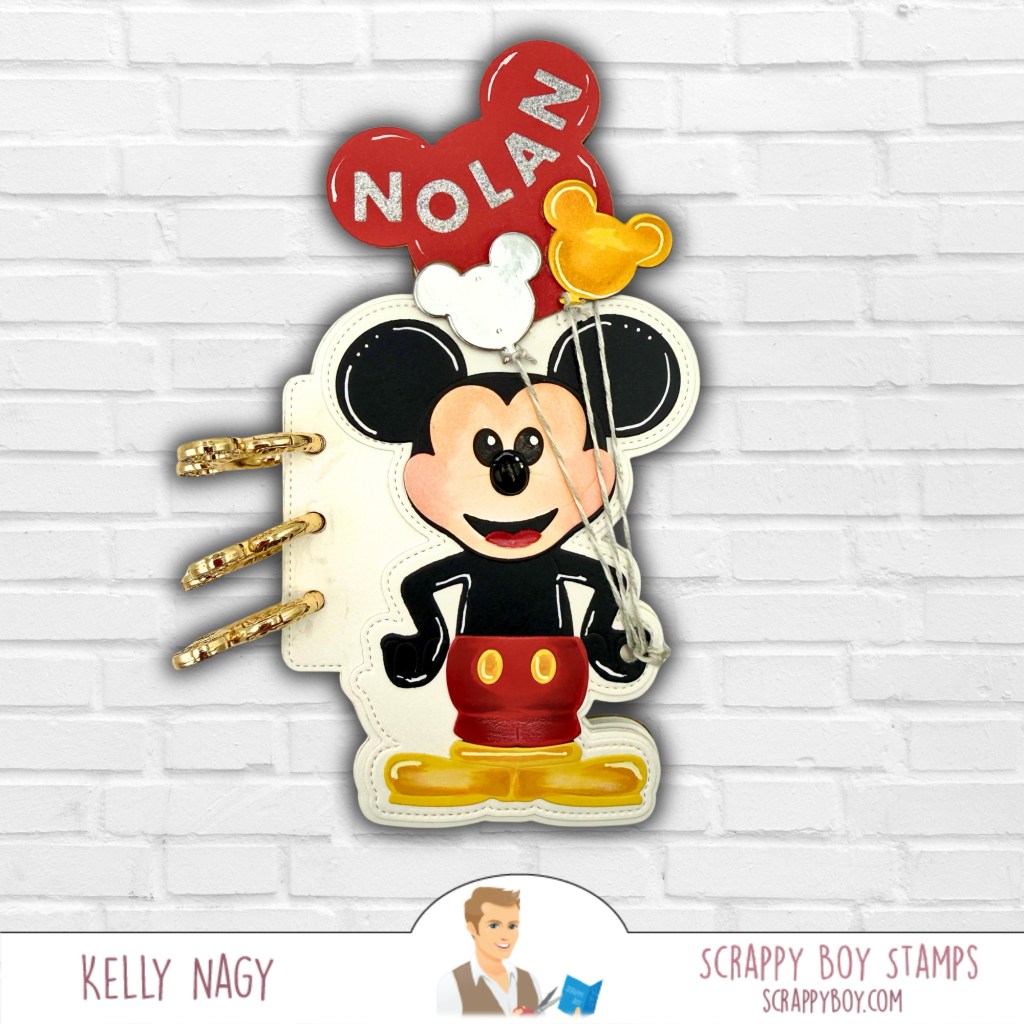
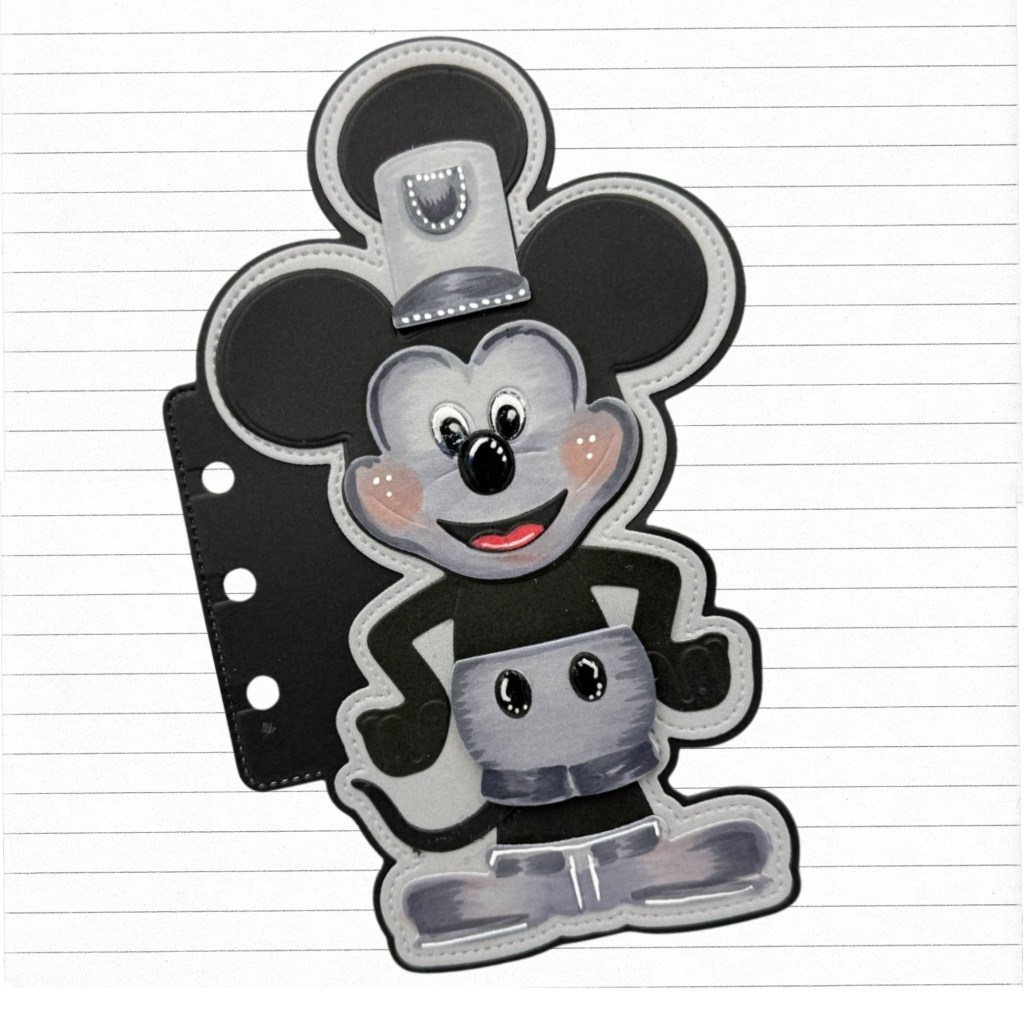
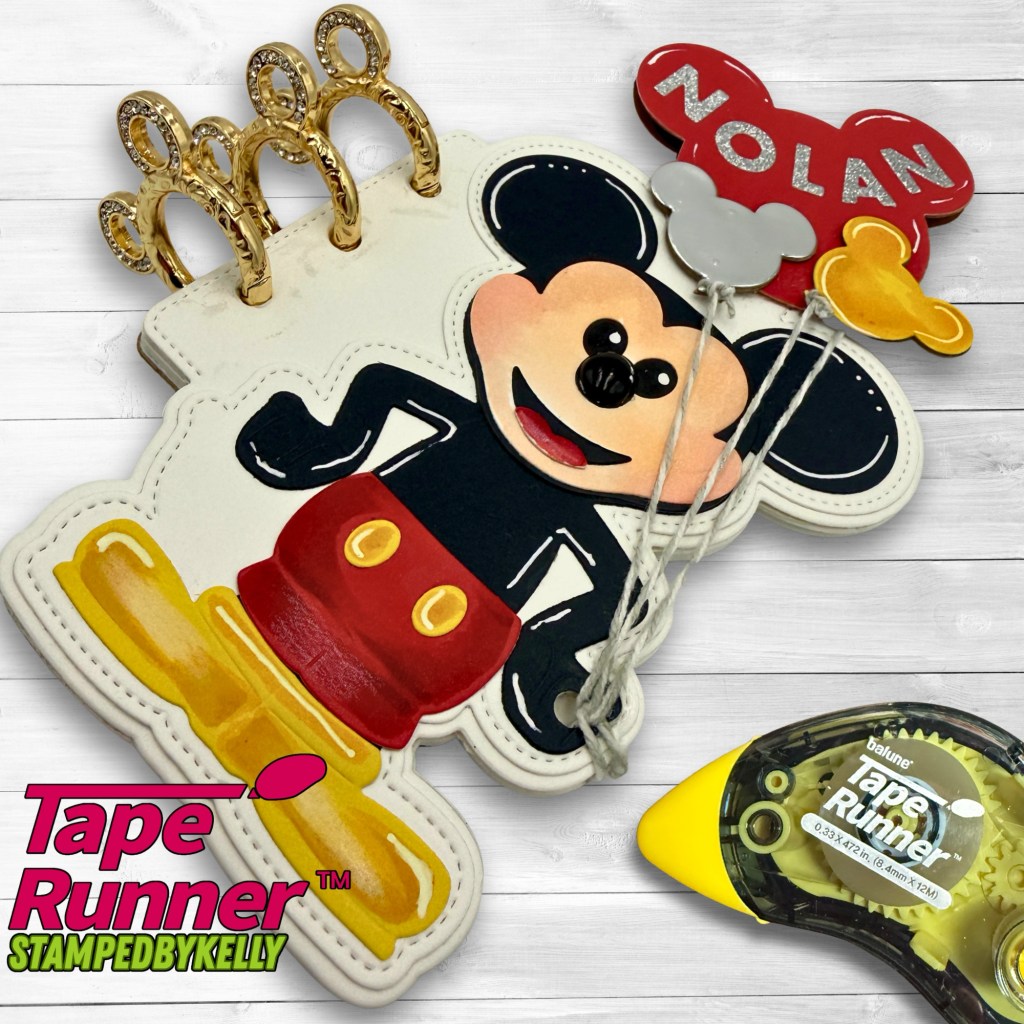
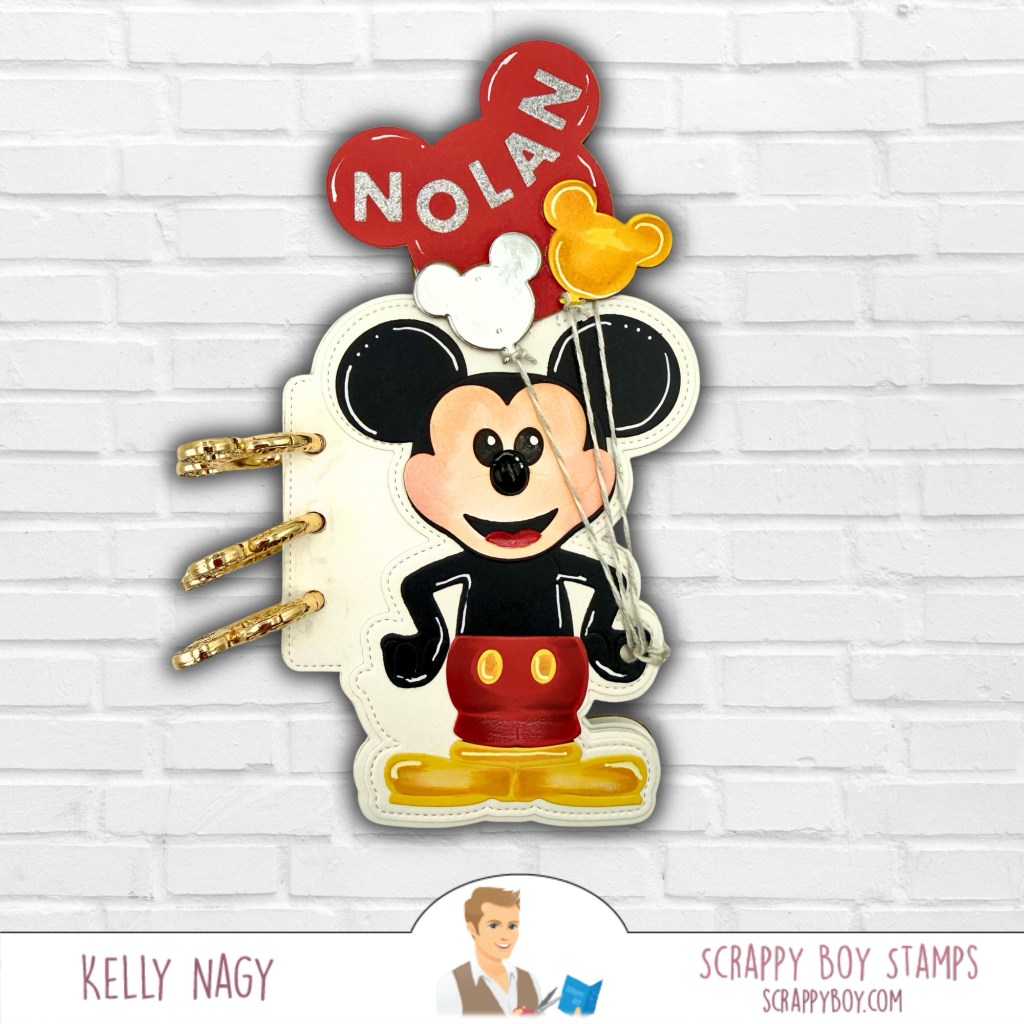
Using Scrappy Boy Stamps’ Vintage Mouse Mini Album Die Set, I created a personalized autograph album just for Nolan!

What I especially love about this die set is its versatility. The possibilities go far beyond a mini album!

  • Autograph Album: Add pages to collect signatures from favorite characters.
  • Birthday Card: Skip the album rings and create an adorable personalized keepsake card.
  • Scrapbook Embellishment: Remove the rings and use the finished character as a dimensional element on a scrapbook layout.

That’s THREE different ways to use one die set, and if you’ve followed me for a while, you know how much I love stretching my crafty stash!

From Black & White to Full Color! 🎨

The Vintage Mouse design has a classic, nostalgic feel, but I wanted something colorful and cheerful for Nolan’s birthday!

I started with colored cardstock to build the character, then added dimension and personality using markers, colored pencils, and my trusty white gel pen.

Those little highlights make such a difference! From the shine on his shoes to the details on his ears and clothing, a few simple touches really bring these die cuts to life.

💕 Let’s Stick Together with TapeRunner.com!

Every great paper-crafting project needs an adhesive you can count on! I love using my favorite dry adhesive from TapeRunner.com to bring all my creative projects together. It’s easy to use, comfortable to hold, and keeps my layers right where they belong!
✨ Save 10% on your cart at TapeRunner.com with my exclusive promo code KELLY10 at checkout!

Because life’s sweetest memories deserve to stick around! 💕

It’s All in the Personal Details!

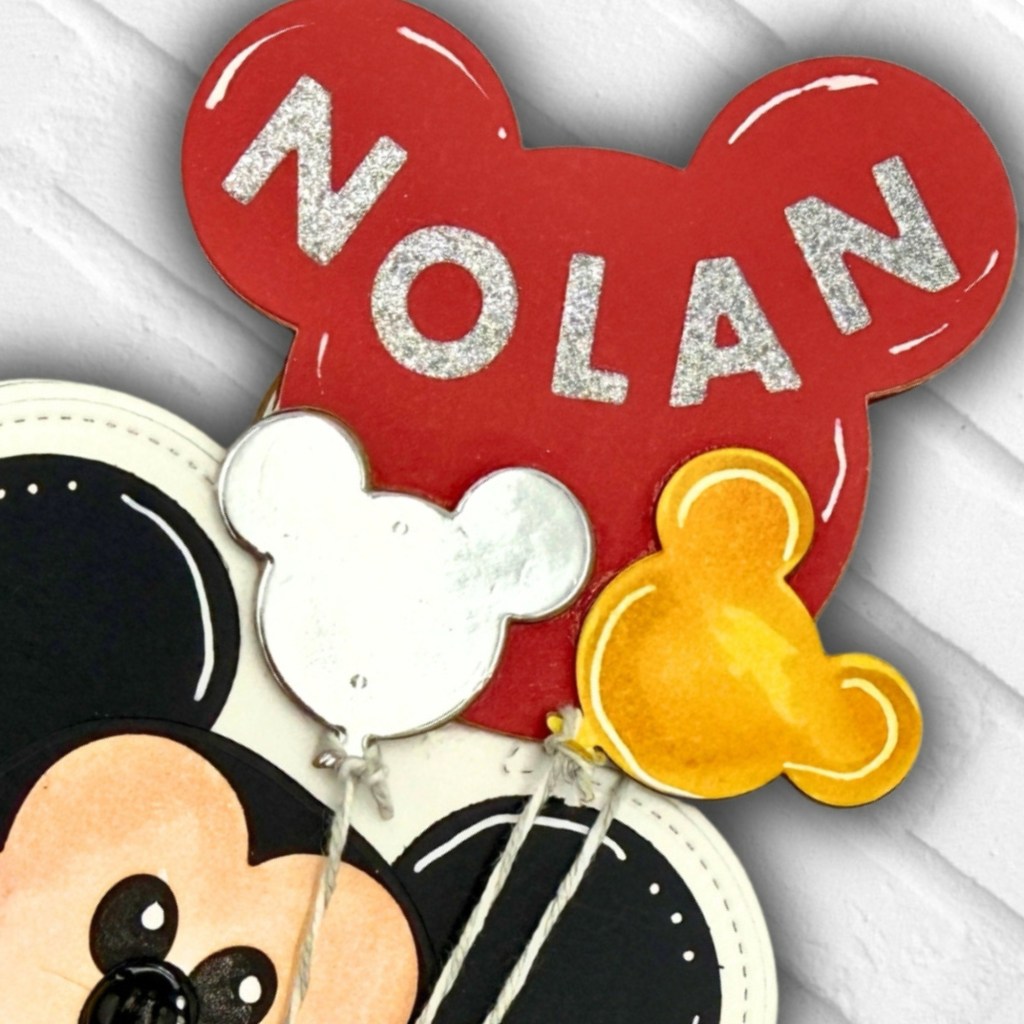
To make this album extra special, I added Nolan’s name to the mouse-shaped balloon using the alphabet dies from Scrappy Boy Stamps’ World’s Best Mug Die Set.

I absolutely LOVE the size of these letters! They’re perfect for mixing and matching with other Scrappy Boy products to create custom sentiments, personalized cards, scrapbook titles, and special keepsakes.

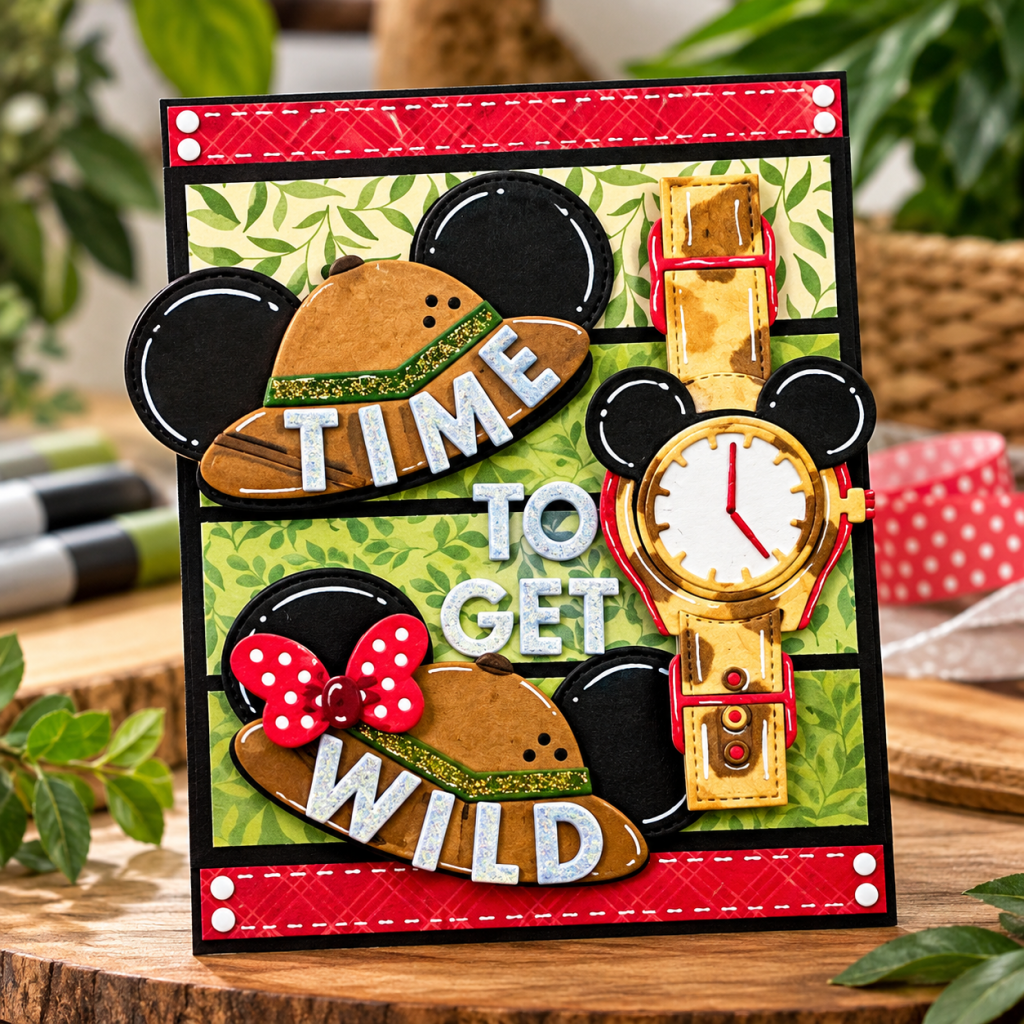
Here is another example of how I have utilized the FONT included in The World’s Greatest Mug Die Set.

Safari Hats & Shaker Watch from Scrappy Boy Stamps

A few coordinating balloons, some twine, and those adorable mouse-shaped album rings finished everything off!

Scrappy Boy Stamps Products Featured

Additional Supplies: Colored cardstock, markers, colored pencils, white gel pen, twine, and album rings.

🛍️ Shop Scrappy Boy Stamps at www.scrappyboy.com.

Crafting More Than Cards — We’re Preserving Memories! 💕

Sometimes paper crafting is about making a beautiful card. Other times, it’s about creating something that will hold a lifetime of memories.

I hope that years from now, Nolan will flip through this little album and see the signatures, photographs, and memories of the magical adventures we shared as a family.

That’s what I love most about this hobby. We’re not just cutting paper and assembling die cuts. We’re creating little pieces of our family history.

Whether it’s a simple birthday card, a personalized autograph album, or a scrapbook page, Scrappy Boy Stamps has so many wonderful products to help make those moments even more special.

And remember my favorite crafty shopping rule: Before purchasing a new product, try to imagine at least three different ways you’ll use it! Mixing and matching your favorite dies is a wonderful way to stretch your stash and make your crafty dollars go further.

Thanks for stopping by and sharing a little of our family’s magic!

💕 Happy Crafting!

Kelly | Stamped by Kelly

🌐 http://www.stampedbykelly.blog

📸 Follow @stampedbykelly for more inspiration!

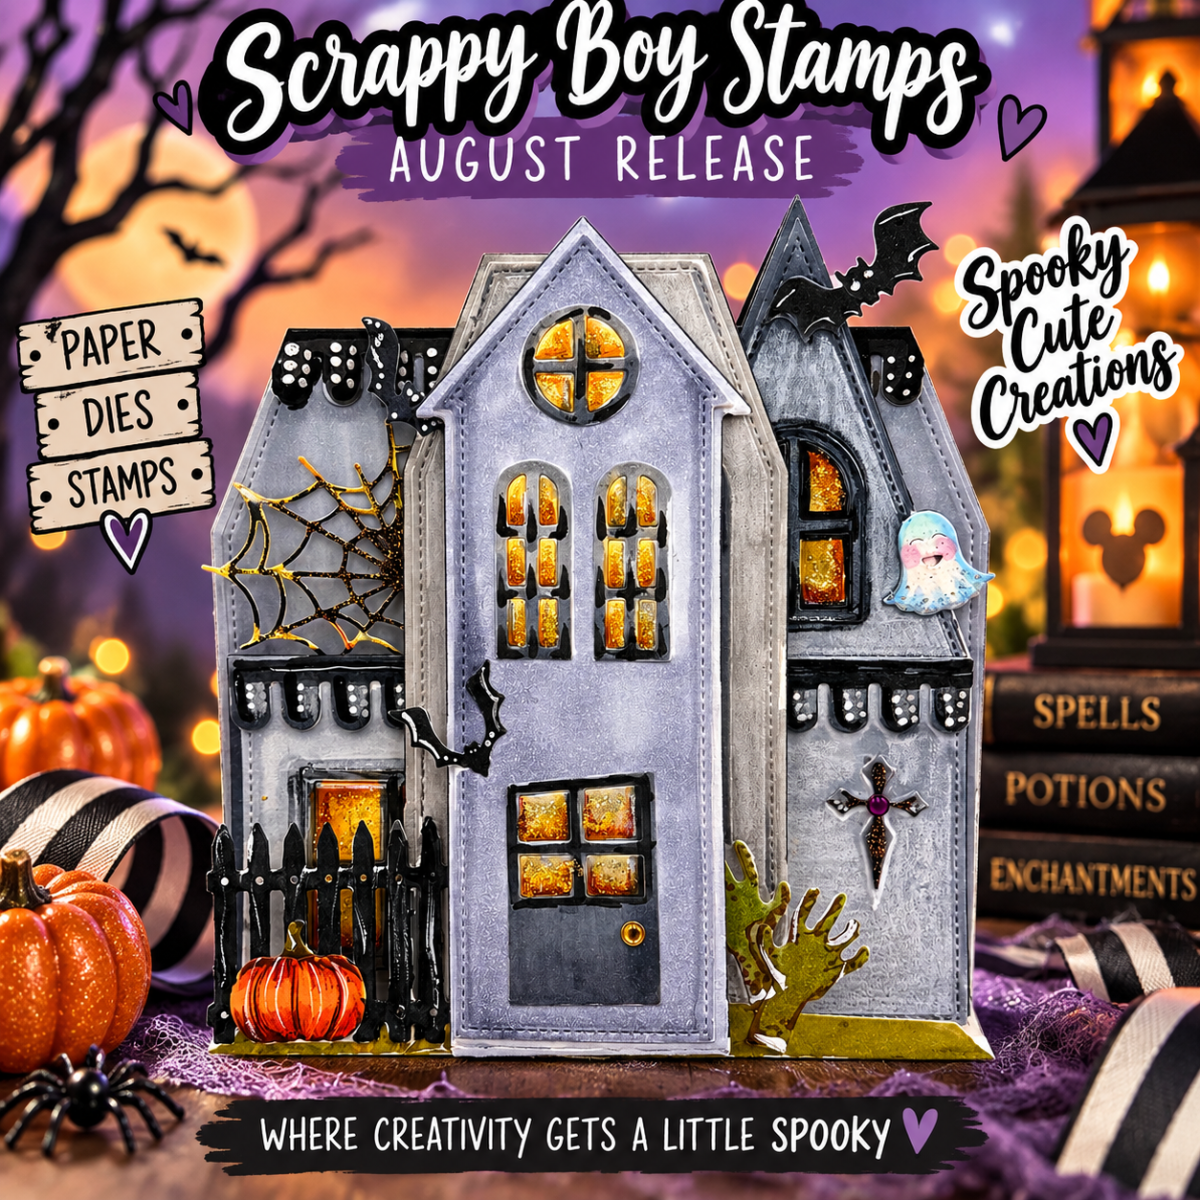
Spooky Cute with the Scrappy Boy Stamps August Release! 🦇🎃

Get spooky cute with the Scrappy Boy Stamps August Release! I’m mixing stamps, dies, paper and a little unexpected inspiration to create Halloween projects filled with dimension, personality and fun—including a special treat box made for my grandson and one of our favorite Halloween traditions. 🎃🦇✨

If you know me, you know I LOVE finding unexpected ways to use my crafty supplies! Sometimes a stamp or die may have been designed with one idea in mind, but I immediately start thinking, “What else can I turn this into?” And living in Central Florida, it probably comes as no surprise that a little theme park inspiration frequently sneaks into my craft room!

For these projects, I pulled out some of the spooky-cute goodies from the Scrappy Boy Stamps August Release and gave them my own magical Halloween twist.

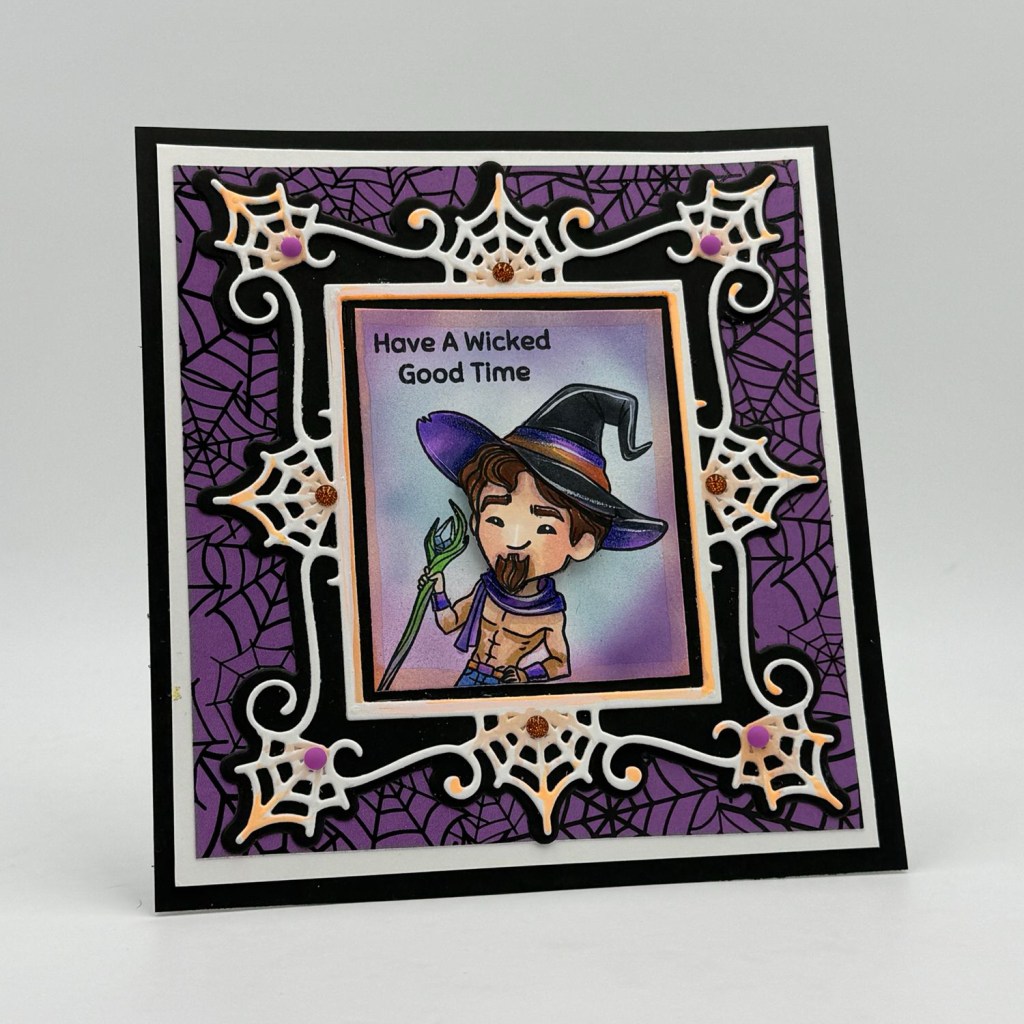
“Have a Wicked Good Time” Gothic Picture Frame card

The Gothic Picture Frame Die was perfect for framing one of the adorable images from Hex Appeal. I kept the traditional Halloween palette of purple, black, orange and white, adding little pops of sparkle to the spiderweb details. I love how the oversized frame makes the stamped image feel like a spooky portrait hanging inside a haunted mansion.

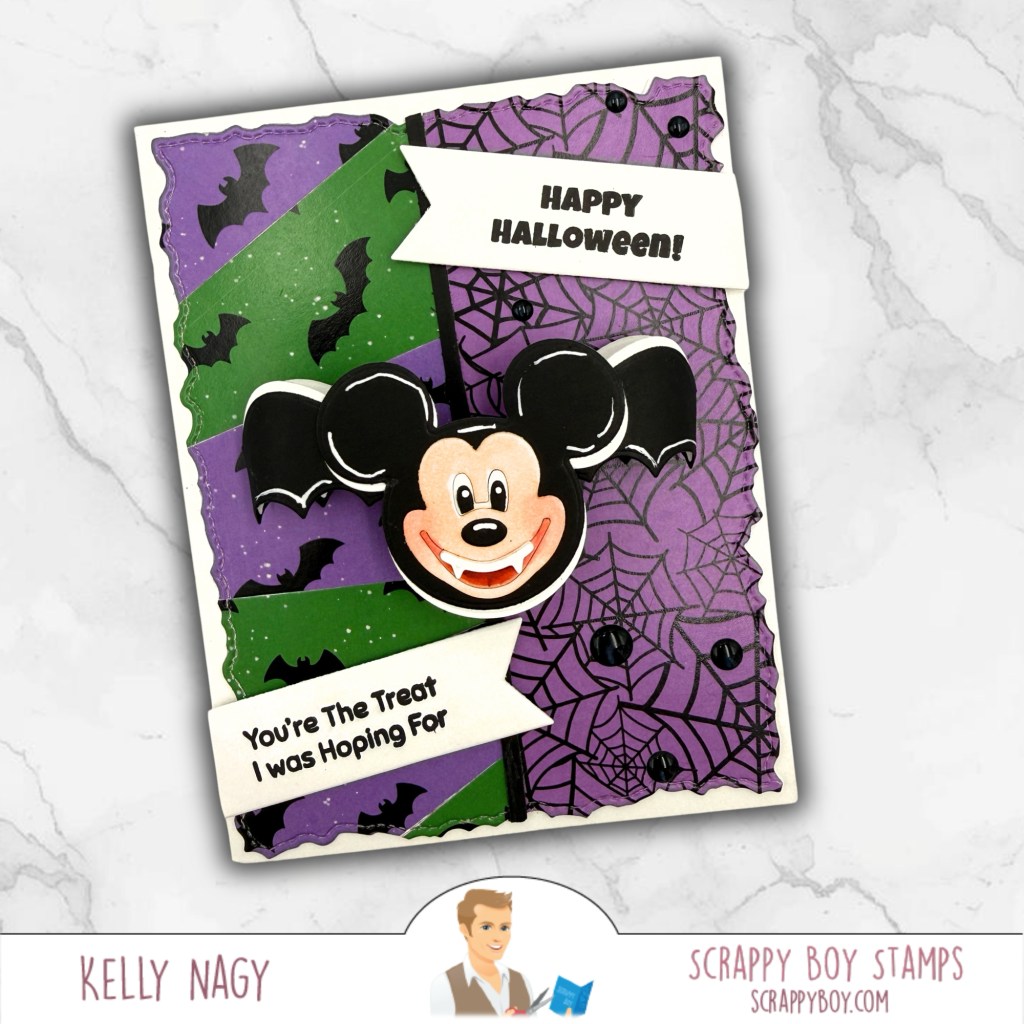
Mouse Bat card — “You’re the Treat I Was Hoping For

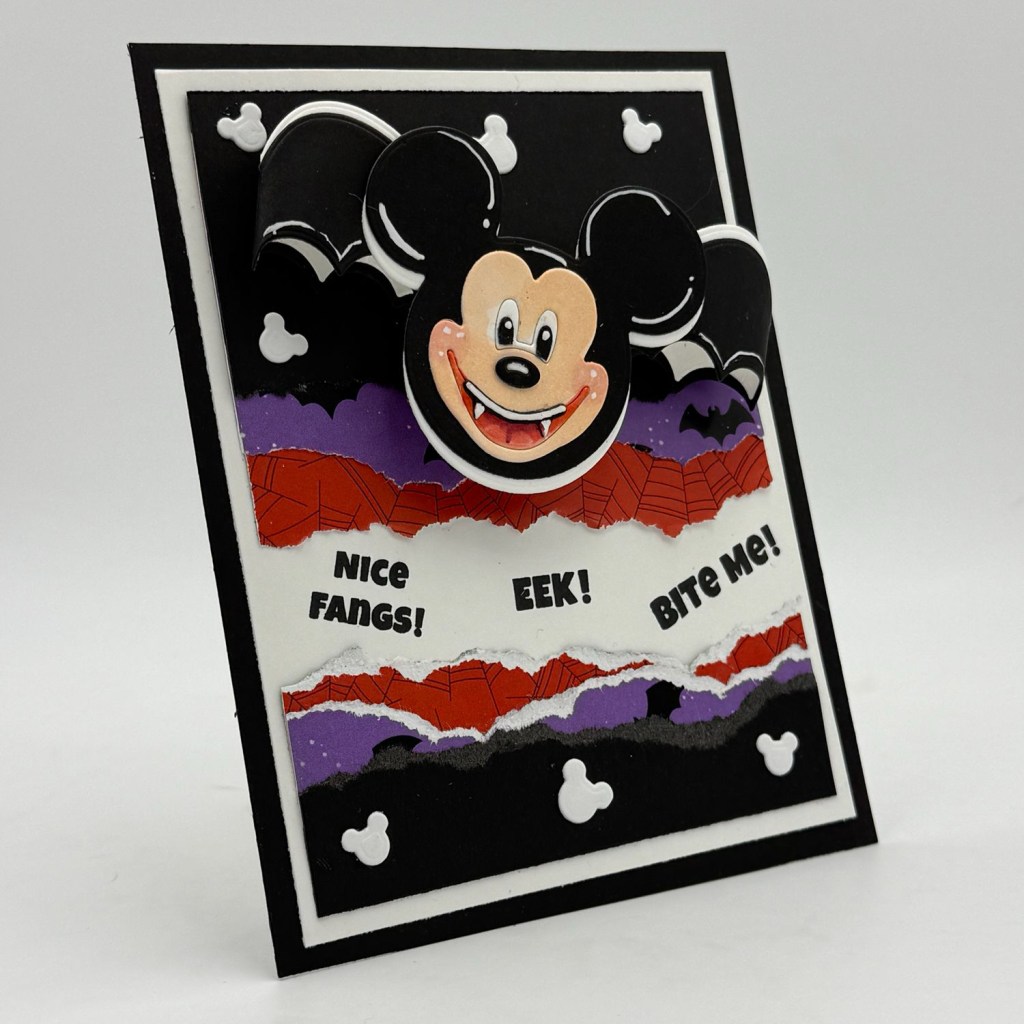
Then came those Mouse Bat Embellishment Dies! These were just begging for some theme park-inspired fun. I played with layers, patterned papers, torn edges and white gel-pen accents to create two completely different Halloween cards.

Mouse Bat card — “Nice Fangs! Eek! Bite Me!”

The dimensional bat ears make such a fun focal point, especially when paired with those classic Halloween colors. I especially love how differently the same basic die can look simply by changing the background, composition and embellishments.

And I couldn’t stop there!

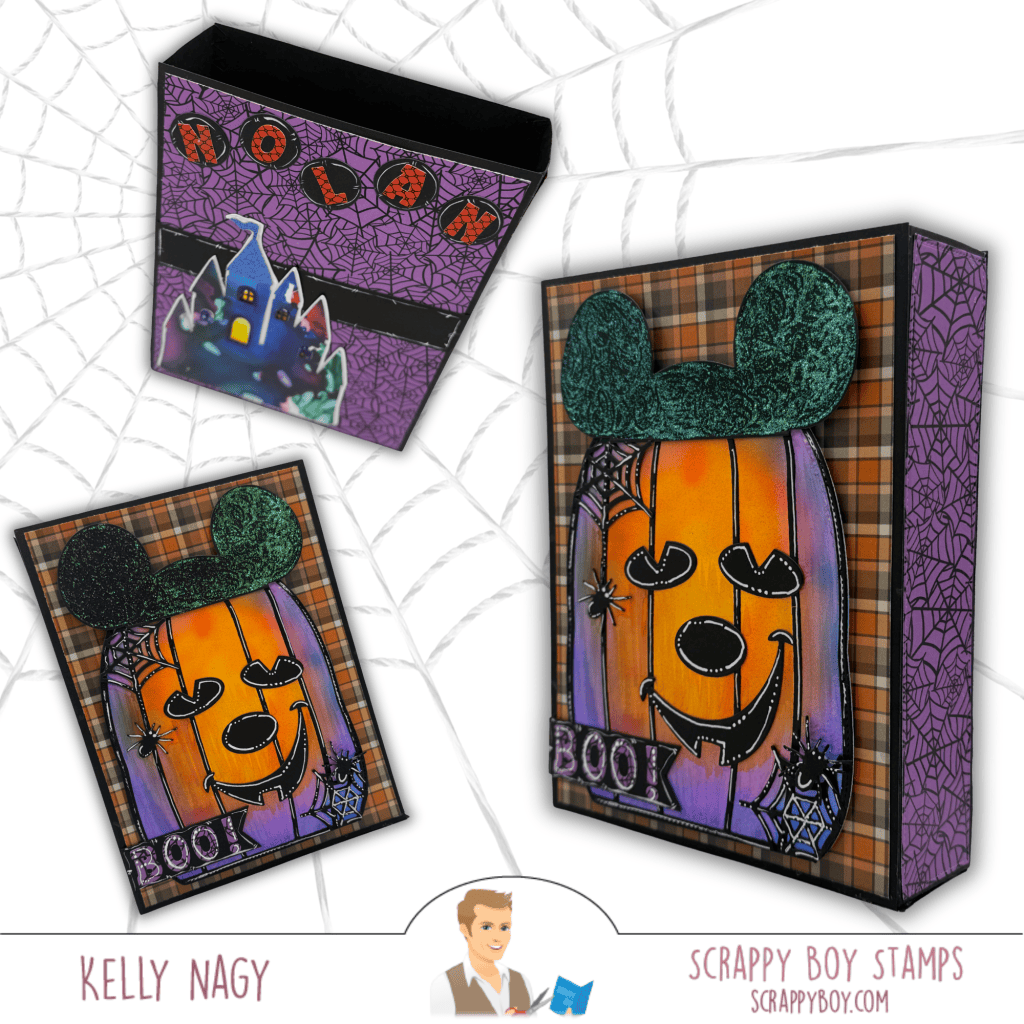
Full Pumpkin Mouse project showing both the card and dimensional folio/box

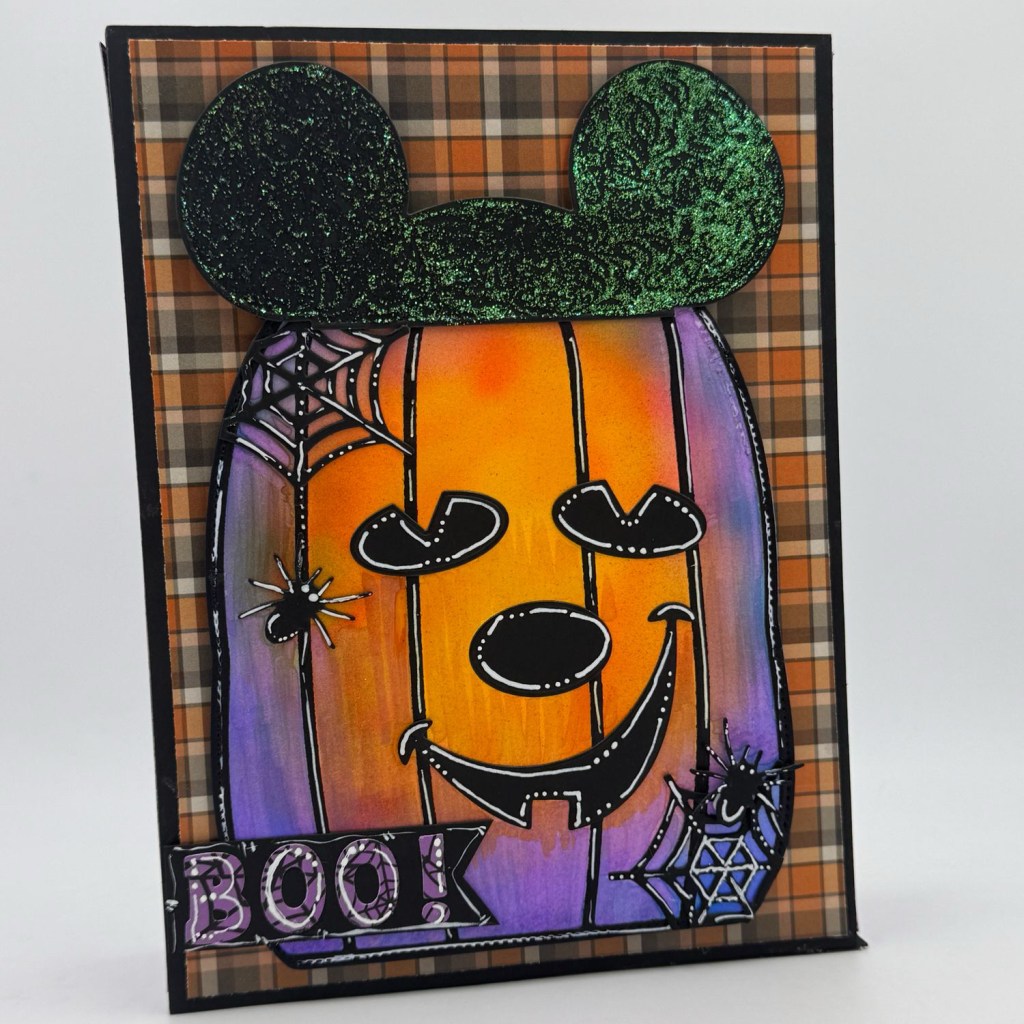
The Pumpkin Mouse Backpack Add-On became the star of one of my favorite projects. Instead of treating it simply as a backpack element, I transformed that big pumpkin into a dimensional Halloween centerpiece and paired it with plaid and spiderweb papers. A little tissue paper and some fun halloween treats and gift cards and you have a decorative, heartfelt gift and memory holder once emptied.

Close-up of Pumpkim

Lots of ink blending, deep shadows, white gel-pen highlights, lovingly put together with my hand-held adhesive from Tape Runner and a little shimmer helped bring all of those layers to life. The close-up really shows how much dimension and texture can be added to simple paper die cuts.

This treat box is especially close to my heart because I created it for our grandson, Nolan, as we prepare for our second annual visit to the Mouse’s Not-So-Scary Halloween Party at the theme park, a tradition that combines celebrating his birthday with officially kicking off the Halloween season here in Central Florida!

I personalized the back with his name and even pulled in the castle die from a previous Scrappy Boy Stamps release, which was the perfect way to add another little touch of magic. I love mixing pieces from different releases and finding completely new ways to use them, but even more, I love knowing that this project will become part of another special memory with our grandson. 🎃🏰🧡

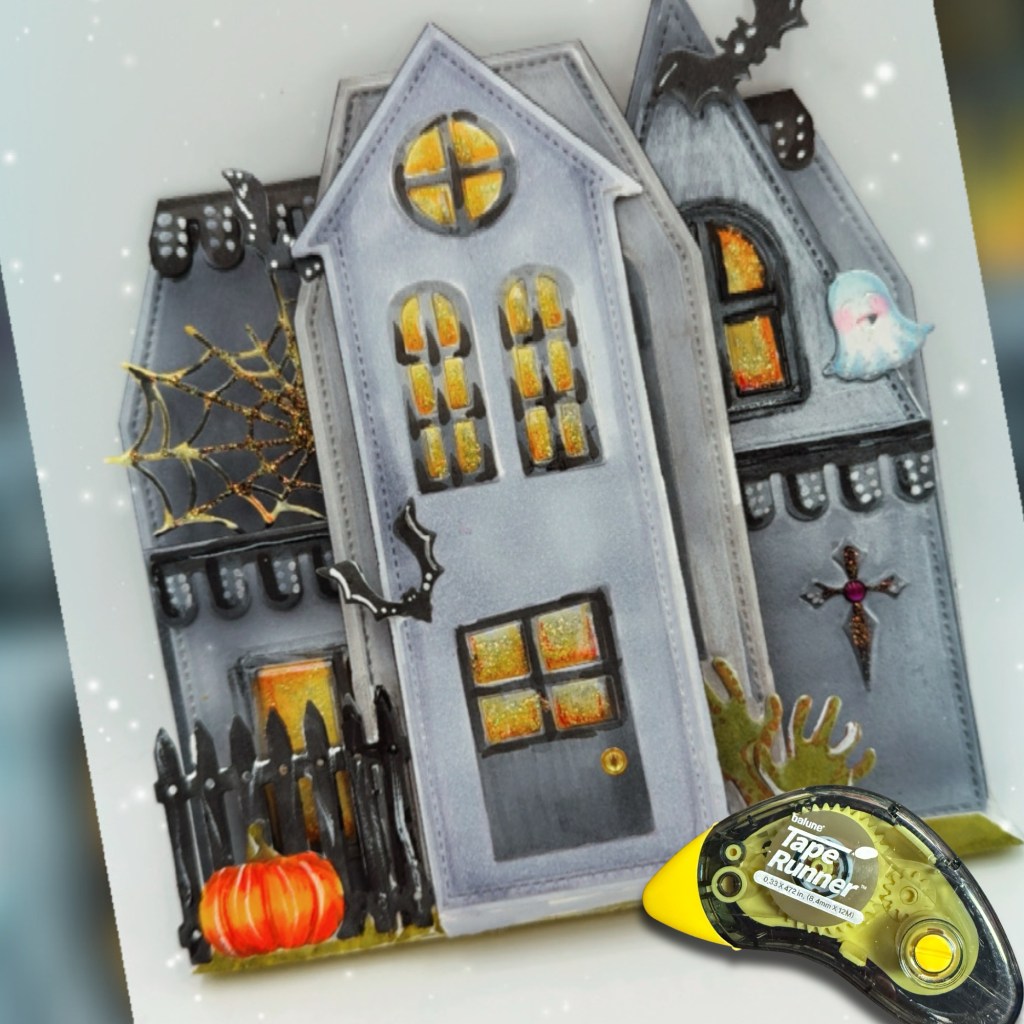
Finally, I had to play with the Haunted House Folio. I went for an eerie-but-cute abandoned mansion look with weathered grays, soft lavender, glowing golden windows, bats, spiderwebs, a pumpkin and even a creepy little hand reaching up from below. It was easy to position and adhere the smaller pieces with my hand-held Tape Runner. This project has so many tiny details to discover!

That’s probably my favorite part about crafting: the dies give you the pieces, but your imagination gets to decide what they become.

I hope these projects inspire you to pull out your supplies and look at them a little differently. Mix collections. Change the intended theme. Add unexpected colors. Turn an embellishment into the focal point. Most importantly, have fun creating something that’s completely you.

Happy crafting — and stay spooky! 🦇🎃✨

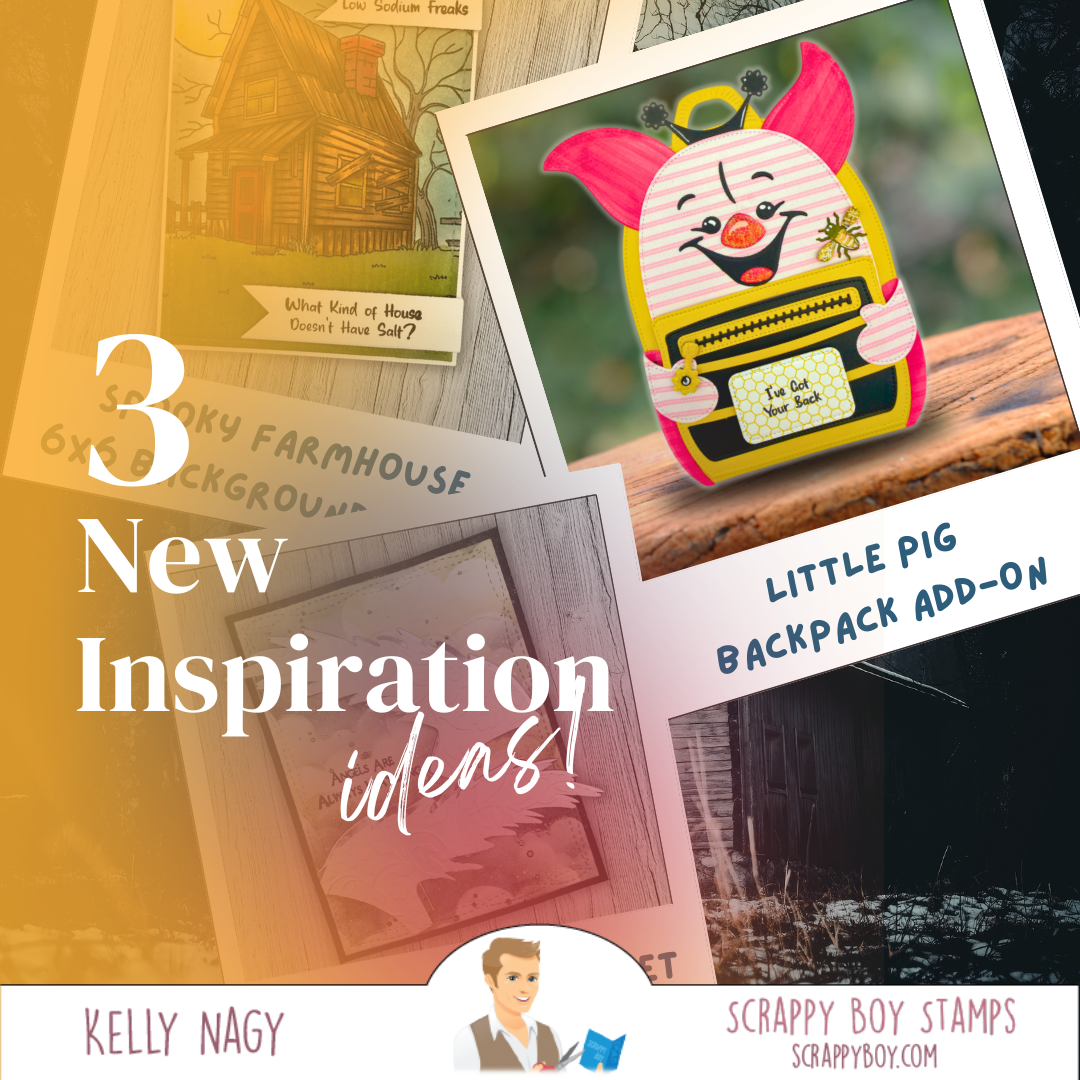
In today’s feature, I’m sharing three distinct card designs created using Scrappy Boy Stamps’ newest release. Each project highlights a different product and aesthetic:

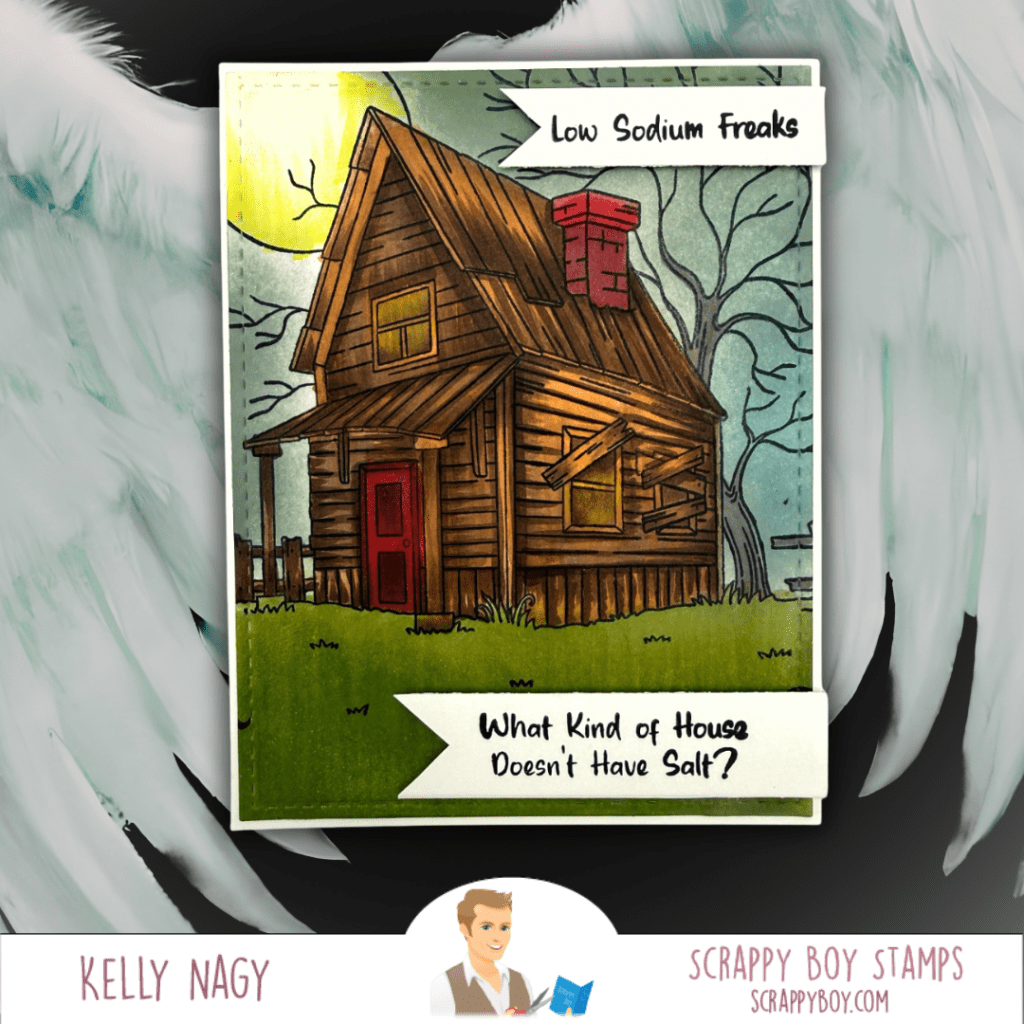
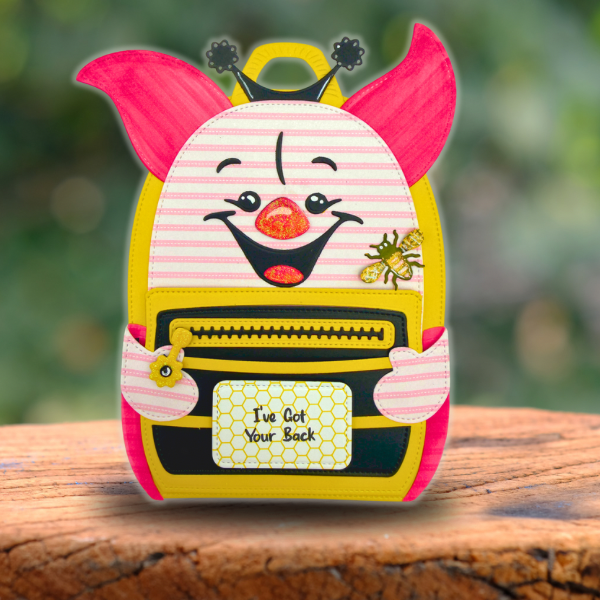
Exploring the newest Scrappy Boy Stamps release has been such a creative journey! For this set of projects, I challenged myself to take three very different elements—the Spooky Farmhouse background, the Wings & Sun dies, and the Little Pig Backpack add-on—and design cards that each tell their own story. From moody and textured to bright and uplifting to sweet and playful, these cards may look completely different at first glance—but there’s a common thread in how they were built. Take a closer look and see if you can spot what ties them all together! It’s my adhesive from TAPERUNNER.COM! Use Kelly10 for 10%OFF only at TapeRunner.com website.

The Spooky Farmhouse 6×6 Background Stamp brings in layered texture and seasonal depth. I cut it down to fit a standard A2 sized card front.

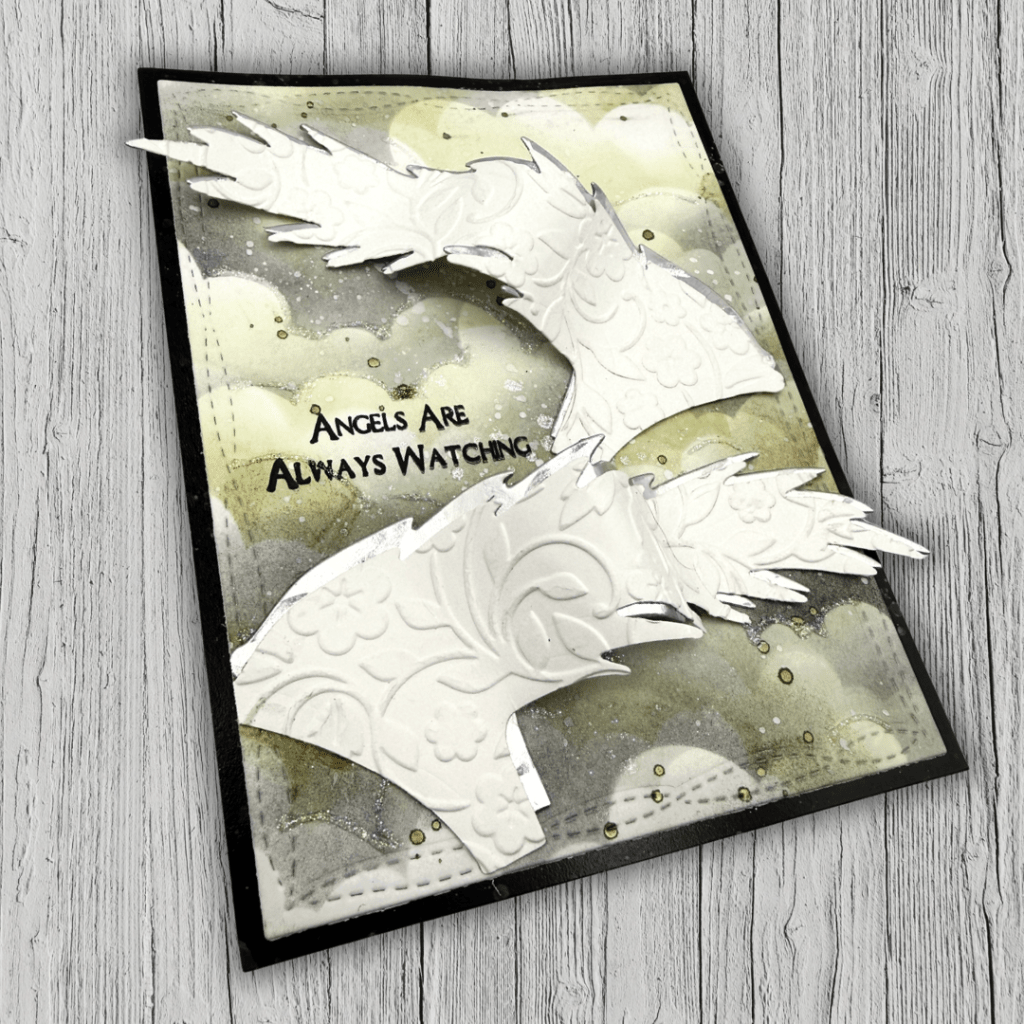
The Wings & Sun Dieset offers a softer, uplifting focal point with dimension. I ran the diecut wings through an embossing machine using a folder from my stash. I think it adds fun dimension, but not necessary. I then applied foam tape in thin strips to create waves and movement. The sentiment is from Bump In The Night and great to send an uplifting message, “Angels Are Always Watching.”

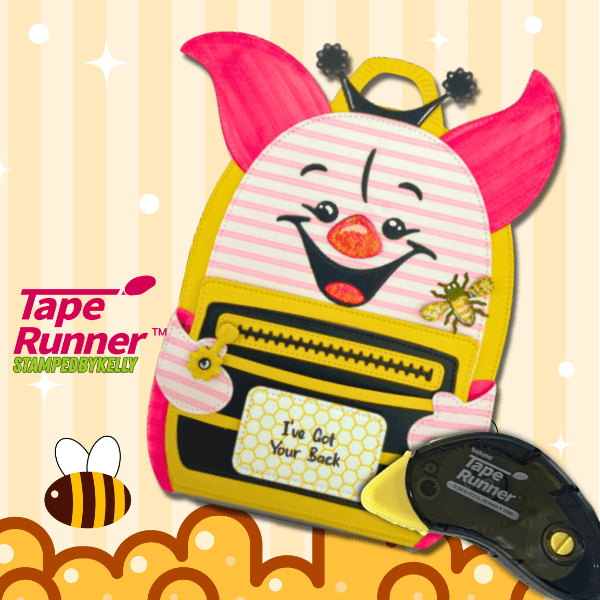
The Little Pig Back-Pack Add On adds a whimsical, character-driven element. Featuring the dry adhesive from TapeRunner and use PROMO CODE KELLY10 for 10%OFF your TapeRunner Cart.

Love putting my layers together with TapeRunner dry adhesive. Less Mess! Convenience ❤️

I wanted the pig to be dressed like a bee, so I used yellow snd black card for the body and ran the mouth diecut through a second time and cut the flower zipper pull a teo times in black to create a bee antennae. The bee is from the Honey Bear Back Pack Add-On Set.. Patterned papers are from the Honey Bear 6×9 paper pack. All of the Little Pig’s body cut from the pink striped patterned papers, with some elements colored with alcohol markers, white gel pen and crystal glaze for added shine.

Coincidentally, I found delight in the “I’ve Got Your Back” sentiment from Bump In The Night, which is a perfect for those who love a GOOD PUN! Perfect for ANY backpack project, LOL!

While each project stands on its own stylistically, they were intentionally designed with a unifying creative approach. Support small businesses and find these products and so much more at Scrappy Boy Stamps

I invite you to explore the projects and consider this:

👉 What is your favorite design element or technique?

Engagement and shared perspective are what makes this creative community so impactful.  Thanks for following, liking and commenting below!👇

Unlocking Creativity: How Die Cuts Transform Your Card Making! ✂️✨

Unlocking Creativity with Die Cuts in Card Making! ✂️✨

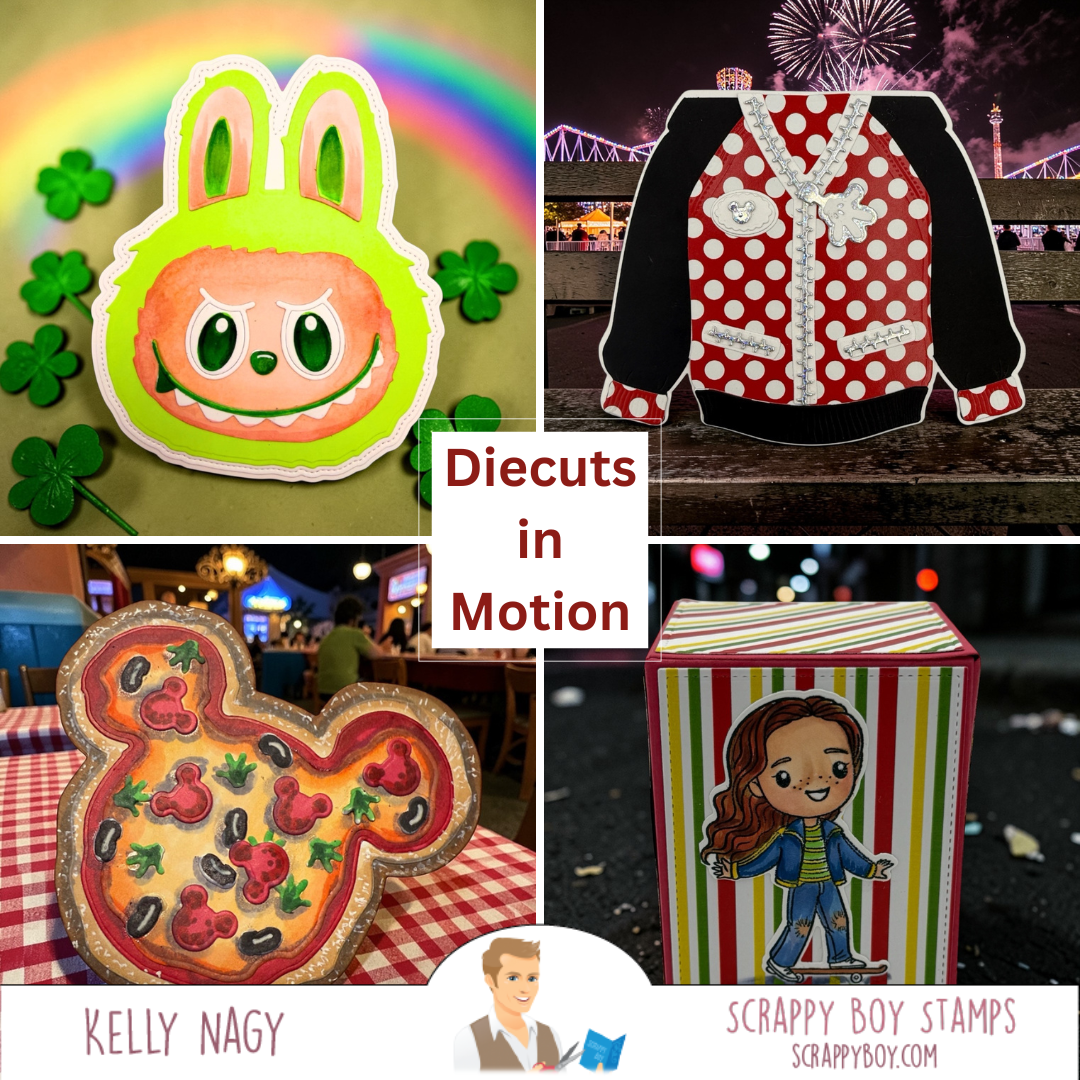
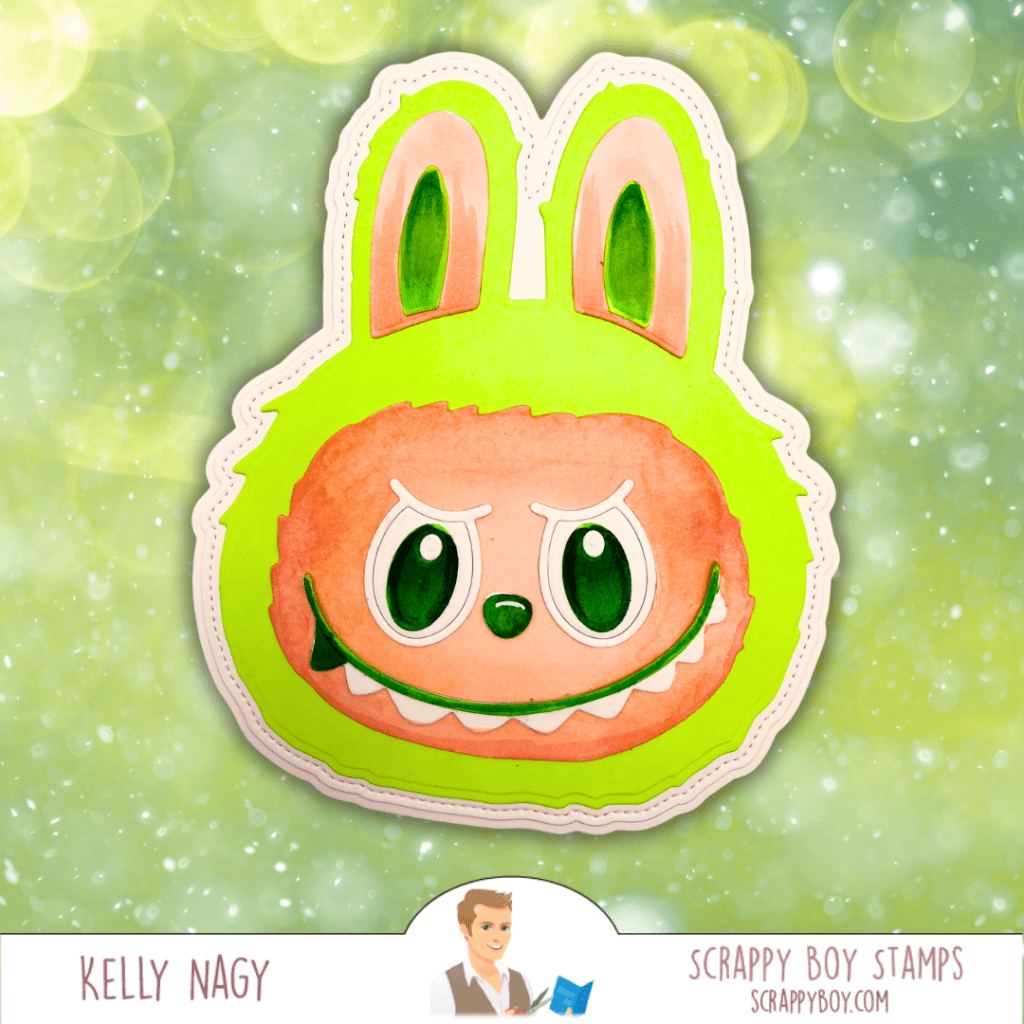
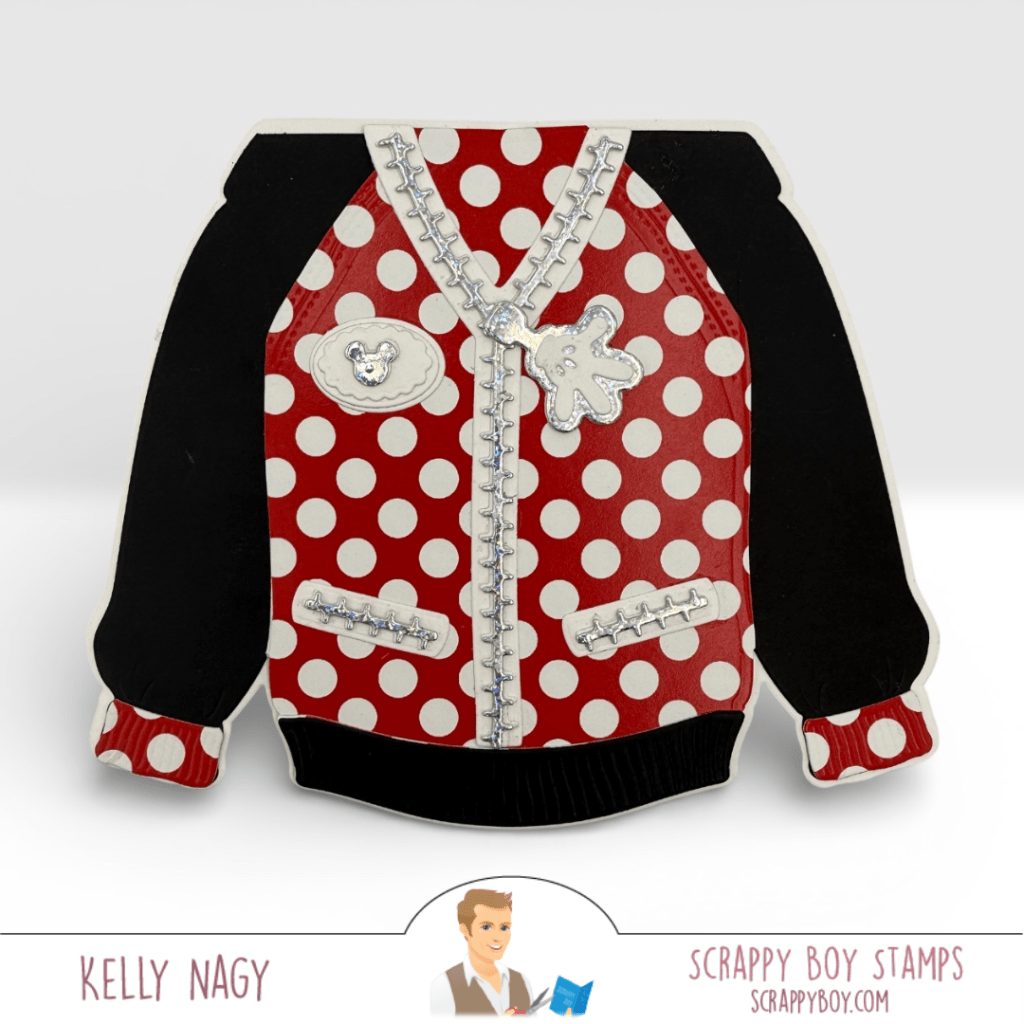
Welcome back, crafty friends! Today, I’m excited to share how die cuts can transform your card making and elevate your projects to new heights. From festive designs like the Shabubu Head Die Set for St. Patrick’s Day to cozy creations with the Hoodie Shaped Card, the possibilities are endless!

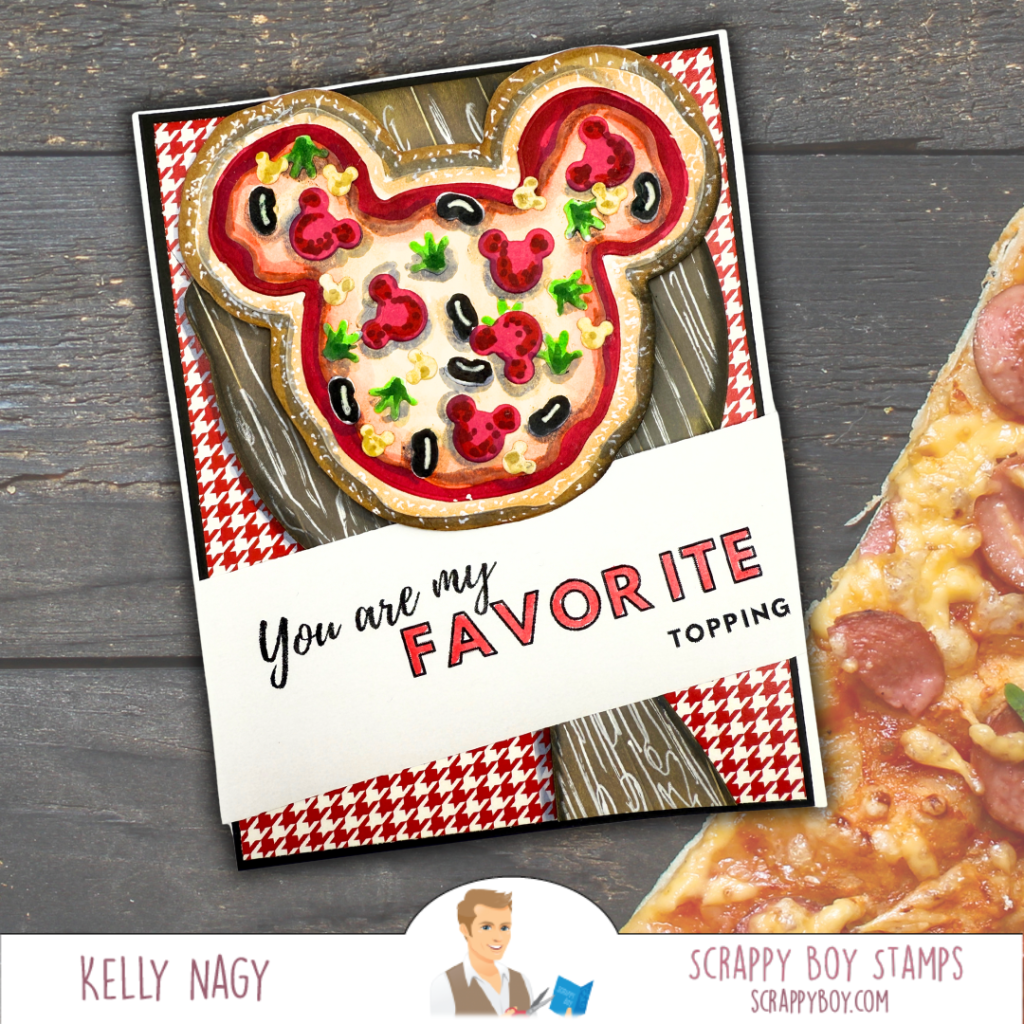
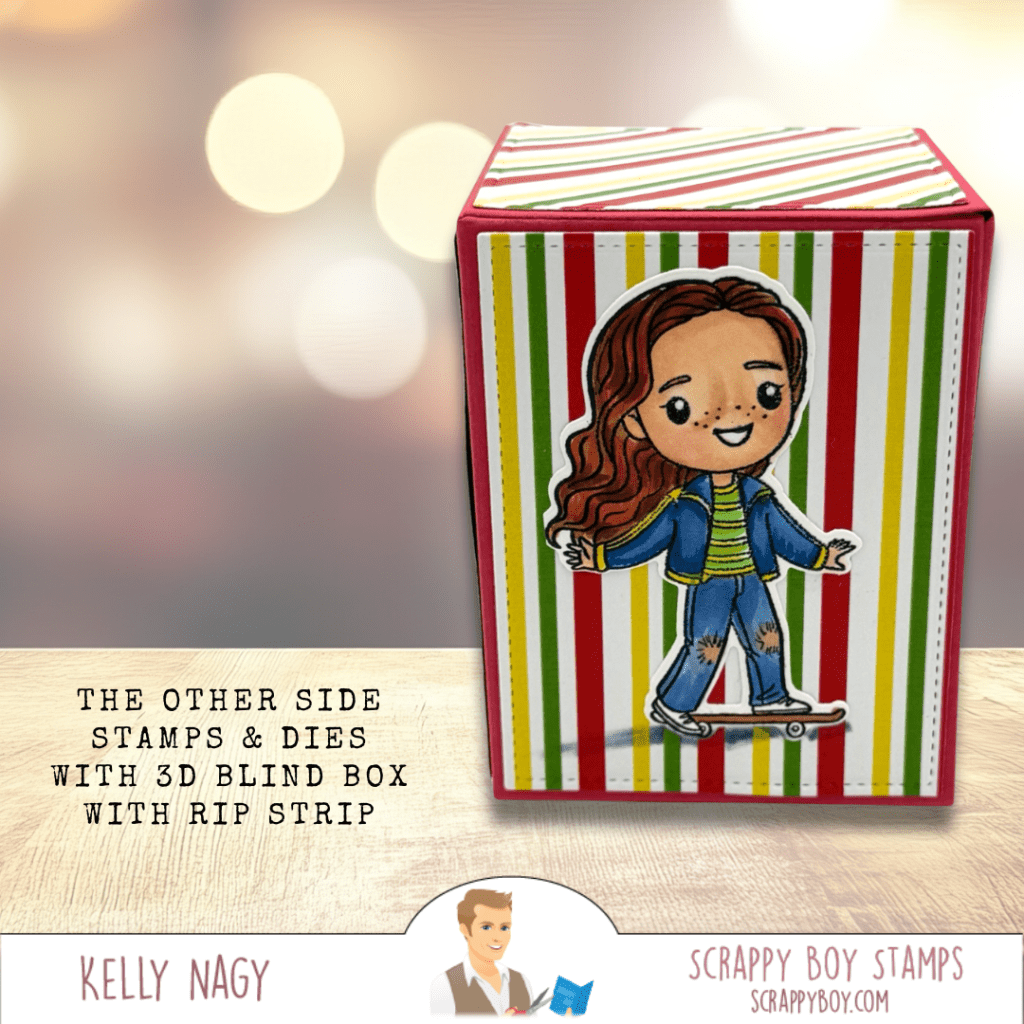
Get inspired by the fun Mouse Pizza Builder Die Set and the creative Blind Box with Rip Strip for unique gift card presentations. With die cuts, you can add dimension and personality to your cards, making them truly special. Ready to unleash your creativity? Let’s dive into these amazing projects together! 💖🎉

Hey there, crafty friends! Are you ready to take your card making and paper crafting to the next level? Let’s dive into four fabulous projects that showcase how die cuts can truly transform your creations!

1️⃣ Shabubu Head Die Set: Just in time for St. Patrick’s Day, this die set lets you customize adorable characters in vibrant green! With die cuts, you can add dimension and personality to your cards, making them extra special. 🎉💚

2️⃣ Hoodie Shaped Card & Add-On Die Set: Say goodbye to basic cards! This hoodie die set allows you to create cozy, themed cards that can be zip-up or feature front pockets. Customization is key, and with just a few die cuts, you can create a professional-looking design that’s full of warmth and fun. 👕✨

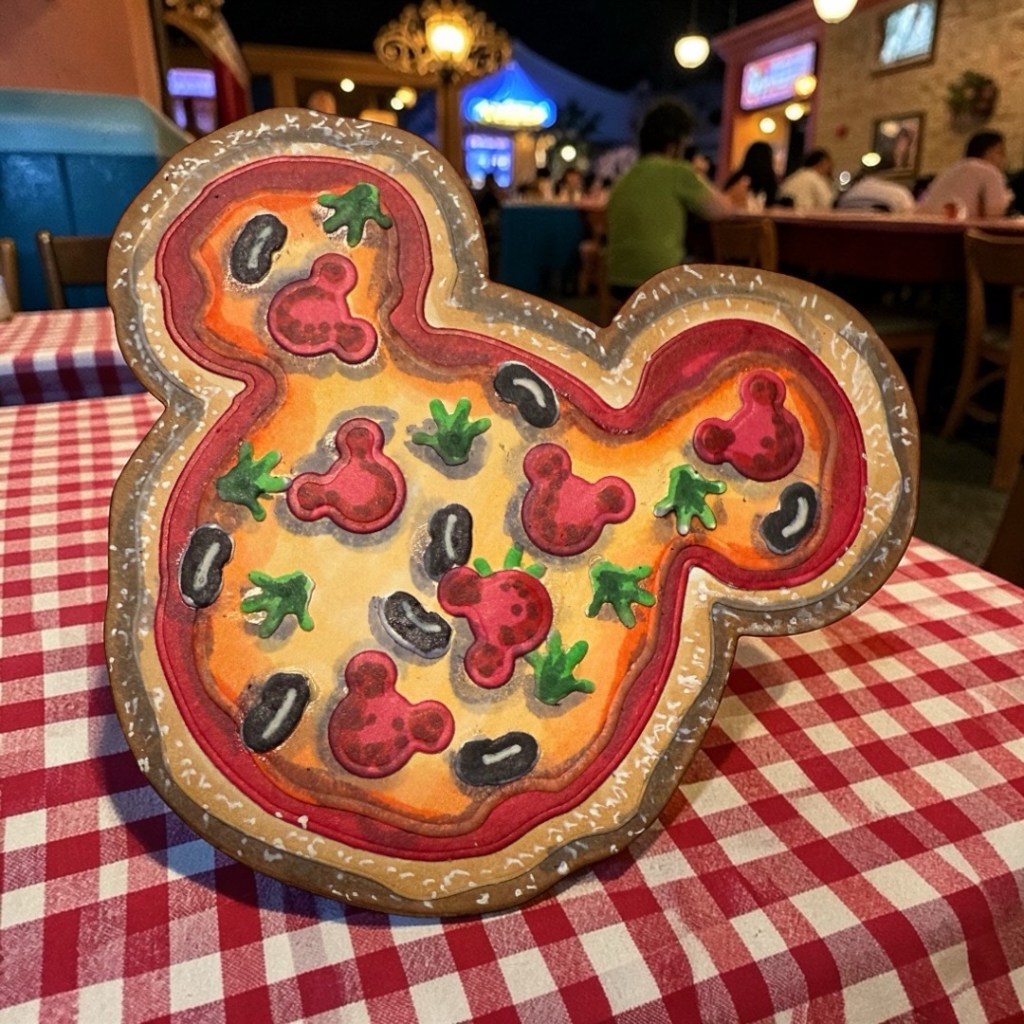
3️⃣ Mouse Pizza Builder Die Set: This set proves that die cuts can do much more than just cut flat shapes! Use them creatively, like I did when I transformed a piece from the Magic Mirror Mini Die Set into a pizza board. Experiment with cutting your dies in plain white cardstock and let your imagination run wild with colors and arrangements! 🍕🐭

4️⃣ Blind Box with Rip Strip: This project combines playful design with functionality! Using patterned paper and an image from The Other Side Stamp Set, I created a gift box that’s perfect for presenting a gift card. The rip strip adds an exciting reveal, making gift-giving even more delightful! 🎁✨

With die cuts, the sky’s the limit! You can add dimension by layering your cuts, and even more depth by adding shadows and colors using your favorite mediums or simple ink blending on the edges.

So, are you ready to unleash your creativity? Dive into these projects and see how die cuts can elevate your crafting game! Share your favorites in the comments below, and let’s inspire each other to create something amazing!

I use dry adhesive and liquid adhesive for my projects. There are specific times when one works better than the other. Follow me for more tips on that and if you wish to visit taperunner.com you can use code Kelly10 for 10% off your cart.

💖 #ScrappyBoyStamps #DieCutMagic #StampedbyKelly #SSBE

🌟 Inspiration Featuring Some of Scrappy Boy Stamps’ January 2026 Release🌟

Card projects featuring January 2026 Release for Scrappy Boy Stamps – Week 1

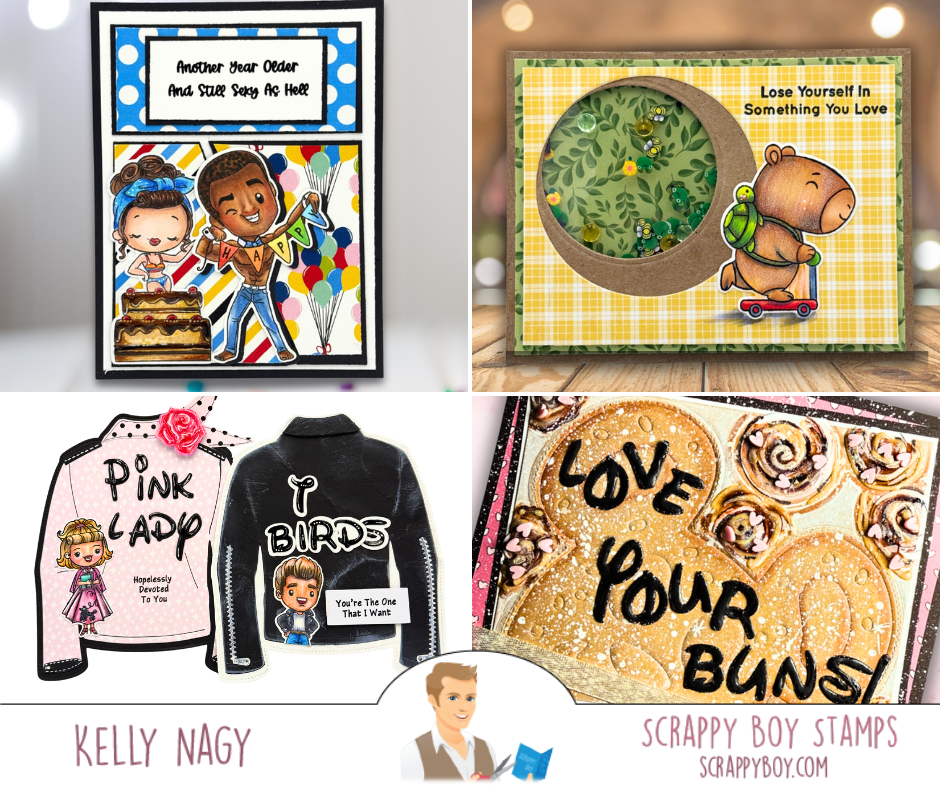
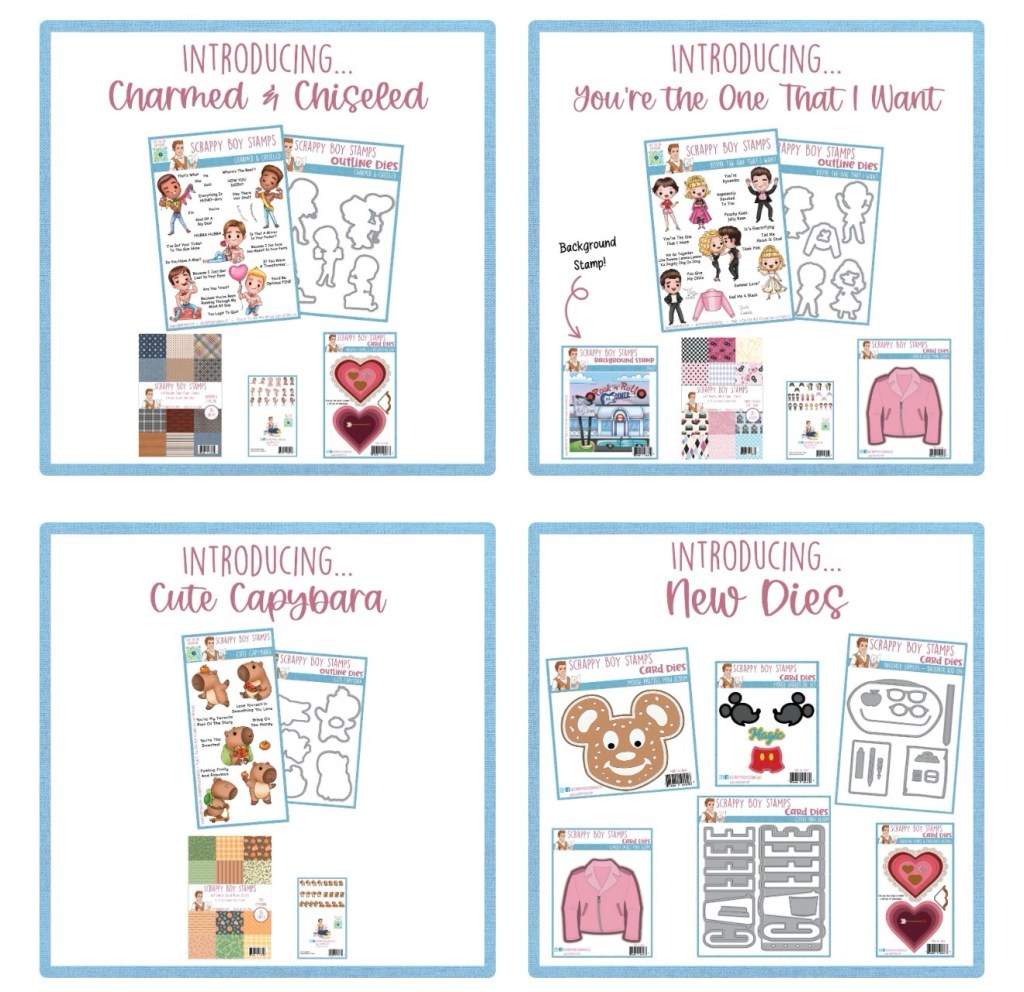
Hey crafty friends! 🎨✨ I’m excited to share four new card projects I created using the unique and whimsical products from the January 2026 release over at Scrappy Boy Stamps!

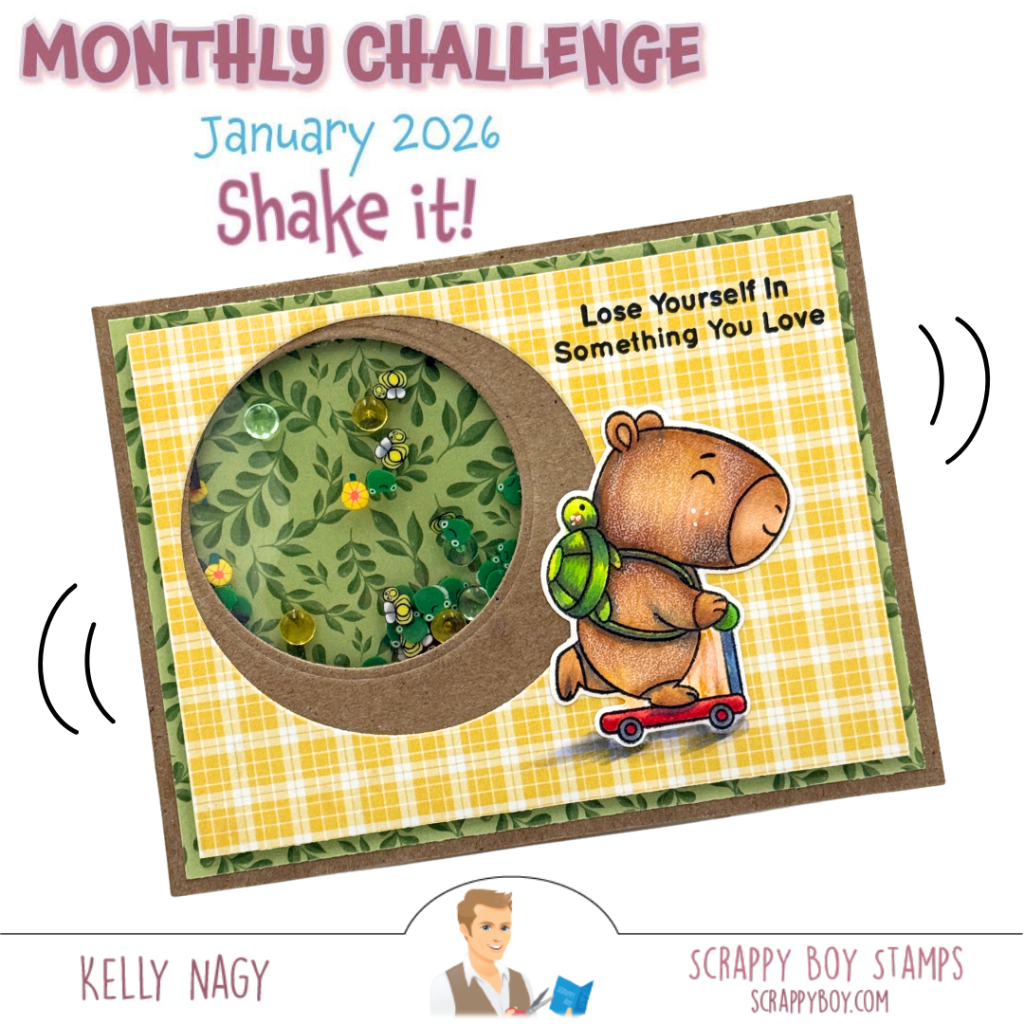
Check out these fun and interactive cards that showcase creativity and charm. Don’t forget, there are opportunities and challenges every month, including a shaker card challenge for January in the Scrappy Boy Inspiration Facebook group!

Before diving into the individual projects, I wanted to share my go-to for assembling cards: the dry adhesive from Tape Runner! 🙌 This adhesive makes it super easy and mess-free to put my cards together. If you’re interested, you can visit tape runner.com and use my code KELLY10 to get 10% off your cart! 🎉 For your convenience, you can also find their products on Amazon, but please note that the promo code isn’t applicable over there. Happy crafting! ✂️💖

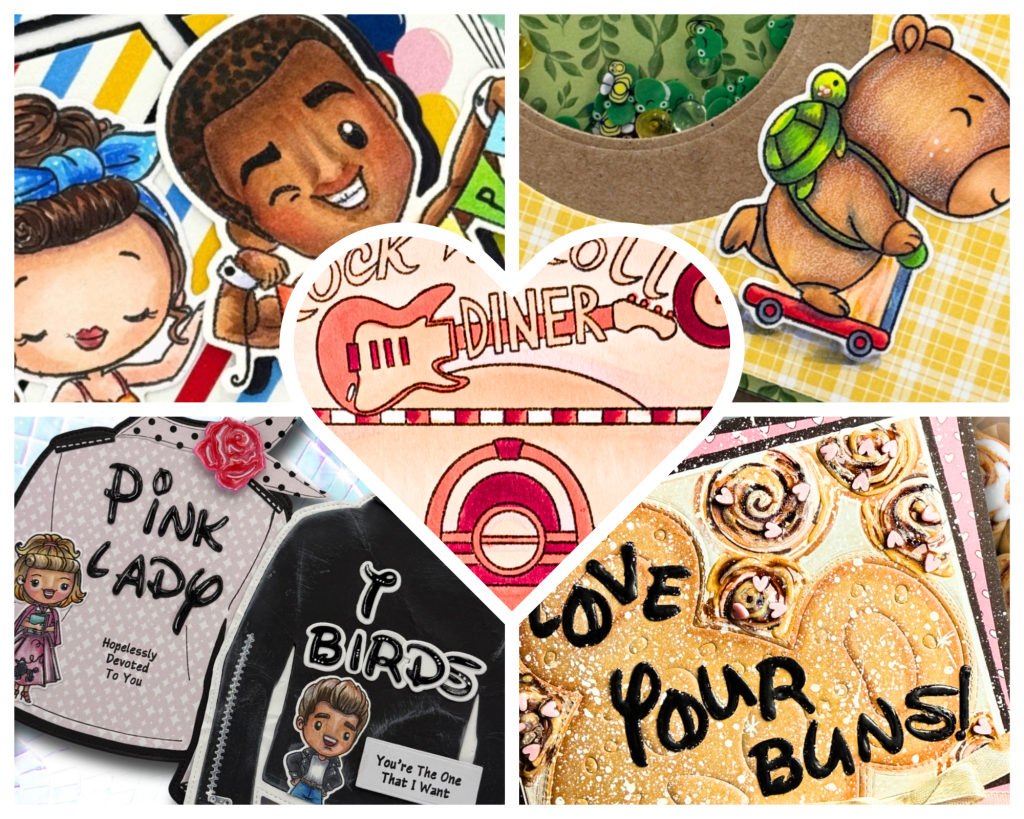
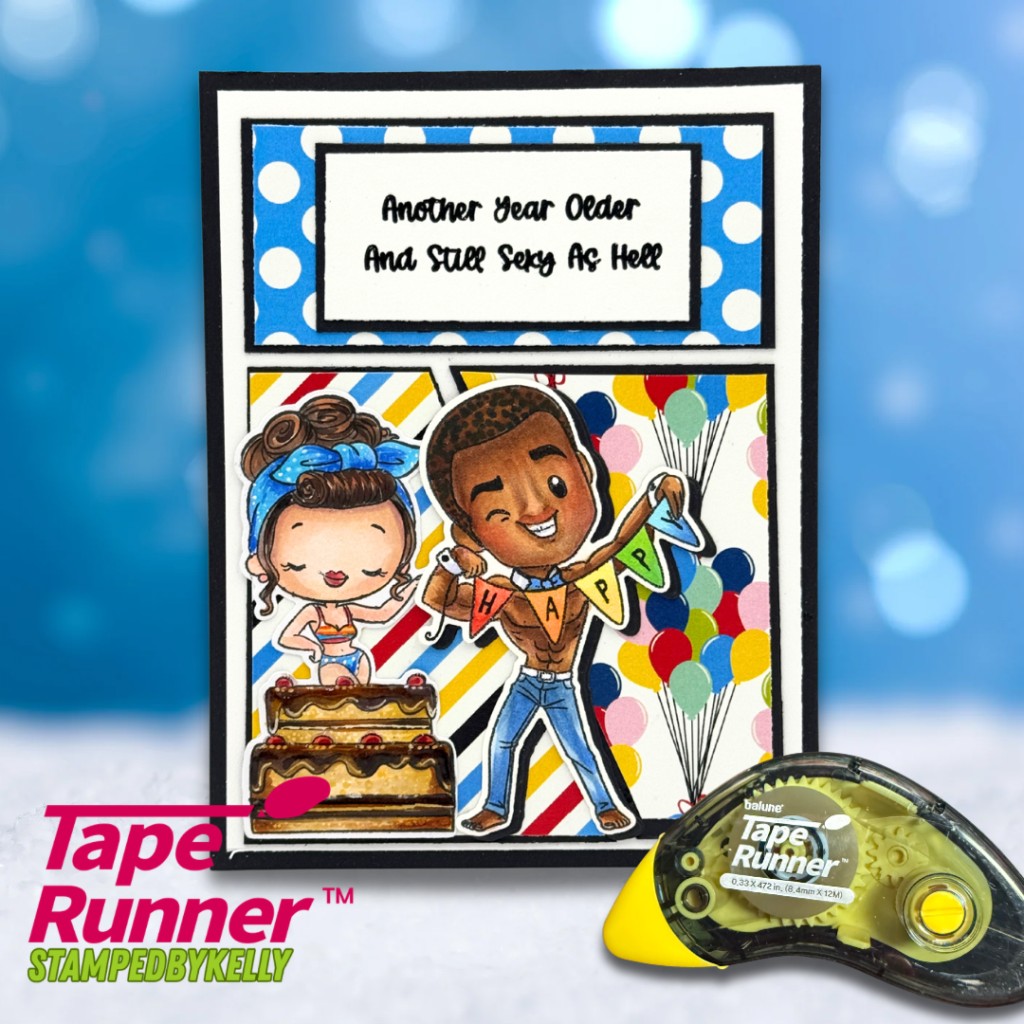
🎂Project 1: Chiseled Charm for Pin-Up Party

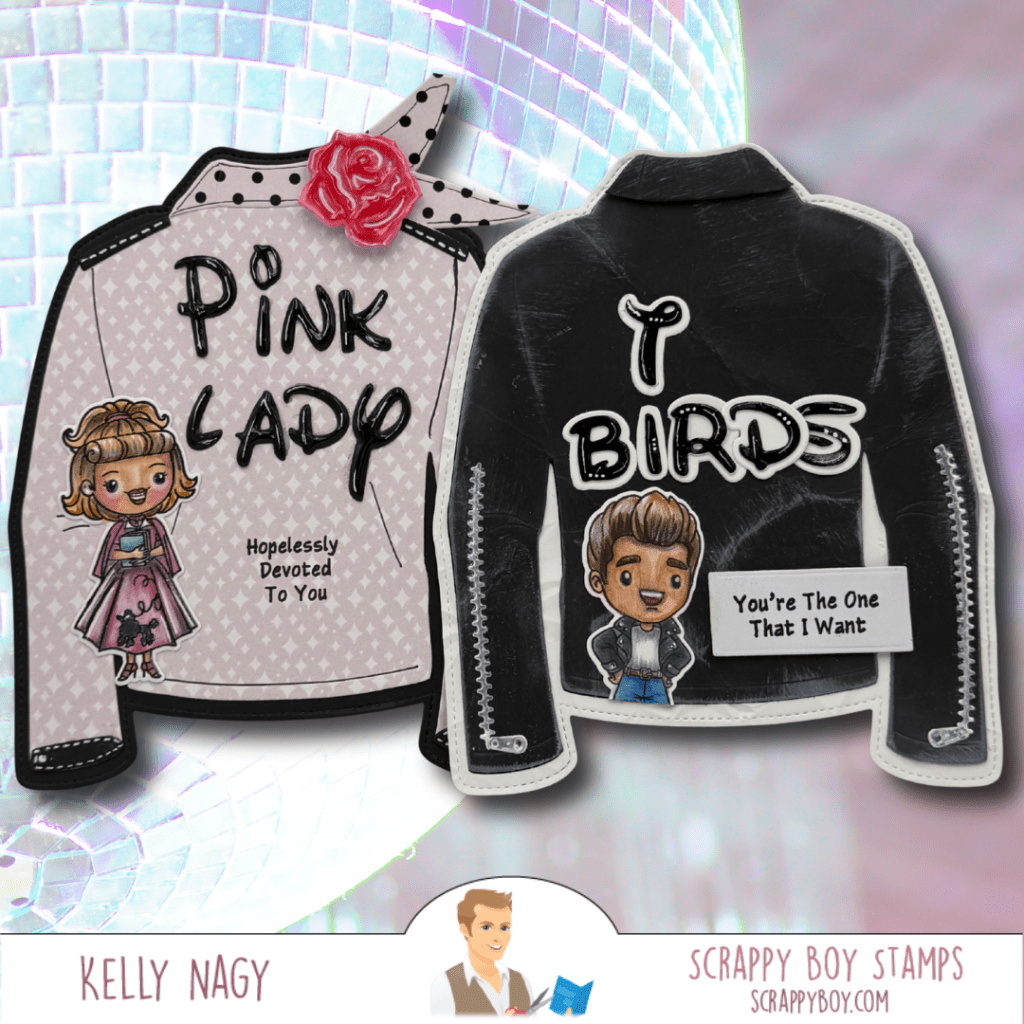
🎂 Project 2: Leather Love Notes from Rydell!

For these 2 shaped cards, project, I’m thrilled to showcase the fun and edgy Leather Jacket Mini Album Die Set paired with the You’re The One That I Want Stamp Set! This combination brings a playful twist to any occasion. I started by using the Leather Jacket die to create a stylish focal point and shaped card base. What a perfect backdrop for any cool character or theme. For the PINK LADY & T-BIRD custom words, I used the Believe in Magic Alphabet Die Set, allowing me to personalize my project in a whimsical way. The overall designs are fun, vibrant, and perfect for celebrating any special moment with a touch of movie FANDOM attitude! Whether you’re making it for a friend or for yourself, this card is sure to impress. Consider using as a fun element on your scrapbook pages!

🌈 Project 3: Cute Capybara Bliss Shaker


I couldn’t resist using the adorable Cute Capybara Stamp + Dies along with the coordinating Cute Capybara Paper Pack. This A2 card will capture hearts with its cuteness and charm! Plus, it meets all the elements for the JANUARY 2026 Card Challenge over at Scrappy Boy Inspiration Facebook Group.

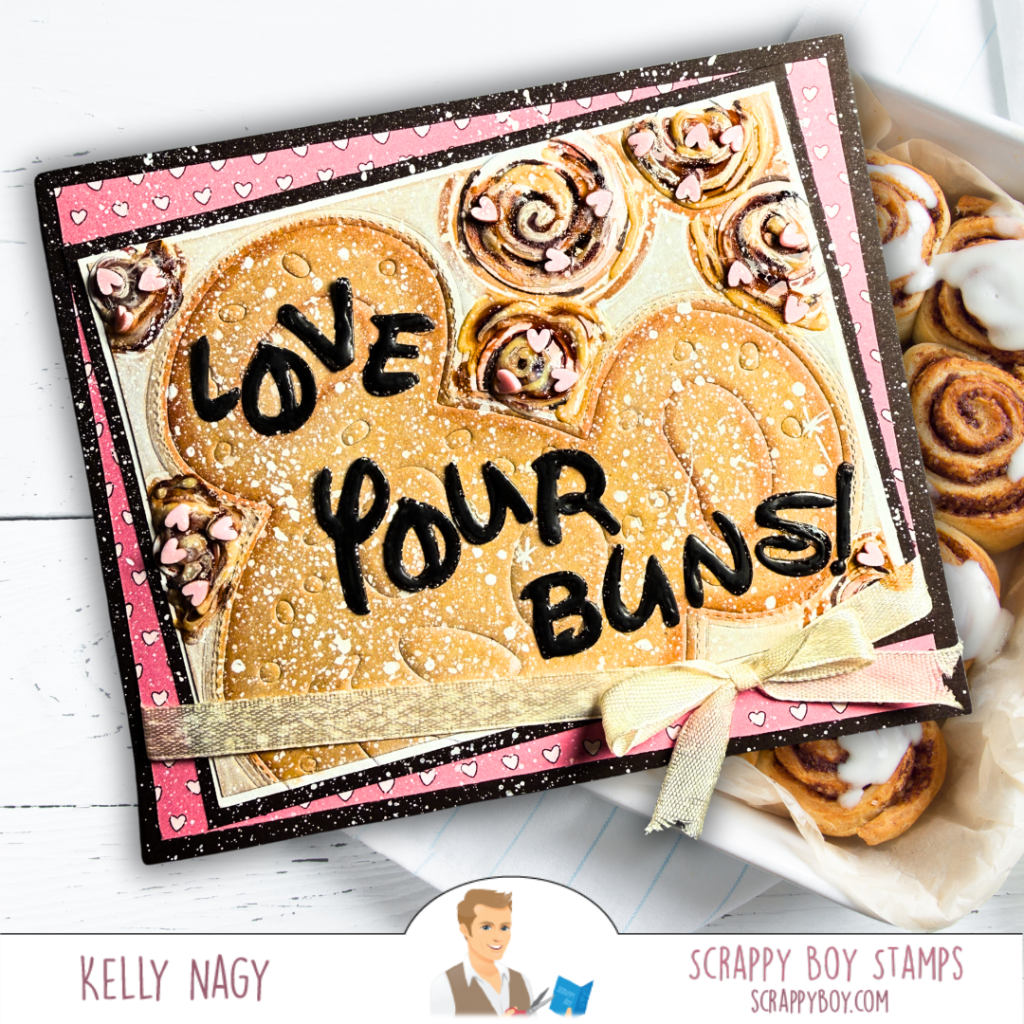
🎉 Project 4: Love Your Buns! SWEET Valentine


Last but certainly not least, I created a delightful SWEET VALENTINE using the Mouse Pretzel Mini Album Die paired with the Mouse Lollipop Accessories Add-On Die Set. Instead of cutting out the Pretzel Die, I used the rubber pad with my die cut “sandwich” to only emboss, NOT CUT, the die into my Kraft cardstock. It looks like a graham cracker cookie, waffle, pancake, baked good….use your imagination and stretch your stash.. This card is perfect for sending sweet messages to your loved one or make fun elements to add to scrapbooking pages.

Photo Credit: Meagan Nagy Archard

Head over to scrappyboy.com to grab these wonderful products and unleash your creativity! 🛍️

🎂Charmed & Chiseled Stamps & Outline Dies
🎂Pin Up Girls Birthday Stamps & Outline Dies
🎂Magical Memories 6 x 9 Paper Pack

🏍️You’re The One That I Want stamp + dies
🏍️Leather Jacket Mini Album Die Set
🏍️You’re The One That I Want Paper Pack
🏍️Believe in Magic Alphabet Die Set
🏍️A2 Dome Shaker Die Set (rose)

🍊Cute Capybara stamp + dies
🍊Cute Capybara Paper Pack
🍊A2 Stitched Rectangle Nesting Dies
🍊Magnifying Glass Die (circle)

🥨Mouse Pretzel Mini Album die
🥨Mouse Lollipop Accessories Add On Die Set
🥨Believe in Magic Alphabet Die Set
🥨Birthday Pin Up Girls Paper Pack

✨ And remember, join the fun over at the Scrappy Boy Inspiration Facebook group and don’t forget to participate in monthly challenges and share your creations using #scrappyboy!

For FREE CONCIERGE travel planning, hit up my bonus daughter, MagicallyMeags, whose insider knowledge and superior energy and creativity can instantly turn your dream vacation into a reality! Tell her Kelly sent you!💋

Happy crafting! 💖✂️ #ScrappyBoyStamps #CardMaking #promocode #stampedbykelly #newrelease

Mix-n-Match Monday featuring Scrappy Boy Stamps

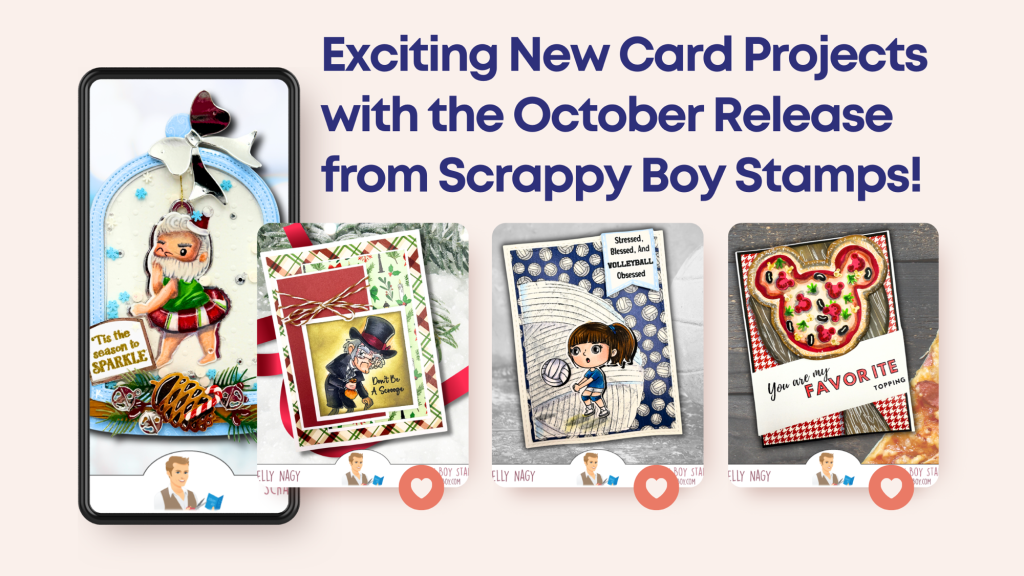
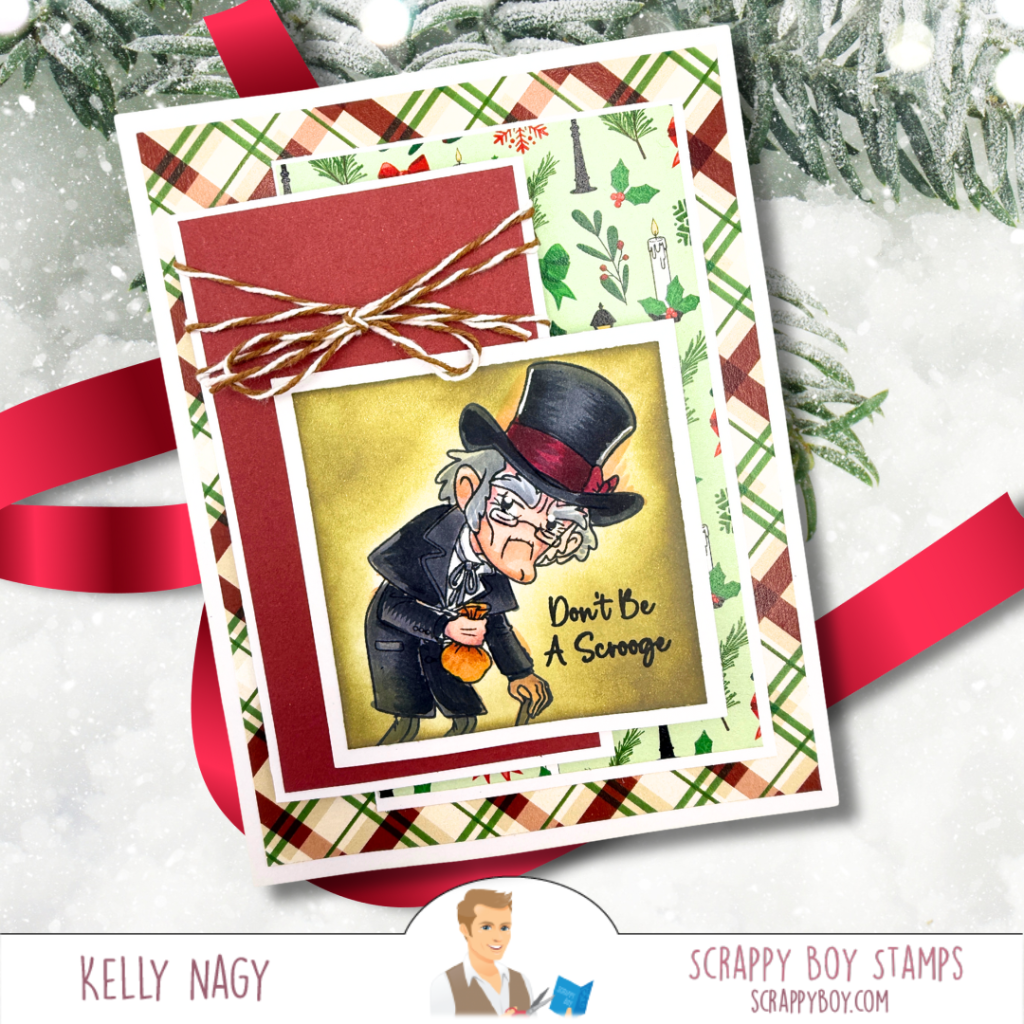
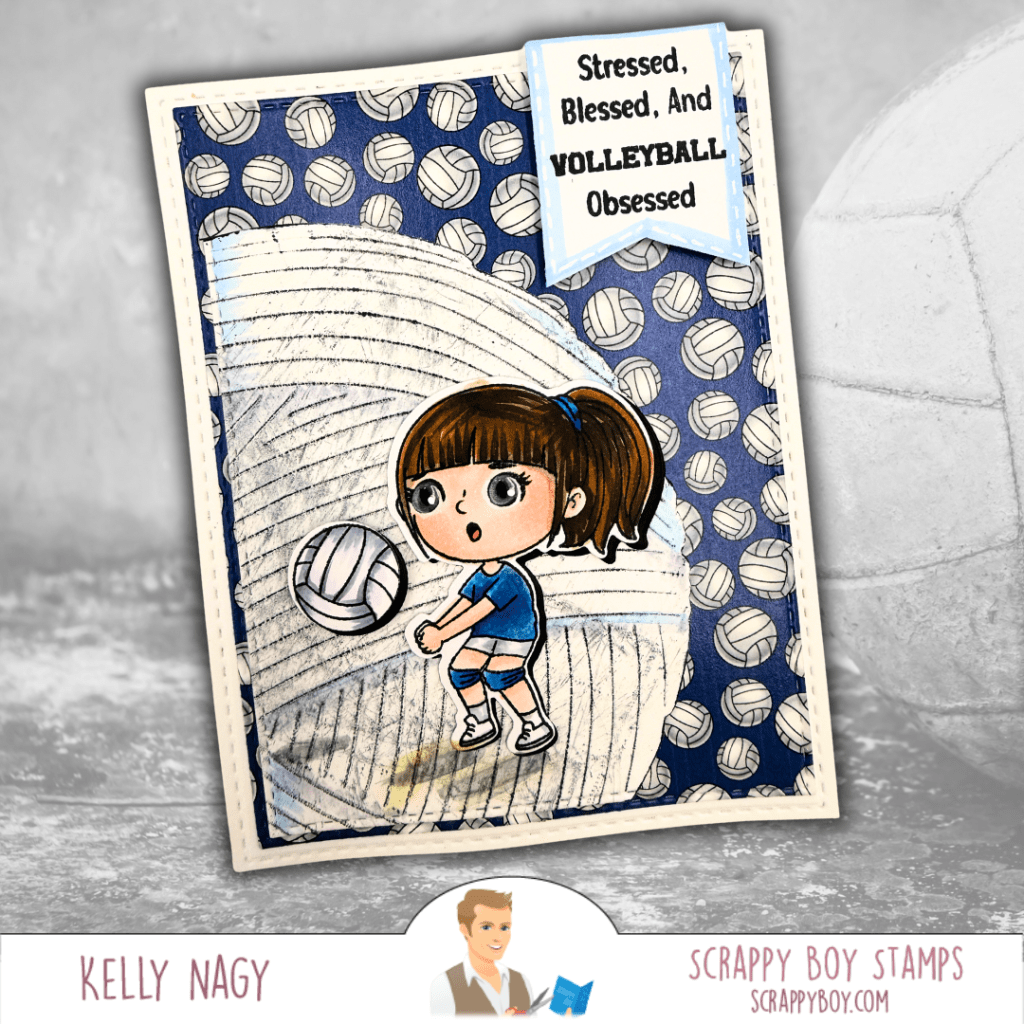
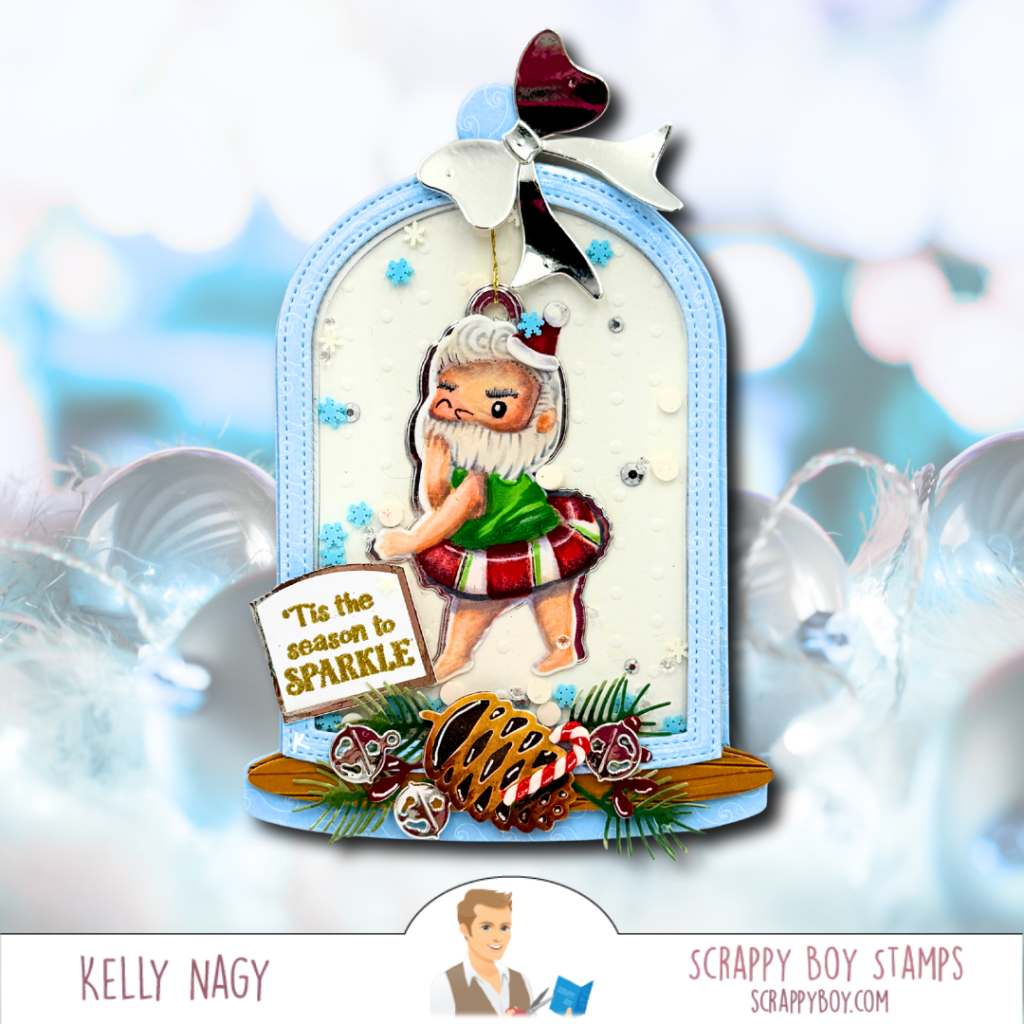
I’m absolutely thrilled to share my latest card projects featuring the October release from Scrappy Boy Stamps! Each project highlights just how versatile these products can be when paired with older release dies and new goodies.

Unique Creations: Stretching My Crafting Stash

Creating unique projects is my passion, and I love pairing unlikely sets together to come up with alternative ways to use my supplies. This approach not only stimulates my creativity but helps others stretch their stash too! Here’s a closer look at some of the projects I’ve crafted in preparation for this month’s release!


SCRAPPY BOY Supplies Used:

  • CHRISTMAS CAROL Stamps & Outline Dies
  • Scrappy Boy Stamps card-making die A2 NESTED STITCHED RECTANGLES
  • Background 6×6 Patterned Paper Pack

SCRAPPY BOY Supplies Used:

  • CUTE KIDS – I LOVE SPORTS stamps & coordinating outline dies
  • YARN BALL MINI ALBUM CARD DIE
  • STITCHED RECTANGLES A2 NESTING DIES
  • 6×6 COORDINATING PAPER PACK

SCRAPPY BOY Supplies Used:

  • MOUSE PIZZA DIE SET
  • MAGIC MIRROR MINI ALBUM CARD DIE
  • 6X6 Paper Pack – miscellaneous from prior release

SCRAPPY BOY Supplies Used:

  • BUTT-CRACKER SUITE stamps and coordinating outline dies
  • A2 DOME MINI ALBUM & CARD DIE
  • WREATH ADD-ON ENVELOPE POP-UP DIE
  • Sentiment from NICE LIST Stamps.
  • INK ON 3 -NO LINE WATERCOLORING INK

This month, I’ve utilized a no line coloring technique on the Butt Cracker Suite images, transforming them into adorable figures lounging in inner tubes! Who knew a ballerina tutu could double as a swimming tube? And one of the images was a perfect fit to create a Santa in a peppermint-colored inner tube, making it ideal for a holiday ornament—especially fun for those crafty friends celebrating the holidays in warmer climates! 😂🌴

Together, let’s get creative and explore new crafting possibilities with our supplies! Follow along for more inspiration! Follow me @stampedbykelly on Social Media. Ask me questions and let’s inspire each other together!

ScrappyBoyStamps #CardMaking #UniqueProjects #StretchYourStash #NewRelease #Diecutting #StampedbyKelly