Life is Brew-tiful Card

Featuring Pajama Crafter Stamps Products

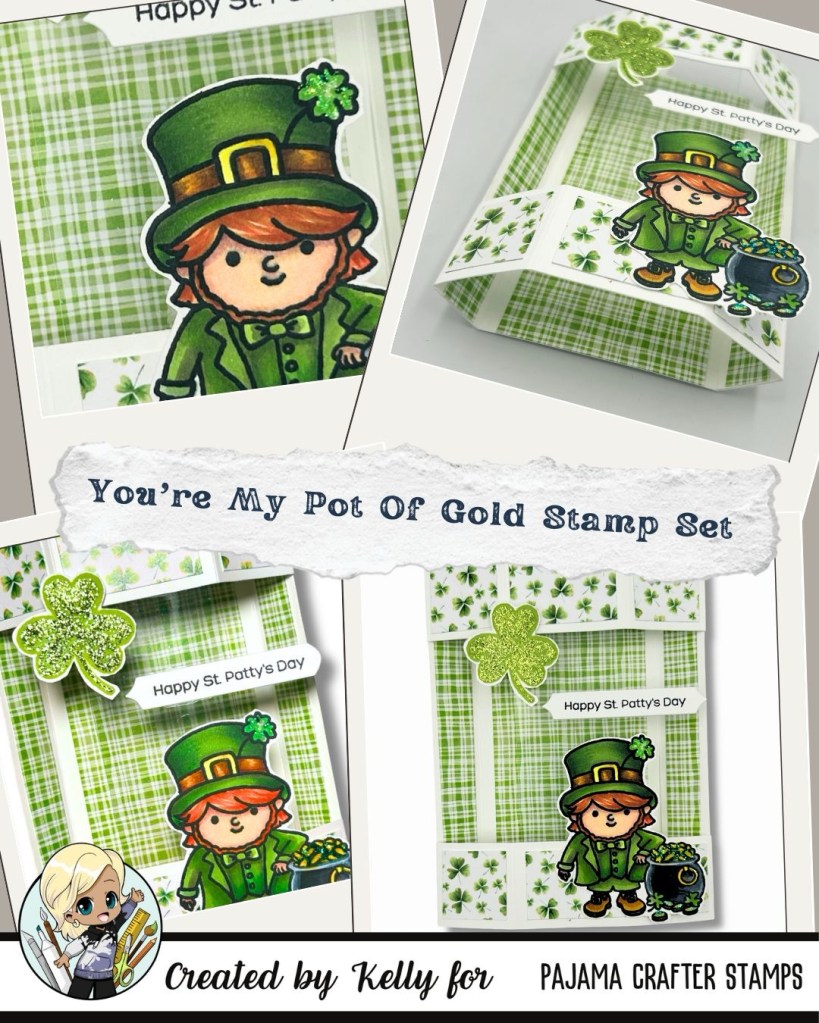
Unleashing Creativity with the “You’re My Pot of Gold” Stamp Set

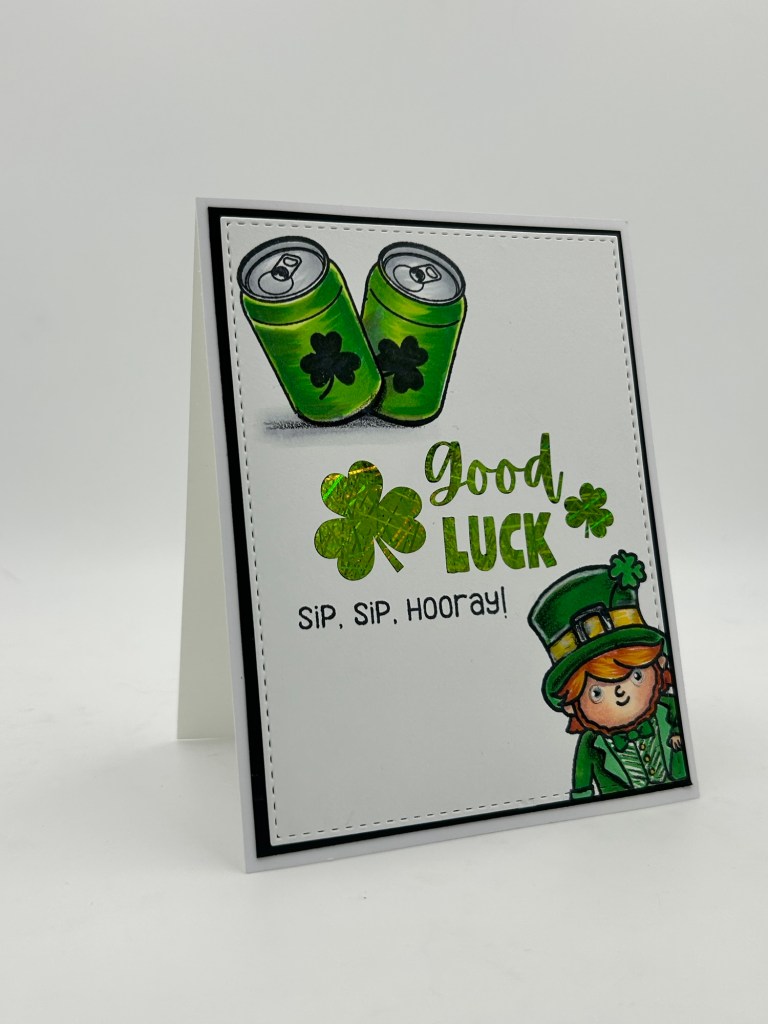
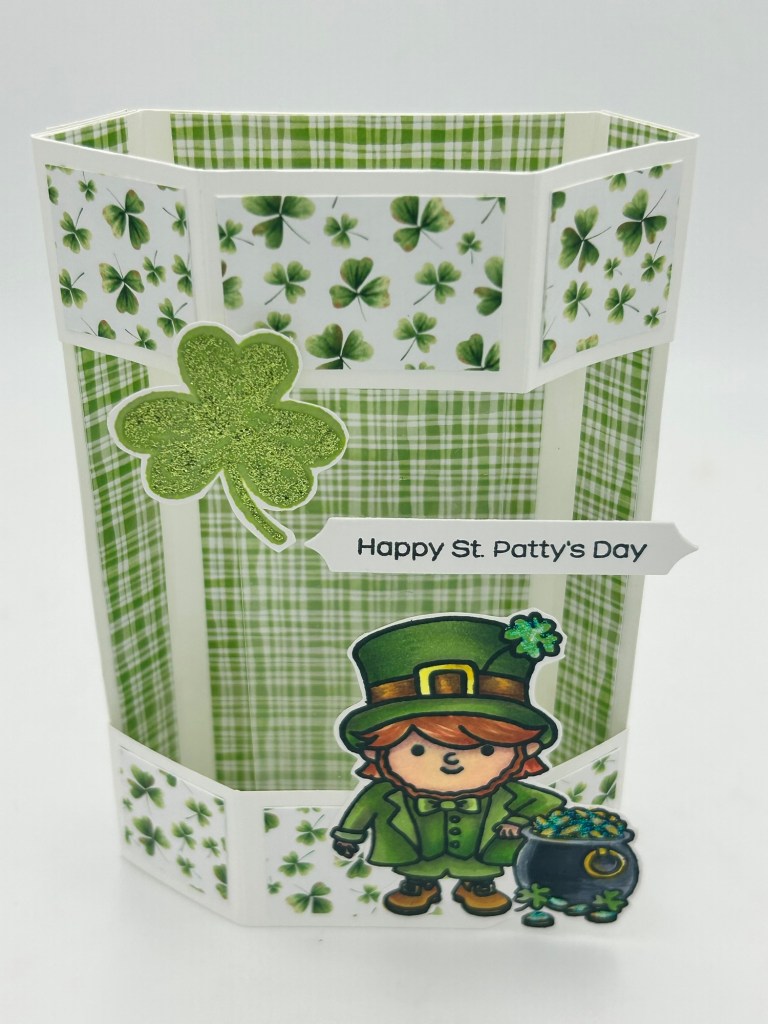
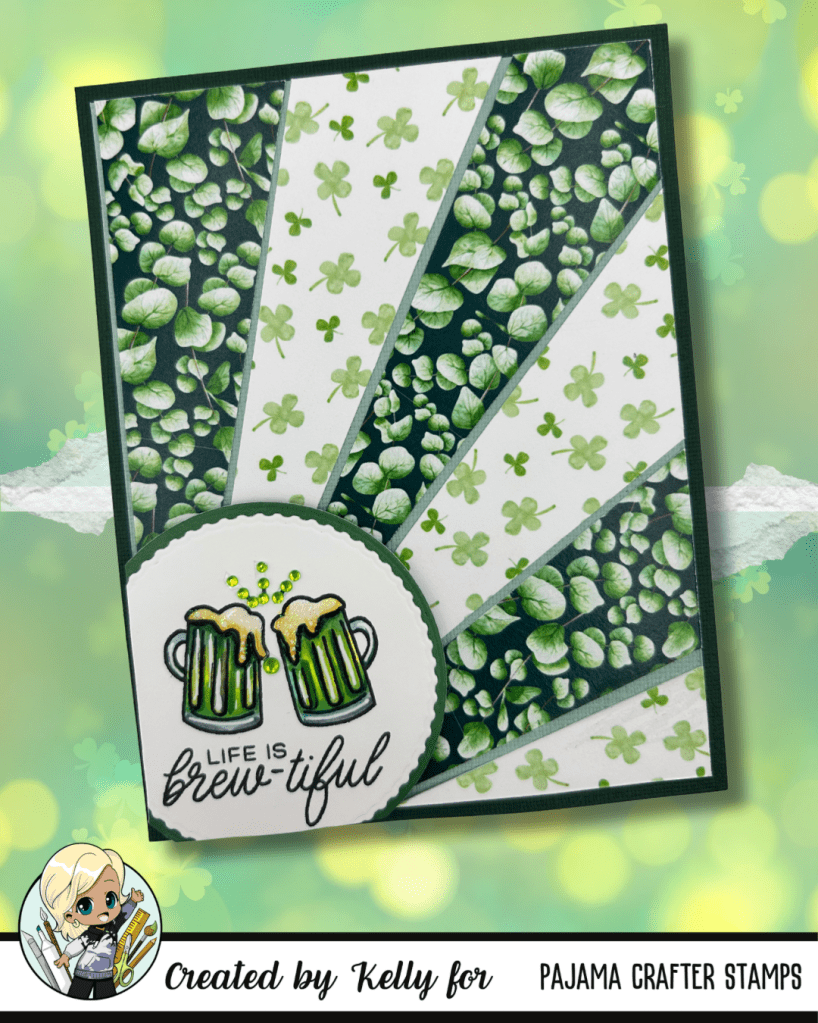
Hey card makers! 🌈 With St. Patrick’s Day around the corner, it’s the perfect time to get crafty and spread some cheer with delightful cards! Today, I’m excited to showcase Pajama Crafter’s stamp set, “You’re My Pot of Gold,” paired beautifully with the vibrant “Emerald Isle” 6 x 6 paper pack. It’s time to make a brew-tiful A2 card that captures the spirit of celebration!


Supplies Needed:

  • Pajama Crafter’s “You’re My Pot of Gold” stamp set
  • “Emerald Isle” 6 x 6 paper pack
  • A2 card base (4.25” x 5.5”)
  • Ink on 3 Detailed Black Pigment Ink
  • Memento Tuxedo Black Ink for Alcohol Marker Coloring
  • Alcohol Markers
  • Stickles (glitter glue)
  • Rhinestones for embellishments
  • White Gelly Roll Pen
  • Adhesive (glue, tape runner, etc.)
  • Paper trimmer or scissors and ruler
  • Circle Nesting Dies

Steps to Create Your A2 Size Card:

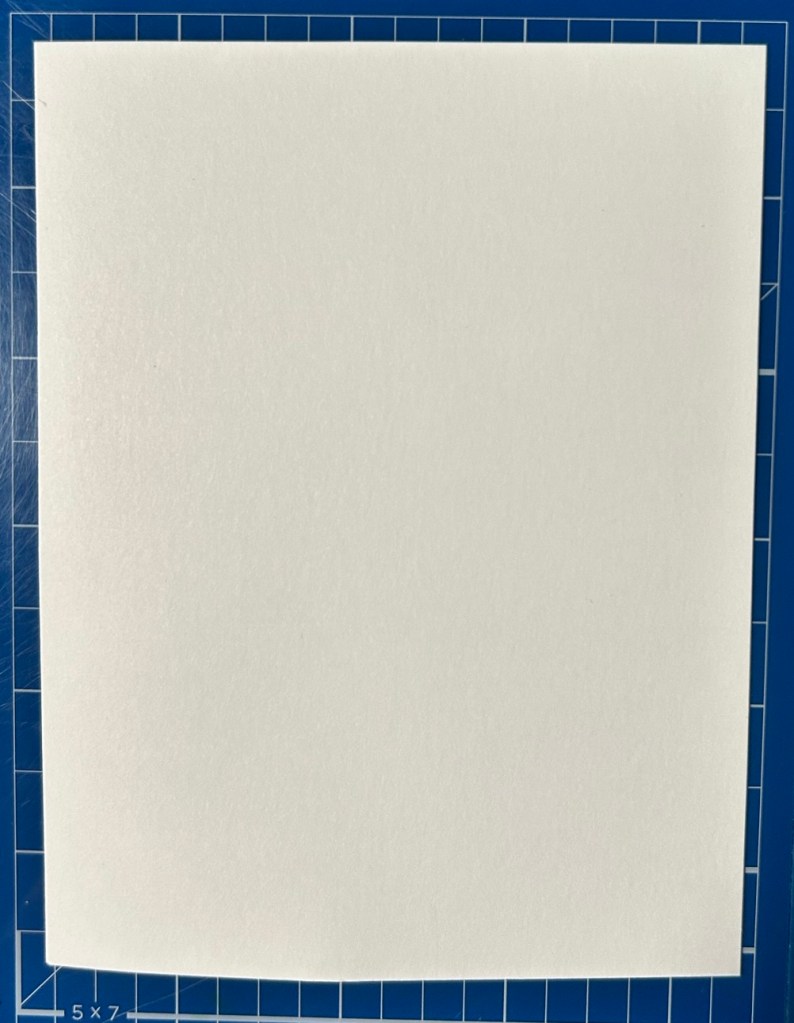
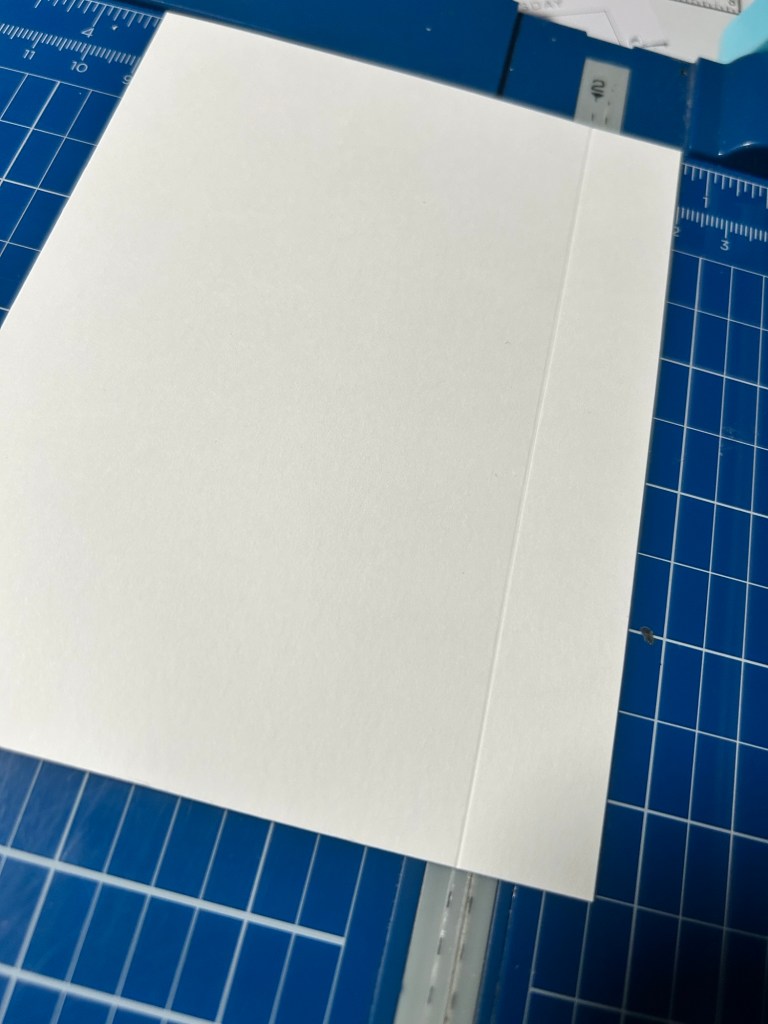
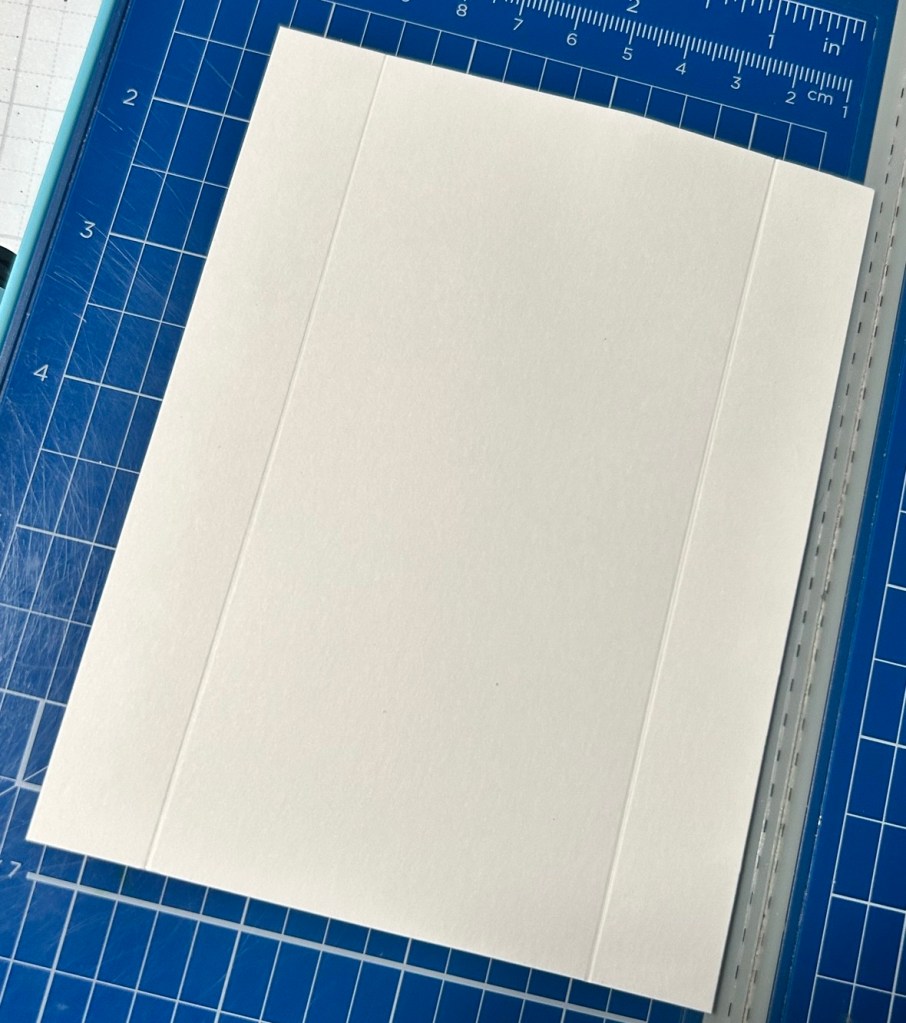
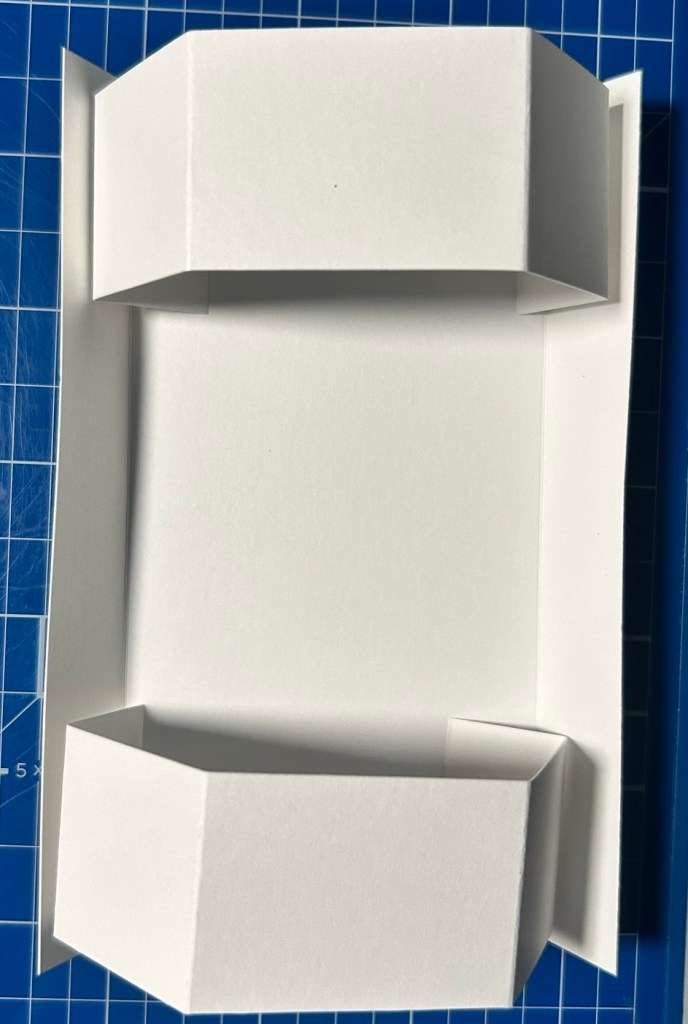
Prepare Your Card Base:

  • Cut a piece of cardstock to 4.25” x 11” and score it at 5.5” to create your A2 card base. Fold along the score line.

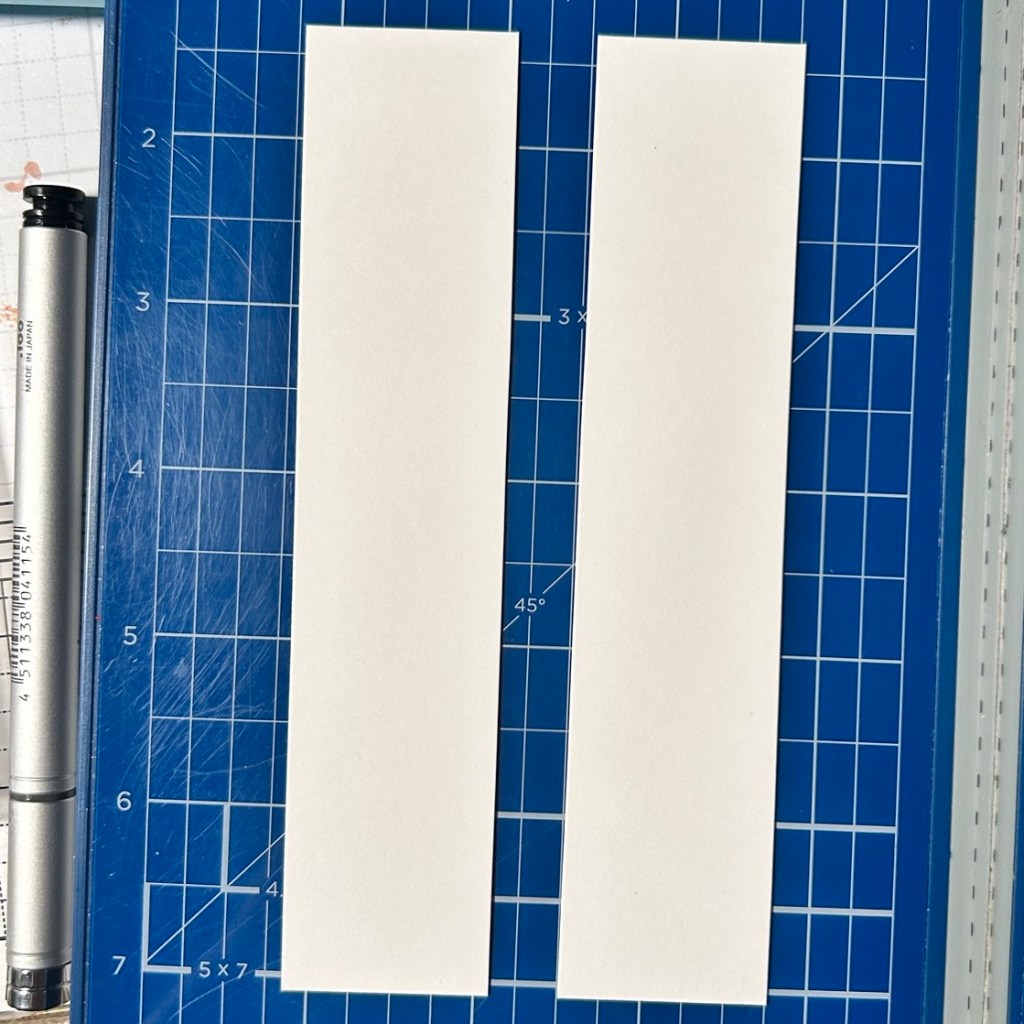
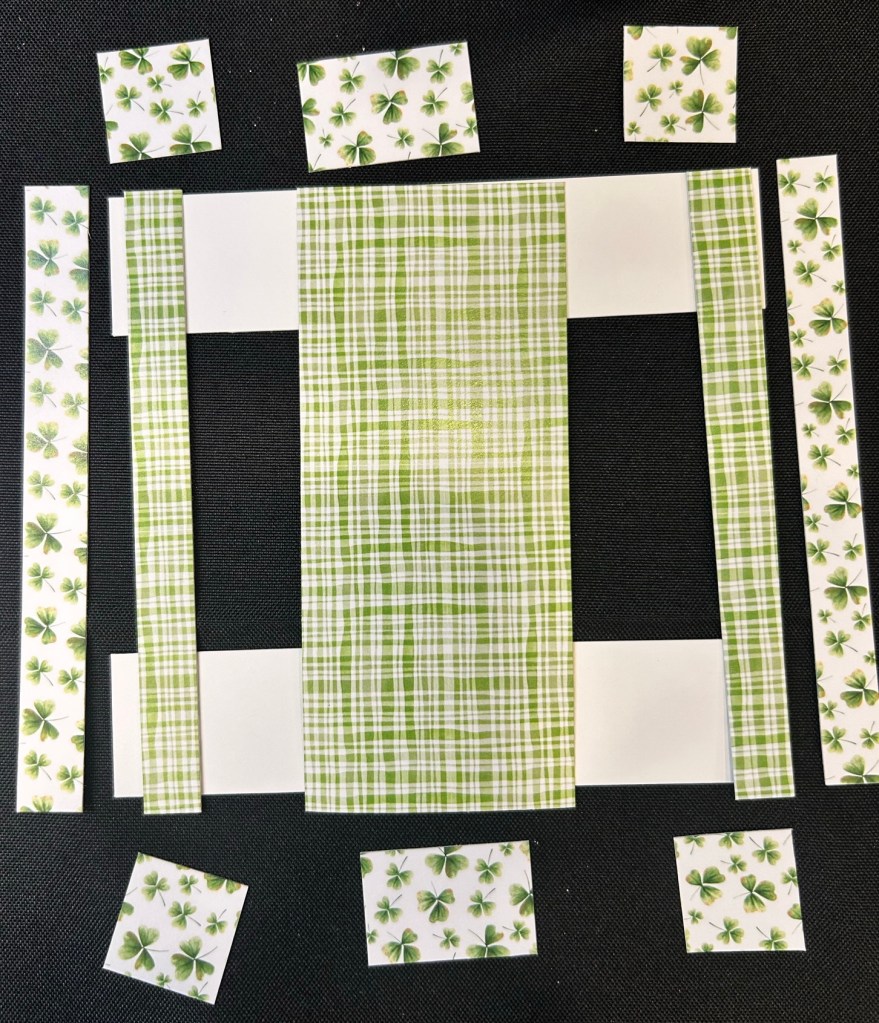
Choose Your Pattern Paper:

  • Select a favorite paper from the “Emerald Isle” 6×6 paper pack.
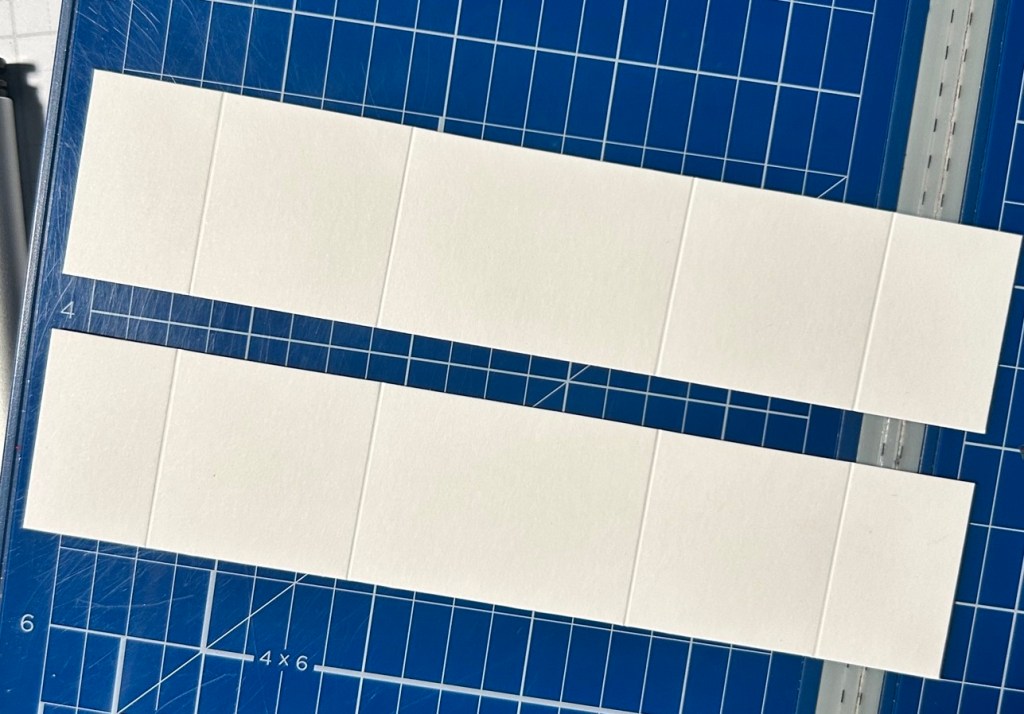
  • I cut my 6×6 paper into 1 1/2 in strips. I started with 6 strips.
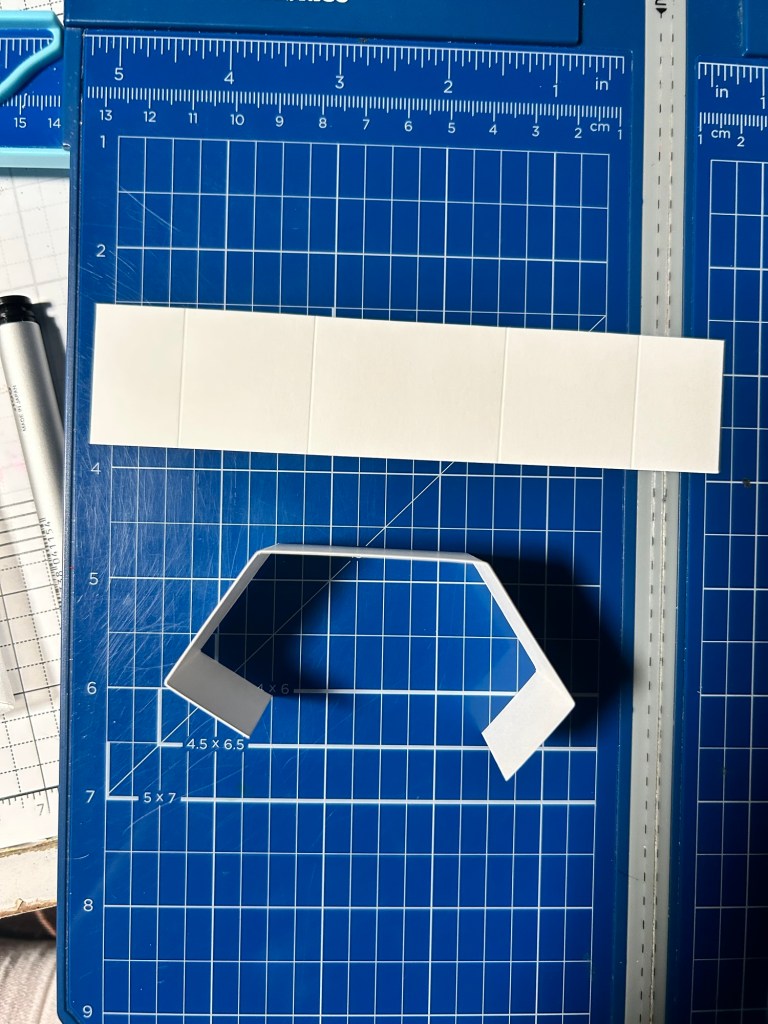
  • Next, I cut them in half from top right corner to bottom left corner. Each strip will then be 2 elongated triangular pieces. If you have double-sided paper, you can choose which side to use. Sometimes images need to be positioned a certain way to make sense, so be careful when planning your layout.
  • Layout before gluing. You will shift to cover the front panel , but don’t worry about the bottom corner of panel looking ugly, as you will cover any overlap or panel left slightly uncovered, as you will not see it underneath the circle diecut & sentiment.
  • Any overlay around remainder of panel should be cut off with scissors or your trimmer.

Stamp Your Image, Color & Embellish:

  • Using the “You’re My Pot of Gold” stamp set, pick a fun stamp design and ink it with your chosen color. Stamp it onto a piece of white cardstock and set it aside to dry. I stamped the beer mugs with Memento Tuxedo Black and used Copic Markers to color them up.
  • If desired, color the stamped image with markers, colored pencils, or watercolors. Feel free to add extra embellishments for a festive touch! I used gemstones in green, some Stickles Glitter Glue snd my white gellyroll pen to add additional details.
  • Copic Colors used: G07, G14, YG01

Layer Your Design:

  • Adhere the pattern paper to the front of your card base using your preferred adhesive.
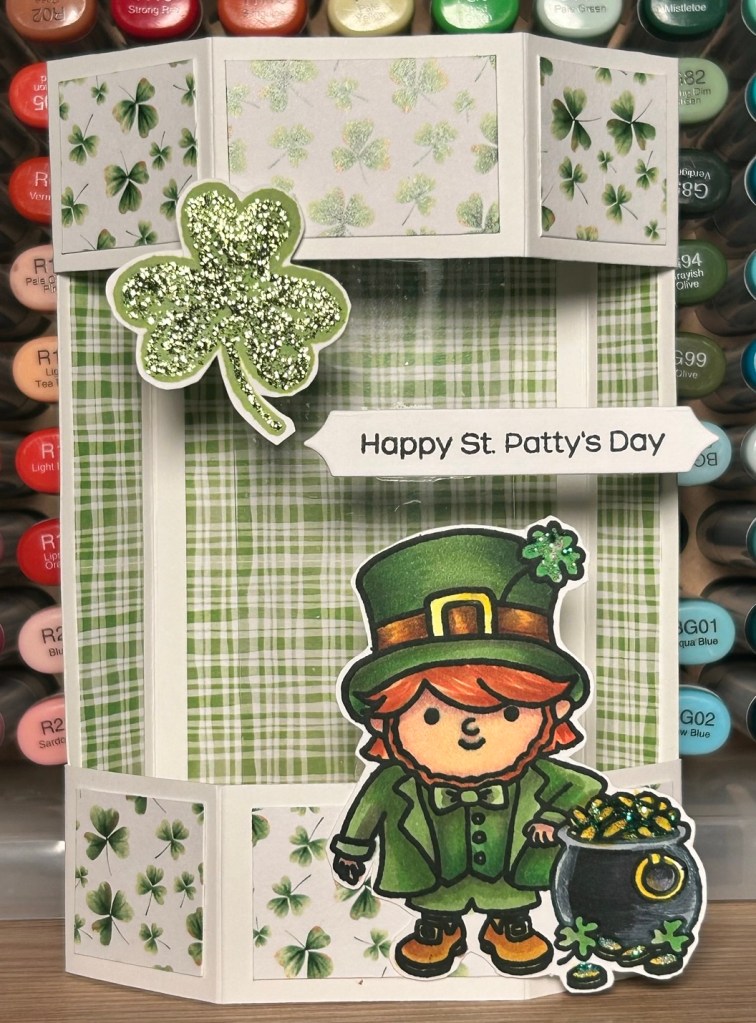
Add a Sentiment:

  • Choose an uplifting sentiment from the stamp set and stamp strategically with the mugs on the circle diecut. Layer onto another circle diecut in coordinating colors. Adhere circle yo overlap bottom lefthand corner, making sure the sentiment and image do not overhang edge of panel.
  • Use scissors to cut any overlap.

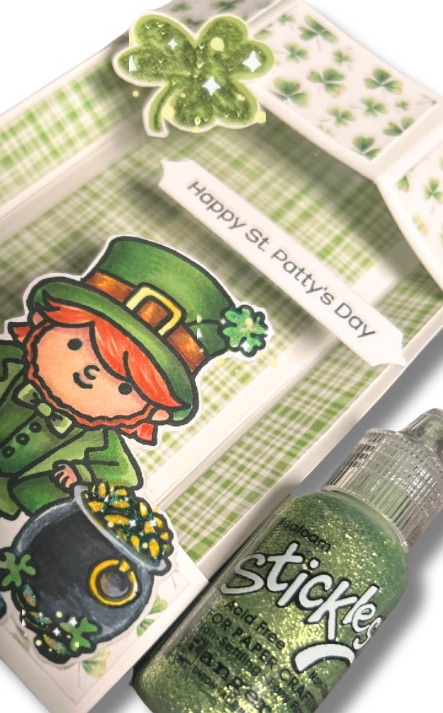
Finalize and Decorate:

  • Add any final touches, such as Stickles glitter glue or rhinestones/ gems, to enhance your design. Make sure everything is securely adhered.

Write a Personal Message

    • Don’t forget to write a sweet note inside the card to share your luck and well wishes!

    Conclusion

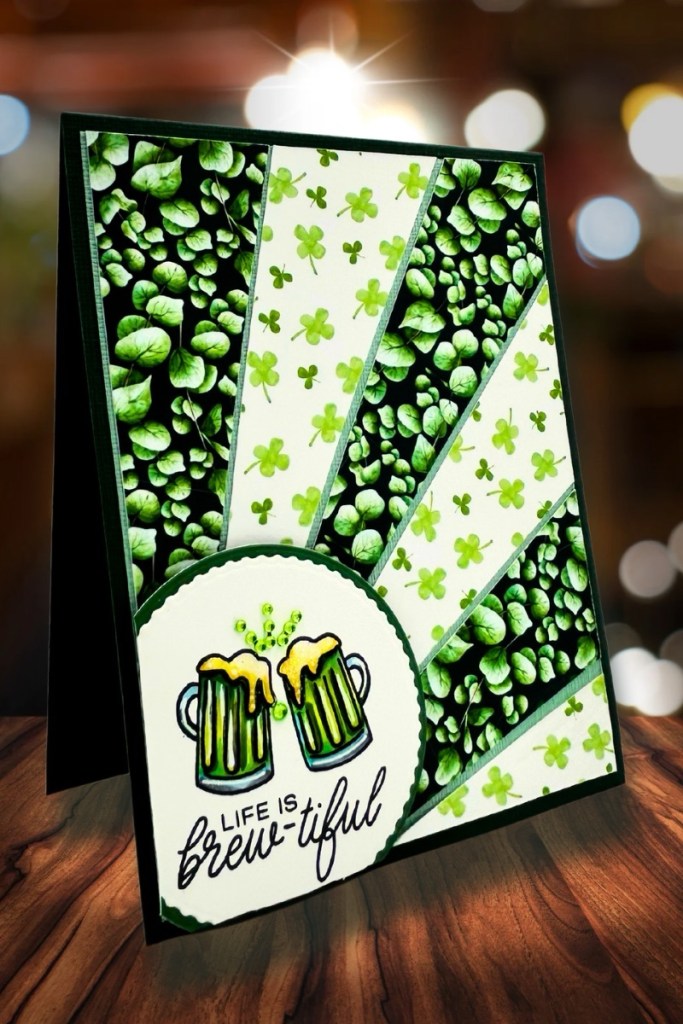
    There you have it! A simple yet fun process to create your very own “Life is Brew-tiful” card using the lovely “Emerald Isle” paper pack. Whether you’re celebrating St. Patrick’s Day or just embracing the spirit of positivity and luck, this card is sure to bring smiles. Happy crafting, and may your card-making journey be as bright as a pot of gold at the end of the rainbow! 🌈✨

    This card recipe can be modified using new papers or your scraps!!! It’s also one of my favorite ways to feature smaller stamps in a fun and creative way!!! Copy the design as is, or modify any of the above steps to make it your own, and let’s start creating some beautiful cards together! 💖

    #PajamaCrafterStamps #YoureMyPotOfGold #StampedbyKelly #CardMaking #StPatricksDay

    Unleash Your Creativity with the Latest Release from Scrappy Boy Stamps!

    New Release featuring Scrappy Boy Products

    Hello, crafty friends! 🎉 Are you ready to dive into a world of fun and crafty magic, inspired by some of your favorite whimsical tales? Just like the enchanting melodies of “Under the Sea” and the charm of spirited adventures, my latest crafting journey has led me to create three fun card projects using the newest images, outline dies, coordinating paper packs, and more from the latest Scrappy Boy Stamps release! 🎶✨

    Every project brings together vibrant colors and cheerful designs that are sure to brighten anyone’s day. With this new release, there’s something for everyone—whether you’re crafting for birthdays, celebrations, or simply to spread joy! 🌈

    My Three Card Projects are here:

    Using the Underwater Scene Builder die set, create a beautiful background with ease!
    Create a scene with FREE pdf and colored up images or pre-colored die cuts for non-colorists (available on Scrappy Boy’s website for all releases)
    Simply cut squares out of coordinating patterned paper to pull together a quick, fun background!
    1. SENDING YOU OCEANS OF LOVE: This card showcases a stunning underwater scene complete with a playful mermaid and shimmering scales. A blend of hot foiled bright blues and greens creates a vibrant backdrop where adventures come alive! A free pdf file is below to help create your own underwater scene. Enhance your card panel with the new add-on Under the Sea Scene Builder Dies. https://scrappyboy.com/collections/little-mermaid/products/under-the-sea-scene-builder-dies
    2. YOU’RE GOING TO BE POPULAR: Embrace your inner hero with this card featuring unlikely friends. Paired with a whimsical background and some delightful die cuts, this project is all about celebrating friendship and the beauty in our differences, what makes each of us unique and special!
    3. YOU’RE TOTALLY SHREDDING IT: Capturing the essence of childhood and the love of music, this card features one of the Cute Kids, a boy playing the guitar accented by square die cuts featuring fun coordinating patterned paper, to bring a touch of whimsy that’s perfect for any little musicians in your life!

    And to help you elevate your creative game further, I’ve put together some downloadable images to assist you in creating beautiful backgrounds to pair with these fun designs. Feel free to download them—it’s my gift to you! Simply print them on one 8 1/2 x 11 piece of paper, and you’ll have all the panels you need to take your projects to the next level. I printed with toner, which allowed me to use my laminator and heat activated foil to create an interesting background.

    Get your free downloads here:

    I hope these projects and resources inspire you to create something spectacular! Don’t forget to share your creations and tag me—I love seeing your crafty masterpieces! 💖 For more inspiration and ideas, be sure to visit http://www.stampedbykelly.blog (http://www.stampedbykelly.blog).

    Here’s to a creative adventure where every craft tells a story—let’s make something truly magical together! ✨

    Watch for a separate blog on these cards to provide additional details and photos, including my Copic marker combos. Make sure you’re subscribed and follow me on social media @StampedbyKelly

    StampedByKelly #ScrappyBoyStamps #Copic #CraftingMagic

    Crafting a St. Patrick’s Day Card: Sip, Sip Hooray! 🍀✨

    Happy crafting, friends! Today, I’m excited to share a fun and festive card that I created to celebrate St. Patrick’s Day using some amazing products from Pajama Crafter Stamps! If you’re looking to add a personal touch to your holiday greetings, this project is perfect for you. To see the latest release and unique offerings, check it out here 👉🏻 https://shareasale.com/r.cfm?b=1737668&u=1886305&m=108254&urllink=&afftrack=

    So, let’s dive in!

    A2 Card featuring Pajama Crafter Stamps

    The Inspiration Behind the Card

    What happens when you mix a Flash Card with the whimsical images from Soda-Lighted and the cheerful vibes of You’re My Pot of Gold? A delightful, foiled card that perfectly embodies the spirit of St. Patrick’s Day! 🎉 This card features playful elements that capture the joy of the holiday and encourages everyone to join in on the festivities with a hearty “Sip, Sip Hooray!”

    Stitched Dies from Scrappy Boy Stamps

    Materials You’ll Need:

    • Pajama Crafter Stamp Supplies
      • Soda-Lightful Stamp Set
      • You’re My Pot of Gold Stamp Set
      • Flash Cards: All Occasion 24 toner A2 Sized Panels
    • A2 Stitched Dies – I like the added finished touch the stitched dies give the Flash Card panels.
    • Cardstock: Heavy White Cardstock, Alcohol Marker Panel (Flash Card or other white smooth cardstock for stamped images), Layering Cardstock for Mat (Black)
    • Foiling – Heat Reactive Foil & Laminator (optional) – the Flash Cards are wonderful! With dark toner images…these cards are awesome foiled or as is! They make great foundations for your projects. They come in 24 A2-sized panels per package. If you mess up or a specific image in the pack doesn’t resonate with your project or style, simply flip over and these cards are pre-cut and high quality, and work lovely with your alcohol markers.
      • iCraft Deco Foil in Green Sketch from Brutus Monroe
    • Ink Pads: Black Memento Ink, safe for Alcohol Markers & Detail Black Ink for crisp sentiment stamping
    • Coloring Medium of Choice – I used Copic Markers, Black Prismacolor Pencil, Luminance 6901 White Pencil & Gelly Roll White Pen 10 for accents and fun details.
    • Adhesives, Scissors & Basic Crafting Tools

    Step-by-Step Process

    1. Create the Card Base:
      Start with a standard A2 card base. I chose a nice heavy weight cardstock in white, cut 11 in x 4.25 in, scored at 5.5 inches., a panel in black slightly larger than the stitched rectangle panel cut from the Flash Cards All Occasion Set that has a toner sentiment, “Good Luck” using the A2 Stitched Card Dies from Scrappy Boy Stamps. This stitched Flash Card panel will be stamped directly on and will set the festive mood!
    2. Stamp the Images:
      Using the Soda-Lightful set, I stamped the soda-can images to customize in a way that resonate with St. Patrick’s Day— ☘️ I used used the clover stamps from the You’re My Pot of Gold stamp set, as well as that cheeky leprechaun! I loved combining these elements to tie everything together.
    3. Copic Coloring:
      • Skin – E04, E11, E00, E000, R20
      • Hair – YR18, Y21, E09
      • Cans & Leprechaun – G09, G14, YG03
    4. Add Foiling:
      After coloring the stamped images, I decided to take it up a notch and foul the Flash Card panel that I cut using the stitched rectangle die and added foil accents. Using a foiling kit, a laminator and Deco Foil, I carefully applied foil to specific areas to make the card shimmer!
    5. Layer It Up:
      Next, I created a thin black border mat of 1/8 inch bigger than the stitched A2 Flash Cards panel using black cardstock to give the card depth and be a stark contrast from the open white space. I played with contrasting colors to keep the eye engaged!
    6. Finishing Touches:
      I added a cheerful “Sip, Sip Hooray!” sentiment to really capture the celebratory vibe. I used a black pencil to create some shadows underneath the cans for my images to have a “landing spot.” It helps to ground your images.

    The Final Product

    And voilà! The card is a vibrant, fun-filled celebration of St. Patrick’s Day that anyone would love to receive. It’s perfect for wishing friends and family a bit of luck and joy!

    Share Your Creations!

    I can’t wait to see how you all celebrate St. Patrick’s Day through your crafting! Be sure to share your creations using the Pajama Crafter Stamps and let’s toast to creativity.

    Whether you’re sipping on a green drink or crafting up something special, remember—may your day be touched by a bit of Irish luck!

    Happy crafting! 🍀💚


    Creative Ways to Show Appreciation Customize Your Gift Card Holders!

    Create Customized Gift Card Holders featuring
    Scrappy Boy’s Products

    Hello, crafty friends! 🌟 Today, I’m excited to share a project that combines two beautiful things: creativity and kindness. With National Day of Kindness upon us, it’s the perfect occasion to show appreciation to those around us. And what better way to do it than with personalized gift card holders?

    I recently discovered the Gift Card Holder for A2 Sized Card Die Set from Scrappy Boy, and it inspired me to create some fun and custom gift card holders that you can easily tailor to your recipients. Speaking of “Taylor”, lol, why not consider an I-Tunes card with this fun custom gift card project.

    Featuring products from Scrappy Boy’s & Shake It Off Flash Cards from Pajama Crafter Stamps

    Whether it’s for a friend, family member, or colleague, these projects are theTitle: Spread Joy with Handmade Gift Card Holders

    In honor of National Day of Kindness, let’s explore a fun and creative way to show appreciation – DIY gift card holders! These adorable projects are perfect for tucking cash, gift cards, or heartfelt notes into, and they can be customized to suit any occasion.

    https://scrappyboy.com/products/gift-card-holder-for-a2-sized-card-die-set

    The Scrappyboy Gift Card Holder for A2 Sized Card Die Set is the ideal tool to bring these thoughtful creations to life. With its versatile design, you can easily craft holders that fit standard A2 cards, making them the perfect size to slip into a wallet, purse, or glovebox.

    Not only are these holders practical, but they also allow you to add a personal touch that will make the recipient feel truly special. Imagine the delight on someone’s face when they open a handmade holder filled with a thoughtful gift!

    To get started, simply gather your favorite patterned papers, embellishments, and the Scrappyboy die set. The set includes all the necessary pieces to create a sturdy, professional-looking holder in no time.

    Whether you’re celebrating a birthday, expressing gratitude, or just want to spread a little kindness, these gift card holders are the perfect solution. Tuck them into your bag or car so you’re always prepared to brighten someone’s day with a special surprise.

    To learn more about the Scrappyboy Gift Card Holder for A2 Sized Card Die Set and to discover additional crafting inspiration, be sure to visit http://www.scrappyboy.com. Happy crafting, and Happy National Day of Kindness!

    🌈🍀 Happy Valentine’s Day and Cheers to Crafting! 🍀🌈

    A2 Fun Fold Stadium Card featuring Pajama Crafter Stamps

    While we celebrate love today, over at Pajama Crafter Stamps, we’re kicking off March Madness!

    Hop along for chance to win 2 sets from release!

    🎉 That means it’s time to gear up for everything from exciting sports events to St. Patrick’s Day shenanigans—and yes, if those Stanley-style cups are your thing, we’ve got you covered!

    Introducing the Project: Lucky Leprechaun Fun Fold Card! 🌟

    Folds & Mails Flat – A2 size card

    Today, I’m thrilled to share a whimsical St. Patrick’s Day card that features a fun fold technique. This A2-sized card lays flat for easy mailing but transforms into a stunning 3D display that beautifully showcases adorable patterned papers and festive images all in one delightful project! It stands majestically on a desk or shelf, ready to spread cheer and admiration.

    Here’s What You’ll Need:

    • A selection of vibrant patterned papers that evoke the spirit of St. Patrick’s Day from the Emerald Isle 6×6 Paper Pad.
    • The cheerful Leprechaun, three-leaf clover and Happy St. Patty’s Day sentiment stamps are from the You’re My Pot of Gold stamp set.
    • Paper Trimmer, liquid adhesive, Heavy Weight white cardstock, Acetate, foam/dimensional foam popdots/tape, bone folder, scoring board, favorite coloring medium and black ink.

    Crafting Details:
    I’ll guide you through the fun fold technique that makes this card truly special! These folds add depth and dimension to your design, making it a fantastic way to display cute patterns and playful images. Each layer tells a story, embodying the excitement of both St. Patrick’s Day and the upcoming March festivities!

    Start with your standard A2 panel- 5.5 in x 4.25 in

    Next, using a scoring board or your paper trimmer with a score blade and take your panel in portrait and score 3/4 in from the left and right longer sides of the panel.

    Scored down the side at 3/4 inch
    Panel Scored at 3/4 inch on both sides
    Cut 2 strips white cardstock at 1 1/4 inch x 5 3/4 in
    Score BOTH strips using scoring board or paper trimmer at 3/4 in, 2 in, 3 3/4 in, and then at 5 in.

    Scored each at: 3/4 in, 2 in, 3 3/4 in and 5 in

    Then using your bone folder, mountain fold each

    mountain fold each scored line
    Here is what we have created as your base without embellishing or glue

    As you craft, enjoy the process of layering papers and arranging your stamped images. Every cut and stamp will bring you one step closer to creating a unique piece that captures the essence of celebration.

    Now we need to cut patterned papers & embellish

    Green Plaid Paper: 2 thin strips cut 3/4 in wide by 5 1/2 inch long, glued to the inside of the A2 panel in those 2 flaps you scored on each side. Cut another larger panel of green plaid 2 3/8 x 5 1/2 inch. See photo above for placement.

    Clover Patterned Paper: Cut 1 strip at 1 inch x 4 inches and another, 1 inch x 3 inches. I cut the 4 inch x 1 inch into 4 separate 1 inch pieces, which are the 4 clover squares below. I cut tge 3 inch piece x 1 in half, leaving two separate 1 x 1.5 inch pieces, which are placed in the middle of the 2 squares. The picture below should give you a good idea of placement.

    All the cut pieces cut and shown where to place when decorating your stadium card.
    The back of project. Cut 2 strips of patterned paper in clover 3/4 in wide by 5 1/2 inches. These will be glued last to cover the seams along the side edges after you glue the top stadium strip and bottom stadium strip.

    Cut a piece of clear acetate 1 3/8 inch x 4 inches. This will be placed strategically tucked inside the center panel, once the card base is assembled and decorated. You’ll want to use glue dots or foam tape sparingly to embellish the acetate, being careful of not having foam tape or glue overlap causing some areas to stick together that we want to pop out freely.

    Final Touch:

    Stamp leprechaun image with Memento black ink and color with Copic Markers (or stamp and color with YOUR favorite medium)

    Copic Color Combos:

    E05, E11, E00, E000, R20

    G24, G46, YG03

    Y00, Y02

    E07, E37, E35, E33

    C7, C5,C3


    Complete your card with the adorable Leprechaun and a spirited sentiment that embraces the fun of the season. I used Seafoam Stickles (glitter glue) to add extra shine and interest to my shamrock and coins. This isn’t just a regular greeting card; it’s a joyful art piece perfect for anyone who loves a little luck in their life!

    So grab your supplies and dive into this crafty adventure as we celebrate Valentine’s Day while eagerly preparing for the vibrant energies of March Madness!

    To see the awesome products and fun release, visit https://shareasale.com/r.cfm?b=1737668&u=1886305&m=108254&urllink=&afftrack=

    Happy crafting, and may all your creations shine with joy and good fortune! 🍀💚

    PajamaCrafterStamps #ValentinesDay #MarchMadness #StPatricksDay #FunFoldCard #StampedbyKelly

    Crafting Love: A Valentine Themed Card

    Hello or welcome back, fellow crafters! Today, I’m excited to share a card design that combines creativity, love, and some fabulous products from Pajama Crafter Stamps. Let’s dive into the details!

    Products Used:

    • Flippin’ Best Stamp Set
    • But First Coffee Flashcards Set
    • Various scraps from my stash for the background
    • Alcohol Markers
    • White gel pen & Colored Pencil Derwent

    The Creative Process:

    To set the stage for this Valentine-themed card, I pulled together various colorful scraps from my stash, creating a fun, cheerful background. The heart-warming “But First, Coffee” flashcard served as the perfect focal point for our lovable penguin.

    For coloring, I utilized my trusty alcohol markers to bring the penguin to life, adding depth and dimension with a white gel pen and Derwent colored pencils. You’d be amazed at how just a few simple details can transform your piece!

    Creative Coloring creates illusion of a “cookie”

    Turning a Heart into a Cookie:

    A fun twist on this design is the heart that the penguin is holding! With a little creative color placement, I turned this heart into a cookie! By adding a tiled dot pattern along the edge and using strategic shading to create a slightly darker hue, it looks just like a freshly baked treat. 🍪

    Finding Joy Beyond Valentine’s Day:

    I know some people don’t typically send Valentine cards, but there’s always an opportunity to share love and kindness with everyone around us. This card isn’t just for Valentine’s Day—it’s perfect for anyone special in your life, young or old. A simple card like this is certain to put a smile on anyone’s face! 😊

    Tips for Easy Coloring:

    • The penguin design is simple—just a classic black-and-white color palette with a pop of pink for the cheeks and orange for the beak and feet.
    • Add a touch of pink and purple to the hearts, and earthy browns for the cookie and coffee/tea.
    • Remember, crafting is all about enjoyment! It’s just paper and ink, so have fun with it!

    If you have any questions or need assistance, please don’t hesitate to reach out! Happy crafting, everyone!

    Check out the amazing products from Pajama Crafters Stamps and let’s get creating!

    Affiliate Link ↗ https://shareasale.com/r.cfm?b=1737668&u=1886305&m=108254&urllink=&afftrack=

    Happy crafting! 💖✂️ #pajamacrafterstamps #stampedbykelly