This week’s Craft Roulette challenge has me reminiscing about a timeless TV series that bridges generations. My son enjoys streaming the show now, just as much as I did when it was first run, and I couldn’t help but let that nostalgia inspire my latest card project! If you’re not familiar with Craft Roulette, be sure to check it out for endless inspiration!

Parameters:
- Project Type: Dude Card
- Colors: Sunflower Field 🌻
- Element: Bird or Birds 🐦
- Random Element: Soot
- Personal Touch: Products from Scrappy Boy Stamps
With these parameters in mind, I decided to create a fun card that can definitely appeal to the guys in our lives. Here’s how I tackled it:
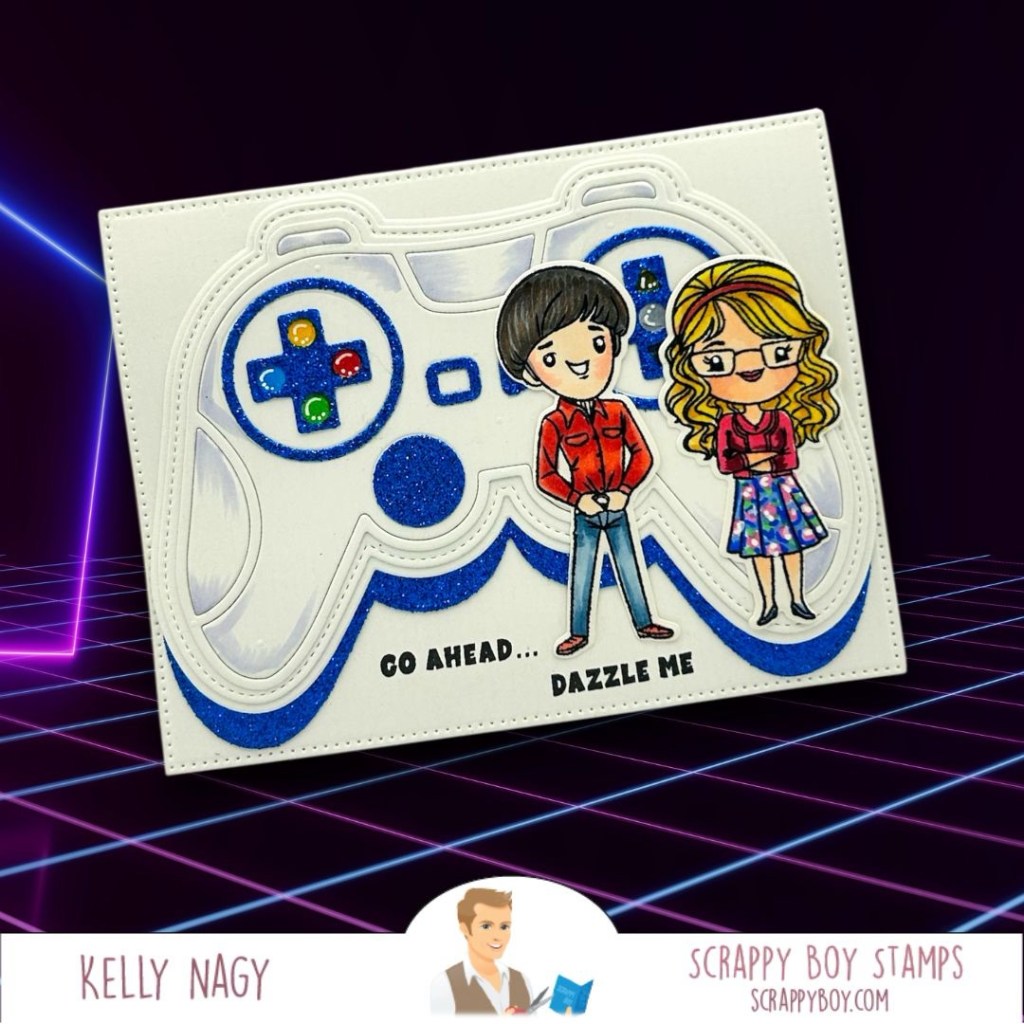
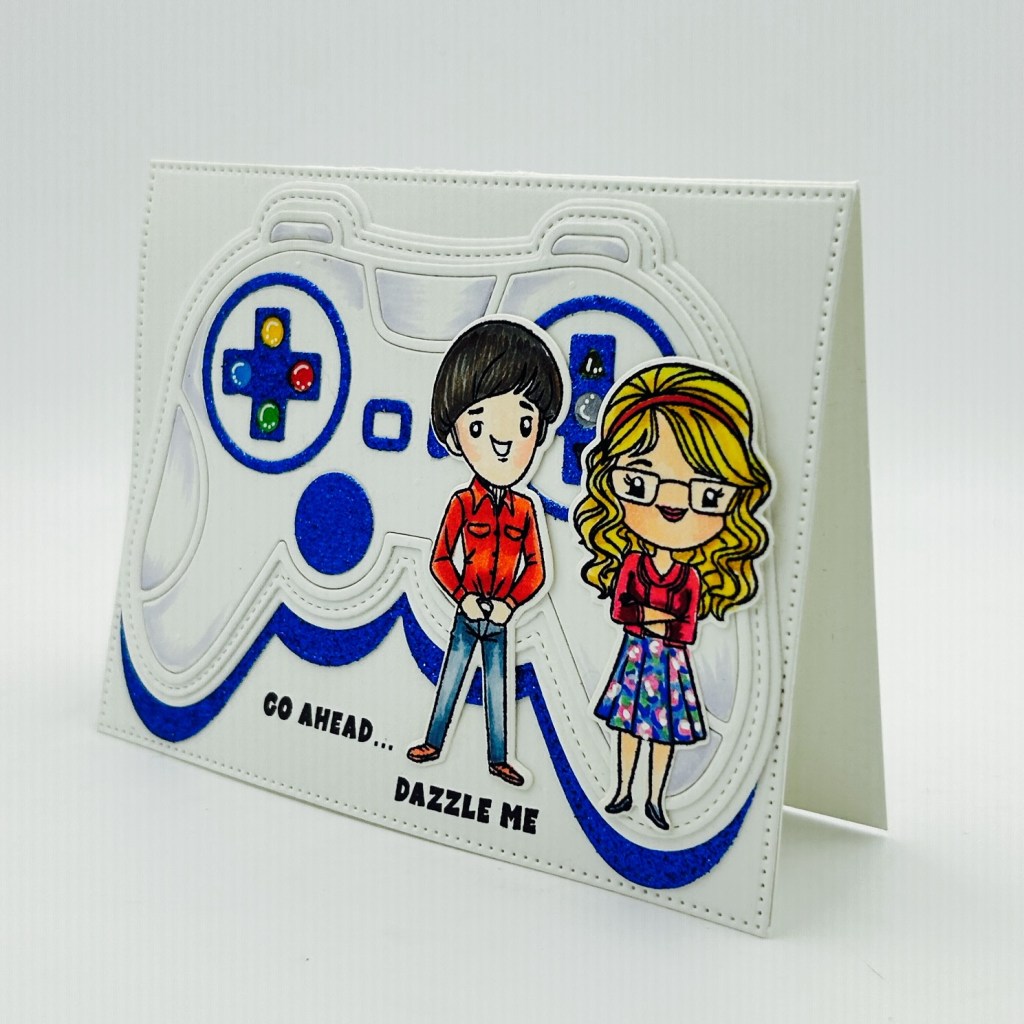
- Dude Card Theme: To keep the card gender-neutral yet engaging, I drew inspiration from the iconic Etch-A-Sketch, a classic toy that ties the card back to the nostalgic theme of the TV show. Boys love toys, right? It’s the perfect motif! Season 3, The Pen. Coincidentally, one if the very few episodes only featuring 2 of the characters.
- Soot Element: I incorporated the random element of soot by using Ranger Ink in the color Black Soot. This added a dramatic flair to my design, using a mini-ink blender and focused on edges and highlighting details.
- Birds in the Sky: To fulfill the bird element, I etched playful birds in the sky. I created a panel featuring a stunning skyline that reflects the urban setting associated with the show. I impressed the New York Skyline die into the panel and then ink blended the Black Soot into the lines, allowing them to really pop. I connected the lines impressed into the paper, just like they had to connect when using the actual toy.🎉
- Sunflower Field Colors: To capture the sunflower field theme, I used vibrant yellow and golden shades throughout the card to create a sunny backdrop featuring some patterned paper from The New Yorkers’ Collection. I also googled the color pallet and included in my images.
- Scrappy Boy Stamps: I made sure to incorporate products from Scrappy Boy Stamps to personalize the card further. The details I added really brought the design to life and aligned perfectly with the memories that inspired it.
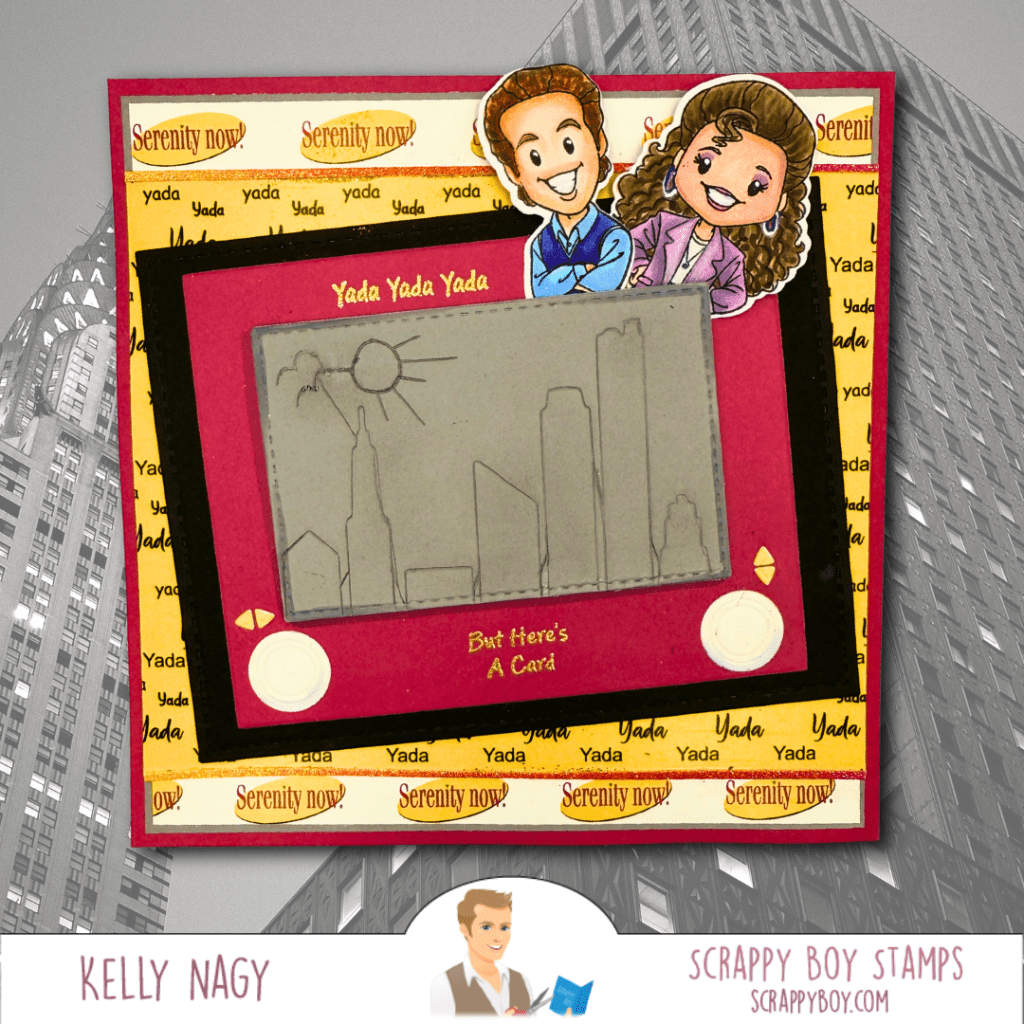
In summary, my completed card features a sky filled with etched birds, a dynamic skyline backdrop in a minimalist design, to emulate the results an Etch-A-Sketch would give. I used Gilded Embossing Powder to embossed my sentiment on the Etch-a-Sketch. The toy is the focal point, on top of splashes of sunflower yellows in the variety of patterned paper in the New Yorkers’ Collection.

The Etch-a-Sketch was made using elements from a variety of dies available at Scrappy Boy Stamps, but you may already have these simple shapes in your collection, including older Scrappy Boy releases.
- Game Controller Card Die – knobs & arrows
- Etched A2 Rectangle Card Dies
- New York Skyline
If you’re also looking for creative card designs, don’t forget to check out Craft Roulette on YouTube!
Follow me on @stampedbykelly
Happy crafting, and may your projects overflow with inspiration! 🖌️✨