Hello, crafty friends!
I’m excited to invite you to join us for the Harvest & Hope Inspiration Hop hosted by Pajama Crafter Stamps starting at Pajama Crafter Stamps’ Instagram Page. We’re celebrating their wonderful new September release filled with cozy fall vibes, heartfelt creativity, and a sprinkle of hope for the future. 🎉
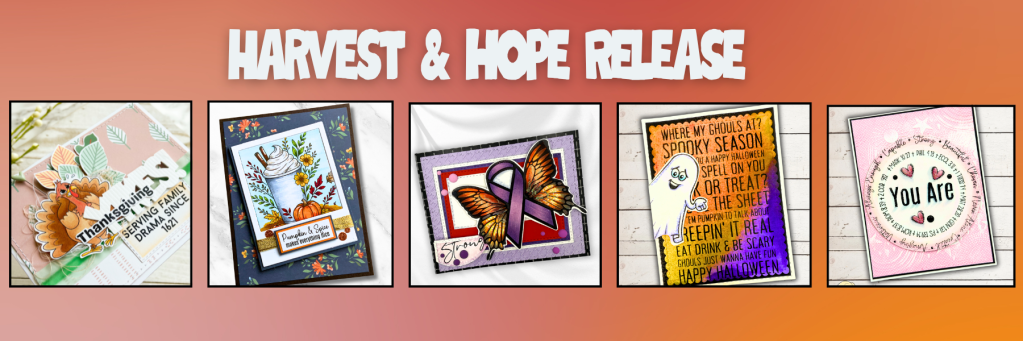
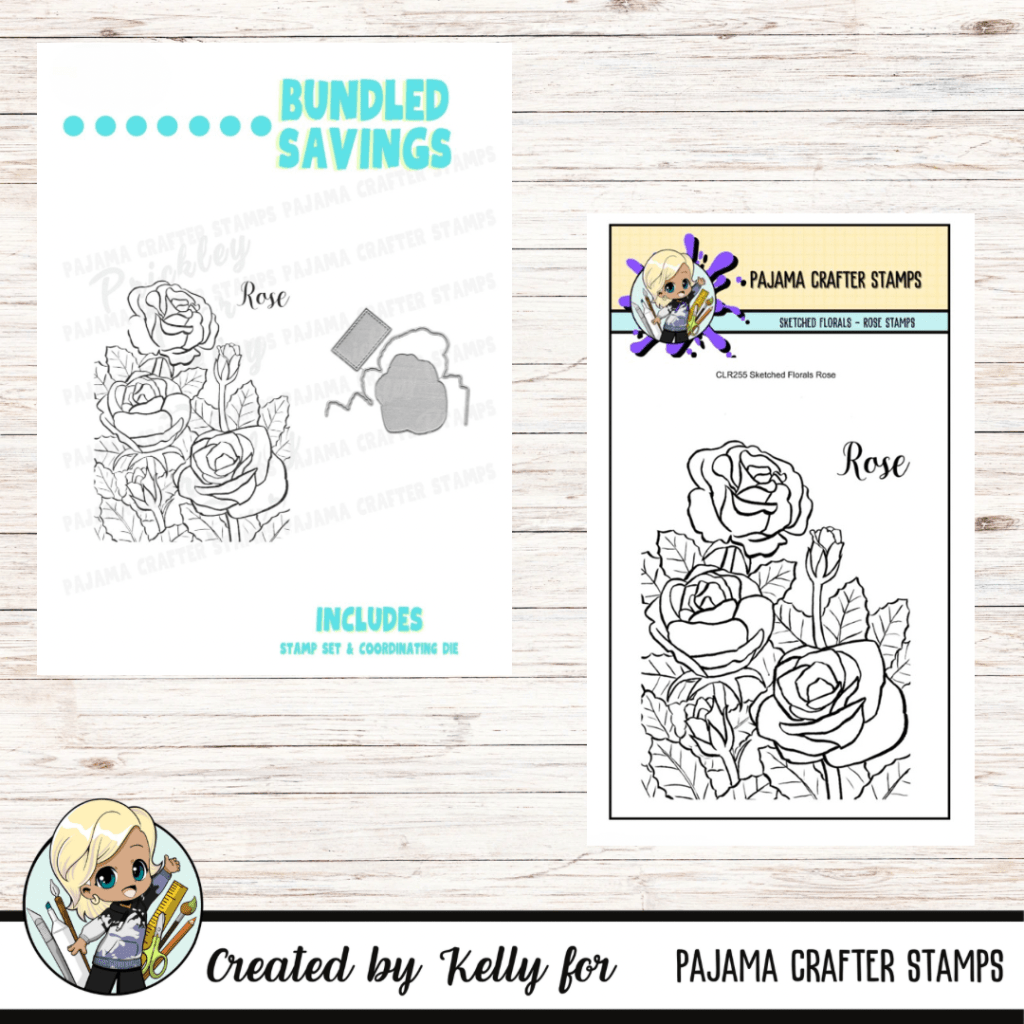
This month, Pajama Crafter Stamps is thrilled to unveil:
- 5 New Stamp Sets
- 2 New Stencils
- Plus, a few surprises along the way! 🎁
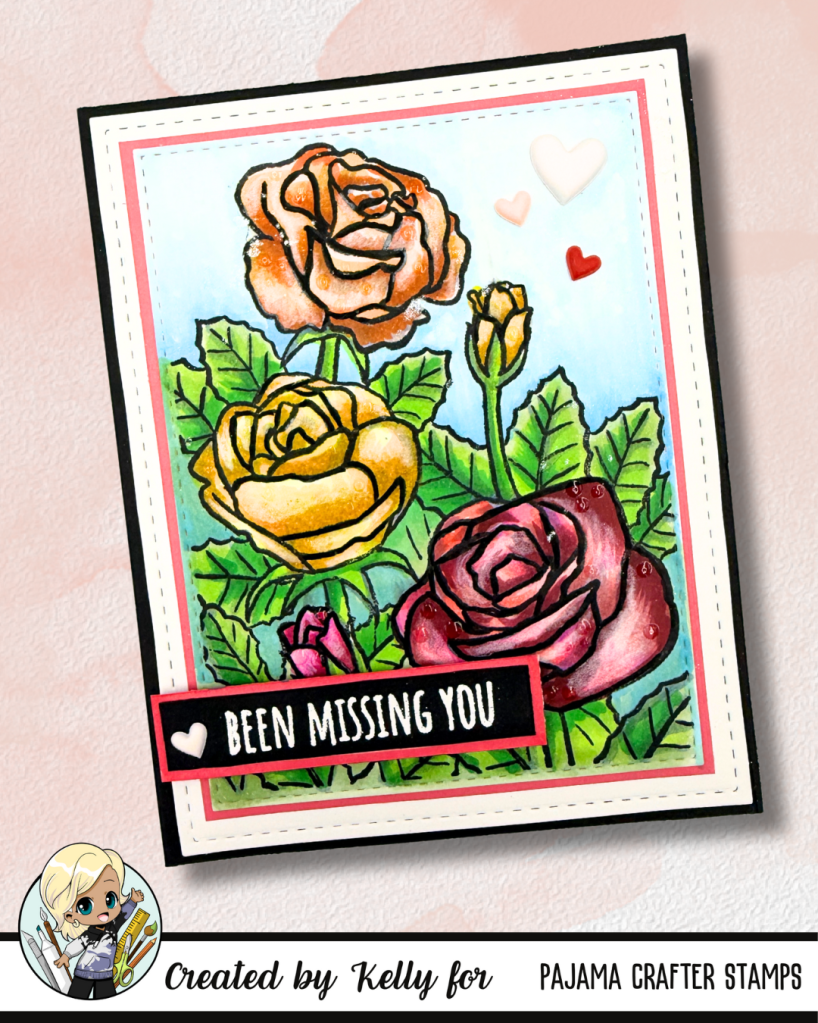
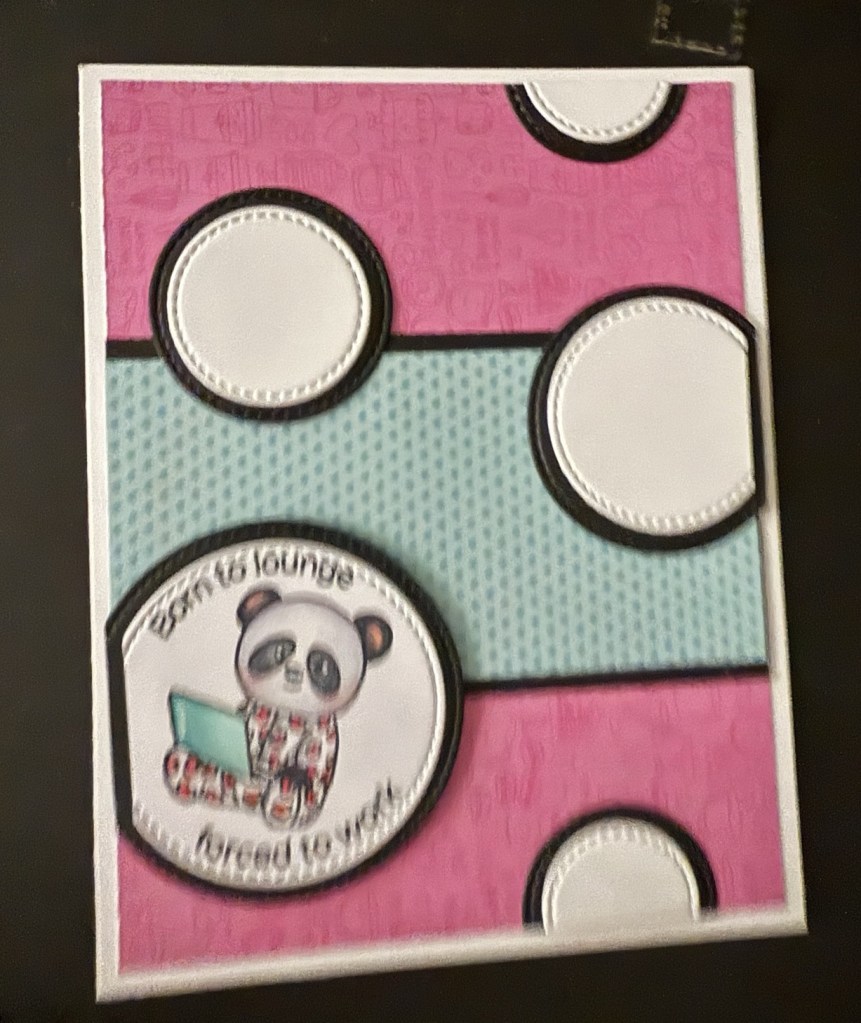
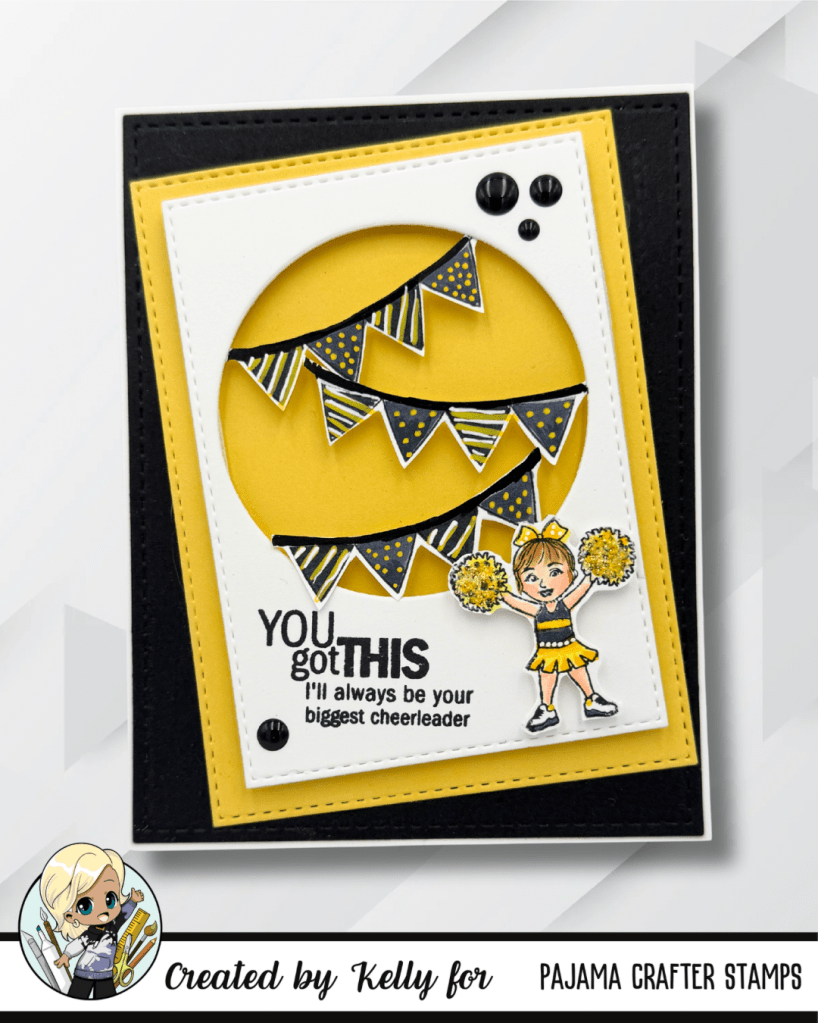
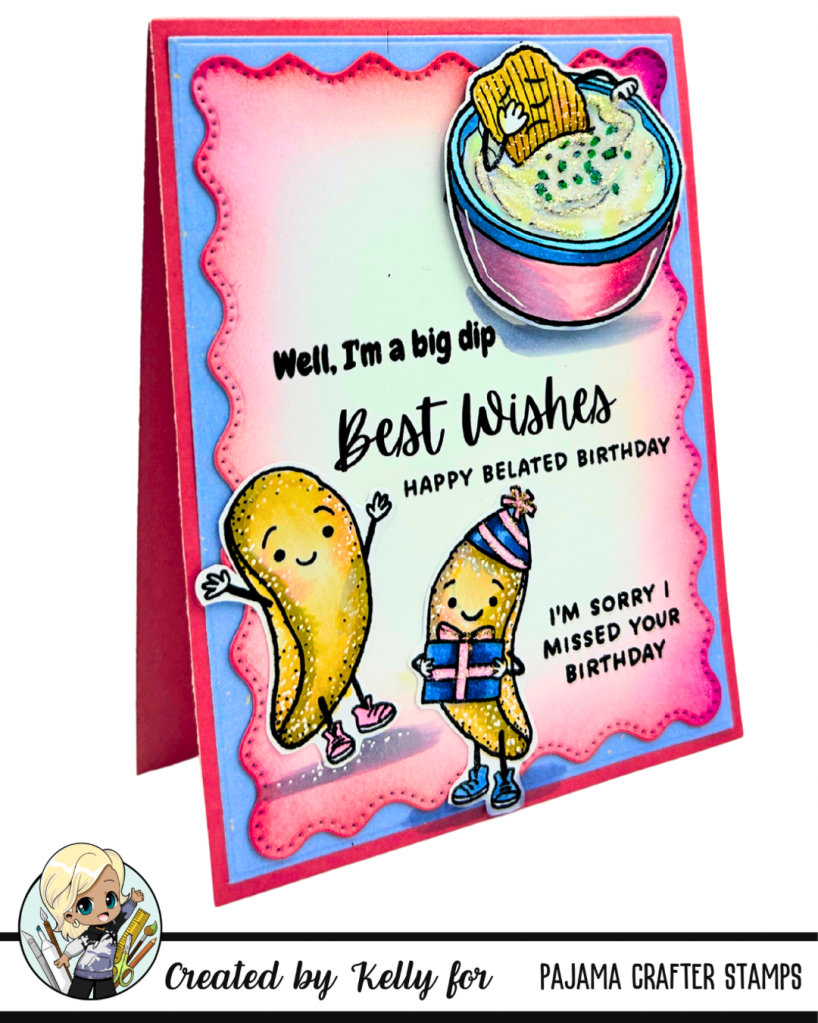
My Featured Project: A2 Card featuring “You Are”
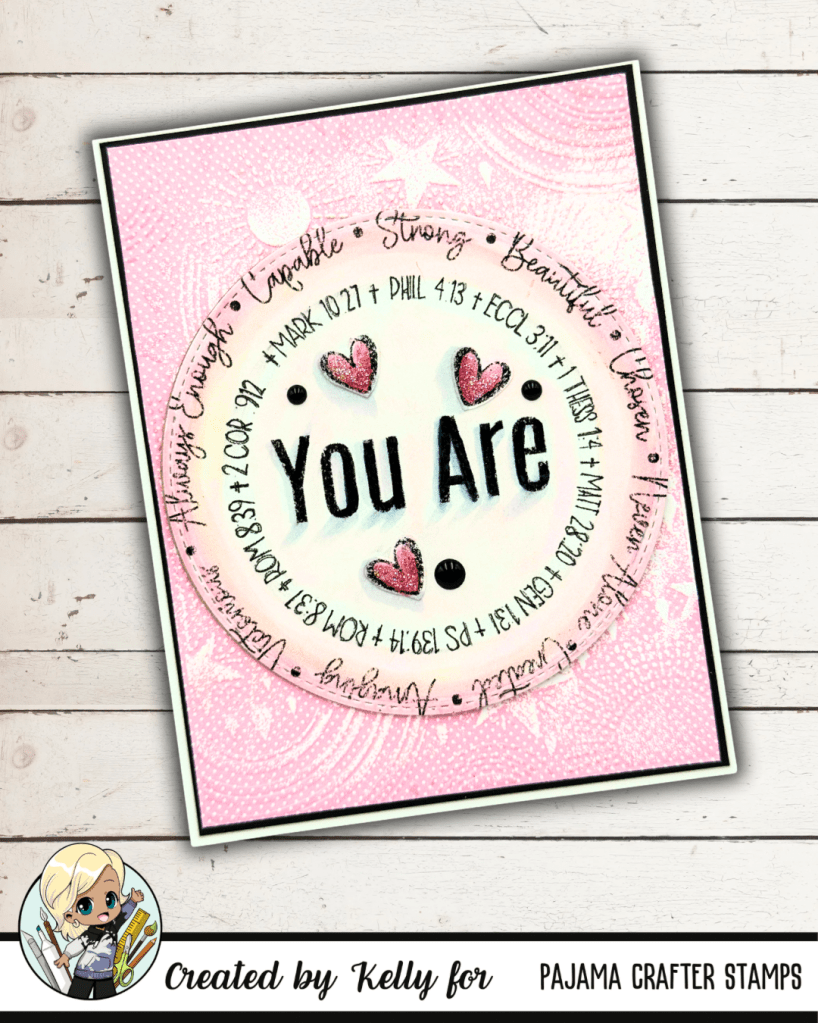
For my project, I used the new stamp set called “You Are.” You can check it out here: https://pajamacrafterstamps.com/STAMPEDBYKELLYBLOG
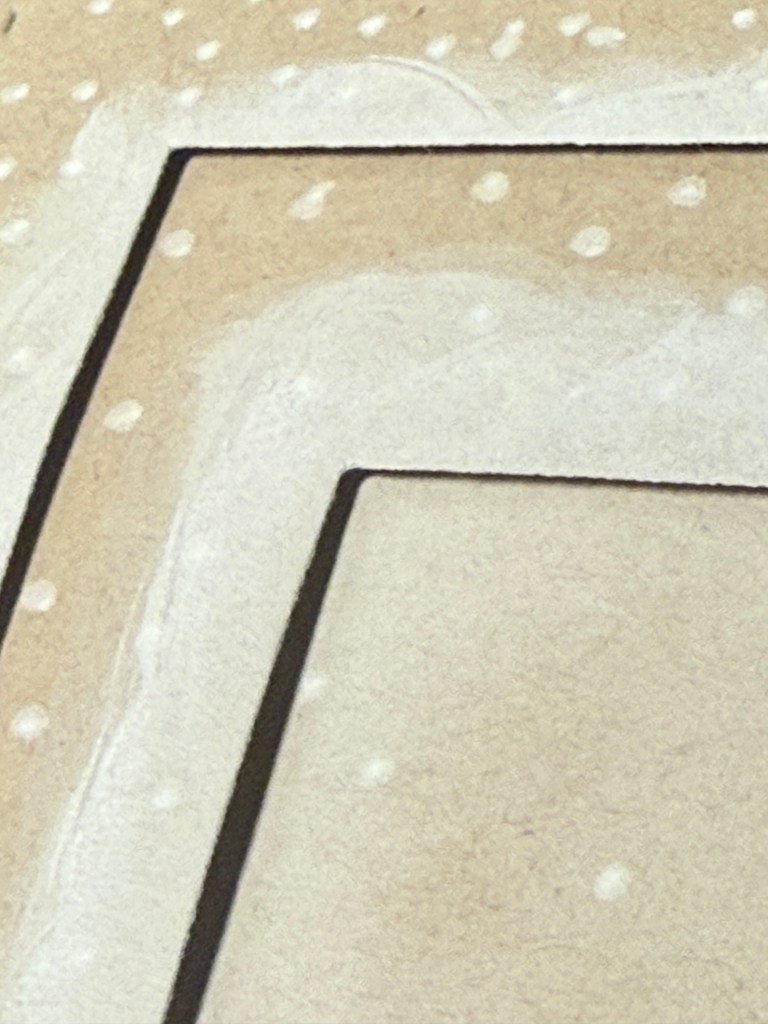
In my design, I incorporated some pink small polkadot patterned paper that I ran through an embossing folder. To bring out the intricate details of the embossing, I dragged a white pigment ink pad over the raised areas. This technique beautifully highlights the texture and makes the design pop!
Next, I layered the circle stamped image using ink blending with distressed ink in pale pink, giving it a soft, dreamy look. To add some dimension, I used dimensional foam tape to pop it up, creating an eye-catching focal point on my card. This is just one of the new sets released.

🌟✨ Unleash the Power of Positivity with the “You Are” Stamp Set! ✨🌟
Dive into a world of encouraging sentiments that uplift and inspire!
- It’s Fine, I’m Fine Everything’s Fine!
- YOU Got This!
- YOU ARE Amazing! Remember That
- And so much more…
Whether you’re celebrating a friend’s achievement, sending love, or just spreading kindness, this stamp set has the perfect words for every occasion. Let your creativity shine as you craft heartfelt messages that make a difference!
Join me, @StampedbyKelly, for more inspiration and joyful crafting tips! Please know all are welcome in this creative community. Let’s spread some love together! ❤️