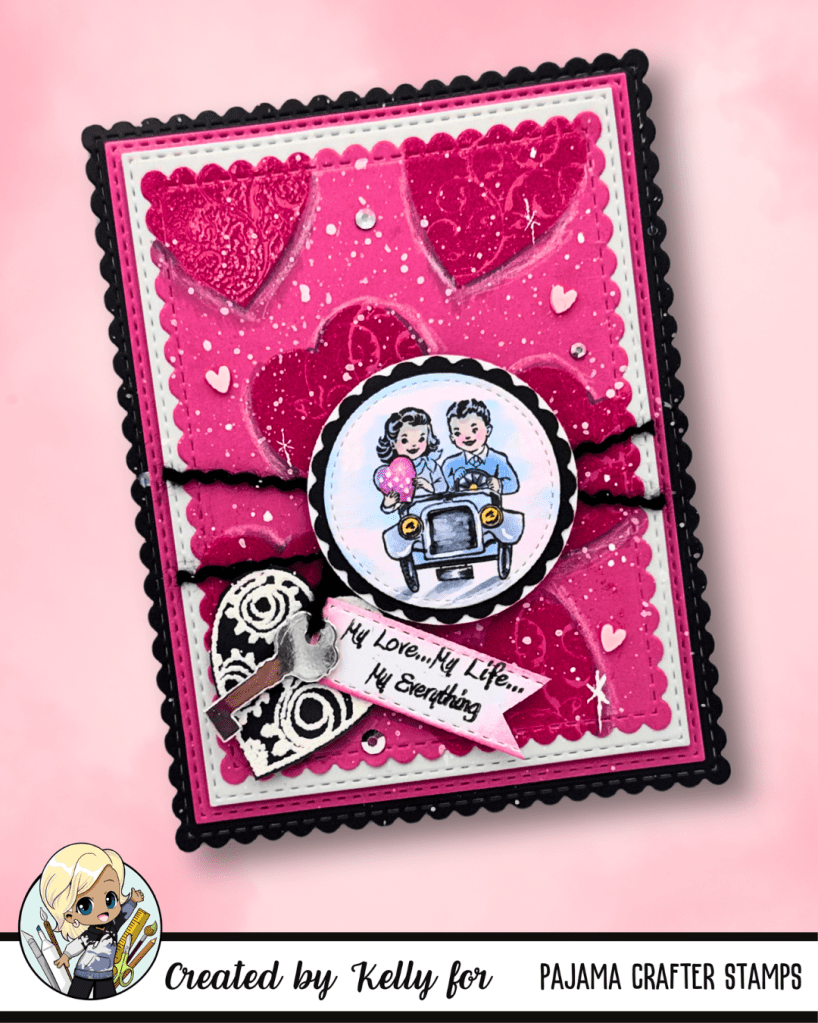
As we dive into the holiday spirit, I’m not only excited about the upcoming festivities, but I’m also preparing to celebrate my 35th wedding anniversary! 🎉 In the spirit of love and creativity, I recently dusted off an adorable stamp set from Pajama Crafters that caught my eye. With Valentine’s Day right around the corner, it’s the perfect time to share love and encouragement through our crafting.
A Special Celebration Card
For my anniversary card, I colored a cute image that represents my hubby and me, pairing it with the stunning heart locket die set. ❤️✨ To add an extra touch of warmth, I created an ink-blended background featuring embossed hearts. It truly captures the essence of our love story.
Perfect for Valentine’s Day!
Even if you’re not celebrating an anniversary, this set is perfect for crafting heartfelt cards for Valentine’s Day or any occasion to spread joy! I particularly love these cute, smaller images as they fit perfectly in those postage stamp layouts.
Retiring Set
Retiring Stamp Sets — Don’t Miss Out!
The best part? This lovely set is retiring soon! You can grab the stamp and die bundle for just $5.99, or snag the Heart Key Crown Die for only $1. 🎉 These deals won’t last long, so make sure to get your hands on them while they are still available!
Join in the Celebration!
Let’s embrace this beautiful season of love together! How are your holiday card plans coming along? I’d love for you to share your creations in the comments below. Let’s inspire one another and create something magical!
Today, let’s dive into the magical world of stamping and explore how we can transform our stamped images into whimsical scenes that tell entirely new stories. The beauty of crafting lies in its endless possibilities, and merging different stamp sets allows us to stretch our imaginations beyond the original designs!
Why Mix and Mash?
Often, we get caught up in using our stamps exactly as intended. But what if we dare to break that mold? By mixing and mashing our favorite stamped images, we can create unique narratives that are both fun and unexpected! Think about taking a flower from one set and placing it alongside a character from another—suddenly, you’ve got a new scene full of life and creativity! 🌈✨
Embrace the Joy of Creation
One of the best parts of crafting is enjoying the process itself. Don’t worry about strict rules or expected outcomes. Allow your instincts to guide you! Even if things don’t turn out as planned, each creation is a step on your artistic journey.
Right now, I have a fun project on my desk that’s in the works. I can’t wait to see how it evolves! Let’s inspire one another with fresh ideas and push our boundaries together.
So, grab your favorite stamps, cut them out, and start mixing! Let’s stamp our way to creativity and make this journey colorful and fun. Don’t forget to share your creations with me @stampedbykelly I’m always looking for new inspiration!
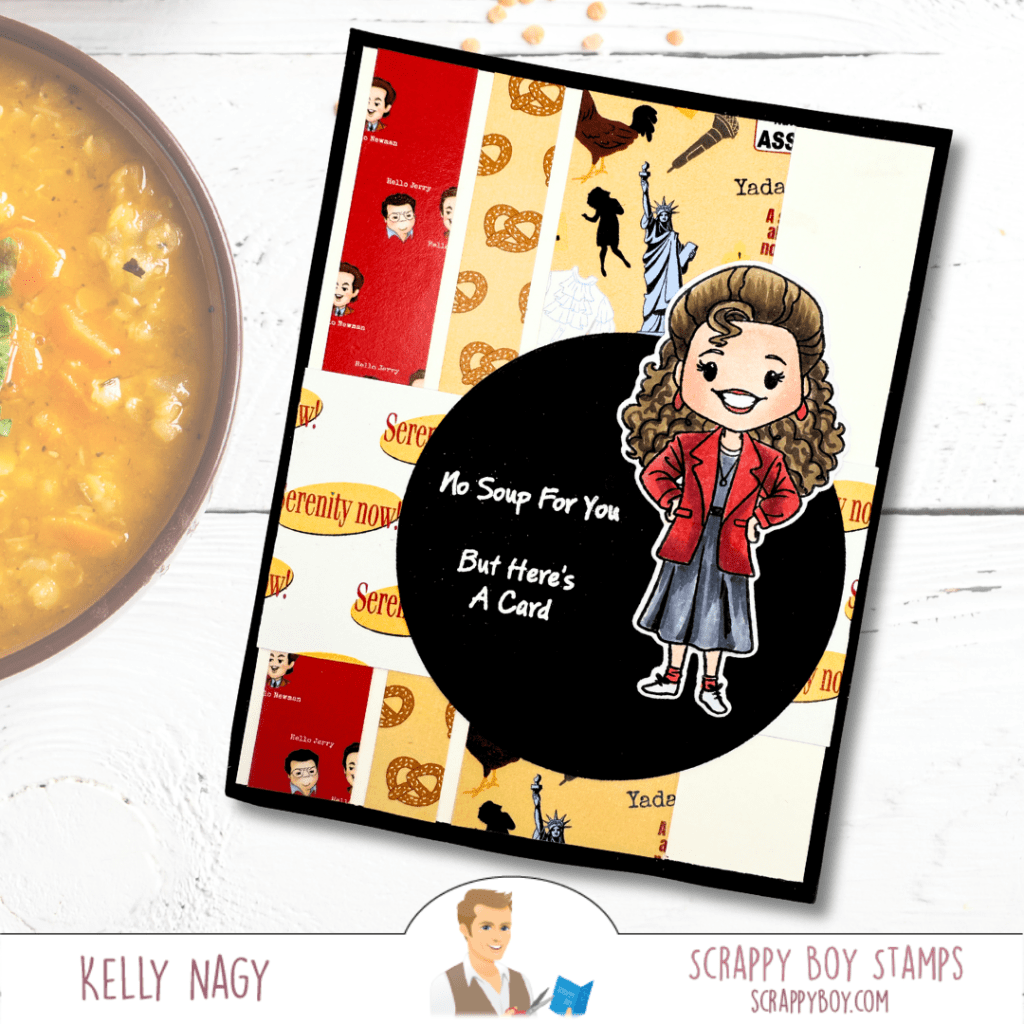
Craft Roulette Submission featuring Scrappy Boy Stamps
This week’s Craft Roulette challenge has me reminiscing about a timeless TV series that bridges generations. My son enjoys streaming the show now, just as much as I did when it was first run, and I couldn’t help but let that nostalgia inspire my latest card project! If you’re not familiar with Craft Roulette, be sure to check it out for endless inspiration!
Parameters:
Project Type: Dude Card
Colors: Sunflower Field 🌻
Element: Bird or Birds 🐦
Random Element: Soot
Personal Touch: Products from Scrappy Boy Stamps
With these parameters in mind, I decided to create a fun card that can definitely appeal to the guys in our lives. Here’s how I tackled it:
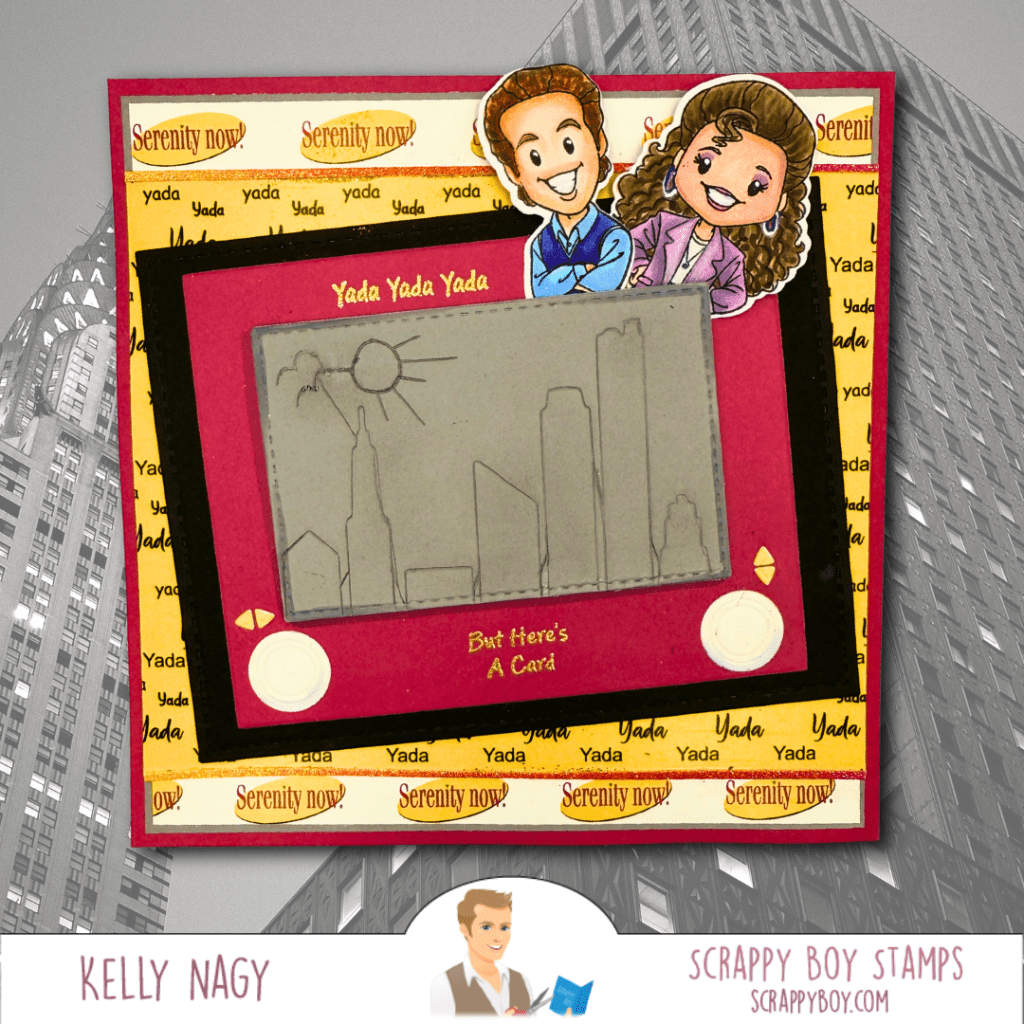
Dude Card Theme: To keep the card gender-neutral yet engaging, I drew inspiration from the iconic Etch-A-Sketch, a classic toy that ties the card back to the nostalgic theme of the TV show. Boys love toys, right? It’s the perfect motif! Season 3, The Pen. Coincidentally, one if the very few episodes only featuring 2 of the characters.
Soot Element: I incorporated the random element of soot by using Ranger Ink in the color Black Soot. This added a dramatic flair to my design, using a mini-ink blender and focused on edges and highlighting details.
Birds in the Sky: To fulfill the bird element, I etched playful birds in the sky. I created a panel featuring a stunning skyline that reflects the urban setting associated with the show. I impressed the New York Skyline die into the panel and then ink blended the Black Soot into the lines, allowing them to really pop. I connected the lines impressed into the paper, just like they had to connect when using the actual toy.🎉
Sunflower Field Colors: To capture the sunflower field theme, I used vibrant yellow and golden shades throughout the card to create a sunny backdrop featuring some patterned paper from The New Yorkers’ Collection. I also googled the color pallet and included in my images.
Scrappy Boy Stamps: I made sure to incorporate products from Scrappy Boy Stamps to personalize the card further. The details I added really brought the design to life and aligned perfectly with the memories that inspired it.
Etch-A New York Memory
In summary, my completed card features a sky filled with etched birds, a dynamic skyline backdrop in a minimalist design, to emulate the results an Etch-A-Sketch would give. I used Gilded Embossing Powder to embossed my sentiment on the Etch-a-Sketch. The toy is the focal point, on top of splashes of sunflower yellows in the variety of patterned paper in the New Yorkers’ Collection.
Featuring Scrappy Boy Stamps & Dies
The Etch-a-Sketch was made using elements from a variety of dies available at Scrappy Boy Stamps, but you may already have these simple shapes in your collection, including older Scrappy Boy releases.
Game Controller Card Die – knobs & arrows
Etched A2 Rectangle Card Dies
New York Skyline
If you’re also looking for creative card designs, don’t forget to check out Craft Roulette on YouTube!
Hello, fellow crafters! 🌼✨ Today, I want to share 3 card projects with you, all of which brought me so much joy and a sense of calm while creating. Crafting is such a wonderful way to relieve stress and express your creativity, and I hope my projects can encourage you to create your own.
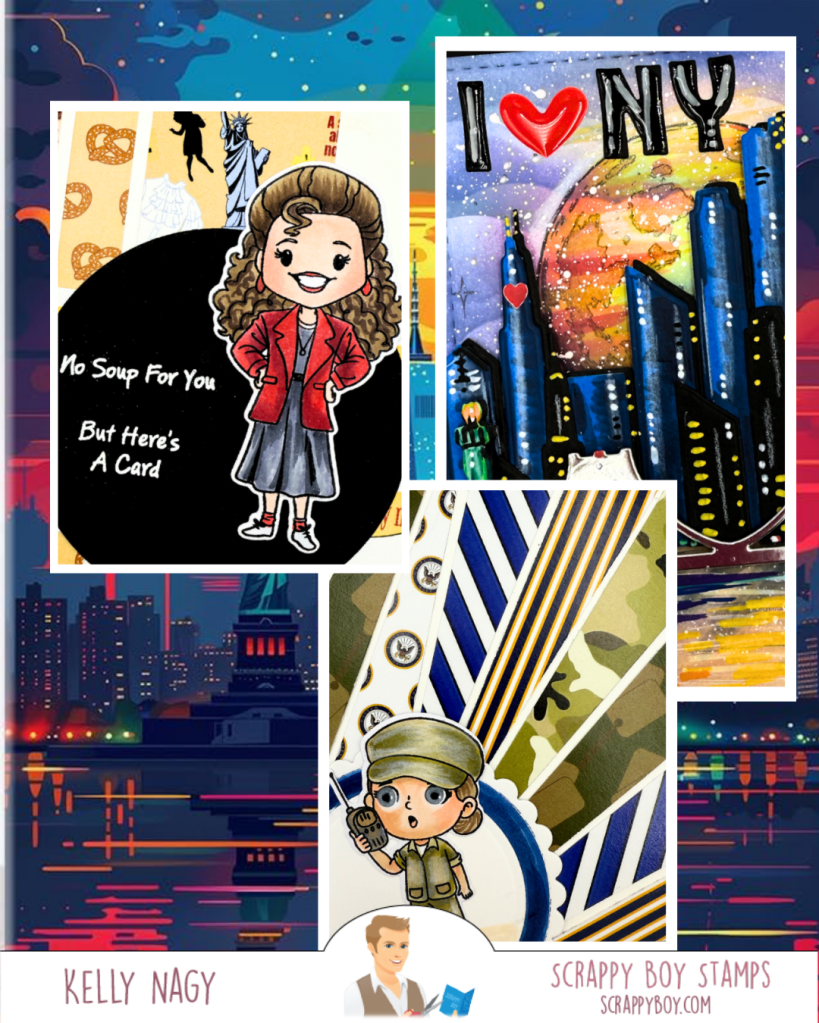
Project 1: The New Yorkers Stamp Set 🌇
For my first project, I played with the New Yorkers stamp set along with the coordinating outline dies and some lovely pattern paper that adds character to my design.
My next project is a celebration of New York. Adding details with white gel pen and variety of Sharpies Acrylic Paint Brush Pens to give them depth and texture. It was a real joy to capture the essence of New York City, and I love how the colors came together.
My goal was to showcase the iconic skyline and capture the city’s spirit while reminding myself how versatile these products can be.
Project 2: Sneak Peek – Different Techniques with the Same Set 👀 Of you love The Mouse, consider following me @stampedbykelly on Social Media.
I’m excited to share a little sneak peek of my second project, which also features the New York Die Set. This time, I took a different approach with my techniques, and I was surprised at how refreshing felt to experiment while using the same set. It’s amazing how changing colors and methods can lead to such different outcomes! I look forward to sharing the full project in the coming week and I hope it encourages you to look at your supplies in a new light.
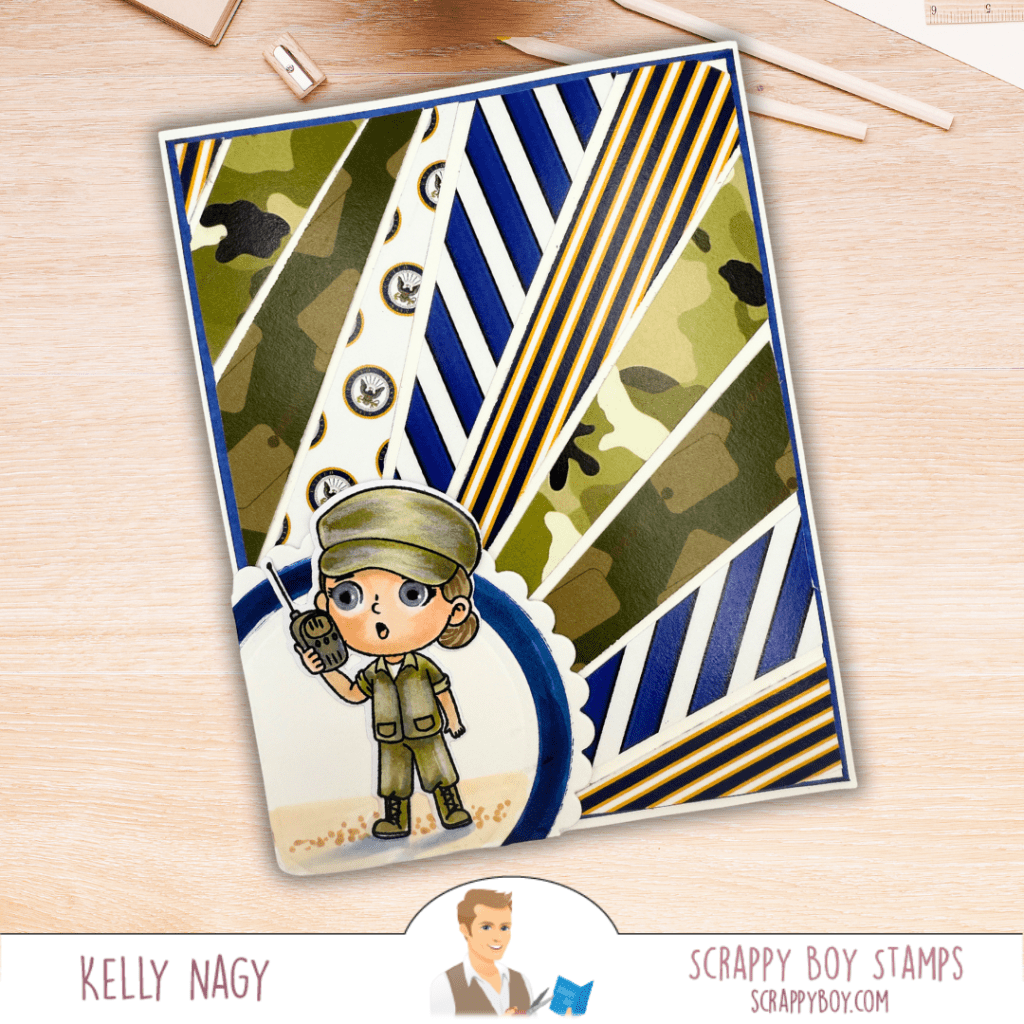
Project 3: Cute Kids Military Set 🎖️
Lastly, I want to introduce you to the adorable Cute Kids Military stamp set from Scrappy Boy. Honoring those who protect our freedoms, this sweet set showcases charming designs in the Cute Kids’ style representing different branches of the military. It truly warms my heart! ❤️
I enjoyed using the coordinating pattern papers that reflect patriotism and complement the playful illustrations. The sentiments in this set are heartfelt, and I hope they inspire others to create cards that celebrate our heroes in a meaningful way.
Conclusion 🎉
Crafting is not just about creating—it’s about the journey and the joy it brings to our lives. I hope my projects inspire you to use what you have, explore new techniques, and look at products differently than they were originally intended. Remember, it’s completely okay to be yourself in your craft, and there’s no right or wrong way to create. Happy crafting, friends! ✂️🌟
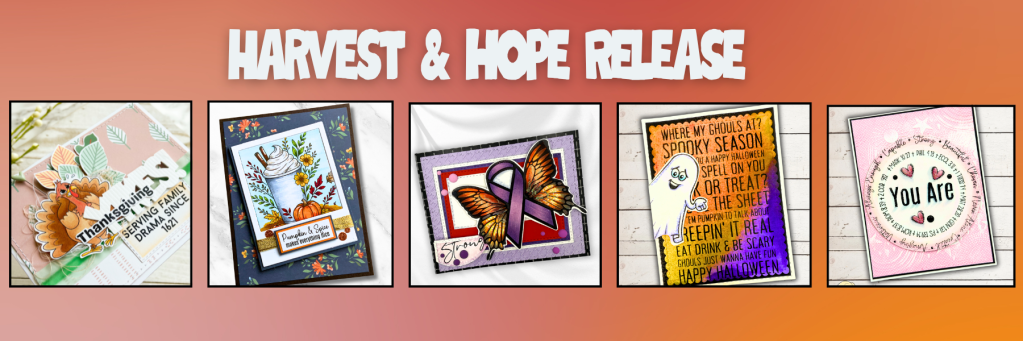
I’m excited to invite you to join us for the Harvest & Hope Inspiration Hop hosted by Pajama Crafter Stamps starting at Pajama Crafter Stamps’ Instagram Page. We’re celebrating their wonderful new September release filled with cozy fall vibes, heartfelt creativity, and a sprinkle of hope for the future. 🎉
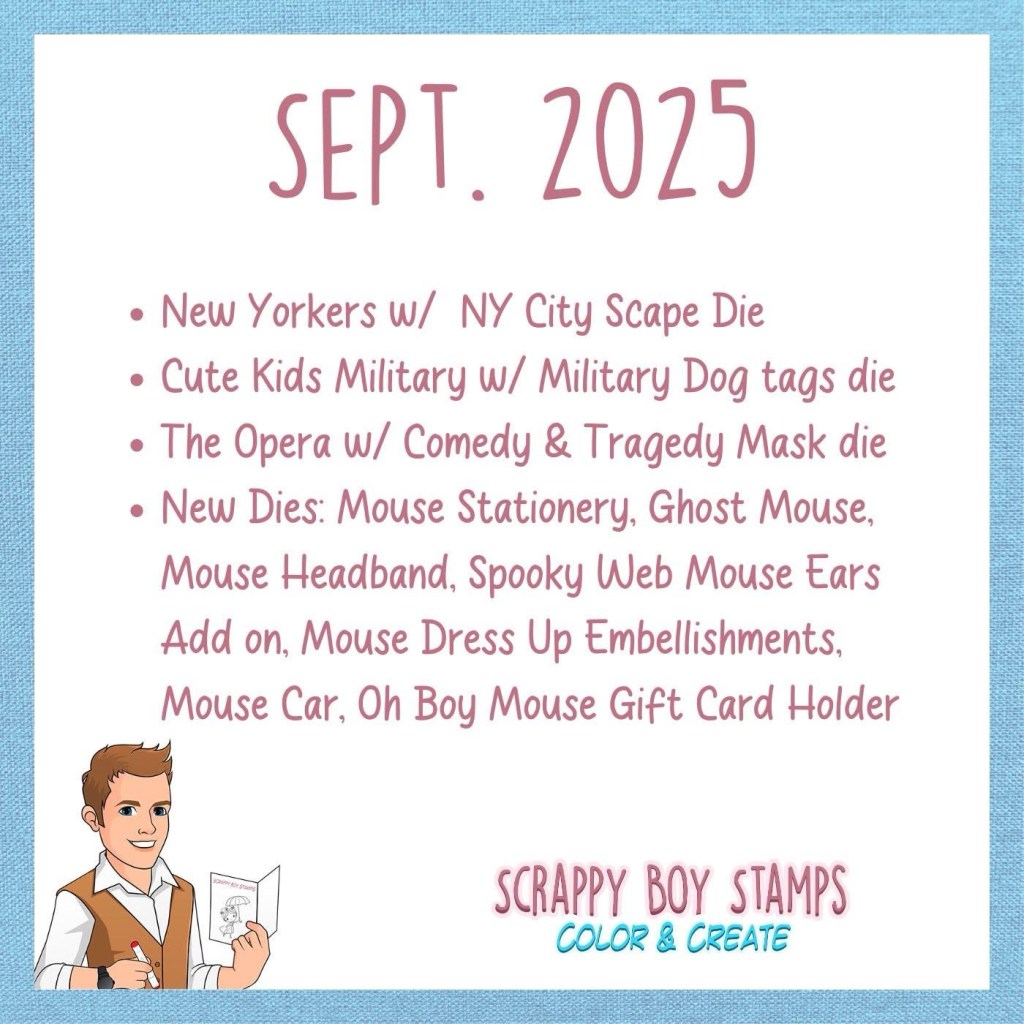
September New Release from Pajama Crafter Stamps
This month, Pajama Crafter Stamps is thrilled to unveil:
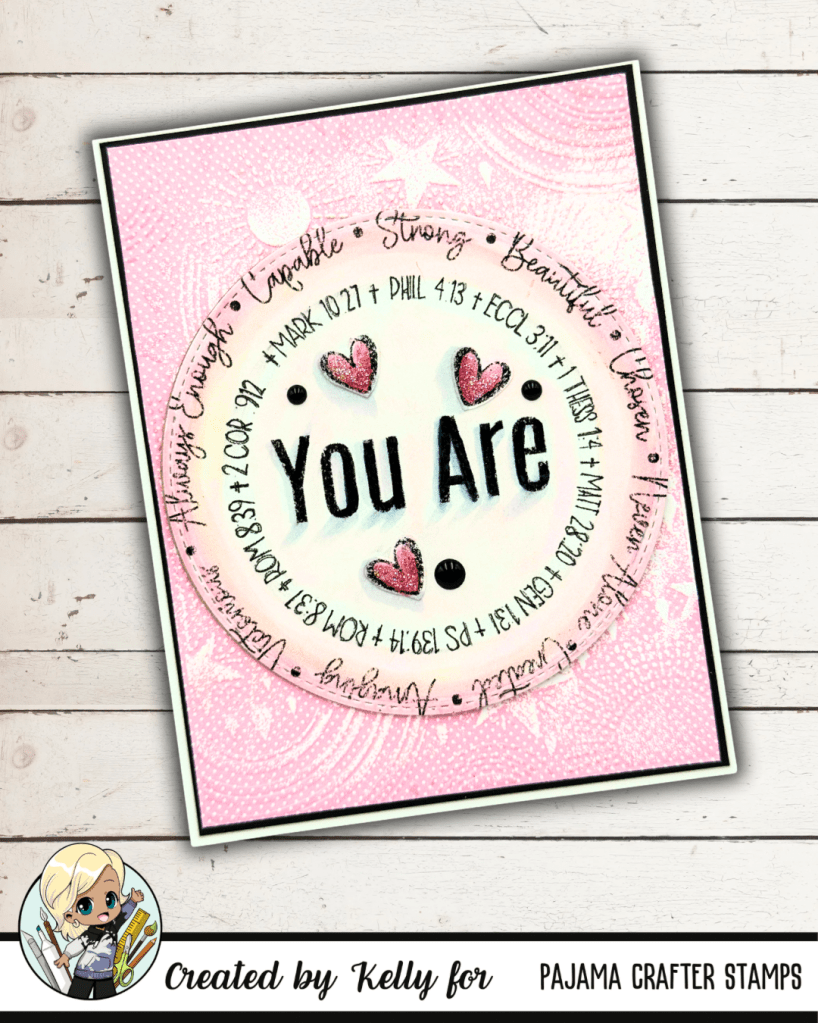
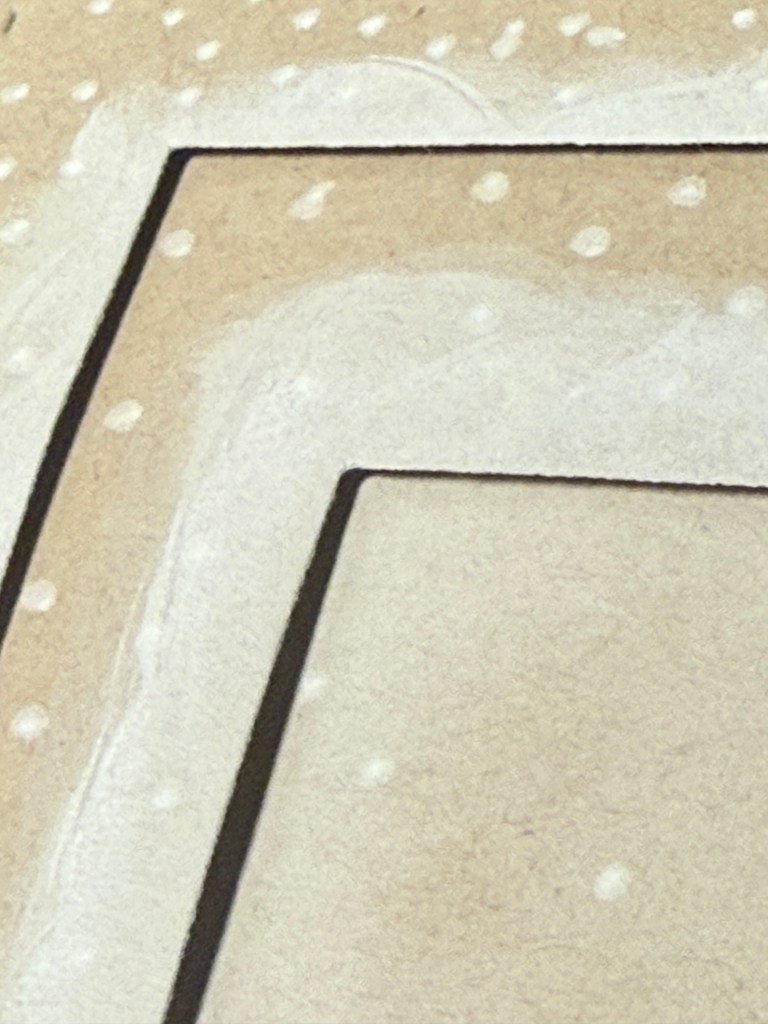
In my design, I incorporated some pink small polkadot patterned paper that I ran through an embossing folder. To bring out the intricate details of the embossing, I dragged a white pigment ink pad over the raised areas. This technique beautifully highlights the texture and makes the design pop!
Next, I layered the circle stamped image using ink blending with distressed ink in pale pink, giving it a soft, dreamy look. To add some dimension, I used dimensional foam tape to pop it up, creating an eye-catching focal point on my card. This is just one of the new sets released.
“You Are Stamps” from Pajama Crafter Stamps
🌟✨ Unleash the Power of Positivity with the “You Are” Stamp Set! ✨🌟
Dive into a world of encouraging sentiments that uplift and inspire!
It’s Fine, I’m Fine Everything’s Fine!
YOU Got This!
YOU ARE Amazing! Remember That
And so much more…
Whether you’re celebrating a friend’s achievement, sending love, or just spreading kindness, this stamp set has the perfect words for every occasion. Let your creativity shine as you craft heartfelt messages that make a difference!
Join me, @StampedbyKelly, for more inspiration and joyful crafting tips! Please know all are welcome in this creative community. Let’s spread some love together! ❤️
Hello, crafty friends! 🌟 Are you ready to take a delightful detour from the hustle and bustle of life? Let’s dive into the wonderful world of paper crafting where fun and creativity reign supreme!
Today, I want to talk about a magical concept: stretching your stash! 🧙♀️✨ You see, sometimes the most thrilling ideas come from looking at your crafting supplies in a whole new light. It’s all about layering, combining, mixing, and matching – just like a crafting buffet! 🍽️💖
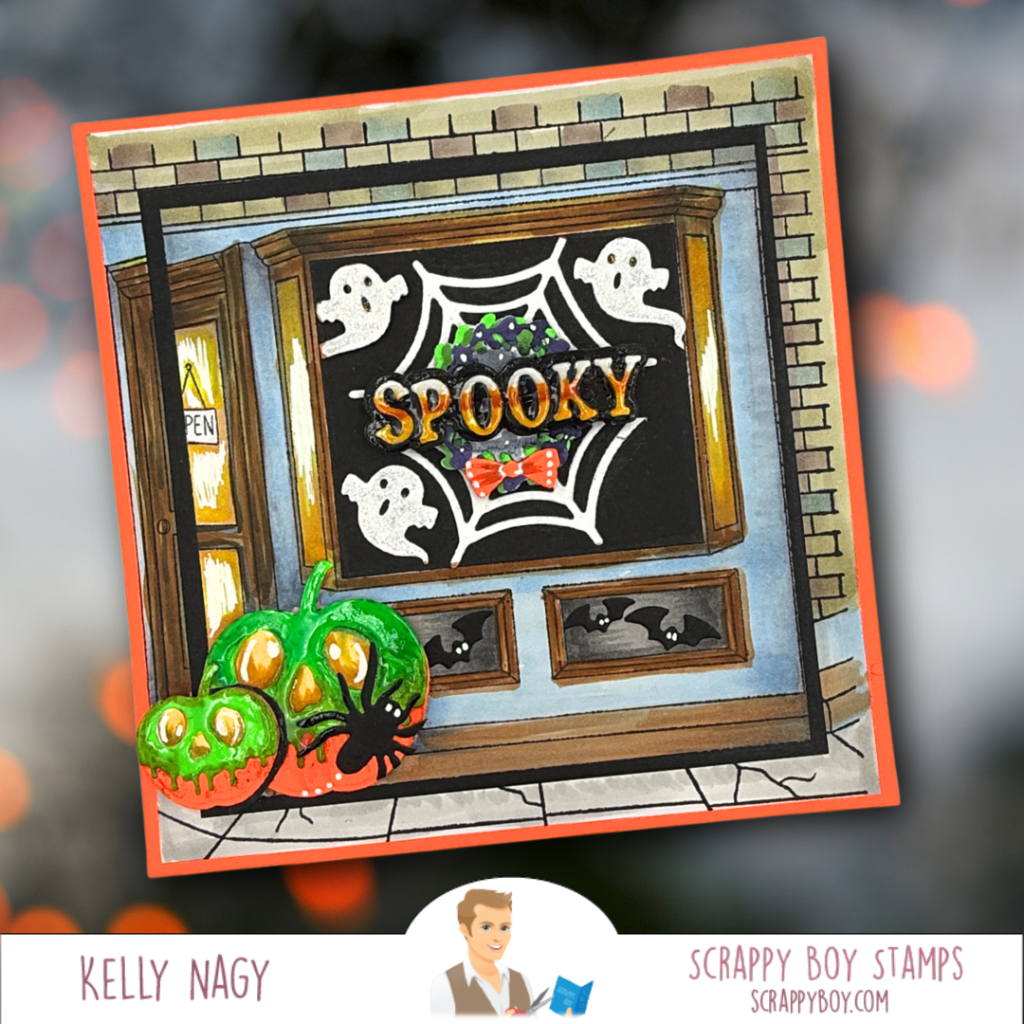
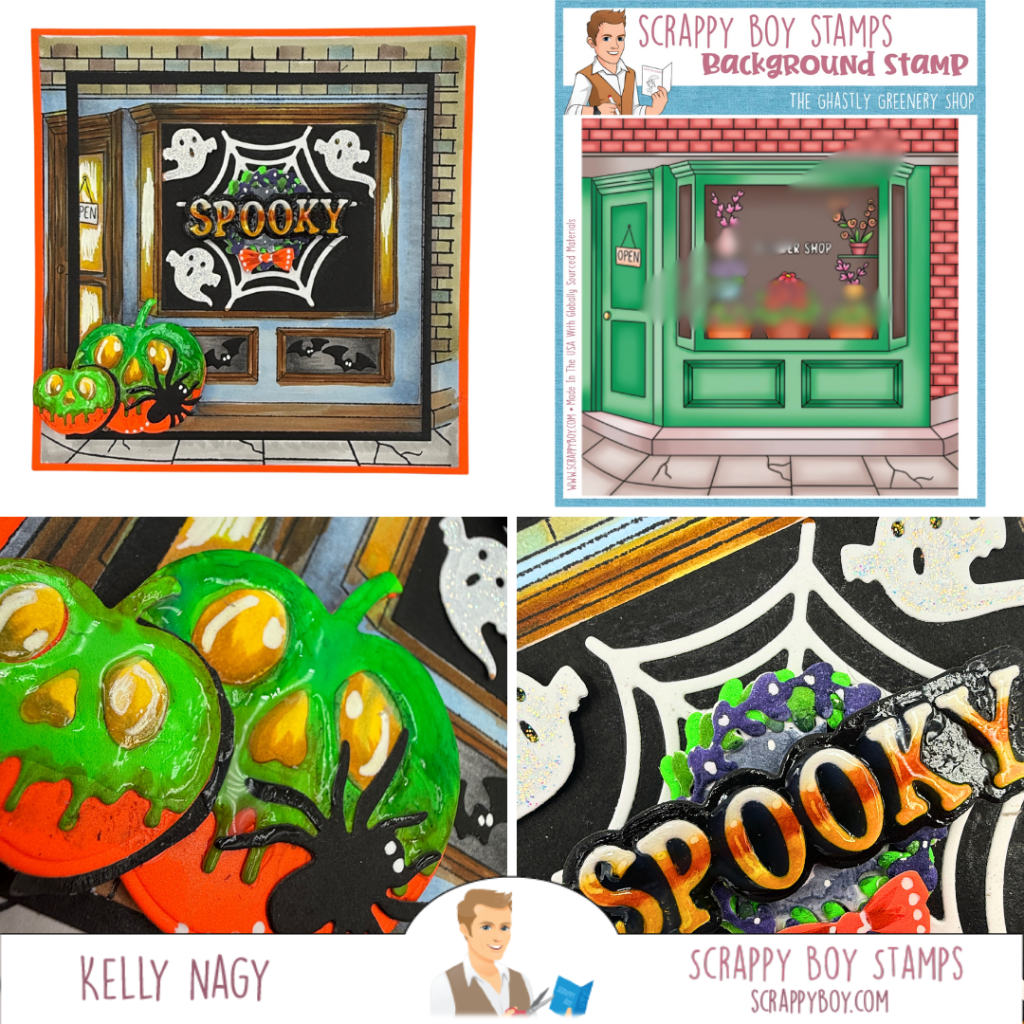
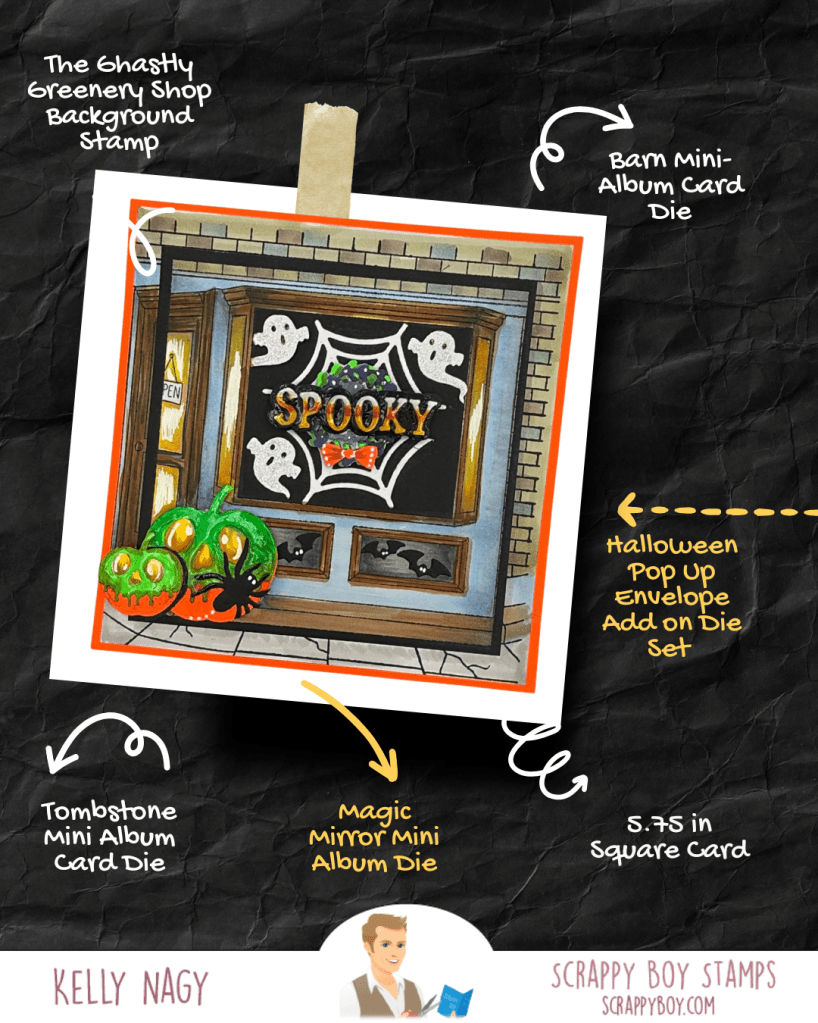
Imagine taking that fabulous die or stamp you thought was only meant for one thing and spinning it into something unexpected. For example, I took the Ghastly Greenery Shop Background Die and transformed it into a Halloween-inspired window! 🎃👻 Who knew our beloved supplies could take on so many roles?
Crafting is all about experimenting—so why not layer up some patterns, combine different styles, or mix and match colors to create a masterpiece? 🎨💫 Remember, it’s your craft supply party, and everyone’s invited!
Above all, let’s not forget the most important ingredient: fun! 🌈 Crafting is the perfect escape from our busy, stress-filled lives. So take a break, put your worries on the back burner, and let’s play! Your craft supplies are just waiting for a little love and imagination.
So grab those tools, let your creativity flow, and remember: when in doubt, craft it out! Happy crafting, everyone! ✂️💕
In today’s fast-paced world, finding ways to unwind and de-stress is more important than ever. One of the most therapeutic activities you can embrace is crafting—specifically, making handmade cards. Not only is it a fantastic outlet for creativity, but it gives you the opportunity to connect with loved ones in a heartfelt way. Let’s explore how crafting can be your escape from stress and a beautiful way to uplift those you care about!
The Magic of Handmade Cards 💌
Imagine sitting down with your favorite colors, stamps, and papers, ready to create something truly special. The act of crafting allows you to immerse yourself in a world of creativity, where your worries can fade away. As you stamp, color, and assemble, you’ll find yourself lost in the joy of creation. Plus, the end result isn’t just a piece of art—it’s a heartfelt message for someone who needs a little encouragement or celebration!
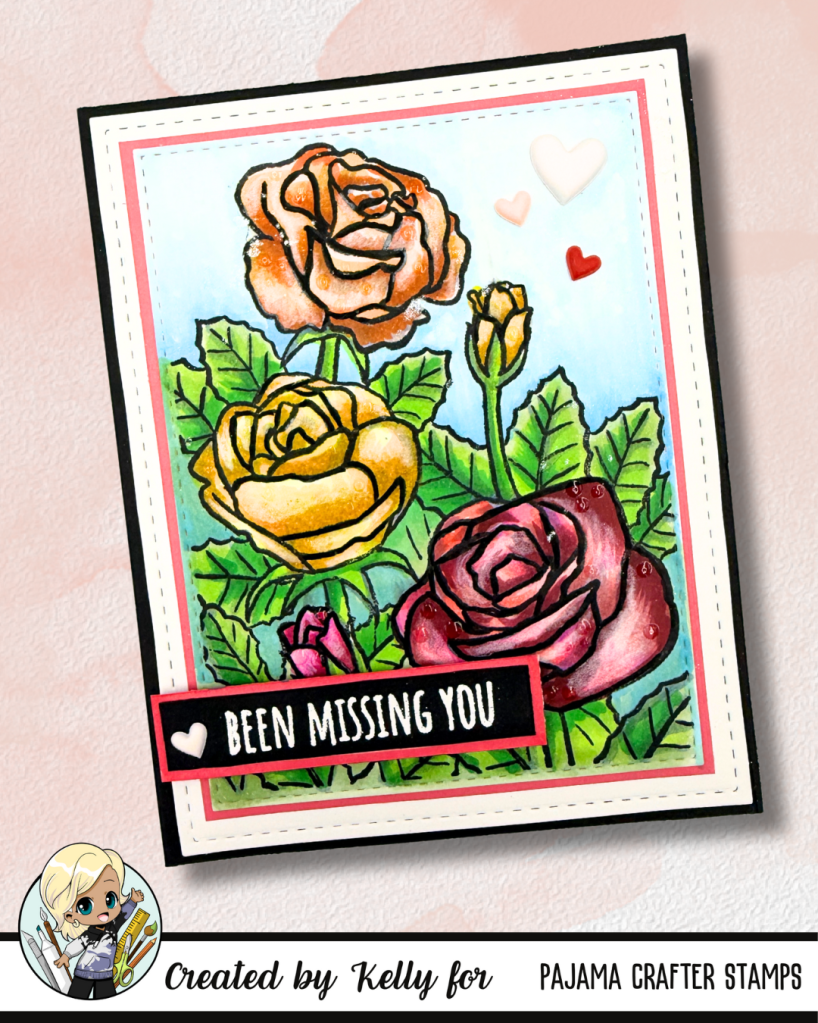
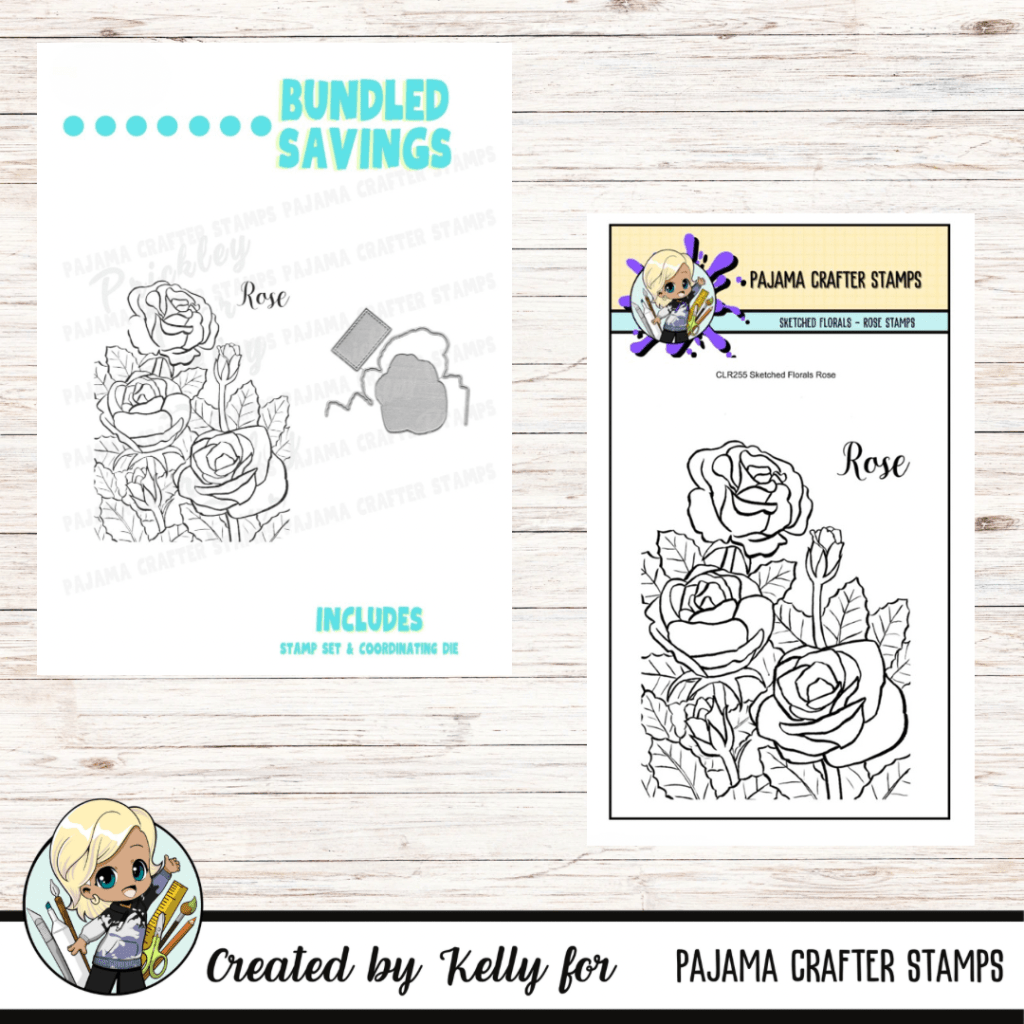
Meet the Star of the Show: Pajama Crafter Stamps’ Sketched Florals – Roses Stamp and Die Bundle 🌹
One of my favorite tools for creating stunning cards is the Sketched Florals – Roses Stamp and Die Bundle from Pajama Crafter Stamps. This versatile set allows you to make beautiful floral designs that are perfect for any occasion—from birthdays to “just because” notes! The intricate details of the roses bring a touch of elegance to your cards, making them truly special.
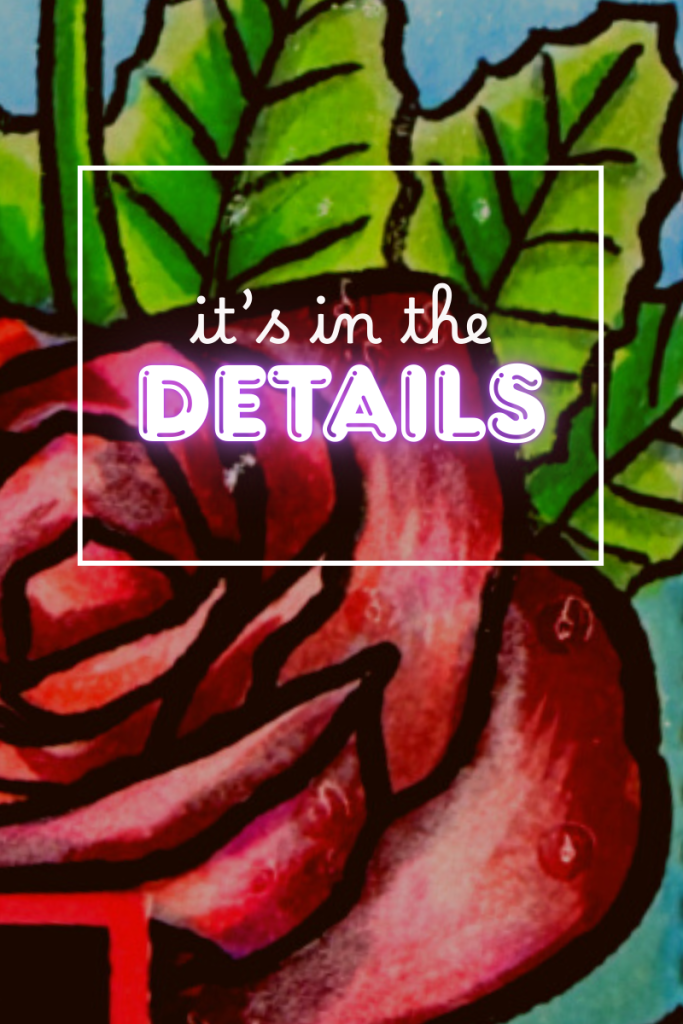
Adding a Touch of Magic: Water Droplets with Crystal Glaze ✨
To elevate your card-making game, consider adding water droplets using crystal glaze. This simple technique adds depth and dimension, making your flowers look fresh and dewy. Here’s how to do it:
Stamp and Color: Start by stamping your roses and coloring them with your favorite medium. Watercolors or Copic markers work beautifully!
Apply Crystal Glaze: Once your flowers are colored and dried, take your crystal glaze and gently apply small droplets over the areas where you want to create the illusion of water droplets. Use a fine-tip applicator for precision.
Let it Dry: Allow the glaze to dry completely. As it dries, it will create a glossy finish that looks just like real water droplets!
Assemble Your Card: Finally, assemble your card with your favorite embellishments and a heartfelt message stamped and popped up with dimensional foam tape.
The Gift of Connection 🎁
After you’ve created your stunning card, think about who in your life could use a little pick-me-up or a reason to celebrate. Whether it’s a friend going through a tough time or a loved one achieving a milestone, your handmade card can make a world of difference. It’s a tangible reminder that someone cares, and sometimes, that’s just what someone needs to turn their day around.
Join the Crafting Community! 🌈
Crafting not only helps you relieve stress but also connects you with a community of like-minded individuals who share your passion. Share your creations on social media, join crafting groups, and inspire others with your unique designs.
In conclusion, crafting with Pajama Crafter Stamps’ Sketched Florals – Roses Stamp and Die Bundle is a wonderful way to engage in a mindful activity, reduce stress, and spread joy to those you care about. So grab your supplies, unleash your creativity, and let the magic of handmade cards brighten your day and the days of others! 💖
The link below will bring you to the Pajama Crafter Stamps’ website where you can check out all the fun goodies they offer.
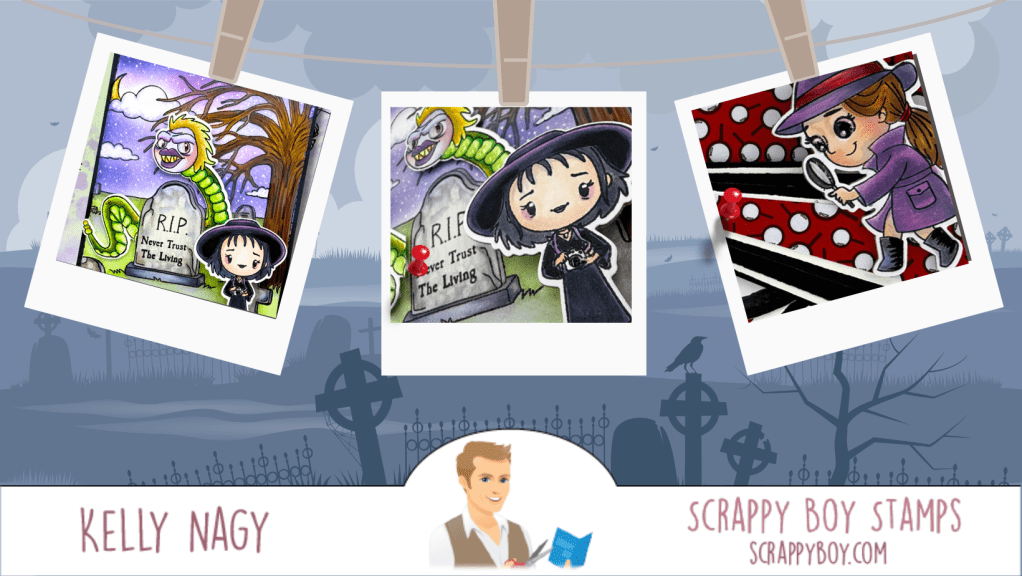
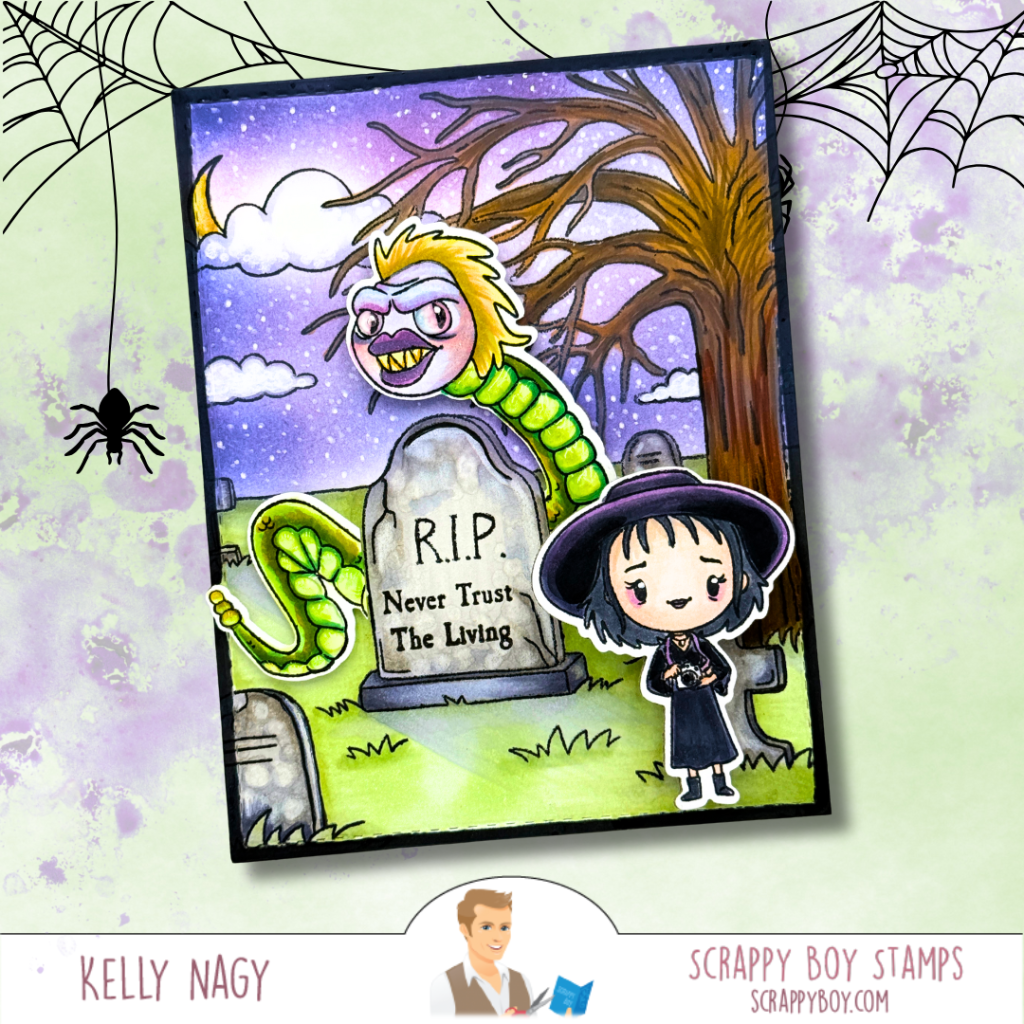
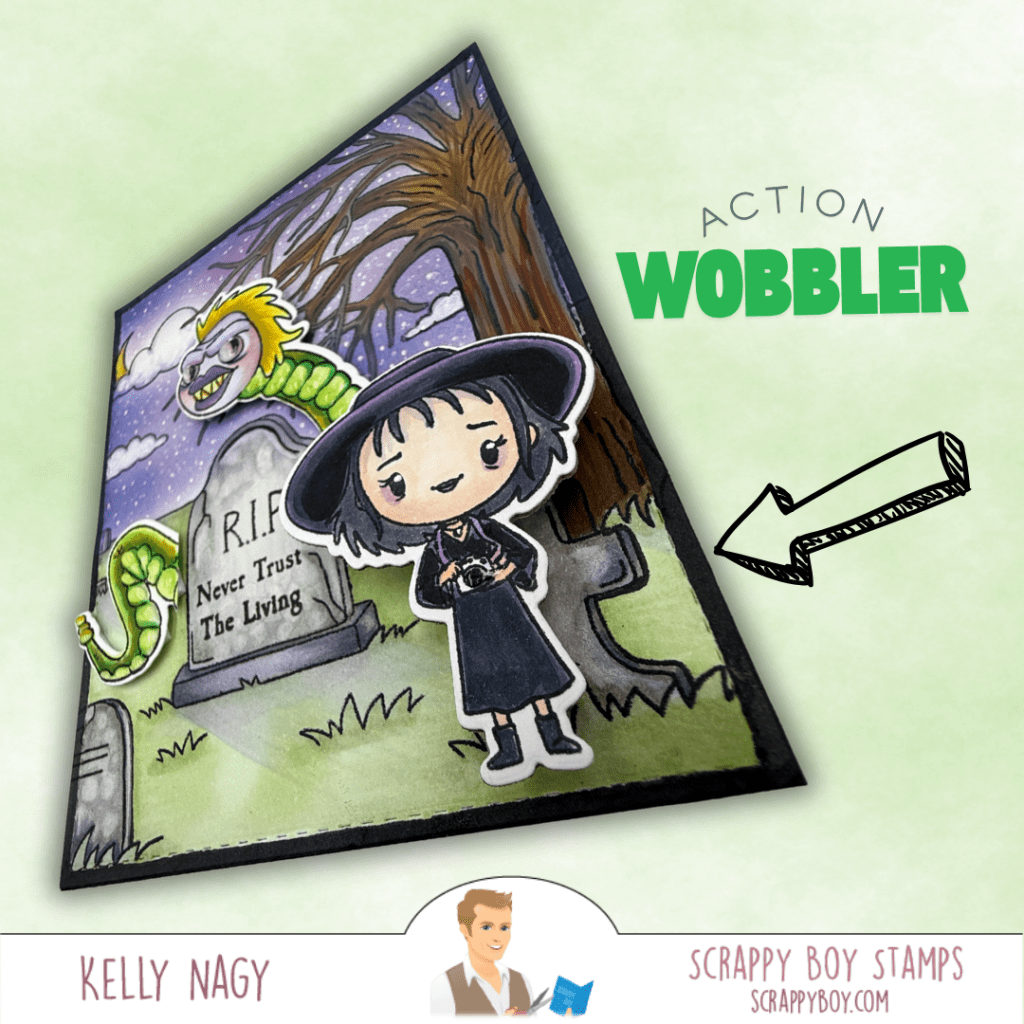
1️⃣ Trickster Ghost 👻: Get ready for some spooky fun! This card captures a playful spirit inspired by a classic movie, making it perfect for Halloween or any movie lover. It features the charming Trickster Ghost stamp set. 🎃🕷️
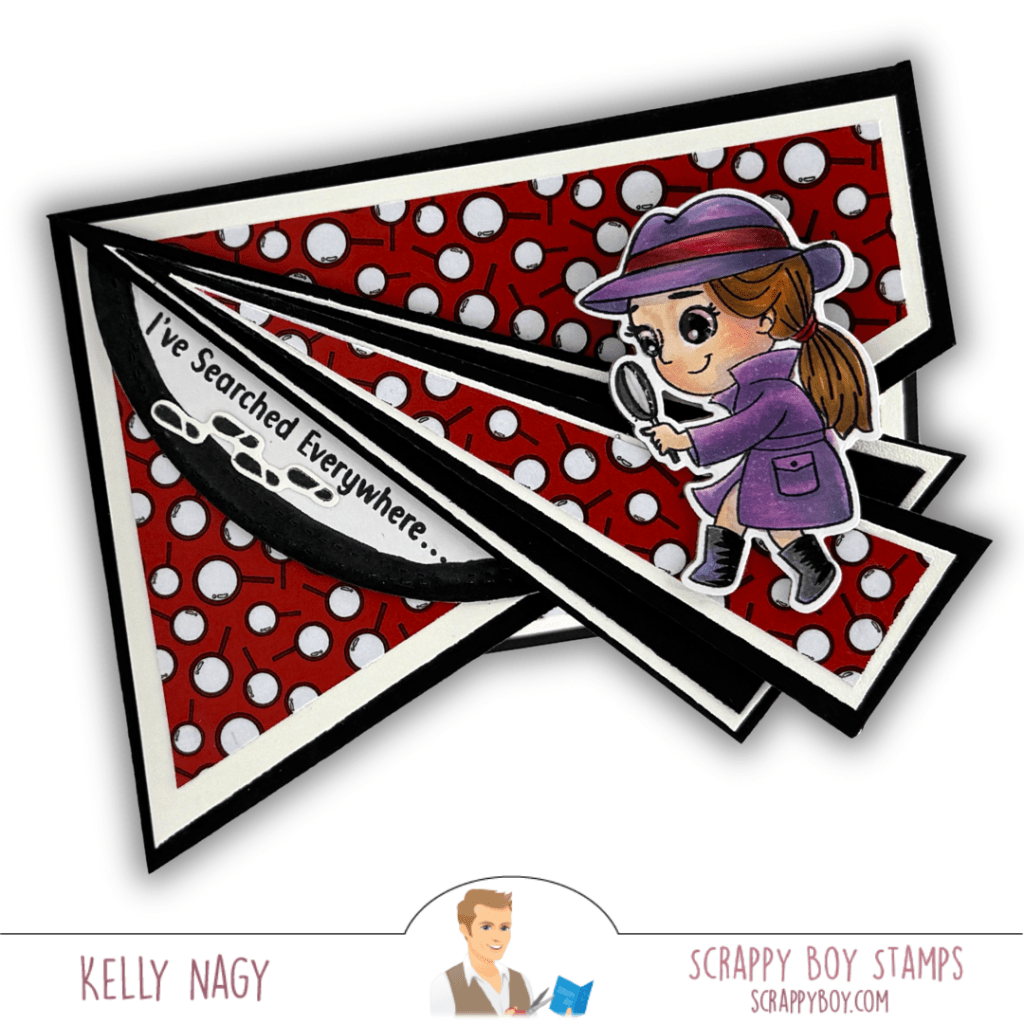
2️⃣ Cute Kids, Detectives 🕵️♂️🕵️♀️: Unleash your creativity with this adorable combo! Ideal for curious little detectives and fans of crime scene investigations alike, this project will surely inspire your crafty adventures! 🔍💼
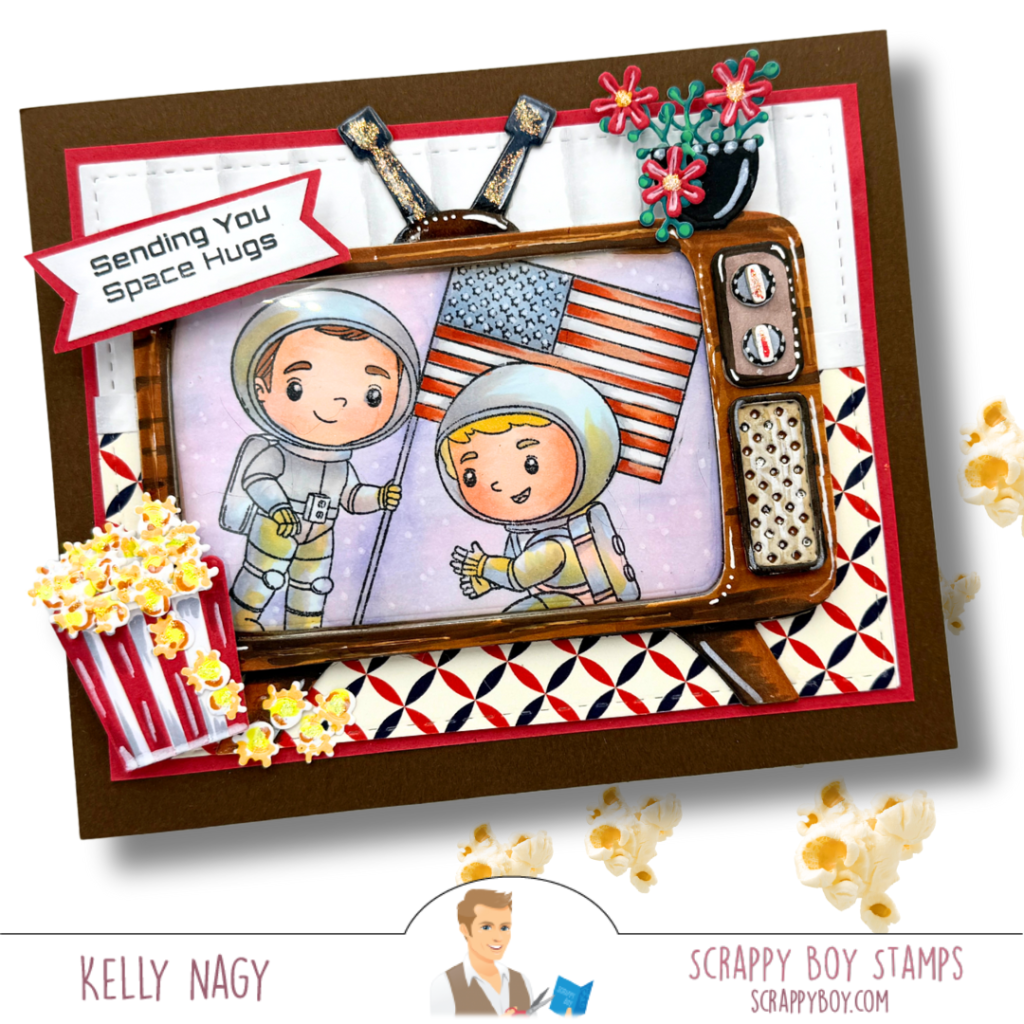
3️⃣ The Moon Landing 🚀🌕: Celebrate adventure and exploration with this spectacular card, perfect for dreamers and adventurers. This creation features the Moon Landing set paired with the fantastic Retro TV Set Die. 🌌✨
I hope these projects ignite your imagination and inspire your own crafting journey! 🌈
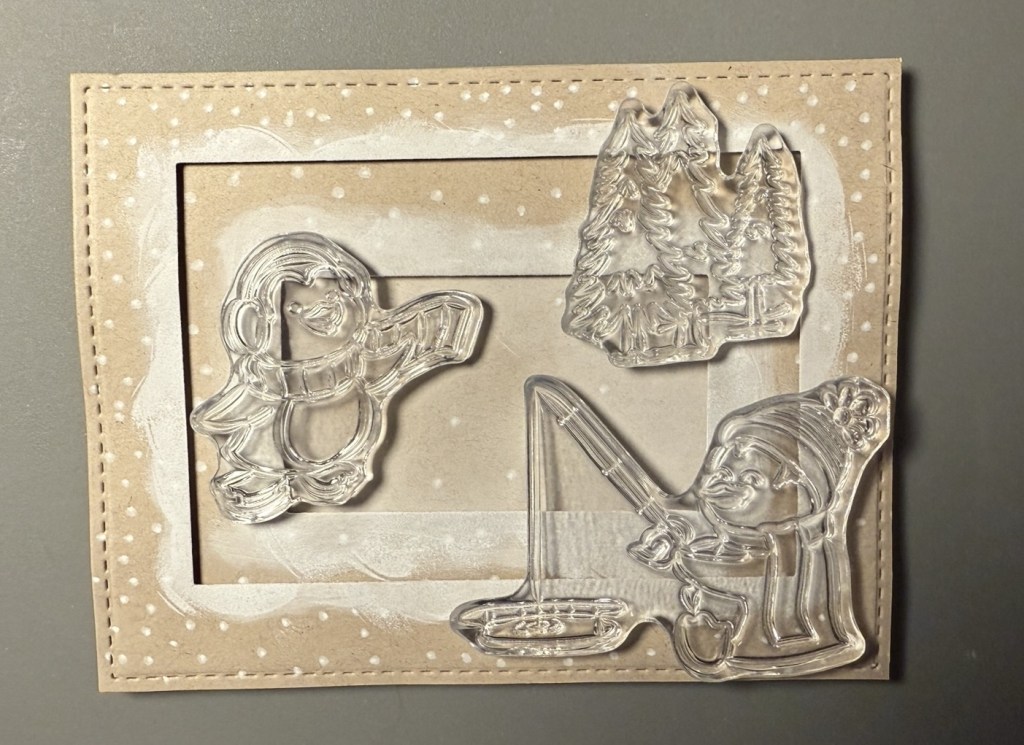
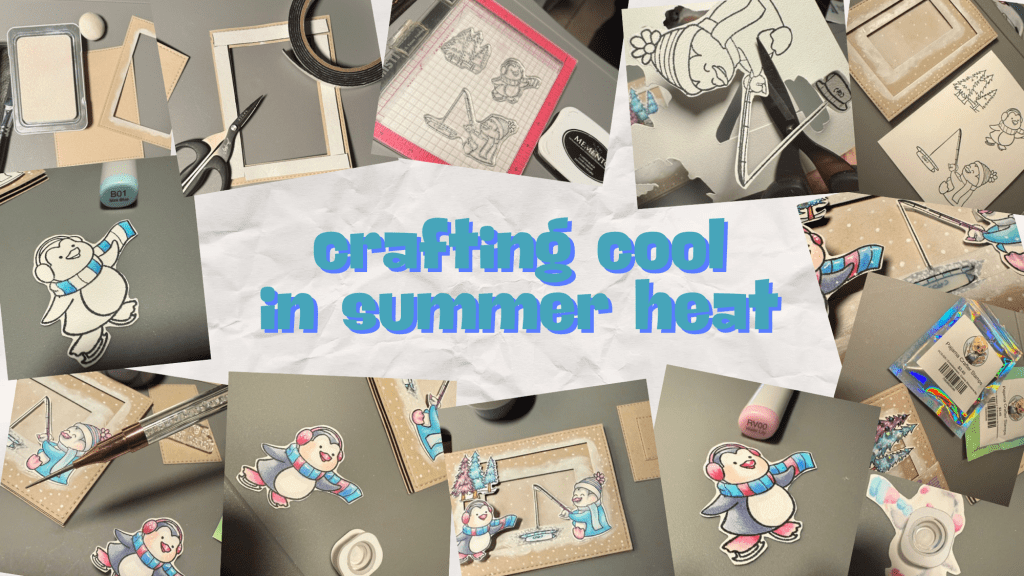
Hello, crafty friends! Today, I’m excited to showcase a special card I created using the adorable Sliding By stamps from Pajama Crafters Stamps. This card doesn’t just feature these adorable penguin images, it’s interactive too, thanks to an action wobbler that adds a fun twist!
💖 The Layers: I love how layers can bring a card to life! I started with a snowy background, layering various patterns and textures to create depth and interest. You’ll see in the photos how each layer flows seamlessly into the next, giving the card a beautiful winter feel.
Used dimensional foam tape to adhere layers, but gives separation for added interest.
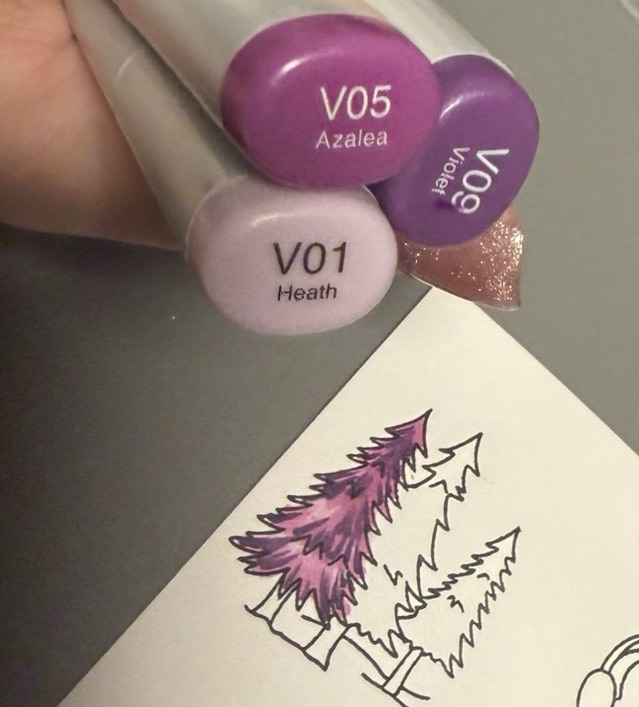
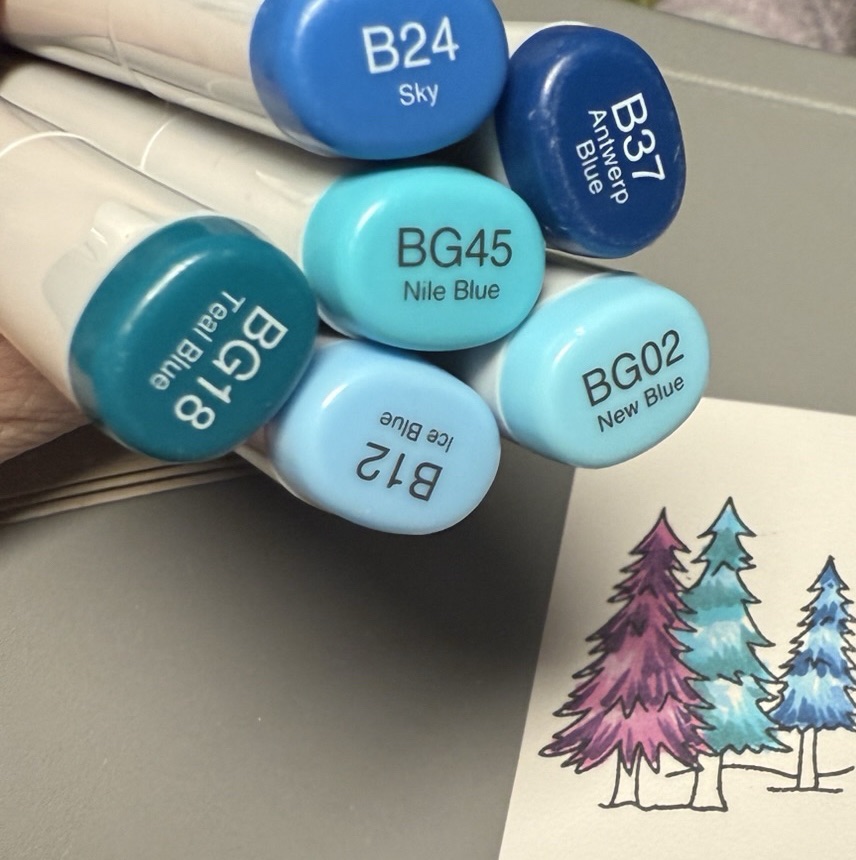
🎨 The Coloring: Coloring is where the magic happens! I used vibrant markers and some shading techniques to make the adorable penguins pop off the card. Each character has its own fun personality. I also chose a whimsical color palette for the trees. This was a fun combo to set the images apart from the kraft colored cardstock.
🎊 Interactive Fun with Action Wobblers: What’s better than a beautiful card? One that wiggles! An action wobbler adds an element of playfulness to my design. I’ve placed it behind one of the penguins, making it bounce every time you give it a gentle push. It brings an instant smile and makes the card even more special!
📸 Photo Highlights: Check out my photos below to see each step of the process, from layering to coloring, and see the action wobbler in action! I hope they inspire you to try something similar in your own crafting adventures.
👉 Don’t forget to explore all the fabulous stamps and supplies at Pajama Crafters Stamps! Your next crafting masterpiece is just waiting to be created!
Hello, crafty friends! This week, I’m excited to share some unique card creations that showcase the power and versatility of die cuts, using fabulous products from Scrappy Boy Stamps. While I usually gravitate towards stamping and coloring with alcohol markers, stepping out of my comfort zone with die cuts opened up a whole new world of creativity. Let’s dive into the details of my three fun projects.
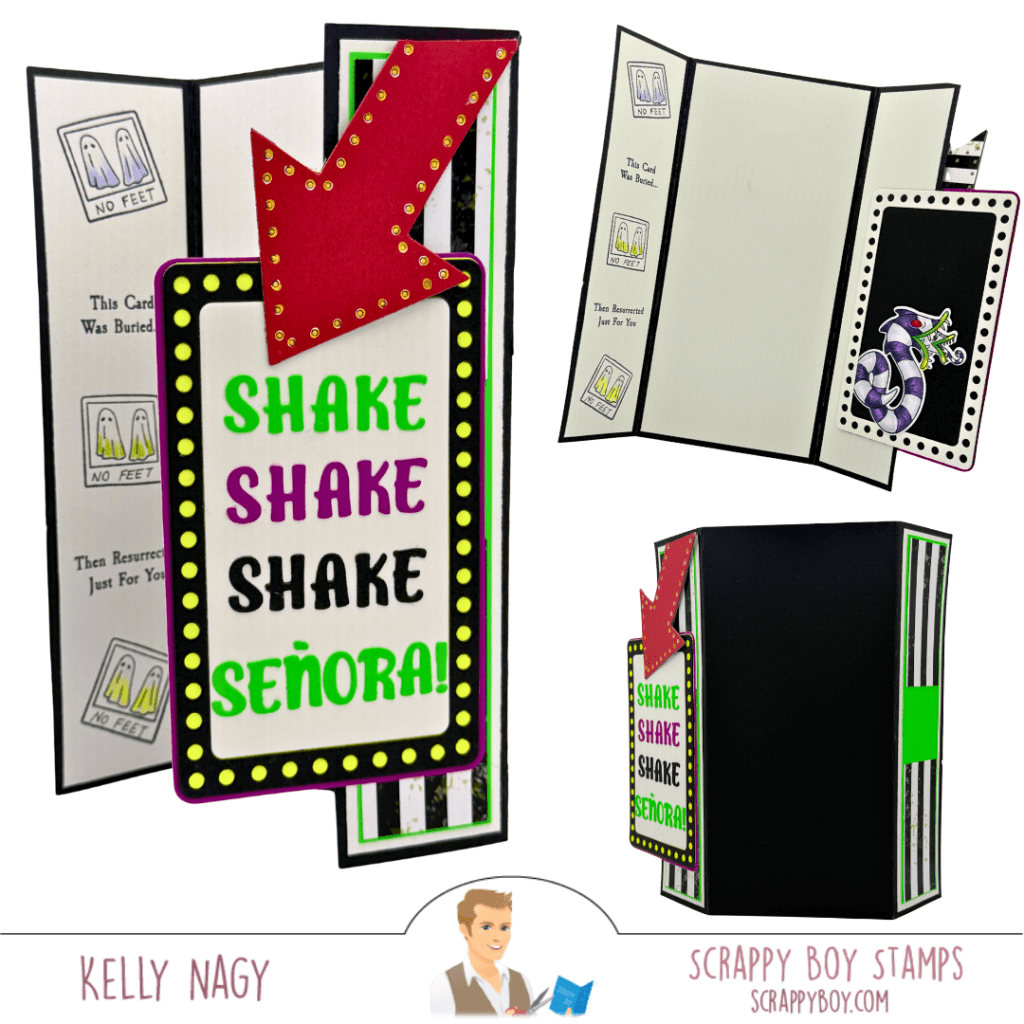
First up, we have a fun-fold marquee die cut card that instantly captures attention. Imagine saying anything you want using the Scrappy Boy Alphabet Dies framed within a dazzling marquee structure! The die cut serves as a stunning focal point, drawing the viewer in with its playful whimsy. To bring the card to life, I used bright colors and a custom sentiment as a nod to a fun scene from the film.
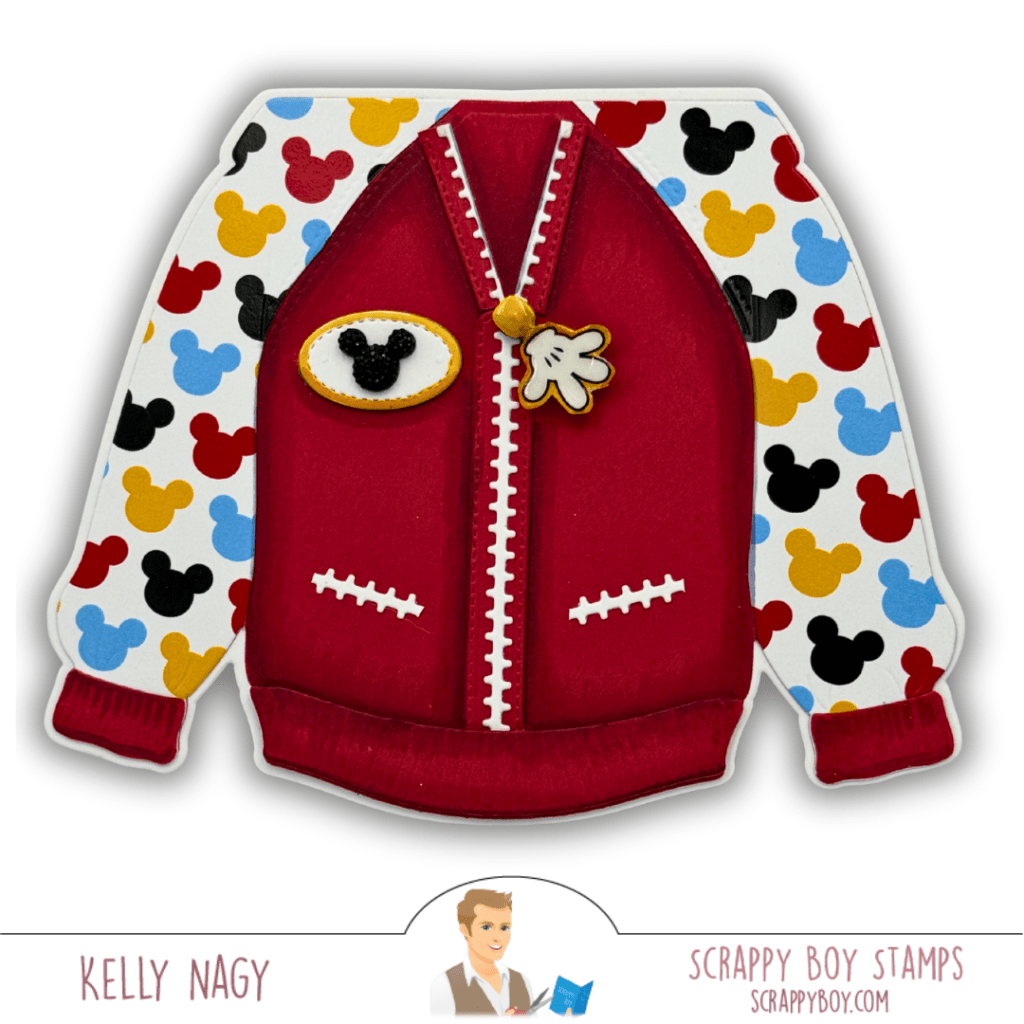
Next is a card that is a bit of a twist on traditional design—the previously released hoodie mini album card die cut transformed into a funky zipper jacket! 😍 To create this playful piece, I combined the hoodie die cut with the zipper from the backpack die set. The result? A fabulous jacket paired with the adorable amusement park pattern papers that give it a fun, themed flair. The details of the zipper add an element of surprise and creativity that’s bound to leave an impression. Plus, I couldn’t resist adding the cute mouse hand zipper pull for that extra touch of amusement park charm.
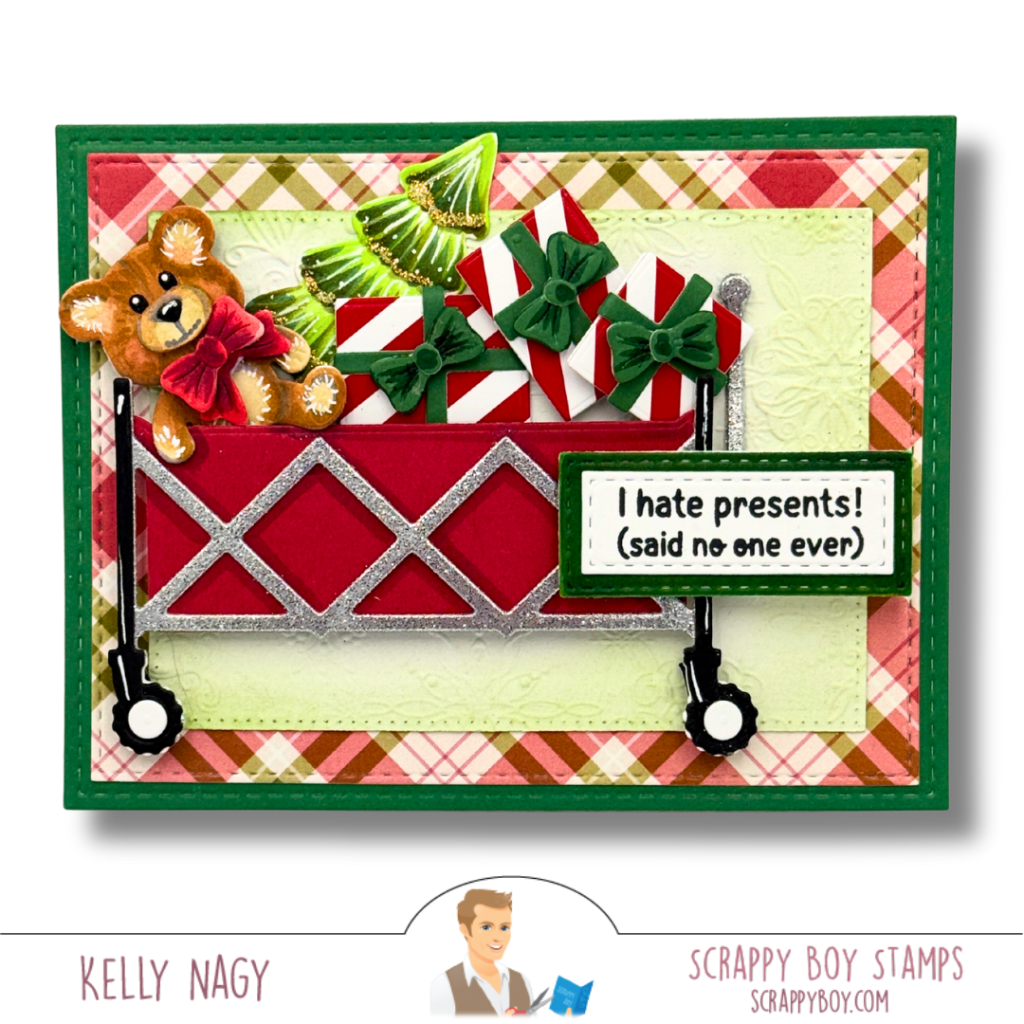
Last but not least, I crafted a delightful cart die cut card, brimming with holiday spirit! 🌟 This cart can be filled with anything your heart desires, but I chose to fill it with whimsical Christmas packages and a charming themed bear plush. I ised my alcohol markers to give the bear die additional personality. To achieve a festive look, I added a red ribbon on the bear’s neck, perfectly complementing the vibrant colors on the patterned paper. I even tucked in a Christmas tree die cut to enhance the holiday feel. The Christmas tree is taken from a previously released Cute Girls Stamp Set called Cute Girl Christmas Toys. These die cuts offer endless possibilities, allowing you to personalize cards for any occasion—birthdays, holidays, or just to spread some cheer!
Tips for Using Die Cuts Creatively:
Layering and Combinations: Don’t hesitate to mix and match different die cuts and Scrappy Boy sets to create something entirely new. My zipper jacket was a collaboration of different die sets that resulted in a unique design.
Play with Patterns: Use themed patterned papers like I did with the amusement park collection. They add depth and character to your card projects, making them stand out.
Think Outside the Box: Die cuts don’t have to be used as-is. Let your imagination run wild, and consider how you can modify or adapt them to fit your creative vision.
Final Thoughts
Die cuts are an incredible way to elevate your card-making game. With products from Scrappy Boy Stamps, the sky truly is the limit! Whether you’re crafting a fun movie scene or a festive holiday cart, using die cuts creatively can bring your stunning visions to life.
I can’t wait to see what you create using die cuts! Share your masterpieces and tag me—let’s inspire each other in this wonderful crafting journey! Happy crafting! 🎨💖✋