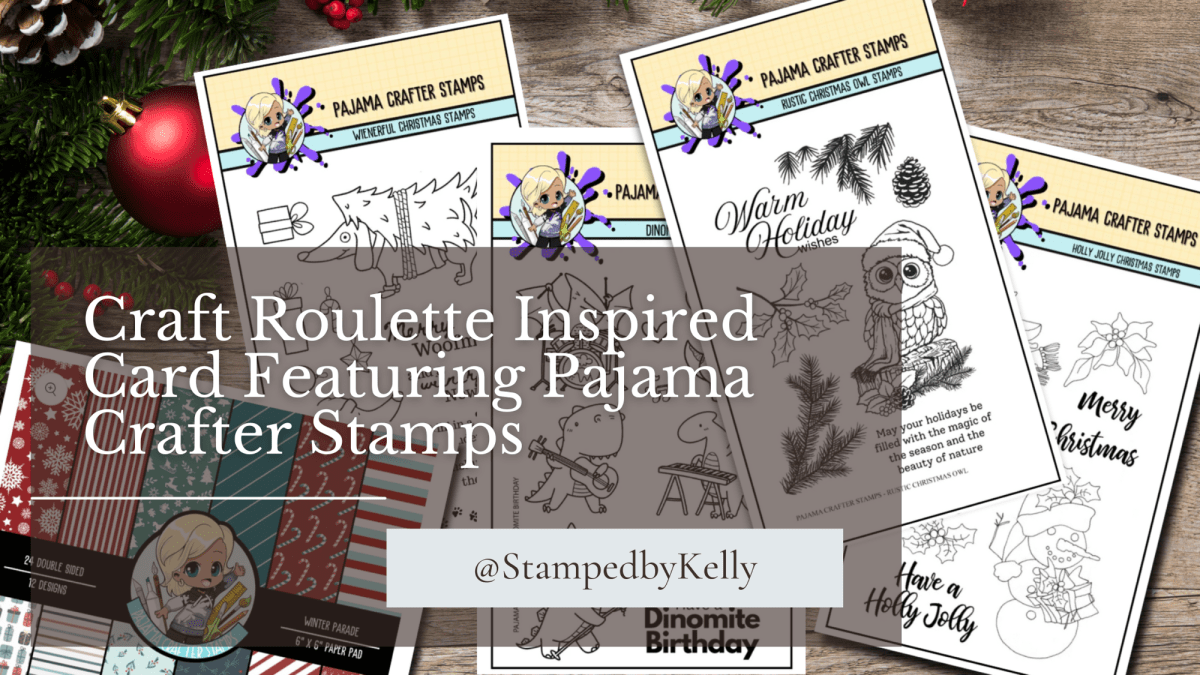

Craft Roulette inspired me this week — the challenge was a fun mash-up:
Project: HOLIDAY card
Colors: Forest Colors
Element: Toy(s)
Random: Wonky
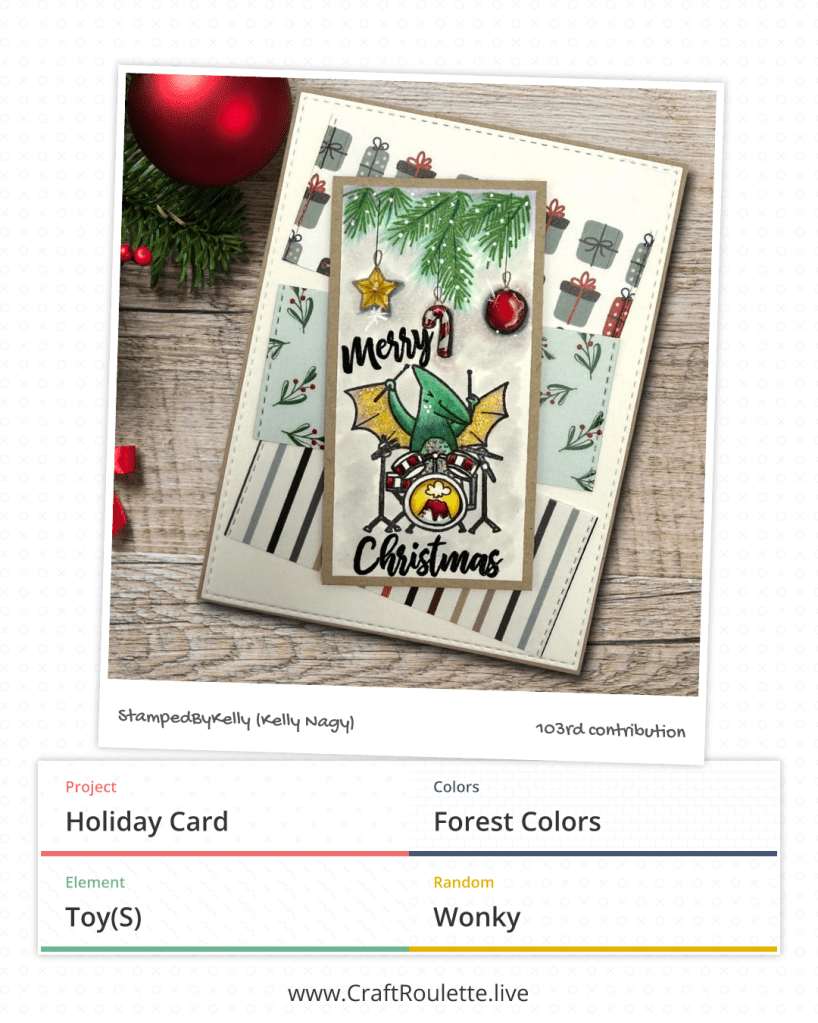
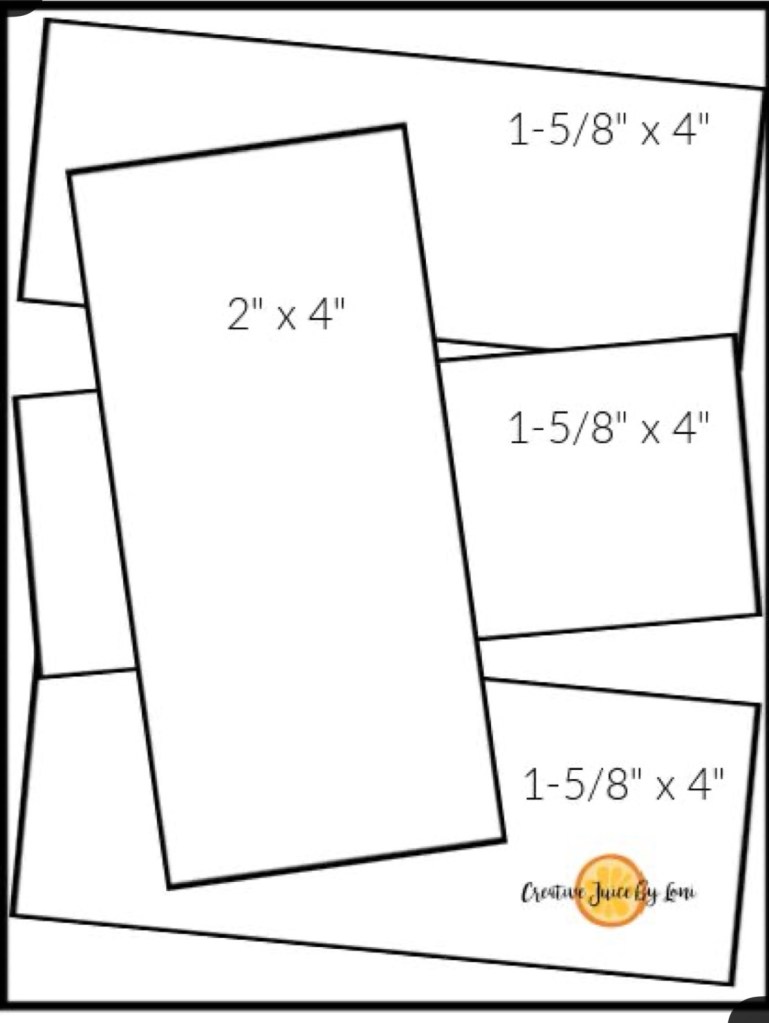
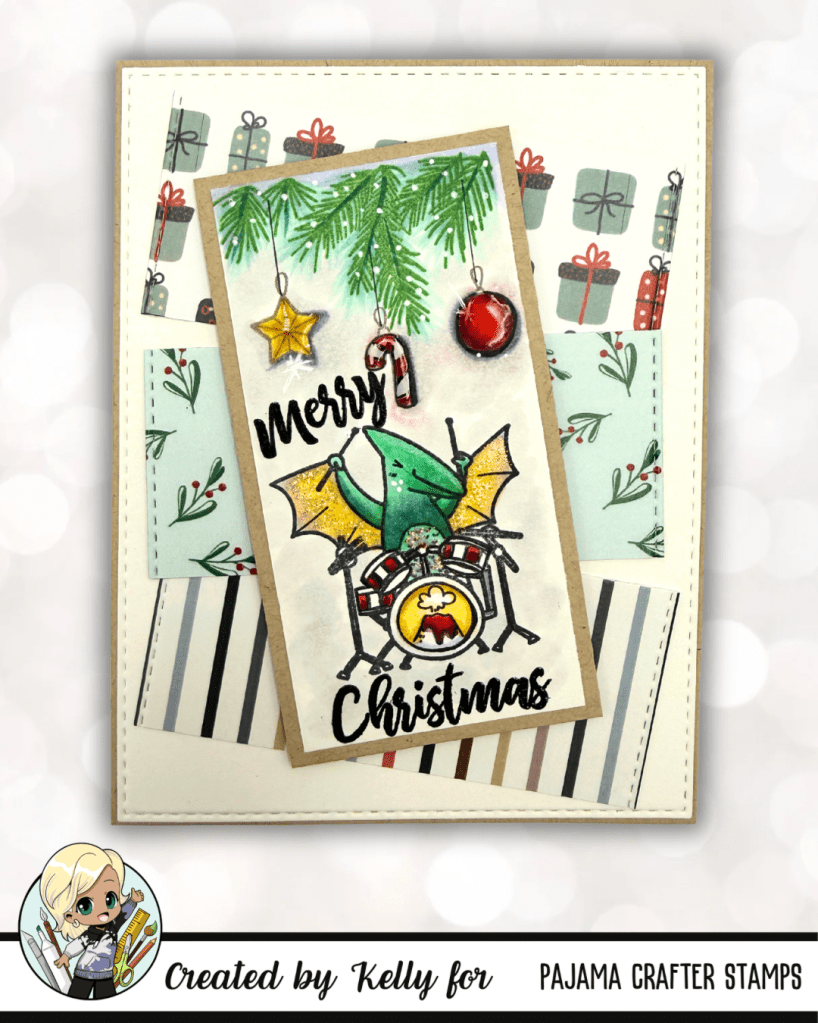
I leaned into cozy, rustic holiday vibes and made a wonky, toy-themed holiday card using Pajama Crafter Stamps’ products. I started with a kraft colored card base, layered a white card layer using a smaller stitched panel and 3 separate stitched strips of paper 1 5/8 inch tall with my stitched die and placed them in a wonky format to give the design playful movement. The sketch came from a Pinterest post I loved by Creative Juice by Loni, but I modified it with my stitched dies to add texture and interest, plus I wanted my patterned papers to be more centered and cut them down a bit to approximately 1 5/8 inch x 3 3/4 inch wide.
Design highlights
- Forest palette: deep pine greens, warm browns, golden yellow sunlight peeking through the trees and berry red accents for a classic holiday feel.
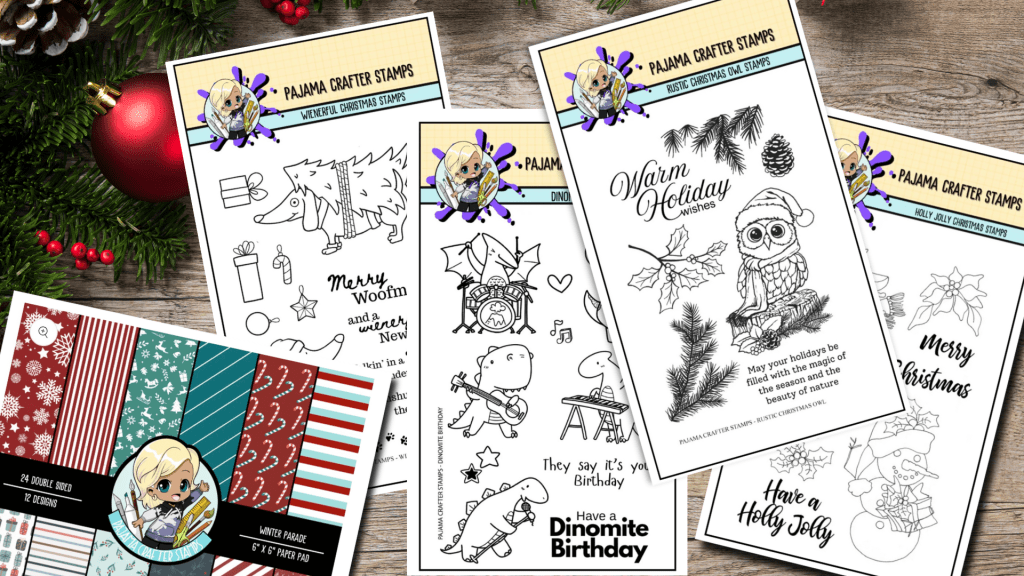
- Toys element: I used the dinosaur playing drums from Dino-mite Birthday Stamp Set, ornament images from the Weinerful Christmas Stamp Set, pine branch from the Rustic Christmas Owl Stamp Set and the sentiment from the Holly Jolly Christmas Stamp Set.
- Wonky layout: the tilted stitched panels using 3 different patterned papers from the 6×6 paper pack called WINTER PARADE. plus a slightly askew sentiment strip makes the card feel fun and handmade.
- Finishing touches: foam tape to pop up focal images, a dusting of white gel pen “snow,” and crystal 3-d glaze and Stickles for some glitz.
Products I used (affiliate link)
https://pajamacrafterstamps.com/STAMPEDBYKELLYBLOG (https://pajamacrafterstamps.com/STAMPEDBYKELLYBLOG)
- Winter Parade 6×6 paper pack
- Dino-mite Birthday Stamp Set
- Holly Jolly Christmas Stamp Set
- Rustic Christmas Owl Stamp Set
- Weinerful Christmas
Quick how-to (5 minutes)
- Cut card base out of Kraft card stock. 5 1/2 x 4 1/4.
- Cut a white cardstock out if a slightly smaller stitched A2 sized stitched rectangle to allow some kraft color base to perk through.
- Cut 3 strips of patterned paper from the Christmas Parade Paper Pack at 1 5/8 in x 4 or use a size smaller A2 layering rectangle to add stitches on the edge of slightly smaller stitched panel; adhere each panel a little wonky/askew. See photo.
- Stamp the dinosaur playing drums image towards the bottom of a white piece if cardstock measuring 1 3/4 2 in x 3 3/4 in. Color with your favorite medium. I used Olo and Copic together, with some white pencil.
- Stamp pine branch on top and select 3 small ornaments and stamp haphazardly under the branch, connecting each ornament to the tree using a straight edge and a black fine liner pen.
- Adhere the stamped panel to a piece of kraft cardstock 2×4 inches. using dry adhesive mini tape runner. I used the Tape Runner MINI.
- Adhere all pieces except the stamped and colored matted panel using the Tape Runner Mini from http://www.TapeRunner.com. For 10% off use code: KELLY10
- Add sentiment, Stickles, crystal effects glaze and white gel pen snow; this allows you to tuck a sparkly accent or two.
- Add the stamped panel with double-sided foam tape for added dimension.
- I used a dirty ink-blending brush with some leftover Walnut Stain Distress Oxide Ink from Ranger. It took a little of the brightness out of the stark white panels to give a rustic or dreamy feel. You can simply add a small amount of the ink to a clean brush snd ink blend off most onto a piece of scrap paper and THEN to your project. It’s very subtle.
If you liked this, try the same sketch with different color combos or swap the images for other critters, toys or ornaments. Thanks for stopping by — and if you shop Pajama Crafter Stamps, I’d appreciate you using my affiliate link above!

Great news — there’s an Instagram hop today, Friday, December 19! Stop by the Pajama Crafter Stamps Instagram page to get started for your chance to win a gift card to use in the shop. HOP on over to my INSTAGRAM page at StampedByKelly to start. We’d love to see you join the fun — hop, comment, and enter to win!
Happy Crafting!