Create with Polar Pals: Crafty Tag Inspiration!

Featuring Polar Pals Stamp Set from PCS

Hello, crafty friends! 🌟

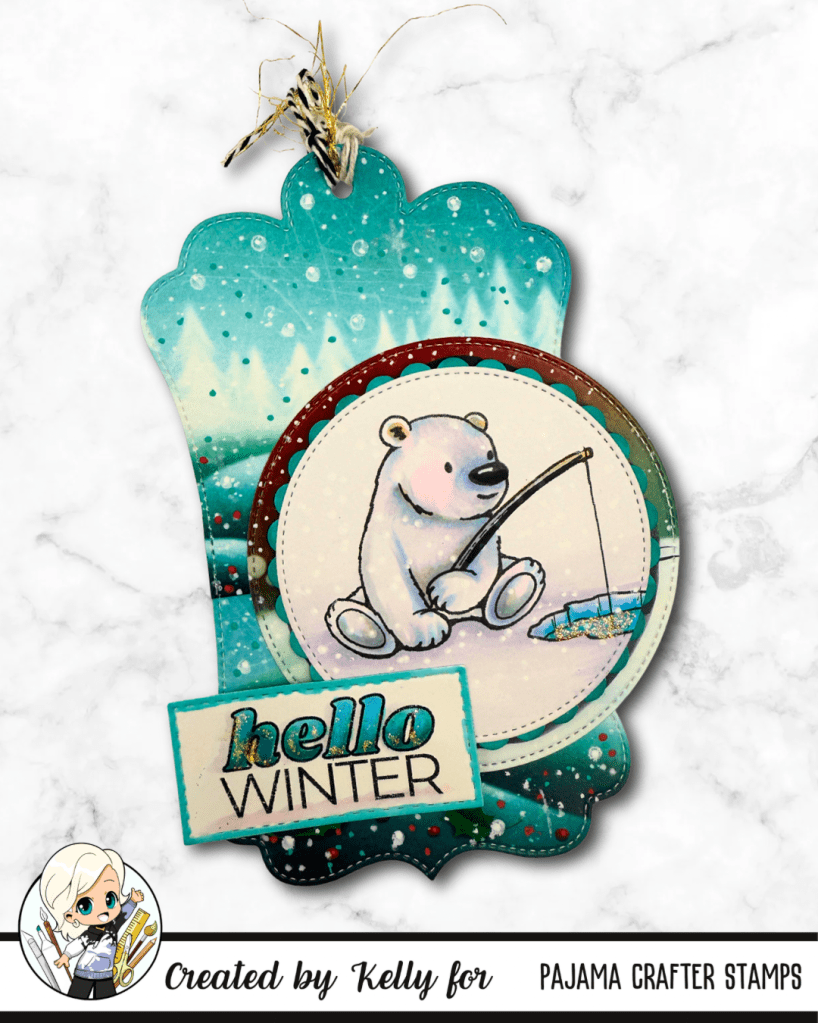
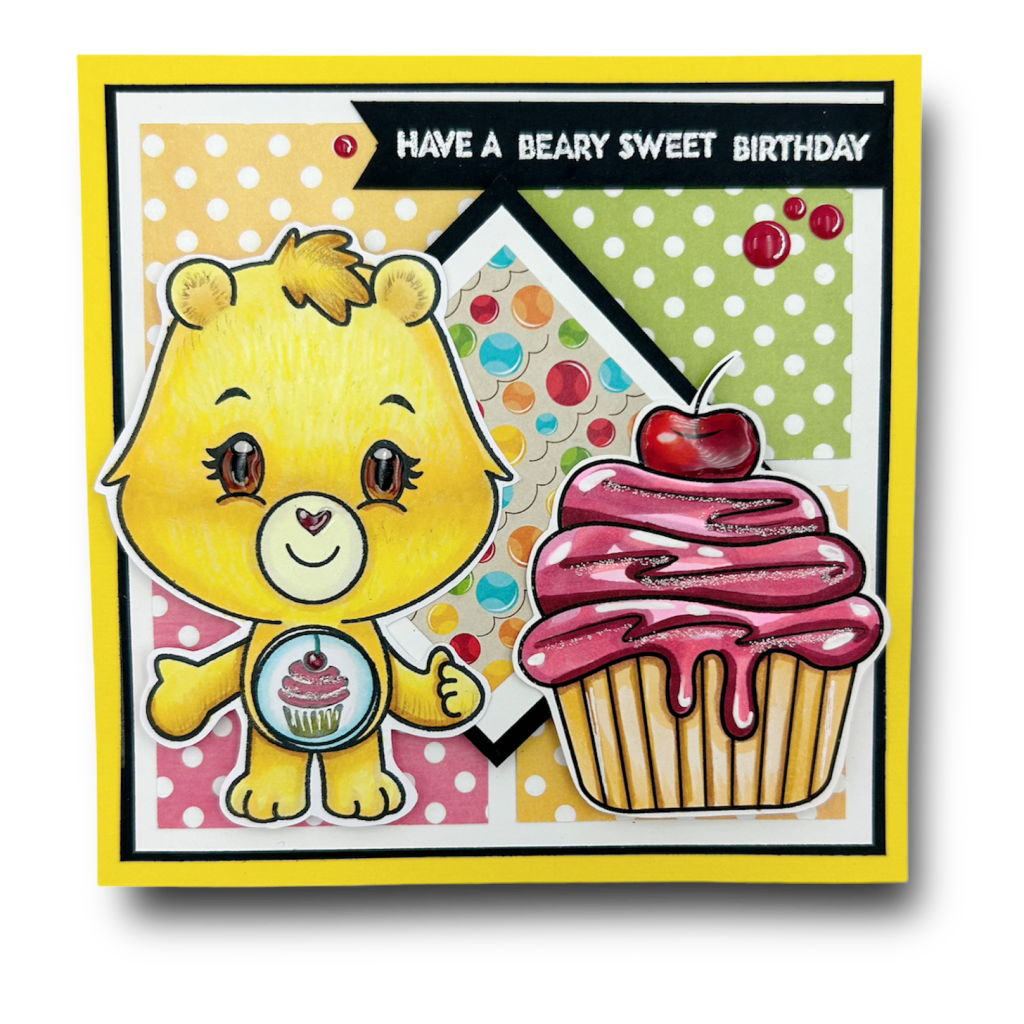
I’m excited to share a fun project featuring one of the newly released stamps from Pajama Crafter Stamps called Polar Pals! This adorable stamp set is perfect for the cozy holiday season, and I’ve paired it with some dies from my stash to create a layered tag that adds a special touch to any gift. 🎁✨

This layered tag isn’t just a pretty addition to gifts; you can also think outside the box! Here are a few more creative ways to use tags:

  • Elements on a Scrapbook Page: Incorporate your tags as decorative elements on your scrapbook pages. They make great titles or embellishments!
  • Christmas Tree Ornaments: Use your tags as ornaments for your Christmas tree, adding a personal and handmade touch to your holiday decor.
  • Banners & Garlands: Create a beautiful banner with tags strung together to celebrate special occasions or to decorate your craft space.
  • Bulletin Board Décor: Jazz up your bulletin boards with themed tags that can be changed out seasonally to keep things fresh.

There’s so much to do with tags, and I hope this project inspires you to get crafty!

And if you’re interested, there’s a fantastic hop going on right now, where you can participate for a chance to earn a prize! The magic all starts at Pajama Crafter Stamps’ Instagram page.

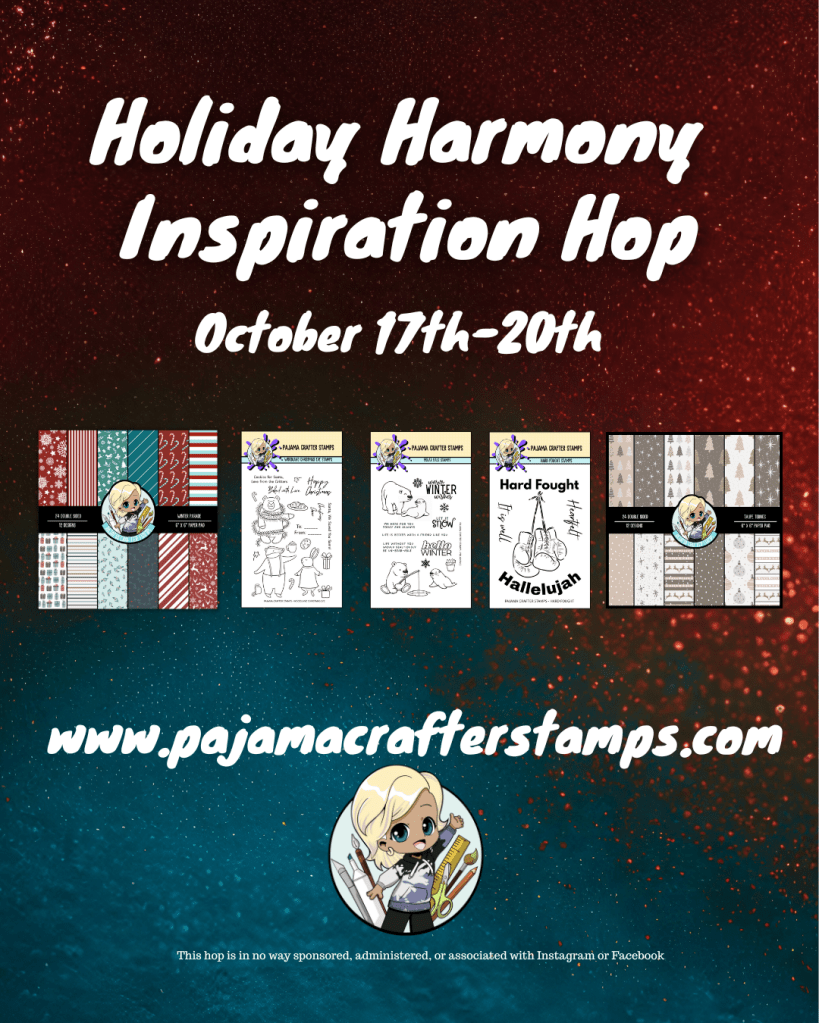
Be sure to check out the latest releases at Pajama Crafter Stamps; I promise you won’t be disappointed.

Featuring Woodland Christmas Eve Stamps from PCS

If you love the projects I create and appreciate my inspiration, I’d be overjoyed if you could click on my affiliate link below. It does not cost you anything extra but lets Joy and her family know that you’re enjoying my work: Pajama Crafter Stamps Affiliate Link (https://pajamacrafterstamps.com/STAMPEDBYKELLYBLOG).

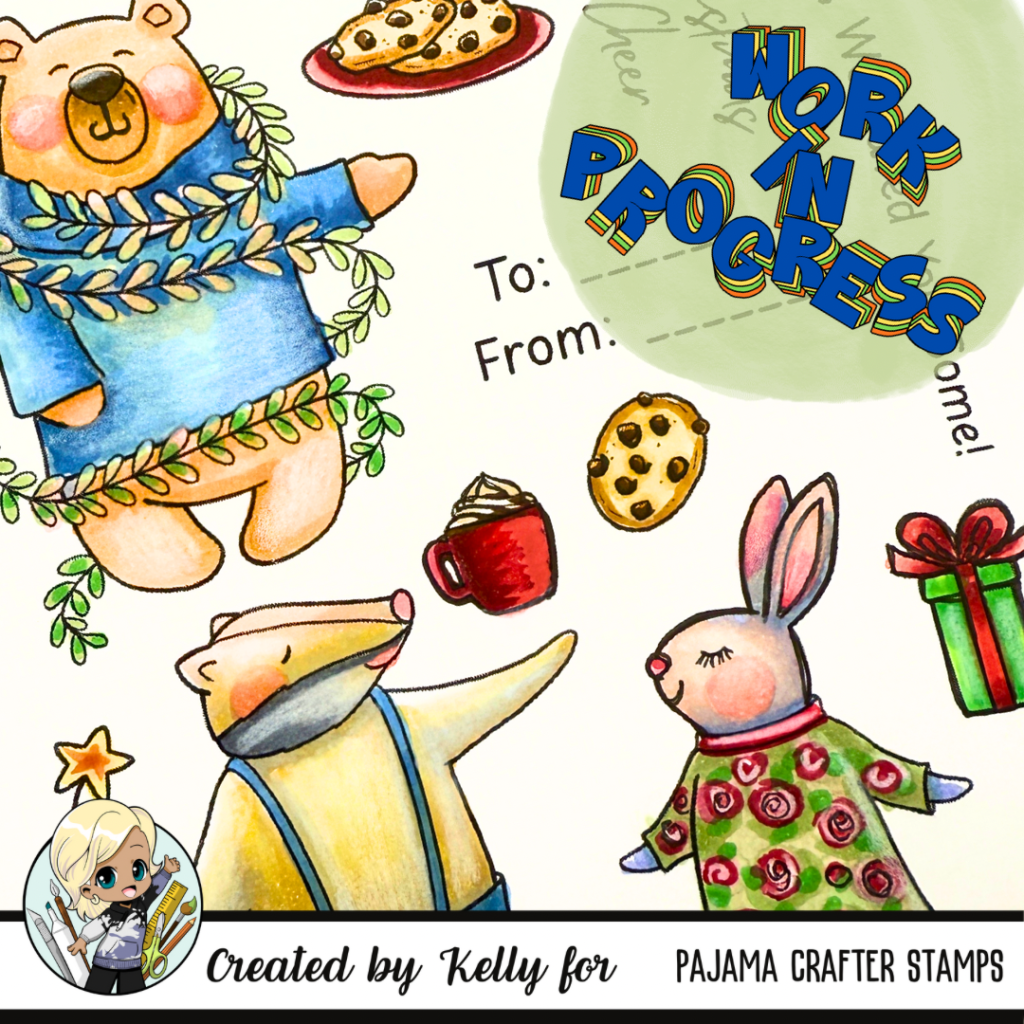
Also, to see my completed projects using these colored up images from the previous WORK IN PROGRESS post, please follow me on Social Media @StampedbyKelly

Thank you so much, and I hope you all have a wonderful weekend filled with joy and creativity! 💖

Happy Crafting!

Unleashing Creativity: The Magic of Die Cuts with Scrappy Boy Stamps 🎉✂️

Hello, crafty friends! This week, I’m excited to share some unique card creations that showcase the power and versatility of die cuts, using fabulous products from Scrappy Boy Stamps. While I usually gravitate towards stamping and coloring with alcohol markers, stepping out of my comfort zone with die cuts opened up a whole new world of creativity. Let’s dive into the details of my three fun projects.

First up, we have a fun-fold marquee die cut card that instantly captures attention. Imagine saying anything you want using the Scrappy Boy Alphabet Dies framed within a dazzling marquee structure! The die cut serves as a stunning focal point, drawing the viewer in with its playful whimsy. To bring the card to life, I used bright colors and a custom sentiment as a nod to a fun scene from the film.

Next is a card that is a bit of a twist on traditional design—the previously released hoodie mini album card die cut transformed into a funky zipper jacket! 😍 To create this playful piece, I combined the hoodie die cut with the zipper from the backpack die set. The result? A fabulous jacket paired with the adorable amusement park pattern papers that give it a fun, themed flair. The details of the zipper add an element of surprise and creativity that’s bound to leave an impression. Plus, I couldn’t resist adding the cute mouse hand zipper pull for that extra touch of amusement park charm.

Last but not least, I crafted a delightful cart die cut card, brimming with holiday spirit! 🌟 This cart can be filled with anything your heart desires, but I chose to fill it with whimsical Christmas packages and a charming themed bear plush. I ised my alcohol markers to give the bear die additional personality. To achieve a festive look, I added a red ribbon on the bear’s neck, perfectly complementing the vibrant colors on the patterned paper. I even tucked in a Christmas tree die cut to enhance the holiday feel. The Christmas tree is taken from a previously released Cute Girls Stamp Set called Cute Girl Christmas Toys. These die cuts offer endless possibilities, allowing you to personalize cards for any occasion—birthdays, holidays, or just to spread some cheer!

Tips for Using Die Cuts Creatively:

  • Layering and Combinations: Don’t hesitate to mix and match different die cuts and Scrappy Boy sets to create something entirely new. My zipper jacket was a collaboration of different die sets that resulted in a unique design.
  • Play with Patterns: Use themed patterned papers like I did with the amusement park collection. They add depth and character to your card projects, making them stand out.
  • Think Outside the Box: Die cuts don’t have to be used as-is. Let your imagination run wild, and consider how you can modify or adapt them to fit your creative vision.

Final Thoughts

Die cuts are an incredible way to elevate your card-making game. With products from Scrappy Boy Stamps, the sky truly is the limit! Whether you’re crafting a fun movie scene or a festive holiday cart, using die cuts creatively can bring your stunning visions to life.

I can’t wait to see what you create using die cuts! Share your masterpieces and tag me—let’s inspire each other in this wonderful crafting journey! Happy crafting! 🎨💖✋

Buzzing with Creativity: A Card Featuring the “Bruno Bee Keeper” Stamp Set 🌼🐝

Hello, fellow crafters! 💖

Featuring Bruno Bee Keeper & The Bees Knees Paper Pad

I am absolutely buzzing with excitement to share my latest creation with you all—a vibrant A2 sized card using the adorable “Bruno Bee Keeper” stamp set! This set is simply a delight, packed with charming bears, lovely flowers, and a host of other fun elements that bring a sweet touch to any project.

Card Details:
For this card, I chose a sunny yellow honeycomb paper from the coordinating 6×6 pattern paper pack. It’s just as cute as it sounds, featuring 24 double-sided sheets that include the most delightful bee and honeycomb designs! 🐻🍯

The stamp set includes various images, such as:

  • Cute bears 🐻
  • Flowers 🌸
  • Birds 🐥
  • Bees 🐝
  • A bee house 🏠
  • A tree with a beehive 🌳🍯

I added some sparkle to the bee’s wings using Stickles and created a soft cloud background with a stencil. For extra shine, I used Crystal Effects Glaze on the honey drips from the jar and the hive. The result is a card that truly shines, just like honey! ✨

Sweet Sentiments:
The “Bruno Bee Keeper” set also includes lovely sentiments like “Bee Brave” and “You’re My Honeybee,” which add a personal touch to every card. 💖 These messages are perfect for showing support and affection to friends and loved ones.

Join the Buzz!
Your support means the world to me! 💕 Please take a moment to like or comment if you enjoy what you see—it really helps me know that my designs resonate with fellow crafters and friends.

If you’re looking for cute and unique craft supplies, definitely check out http://www.pajamacraftersstamps.com (http://www.pajamacraftersstamps.com) for their amazing offerings!

It would be SWEET as HONEY if you would follow me on social media @stampedbykelly

Happy crafting!


Don’t forget to share your thoughts and tag me in your creations using the “Bruno Bee Keeper” stamp set! Let’s spread the joy of crafting together! 🐝✨

Build A Caring Bear….Kisses??!!

Belly Badges from set fit perfectly to bottom of all standard size Hershey’s Kisses.

The Build a Caring Bear set will certainly be a great addition to any paper crafter’s stash. This is a versatile set that is great for cards, planners, scrapbook pages and even party decor and favors!!!

The belly badge goes in the middle of the bear’s tummy, but these badges are also the perfect size to adorn the bottom of a Hershey’s Kiss!

If you’re looking for a fun and unique way to personalize your treats inside your treat bags, look no further than the soon to be restocked BUILD A CARING BEAR set from Stamp Anniething. These fun images can be stamped in all black, stamped with your favorite color and are the perfect size to decorate the bottom of a Hershey’s Kiss, and with a wide variety of themed emblems in the set, you can customize each treat to fit your holiday, event or celebration.

Circle size stamps can be easily fussy cut out or use a small circle die or punch

Build a Caring Bear belly badge stamps have a variety of different emblems to match the themes of your party or event. Here are just a few ideas:

  • Sunshine – Get Well, Be Happy, Don’t worry
  • Heart – Love, wedding (emboss in gold or silver), Anniversary, Valentines
  • Clover – St. Patricks Day, sending luck
  • Graduation Hat – Graduation of any kind
  • Stormy Clouds- Wedding Shower, Bridal Shower, Baby Shower
  • Cupcake – Birthday
  • Tree – Christmas
  • Star – Job Well Done, Memorial Day, Patriotic

Once you’ve chosen your badges, it’s as simple as attaching them to the bottom of each Hershey’s Kiss using a dab of frosting or melted chocolate. You can also adhere using double-sided tear/paper tape. Not only do these badges add a colorful and fun touch to your treat bags, but they also make each treat feel more personalized and thoughtful.

So the next time you’re planning a party or event, consider adding Build a Caring Bear belly badges to your list of decorations. With their colorful designs and customizable options, they’re sure to be a hit with guests of all ages! Happy Crafting!

Have A Beary Sweet Birthday featuring Stamp Anniething

Card features Build A Caring Bear
Limited Edition Set by Stamp Anniething

The art of gift-giving isn’t just about what’s inside the box. Adding a personal touch to your greeting card can make all the difference, especially when it’s for someone very special. That’s why I’m excited to share with you this really cute new set from Stamp Anniething that can be customized for any occasion and recipient.

Image is DISTORTED on purpose to prevent theft

I created a birthday card using the Build A Caring Bear set, as well as patterned paper from the SUMMER TROPICS pack as a background. So, let’s dive in and see how to make this versatile square card.

The first thing you’ll need is a 5 1/4 in square card base. This size will provide enough space to showcase your creativity while still being efficient enough to mail. Next, you’re going to create your characters using the Build A Caring Bear set. The great thing about this set is that you can mix and match the different elements like faces, arms and belly tag to create your unique bear. I decided to go with a Happy Cupcake Bear because I wanted to create a festive and colorful birthday card.

Once I BUILT my bear, I started creating a fun birthday scene. To do this, I downloaded a free digital image that coordinated with the image on my bear’s belly. It’s easy to do and it provides a great way to add a personal touch to your card. I went with a cupcake!

Free Digital Image – unknown source, so sorry

I wanted to create texture on the card, so I used patterned paper from the SUMMER TROPICS pack to make the background. The bright colors and versatile patterns are perfect for a celebration and it compliments the bear image well. I cut a total of four (4) two-and-a-quarter inch squares and a 2 1/2 inch square in white and a 2 3/4 inch square in black to frame and then place in center on the diagonal using double-sided foam tape. I had a small square scrap I added from the Pets Grab & Go Box (no longer available), that I added to the center of the square.

6×6 paper pack – 24 pages

Finally, I added a sentiment to the top right of the card, wishing the recipient a BEARY sweet birthday. It’s simple, but heartfelt, and it ties everything together nicely. Added some Enamel Dots from Stamp Anniething to repeat the pops of color in a triangular pattern, to draw your rye from the sentiment to the cherry on the cupcake and back to the sentiment again.

Build A Caring Bear Birthday Card

In conclusion, with little effort, anyone can make a sweet, personalized birthday card using the Build A Caring Bear set and Summer Tropics patterned paper. You can change the occasion, color scheme or even switch out the face, belly badge and arm positions to create a unique design tailored to whomever you’re giving it to. It’s a thoughtful gesture that shows you care, and the recipient will surely appreciate the time and effort put into it. Happy creating!

You’re Sweet Card

One of my favorite things to do when I get a new stamp set is look at all of the elements and think about what I could do with the images DIFFERENTLY than what they were originally intended. The Pretty Little Things set from Scrappy Boy Stamps has so many fun elements…….like the cute little teddy bear, the toy train set and the rocking horse.

I decided to challenge myself and make a card using only one element from this stamp set, the teddy bear. This teddy bear can be used in so many ways, like as kid’s best friend, in my first SBS card post, safely tucked into his dresser drawer or like one of my all time favorite crafting candies, gummy bears!

When you have smaller elements from a set that you would like to feature on a card, I have found one of my favorite ways to do this is by using a stamp positioner and a wreath-builder stencil like one from Gina K Designs.

I started by cutting a piece of white Sweet Sentiment Paper 4 inches by 4 inches square. I placed the wreath-builder stencil securely in the corner of the stamp positioner, then placed the 4×4 square piece of paper in the stencil opening and lined up my bear stamp on the paper and picked up the stamp with the positioner. I inked up the bear with Simon Says Stamp Intense Black Ink and stamped the bear in my Tim Holtz Stamp Positioning Tool. I then rotated my 4 x 4 inches square piece of paper, continuing to re-ink and stamp my image until I had stamped the bear in a complete circle to form a wreath. I wanted to make an all occasion card and came across one in my craft supply arsenal that said, “You’re Sweet” and used my stamp positioner to carefully center the sentiment in the middle of the gummy bear wreath. This sentiment is from an older Paper Smooches set called “Giddy Gumdrop.”

Then, I colored up my images using rainbow colors from my Copic collection as follows:

  • Dark Pink: RV02, RV09, RV14
  • Light Pink: R85, R81, R83
  • Orange: YR02, YR16, YR18
  • Yellow: Y02Y08, Y19
  • Light Green: G00, G14, G24, G43
  • Dark Green: G07, G14, G24
  • Blue: B00, B60, BG05
  • Violet:BV00, B63,V000, V15

When I colored the bears, I tried to leave the nose/snout part of the bear lighter, so that it gave more dimension. I thought that the dimensional bear would have their nose sticking out some and catching the light reflecting off of it, so that part of the bear was lighter, as well as the center of his tummy. I then wanted to give my bears a little sparkle and use a Wink of Stella Clear Pen to apply a little glittery shimmer to them. I finished the bears by applying Hero Arts Lacquer Pen to apply the crystal clear glaze over the bears and allowed to dry completely.

To complete my card, I double-matted my colored 4×4 piece with the bears using some white glitter cardstock, some FSJ/Spellbinders lemongrass cardstock. I then created the main card base out of the same lemongrass cardstock forming a 7.5 in x 7.5 in square base. I then cut another piece of FSJ/Spellbinders watermelon fusion cardstock 7.25 x 7.25 inches square. I then rummaged through my massive collection of patterned paper to select a plaid pattern that coordinated with the colors of my bears. This was cut down to 7×7 inches square and assembled all the various layers to finally form my finished card.

I did go back and forth wondering if I should add some spatter or some sequins, but I loved these bears so much and wanted them to leave it simple and clean…..and let them stand out on their very own. Do any of you struggle with knowing when to stop or letting your image stand out on their own by “embracing the white space?” Leave your response below…I’d love to know!

Thanks for stopping by and don’t forget to get crafty!