Stretch your Christmas stamps beyond the holidays! See how simple color changes turn one festive stamp set into handmade cards for any celebration.
I have a new technique obsession to share today!
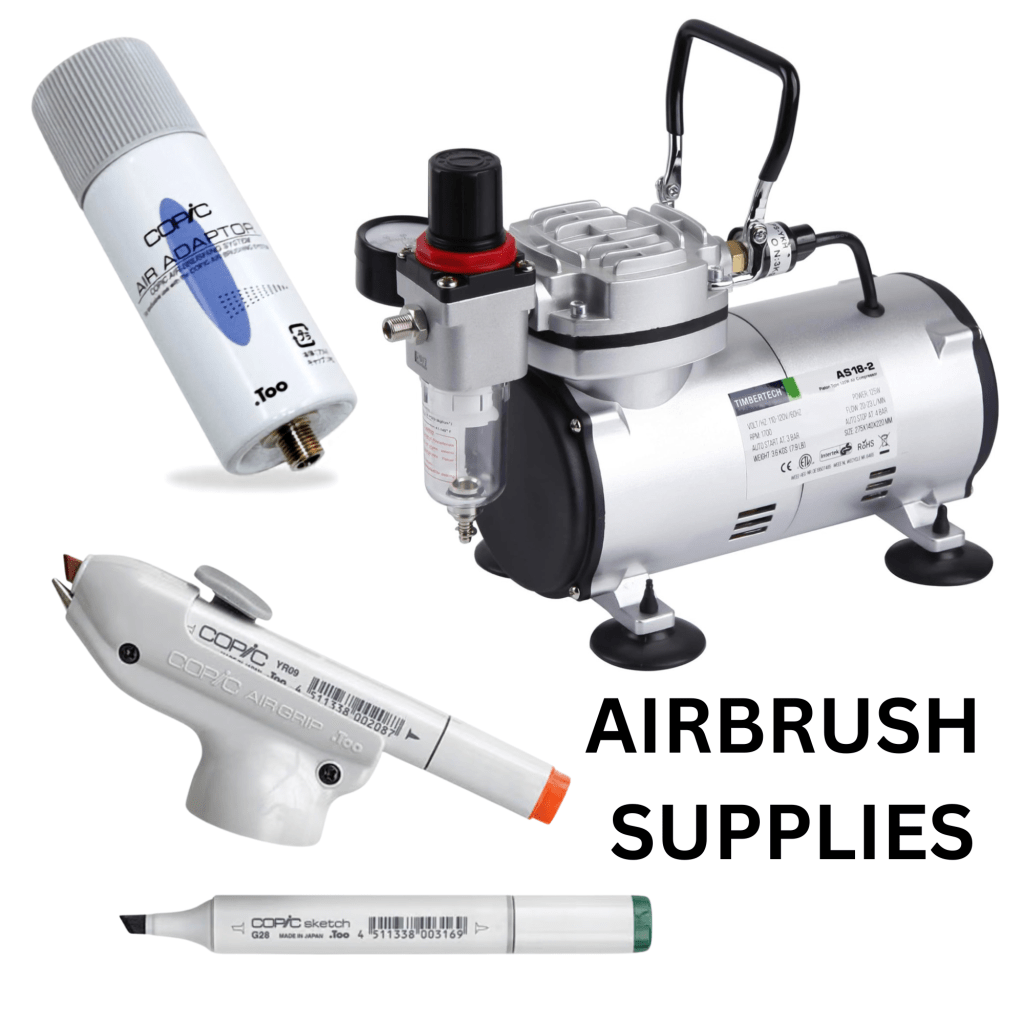
Example of what I used to create airbrushed backgrounds
I’ve been experimenting with my Copic markers and an air compressor attachment, and I LOVE the soft, blended backgrounds I can create. Even better? This technique is easy to customize simply by changing your colors.
Yes, it’s designed for Christmas—but who says it has to stay there?
🐱 Same Stamp. Different Celebration.
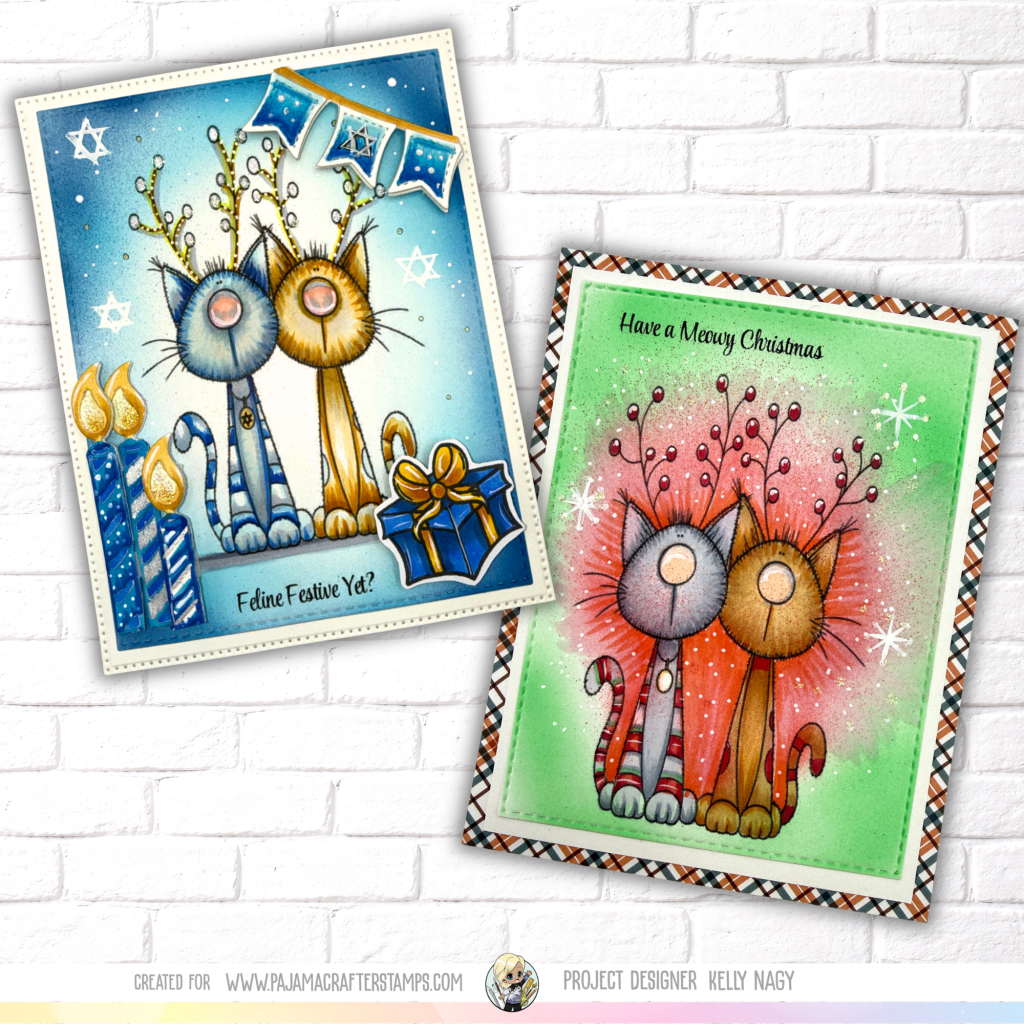
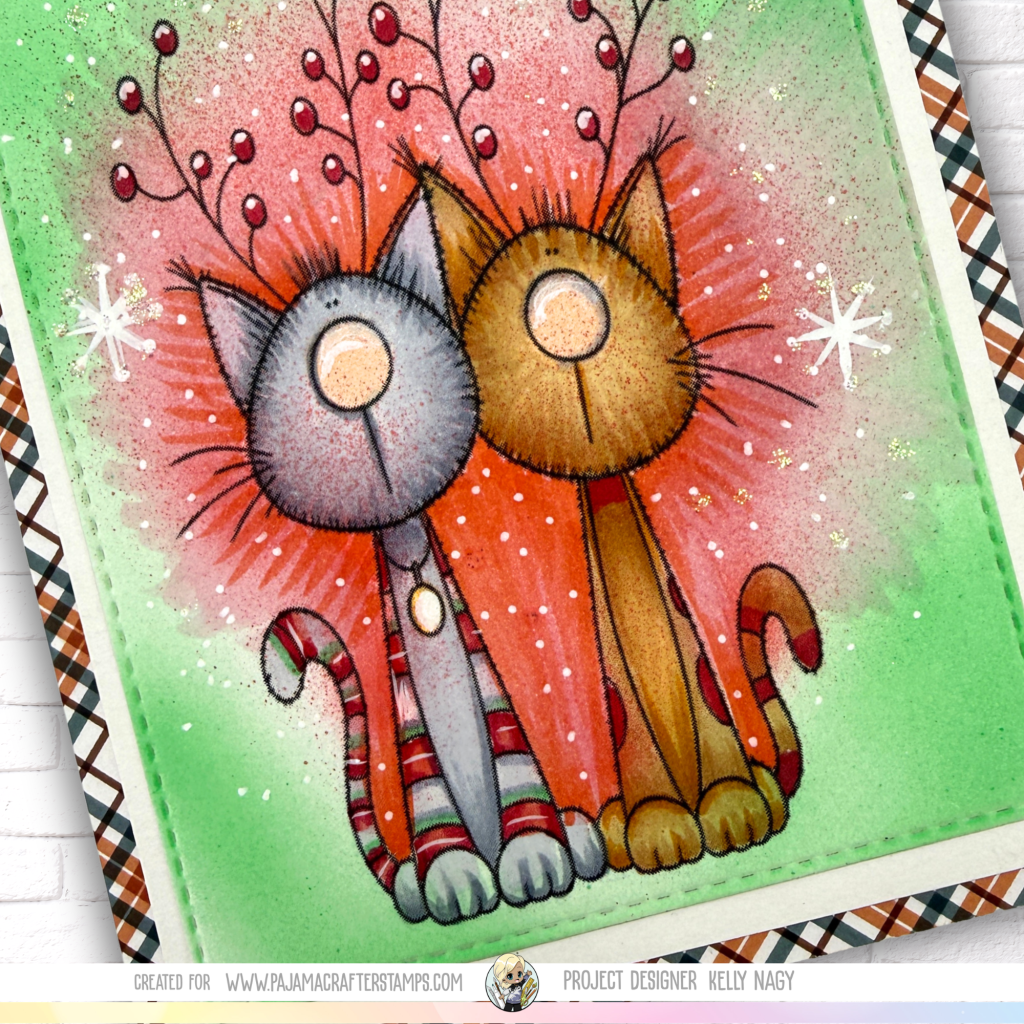
For one card, I embraced Christmas with festive reds and greens.
❤️ 💚 🤍 CHRISTMAS
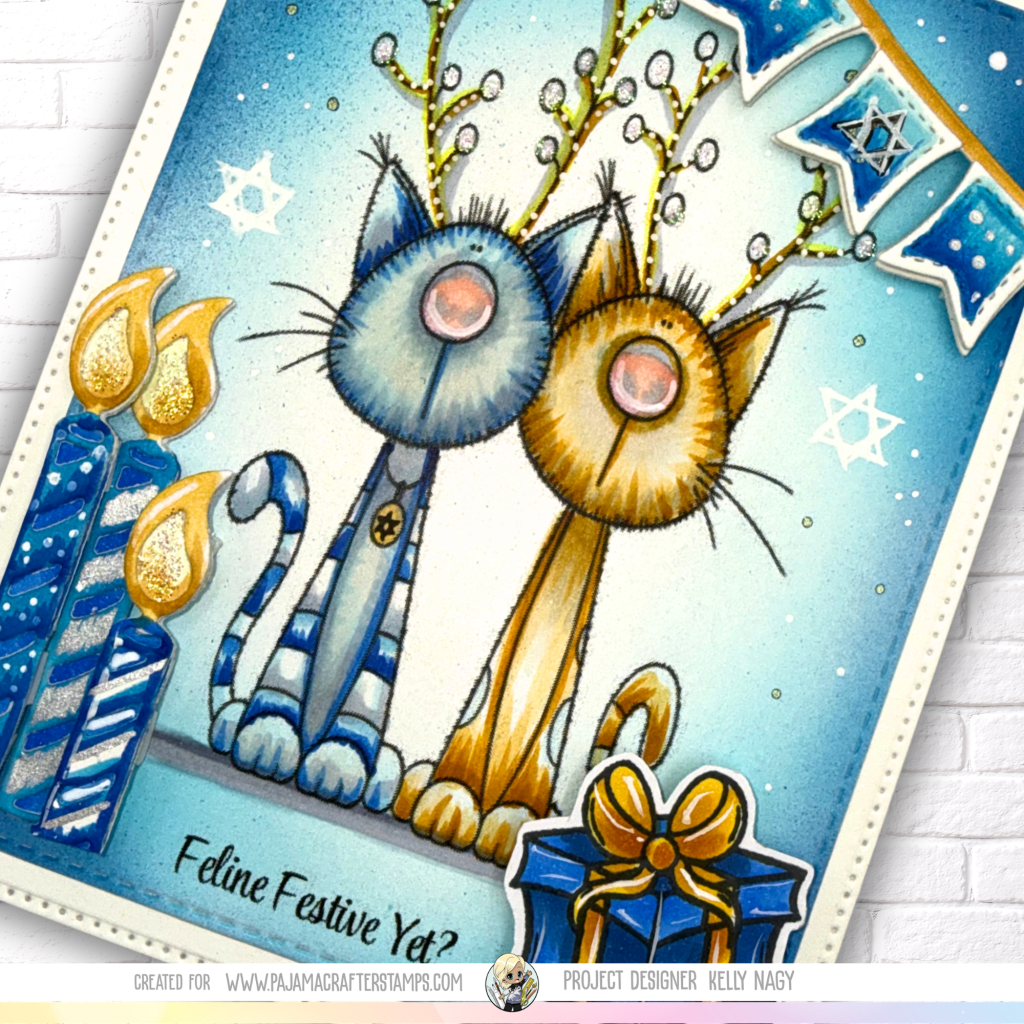
Then I took the same MERRY MEOWMAS image, changed my Copic colors and added a few elements from my stash to create a Hanukkah-inspired card.
💙 🤍 💛 HANUKKAH
The air compressor attachment made it easy to coordinate each background with my Copic coloring. I simply sprayed light layers of color and gradually built the intensity until I was happy with the result.
No complicated blending—just spray, layer and have fun!
💙 Why This Project Is Personal
We are a blended family. My husband’s children from his first marriage were raised Jewish by their mom while also celebrating Christmas with us. Today, they have families of their own who continue to recognize both traditions.
That makes creating for different celebrations especially meaningful to me.
It also reminds me that our stamps don’t have to be limited by the holiday printed on the package!
❤️ 🖤 💚 KWANZAA
❤️ 🩷 🤍 VALENTINE’S DAY
🧡 🤎 💛 THANKSGIVING
🖤 🤍 💛 NEW YEAR’S
❤️ 🧡 💛 💚 💙 💜 BIRTHDAYS
Change the colors. Add something from your stash. Change the sentiment.
Make it YOUR celebration!
🎨 Try It Yourself!
Grab a stamp that was designed for one specific holiday and ask yourself:
“What ELSE could this become?”
For me, MERRY MEOWMAS went from Christmas kitties to a completely different celebration with little more than Copic color choices, some airbrushing and a few creative additions.
That’s exactly the kind of crafting I love—using what we have in unexpected ways!
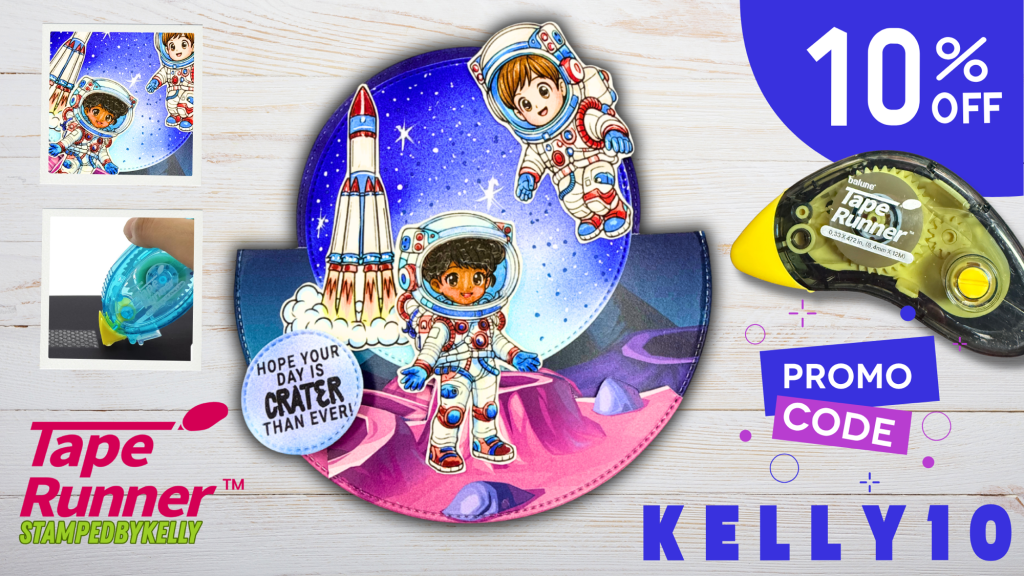
Use KELLY10 for 10% Off your cart at TapeRunner.com
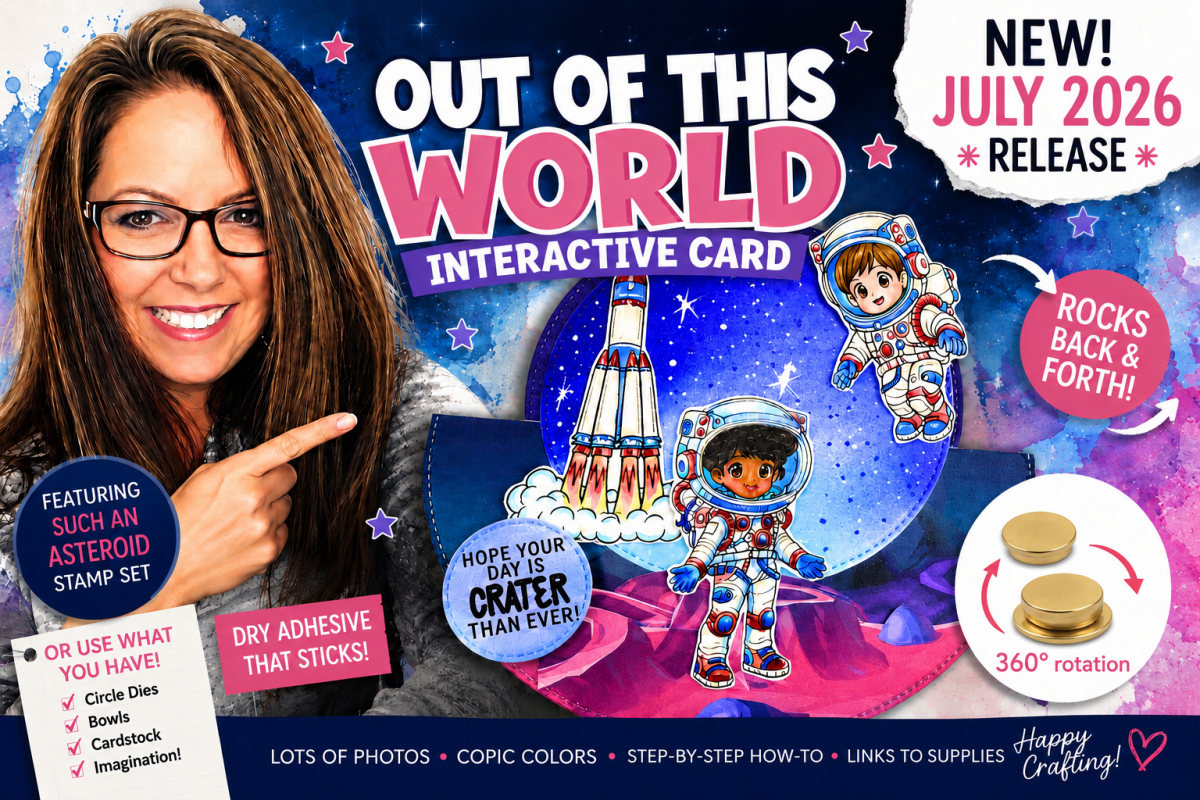
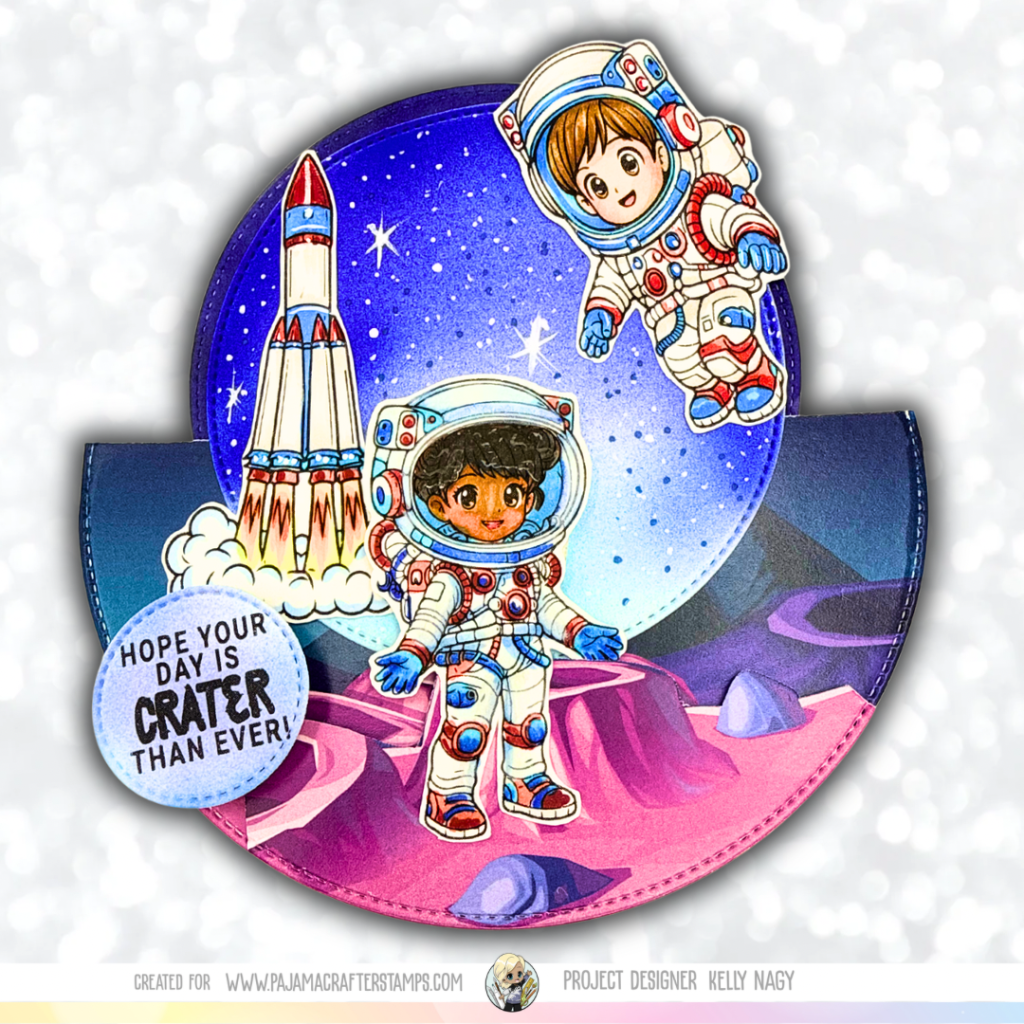
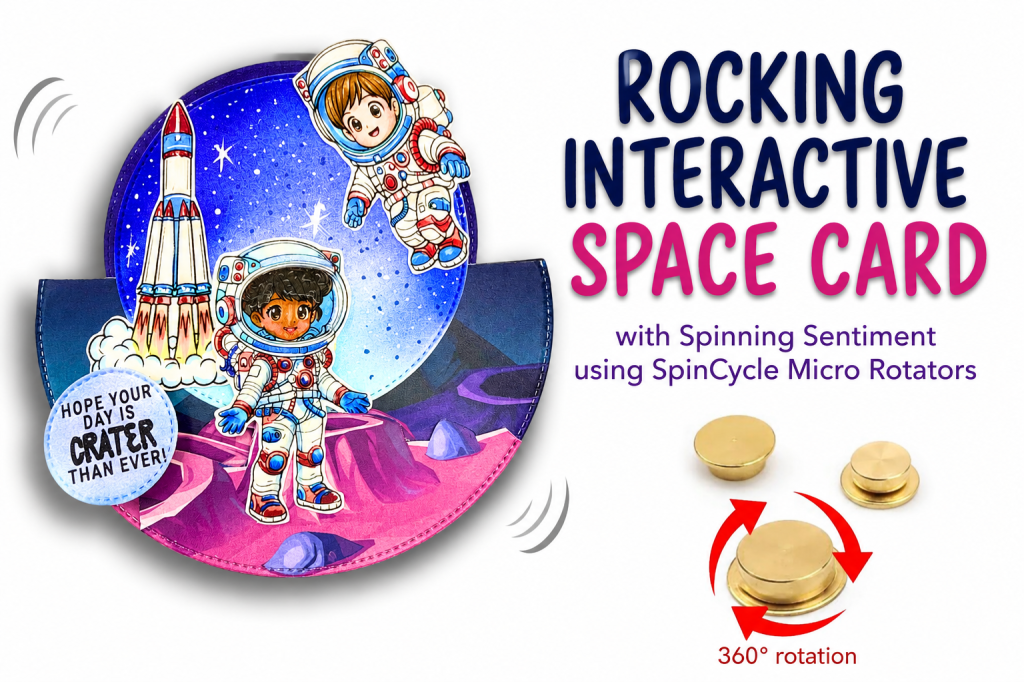
Create an interactive space-themed rocking card with easy Copic coloring and a 360° spinning sentiment using the new SpinCycle Micro Rotators. Put together with a combination of my favorite wet and dry adhesives. Perfect for making someone smile!
One of my favorite things about cardmaking is combining Copic coloring with interactive elements. There’s just something magical about handing someone a card that actually moves. It immediately brings a smile to their face!
For today’s project, I reached for the adorable Such an Asteroid stamp set and created a rocking card that features not one—but two interactive elements!
The entire card gently rocks back and forth, while the sentiment spins a full 360 degrees.
Color First…Then Build Your Scene
Before I even think about assembling my card, I always start with the coloring.
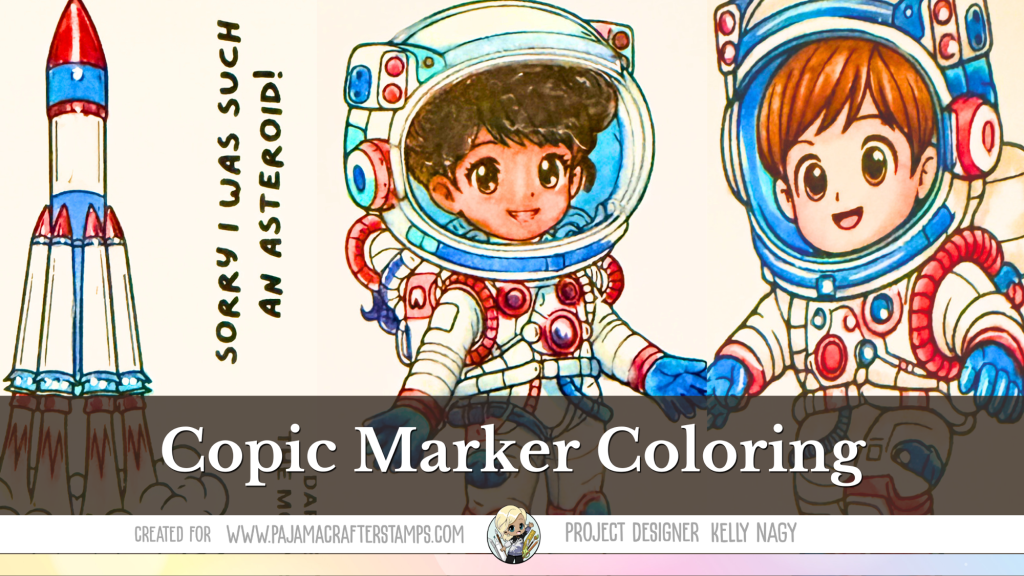
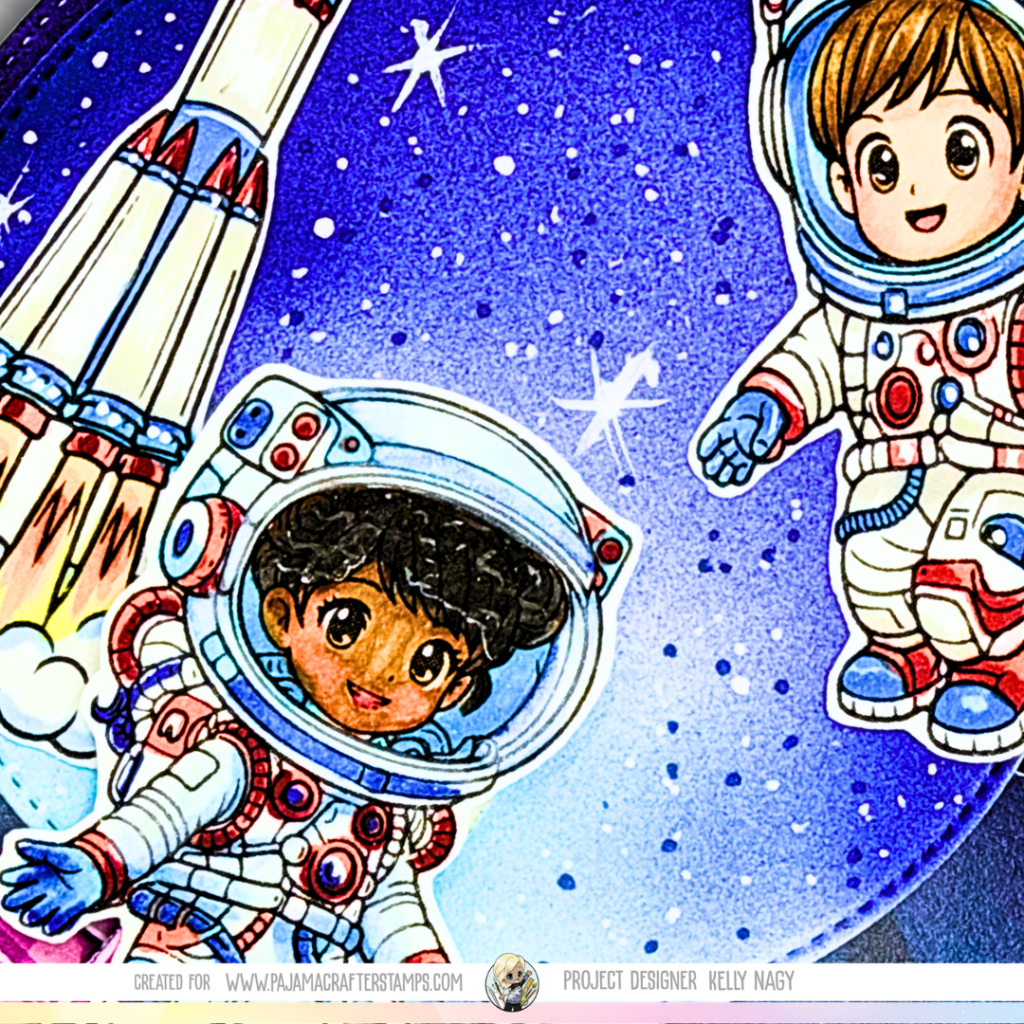
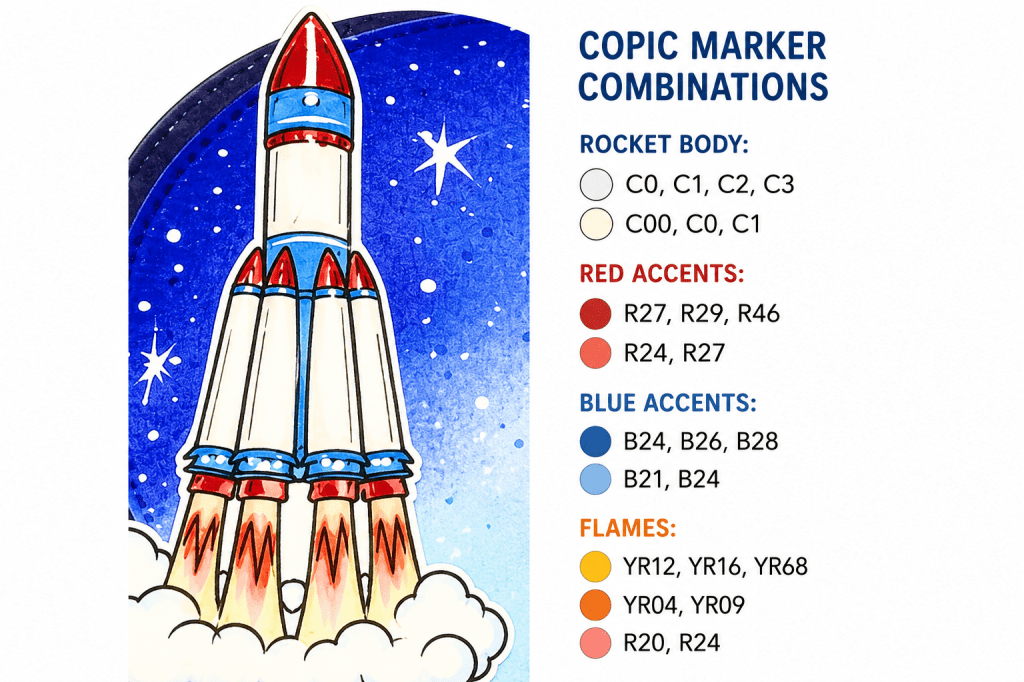
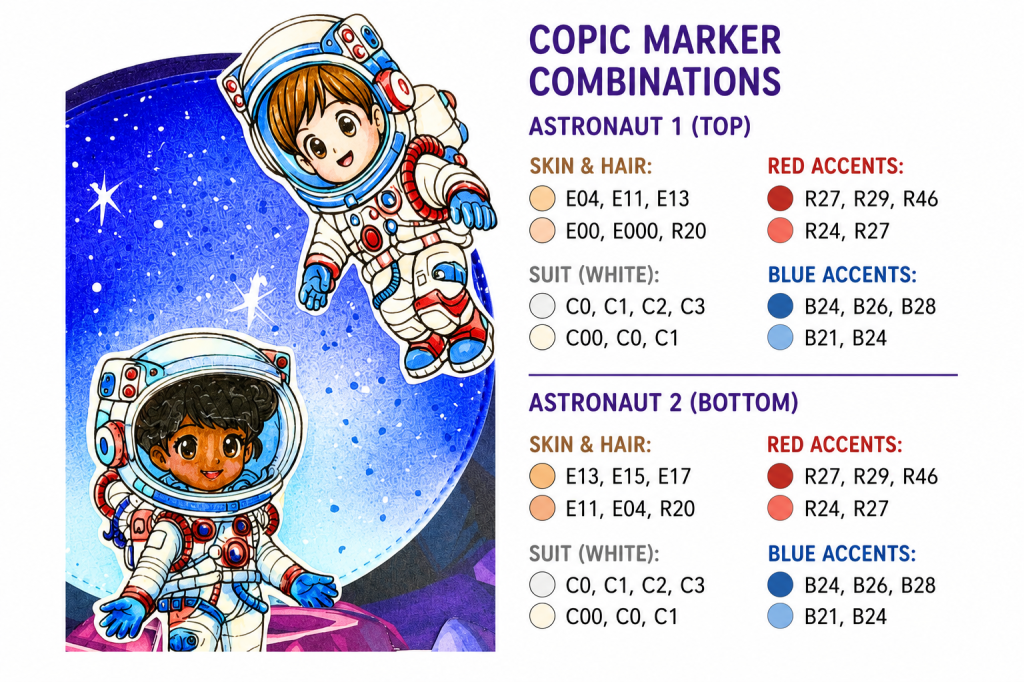
These sweet astronauts from Such An Asteroid stamp set were an absolute joy to color with Copics. I kept the spacesuits bright and clean using cool grays and added pops of vibrant reds and blues to coordinate with the rocket. For the night sky, I blended rich blues into a soft glow behind the astronauts before splattering white paint to create the stars.
One of my favorite things about space-themed cards is that there’s no right or wrong. You can create colorful galaxies, glowing planets, or simply let your imagination take over.
Interactive Cards Don’t Have to Be Complicated
If you’ve never made a rocking card before, don’t let it intimidate you.
In fact, you probably already have everything you need!
Look through your craft room for:
Circle dies
A circle cutter
Bowls or plates to trace
Or simply fold your cardstock in half and cut a half-circle, just like we all learned in kindergarten.
Sometimes the simplest supplies create the most memorable cards.
Add Even More Movement
Want to take your interactive cards to the next level?
The new SpinCycle Micro Rotators from Pajama Crafter Stamps make it incredibly easy to add spinning elements to your projects.
I used one behind my sentiment so it spins a full 360°, but that’s only the beginning!
Imagine adding them to:
planets
stars
balloons
flowers
steering wheels
snowflakes
pinwheels
ornaments
little critters
anything you want to twirl!
You can even add multiple SpinCycle Micro Rotators to a single card to create several independently spinning elements. The possibilities are almost endless, and they add such a fun surprise for the recipient.
Copic Color Combinations
I always enjoy sharing the colors I use in case you’d like to recreate the look or adapt it to your own project.
Interactive cards may look impressive, but they’re surprisingly easy to create—and they’re always the cards people remember.
Whether you use supplies already in your craft room or decide to try the new SpinCycle Micro Rotators, I hope this project inspires you to add a little movement to your next handmade card.
After all, handmade cards should be just as fun to play with as they are to create! To let me know you like what I post, please follow me on social media @stampedbykelly and subscribe to my Youtube channel. I am hoping if I get enough subscribers and interest, I hope to be encouraged to start my YouTube channel journey.
As a Pajama Crafter Stamps and TapeRunner Design Team member, I may earn a small commission if you shop using my affiliate links at no additional cost to you. Your interest and support encourages me to begin creating process tutorials, sharing alcohol marker and pencil coloring inspiration, and bringing interactive card ideas to the crafting community. Thank you!
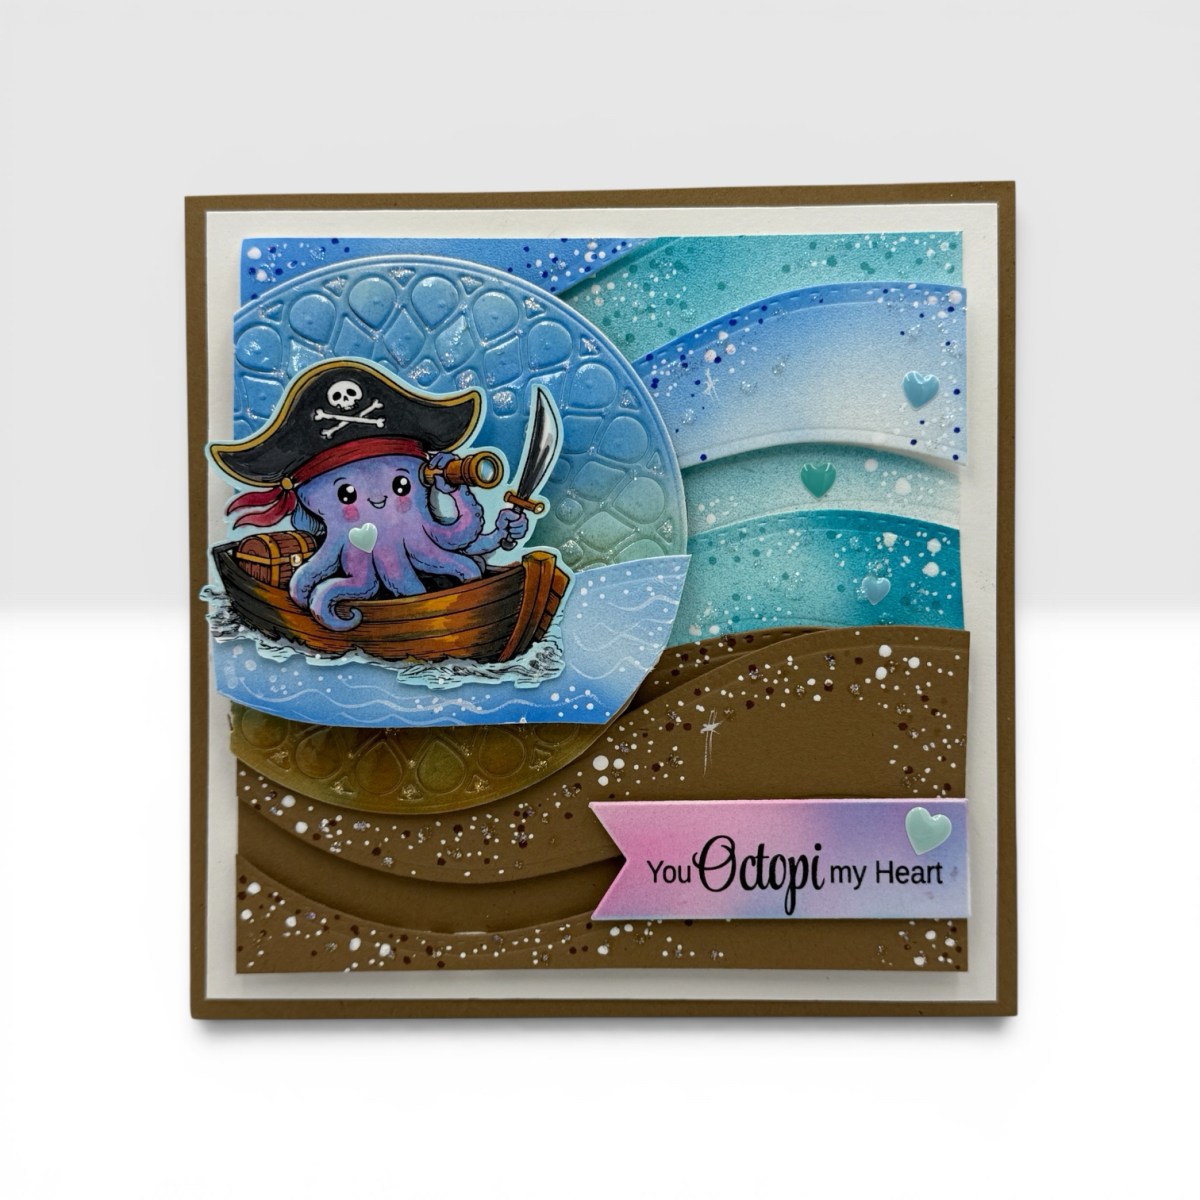
Set sail for Summer Week with Pajama Crafter Stamps! This cheerful square card features the adorable Kraken Good Day stamp set paired with layered ocean waves created using the Stitched Scalloped Border Dies, a textured Circle Peek-a-Boo Die, and a sentiment cut with the Banner Die Set. See how I combined scene building, Copic coloring, and dimensional die cutting to create a bright beach-inspired card that’s perfect for celebrating all the fun of summer! 🐙🌊☀️
Set Sail for Summer with the Kraken Good Day Stamp Set
When I think of summer, I immediately picture sunny skies, sparkling water, and fun adventures on the ocean. My featured card layout is versatile enough to be a backdrop for so many different beach scenes. I hope you use these ideas as a springboard to create your own!
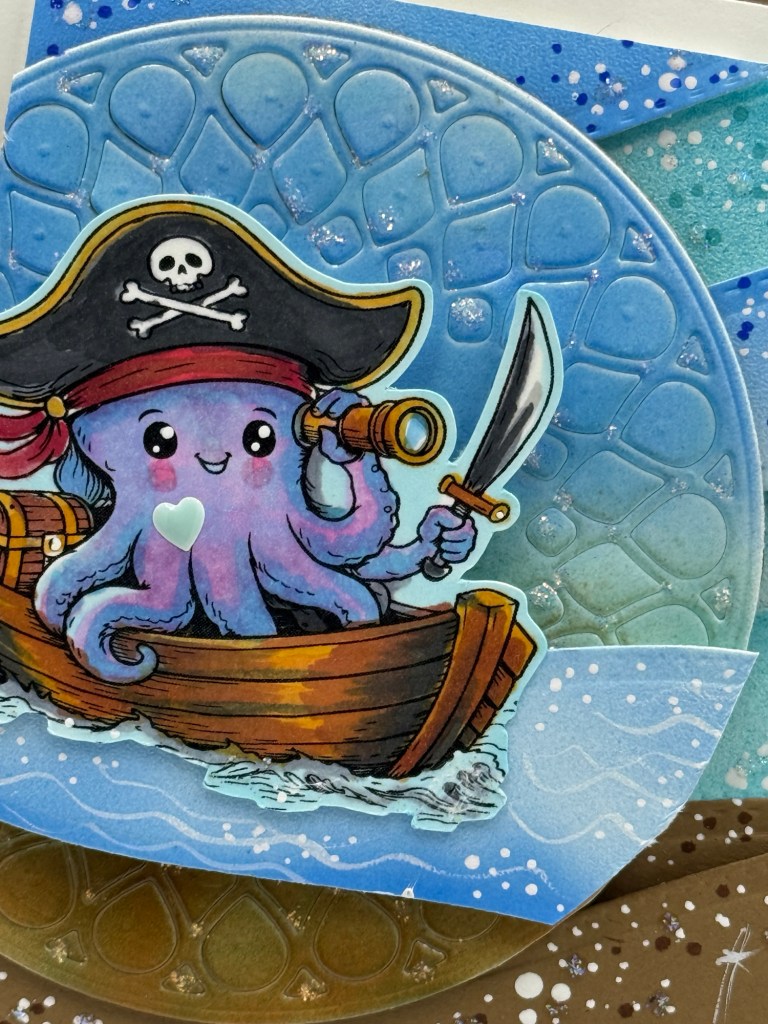
For my Pajama Crafter Stamps Summer Week project, I created a bright, beach-inspired square card featuring the adorable pirate octopus from the Kraken Good Day Stamp Set. It’s a playful reminder that summer is all about making waves, exploring new adventures, and having fun!
One of my favorite things about themed weeks is seeing how every designer interprets the same challenge in completely different ways. While some may create camping scenes or floral gardens, I decided to head straight to the beach with layered ocean waves and a cute little kraken pirate ready to sail into summer.
Creating the Background
The background is where this card really comes to life.
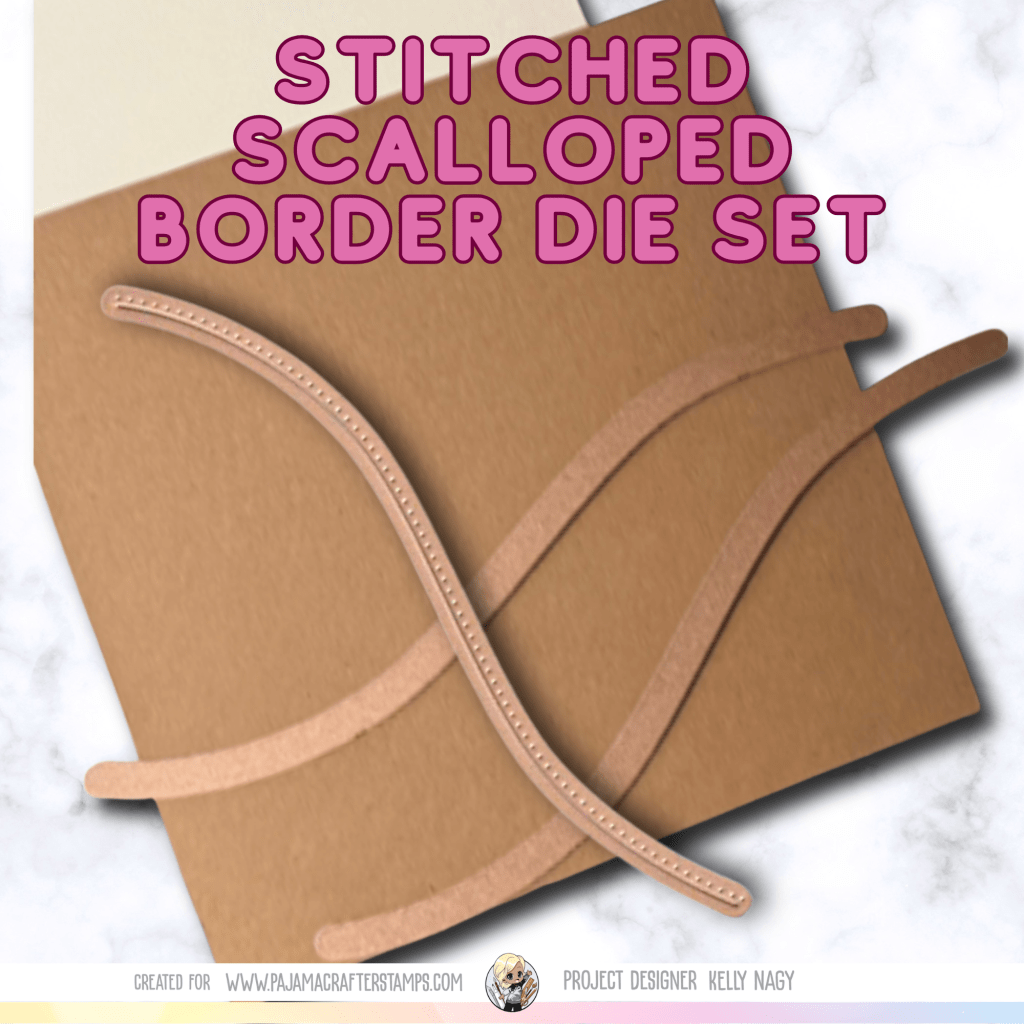
I began by die cutting multiple wave sections using the Stitched Scalloped Border Dies. Each layer was ink blended with shades of aqua, turquoise, and soft blue to create movement and depth. A few darker blue marker dots and plenty of white gel pen to create splatter to help give the look of sparkling ocean spray.
To ground the scene, I created sandy shoreline layers using warm kraft cardstock and added additional white dots with my white gel pen to create “splatter” for a whimsical beach feel. I do the same with brown marker dots in different sizes for added interest and texture, think “grains of sand.”
Adding Dimension & Movement
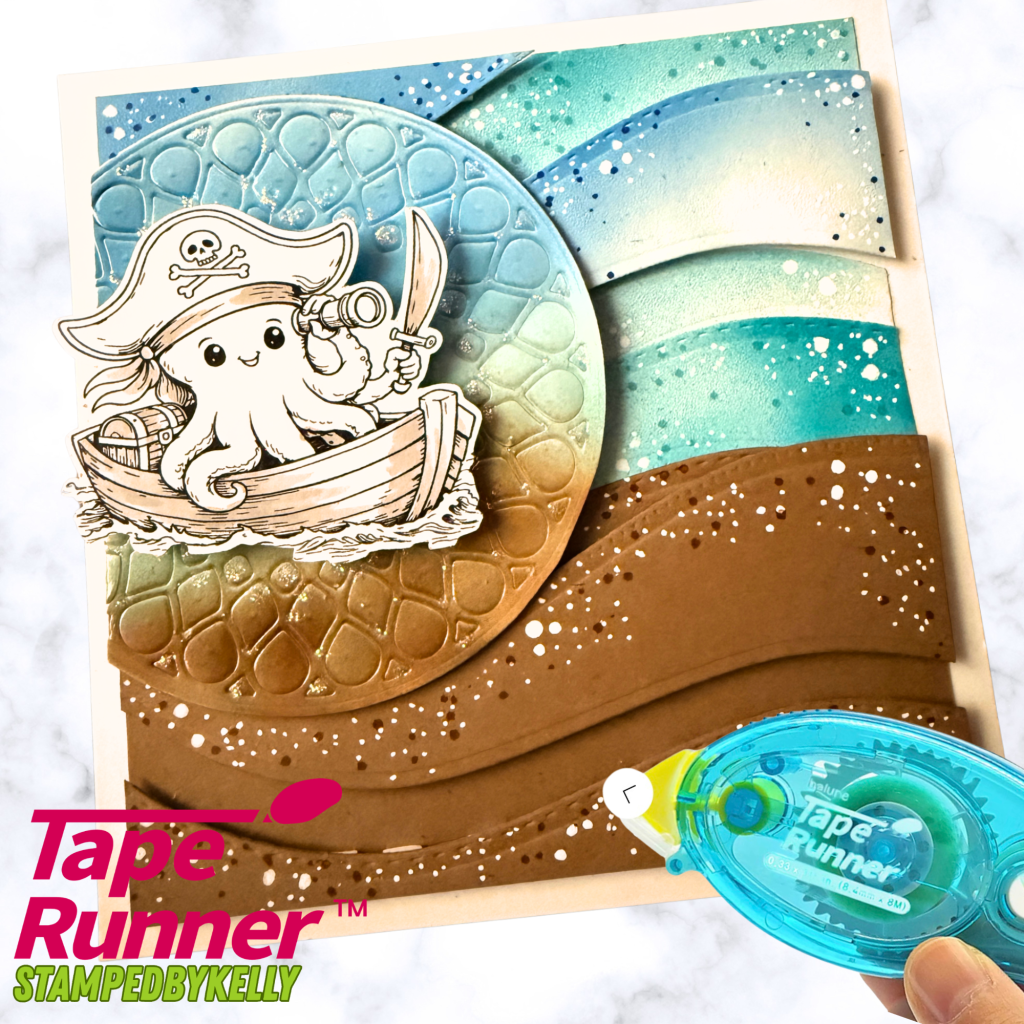
One of my favorite design elements is the large circle focal point. I cut a hole in the middle of the circle to allow me to pop-up a SPIN-CYCLE Micro Rotator, so my boat ROCKS!!!! Follow me on social media @stampedbykelly to see my reel in action!!!
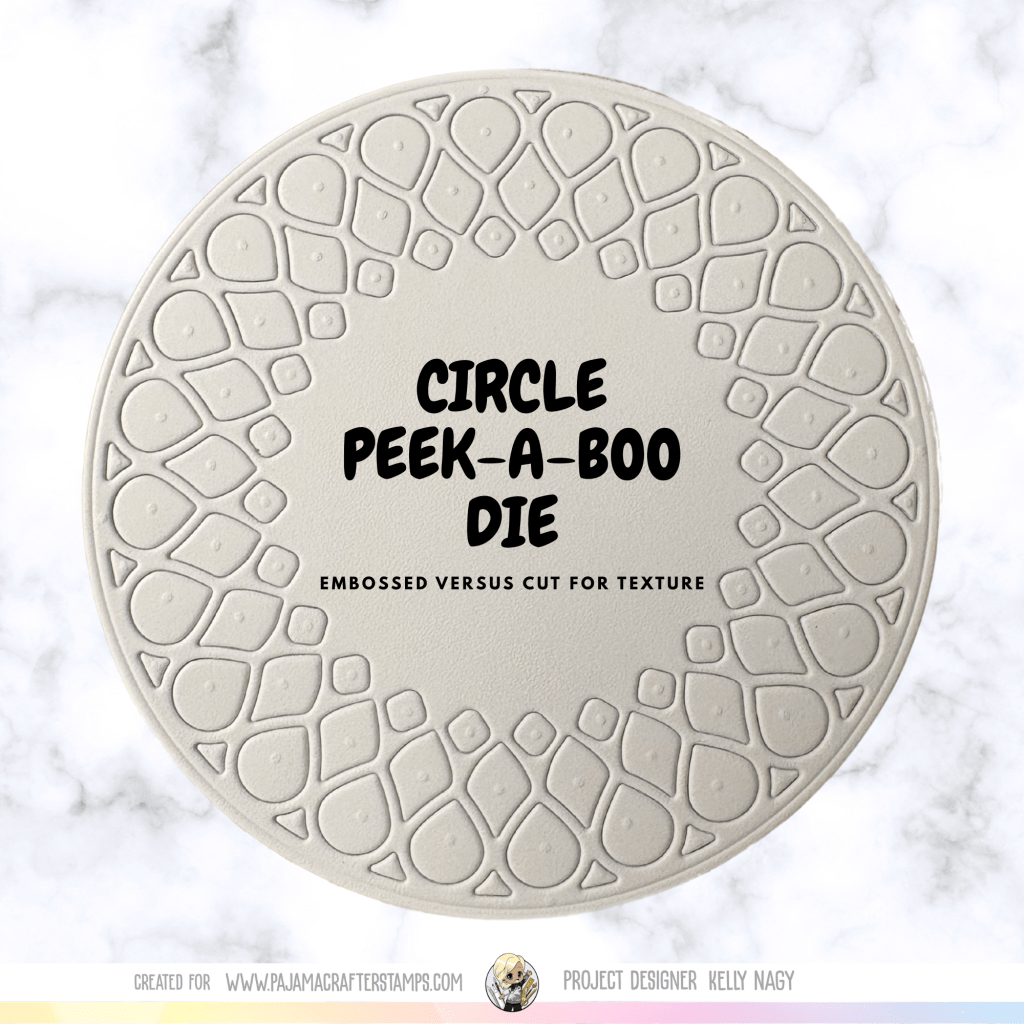
I used the Circle Peek-a-Boo Die to create a layered window effect behind my stamped image. The embossed circle adds wonderful texture while helping draw your eye directly to the adorable pirate octopus. I used 3D Galaxy Gloss, but you can achieve the same end result with items already in your stash! Do you have Crystal Effects, Glaze, Heat emboss with clear powder over your ink blended circle, clear Nuvo drops, clear paste or emboss or cut out of glossy cardstock.) These are all ways I add interest without added bulk.
The circle overlaps the waves and shoreline, giving the entire card a dimensional scene-building effect.
I colored him with Copic markers in cheerful shades of lavender and purple before adding warm wood tones to the boat and rich blacks and reds to his pirate hat. Small white gel pen highlights help bring the image to life.
His little telescope, treasure chest, and pirate sword make him ready for a full day of summer adventures.
This card is part of Summer Week at Pajama Crafter Stamps, where the design team is sharing projects inspired by everything summer means to us! From beach days and vacations to flowers, camping, fireworks, and sunshine, you’ll find a wide variety of creative ideas all week long using Pajama Crafter Stamps products.
Be sure to check out the inspiration from the entire Design Team—you’ll love seeing how everyone puts their own unique spin on the same summer theme!
Copic Color Suggestions
Octopus
V20
V22
V25
RV63 (cheeks)
Water
BG10
BG11
BG13
B00
B02
Boat
E33
E35
E37
Sand
E41
E43
E44
Hat
C7
C9
R24
R27
Tape Runner
I assembled my layered die cuts using my favorite adhesives from Tape Runner. Foam adhesive from my stash adds wonderful dimension between the waves and circle focal point, making the scene really pop.
🛒 Save 10% with my affiliate code KELLY10 at TapeRunner.com!
Affiliate Disclosure
This post contains affiliate links. If you choose to shop using my links or discount code, I may earn a small commission at no additional cost to you. Thank you for supporting my crafting journey!
Thank you so much for stopping by! I hope this cheerful pirate octopus inspires you to create something that reminds you of summer. Whether it’s sunshine, sandy beaches, or sailing off on a new adventure, there’s no wrong way to celebrate the season with stamps! 🌊🐙☀️
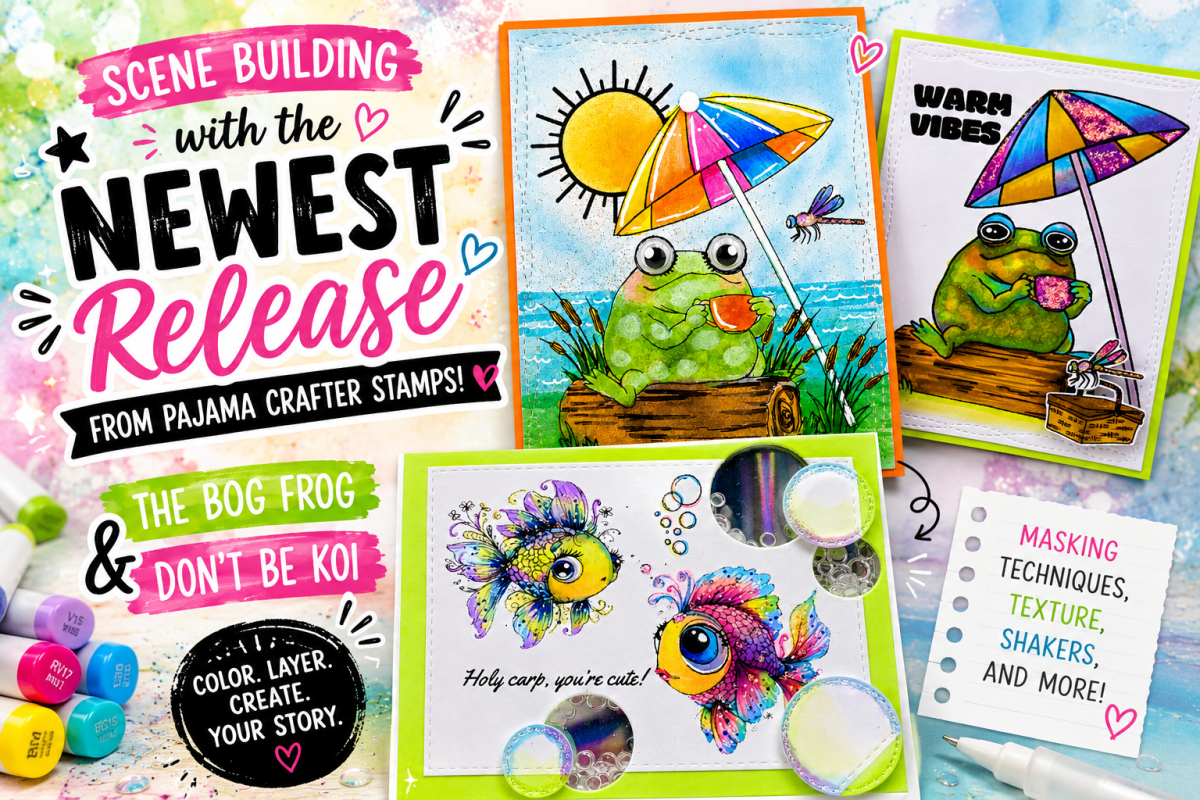
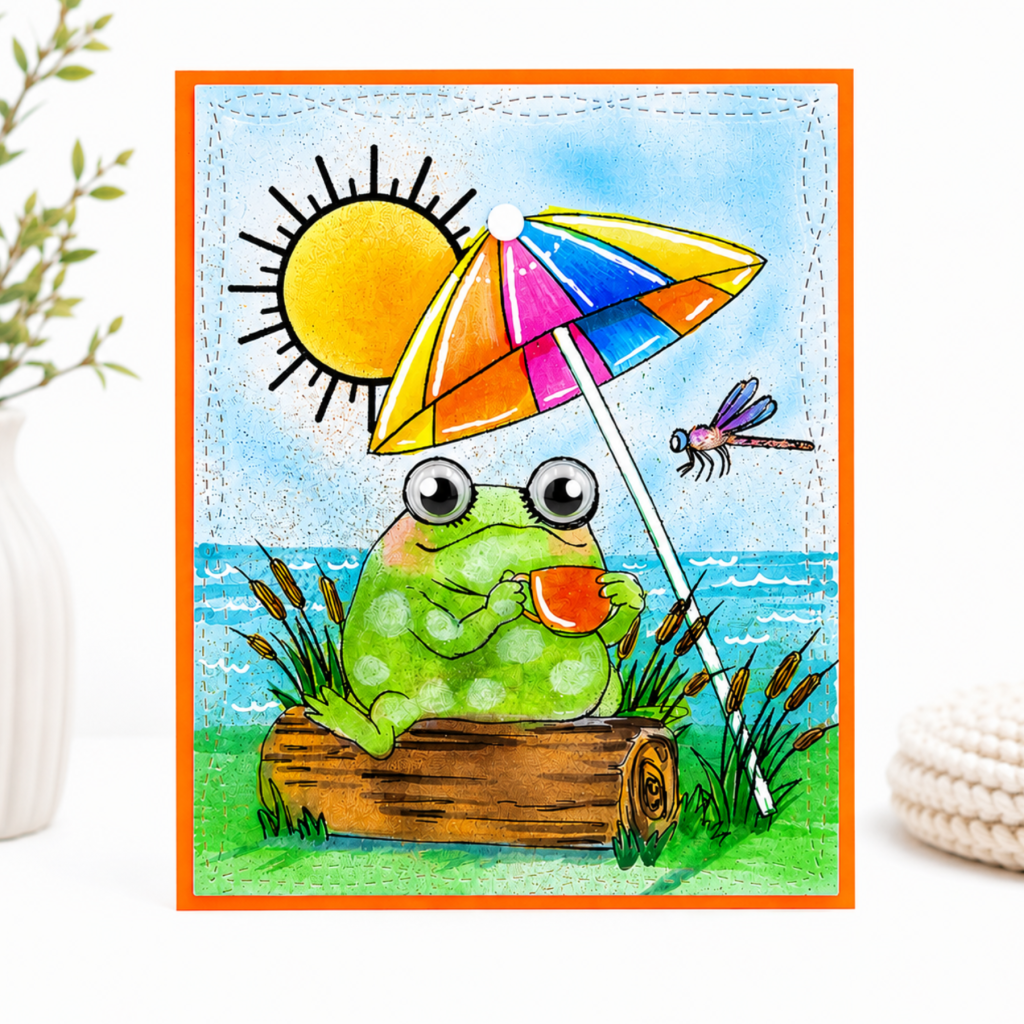
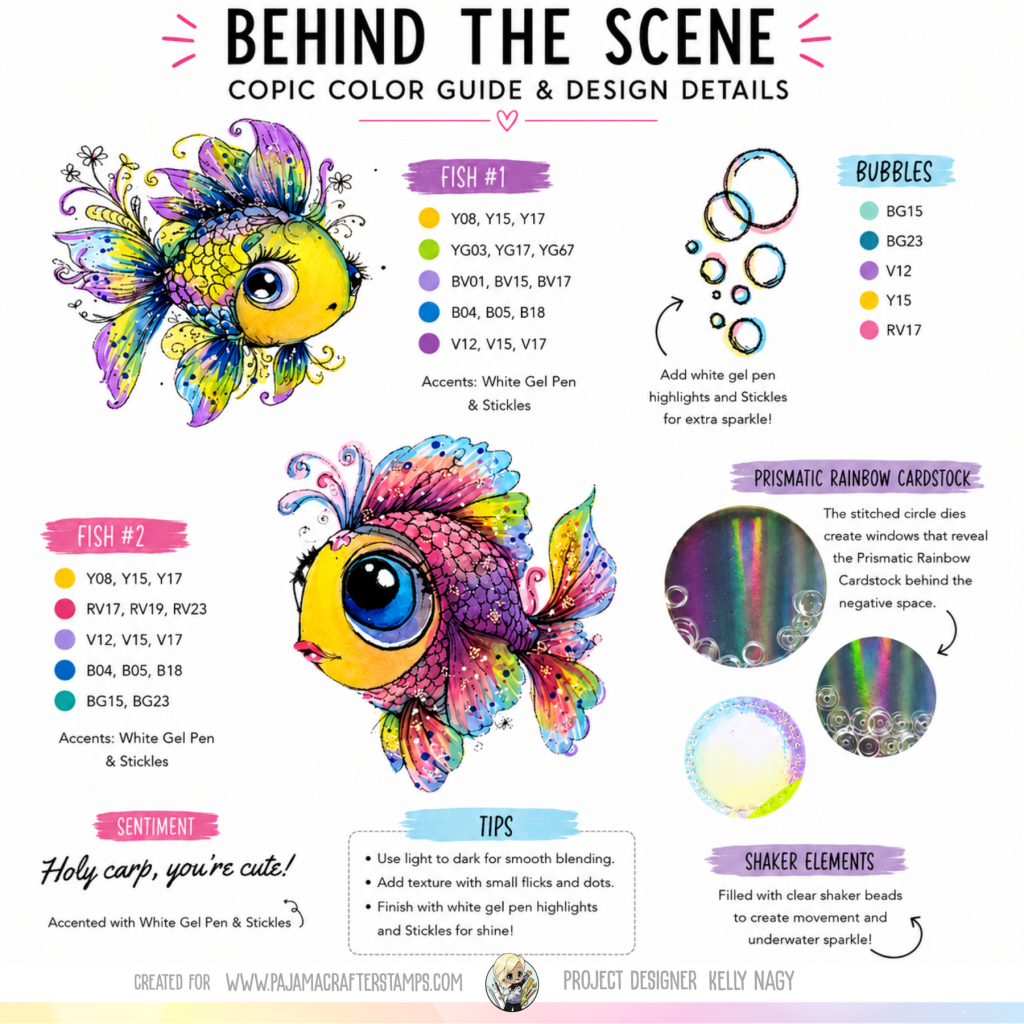
Bright colors, playful scene building, and layered creativity come together in these first projects featuring the NEWEST release from Pajama Crafter Stamps! Today I’m sharing cards created with The Bog Frog and Don’t Be Koi stamp sets using masking techniques, shaker elements, Zero Colorless Blender Marker texture, white gel pen accents, and vibrant Copic coloring to bring these whimsical scenes to life.
Today I’m sharing my first two projects featuring the newest release from Pajama Crafter Stamps using The Bog Frog and Don’t Be Koi stamp sets!
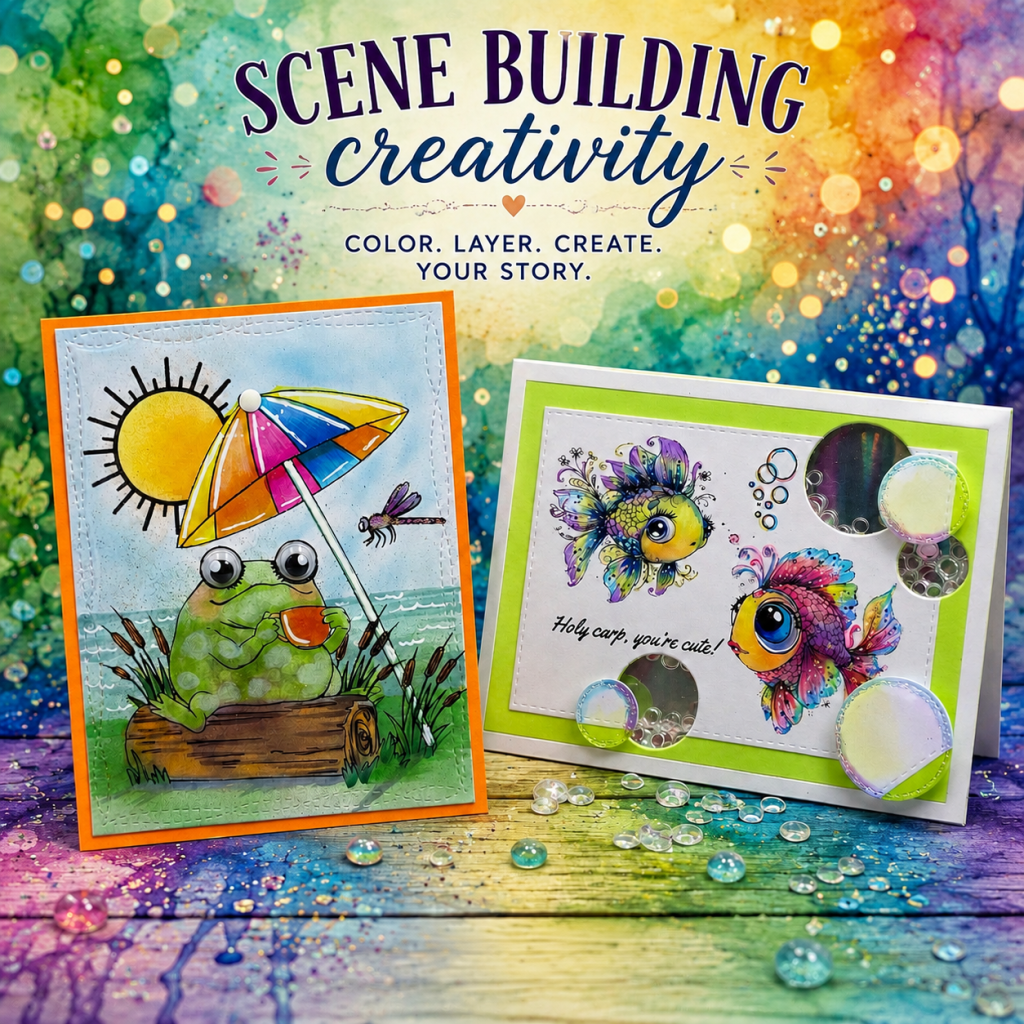
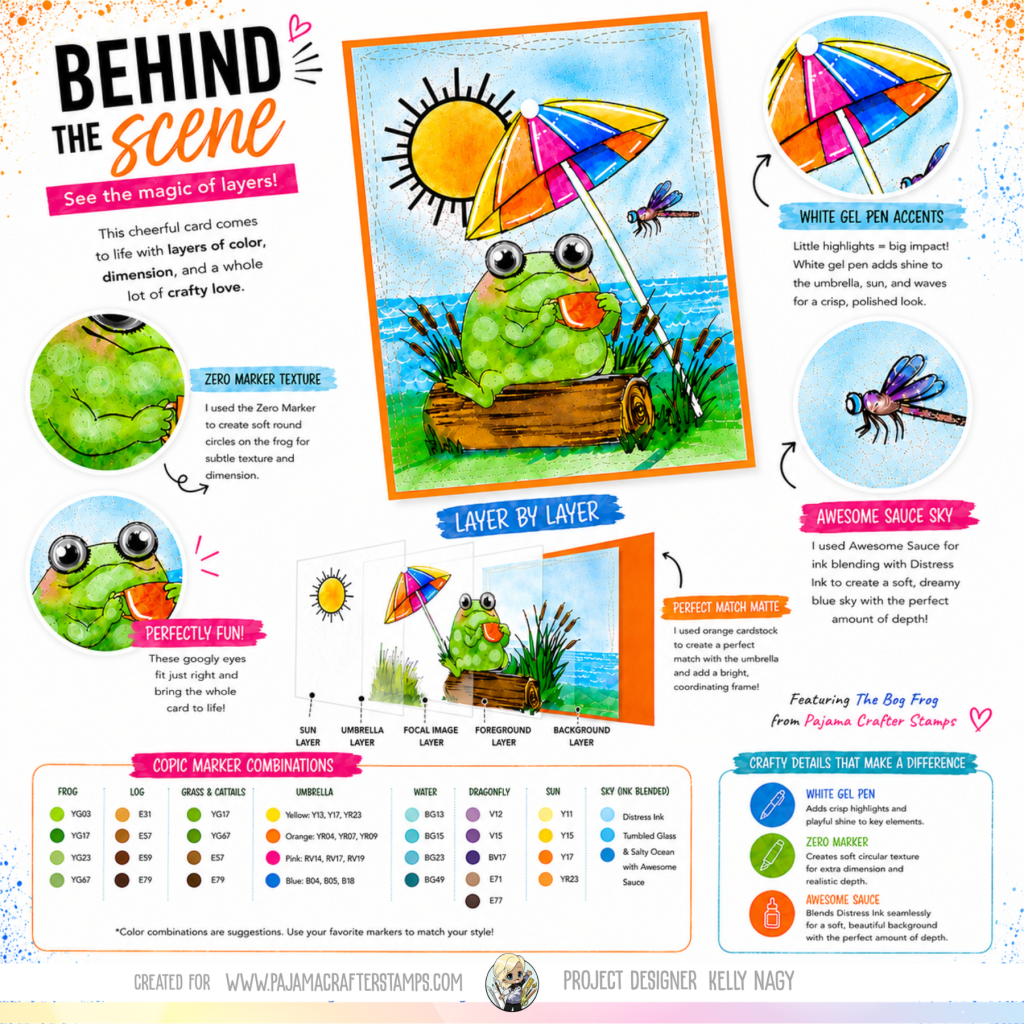
For my first Bog Frog card, I created a bright summer scene with layered elements, ink blending, and masking techniques to build depth. I used a Zero Colorless Blender Marker to add soft texture to the frog along with white gel pen accents for extra highlights.
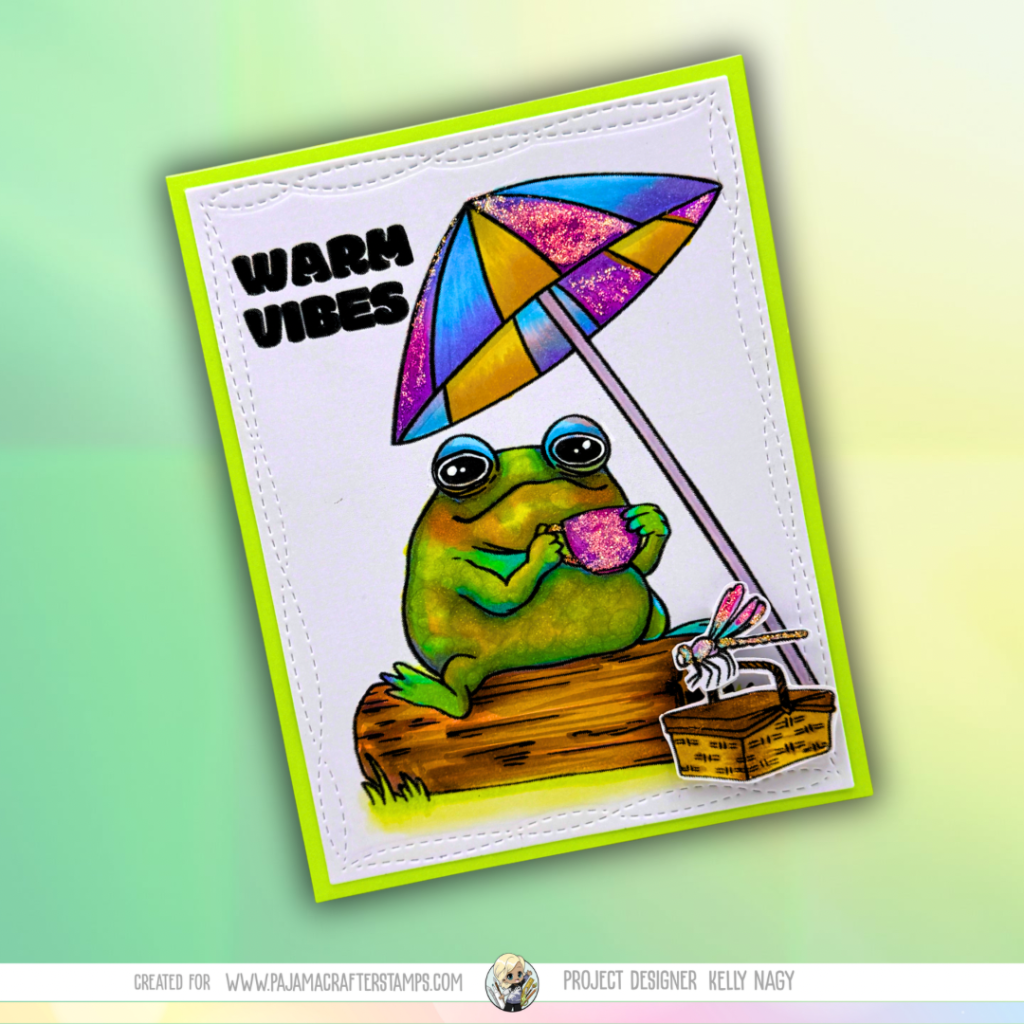
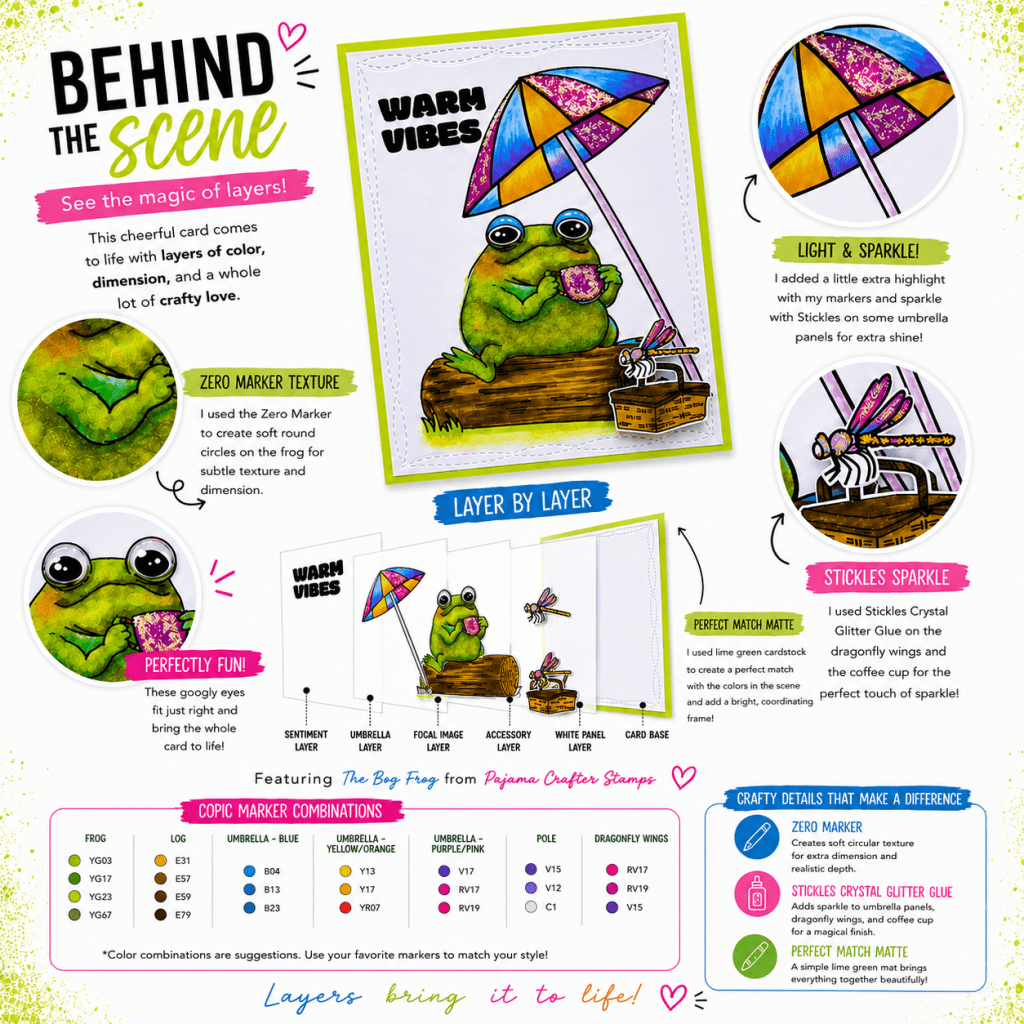
I also created a second Bog Frog design with bold color, sparkle, and a cleaner layout. The umbrella panels and dragonfly wings were finished with Stickles Crystal Glitter Glue for extra shine.
For my Don’t Be Koi project, I paired vibrant Copic coloring with shaker elements and prismatic rainbow cardstock behind the stitched circle windows for a fun underwater effect.
Sometimes scene building comes from dimensional layers, but it can also be created directly through masking techniques. I love using masking to overlap images and create more natural scenes while still keeping cards mail-friendly.
If you would like to see a future video tutorial on masking and scene building, let me know in the comments! I’ve been considering starting a YouTube channel and would love the encouragement from this crafty community. 💕
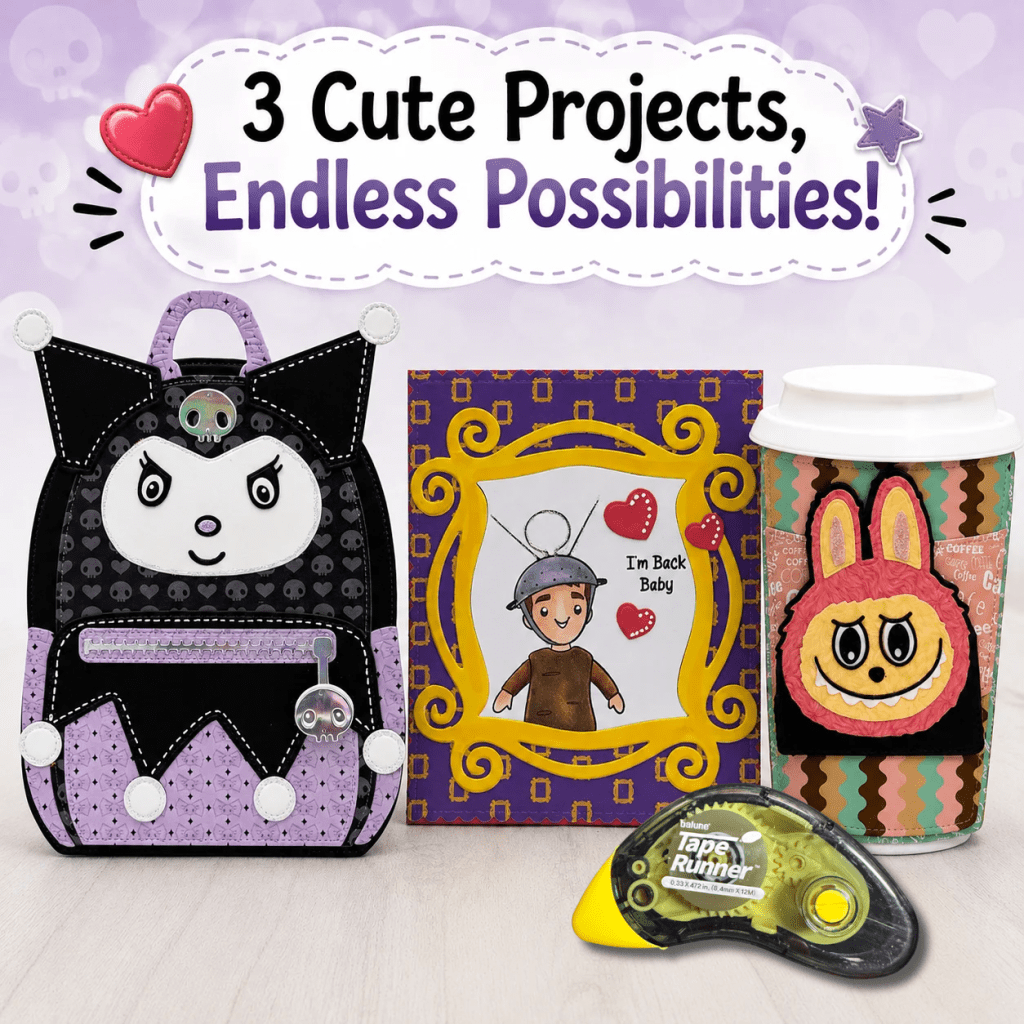
Create adorable handmade projects with Scrappy Boy Stamps including a spooky-cute Evil Bunny Backpack gift holder, Friends Forever handmade card, and coffee cup gift card holder die set. Get paper crafting inspiration, layering ideas, and interactive project inspiration using dies, stamps, and patterned paper.
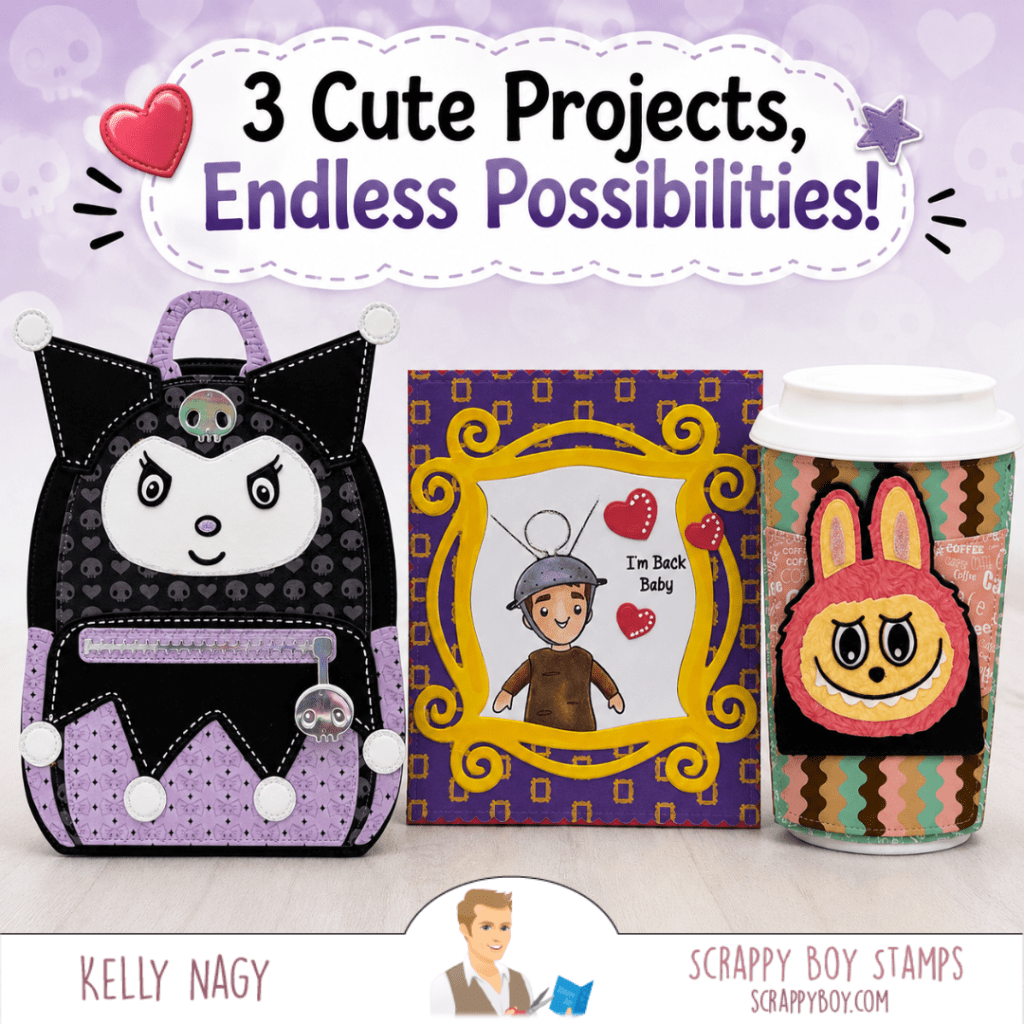
Today I’m sharing three fun handmade projects featuring products from Scrappy Boy Stamps! These projects are full of personality and include interactive elements, layered die cuts, and playful details that make paper crafting so much fun. putting them together’s really easy and clean when using the tape runner, my favorite dried adhesive. I also use a combination of wet glue and foam tape to create dimension. If you would like a coupon code for taperunner.com, use KELLY10 for 10% off your cart.
From a spooky-cute backpack gift holder to a friendship-themed card and an adorable coffee cup gift card holder, each project has its own unique style while still coordinating beautifully together.
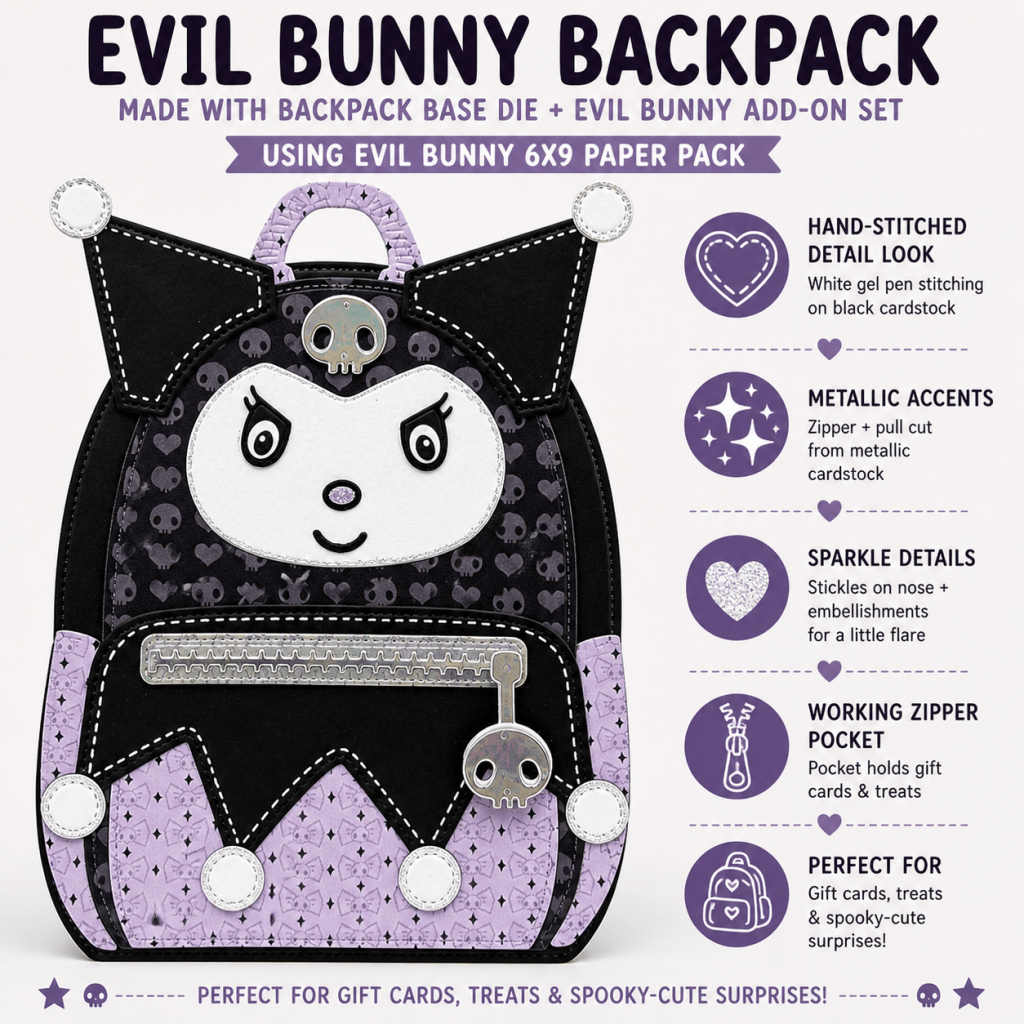
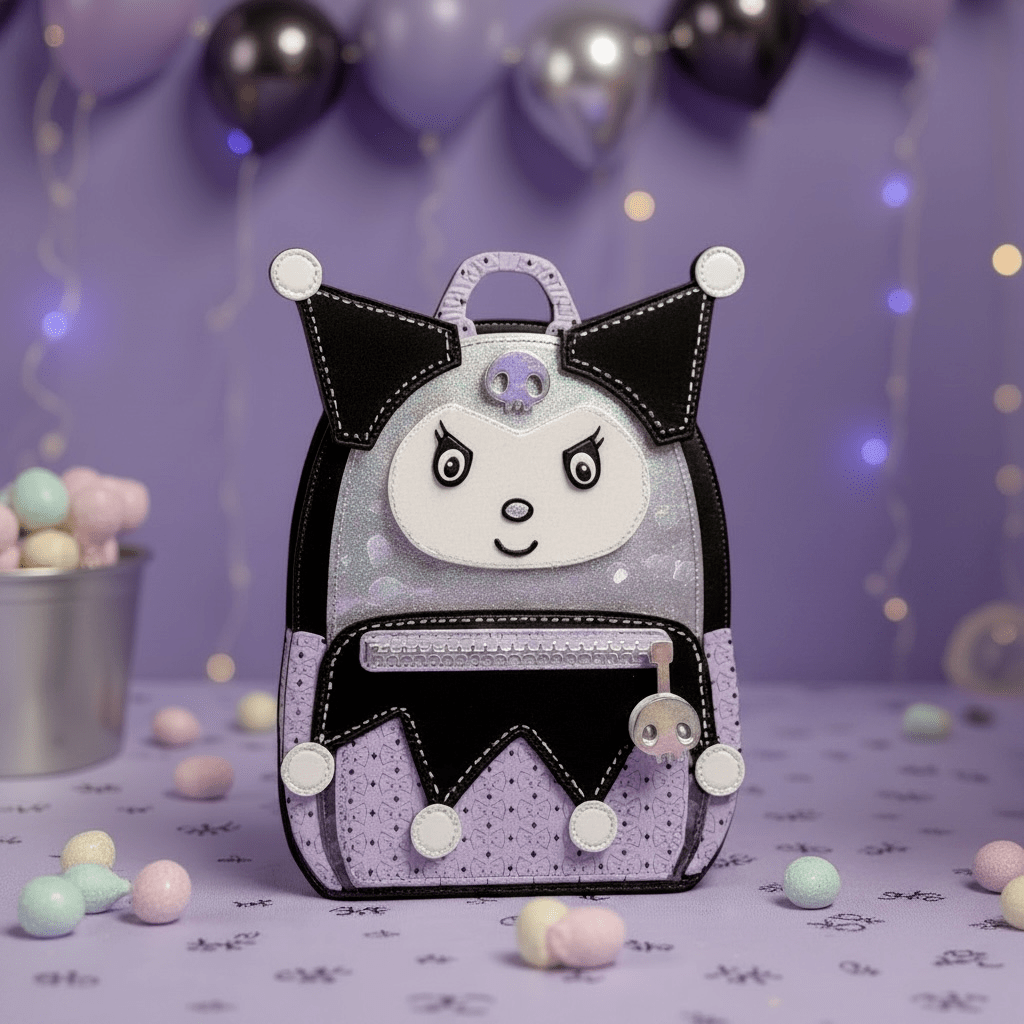
Evil Bunny Backpack Gift Holder 🖤💜
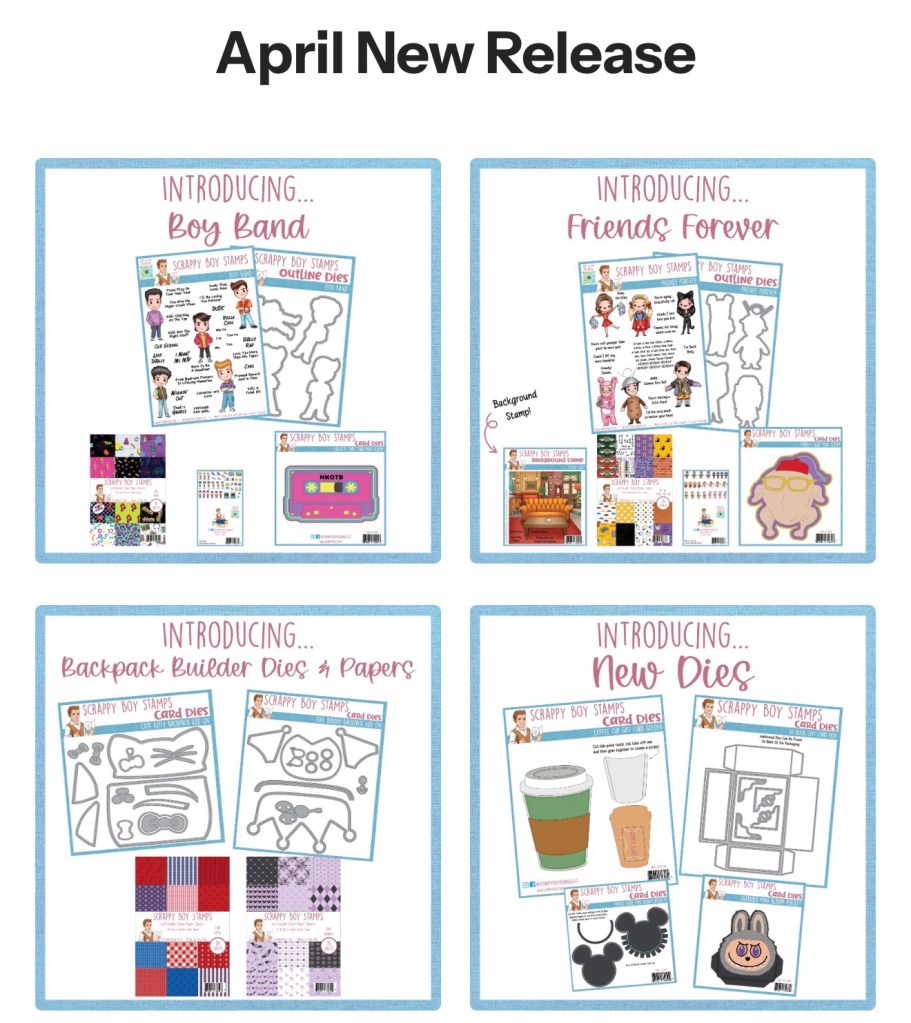
This backpack project was created using the Backpack Base Die paired with the Evil Bunny Backpack Add-On Set and coordinating patterned papers.
What I love most about this project:
Faux stitched details using a white gel pen
Metallic zipper accents
Interactive zipper pocket
Dimensional layered elements
Perfect size for treats or gift cards
The black and lavender color palette gives this project the perfect spooky-cute vibe while still keeping it playful and fun.
Supplies Used:
Backpack Base Die
Evil Bunny Backpack Add-On
Evil Bunny 6×9 Paper Pack
White gel pen
Metallic cardstock
Foam adhesive
Friends Forever Card 💛💜
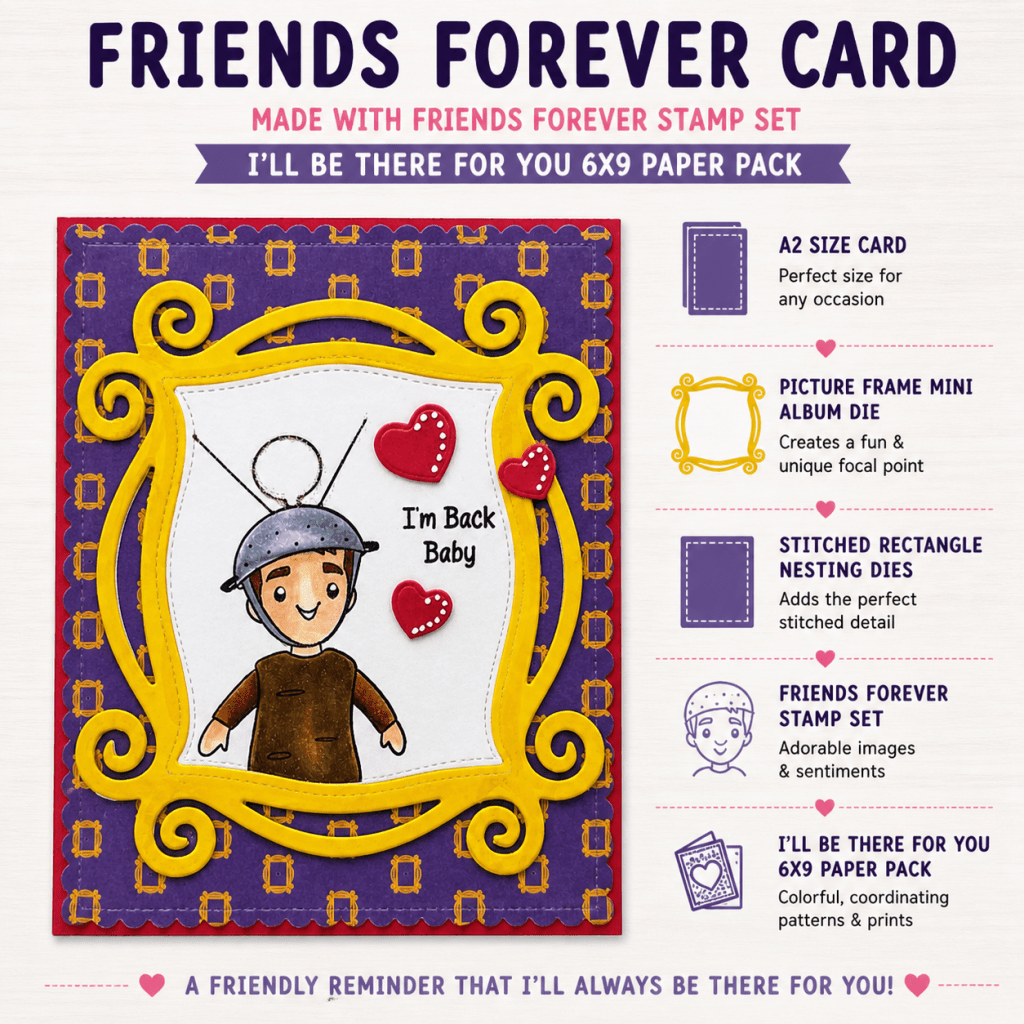
Next is this bright and cheerful friendship-themed card featuring the Friends Forever Stamp Set and the Picture Frame Mini Album Die.
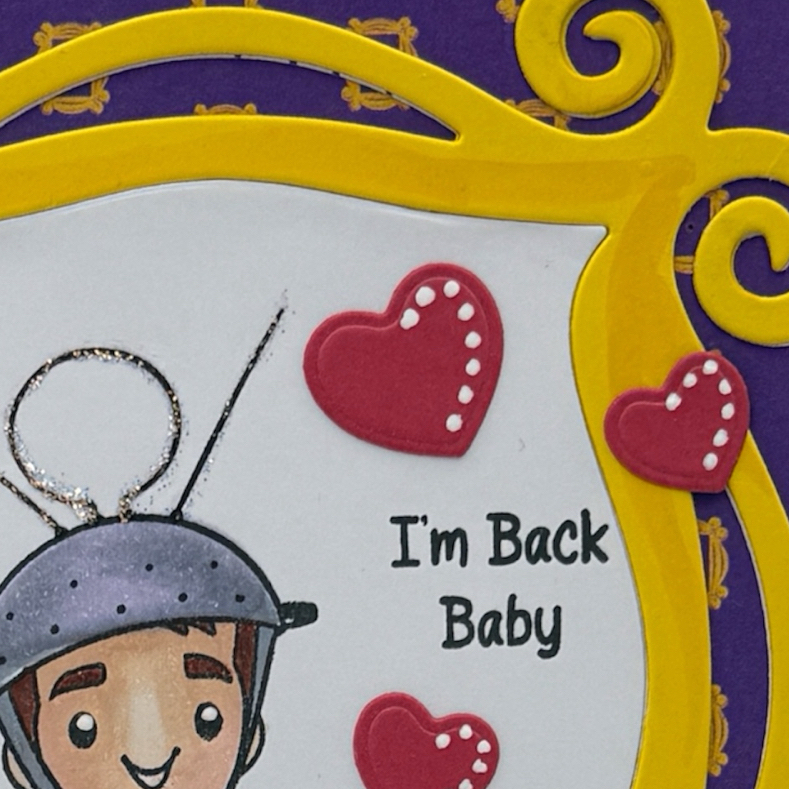
I love how the bold yellow frame pops against the purple patterned paper background. The layered hearts and sweet sentiment make this such a fun card for a friend or just-because greeting.
Details:
A2 sized card
Layered die cut frame focal point
Stitched rectangle details
Hand-colored stamped image
Coordinating patterned papers
This design would work for birthdays, encouragement cards, or simply sending happy mail to a friend.
Stickles & white gel pen accents add interest – hearts from SHAKER PLATES
Coffee Cup Gift Card Holder ☕💗
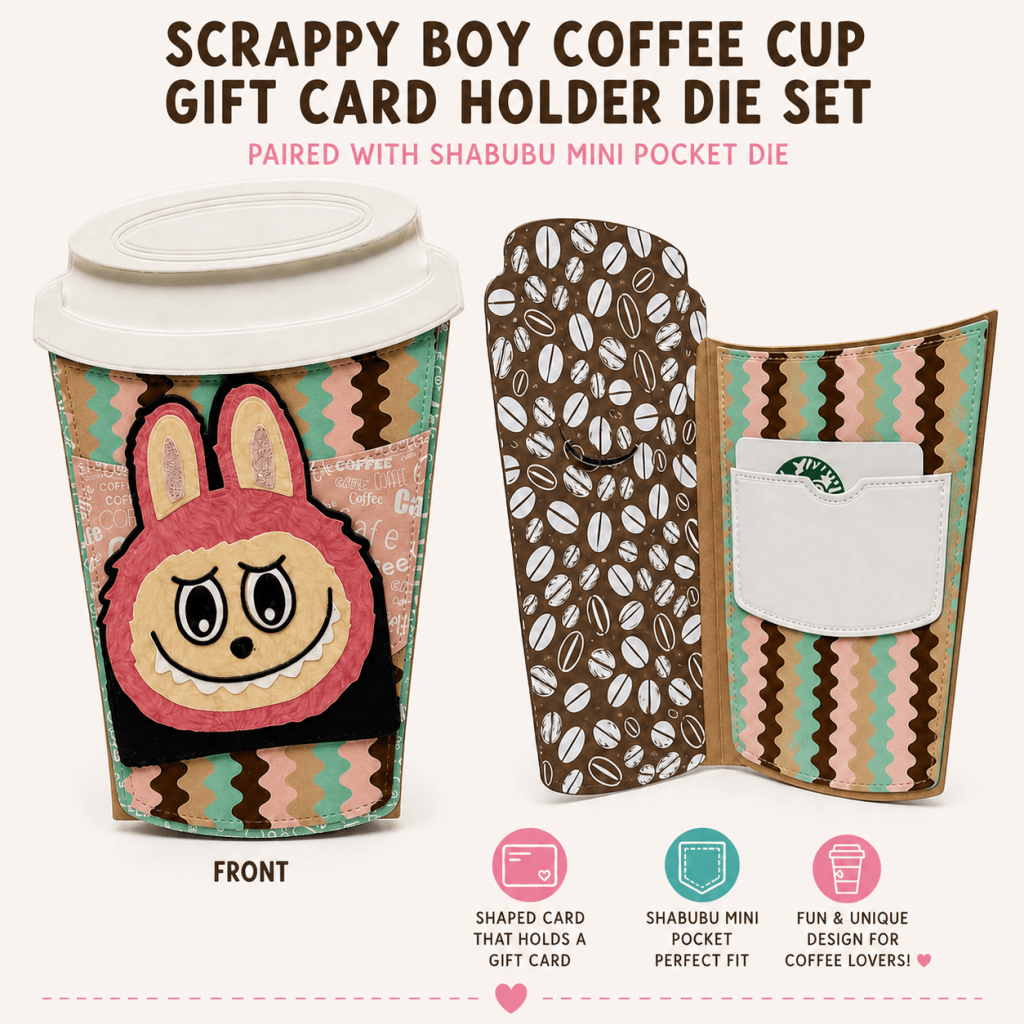
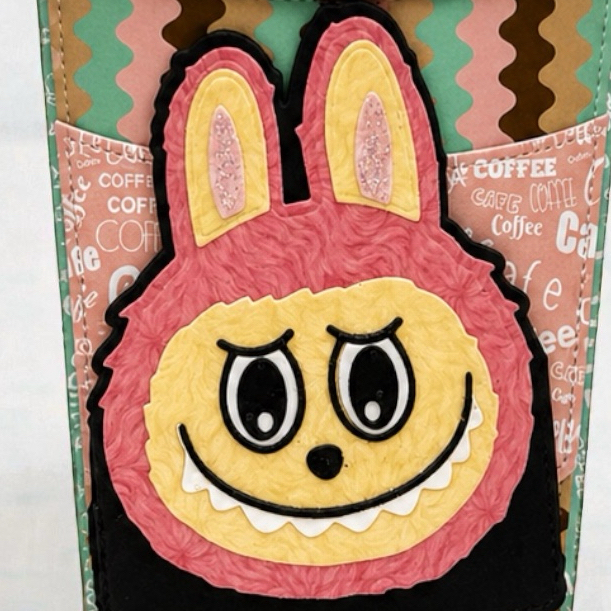
This coffee-themed project might be my favorite because it combines a shaped card with a hidden gift card pocket!
Created using the Coffee Cup Gift Card Holder Die Set and paired with the Shabubu Mini Pocket Die, this project is both cute and functional.
The fun patterned papers and dimensional bunny embellishment make this such a unique gift idea for coffee lovers.
Perfect For:
Gift cards
Teacher gifts
Coffee shop surprises
Birthday treats
Thank-you gifts
Shabubu Mini Pocket Die
Why I Love These Projects Together
Even though these projects each have a completely different theme, they all showcase what I love about crafting with Scrappy Boy Stamps:
Interactive designs
Fun layered dies
Coordinating products
Creative gift ideas
Endless customization options
Mixing stamps, dies, papers, and embellishments together helps create projects that feel cohesive while still allowing each design to stand on its own.
Final Thoughts
I had so much fun creating these projects and experimenting with different styles and themes. Whether you love spooky-cute designs, friendship cards, or gift card holders, there are so many ways to customize these products and make them your own.
Be sure to check out more inspiration and project details over on my blog:
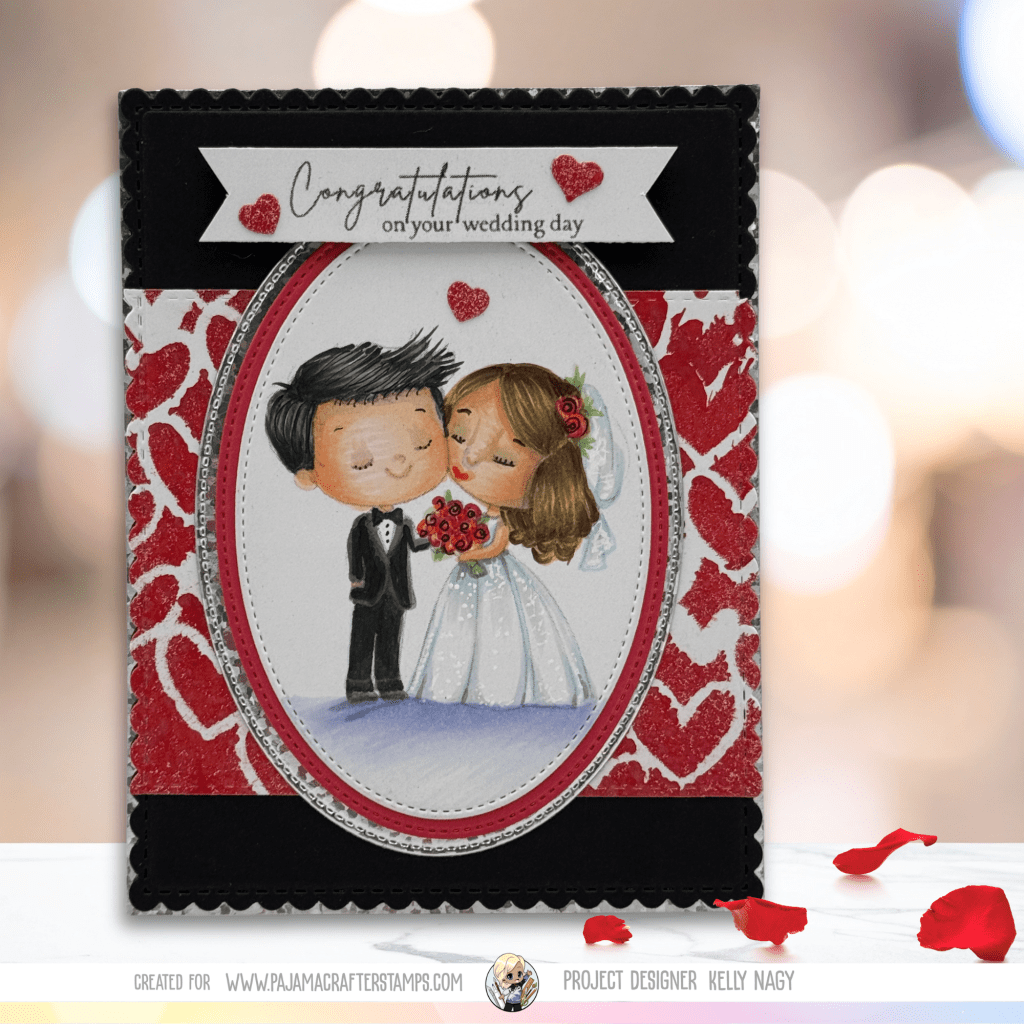
For today’s project, I designed an A2-sized card using the BOUND BY LOVE stamp set from Pajama Crafter Stamps’ newest release. The sweet, intimate illustration of the couple instantly brought me back to my own wedding day, which became the heart behind my color selections, including hair and skin tones.
I leaned into a classic black-tie color palette using COAL and MARSHMALLOW cardstock, accented with bold red to represent love and roses. I’ve always loved that combination—it feels timeless, elegant, and full of emotion.
To add depth and interest, I used the IN MY HEART OF HEARTS stencil in the background. The pop of red and repetition of hearts creates movement without distracting from the focal image. A layer of DISCO BALL Specialty Silver Sparkle Card Stock adds just the right touch of shimmer—because every wedding card deserves a little sparkle.
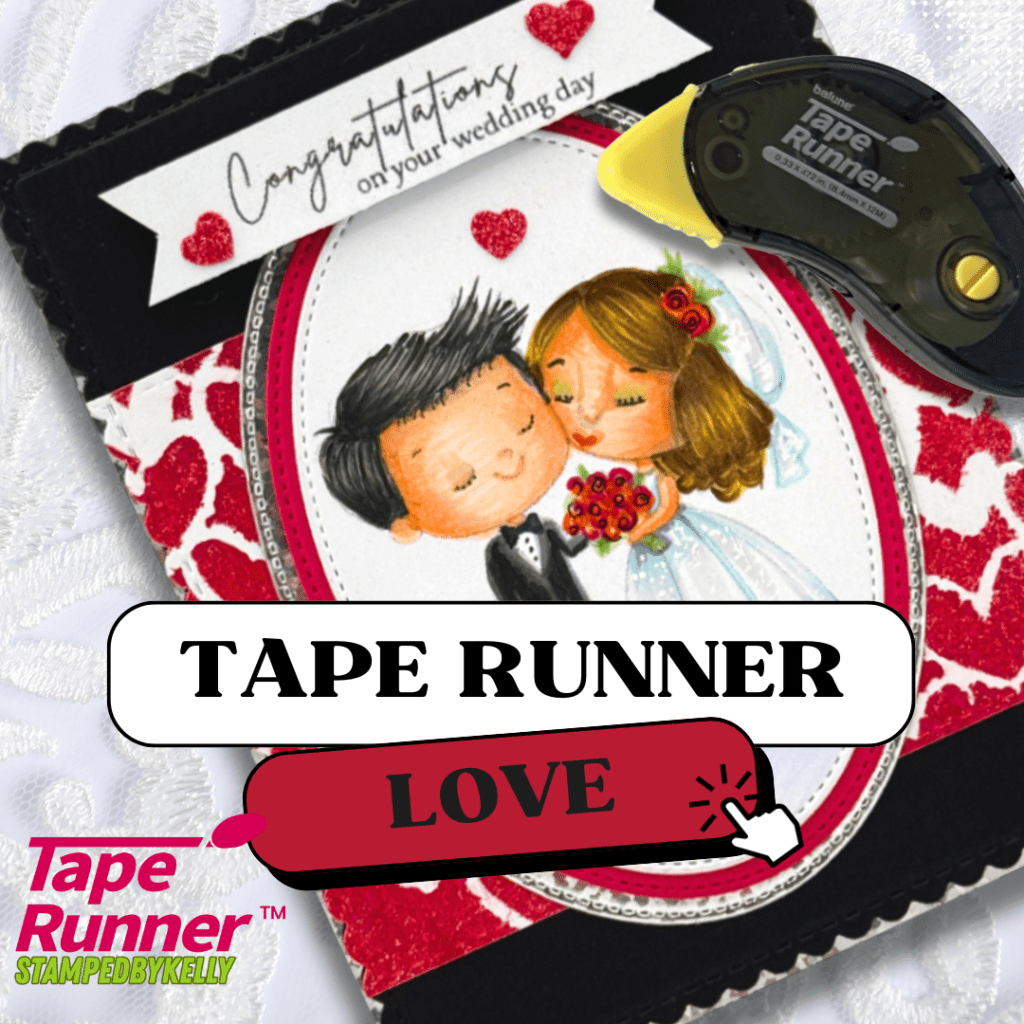
Layers easily put together using TAPERUNNER.COM
I really enjoy the convenience and ease of using my hand-held dry adhesive from Tape Runner. Use promo code KELLY10 for 10% OFF your cart!
What I love most about this design is how easily it can be customized. Whether you match wedding colors or personalize details for the couple, it’s a layout that adapts beautifully.
This card was made with intention and heart—just like the celebration it represents.
Visit Pajama Crafter Stamps to pick up the new release set called BOUND BY LOVE or to check out any of the other wonderful offerings they have.
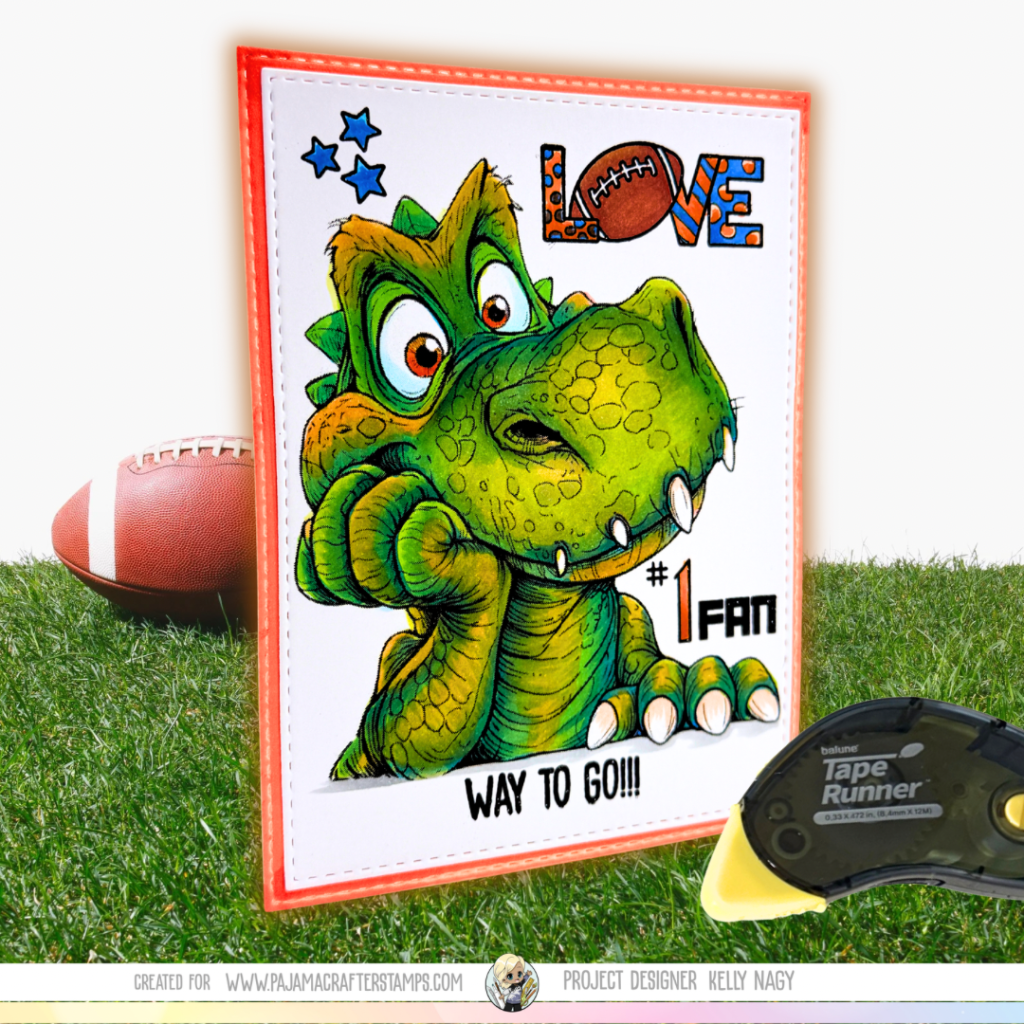
Dino, Gator, or Dragon? Join the Pop of Color Instagram Hop as I reimagine Pajama Crafter Stamps’ new Closer to Extinction and pair it with the fresh Hog Your Shine release. Is that stamped creature a dinosaur, an alligator, a dragon—or something entirely new? I masked and mashed up images for a playful, unexpected twist. Hop over to Instagram to see the full card, my WIP shots, and the design team’s colorful projects — plus giveaway!
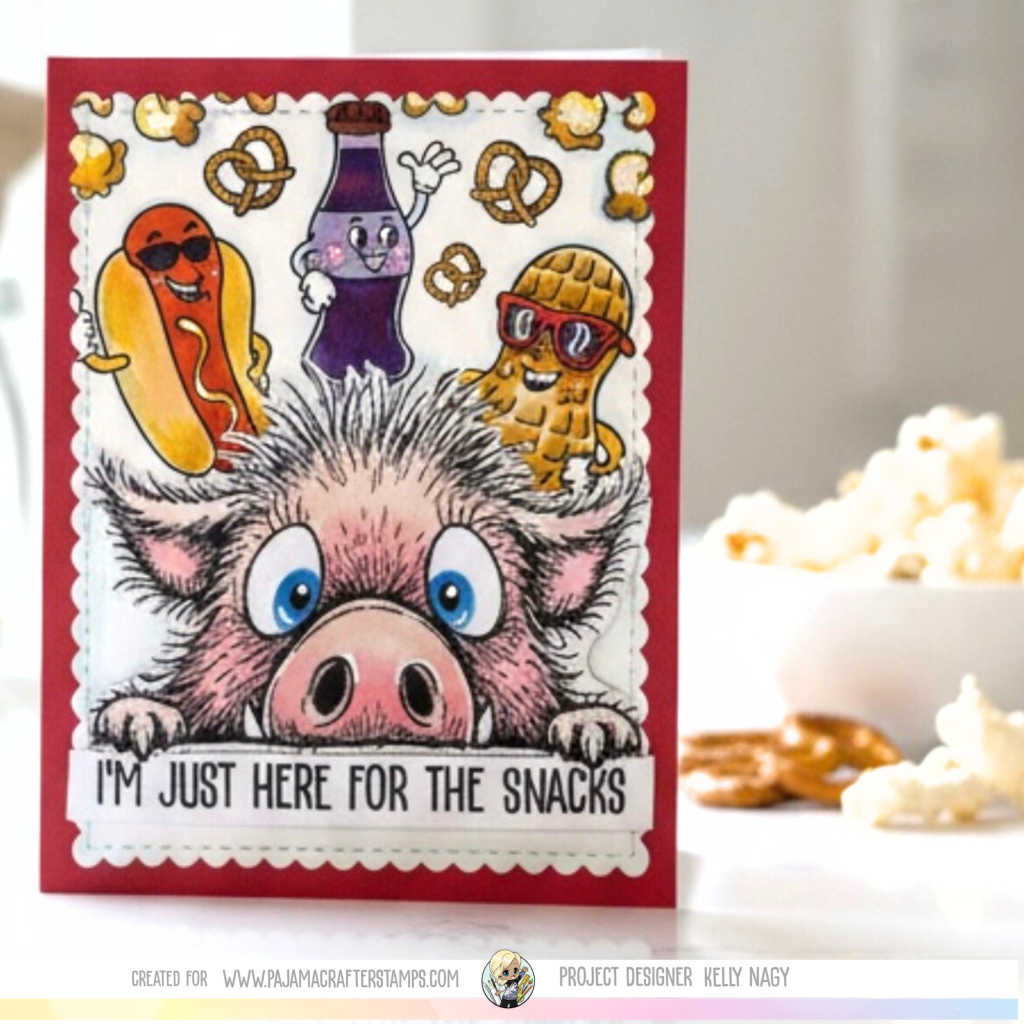
Today I’m thrilled to share Pajama Crafter Stamps’ newest release: Hog Your Shine! I paired this new set with two favorites — Stadium Food and Date Night — to make a fun, snack-loving card with the giggle-worthy sentiment, “I’m just here for the snacks!” Food (and friends) really are the best part of any get-together, and these stamps capture that playful vibe perfectly.
Marshmallow Cardstock — my go-to for alcohol-marker coloring; crisp, bright, smooth finish
Pig Press — used on top of my stamp positioner for a solid impressions every time
Barely Arts glue — available as Starter Kit (with detailed tip) and Refill — my adhesive for layering when a wet glue is desired
Color and technique I colored on Pajama Crafter Stamps’ Marshmallow Cardstock with alcohol markers for bold, smooth blends and bright, crisp results. The Hog Your Shine images are perfect for layered color and playful shading, and Stadium Food adds that snack-time charm. I used the Pig Press with my stamp positioner to get clean, even impressions every time.
Join the POP of Color Instagram Hop We’re hopping over on Instagram for the Pajama Crafter Stamps March 2026 Inspiration Hop: POP of Color. Our design team is sharing colorful new projects, tips for using color and contrast, and loads of crafty inspiration. Hop with us on Instagram at @PajamaCrafterStamps and @stampedbykelly — there’s also a chance to win a certificate toward purchases on the Pajama Crafter Stamps site!
Shop and support Fill your cart at PajamaCrafterStamps.com — I’ve included product links above for easy shopping.
See you on Instagram — hop, enjoy the projects, and don’t forget the snacks!
Here is a perk at my HOP CARD, which I used the NEW RELEASE, Closer to Extinction, but with creative color placement, made him a FLORIDA GATOR!! To put my simple layers together, my GO TO dry adhesive is from Tape Runner and you can use promo code KELLY10 for 10% off your cart.
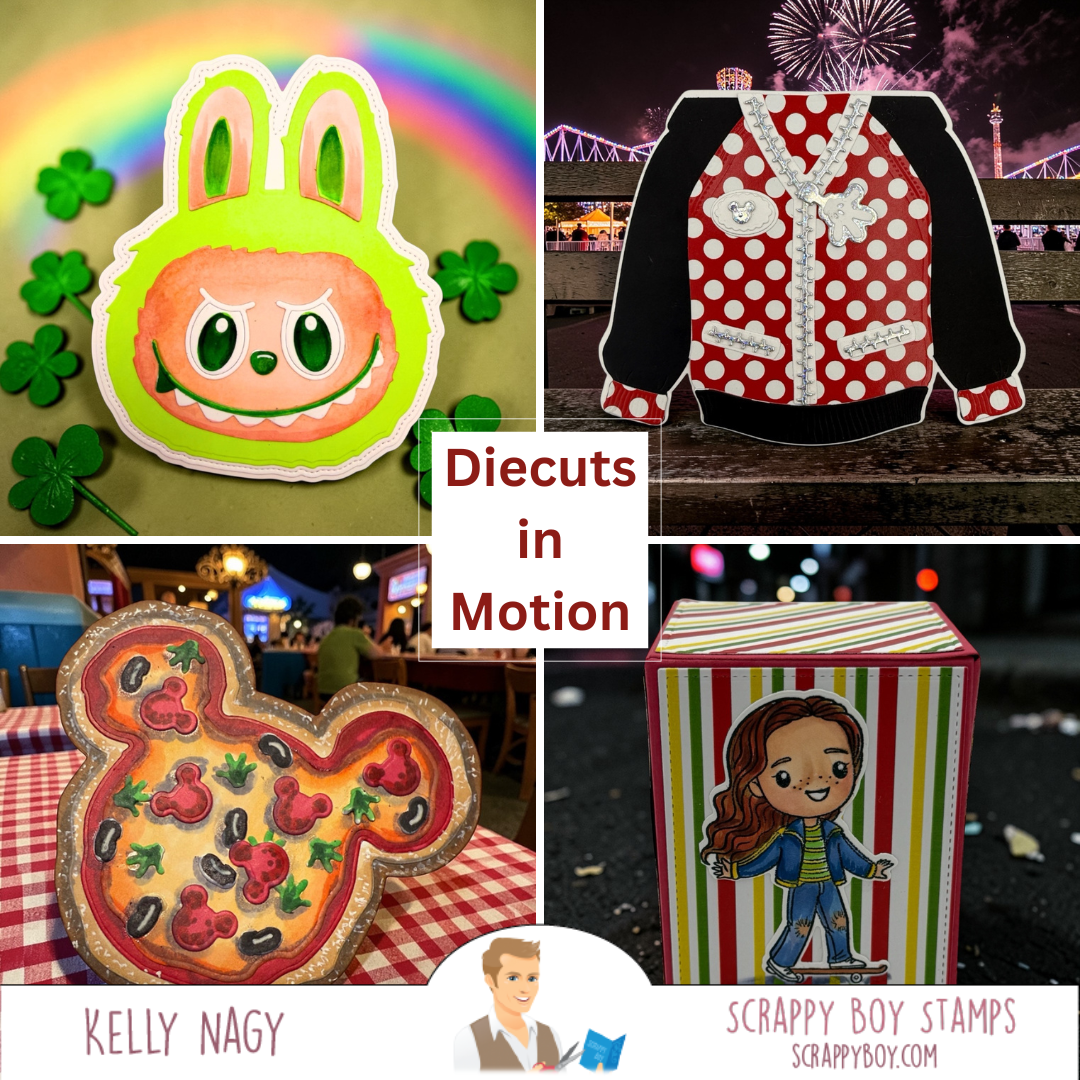
Unlocking Creativity with Die Cuts in Card Making! ✂️✨
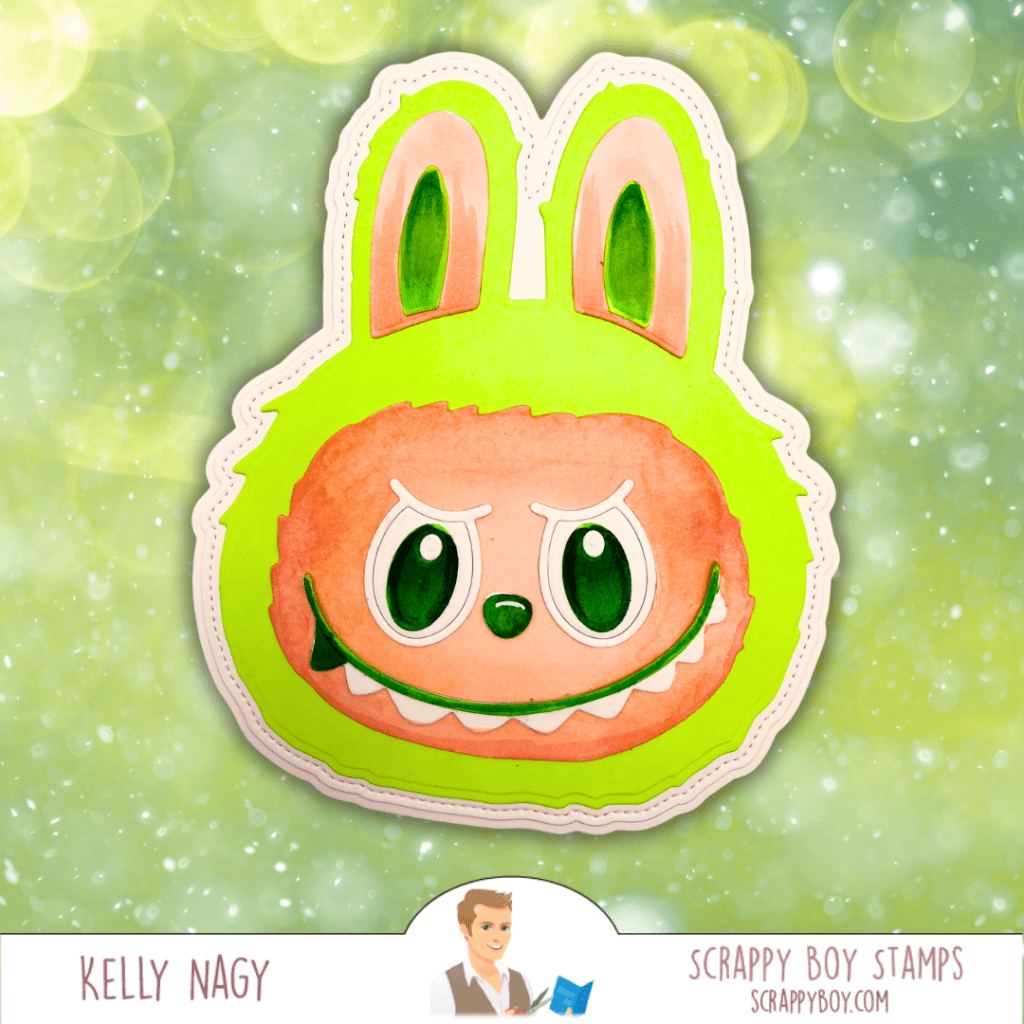
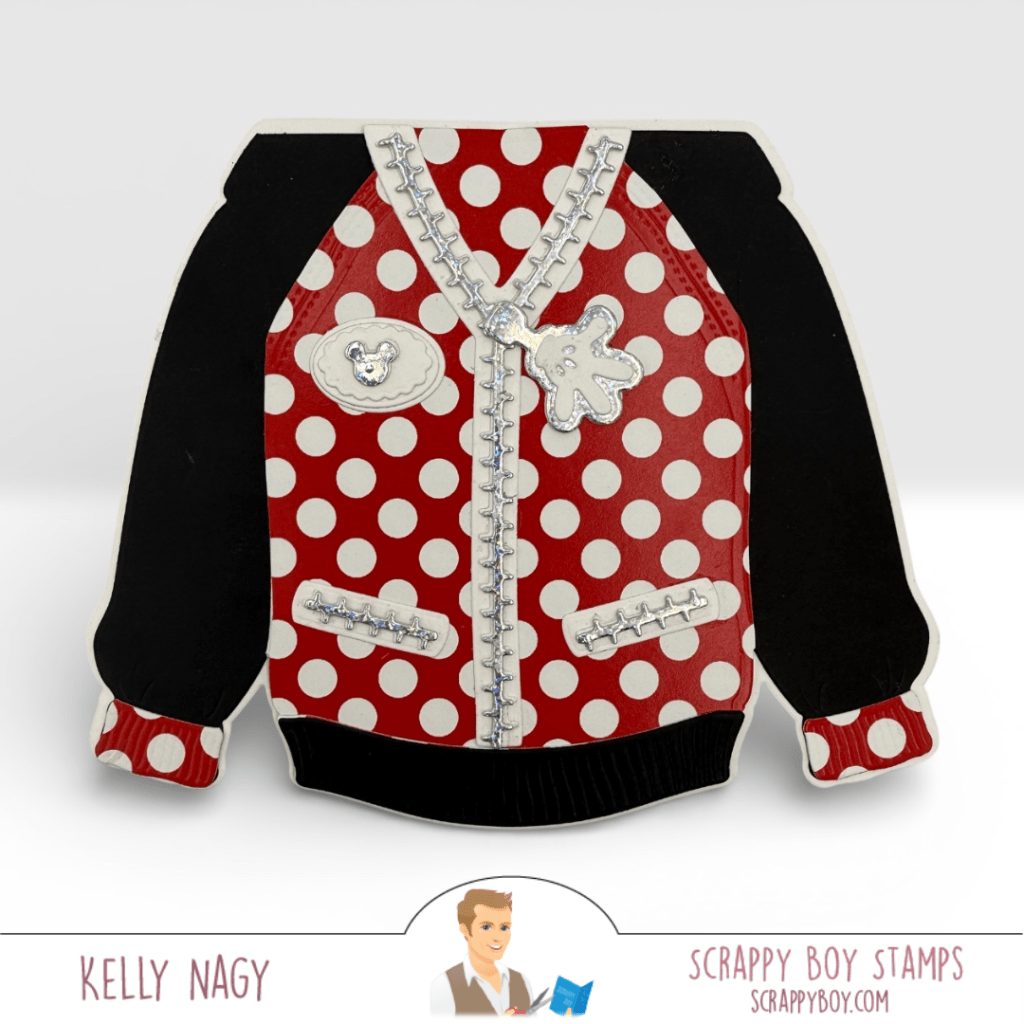
Welcome back, crafty friends! Today, I’m excited to share how die cuts can transform your card making and elevate your projects to new heights. From festive designs like the Shabubu Head Die Set for St. Patrick’s Day to cozy creations with the Hoodie Shaped Card, the possibilities are endless!
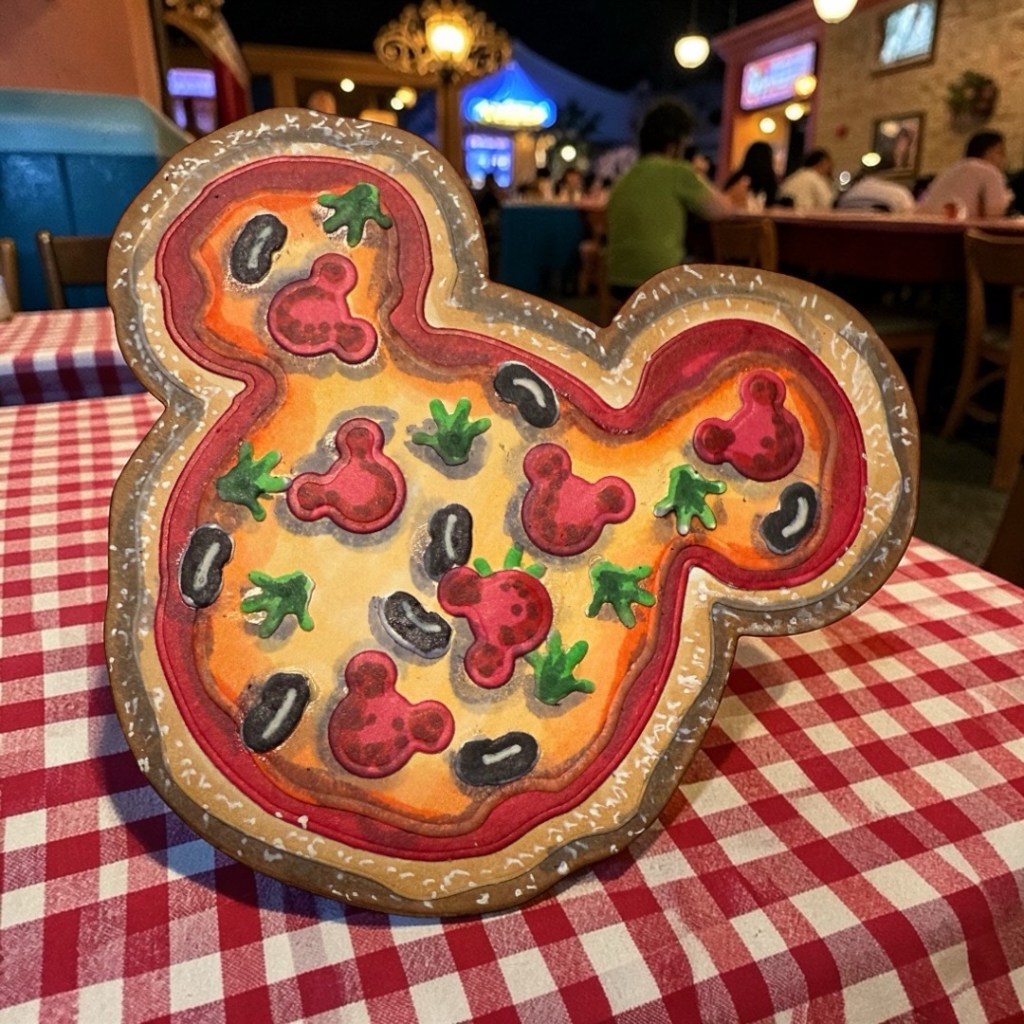
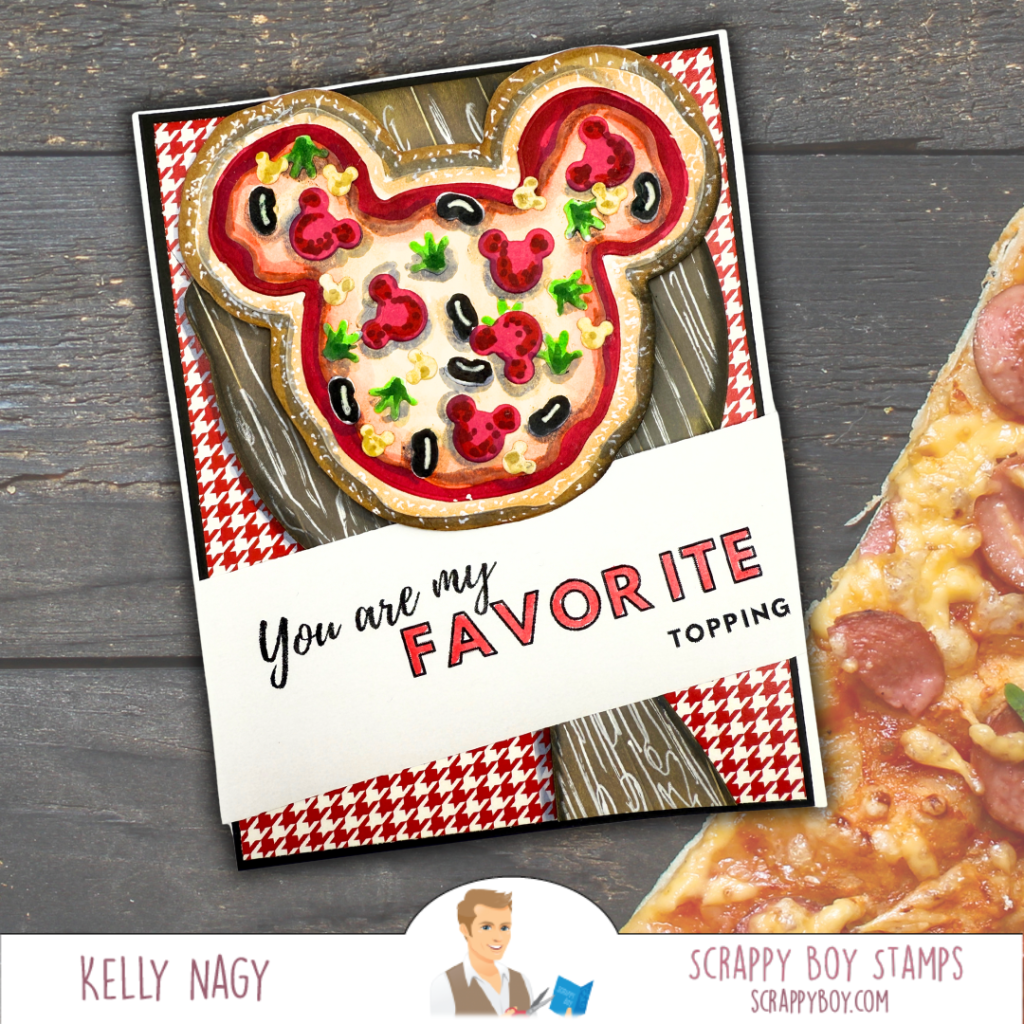
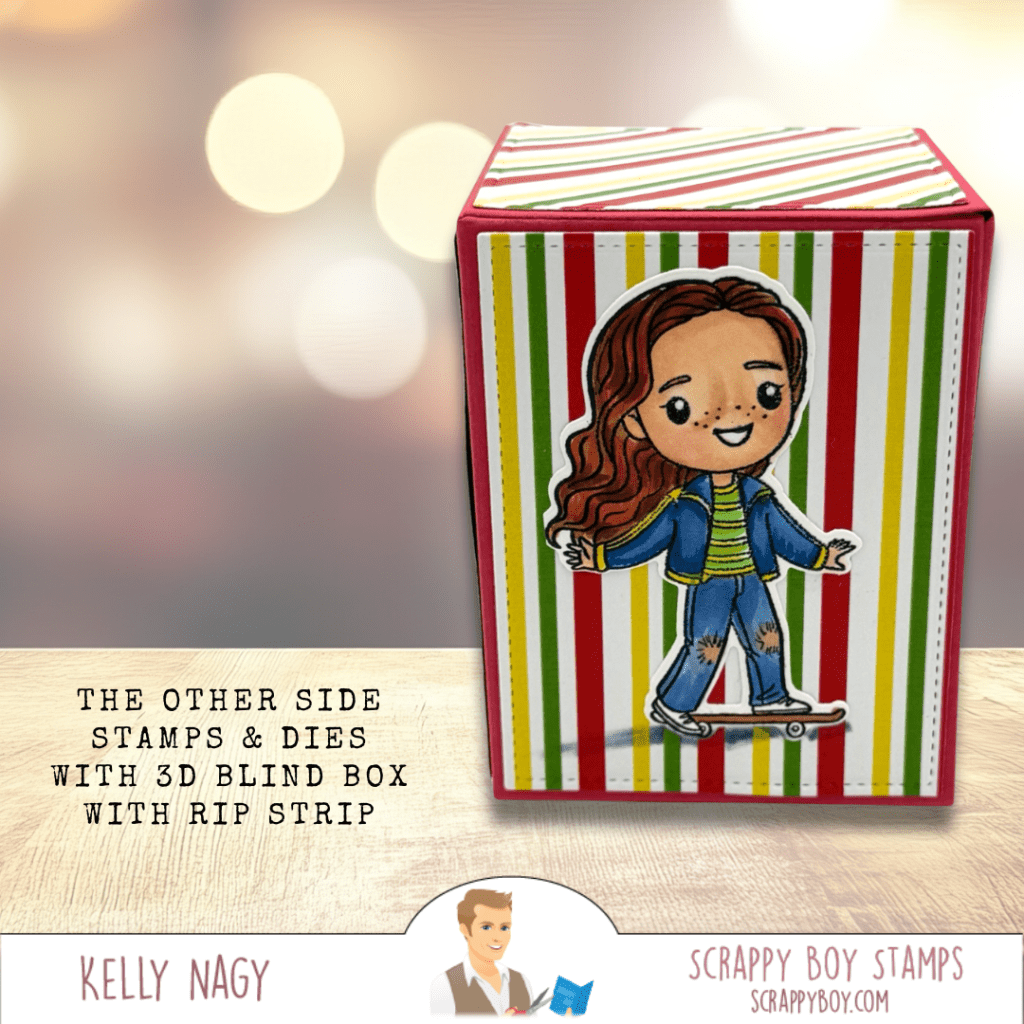
Get inspired by the fun Mouse Pizza Builder Die Set and the creative Blind Box with Rip Strip for unique gift card presentations. With die cuts, you can add dimension and personality to your cards, making them truly special. Ready to unleash your creativity? Let’s dive into these amazing projects together! 💖🎉
Hey there, crafty friends! Are you ready to take your card making and paper crafting to the next level? Let’s dive into four fabulous projects that showcase how die cuts can truly transform your creations!
1️⃣ Shabubu Head Die Set: Just in time for St. Patrick’s Day, this die set lets you customize adorable characters in vibrant green! With die cuts, you can add dimension and personality to your cards, making them extra special. 🎉💚
2️⃣ Hoodie Shaped Card & Add-On Die Set: Say goodbye to basic cards! This hoodie die set allows you to create cozy, themed cards that can be zip-up or feature front pockets. Customization is key, and with just a few die cuts, you can create a professional-looking design that’s full of warmth and fun. 👕✨
3️⃣ Mouse Pizza Builder Die Set: This set proves that die cuts can do much more than just cut flat shapes! Use them creatively, like I did when I transformed a piece from the Magic Mirror Mini Die Set into a pizza board. Experiment with cutting your dies in plain white cardstock and let your imagination run wild with colors and arrangements! 🍕🐭
4️⃣ Blind Box with Rip Strip: This project combines playful design with functionality! Using patterned paper and an image from The Other Side Stamp Set, I created a gift box that’s perfect for presenting a gift card. The rip strip adds an exciting reveal, making gift-giving even more delightful! 🎁✨
With die cuts, the sky’s the limit! You can add dimension by layering your cuts, and even more depth by adding shadows and colors using your favorite mediums or simple ink blending on the edges.
So, are you ready to unleash your creativity? Dive into these projects and see how die cuts can elevate your crafting game! Share your favorites in the comments below, and let’s inspire each other to create something amazing!
I use dry adhesive and liquid adhesive for my projects. There are specific times when one works better than the other. Follow me for more tips on that and if you wish to visit taperunner.com you can use code Kelly10 for 10% off your cart.
Life can be overwhelming, and sometimes, words escape us. In moments of grief or struggle, a simple card can bridge that gap, offering solace when our voices fall short.
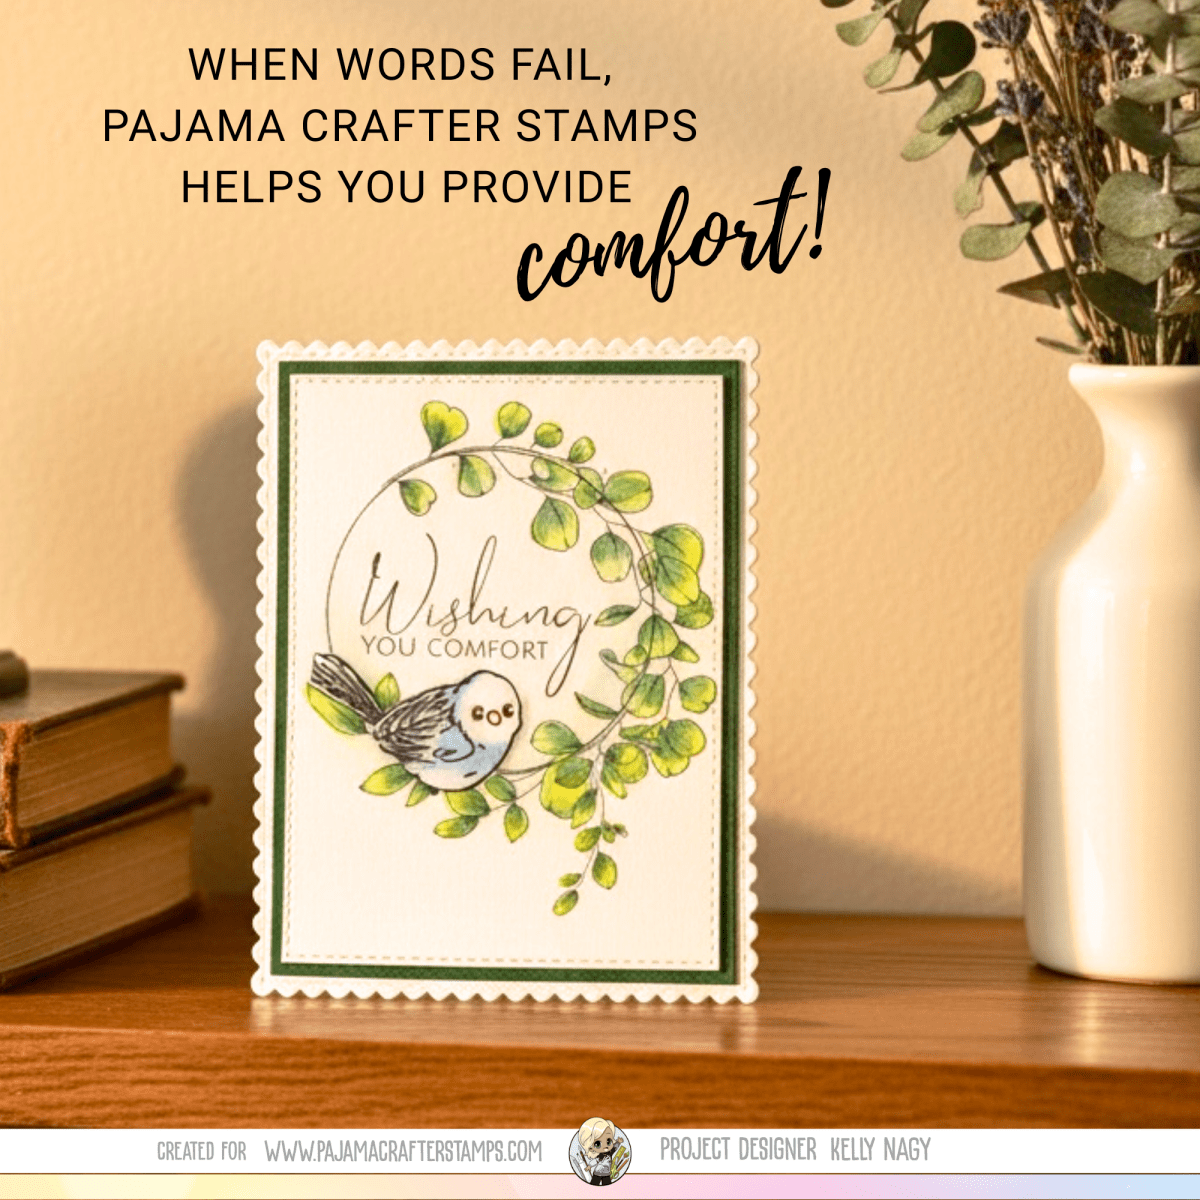
Imagine holding a beautifully designed card, lush greenery enveloping heartfelt sentiments. This card, whether a sympathy note or a gesture of friendship, says, “I’m here for you.” It brings a sense of connection, reminding your friend that they are not alone in their journey.
Choose thoughtful words that resonate, and let the card carry your love and support. Sometimes, a little reminder can make a world of difference. 💌✨
Hello crafty friends!
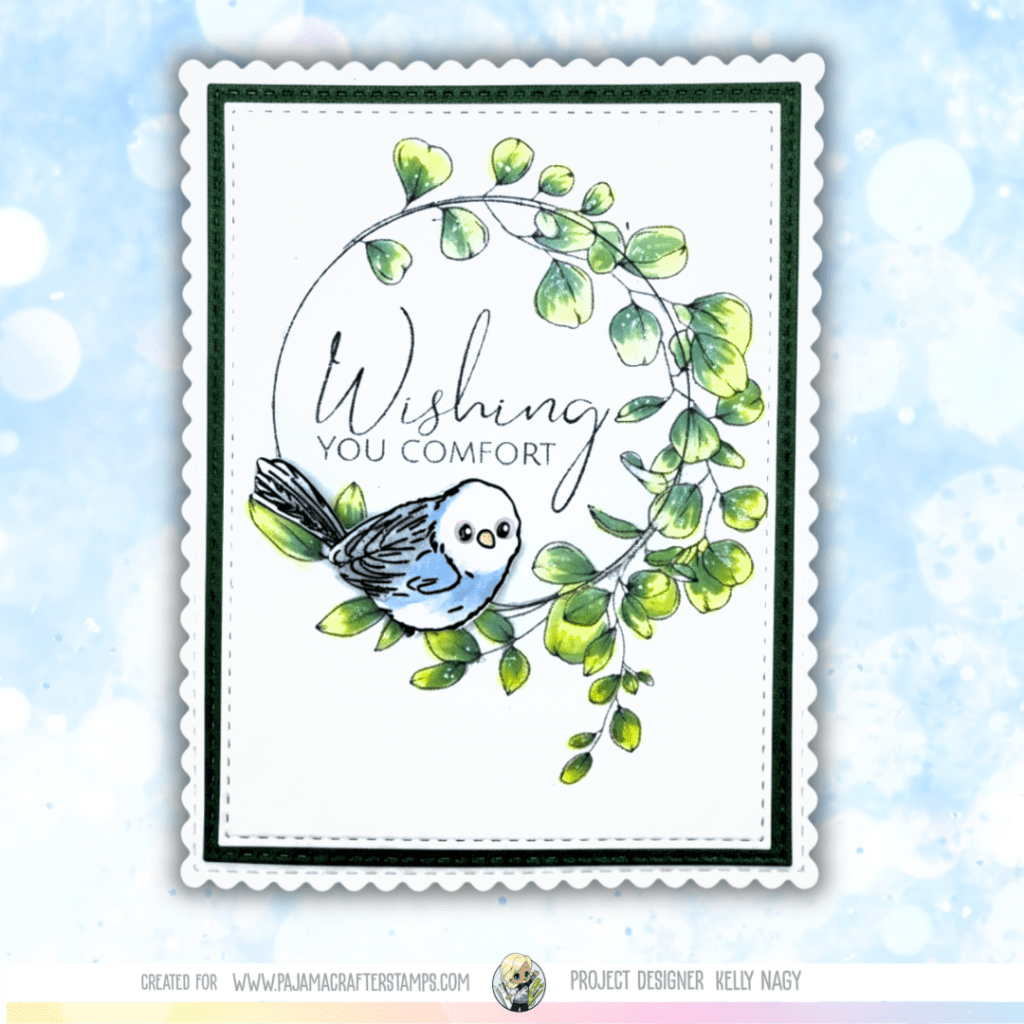
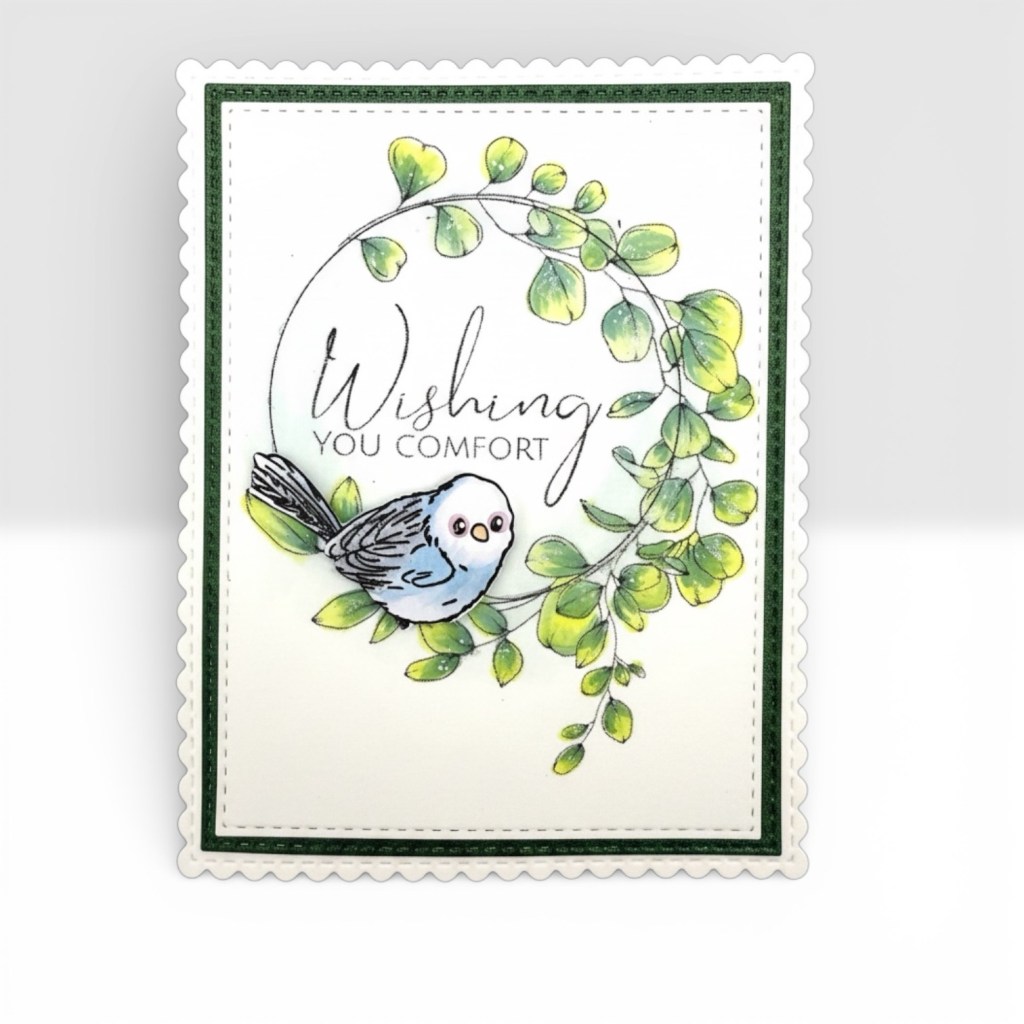
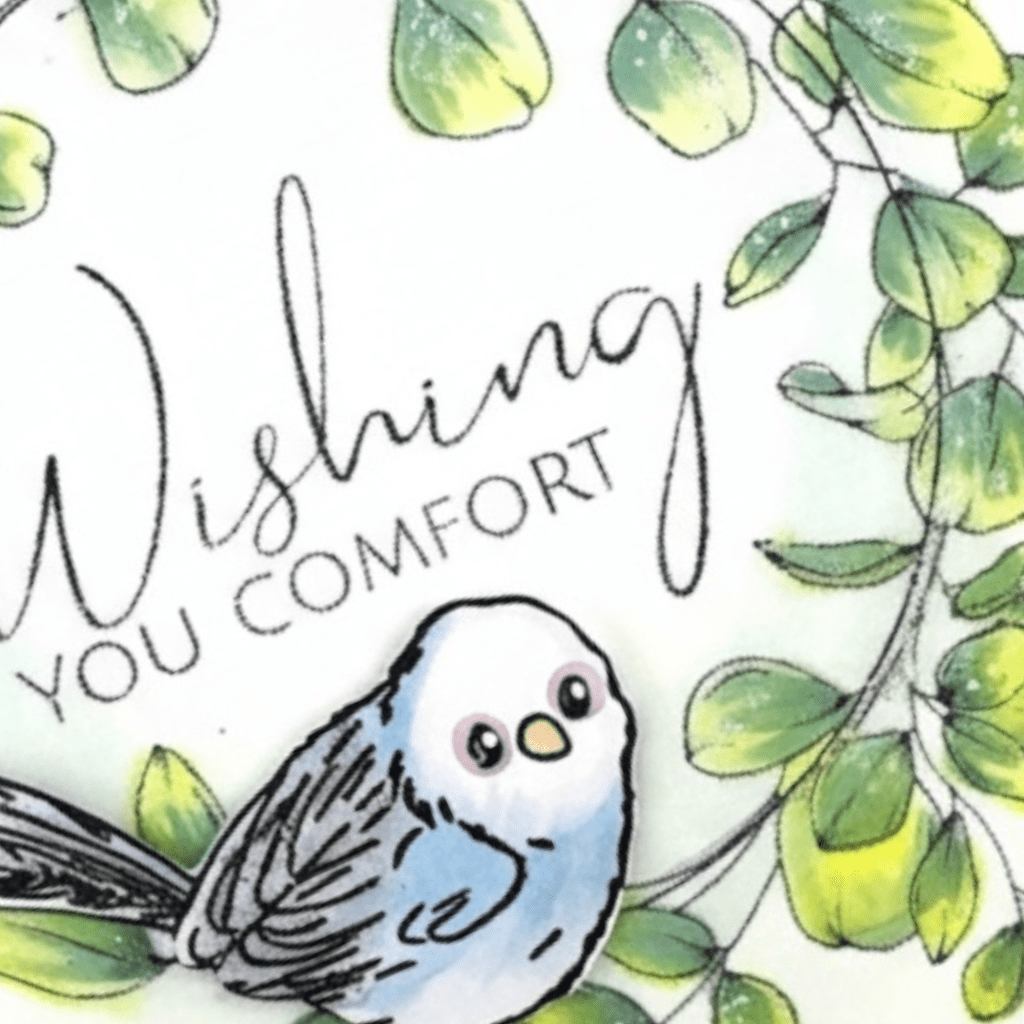
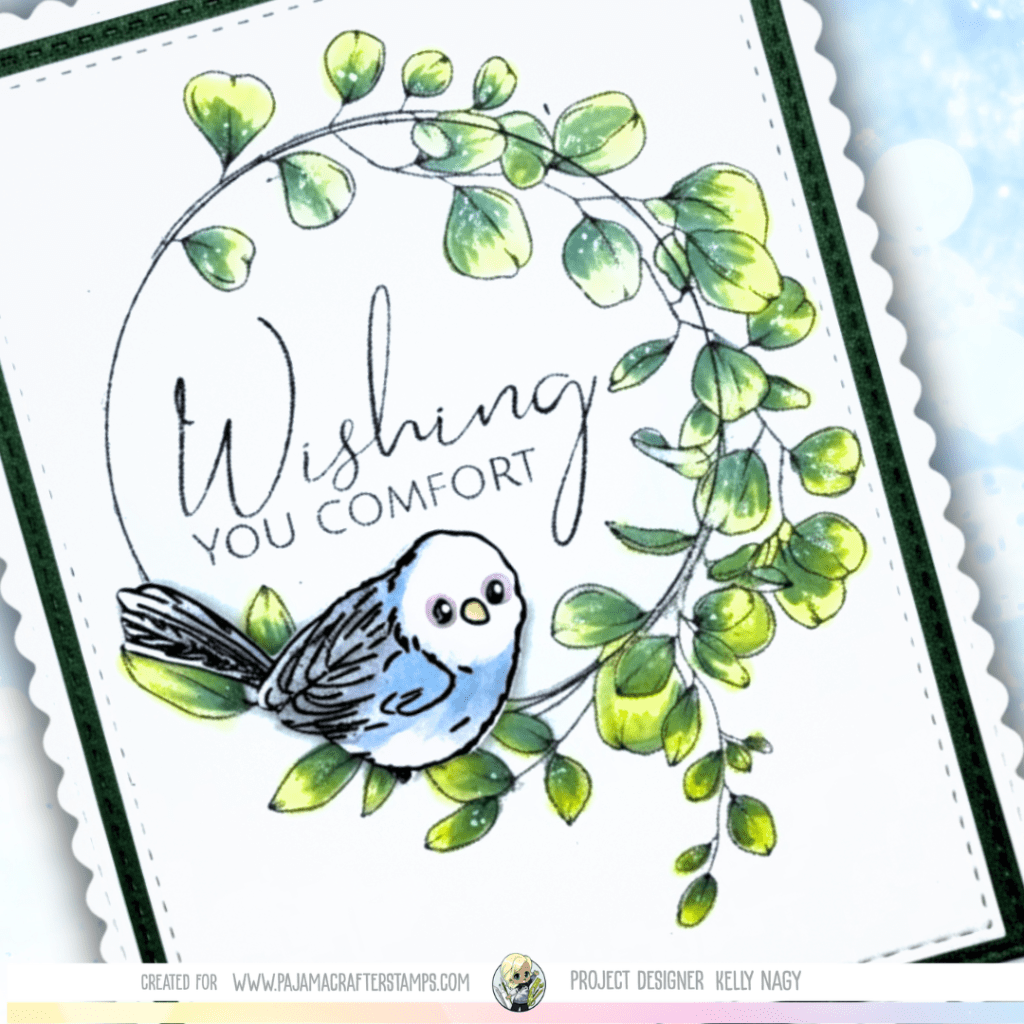
Today I’m sharing a card created with the beautiful In Our Hearts Always stamp set from Pajama Crafter Stamps. This heartfelt set is perfect for creating cards that offer comfort, encouragement, and support during difficult moments. I paired it with a sweet bird image from the Birds of a Feather stamp set to create a design that feels gentle and thoughtful.
Card Design
For this A2 card, I wanted the design to feel simple and supportive, allowing the sentiment and imagery to take center stage. I began by hand-stamping and coloring the bird image, keeping the coloring soft so it would complement the sentiment without overpowering it.
To create a clean and polished layout, I layered panels of Marshmallow and Coal cardstock. The contrast between the light and dark layers provides a strong foundation for the focal image while still keeping the overall design elegant and balanced.
The sentiment from the In Our Hearts Always set adds the perfect message of comfort. This set is wonderful to have in your collection for those times when you want to send a meaningful card to someone who could use a little extra support.
Finishing Touches
Once the focal panel was complete, I assembled the layers onto an A2 card base. The layered cardstock panels help frame the design and draw the eye to the stamped image and sentiment.
This card is a reminder that handmade cards can be a powerful way to show someone they are loved and remembered.
Pajama Crafter Stamps — In Our Hearts Always Pajama Crafter Stamps — Birds of a Feather Pajama Crafters Stamps – Marshmallow Paper Pajama Crafters Stamps – Coal Paper
For the perfect layered card while minimizing warping, I recommend using dry adhesive from TapeRunner.com. Their adhesive prevents the moisture that can overpower fibers with liquid glue. Use promo code KELLY10 for 10% off your entire cart—great for all your crafting needs!
Thank you so much for stopping by today! I hope this project inspires you to create a card that shares kindness and encouragement with someone who may need it.
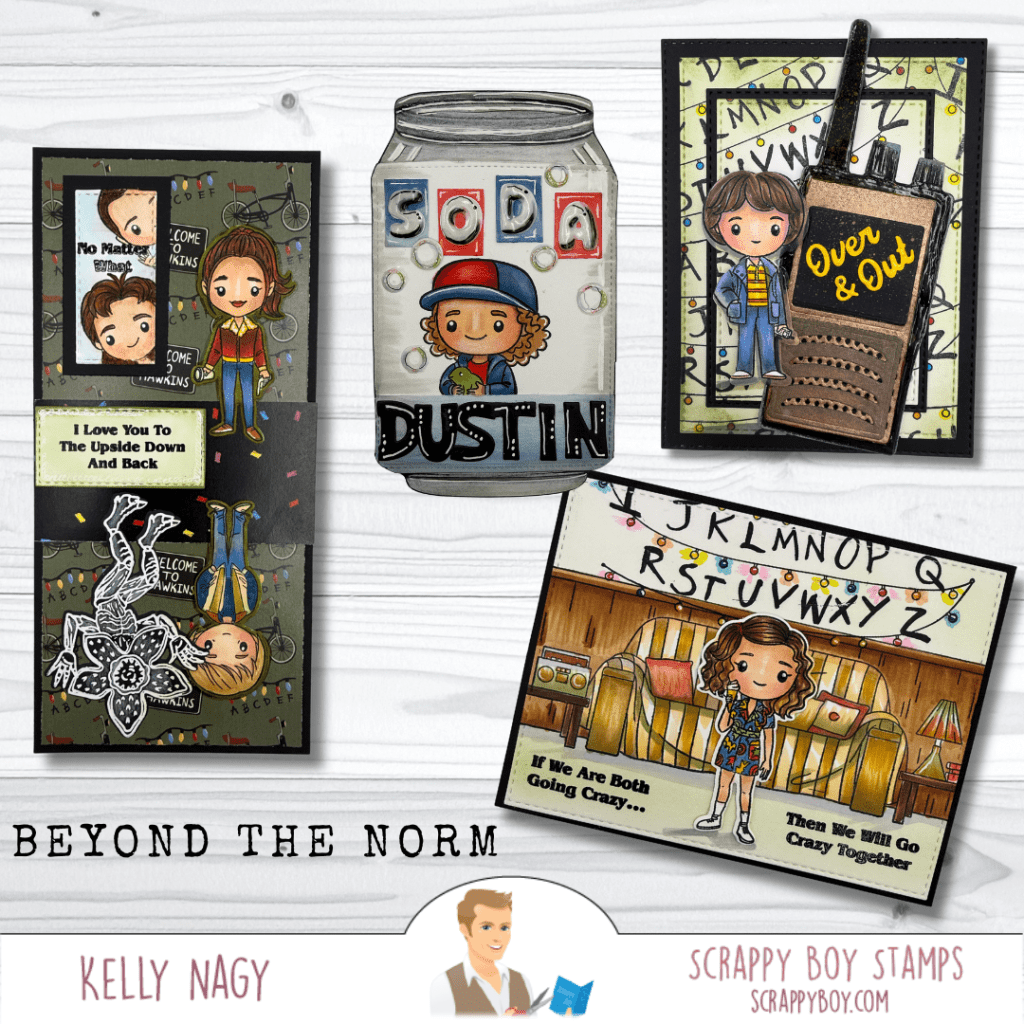
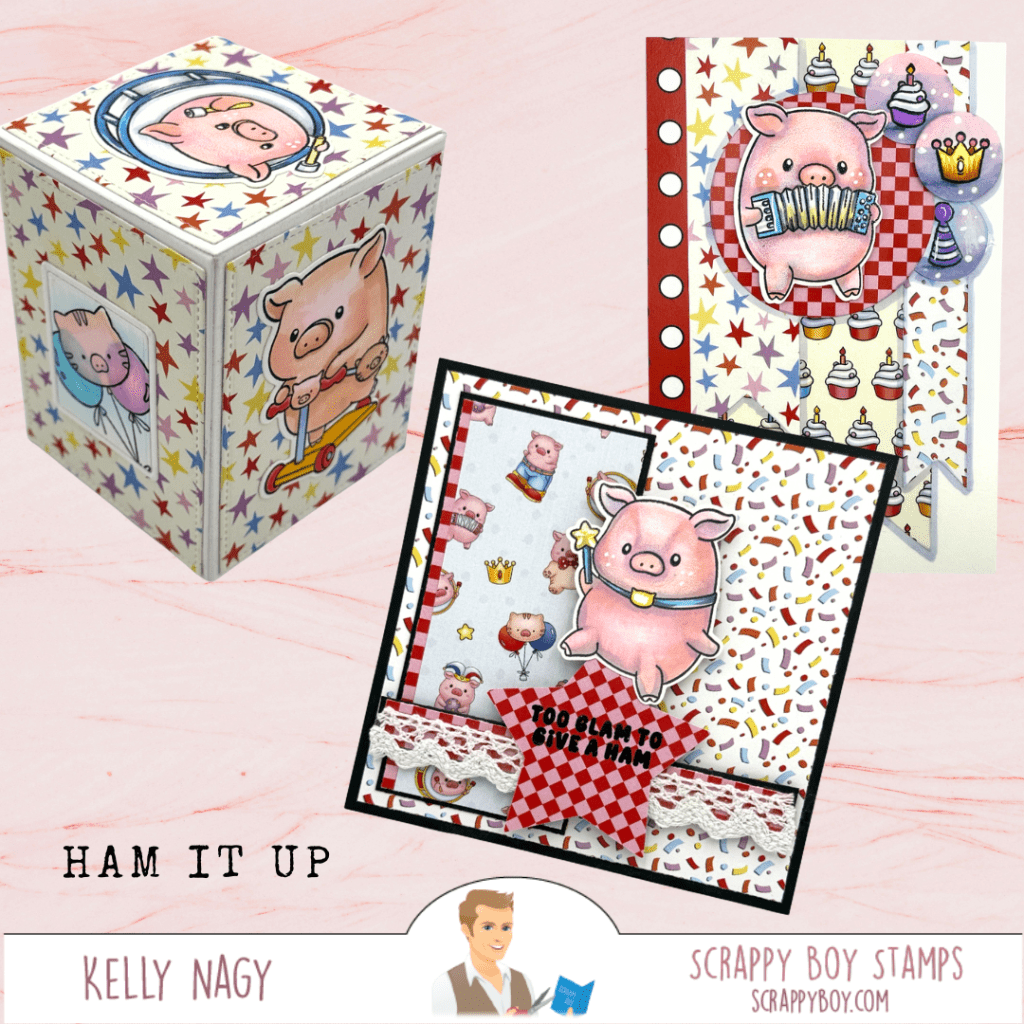
Discover three fun paper crafting projects featuring the newest release from Scrappy Boy Stamps! In this post, I’m sharing an A2 scene card, a playful mini slimline card, and a creative Easter favor made with the Shabubu Head Card Die and Blind Box Die. I’m also sharing one of my favorite crafting tips—using dry adhesive from Tape Runner to keep layers smooth and warp-free while assembling detailed card designs. ✂️✨
The newest release from Scrappy Boy Stamps is packed with playful characters, creative dies, and fun papers that make crafting an absolute joy! Today I’m sharing three different paper projects featuring items from this release. Each project highlights how easily these products can be mixed, matched, and customized to create something truly unique.
Before we jump into the projects, I also want to share one of my favorite crafting essentials. When assembling my cards and layered die cuts, I almost always reach for dry adhesive from Tape Runner. Dry adhesive is fantastic for cardmaking because it helps keep papers—especially lighter weighted papers—from warping or developing ripples, which can sometimes happen with wetter adhesives.
Another reason I love using dry adhesive is that it’s a bit more forgiving at the start. If something isn’t perfectly aligned, you can gently warm the adhesive with a heat tool and carefully lift the piece to reposition it before it fully bonds. This makes it much easier to straighten layers and fine-tune placement while assembling your design.
If you’d like to give it a try, you can visit taperunner.com and use the promo code KELLY10 to receive 10% off your entire cart.
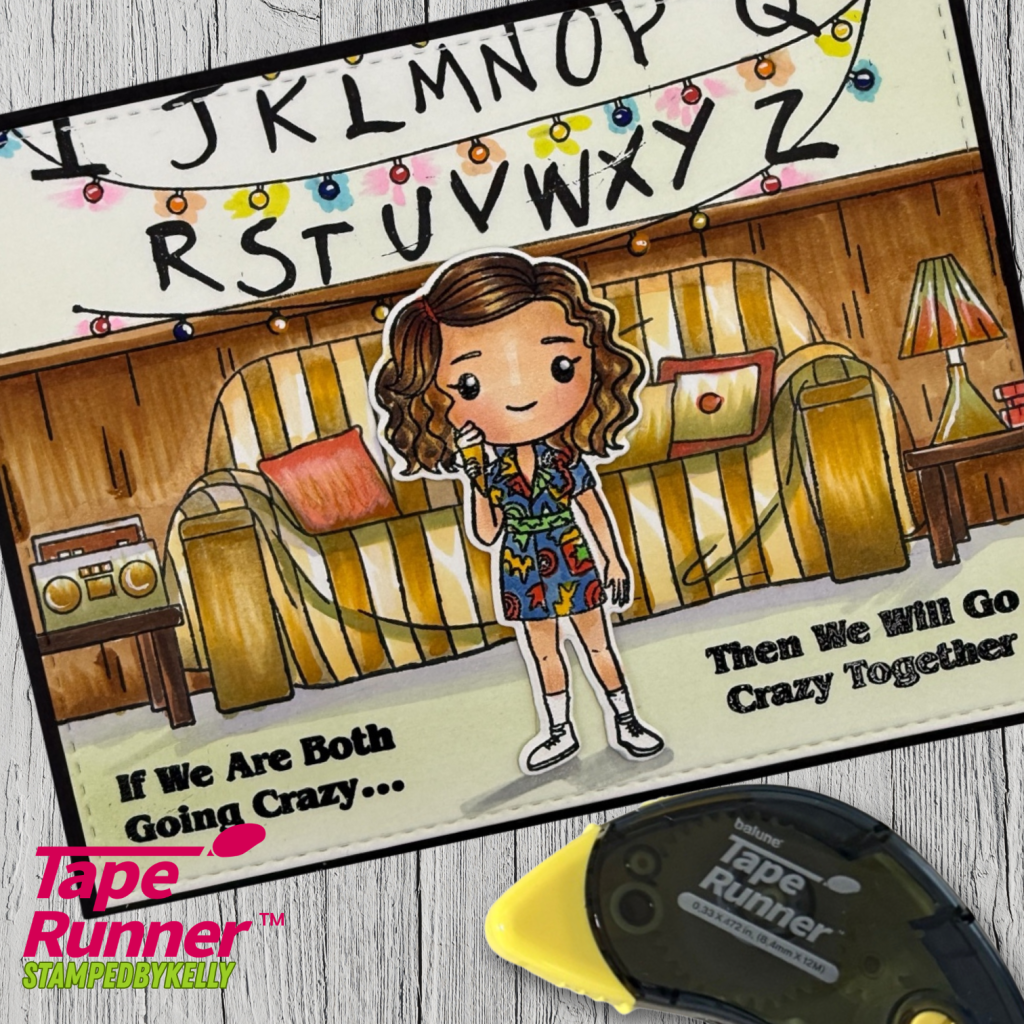
A2 Landscape Card – The Other Side
For my first project, I created an A2 landscape card using the The Other Side Stamps & Outline Dies. I paired the images with the Beyond The Normal Living Room Background Stamp to build a fun and detailed scene.
To pull the design together, I used patterned papers from the Beyond the Normal 6×9 Paper Pack. The papers coordinate beautifully with the stamped images and really help bring the entire card to life. I love how easy it is to create a full scene with this collection—it almost feels like stepping right into the story.
When layering the stamped images and patterned papers, I used dry adhesive from Tape Runner to keep everything smooth and flat. Scene cards often include multiple layers, and dry adhesive helps prevent bubbling or distortion in the patterned paper.
Products Used
The Other Side Stamps & Outline Dies Beyond The Normal Living Room Background Stamp (6×6) Beyond The Normal 6×9 Paper Pack
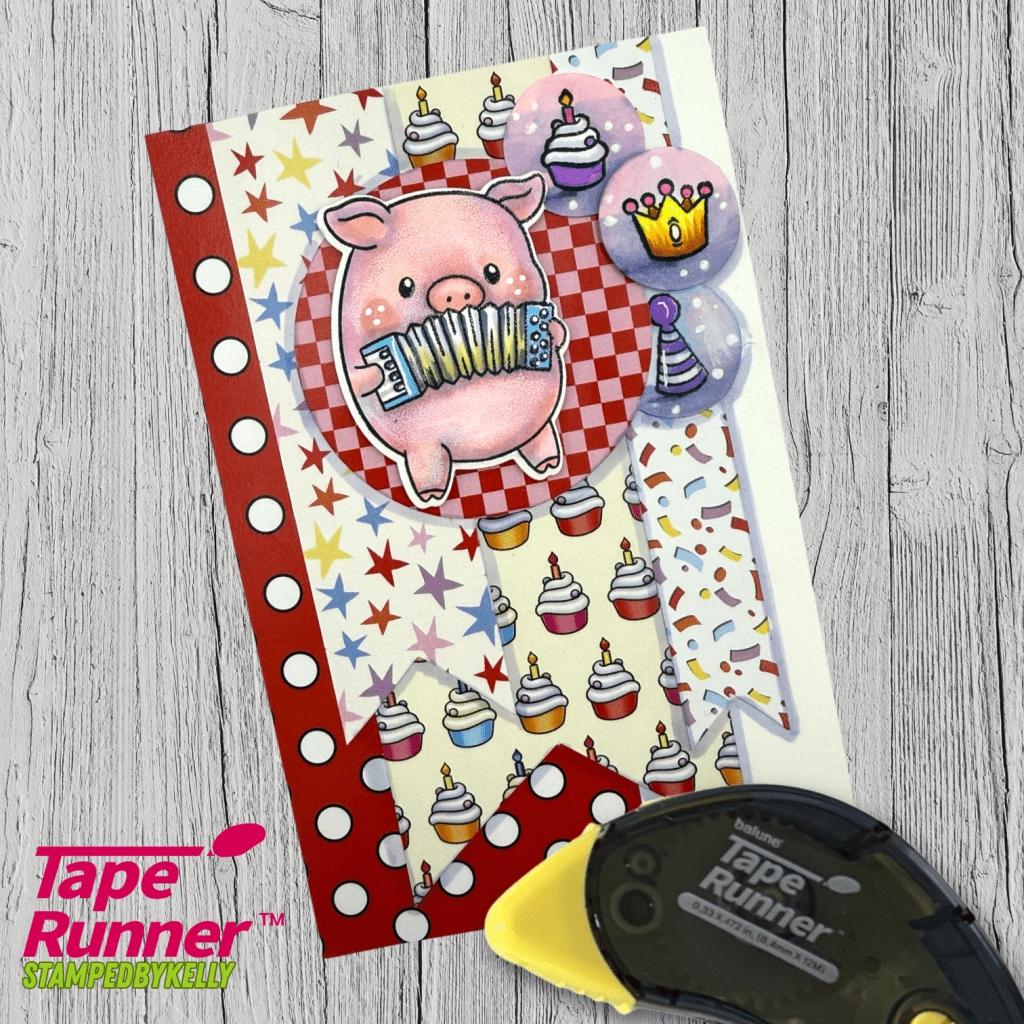
Mini Slimline Card – Ham It Up
Next, I created a playful mini slimline card using the adorable Ham It Up collection.
This project features the Ham It Up Stamps, Outline Dies, and the coordinating 6×9 Paper Pack. The patterned papers add the perfect pop of color, while the stamped images bring so much personality to the card.
Mini slimline cards are such a fun format when you want something a little different while still keeping the design simple and eye-catching. I again used dry adhesive from Tape Runner while assembling the layers and die cuts because it works wonderfully for stacking die-cut elements while keeping everything smooth and wrinkle-free.
Products Used
Ham It Up Stamps Ham It Up Outline Dies Ham It Up 6×9 Paper Pack
Shabubu Easter Favor – A Fun Surprise Project
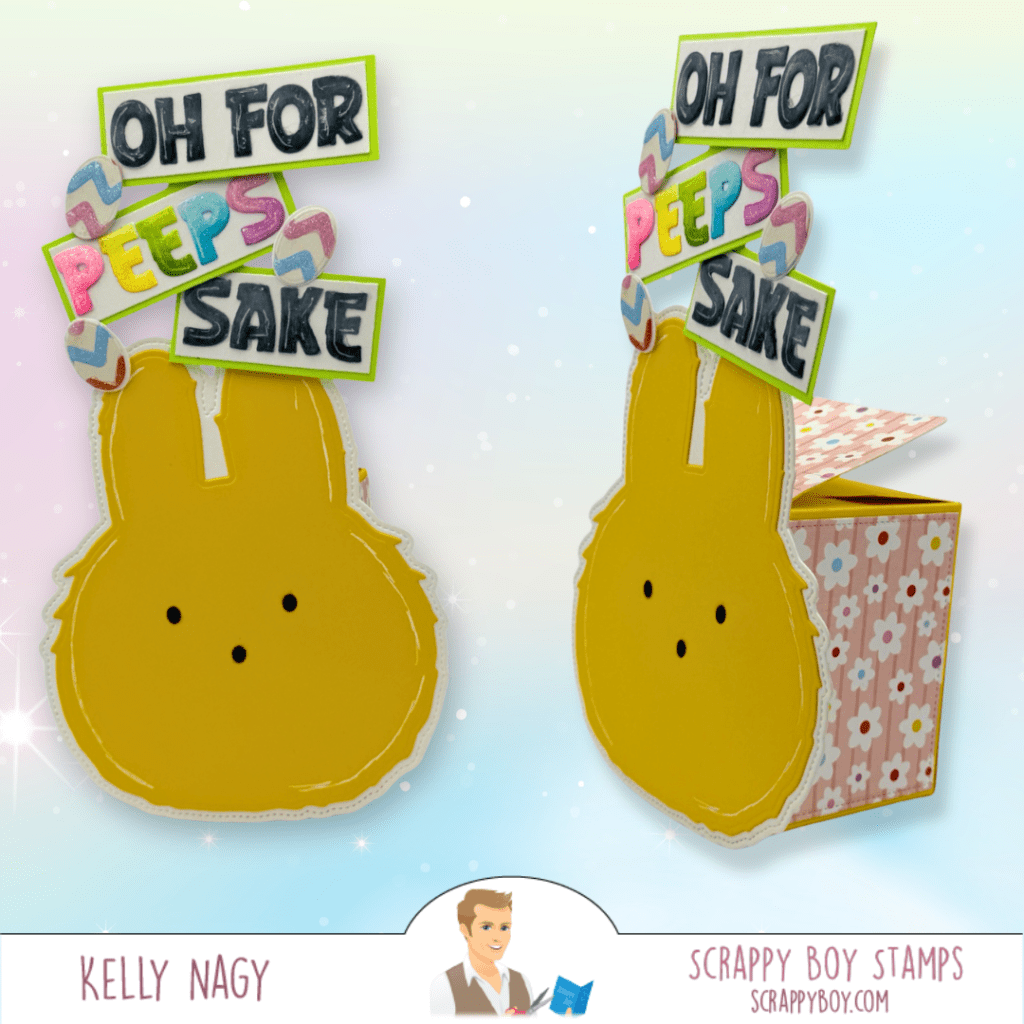
For my third project, I wanted to create something a little unexpected! I used the Shabubu Head Card Die and paired it with the Blind Box Die with Rip Strip to design a fun Easter favor or small gift project.
The Blind Box die creates a playful interactive element with the rip strip, making the project feel like opening a surprise package. To personalize the favor, I added a custom message using the Scrappy Boy Alphabet Die.
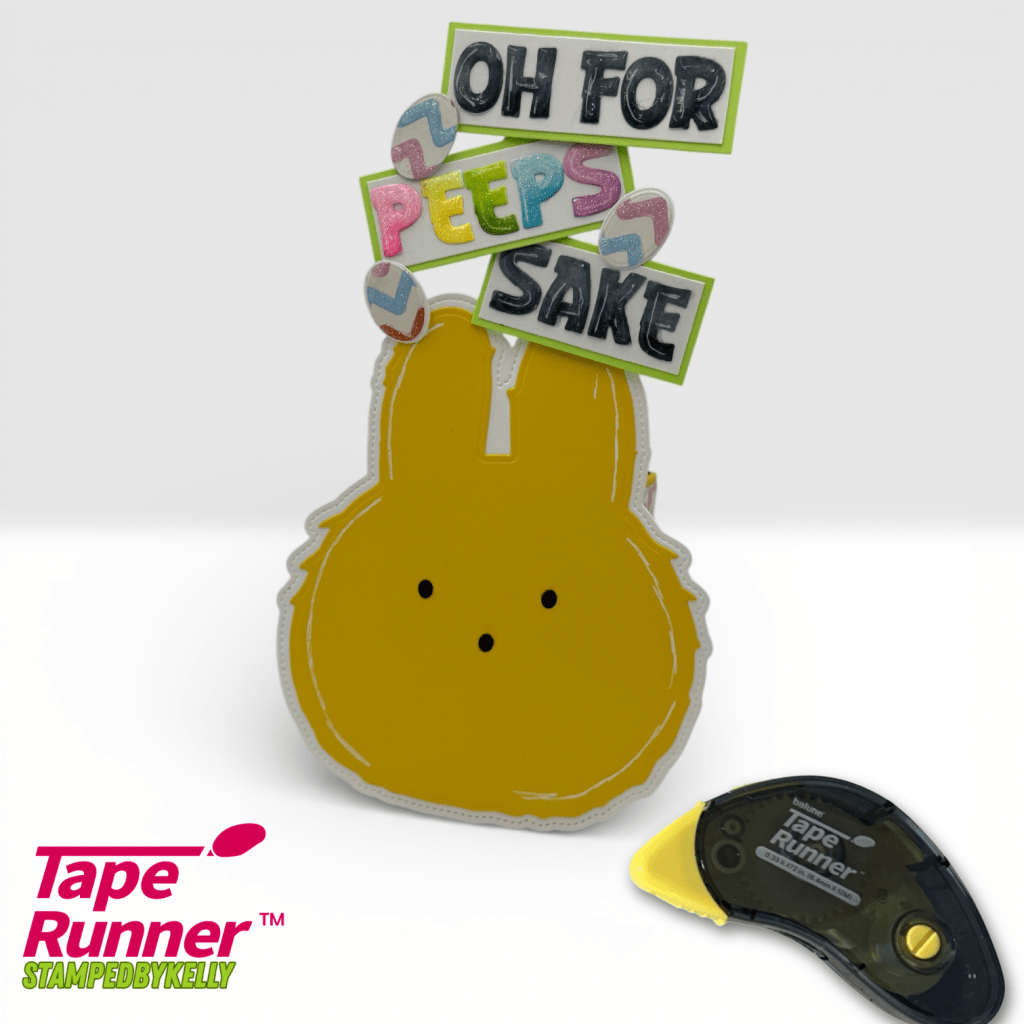
This would be perfect for Easter treats, small gifts, or party favors, and I love how these dies can be combined in creative ways to create something completely new. While building up the layered die pieces for the Shabubu design, dry adhesive from Tape Runner made it easy to stack the layers neatly while keeping everything perfectly flat.
Products Used
Shabubu Head Card Die Blind Box Die with Rip Strip Scrappy Boy Alphabet Die
So Many Creative Possibilities
This newest release from Scrappy Boy Stamps offers so many fun ways to create cards, gifts, and interactive projects. Whether you’re making detailed scene cards, mini slimlines, or surprise gift packaging, these products make it easy to craft something memorable.
And when it comes to assembling those layers, dry adhesive from Tape Runner is one of my favorite tools for keeping papers smooth, preventing warping, and allowing a little flexibility while putting everything together.
If you’re interested in these products, you can find Scrappy Boy Stamps products at scrappyboy.com as well as at Scrapbook.com.