I’m thrilled to share my latest creation featuring one of the newest stamp sets from the April 2025 release from Pajama Crafters Stamps—Champion in the Making! This adorable set showcases the cutest little boy and girl, making it perfect for any Little League celebration. But that’s not all! It also has elements that cater to the adults in the crowd, too, so you can create cards for fans of all ages!
Sentiments include:
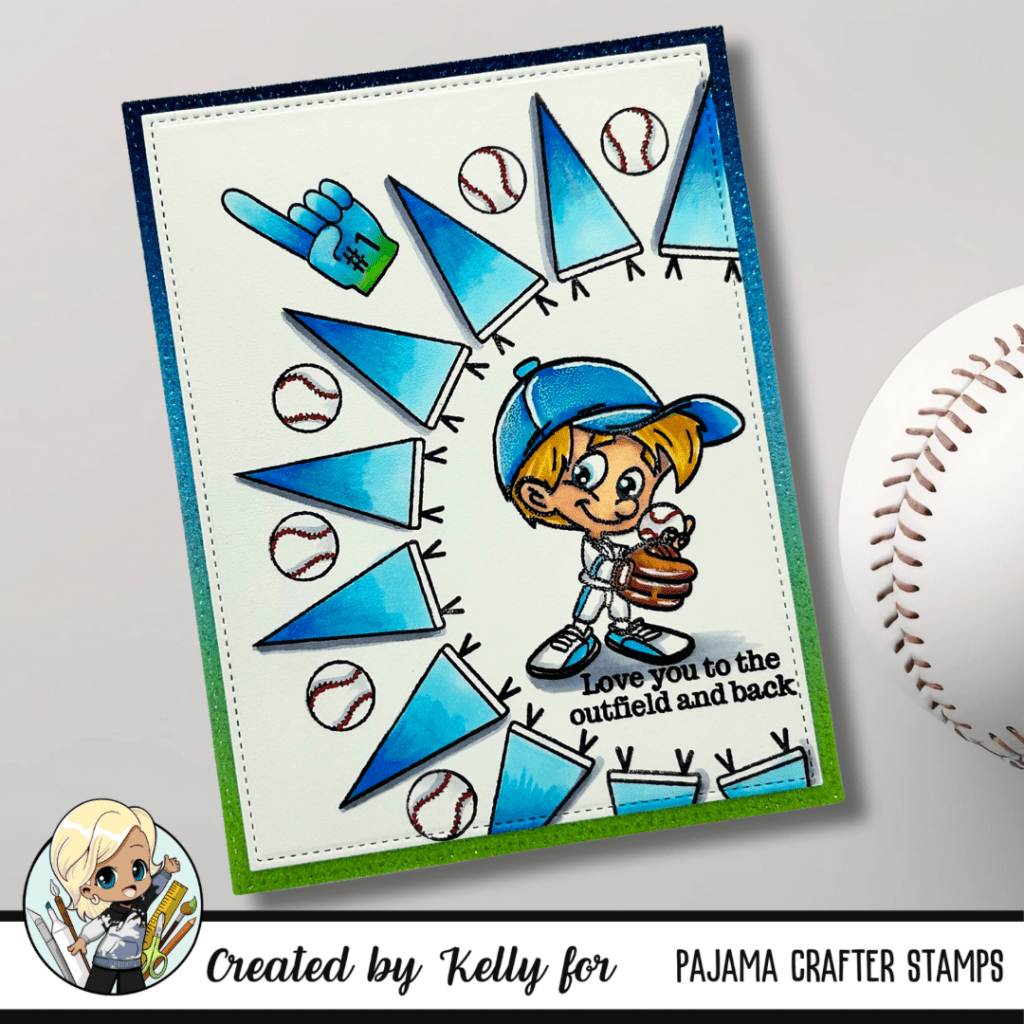
Love you to the outfield and back
I’m you’re biggest fan
Champion in the making
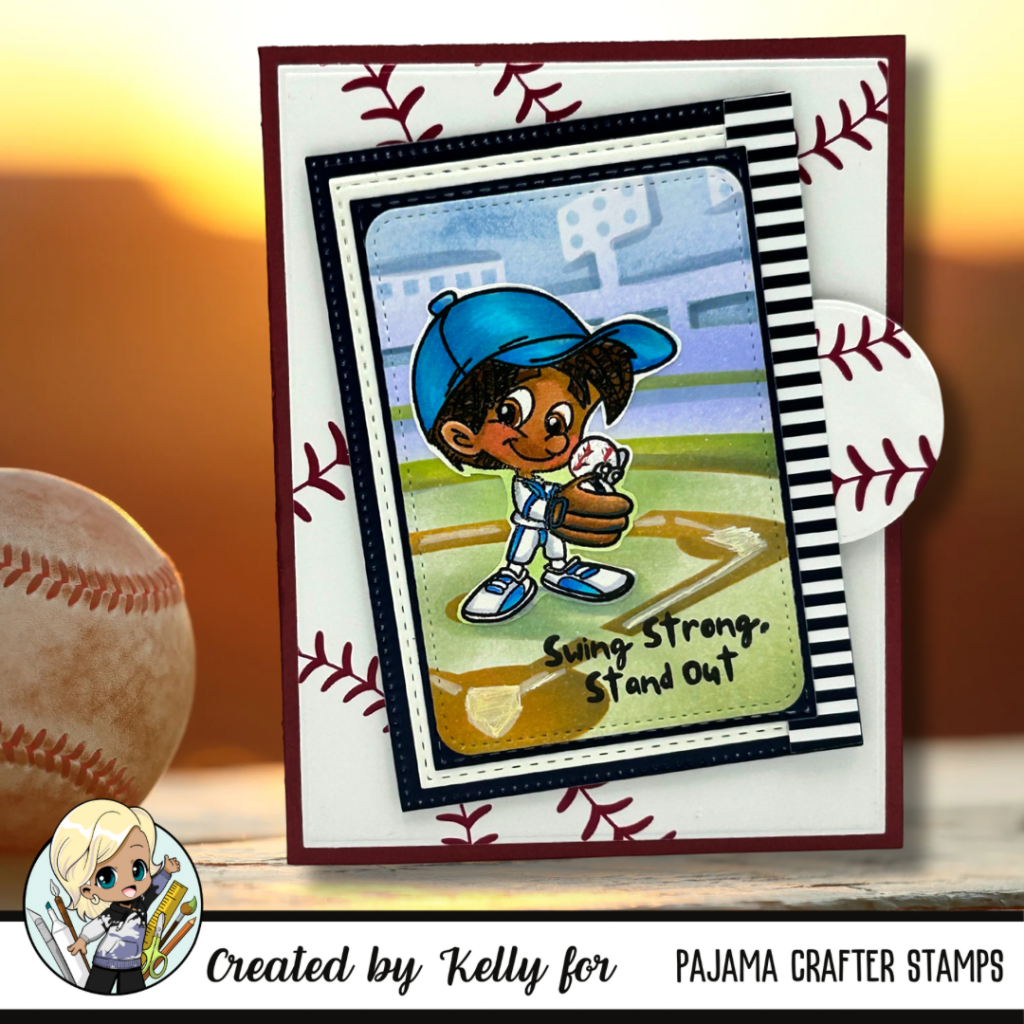
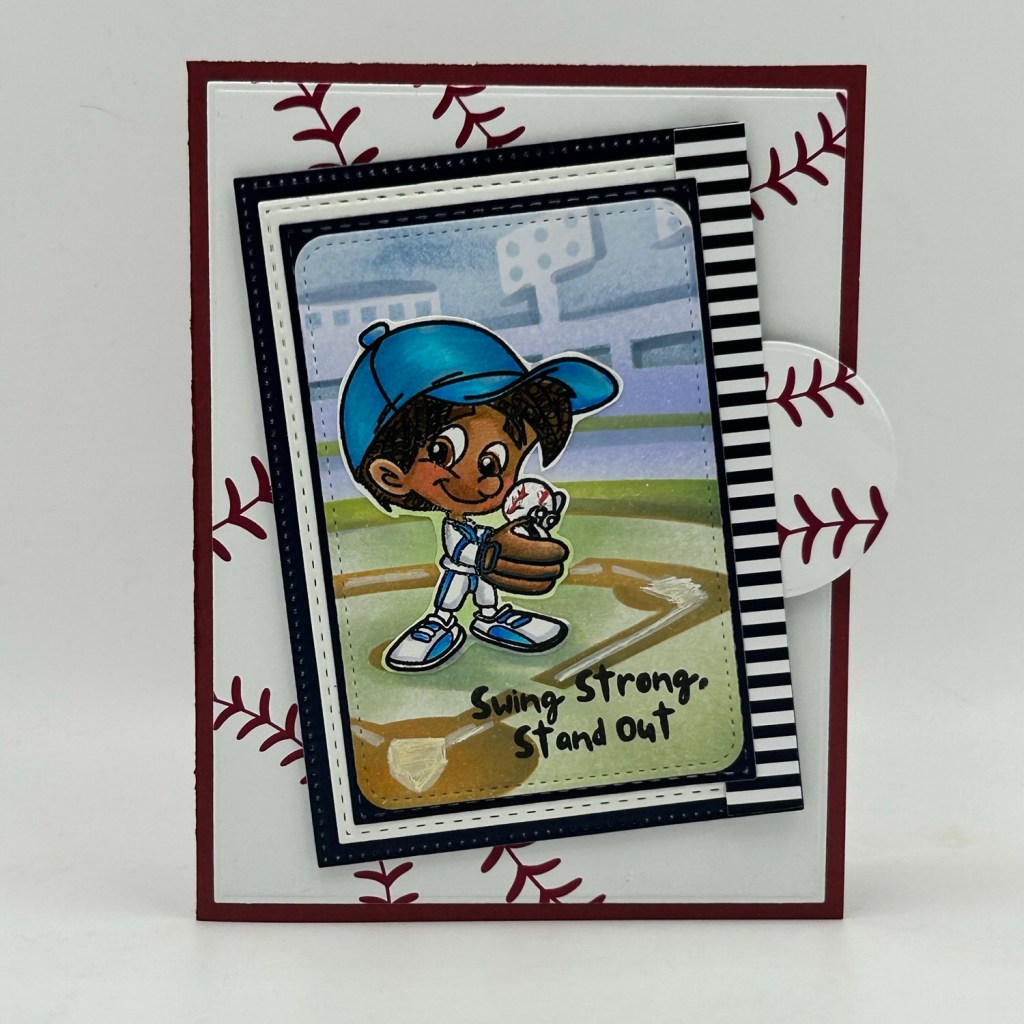
Swing strong, stand out
“Set your goals high and don’t stop until you get there..” – Bo Jackson.
With a fantastic selection of sentiments like these, this stamp set is ideal for crafting heartfelt cards that can cheer on the young players or honor the passionate spectators! ⚾️💌
For this project, I used the Stamp and Spin Tool by Sizzix—one of my favorite ways to showcase smaller stamps on the front of a card! By stamping multiple images of the pennant flag, I created a stunning focal point featuring the baseball player! What a fun and unique way to create a playful background. 🌼🌀
Creating handmade cards is a wonderful way to show support and encouragement—imagine the smiles on the faces of both young sluggers and adult fans when they receive a personalized card crafted just for them! for those interested in the color blue that I achieved here I use three of my Copic markers: FB2, SBG2 and B02. I use those colors for his hat and any other blue on the card, including every pennant in the circle. Skin color – E00, E004, E11, R20. Blonde hair – Y21, YR23 and E13.. on the foam finger, I added a little bit of the fluorescent FYG2 Copic marker to tie in the green in the blue-green sparkle card base. 🌟
Whether you’re celebrating your favorite Little League star or honoring someone who loves the game, this fabulous new stamp set has everything you need to score big with your card-making!
Happy crafting, and let’s keep celebrating the champions in our lives—young and old alike! 🏅💖
I am excited to share a fun project featuring their latest release! ⚾️ Hand-stamped greeting cards are a fantastic way to blend your creativity with a love for baseball, and the new supplies from Pajama Crafters are perfect for crafting unique cards.
Introducing the Latest from Pajama Crafters
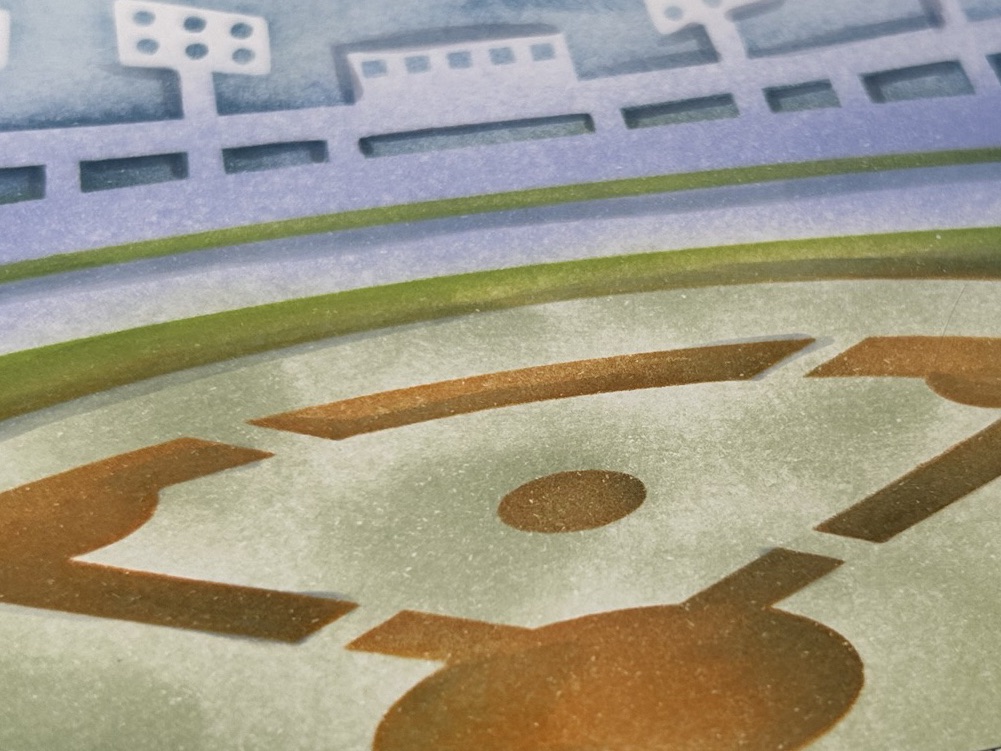
This month, I’m thrilled to introduce & showcase the Champion in the Making stamp set, complemented beautifully by a coordinating stencil called, Legends Born. These, paired with the 6×6 paper pack, are ideal for creating personalized cards that any baseball fan will cherish!
Crafting Your Card
Here’s a simple guide to making your own baseball-themed greeting card:
Gather Your Materials: You’ll need the Champion in the Making stamp set, the Legends Born stencil, a variety of inks, and the Let’s Play Ball 6×6 paper pack. This pack boasts 48 double-sided sheets featuring 12 unique designs, so you’ll always have a great pattern to choose from! Very versatile, too!
Design Your Card: Start by selecting a few sheets from the Let’s Play Ball paper pack as your background. The vibrant patterns provide the perfect stage for your stamped images.
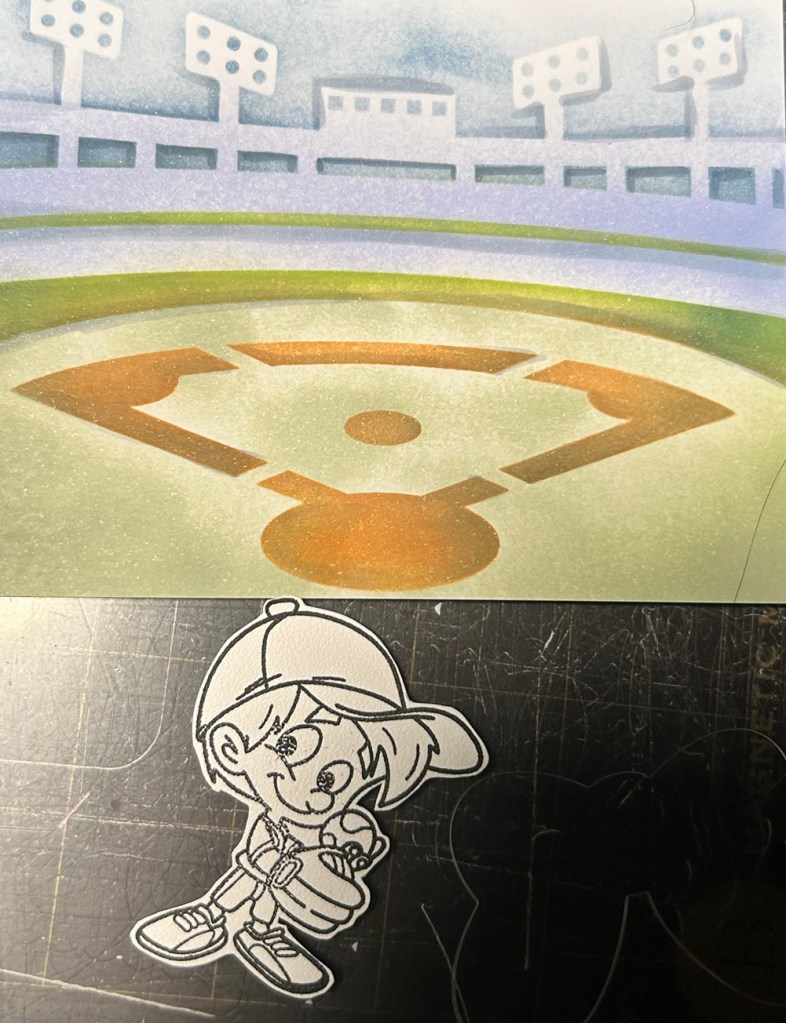
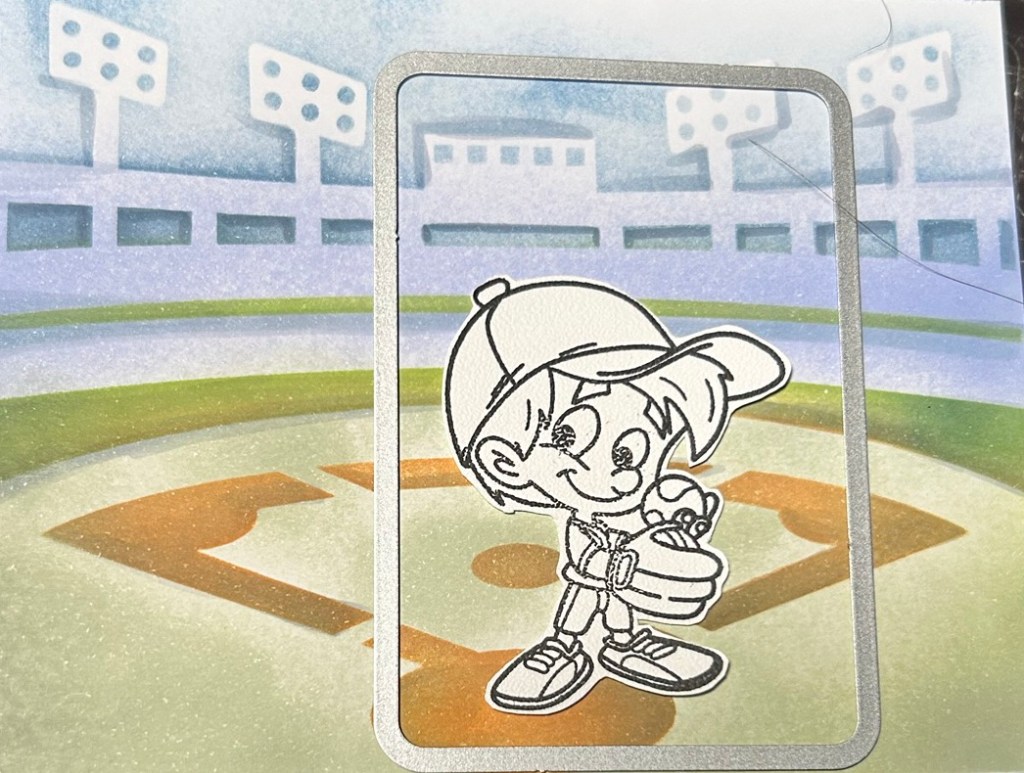
Stamp & Layer: Use the Champion in the Making stamp set to create your baseball motifs and sentiments. After stamping, use the Legends Born die set to cut out your images, and layer them on top of your patterned papers for an eye-catching look.
Assemble & Personalize: Once your card is layered, don’t forget to add a personal touch! Write a heartfelt message inside or include additional embellishments to make it truly unique.
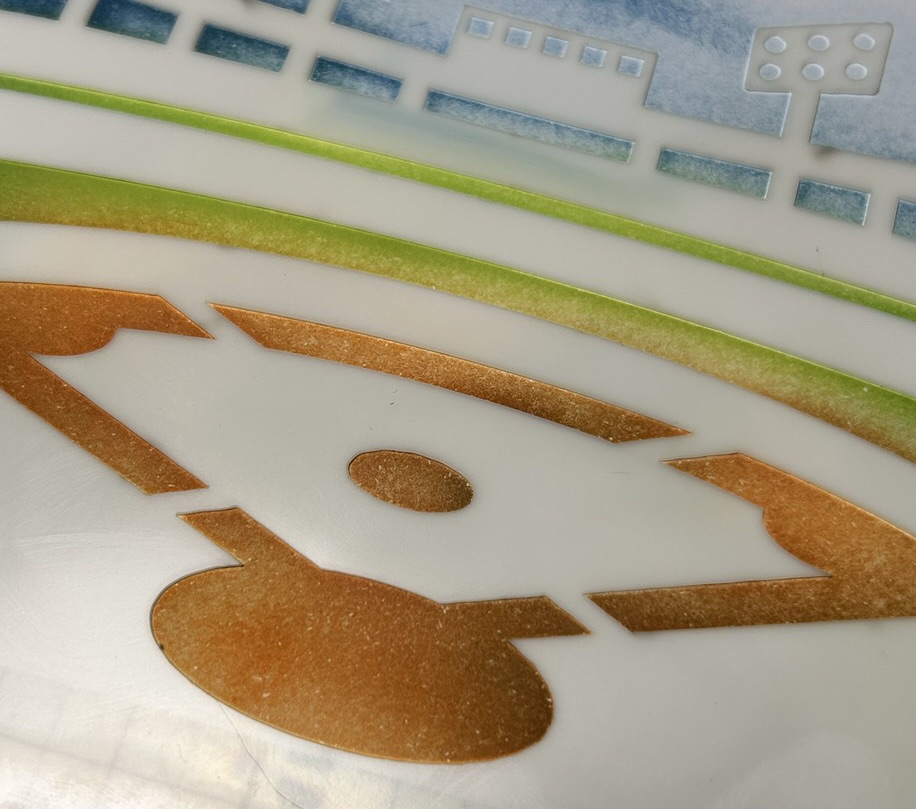
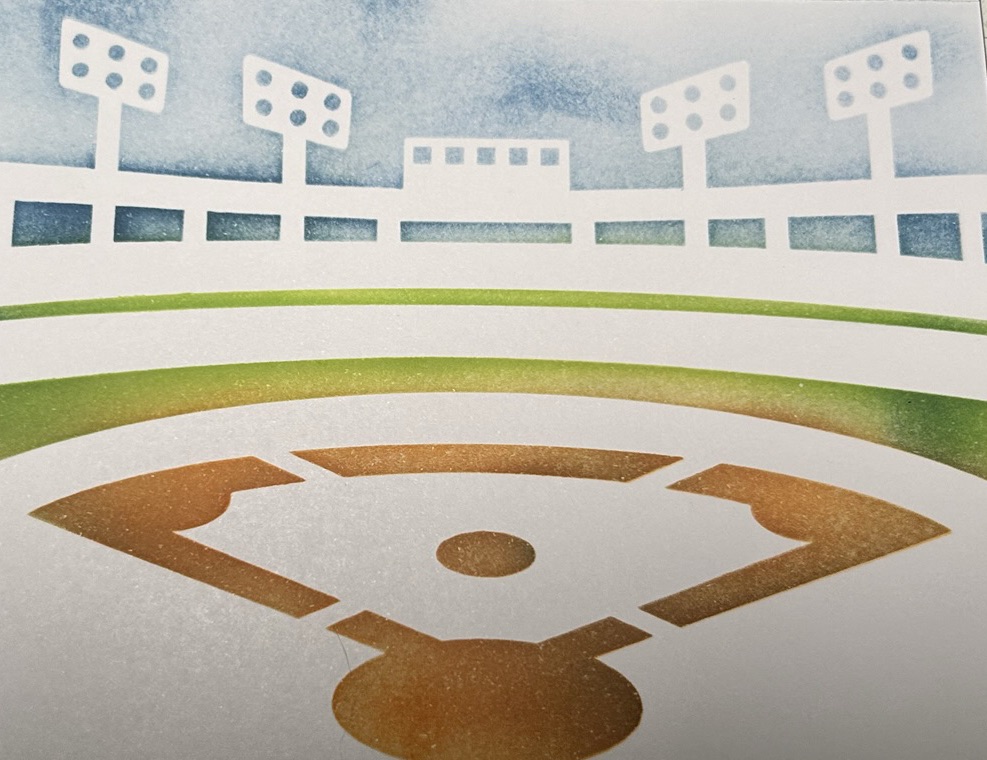
Remove Stencil & Ink Blend Over White
Crafting as Stress Relief
Crafting is not just a fun activity; it’s also a fantastic way to relieve stress! Engaging in creative projects like card-making allows you to focus your mind, express yourself, and take a break from daily pressures. So, gather your supplies and let your creativity flow!
Final Thoughts
Hand-stamped baseball cards are a wonderful way to express appreciation or share a thoughtful message with friends and family. With the Champion in the Making stamp set and Legends Born coordinating stencil, and 6×6 paper pack, you can create cards that are sure to hit a home run!
Happy crafting, and may your creativity continue to soar!
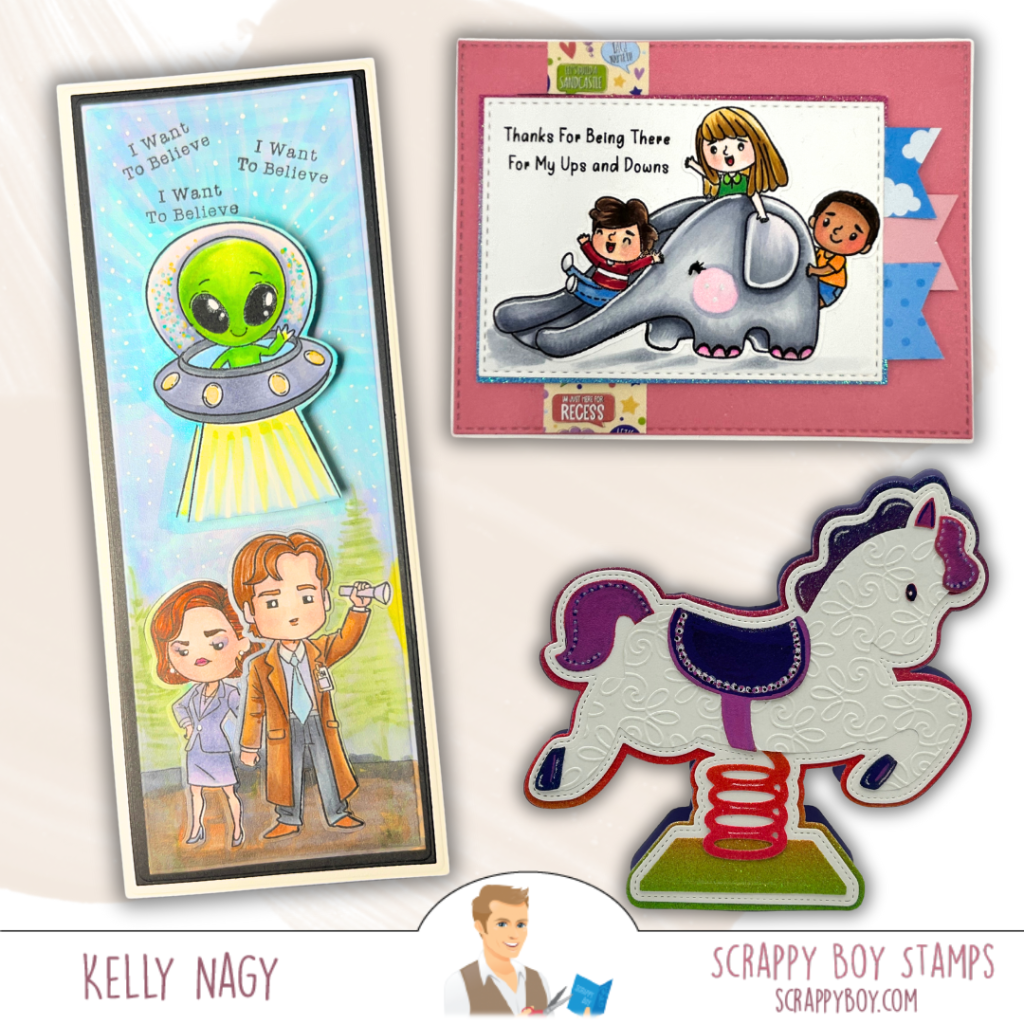
Spring has sprung, and so has an exciting new release from Scrappy Boy Stamps! With fresh products hitting the shelves , it’s the perfect time to dive into some creative card-making. This release includes four fabulous lines: We’re Not Alone, Aliens Landed in Roswell, Cute Kids Playground, and a wonderful variety of card making and scrapbooking dies. Let’s check out some creative ideas for three card designs you can create with these new goodies!
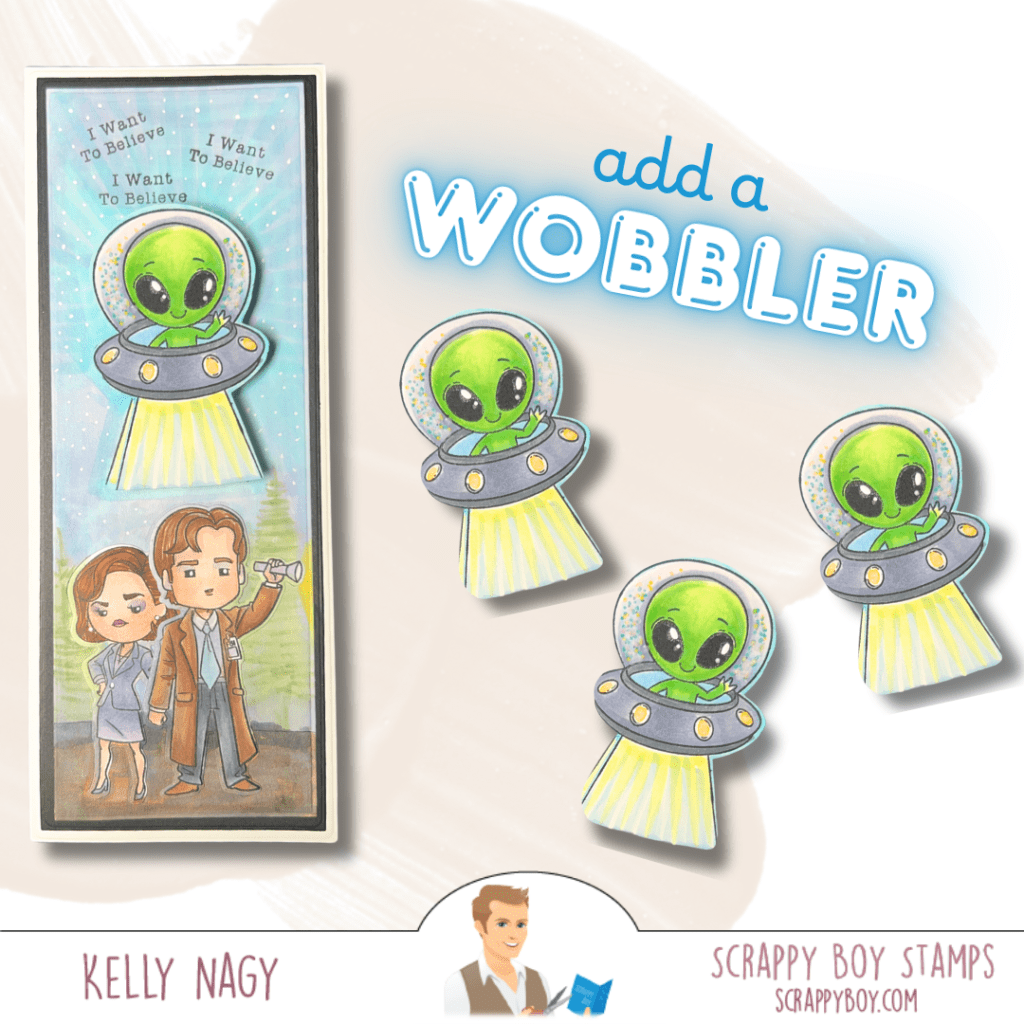
1. I Want To Believe Slimline Card 🚀
I did a mash up of Aliens Landed in Roswell with We’re Not Alone to create a whimsical card showcasing one of the cutest aliens! Start with a dusky/starry night background using vibrant colors, then use the coordinating stamps and dies to bring your alien friend and beloved characters to life. For my card, I added an action wobbler to add movement and interest. Don’t forget to complete your card with a fun sentiment like “I WANT TO BELIEVE” to tie everything together!
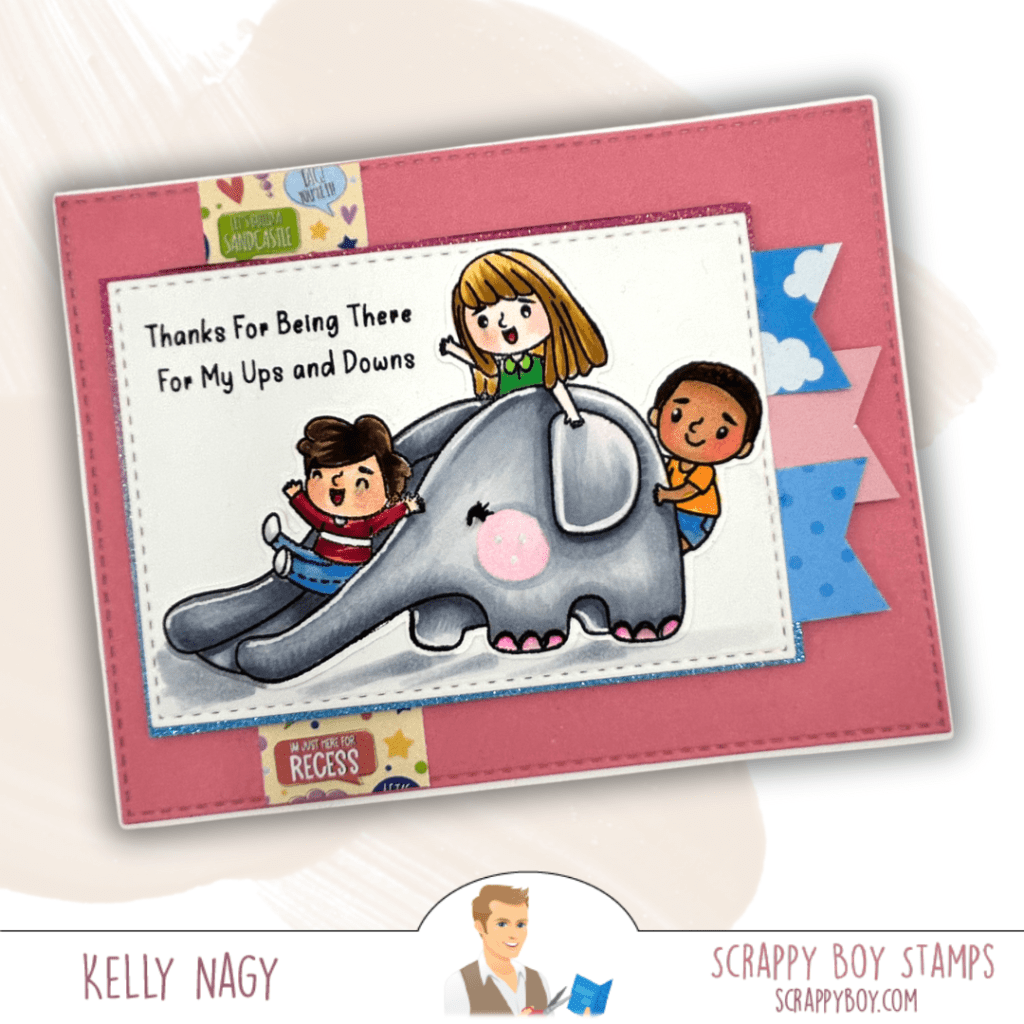
2. Playground Fun Card 🎡
Using the Cute Kids Playground set, I crafted an adorable scene that captures childhood joy. To make your own, use the playground-themed stamps to create a colorful layout of kids playing on swings and slides. My card features a fun elephant slide. I layered several different coordinating patterned papers from the 6×6 paper pack in cheerful colors for that extra pop!
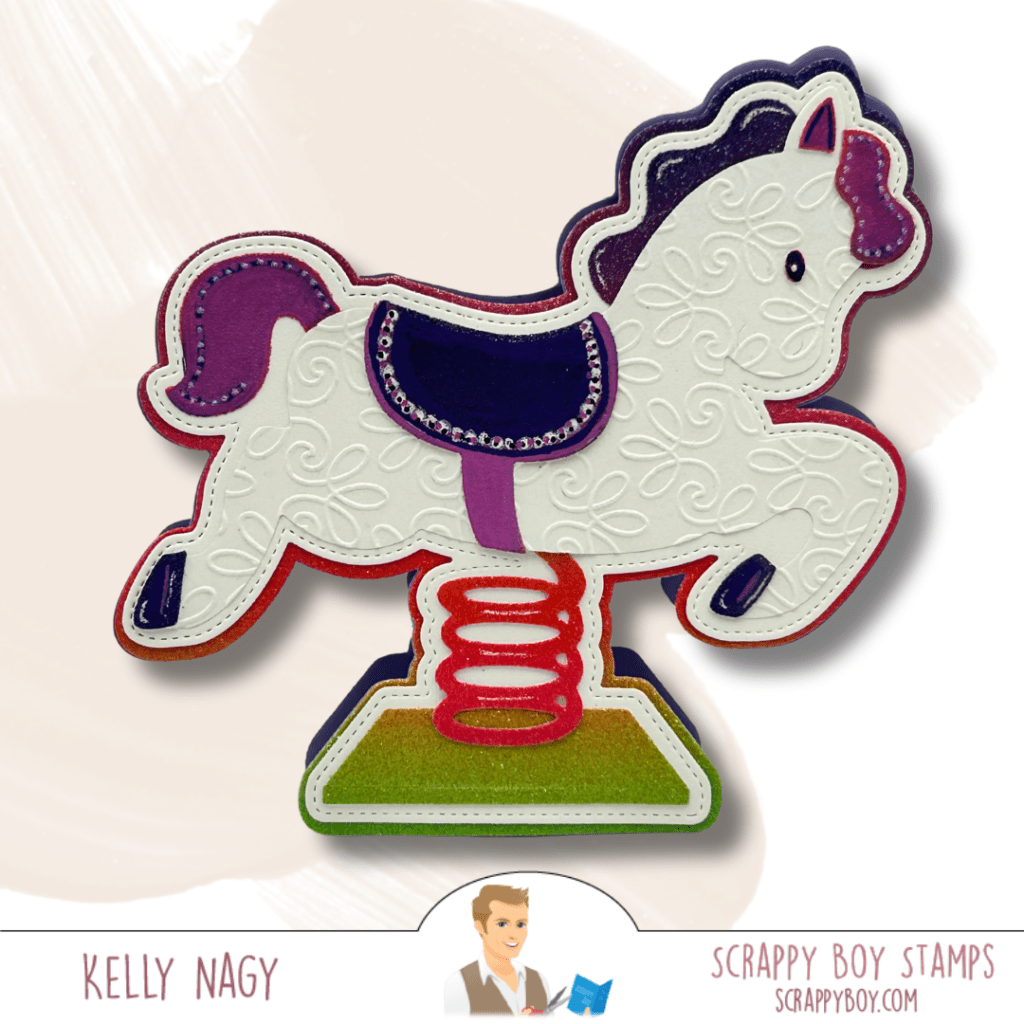
3. Rocking Horse Shaped Card🌌
Using the new Rocking Horse Mini Album Die, I created a shaped card. Use for scrapbook elements OR as it’s intended use, a mini photo album die. I cut all elements in white for ease and then use my Copic markers or Distress Inks to create additional colors. If you look closely, you might see that I ran some elements through my Big Shot die-cutting machine with a fun embossing folder. You can also use up your scraps! Have fun!
Get Crafting! 🖌️
These new releases are sure to inspire and ignite your crafty spirit. Whether you want to create cheeky alien cards or childhood adventures, Scrappy Boy Stamps has you covered. Make sure to grab your favorites before they fly off their shelves!
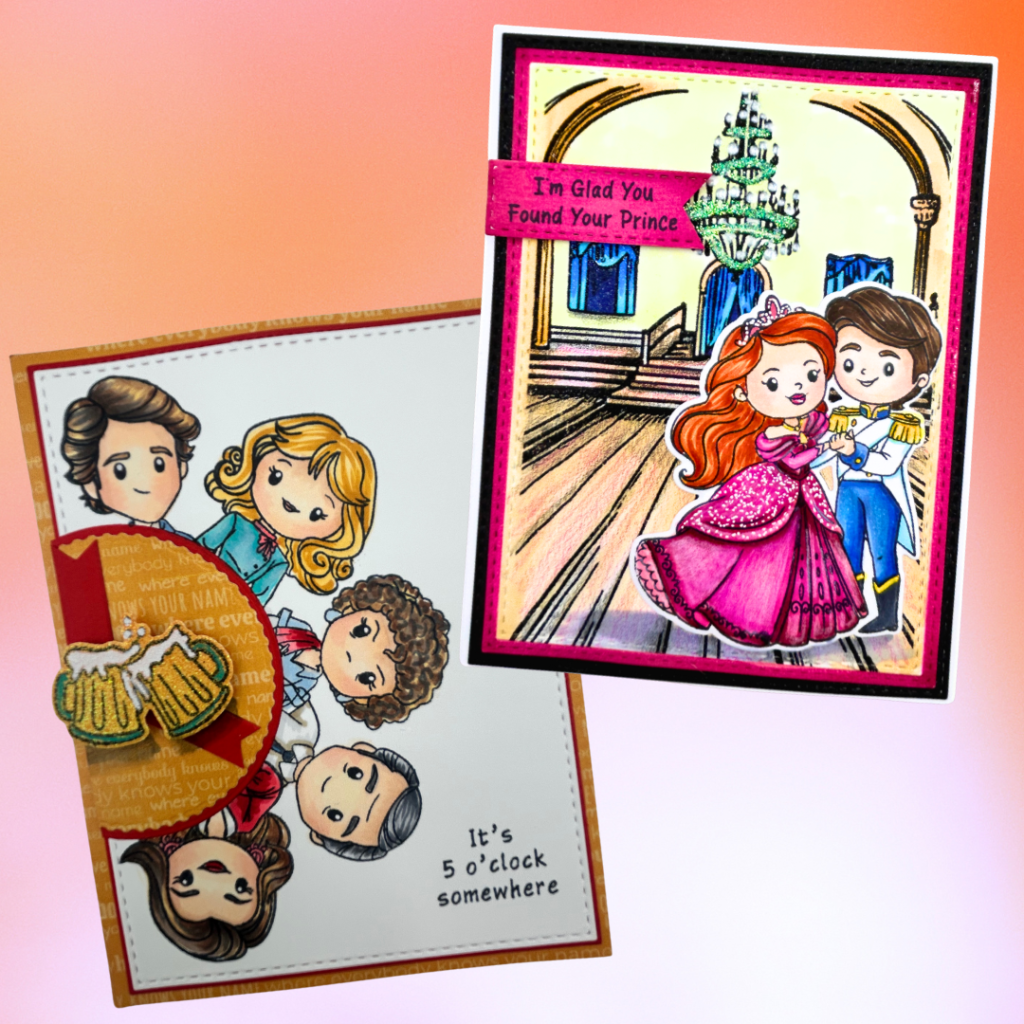
I’m excited to share my latest handmade cards using images from Scrappy Boy Stamps.
Embracing the white space-using a wreath layout
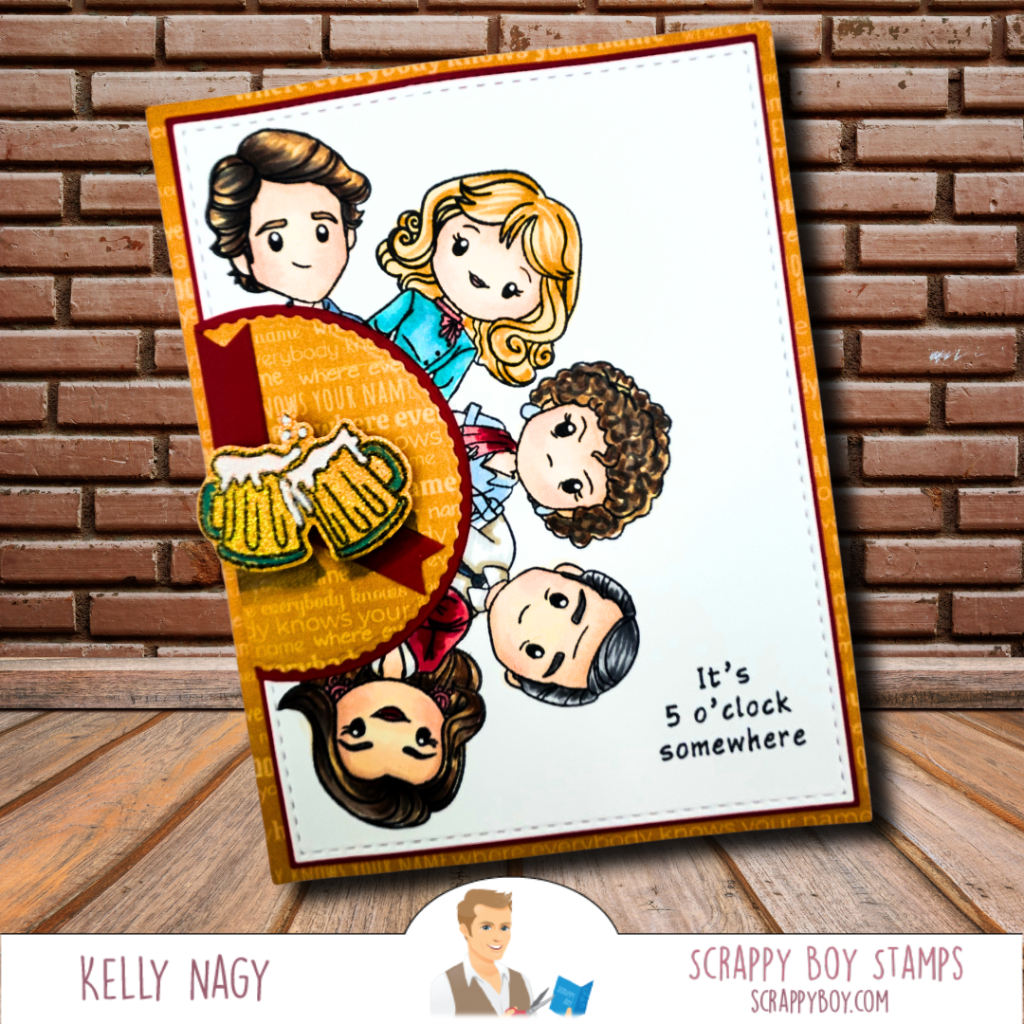
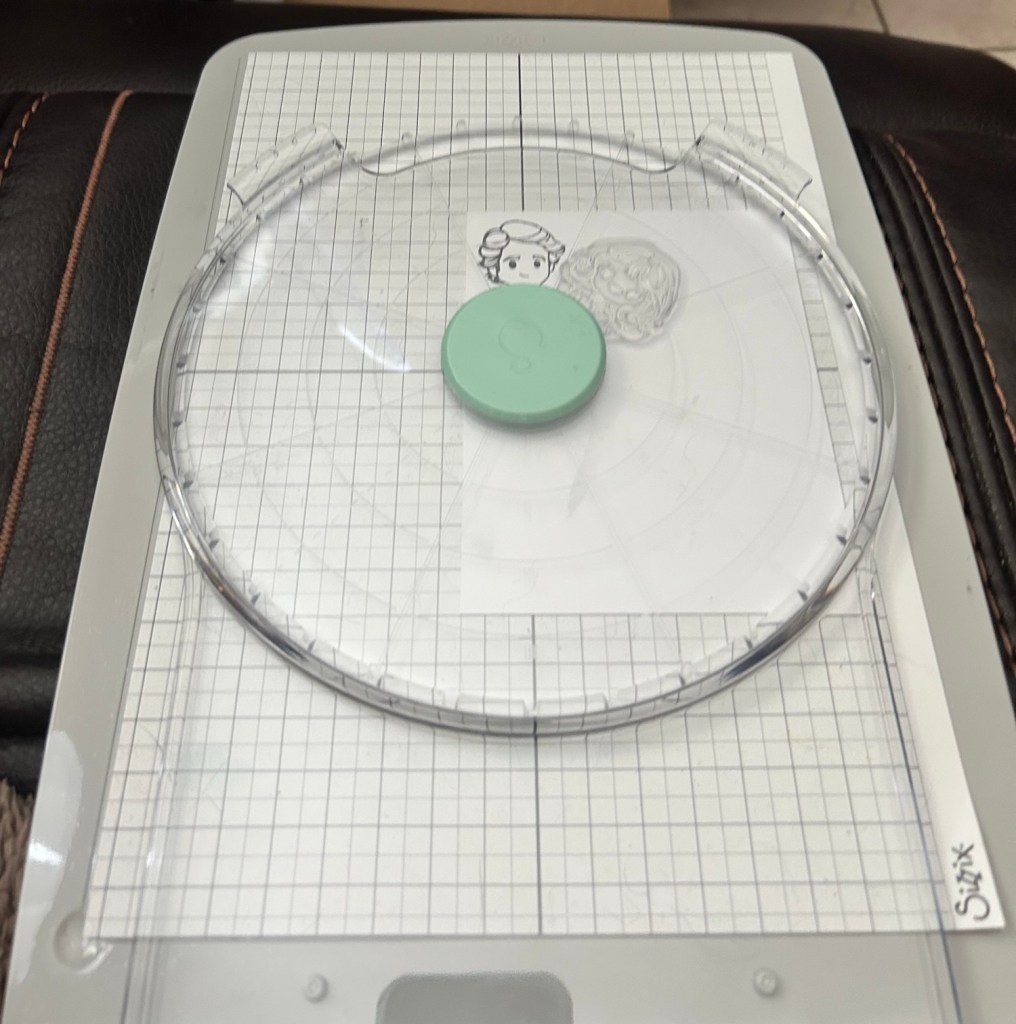
Card 1: The Neighborhood Bar This card features the “The Neighborhood Bar” set from Scrappy Boy’s latest release. I wanted to create a scene that looked like a clock, so I could fit as many characters on the front of an A2 card using my Sizzix Making Tool with Add On Stamp & Spin Tool.
Sizzix Making Tool w/ add on Stamp & Spin
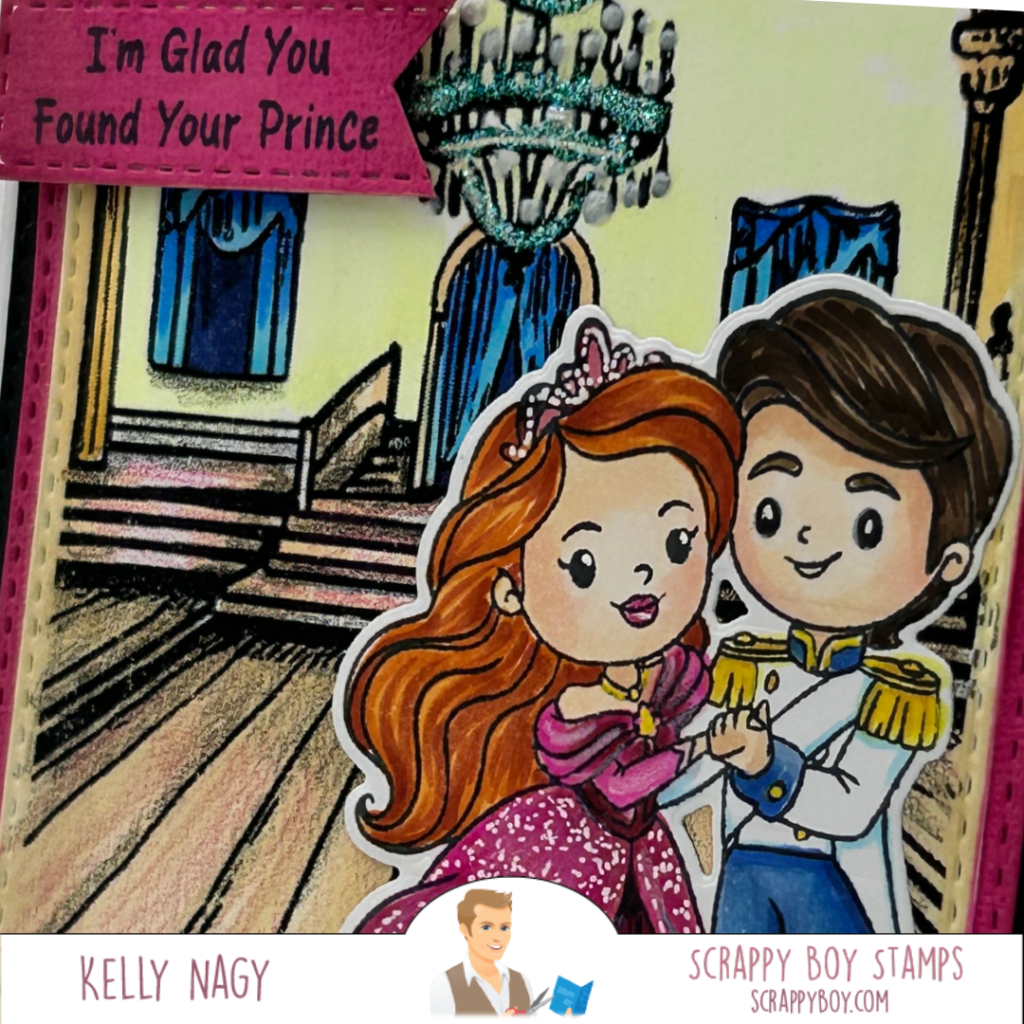
My second card features a prior release called Little Mermaid. I created a background you can download and use for FREE.
Close Up of A2 Cardfront
Card 2: The Little Mermaid This card showcases the “The Little Mermaid” set from a previous release. Please tag me in social media @stampedbykelly so I can see how you used the image in your creations!! Download for FREE here–>
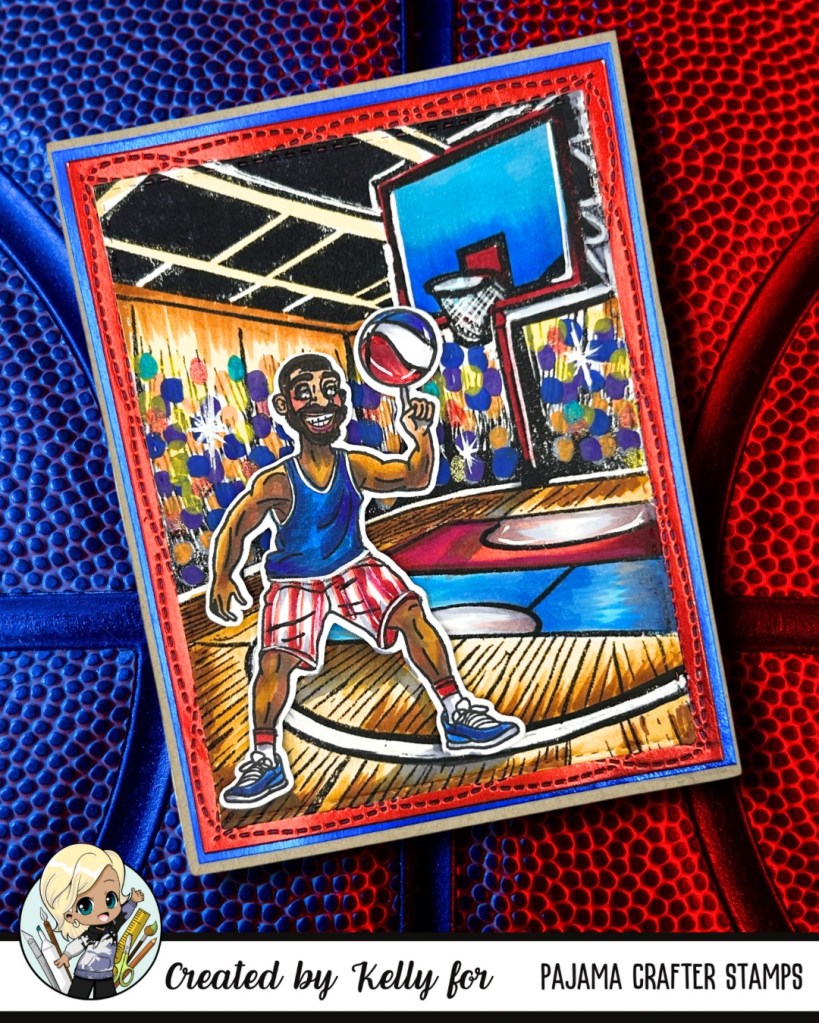
Ah, Saturday mornings! Those magical hours when cartoons lit up the screen, and the Harlem Globetrotters whisked us away on whimsical adventures filled with laughter, amazing basketball tricks, and that unforgettable theme song. 🏀✨ Inspired by those iconic episodes, I decided to craft a Globetrotter-themed card to kickstart this weekend!
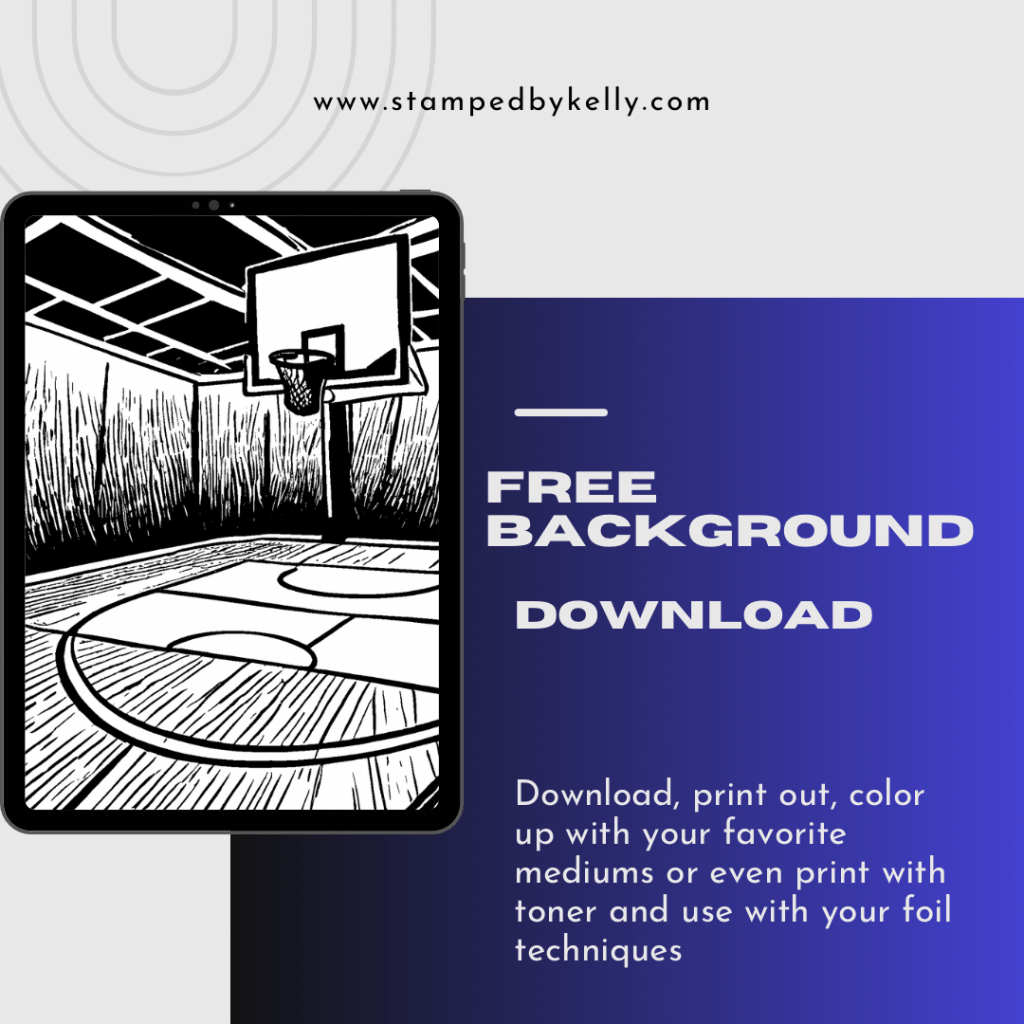
Creating this card was an absolute BLAST! I had so much fun designing an A2 panel to jumpstart my crafting and create a background to bring the images to life.
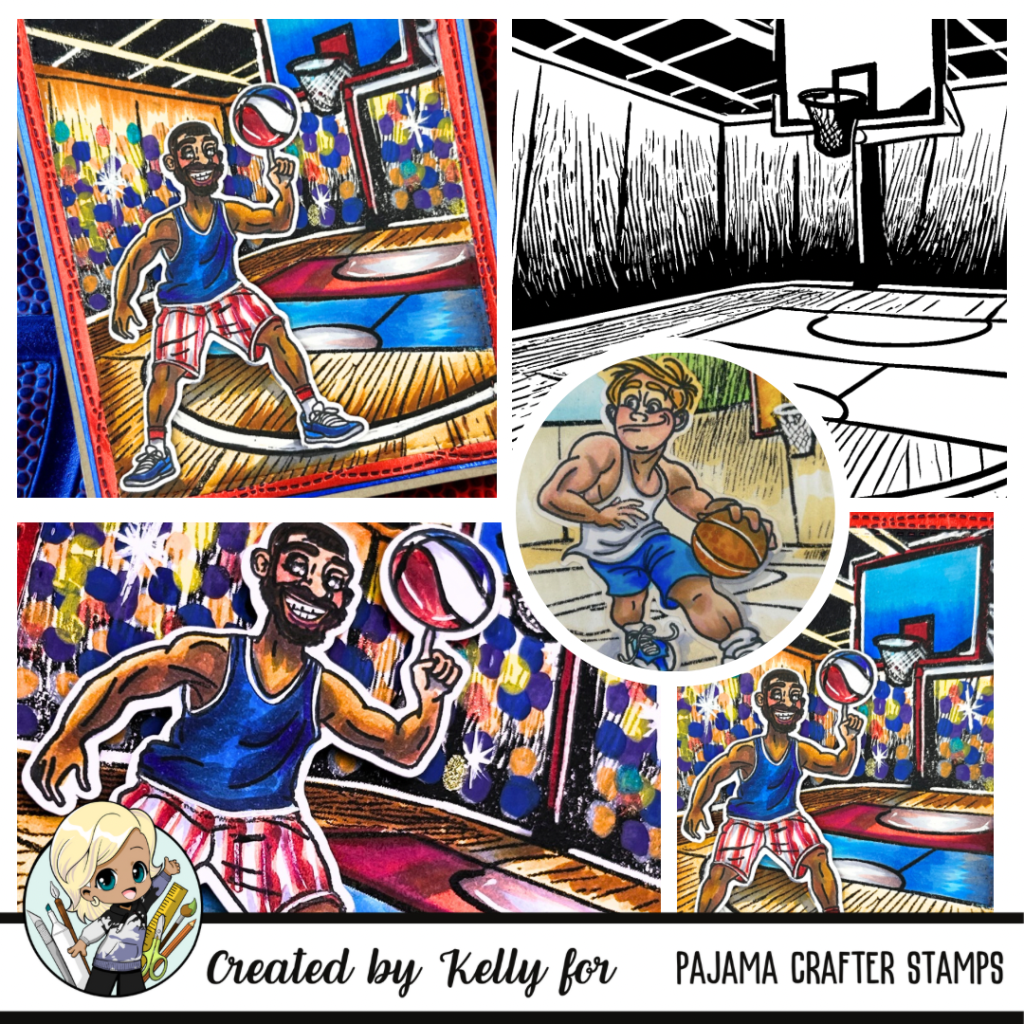
I spy a different athlete and they have a girl, too.
💡 For all my fellow crafters — this isn’t just a one-size-fits-all project! You can customize your card with the delightful LET’S BOUNCE set. Celebrate a beloved player or infuse the colors of your favorite team; the possibilities are endless! To see the fun lineup, including the stamp set called LET’S BOUNCE >>>>>>>Click Here
Don’t miss out on unleashing your inner Globetrotter this weekend! Craft your unique card and let those vibrant colors and fun designs shine! Click the link above to DOWNLOAD the background to help you bring these images to life. You can download and use for FREE! Please tag me @stampedbykelly so I can see what you make!!!
Happy crafting, everyone! Please follow me on social media @stampedbykelly for my next post which will have my Copic Combos for this card updated.🌟✂️
I’m thrilled to share some exciting news from Pajama Crafter Stamps—their Spring Release has officially launched! As a member of the design team, I’ve had the joy of creating with two of the four incredible NEW stamp sets being released this month, and I can’t wait to show you my card projects!
📦 Featured Sets:
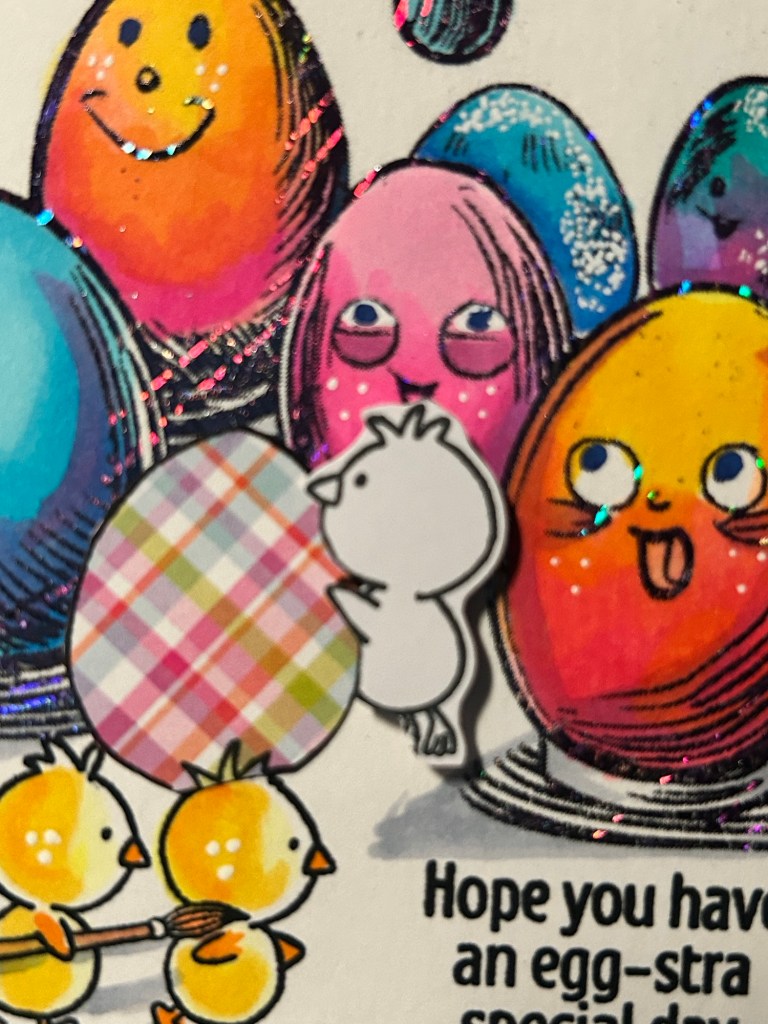
The “Eggstra Special” stamp set is perfect for adding a whimsical touch to your springtime cards.
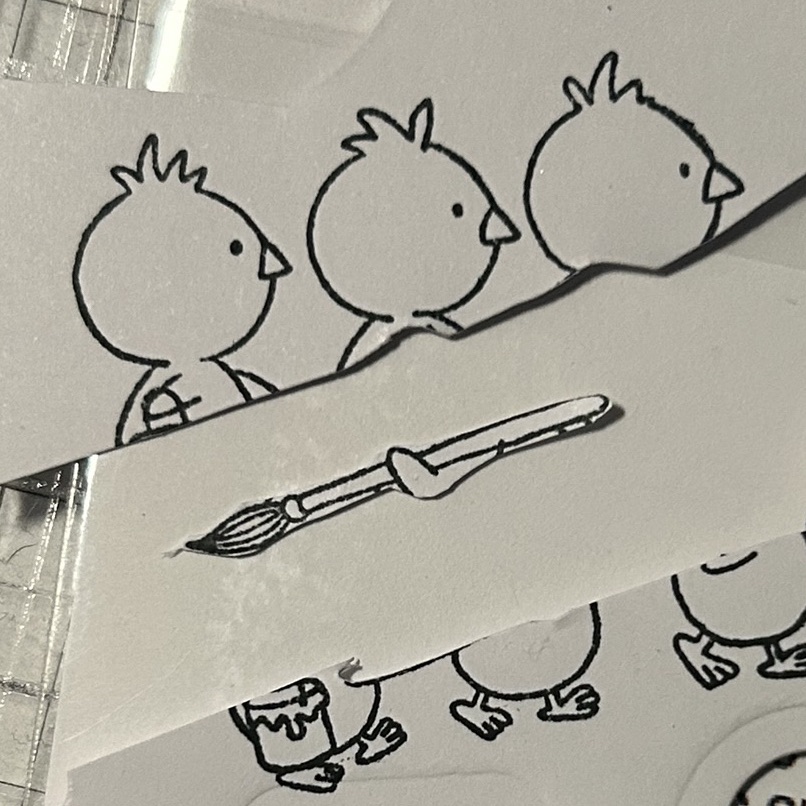
I used bright and colorful patterned paper, as well as some sparkly orange ombre paper to mat my foiled card panel. I created a background to represent an art exhibit, with these cute chicks creating their best painted egg “portraits.” The file is available FREE to you. I created a pdf file you can download with my background design for free.
Fussy cut the paint brush from the 3 chicks and piece it with the single chick image to create an amazing artist!Here is the “before” I added the paintbrush. I even cut his arm with it and pieced it into the single chick.Fussy-cut the paintbrush out and glue in place
Next up is the beautiful “Where Hope Blooms” stamp set. I used the 3 little birds, flower, leaves and cute kitty, sitting on a windowsill overlooking the city. This background is also available fir download to use for FREE on your projects.
Card Project: For my creation, I chose a soft, watercolored background look using Copic markers to mimic a colorful and bustling city. I stamped the images and colored them up, too. The smaller images are popped up with foam squares for a little dimension. I added a little white gel pen to put the finishing touches on my card.
✨ Ready to Create?
I hope these projects inspire you to dive into spring crafting! Don’t forget to check out the new release on the Pajama Crafter Stamps website and see the delightful options available using my affiliate link to let Joy know you like what I create!
Happy crafting, everyone! I can’t wait to see what you create with these beautiful sets! Don’t forget to grab the file to print fun backgrounds inspired by this Spring Release!! 🎨💌
A2 Fun Fold Stadium Card featuring Pajama Crafter Stamps
While we celebrate love today, over at Pajama Crafter Stamps, we’re kicking off March Madness!
Hop along for chance to win 2 sets from release!
🎉 That means it’s time to gear up for everything from exciting sports events to St. Patrick’s Day shenanigans—and yes, if those Stanley-style cups are your thing, we’ve got you covered!
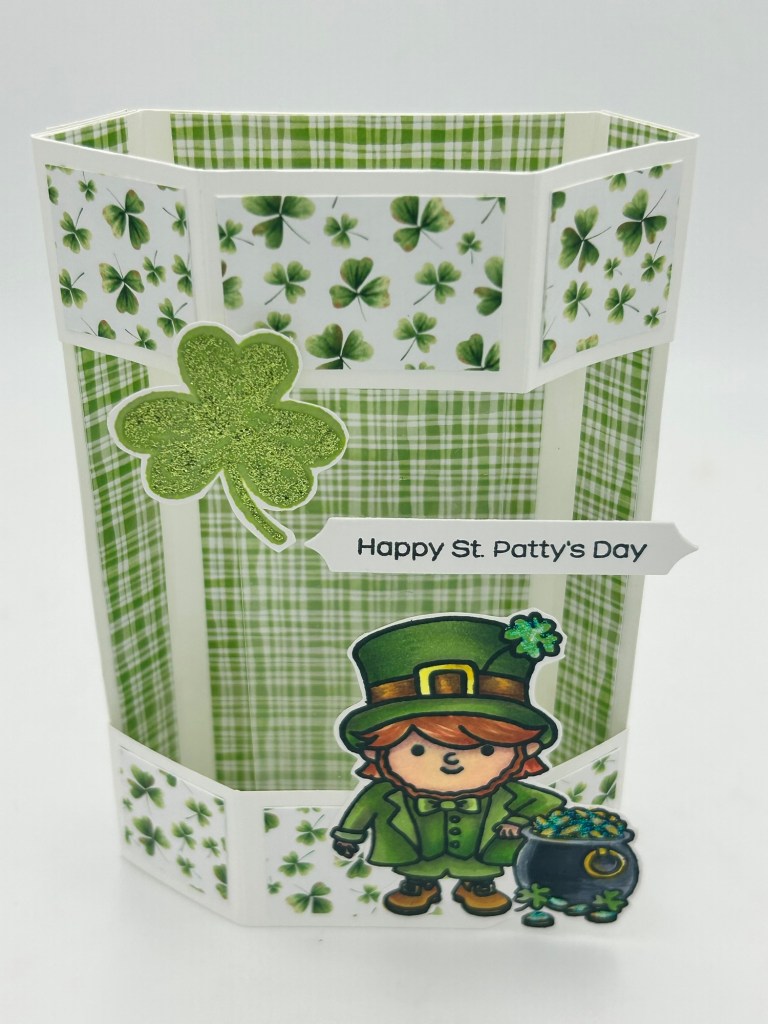
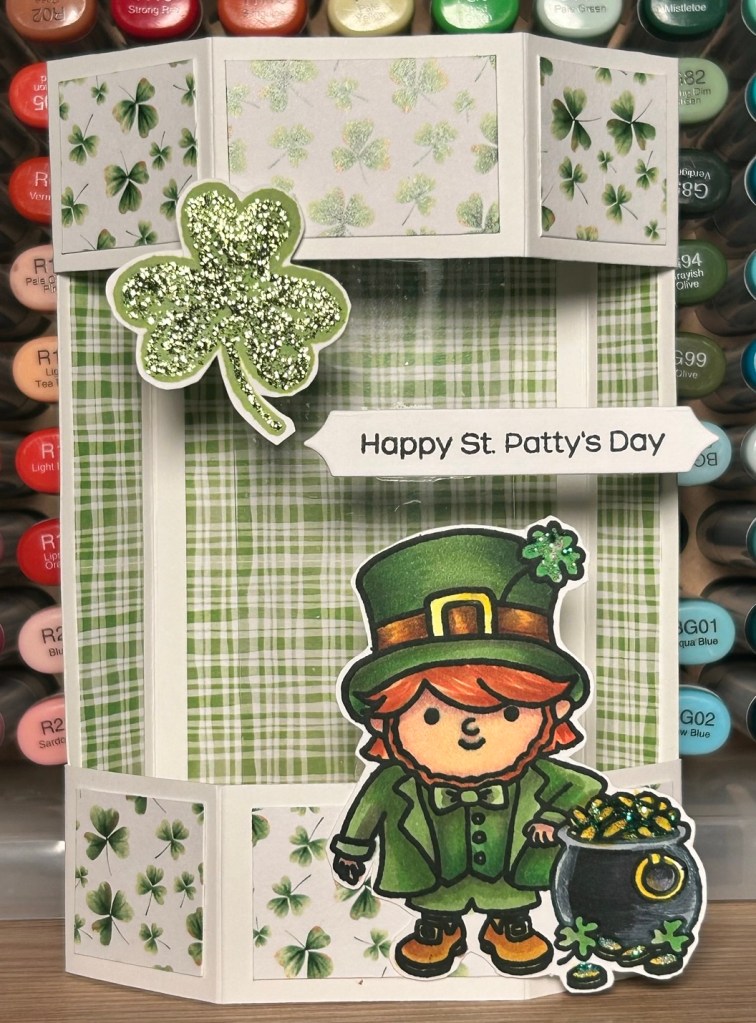
Introducing the Project: Lucky Leprechaun Fun Fold Card! 🌟
Folds & Mails Flat – A2 size card
Today, I’m thrilled to share a whimsical St. Patrick’s Day card that features a fun fold technique. This A2-sized card lays flat for easy mailing but transforms into a stunning 3D display that beautifully showcases adorable patterned papers and festive images all in one delightful project! It stands majestically on a desk or shelf, ready to spread cheer and admiration.
Here’s What You’ll Need:
A selection of vibrant patterned papers that evoke the spirit of St. Patrick’s Day from the Emerald Isle 6×6 Paper Pad.
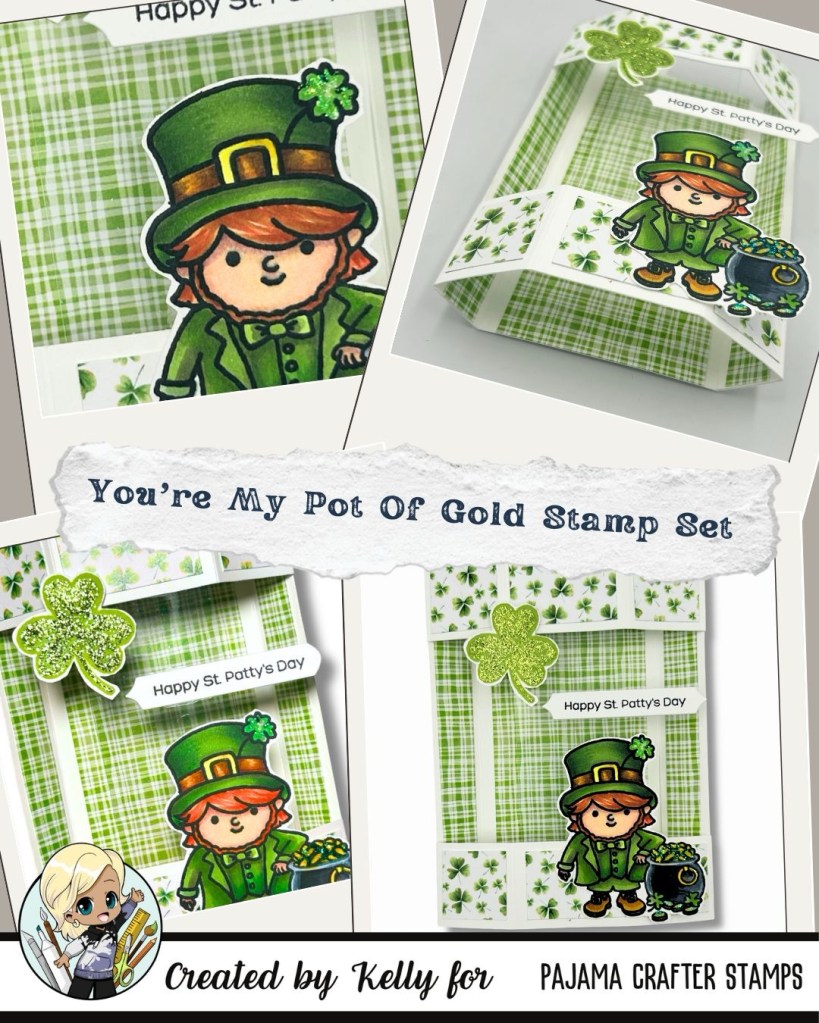
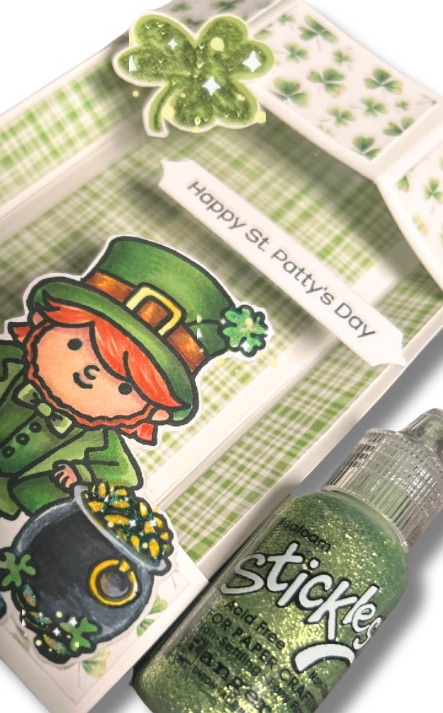
The cheerful Leprechaun, three-leaf clover and Happy St. Patty’s Day sentiment stamps are from the You’re My Pot of Gold stamp set.
Paper Trimmer, liquid adhesive, Heavy Weight white cardstock, Acetate, foam/dimensional foam popdots/tape, bone folder, scoring board, favorite coloring medium and black ink.
Crafting Details: I’ll guide you through the fun fold technique that makes this card truly special! These folds add depth and dimension to your design, making it a fantastic way to display cute patterns and playful images. Each layer tells a story, embodying the excitement of both St. Patrick’s Day and the upcoming March festivities!
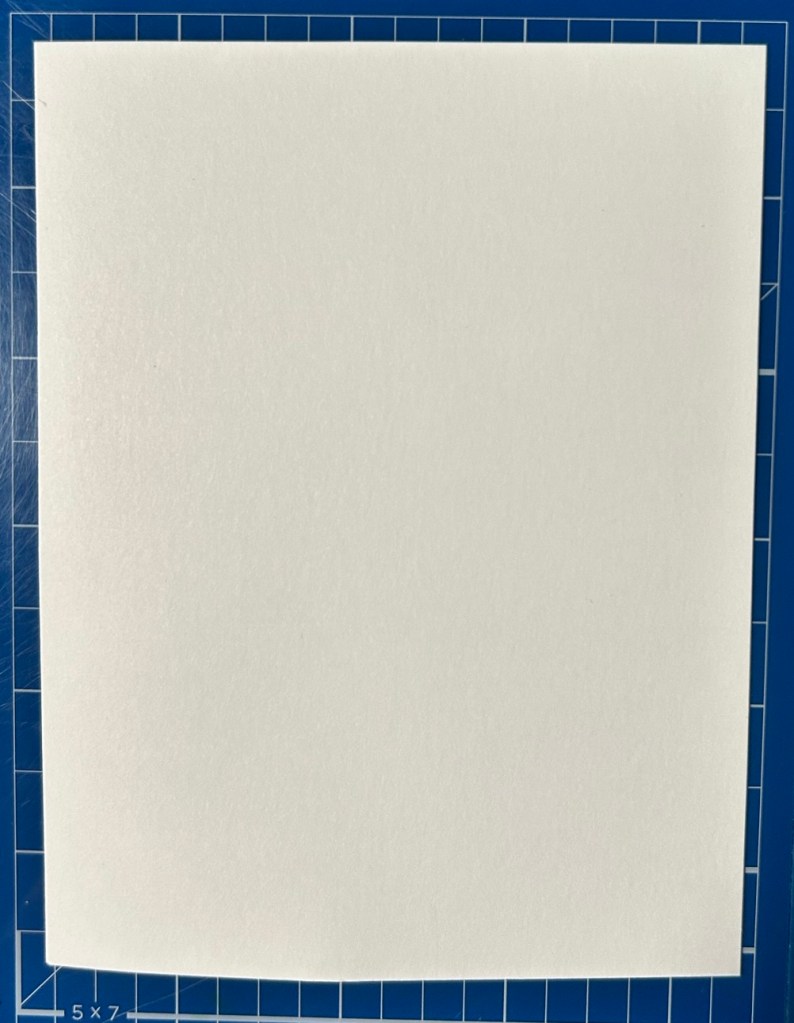
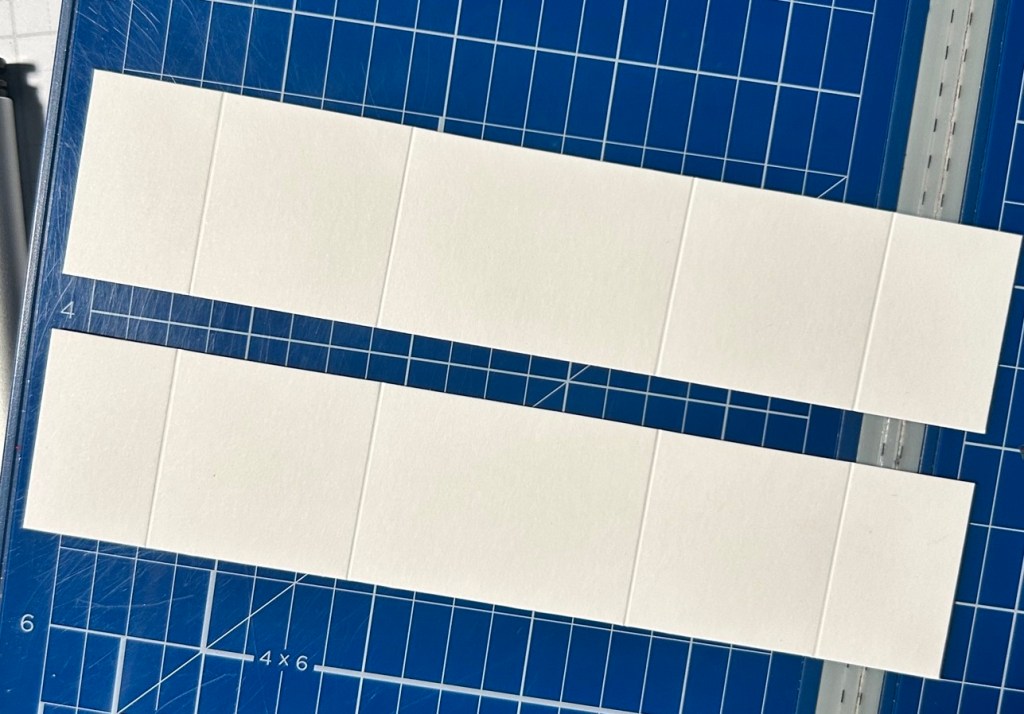
Start with your standard A2 panel- 5.5 in x 4.25 in
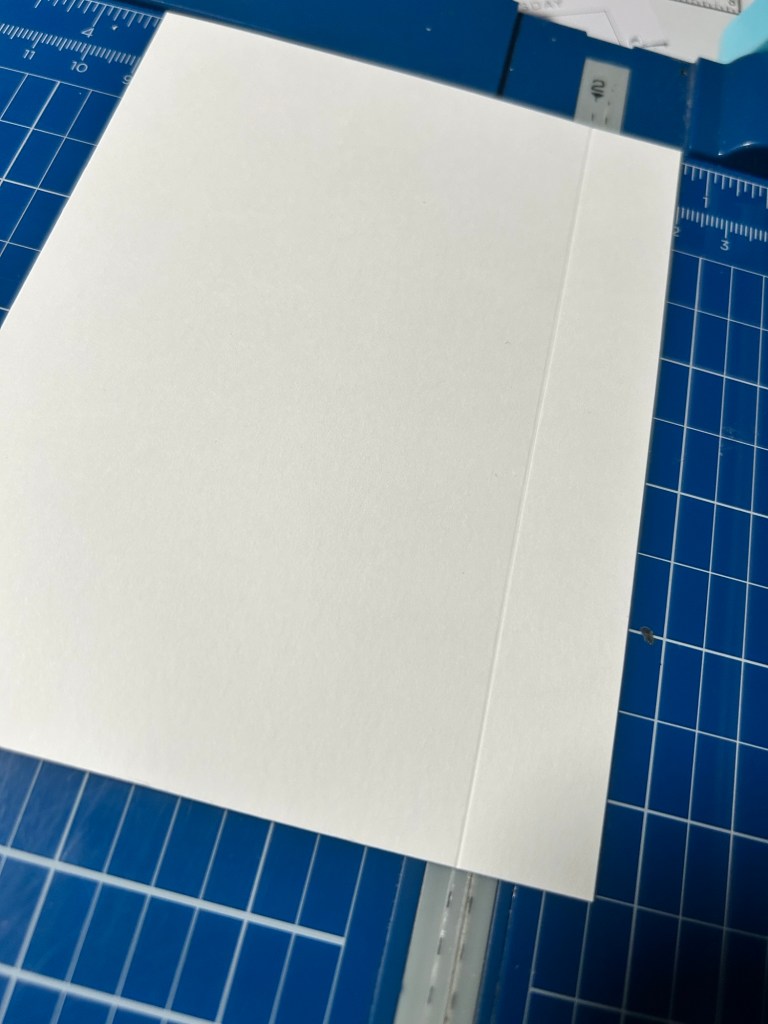
Next, using a scoring board or your paper trimmer with a score blade and take your panel in portrait and score 3/4 in from the left and right longer sides of the panel.
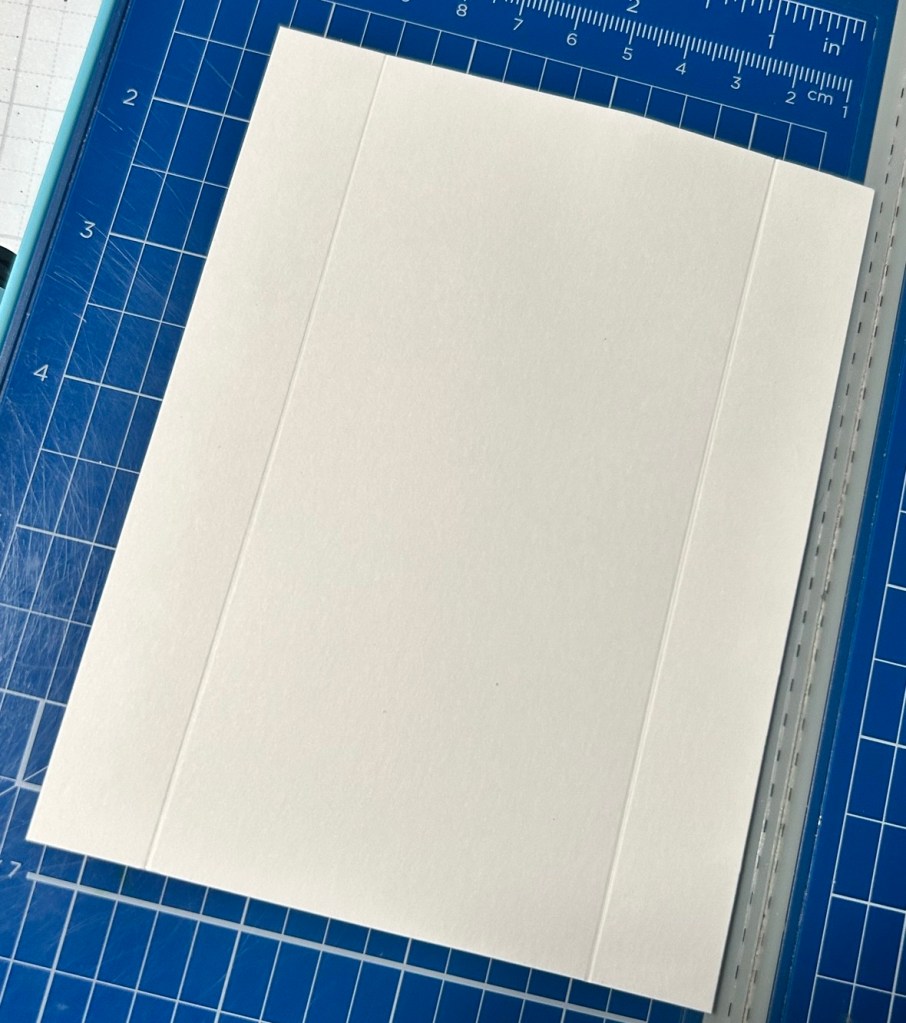
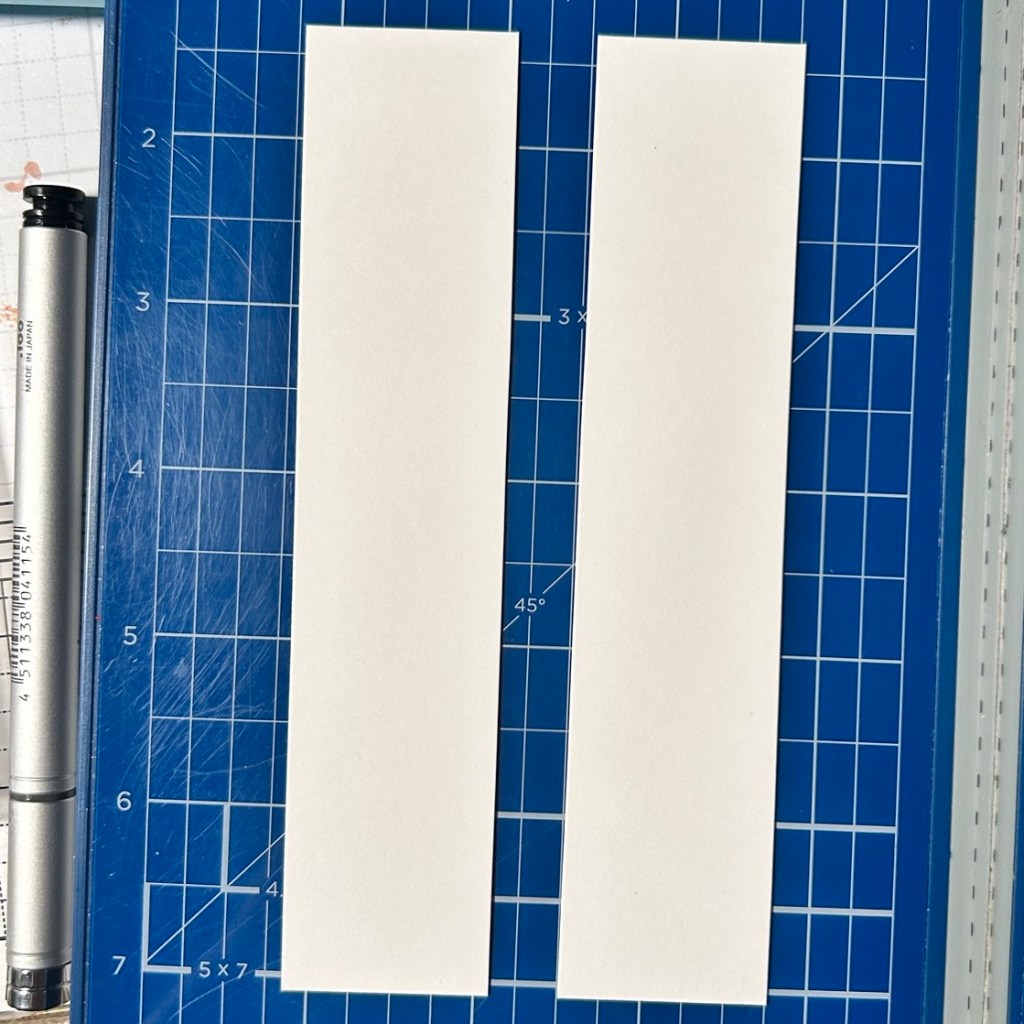
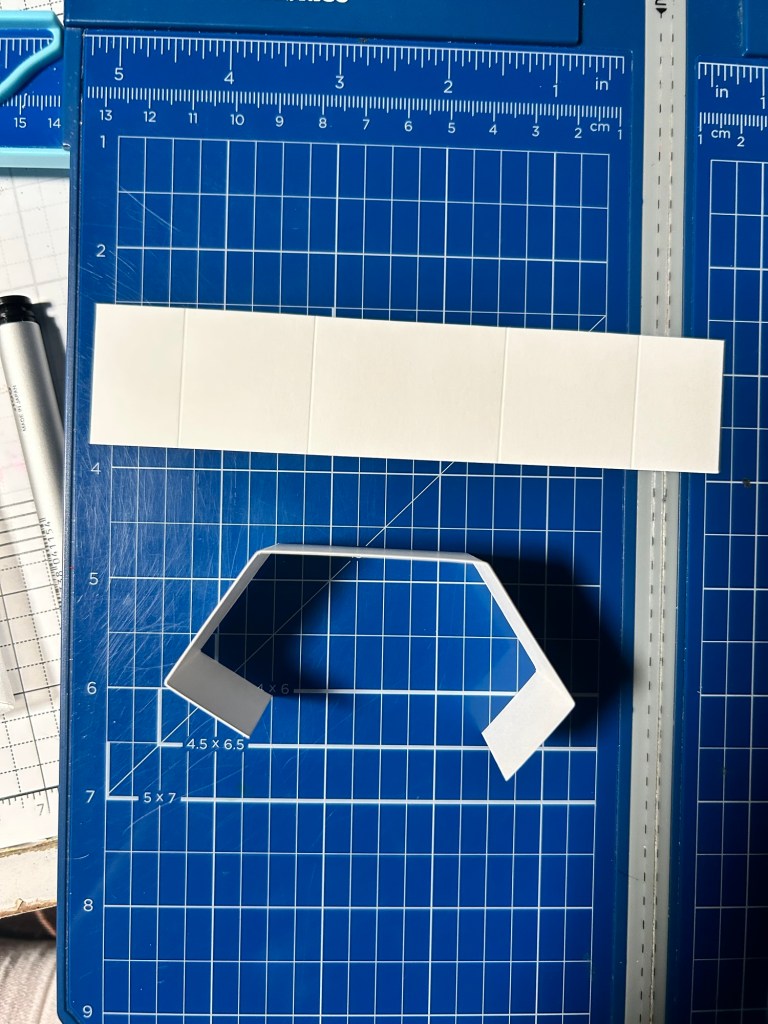
Scored down the side at 3/4 inchPanel Scored at 3/4 inch on both sidesCut 2 strips white cardstock at 1 1/4 inch x 5 3/4 inScore BOTH strips using scoring board or paper trimmer at 3/4 in, 2 in, 3 3/4 in, and then at 5 in.
Scored each at: 3/4 in, 2 in, 3 3/4 in and 5 in
Then using your bone folder, mountain fold each
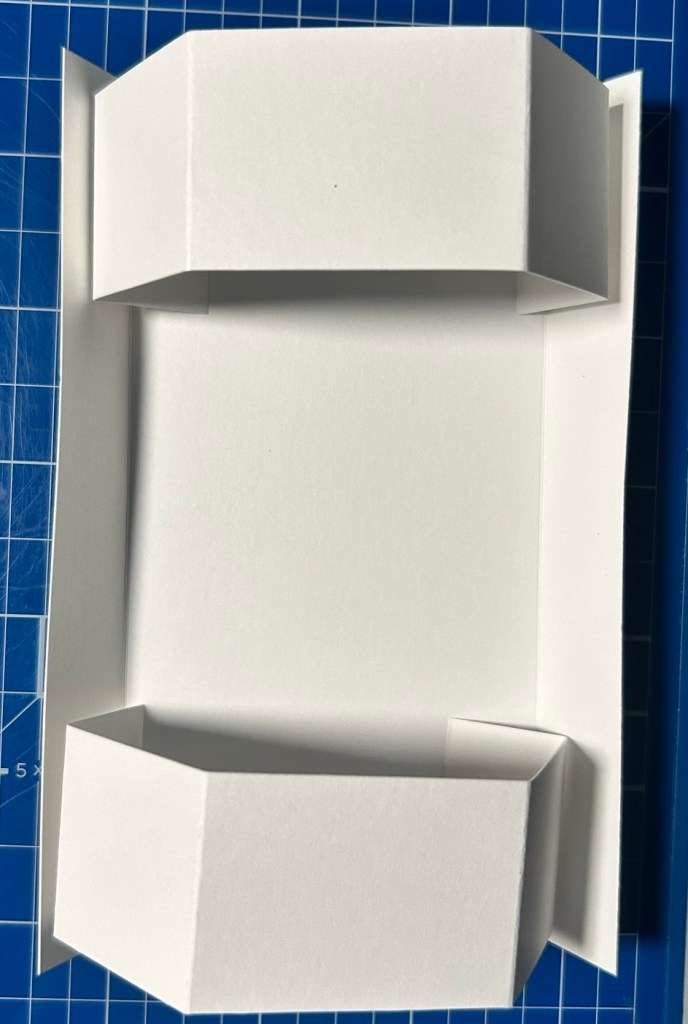
mountain fold each scored lineHere is what we have created as your base without embellishing or glue
As you craft, enjoy the process of layering papers and arranging your stamped images. Every cut and stamp will bring you one step closer to creating a unique piece that captures the essence of celebration.
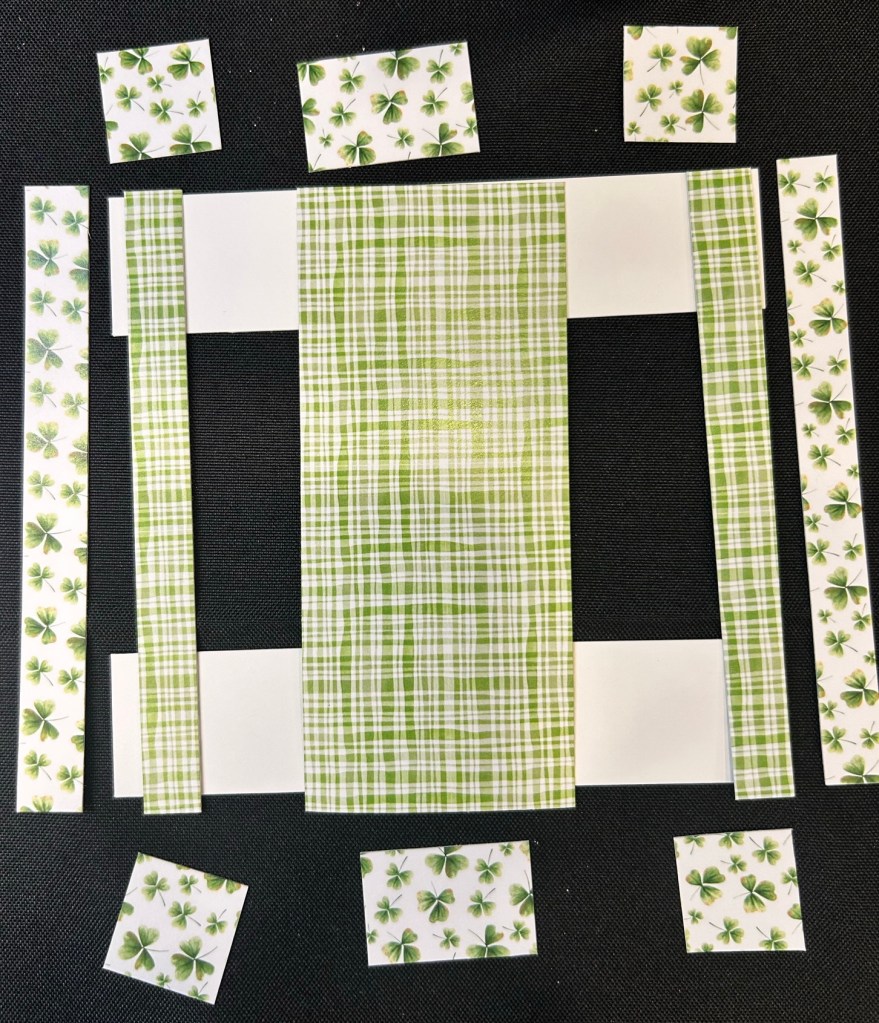
Now we need to cut patterned papers & embellish
Green Plaid Paper: 2 thin strips cut 3/4 in wide by 5 1/2 inch long, glued to the inside of the A2 panel in those 2 flaps you scored on each side. Cut another larger panel of green plaid 2 3/8 x 5 1/2 inch. See photo above for placement.
Clover Patterned Paper: Cut 1 strip at 1 inch x 4 inches and another, 1 inch x 3 inches. I cut the 4 inch x 1 inch into 4 separate 1 inch pieces, which are the 4 clover squares below. I cut tge 3 inch piece x 1 in half, leaving two separate 1 x 1.5 inch pieces, which are placed in the middle of the 2 squares. The picture below should give you a good idea of placement.
All the cut pieces cut and shown where to place when decorating your stadium card.The back of project. Cut 2 strips of patterned paper in clover 3/4 in wide by 5 1/2 inches. These will be glued last to cover the seams along the side edges after you glue the top stadium strip and bottom stadium strip.
Cut a piece of clear acetate 1 3/8 inch x 4 inches. This will be placed strategically tucked inside the center panel, once the card base is assembled and decorated. You’ll want to use glue dots or foam tape sparingly to embellish the acetate, being careful of not having foam tape or glue overlap causing some areas to stick together that we want to pop out freely.
Final Touch:
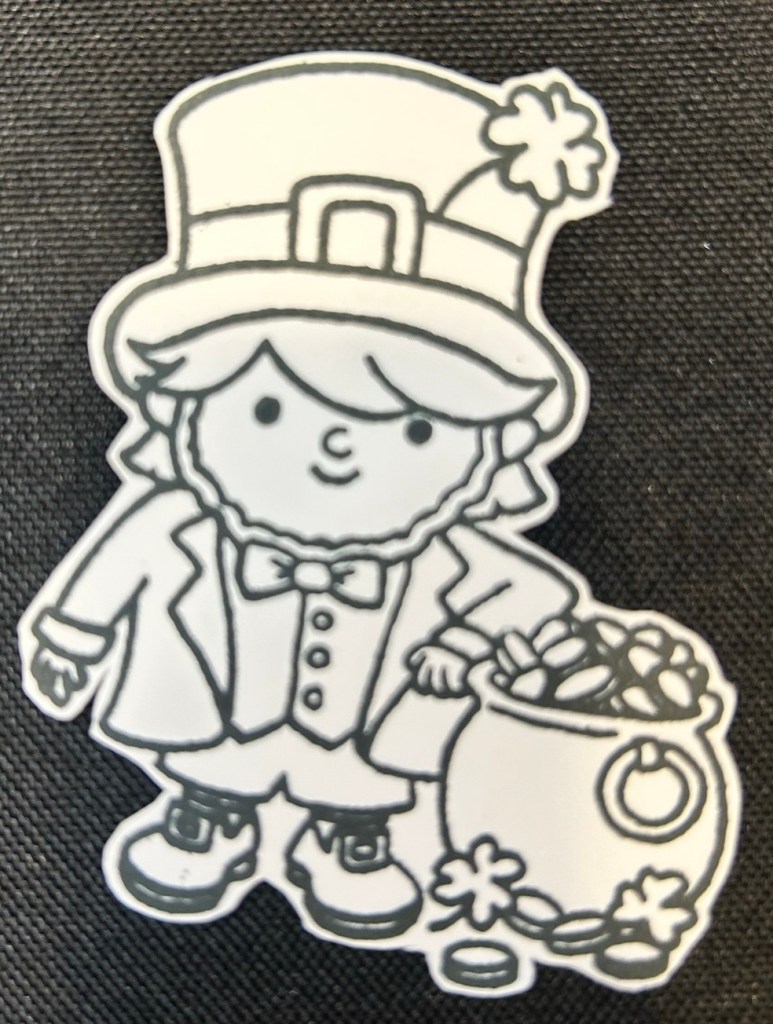
Stamp leprechaun image with Memento black ink and color with Copic Markers (or stamp and color with YOUR favorite medium)
Copic Color Combos:
E05, E11, E00, E000, R20
G24, G46, YG03
Y00, Y02
E07, E37, E35, E33
C7, C5,C3
Complete your card with the adorable Leprechaun and a spirited sentiment that embraces the fun of the season. I used Seafoam Stickles (glitter glue) to add extra shine and interest to my shamrock and coins. This isn’t just a regular greeting card; it’s a joyful art piece perfect for anyone who loves a little luck in their life!
So grab your supplies and dive into this crafty adventure as we celebrate Valentine’s Day while eagerly preparing for the vibrant energies of March Madness!
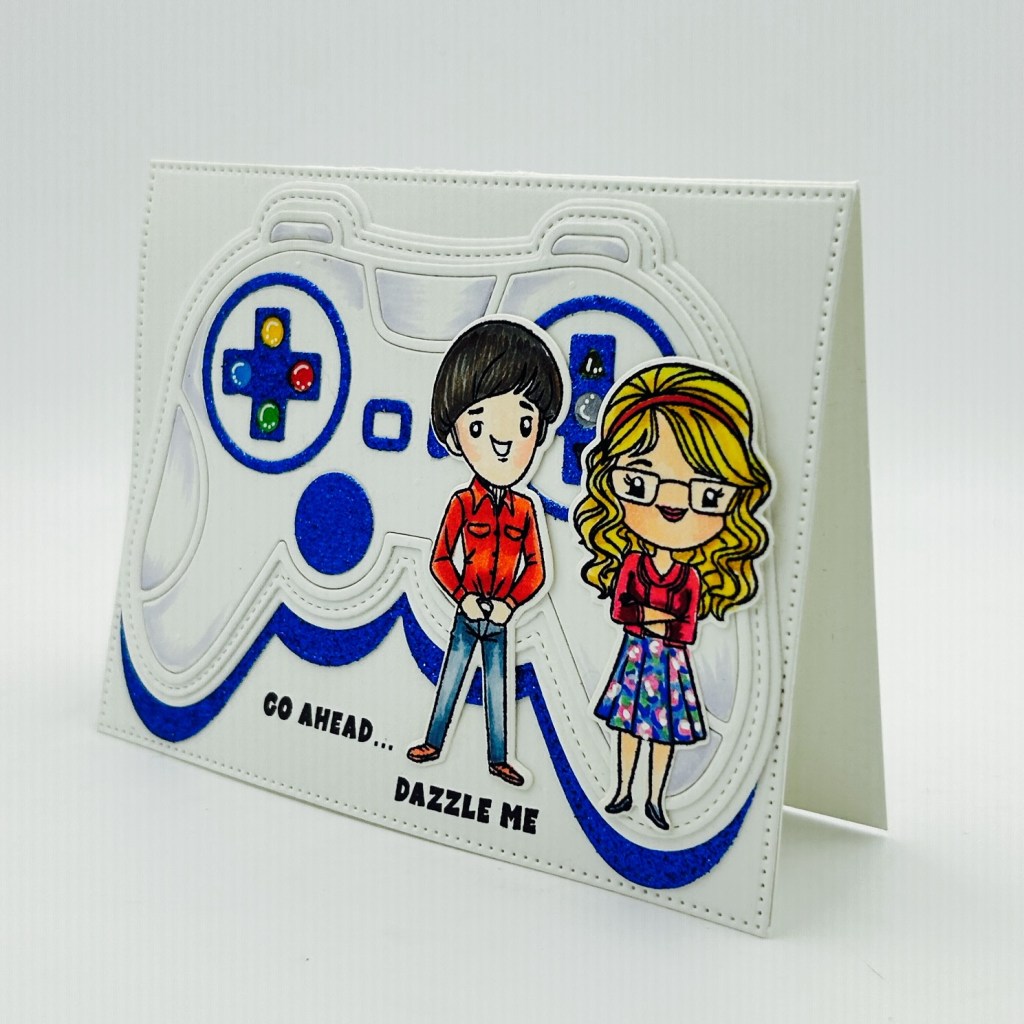
Quick Steps to Create a Game Controller Shaped Card, Mini Album or Scrapbook Page Element
Crafting your own game controller themed card is simple and fun! Here’s a quick guide to get you started:
Materials Needed:
Heavy white cardstock
Copic markers
Colored pencils
White gel pen
Metallic blue cardstock and scrap colored cardstock for small elements
Stickles
Game Controller Mini Album and Card Die
Memento Tuxedo Black Ink
Math, History & Science Stamp & Die Set
Stamp Positioner or block for stamping clear stamps
A2 sized card base, although you can make this a truly shaped card by cutting the folded card base with the largest game controller outline die.
Featuring products from Scrappy Boy Stamps
Steps:
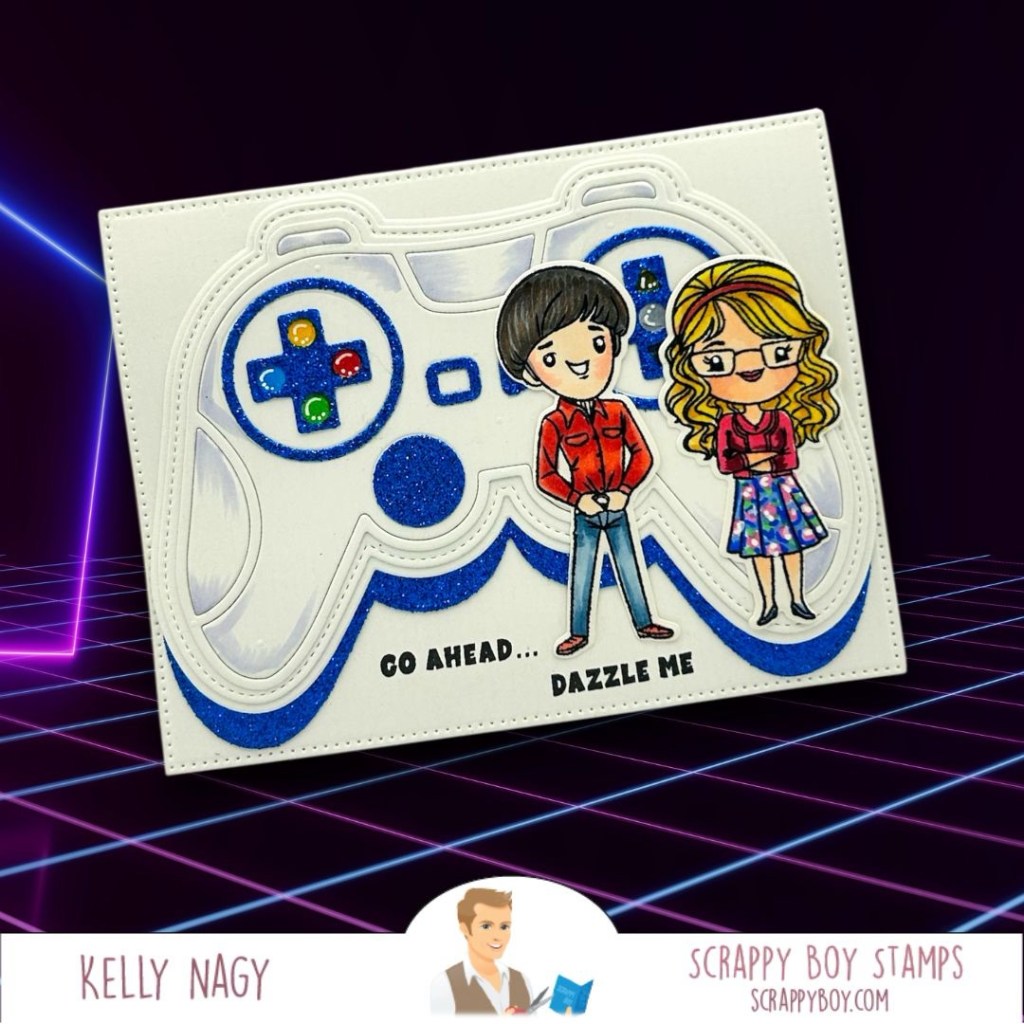
Cut the Elements: Use the Game Controller die to cut out the main card shape from heavy white cardstock. Cut additional accent pieces from metallic blue and mirrored colored cardstock for the buttons for added flair.
Color and Detail: Use Copic markers and colored pencils to color the card. Add details with the white gel pen for highlights and interest.
Shadows on controller: BV31, BV34, BV00
Dark Hair: T7, T5, T3
Fair Skin: E04, E11, E21, E00, E000, R20
Jeans: B00, B21, B34, B37
Guy’s Red Shirt: R21, R27, R59
Guys Shoe: YR27
Blonde Hair: YR20, YR23, Y26, E15
Gal’s Red Top: R83, R85, R89
Skirt: FBG2, FB2, B00, G07, G14, RV19
Shadows: BV23
Layer and Assemble: Layer the main card on top of the larger stitched die cut from metallic blue cardstock and offset to give added shadow and fun dimension. Attach the accent pieces strategically to enhance the design (see image & also placement marked by embossed impressions from die)
Personalize: Use stamped sentiments or handwrite a message inside to make it special for the recipient.
Finishing Touches: Ensure everything is securely glued, and your card is ready to dazzle!
Enjoy your crafting adventure and let your creativity shine!✨
Front View – 6×6 in square card feat. Yeti Friends
This cheerful penguin is perfect for bringing a wintery vibe to any occasion! Below, you’ll find a card sketch to help inspire you to create something today! 🎨💖
Sketch No. 1 – 6×6 square card
Check out the side view of the card featuring the Yeti Friends stamp set from Pajama Crafters Stamps! ❄️ I added a snowflake die cut from PCS (older product) and created coordinating peppermint candies using a circle die from my stash to finish off my shaker card. Perfect for the winter season! 🎉”
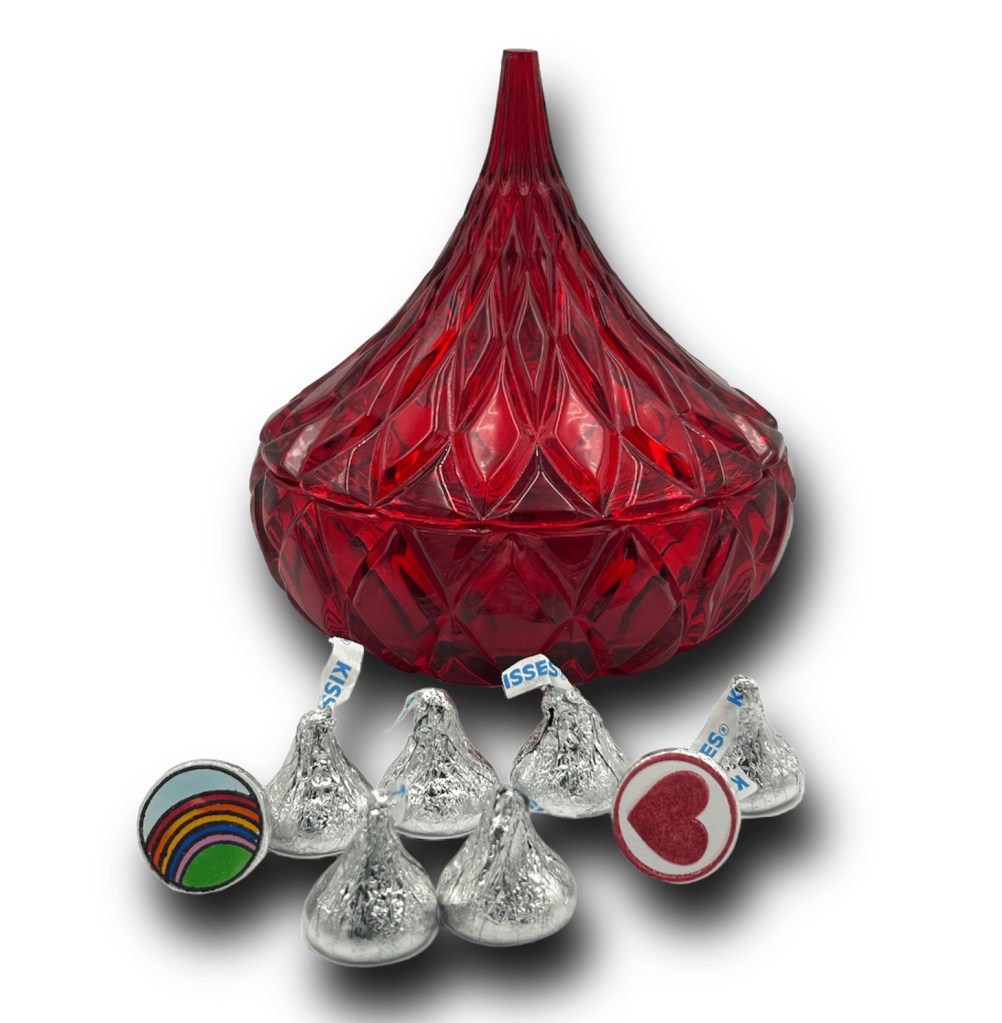
Belly Badges from set fit perfectly to bottom of all standard size Hershey’s Kisses.
The Build a Caring Bear set will certainly be a great addition to any paper crafter’s stash. This is a versatile set that is great for cards, planners, scrapbook pages and even party decor and favors!!!
The belly badge goes in the middle of the bear’s tummy, but these badges are also the perfect size to adorn the bottom of a Hershey’s Kiss!
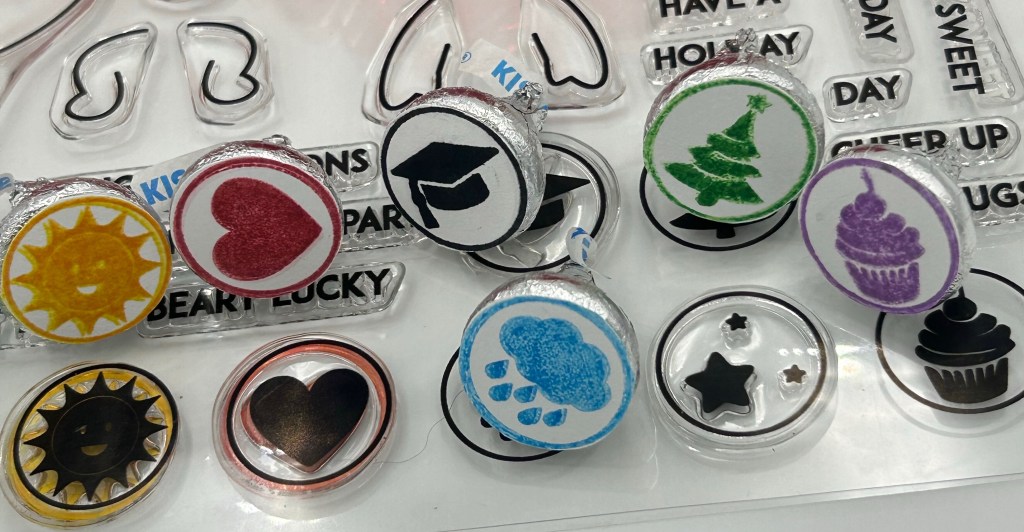
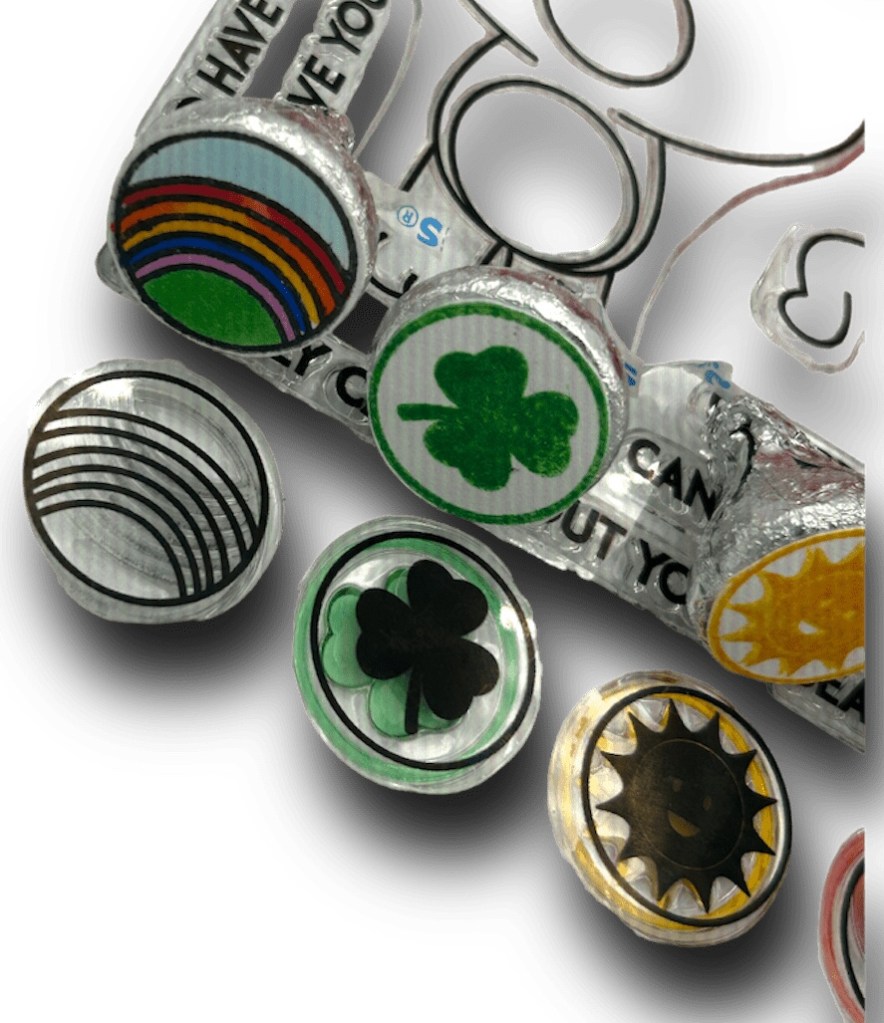
If you’re looking for a fun and unique way to personalize your treats inside your treat bags, look no further than the soon to be restocked BUILD A CARING BEAR set from Stamp Anniething. These fun images can be stamped in all black, stamped with your favorite color and are the perfect size to decorate the bottom of a Hershey’s Kiss, and with a wide variety of themed emblems in the set, you can customize each treat to fit your holiday, event or celebration.
Circle size stamps can be easily fussy cut out or use a small circle die or punch
Build a Caring Bear belly badge stamps have a variety of different emblems to match the themes of your party or event. Here are just a few ideas:
Sunshine – Get Well, Be Happy, Don’t worry
Heart – Love, wedding (emboss in gold or silver), Anniversary, Valentines
Once you’ve chosen your badges, it’s as simple as attaching them to the bottom of each Hershey’s Kiss using a dab of frosting or melted chocolate. You can also adhere using double-sided tear/paper tape. Not only do these badges add a colorful and fun touch to your treat bags, but they also make each treat feel more personalized and thoughtful.
So the next time you’re planning a party or event, consider adding Build a Caring Bear belly badges to your list of decorations. With their colorful designs and customizable options, they’re sure to be a hit with guests of all ages! Happy Crafting!