

Hello, crafty friends! 🎉
I’m thrilled to share my recent card creations using products from Scrappy Boy Stamps’ August release! Each project showcases a unique theme that I can’t wait for you to see!
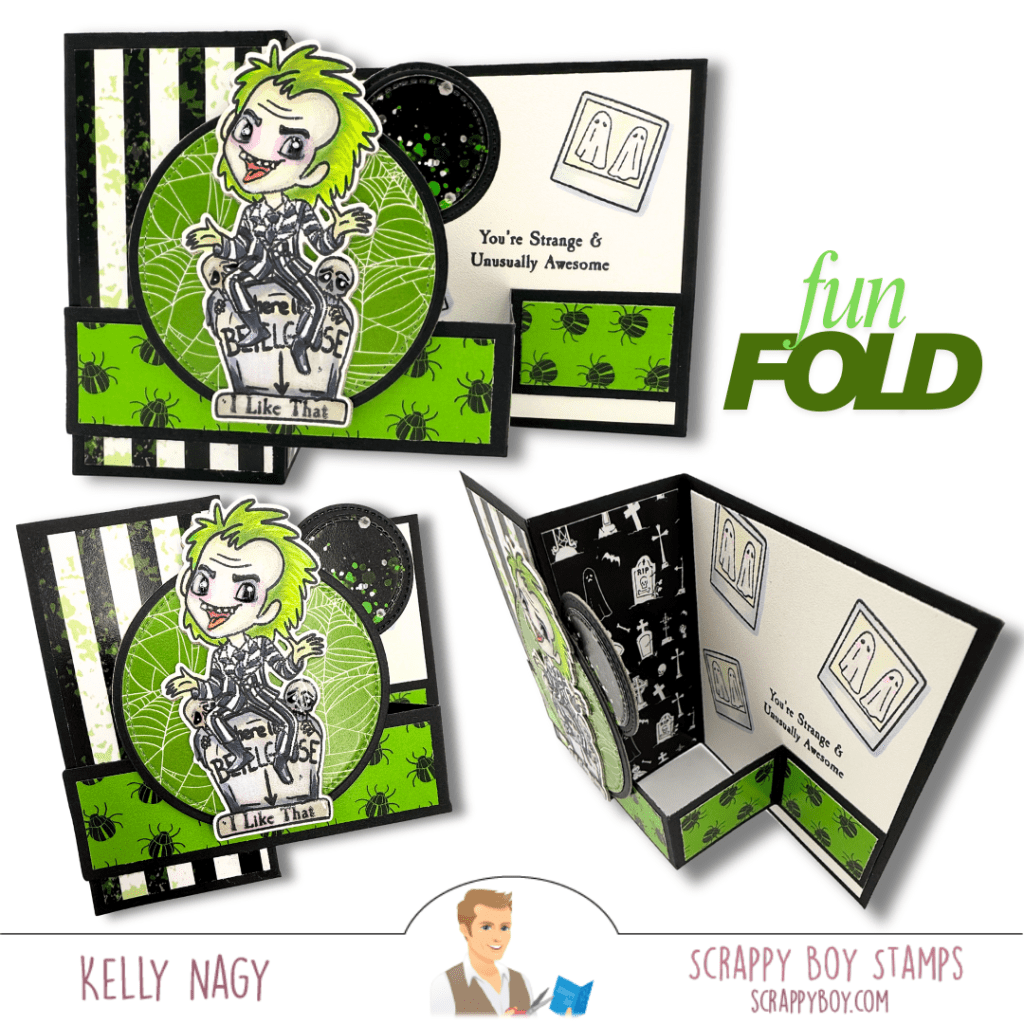
🦇 Fun Fold Card Inspired by a Cult Classic
First up, I created a fun fold card inspired by a quirky underworld couple from a beloved movie. This card is perfect for Halloween lovers! With enchanting pattern papers and a main character that brings a smile, it’s a delightful addition to any Halloween celebration. 👻💀
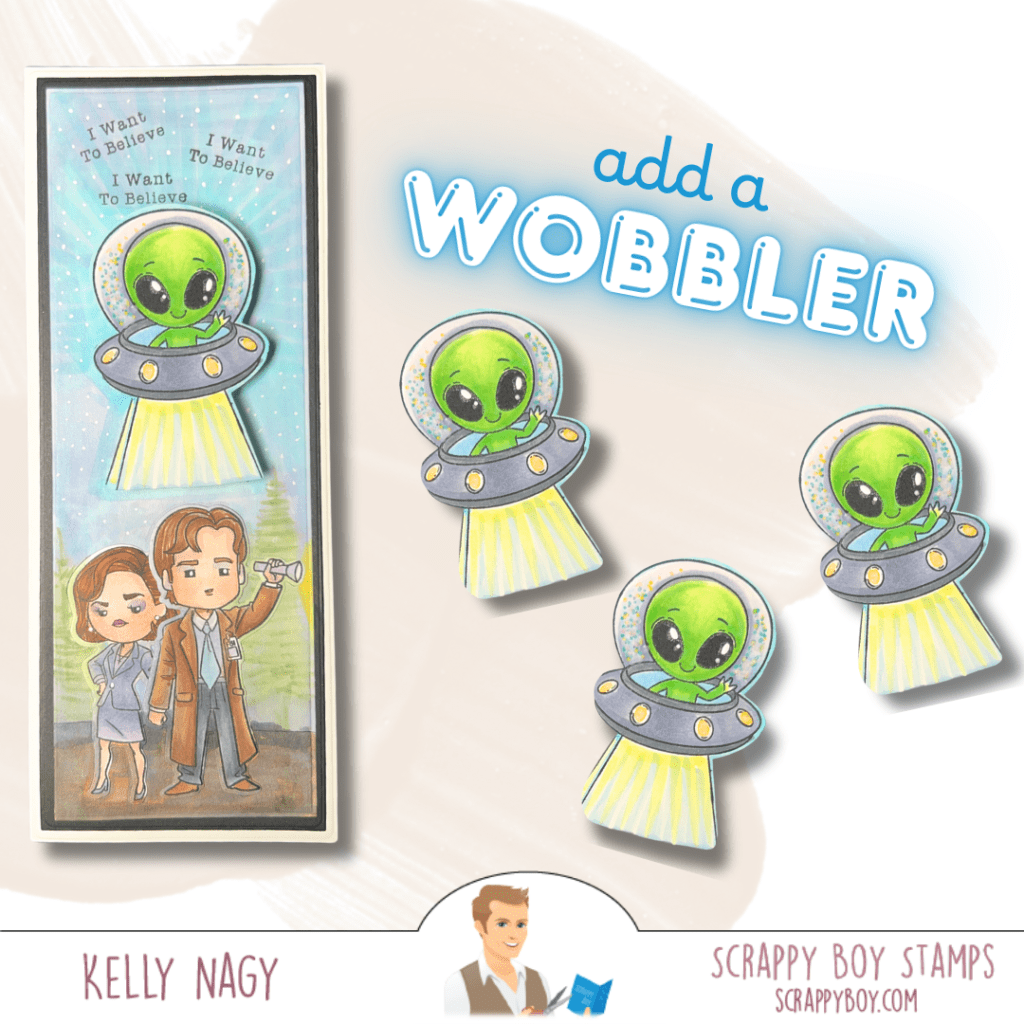
Creating a Z-fold card in A2 size is simple and fun! Start with a piece of cardstock measuring 4.25” x 11” and score it at 2.75” and 5.5” along the long side. Fold the cardstock in half at the 5.5” score line, creating the first ‘Z’ fold. Then, take the smaller section and fold it back on itself at the 2.75” score line. This will give you a card that opens in a zigzag manner. Decorate each panel as desired, and you’ll have a beautiful Z-fold card perfect for any occasion! Happy crafting!

🔍 Crafty Twist on a Favorite Show
Next, I took inspiration from a show I adore, where amateur sleuths navigate mysteries in their fancy apartment building. This time, there’s a twist—my characters are all crafters! 🎨✂️ I’ve customized each character image with specific colors to make them instantly recognizable, and added crafty elements from the “Crafting Tools Die Set Add-On Craft Cart.”
Crafting inspiration can come from the smallest details! By layering cardstock and utilizing elements from your stash, like the crafty elements from the add-on set for the craft cart, you can beautifully tie your design together and add depth. I also love to create custom sentiments using my printer, which I cut out and pop up with dimensional foam tape for added interest. One of my favorite aspects of the Scrappy Boy line is how it mimics the images in the coordinating pattern paper, creating miniature versions that are perfect for fussy cutting. Incorporating these into my scenes brings an extra layer of creativity to my projects!

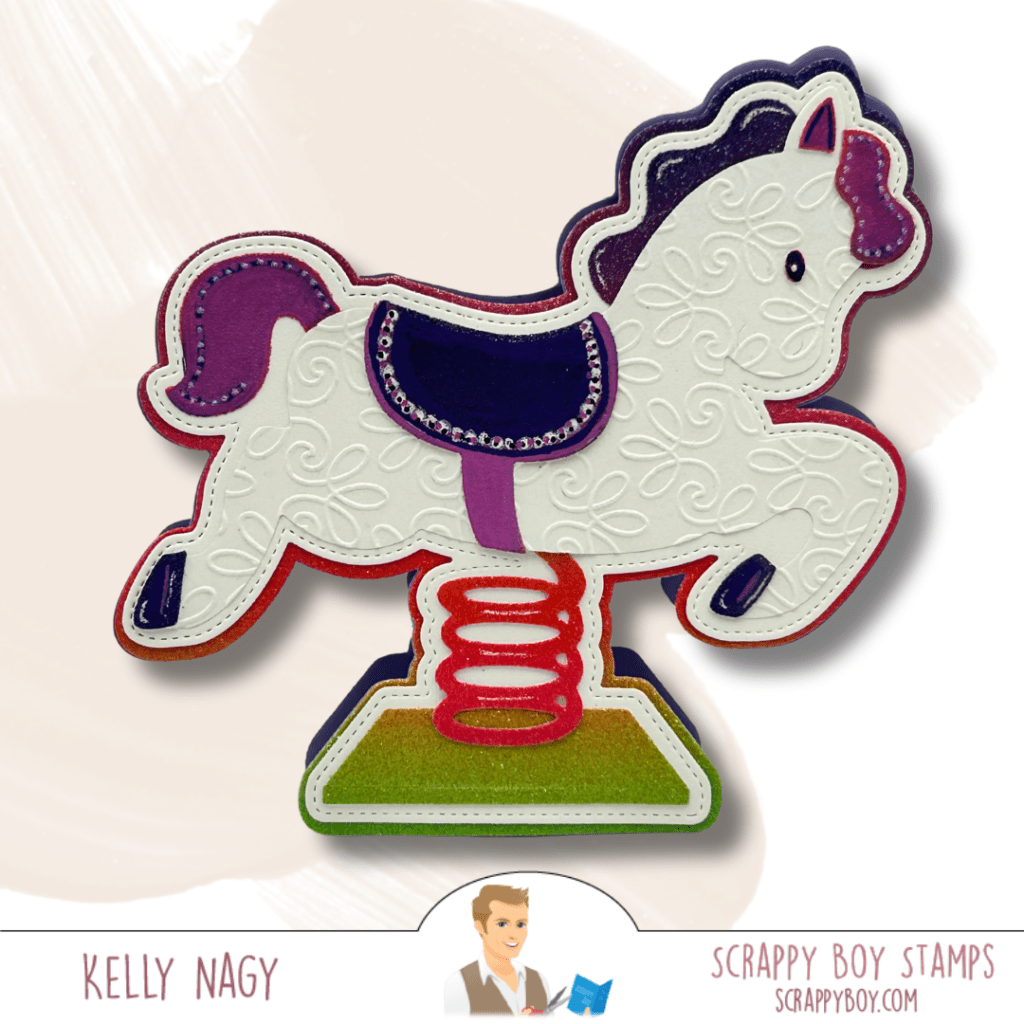
🎡 Whimsical SHAKER Mouse Wand
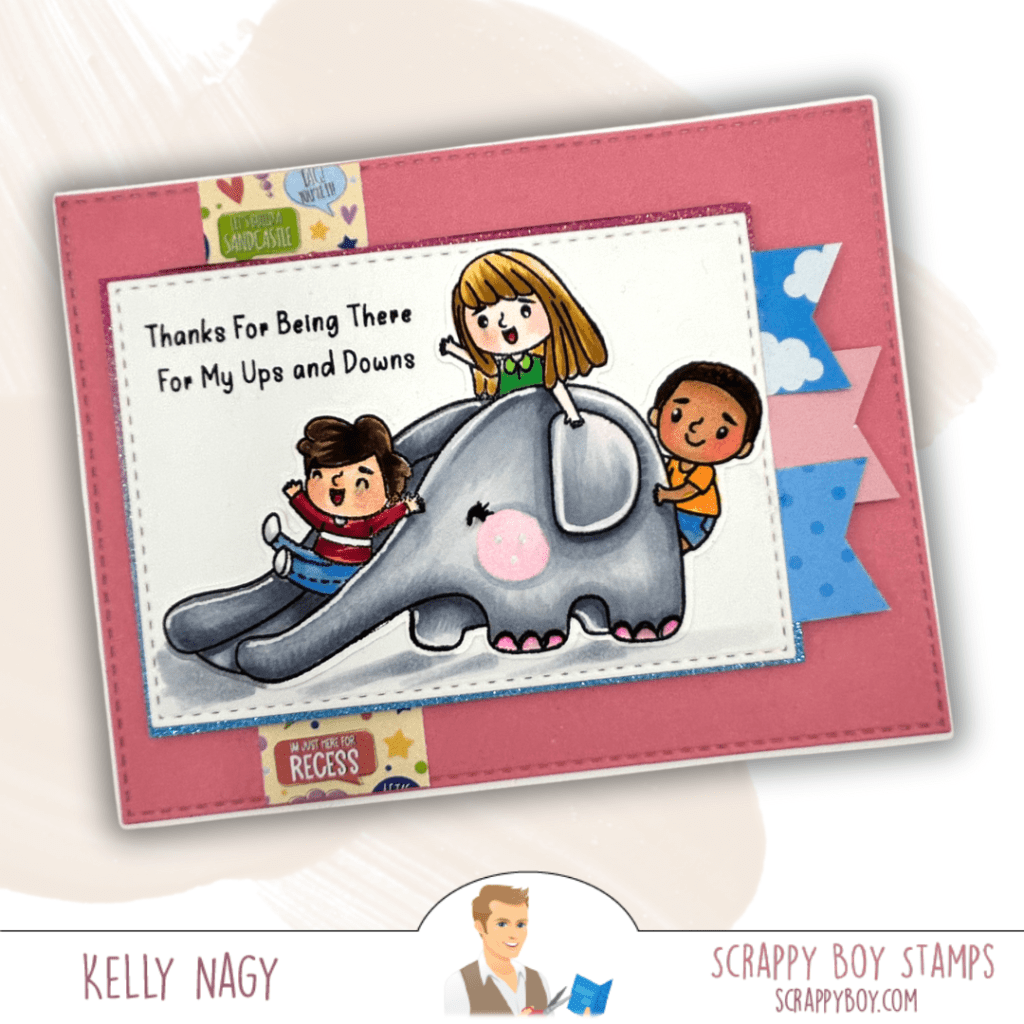
Lastly, I’m excited to introduce the new standalone Magnifying Glass Die that coordinates with the Cute Kids Detective Set! Instead of a standard magnifying glass, I paired it with fun theme park elements and colorful papers, creating a whimsical SHAKER mouse wand. 🎈🐭 I even made some shaker bits using coordinating cardstock and shaker cover plate dies to add that extra flair! The zipper pull mouse hand die creates a fun “dangle” on the SHAKER wand.
I’m excited to share how I transformed the magnifying glass into a theme park-inspired shaker wand! Many of the elements released are perfectly sized to layer with other items in your stash, so don’t hesitate to mix and match or get creative with die cuts—even using the negative space they leave behind. I love the fun new spin I was able to give the magnifying glass, especially with the addition of a dangle made from a zipper pull mouse hand die on the handle! Inside the shaker, I filled it with confetti and cut pieces from a cover plate die, creating shaker bits that perfectly match my project. How fun is it to elevate your creations this way? Be sure to check out all the fantastic products available at scrappyboy.com!
Your support means the world to me, so don’t forget to follow me on social media @stampedbykelly. 💖
Happy crafting, everyone! 🌟


